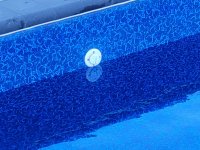
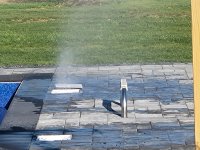
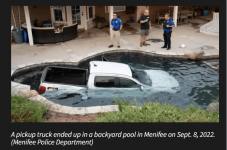
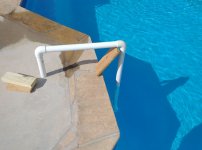
How not to make a Skimmer Basket grabber pole.

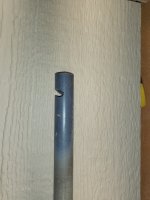
I normally just stick my hand in the water to grab my skimmer baskets, but today is a little colder than normal so I thought I'd make a very simple PVC pole with a slot on one end to capture the basket handle.

Took it out and it just would not capture the bar across the middle of the basket. Frustrated, and already cold, I just used my hands to finish the job.

My pole looked like this...

Skimmer Basket Pole.jpg

It did not take long to locate the problem.. :mrgreen: :brickwall:

Sigh!!,

Jim R.

Freeze protection on plumbing with a retaining wall

E8F9B6CC-9874-4678-ABB6-088E184BE6A2.jpeg

Back side of my pool has a retaining wall with gravel back fill. This is the skimmer side. There is about 3 ft of pipe that goes through the back fill under the deck before it is buried in concrete in the footer. Will be below freezing for two days with a low of 12 but negative wind shields. Pool is covered and equipment is winterized. I did not blow out plumbing. Any worries?

Freeze Preparations (TX, LA, GA, AL, FL, etc)

UPDATE FROM MOD @Texas Splash : For those who typically do NOT close their pool, please jump to post #51 (page 3) HERE for a starting snapshot of what to do during these harsh winter events.

Forecast says we could see temps in the teens next week. I am concened about my pool equipment freezing and bursting the plumbing. Should I drain my pool below the skimmer retuns to prevent damage? If so is there a specific submersible pump that I should be looking at?
  • Like
Reactions: BowserB

Trick for reading pH if you're colorblind

I specifically have Deuteranopia (red-green colorblindness) and it makes reading pH measurements painful.

So instead of struggling with color matching, I thought of a good way to read pH with a color picking app. Any color app that reports colors in HSV (hue, saturation, value) space is ideal since really you care about the hue and if you use RGB color space you'll have to do some non-trivial computations to match to the closest actual color while ignoring brightness.

1. Go through the normal steps with your test kit. On my Taylor it's fill up to the 44 mL mark, add 5 drops of phenol red, etc.
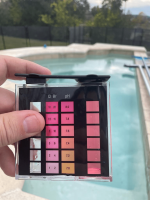
2. Hold up to the light and take a picture like below.
3. Load the image into a colorpicker app.
4. Use the colorpicker to find the Hue value of your water sample part of the image.
5. Find the closest hue value on the pH colorscale parts of the image. You can interpolate your sample color's hue between two pH scale color hue's if you want a little more accuracy if your sample falls between the hue values on the color scale. But I'd suggest against going too crazy with interpolation since with the same exact water, my pH varied by almost as much as +-0.1 with this method.

Example picture:
1670628934337.png

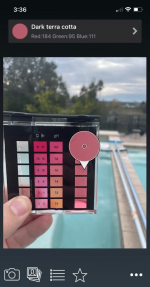
Screenshot from app:
1670629125798.png
Turns out my water sample color here (Dark Terra Cotta) has a hue degrees of ~350 and,
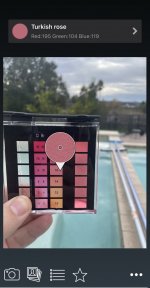
IMG_5032.jpeg
the 7.6 pH scale color (Turkish rose) has almost exactly the same hue degrees, 350.

Incidentally, 7.8 pH on the color scale was 341 degree, the hue of 8.0 pH was 338 degrees. The hue of 7.4 pH was 5 degrees (same as 365 degrees), etc. Keep in mind that the absolute hue values will depend on the background you used, so they won't always be these numbers that I listed here. This is just an example.

Thank you TFP

Whelp, it’s been about a year since I started taking care of my pool and learning from everyone here. This time a year ago, I was afraid of my pool issues and here I am having done a full year and can do so much I never expected on my own. Thank you to everyone who helped me along and to those who posted and let me follow along to see what’s what. 🙂

New pool build with contemporary grotto

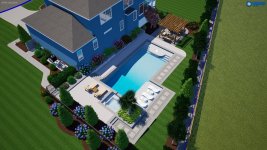
New pool build/owners here and are working on getting the contract in place. Have a things to work out before we go forward, mainly with the grotto. Here is a picture of the design. As pictured, the grotto is showing travertine stairs and top decking. In the contract it is shown as spray decking for the stairs and grotto top. When mentioned to the PB they said the travertine would be too slippery and not be recommended but they would include it if we desire. Do you all have any recommendations for which direction to go. For pure cosmetics, I would like travertine. If the coping is travertine around the pool, I dont see how the stairs and top would be any different.

Is there anything else in the equipment that seems off or anything else to be looked at? Thanks in advance!
  • Love
Reactions: Newdude

Construction completed - we love our new concrete pool - 8 months start to finish

Hi all,

I posted here back in November with my design and received really great feedback. I created the design myself using Pool Studio and provided the build plans to the PB. I acted as my own GC and managed all the sub-contracting for the patio, pool deck, electrical, mechanical and landscaping while the PB managed the pool tile, plumbing and concrete sub-contractors.

It was a long process with many months of idle time in between inspections, delays, scheduling conflicts, etc. The patience paid off and was well worth the wait. We have been in the pool everyday until 9/10pm since the first week of August. First thing we do after my daughter is home from school and we're done working is jump in the pool. This has been a really great addition to our home and created an outdoor living space we plan to use for many years to come.

Specs:
18'x40' pool - 7 LED lights - 1 Bubbler with LED
8'x16' tanning ledge - 2 LED lights - 2 Bubblers with LEDs
8'6"x7'6" spillover spa - 1 LED light
WetEdge Primera Stone Grigio Treasure
Natural Gas heater for Spa/Pool
Variable Speed Pump for Bubblers
Variable Speed Pump for Spa/Pool
Salt cell with chlorinator (not started salt yet)
Hayward OmniLogic Smart Panel
Landscaping lights
Pergola with fan, gas grill, and outdoor fridge

Original thread: Raleigh, NC - First time pool build - using my own design I created in Pool Studio - feedback request

pool_ - 6.jpeg
405 Saddletop Pool and Patio_012.jpgpool_ - 4.jpegpool_ - 25.jpegpool_ - 27.jpegpool_ - 31.jpegpool_ - 3.jpegpool_ - 13.jpegpool_ - 16.jpegpool_ - 18.jpeg

First tests with proper test kit; and is it time to replace some water?

Hi all,

New pool owner as of July 2022. In other threads, some members advised me to get a proper test kit and to come back with any questions at the time. Well, now is the time and I do have a few questions.

First, my test results using my new TF-Pro, which is so great...

FC: 4.0
CC: 0.5
pH: 7.4
TA: 70
CH: 575
CYA: 90
Water Temp is currently around 47 F

I also tested my water source with the kit and found it to have...
CH: 200
CYA: 0

My CH and CYA levels are most concerning to me right now. I have been using a tablet feeder for chlorination since the pool was new in July, but after reading more about that here and hearing from some of you, I have stopped using tablets and have switched to liquid chlorine to avoid putting any more CYA in the pool.

I know everyone here has advised I should look at eventually switching to an SWG, but assuming that's a bit down the road for me, I'm looking for steps I can take now to get things in line.

My first thought is that I should attempt a partial water replacement -- something I haven't done before. I have been reading about the No Drain Water Exchange here -> Draining - Further Reading -- and I think I could pull that off sometime in the next week.

My thought is to replace 50% of my water. This should bring the CYA down to around 45 and CH to around 375. Those seems like good targets to hit to sort of reset everything, but I'm wondering if there's anything else I should consider before doing this.

@Dirk you were one of the biggest encouragers for me to get to testing, so tagging you here to see if you have any thoughts.

We Have a Winner! TFP Pool of the Month (December 2022); Theme - Holiday Feel

1. On the first of each month, a contest "theme" will be announced (i.e. water clarity, family fun, decking, custom features, lighting, scenery, etc)
2. Members have 10 days to upload ONE image for consideration; Photo must be related to the thread titled theme for that month.
3. Per general TFP rules, nothing profane, political, or insulting.
4. The first 10 days is the submission period. Posts are limited to ONE image ONLY. No discussion posts yet. This will make viewing much easier for all.
5. Days 11 - 15 the thread will be locked and is for voting only. No more uploads. Viewers now have a final opportunity to vote (or modify their selection) for their favorite upload.
6. Members are encouraged to use an emotion icon ("Like" or "Love") to vote for their favorite upload; it will be tough, but select only one favorite.
7. On day 16, emotion Likes/Loves will be tallied for a winner. In the event of a tie, we will create a poll on the thread to make a final selection.
8. Once a winner is announced, the thread will be unlocked and comments/discussions are welcomed. Winner and nominees can tell us all about their pool/photo/event.
9. A member can only be selected as winner once per calendar year.
10. Winner will receive a $50 gift certificate from tstestkits.net! Oh, and maybe some bragging rights. :poke:

This should be fun. Showcase your backyard/pool holiday decor. Let’s see those pics! Have fun and good luck to those who apply!

I'm SLAMing and desperately need guidance

Hello everyone!

Here is situation:
  1. The pool belongs to my kiddo's school. And I need to be very frugal with money and resources.
  2. The pool is 24K gallons, plaster, multiport valve and DE filter with hard-wired (or hard-plumbed?) waste line.
  3. It is 30 minutes drive from my house, so my hours with it are limited to 8a-3p, maybe till 5pm.
  4. I've began SLAMing Oct 31.
  5. Pump ran 24/7.
  6. I've added chlorine at least twice almost every day.
  7. I've brushed the pool with stainless steel brush every day.
  8. The filter develops high pressure (35 psi) about 30 minutes or so after wash and DE reload. I assume it gets full of crud that quickly - I started with vivid green pool.
  9. When filter gets full, the flow goes to almost nothing. I have flow gauge and there's nothing from returns.
  10. At this point I switch pump to recirculate, and wash the grids.
  11. 5 days into SLAMing, I found a crack in the manifold. I patched it with JB Weld Plastic Weld (2 parts clear epoxy) and let it cure over the weekend. I ran it again once (same 30 minutes until pressure goes to 35 psi) and the crack opened up again.
  12. At the same time, I found broken handle spring and bad spider gasket in multiport valve. It has been leaking DE back into the pool during backwash and it has been leaking water into waste line.
  13. New spider gasket, spring, spring o-rings installed.
  14. Return lines were checked by plugging all returns but one and recording the flow. The flow to farther return ports is a little less: 75 gpm vs 80 gpm on closer ports.
  15. There are 5 return ports with eyeball covers.
  16. I have lost my head after few days of no progress so I added borax at a wrong time.
  17. And I've tried clarifier in the pool after good results in test bucket. Without filter running, it didn't help.
  18. Logs: PoolMath Logs
  19. I have TFT-100 test kit.
What do I have now:
  1. The water is much lighter, but has green hue and is very murky.
  2. I am losing FC so there's live algae in there.
  3. I can see few spots in shallow parts but it feels that I still have a big infestation. But I can't see other hideouts because the water is opaque, so I just brush and focus really hard scrubbing on one section a day.
  4. The stairs have visible algae spots so they get brushed hard every day.
  5. The filter can't be run overnight.
  6. I can't keep washing and adding DE few times every day - it takes a lot of water and about $8 worth of DE every time.
  7. Water is about 70F.
  8. When I figure out how to share my logs, I'll add them to this post.
Questions:
  1. Did I miss some info about DE filter usage during SLAMing?
  2. I speculate that filter clogging up this quickly have caused the crack and I'm afraid to break new manifold the same way with my improper method.
  3. Without constant filtering and with huge amount of crud floating in the water, would it be more practical to use floc, vacuum to waste and then keep going with SLAMing and brushing where I can see algae spots? Loss of water feels like a moot point as I will be losing it by daily washing of filter grids. Besides, I'll save some on not running the pump for one night.
  4. I'm also considering putting on full wetsuit and going into the pool. I'll feel slimy spots with my feet and will be able to do intense brushing at those spots.
  5. I'm open to suggestions of experienced users. The above is just what I can come up with in my ignorance.
Thank you for all and any help!
Feeling the profound depths of my ignorance, yours truly,
Ig20221108_151112.jpg20220908_081146.jpg
  • Love
Reactions: Leebo

DIY - Automated Liquid Chlorine Dispenser

So, I'm tired of adding LC to the pool every couple of days. At the beginning of the season my CYA levels were at zero, so adding a puck or two wasn't too big a deal. I have a Trichlor dispenser that I would keep on a low setting with a couple of pucks. It seemed to baseline the pool at about 1PPM, then I would add LC every couple of days. I don't like adding bleach regularly, I hate having my sinuses cleared when I open the Trichlor dispenser, I'm watching my CYA climb steadily, AND my wife has an open invitation to all the neighbors with kiddos that they can come swim anytime they like. Great! I'm running a public pool apparently. ;-) Its been really difficult to keep the FC levels stable unless I do something every day. I'll forget to add LC for a few days and my FC will drop to near zero. Then I'll add a gallon and it will spike. This can't be good for the pool, and I get stressed when I look out and see half the neighborhood in the pool, knowing that I'll have my tester in one hand and a bleach bottle in the other for a few days.

After a bit of research, I decided to rig up an LC dosing system that I can fill and not have to watch like a hawk for a week or two. I want it to maintain FC at a 2-3PPM baseline, and allow me to "shock" (add a measured amount of LC if needed) or SLAM with the push of a button. So I started gathering parts. I realized quickly that a parastaltic pump would be the best, but got a little sticker shock when I saw how expensive they are. I searched around and found an old Stenner 45M1 for 40 bucks on ebay that worked but needed to be rebuilt. 35 bucks later, I had a working pump that flows 64oz/hr at 25PSI. I also picked up a 20 gallon barrel (that smells like cherry soda), some 1/4 inch poly tubing and a few plumbing parts from the hardware store, and a Shelly1PM wifi switch from Amazon. For less than $150 bucks, and an afternoon of tinkering, I've got an automatic LC dosing system.

- Stenner 45M1 - $40
- Roller and tubes - $35
- Cherry soda barrel - $45
- 1/4 inch black poly tube - $5
- Plumbing bits - $15
- Shelly1PM - $9

Setting up the barrel and pump was simple. My pool return line at one point had a booster pump for a cleaner. When I upgraded to a VS pump, I no longer needed the booster, so I capped off the line into the return. It made a perfect spot for the 1/4 tube insertion. My VS pool pump runs continuously, and from 10 PM until 10AM I have it set to drop to 1200 RPM. The pressure in the filter during this cycle is about 5-8PSI, and the flow meter says it runs about 20 gpm. I have the barrel setup just inside the garage. The poly tubing runs through the exterior wall and about 10 feet to the pool equipment.

The Shelly1PM is what makes this system so great. These are the coolest little devices; I've been playing with them for a few months now for custom lighting and have been blown away at how much they can do for automation - and they are super cheap. I have one on this system that kicks the dosing pump on at 10:01 PM, runs for 30 minutes, and shuts off. At 30 mins, I get about 32oz of LC dosed. Right now, my barrel has 12% in it so 32oz per day should be enough to keep me between 2 and 3PPM. If its higher or lower, I can adjust the timer. I also have a setting that if I push a button connected to the Shelly, it will kick the pump on for 30 mins and shut off, or, if I long push the button it will kick the pump on for 1 hour and shut off. I figure, if the bio load on the pool is super high - AKA neighborhood pool party, I can shock the pool with a higher dose. There is also a way to have it send a text when it kicks on or off, but I haven't had time to explore this yet. It is also wifi enabled and connected to the cloud, so I can kick the pump timer on from my phone or from the Shelly cloud website.

The system has been running about a week now, and so far things are running smoothly. I have to tweak a few little things, run permanent power to where the pump is, and vent the barrel outdoors. So far I'm pretty happy with this setup and LOVE that I don't have to stress about manually adding LC to the pool. I also LOVE that I don't have to run or open my Trichlor dispenser. I'm already itching to play with some type of sensor that can alert and dose based upon levels. The Shelly can take custom firmware and have external sensors. I might play with something like that in the future... emphasis on the might...

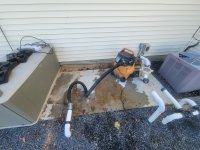
Closing with shop vac.

Today was the day for closing and it went great with a 6HP shop vac. I hooked my blower up for fun after, and there really wasn't much left but some spray.

Anywho I wanted to do a write up for all the folks wondering if they could save a chunk of change and tackle their own closing.

First, I vacuumed. Everybody can already do that. Then, I drained below the returns. I used my main drain and waste line, but a submersible pump would have worked also.
20221119_110317.jpg

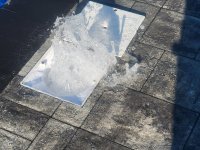
I put the shop vac hose on the exhaust post so it would blow, and it was a perfect fit in the skimmer hole. As soon as I got it in there, water was coming out of the returns. It wasn't violent like it would be with a blower, but once the bulk of the water was out, it spit like a cyclone would.

20221119_134147.jpg


Only the first return emptied being the 1st stop on the run. So I plugged that one and the remainder of the water blew out the other return.

20221119_134636.jpg


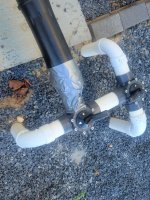
That was too easy, so I filled the pipes with the hose and took apart the equipment pad in order to isolate the lines like some of you may have to do for a shop vac to work with complex systems. I used duct tape to seal the hose to the line. Just a few wraps is plenty. 20221119_134714.jpg

The return looked like the above pic again. The skimmers blew pretty impressive for a weak blower.

20221119_135019.jpg


Then I hooked up my (768 CFM at the nozzle) leaf blower to see what was left, and there wasn't anything left but drips. Again, a few wraps of duct tape made the seal.

20221119_140007.jpg


20221119_135958.jpg

20221119_135838.jpg
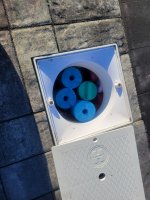
The returns got plugged and the skimmers got gizzmos with Teflon tape on them and some cut up pool noodles.

20221119_141812.jpg

20221119_142700.jpg

Why... WHY?!?

Think your yard isn't all it could be? Envious of others' pools, or landscaping? Wishing you had more time to make everything "just so?" Check this out:

IMG_5254.JPEG

[After considering everyone's critique of this thread and this image and the way I approached this topic, I've cropped the original picture of the yard down to just a remnant. I learned a lot from this thread, but there's no further purpose served by leaving the original picture in place. Thanks to all for your comments.]

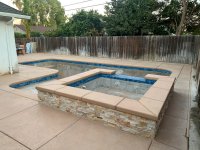
This is my neighbor's new pool! And recently "renovated" yard. His front yard matches nicely!

This pool is only about a year old. I'm guessin' we're looking at about $100K. The fact that the PB couldn't manage to get the pool's level to match the patio aside, or the owner's sad, mismatched choices for stone work, uh, what the H? Why would you spend all that money to put in a pool, but then make it, and keep it, unusable?? WHY?!? This "recon" photo was taken by the next door neighbor, who has to look out his 2nd story master suite windows at this mess. This guy's house and yard and pool is the neighborhood mystery.

He spent all that money, but then stopped short of any sort of landscaping, front or back. OK, maybe he's tapped out. But he has yet to even clean up the construction debris! And as if that wasn't bad enough, he let the pool turn. And he's got the same hard water I do, but after one year his calcium ring is as bad as mine at six years. Which means he's not paying any attention to his levels. Obviously. Again, what the H?

I gave him the TFP spiel during contruction. He made it quite clear he wasn't interested, because he's owned pools before and knew everything he needed to know already. Uh huh. Fast forward to last summer, he was having a small party and couldn't get the spa on. So he calls me over to sort out his automation controller, which I managed easy enough. So he says "thanks." Huh? How about offering me a drink at least, ya bum! Nothin'.

So unless that mess starts harboring mosquitos (at which point we'll call the city in), I'm not even going to offer to help this guy. I'm out. He probably wouldn't accept help anyway. You can lead a horse to water, but you can't make him drink. Heck, no horse would go near that pool!!

  • Locked
Informational update from Marina Pool and Spa

As you know TFP does not have advertisers, nor do we normally allow marketing from outside sources. But I received an email today from one of my trusted suppliers that I would like to share, as it provides an insight into some of their supply chain issues.

"Hi Guys,

Hope all is well and you've had a great summer! I wanted to let TFP members know about Maytronics pool cleaners and Pentair salt cells and equipment for next season. Supply is getting better but still not great so somethings will still be hard to find and price increases are expected to be significant - somewhere in the range of 10-20% in some cases. Maytronics parts are still hit and miss but they've just moved their US facilities to a larger warehouse so fingers crossed that things will get better soon!

I've got a good supply of Maytronics Active 20, 30, 40 and 60 cleaners and a handful of Explorer E70 cleaners at last seasons price but once these are gone, they could be anywhere from $50-$250 more.

Salt cells and related equipment will be a huge challenge next year. I JUST got 1/4 of my 2021 order of cells if you can believe but I do have some if your members want to pre-plan for next season. Pricing will still be at 2021 levels for what is in stock now but will go up significantly if/when Pentair has more to ship.

Thanks so much for all your continued support. I can't tell you how many people we refer to your site and how many awesome clients you of course send our way! EVERYONE raves about you, but you already know that.

You guys are the best!

Margaret Mills
Marina Pool, Spa and Patio
7777 West Jewell Avenue
Lakewood, Colorado 80232
303-985-0077"


Thanks,

Jim R.

Leak Detection (Pressure Side), Results, and Frankenplug

After 9 years it finally happened – the dreaded leak. Here is my story.

In the San Antonio area we have black clay soil that is horrible for structural support of any kind and often causes problems for home foundations, fencing, asphalt, pools, etc. When we observed excessive water loss, I hoped it was weather related since there were no signs of a leak at ground level anywhere (pressure side). No loss of prime or excessive air in the pump (suction side). It has been extremely windy in our rural area for several weeks, and my chemical levels remained steady, specifically my salt, CYA, and CH, so I remained optimistic it was not a leak. Now that it’s November we’re seeing a big difference between the mild water temperature and that of the drier, cooler ambient air, which can also influence evaporation. You can check your own anticipated evaporation rates using THIS LINK. Still, something didn’t seem right. I ruled-out a leak at the equipment pad and my filter drain line was dry. I attempted dye testing at all areas in the pool shell (jets, lights, skimmer) with no obvious indication of a leak. I have six returns jets that are all tied-in on the same line, so my biggest fear was that there was a break in my pressure side return jet line or at one of the jet connections.
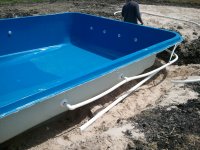
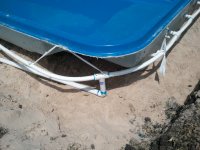
2013-04-01 13.42.45.jpg

2013-04-01 14.12.34.jpg

full


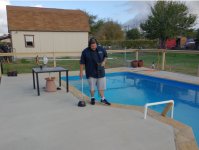
First I started with a bucket test. Free & easy. I tried it several ways: No changes to pump or system operation, pump off, plugging the return jets with closure plugs, etc. Each of these in an attempt to diagnose to some degree where the leak could be (static, suction, or pressure). What confirmed my fear was when I plugged the return jets. The bucket test result – no water loss the following days with the return jets plugged. Now I was 99% sure the leak was in my return line to the jets. Before I called a leak detection company, I did a couple more things. I was allowed to keep the pump running since I have a separate waterfall return line that I was able to divert into the pool to keep water moving to circulate chemicals and prevent algae. Then I wanted to experiment by making my own pressure tool.
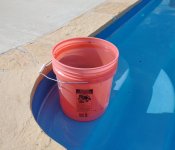
Bucket.JPG

Waterfall Stub.JPG

Jets plugged.JPG

So as a final test while waiting a leak detection company to pinpoint the leak, I created two water pressure leak tools as seen below. One tool (the long one) is designed to go in the skimmer (suction) and the other tool for the return jet line (pressure) that goes into my 3-way valve back to the pool. I obtained all the parts below from my local hardware store with the exception of the pressure gauges that I ordered online. These are low-psi (glycerin-filled) pressure gauges that would provide easy-to-read (low pressure) readings for this purpose (pools).
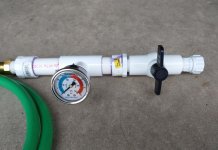
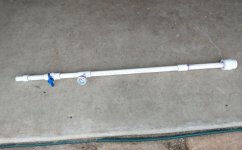
DIY Gauge 2.JPG

Skimmer Gauge 1.JPG

The suction line tester screwed easily into the skimmer, so I simply closed the 3-way valve at the pad and performed the test by increasing the pressure slowly to about 15-20 psi then closing incoming water. After increasing the water pressure, it held to my satisfaction, so I could formally rule-out the suction line. For the pressure side, I simply removed the 3-way valve handle/cover and inserted the tool there.

Now that I confirmed a pressure line problem at the return jets, it was time to call a leak detection company to pinpoint the area. They use a combination of water and air pressure, coupled with specialized listening devices (i.e. deck plate) to search for the leak and try to pinpoint it. This would help later for minimal invasion to the ground or decking areas. In my case it wasn’t so easy. They could not pinpoint the sounds being heard to a specific location. I listed myself and understood it was not that easy.
Deck Plate.JPG

Instead, the techs grabbed their camera gear and more dye.
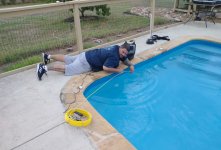
Scope.JPG

Eventually they found the culprit – a crack at the return fitting. Here is an example of the troublemaker. Look closely in this example. The break was at the rear of the return jet fitting (threads) in the 12 o'clock position where the PCV line is glued in to the fitting. My guess is the water line behind the shell dropped over time lifting upwards in the fitting causing a break at the top inside.
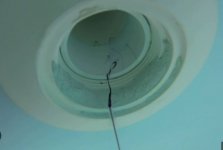
Return Jet.JPG

So now I had 3 options:
1 – Let them cut concrete, dig down, and completely replace the return fitting at the tune of about $2,000.
2 - Try to apply some A&B Epoxy into the crack. It might work, or only last for a while until the pipe shifts again.
3 – Use a Frakenplug that costs about $90.

I have elected to go with the Frakenplug for now and see how it lasts. Here is how it works.

Login to view embedded media
Moral of the story …… leak detection can be very tricky. Not always "in your face" obvious. If you suspect a pool leak, take it one step at a time. Follow a simple process of elimination between the pool shell (static-structural), pressure side, then the suction side. See the YouTube links below for some great illustrations. Not all leaks show themselves with chemical changes, colored dye, etc, so be prepared to think outside the box. Leave nothing to chance. You may even consider shopping for a few basic tools or parts so you can do a DIY test like I did before calling a professional. You’ll be more informed and confident when discussing the situation, repair processes, and potential fees. It might even save you some time and money. In my case, having the leak narrowed down in advance and knowing some background in pool plumbing helped save some time and in-turn saved me a few bucks with the leak detection company.

Speaking of leak detection companies, shop around. I called about 4 of them, including American Leak Detection who seems to have a good reputation. I did not chose them because I did not like their quote or how they interacted with me. Very impersonal in my case. So if anyone in the local San Antonio area needs help wit leak detection, PM me and I'll be happy to let you know who performed my testing.

Below are some helpful links. Good luck!


YouTube Links:

Login to view embedded media
Wind issues with winter cover no more.

I have discovered that adding water tubes on top of my winter cover around the inner edges I have eliminated wind lift. Fill the tubes around 50%, allowing for freezing, tie bungee cords or rope 1 foot from each end and connect to wire holding winter cover on. Run water tubes end to end thus circling the inner edges of the pool. The water tubes can be bought at many different places, hopefully this helps you as it did for me.

Attachments

  • Screenshot_20221109-183945_Chrome.jpg
    Screenshot_20221109-183945_Chrome.jpg
    185.8 KB · Views: 35
  • Screenshot_20221109-185702_Chrome.jpg
    Screenshot_20221109-185702_Chrome.jpg
    245.8 KB · Views: 33

We Have a Winner! TFP Pool of the Month (November 2022); Theme - Lighting

1. On the first of each month, a contest "theme" will be announced (i.e. water clarity, family fun, decking, custom features, lighting, scenery, etc)
2. Members have 10 days to upload ONE image for consideration; Photo must be related to the thread titled theme for that month.
3. Per general TFP rules, nothing profane, political, or insulting.
4. The first 10 days is the submission period. Posts are limited to ONE image ONLY. No discussion posts yet. This will make viewing much easier for all.
5. Days 11 - 15 the thread will be locked and is for voting only. No more uploads. Viewers now have a final opportunity to vote (or modify their selection) for their favorite upload.
6. Members are encouraged to use an emotion icon ("Like" or "Love") to vote for their favorite upload; it will be tough, but select only one favorite.
7. On day 16, emotion Likes/Loves will be tallied for a winner. In the event of a tie, we will create a poll on the thread to make a final selection.
8. Once a winner is announced, the thread will be unlocked and comments/discussions are welcomed. Winner and nominees can tell us all about their pool/photo/event.
9. A member can only be selected as winner once per calendar year.
10. Winner will receive a $50 gift certificate from tstestkits.net! Oh, and maybe some bragging rights. :poke:

This should be fun. Showcase your hard work. Show us your lighting. Let’s see those pics! Have fun and good luck to those who apply!

DIY build in Biloxi

I will try to post as many pictures as possible along the way but I might not show every mistake I make. I am an avid diyer and I'm not afraid to take chances and make mistakes.

We will be installing a 14x28 vinyl liner pool with Tara silver falls liner, 42"polymer walls and gray trim and center polymer step with 6" radius corners (cantilever) and a wedge bottom. We decided on the wedge for a more usable wading area for adults although we could have just gone with 48" walls to accomplish this. I couldn't find much info on this site about wedge bottoms as most seem to be sport or traditional.

We did a semi in ground pool at our last home so we have some experience with the dig although this will be much more difficult. I will be subbing out electrical and plumbing per my local code requirements. I will hopefully keep a detailed spreadsheet of cost as well. This price won't include the "pool house" (more like covered sitting area with storage) which is planned for after completion of pool.

Dig is planned for next week however we are monitoring the rain. We are renting a mini excavator for the dig but with the gradual slope of a wedge bottom I'm wondering if a skid steer might be beneficial as well.

Attachments

  • PXL_20220809_162109571.jpg
    PXL_20220809_162109571.jpg
    556.7 KB · Views: 112
  • PXL_20220809_164744665.jpg
    PXL_20220809_164744665.jpg
    706.1 KB · Views: 110
  • image.jpg
    image.jpg
    598.2 KB · Views: 107
  • PXL_20220730_160857148.jpg
    PXL_20220730_160857148.jpg
    338.8 KB · Views: 116

We Have a Winner! - TFP Pool of the Month (October 2022); Theme - Landscaping

1. On the first of each month, a contest "theme" will be announced (i.e. water clarity, family fun, decking, custom features, lighting, scenery, etc)
2. Members have 10 days to upload ONE image for consideration; Photo must be related to the thread titled theme for that month.
3. Per general TFP rules, nothing profane, political, or insulting.
4. The first 10 days is the submission period. Posts are limited to ONE image ONLY. No discussion posts yet. This will make viewing much easier for all.
5. Days 11 - 15 the thread will be locked and is for voting only. No more uploads. Viewers now have a final opportunity to vote (or modify their selection) for their favorite upload.
6. Members are encouraged to use an emotion icon ("Like" or "Love") to vote for their favorite upload; it will be tough, but select only one favorite.
7. On day 16, emotion Likes/Loves will be tallied for a winner. In the event of a tie, we will create a poll on the thread to make a final selection.
8. Once a winner is announced, the thread will be unlocked and comments/discussions are welcomed. Winner and nominees can tell us all about their pool/photo/event.
9. A member can only be selected as winner once per calendar year.
10. Winner will receive a $50 gift certificate from tstestkits.net! Oh, and maybe some bragging rights. :poke:

This should be fun. Showcase your hard work. Let's see that nice landscaping. Let’s see those pics! Have fun and good luck to those who apply!

Snoo's 1st close: inground, vinyl, sand filter

Not sure how to close:
Deck Jets
Slide

Pics to come.

Watched some videos. Have a good idea. Already have the antifreeze. We have a compressor. Plan to pick up funnel & attach short plastic hose for filling lines with antifreeze.

1. Slam pool.
2. Turn off pump.
3. Drop water to just below returns using submersible pump.
4. Remove plugs from pump & sand filter and allow to drain.
5. I need order to which to blow out lines... slide? Deck jets? Returns? Skimmer? Main drains?

9. Turn off breaker to pool equipment.
10. Make donation to TFP. ❤️
  • Love
Reactions: kimkats

Cloudy Water - Check Yourself First!

Yesterday evening, I got home right at sundown with low light. Water seemed off and hazed, cloudy! Kicked a few stones for a bit, put the pool cleaner in and started planning my strategy and options and questions for the board. This would be my first and only day ever with non-sparkling water and now it's a cloudy haze. SLAM in my cards when I've never let FC fall??? If so, I've been doing something all wrong, all along!

Went out after dark while robot running and could not even read the bot's label, nav light looked hazy underwater. Then, when I went to scratch my head and curse a bit more, I also took off my glasses. All of a sudden, the pool went to clear sparkle!!!!! Never seen such a layer covering my lenses!!!

Well, this post was initially going to be about asking for help. So, now, just telling on myself instead.

Lowered TA to 50, let's see if pH stabilizes...

After dealing with chronic high pH and SWCG cell scaling issues, I've taken the advice here and lowered my TA from 100 to 50 over the past month using aeration and regularly adding muratic acid to bring the pH back down.

One observation, is that it is surprising to me how long this process takes. I have a waterfall and then also an aerator that I pointed down so that it's creating a lot of bubbles. I ran these features 24/7 (not at full pump speed but still) and it still took about a month to finally get to where I'm at.

Anyway, I'm hoping this will help keep my pH more stable, I'll monitor results and report back here for anyone else who finds themselves in the same boat. If this doesn't work my next step will be adding boric acid.

People over complicate things

This for the most part sums up what I need to add to my pool for the past 5 years. Most of the time I don't even test, I just pour some in and I seem to be pretty good at judging the size "swig" the pool needs every 2 days. I probably test my water once a week unless I suspect an issue.

There's the occasional need for muriatic acid and or CYA......but it's rare.
Of course, when I initially filled the pool I used quite a bit of muriatic acid and daily testing. But once it settled down it's been very stable.

Am I alone?

6ssbj6.jpg

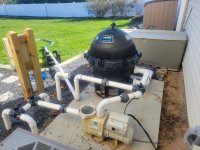
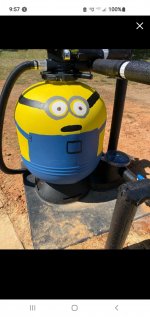
Filter