Opened to algae now cloudy water

Hi there, first time closing myself. All went well but opened to a green pool. Green like the grass green. I didn't use any algicide so maybe next time I'll try this. I started slam process and green went away quickly. Pool still very cloudy though and appears to be getting cloudier as I keep up the slam. Wondering if this is normal and if there's something else I should be doing to help clear the water. Note, I have a sand filter so maybe it's having trouble clearing the dead algae? I'll back wash it again tonight and see if that helps. Note, levels today are:
FC 12, TC 12.8, PH 7.5, TA 91, CH 80, CYA 30

Anything else I should be doing. Note, I've added more chlorine to keep the slam going. Thank you!!
  • Like
Reactions: Mdragger88

balancing beam game across the pool-- ideas?

I'd love to have a way so the kids can do chicken-fights across the middle of the pool (mine is 4metres across, fibreglass) I think it'd be heaps of fun. (ie. try to knock the opponent into the pool, with one arm behind their back. Or used those padded staffs).

Have you ever seen this done before, or done it yourself? But what to use as the bridge across the pool?

--a long tube of galvanised steel, such as used for a street sign. ... but if it somehow fell in the pool, it would surely do some serious damage.

-- a long wooden post ... but the edges would be dangerous
-- a long tree tree (100mm or so ... 4" might be thick enough) with bark & branches stripped off of course

-- a slackrope (ie. wide flat-stapping with a ratcheting tensioner, such as you use to tie down loads on a trailer). I like this idea as it woudn't damage the pool ... but i imagine it'd be way too hard for two people to walk across, they'd fall in before the battle even begins. Unless there were a way to stabilize it, perhaps with criss-crossing ropes?

whaddyareckon?
  • Like
Reactions: fishbait

PVC Plumbing of Bestway AGP

I just finished the plumbing of my Bestway above ground pool, a project I've been wanting to do since I first got the pool. Many thanks to my DH Mike for doing the heavy lifting, and especially to the good folks on TFP who showed me it could be done and how to do it. I thought I'd pay it back by posting pics to show how I did it!

This is an overview of the whole thing. It looks like it's really close to the A/C unit, but it's not. The pad is a good 6 ft from the A/C.

pvc plumbing.jpg

Here we have a view of the pump. It's a 1 hp Blue Torrent, single speed. Got it just before the law changed, and avoided having to get a VS pump. Not that they're not good, but holy moley if they aren't expensive!! Now I have a pump basket and everything, like a real pool!!

pump.jpg

Here's the outlet. Next year I'll be putting in a second outlet, opposite this one, for more circulation.

outlet.jpg

Here are the inlet and the skimmer, connected by a tee fitting.

inlet and skimmer.jpg

And here's the multi port valve and the sand filter.

IMG_20220505_165335237_HDR.jpg

We used a total of 25 ft of flex pvc, 2 Hayward inlet/outlet fittings, 3 unions, a tee connector and a couple of elbow connectors. And one gate valve. Took about a week, taking our time. I imagine if we were 20 yrs younger, we could have done it in a day or two. The equipment is a 1 hp Blue Torrent single speed pump and a 19 inch Harris sand filter, complete with 175 lbs of pool sand. I got all the pvc stuff from Amazon, along with the fittings, the filter and pump came from Inyo Pools during a massive sale. Sand came from the pool store, Brown's Pools. I think all told I spent $250 to $300 on the project.

IT CAN BE DONE!!!

Liquid Chlorine Usage Rate

How much liquid chlorine do you add per day? I’m in DFW area with about a 20k gallon pebble tech pool. The pool is mostly in direct sun but it gets a good amount of shade starting around 3 pm this time of year. I have been using tabs and watching my CYA closely, it is now at 40-50 so I’m switching to LC. All my tests are in the recommend ranges in the Pool Match app - I could actually boost my calcium a little bit.

Now that I’m doing the TFP method I’ve measured my OCLT (all is good) and measured over the last few days my daily chlorine usage. My testing has shown that I’m losing about 2 ppm of chlorine per day. From reading here it looks like this is about average so here are my questions:

1. Are y’all really adding almost a gallon of LC every couple days? This seems really exorbitant. Lots of people I’ve talked with test once a week and “shock” once a week as well. They might add some extra after a swim party.

2. I plan on testing FC every couple of days to ensure my levels don’t drop below the minimum. Does that sound about right?

3. The TFP method doesn’t take into account phosphates or TDS. I get lots of leaf debris and now pollen tubes from the lovely live oaks that are around. Should I pay more attention to this than the “normal” pool owner? I’m literally having to sometimes clean both skimmers out 2x a day due to all the debris.

4. I’m running my pump about 10 hours a day at low RPM’s. Any thoughts about adjusting that up or down?

I appreciate this forum and have learned a lot. Thanks in advance for your time and your replies.
  • Like
Reactions: cznkane

OCLT question re: very high chlorine

Been slowly getting my pool ready for swimming. It’s looking pretty good but, it’s been too cold here to swim. I cleaned up the pool yesterday (vacuumed, brushed, . . .) and then I made a bit of a mistake. I dumped a gallon of LC in the pool. That brought the chlorine level to 17 when I did my test last night after sunset. (Note to self - never add anything without a current reading and using pool math.). This morning I did my pre-dawn test and it looked like I passed but 34 drops is a lot and doing the test twice gave me slightly different answers. (32 drops and 34 drops). So, this is my plan and my question:

My plan is to let the chlorine float down to something more like 10 and retest. Basically do an OCLT for however many days it takes to get the chlorine down. Of course if it’s still high at night, I’ll skip getting up early. I’ll get up early when the night time reading is lower than 10 (20 drops). Anyone see any problem with this?
  • Like
Reactions: Mdragger88

DIY 20' x 40' In-Ground Build - In Progress!

After spending a fair amount of time last year attempting to find a pool builder, and coming up unsuccessful(Most were 2+ years out, or willing to do it for insane amounts of money) - we decided to tackle this project ourselves.

The pool build is as follows:
-Pool Warehouse/Hydra Pools 20'x40' 42" steel wall kit, 6" corner radius
-7' Corner Step, liner over steel
-Auto365 Auto Pool Cover
-Hayward OmniLogic Cat5 Smart Phone controlled 40k Salt System
-Hayward TriStar 2.7HP Vs900 Pump
-Hayward C5030 Cartridge Filter
-2 AquaGenie Skimmers
-4 1.5" Hayward Color LED Lights
-Hayward H-Series 350k btu Heater
8' Diving Board

I will be contracting out the excavation(sort of a joint effort - my son and I have been able to help and we're having a lot of fun with it!), and the concrete decking - everything else will be done DIY.

As you will be able to see in the photos, there is a fair amount of regrading with the landscape to be done - and potentially a retaining wall in the deep end corner. I plan on installing french drains around the pool as well to control moisture.

We started the dig just over a week ago and have made good progress! Have the 42" depth dug in nearly the entire pool, will finish that tomorrow as well as digging the hopper.

I have one question at this point: On the deep end panels, everything is level and square. Even when we push the panels in as tight as they can go in the corners, we still measure to 20' 1/2". Is this normal? Maybe I am overlooking something?

Thanks in advance!

Joe

image-16-04-22-06-15-1.jpegimage-16-04-22-06-15.jpegimage-16-04-22-05-54-15.jpegimage-16-04-22-05-54-14.jpegimage-16-04-22-05-54-13.jpegimage-16-04-22-05-54-8.jpegimage-16-04-22-05-54-5.jpegimage-16-04-22-06-29-1.jpegimage-16-04-22-06-29-2.jpegimage-16-04-22-06-29.jpeg

Variation on CYA sock method

I always get so bored waiting for the CYA sock in the skimmer to dissolve... And remembering to squeeze the paste in the sock every once in a while is a hassle.

So I rewired it!
man taylor GIF


The other way is the "Sock in the Skimmer."

May I respectfully submit: "The Foot-glove in the Fountain!"

IMG_20220503_153953568.jpg

Bonus, I can aerate to bring pH up at the same time. With the water spraying up through the sock the granules dissolved really quickly, no brushing, and no need to grope the pasty lump in an old sock. Bleugh.

Results progression - getting there, thanks to TFP and TF-PRO

First full year with a pool coming up. Been busy the last 3 weeks - installed solar heaters and plumbing, as well as a SWCG (CircuPool Edge-40), and all the while, learning the PoolMath app and how to log effectively, and of course water chemistry and testing methods/processes thanks to threads and articles here at TFP. I started wtih a Leslie's test as I had no test kit a couple weeks ago. Leslie's TA was off by over 50, compared to TF-Pro (220 at its highest on TF-Pro, 167 from Leslies). Apparently I ddin't log the 220, but it took over a gallon of acid to get to 170 on the TF-Pro kit.

So this is Leslie's results, 11 days ago (actual test was two weeks ago, but I logged it in PoolMath 11 days ago):
PNbZI1wl.png


Test from this morning (TA, pH, FC, TC, Salt, CYA tested; TC not shown, it's 0.5 ppm):
J3bw6e9l.png


Test kit - yes I do in fact find that wearing the pink bunny ears leads to slightly better and more ideal test numbers. Tide goes in, tide goes out - can't explain that:
E9jCDtNl.png


FC is higher than I intend to keep it, and I need to bump up CYA 10-20 points, due to the SWCG. I plan on keeping FC at 5-6, maintained by the SWCG and topped off with LC if needed. Still getting the hang of the CYA test, but I've added 8 lbs of stabilizer to my 16k gallon pool, so I think I'm in the ballpark. I lifted FC up a bit to "prime" the water for the SWCG, which I just turned on last night after adding 12 bags of salt throughout the morning. Lastly, pH should come up today after a full day of rain. I may have to vac to waste as my water level is getting a little higher than I want, and we're going to get an inch of rain today.

But all in all, I'm really happy with everything - the numbers are consistent and predictable. Not quite sure why I have .5 TC right now - it's cold, rainy, and crappy out for the last 4-5 days in this area, but I'll keep an eye on it and test again tomorrow. The app and the kit have made testing almost fun, or at the very least, not a burden.

For reference - my fill water is pretty high in TA - tested at 320 with the TF-Pro kit. It's also pretty high in copper and iron. I have a packet of CuLator that I haven't used. Really want to have everything in check first, and just add that to make sure I don't throw anything off that I can't quickly correct. Also, at that point, I'll be adding boric acid. I know it's more costly than Borax + MA, but I do prefer simpler if it's affordable within my budget, and boric acid seems a simpler route. I also don't like handling MA anymore than I absolutely have to.

This is an AGP with a vinyl liner, so not sure if I need to do anything for the CH or not?

Thanks for reading, and more importantly, thanks for all the great resources and input found here.

Todd
  • Like
Reactions: Newdude

Oh happy day! Uncovered pool today.

Beautiful Sunday afternoon so I braved uncovering the pool today and re-installing the pump and SWG removed at shutdown to prevent freezing.

Well, the water looks... how shall I put it... PERFECT! ;) Like it was just closed yesterday and not 6 months ago... Could not be any cleaner or clearer.

I could not restart the pump because I have to add 10 inches to refill... should be done tomorrow hopefully and after running the pump a while I can get a sample to test. So... fingers crossed that everything is as it seems.

There was a layer of slime from leaves, pollen, dust and such on top of the solid cover so I spread it out on the lawn and sprayed with a 50% bleach in water mix then broomed and rinsed it off so it can be put away for the summer.

Thank goodness for TFP and all the expert help I got last year with my conversion to SWG from the... dirty word... Perma-salt ionizer. And I have nothing but praise for the pool math app. After adjusting everything to as near to ideal as I could last summer it was almost like putting my pool on cruse control!

I just wanted to drop by to give a big thanks to the entire group!

TD

All manner of critters!

I knew before the rainy season started back up I needed to clear out my creek. Also before critter / snake / flea & tick / poison ivy / mosquito season.

There's so many great critters in our neighborhood. We've got another pair of red tailed hawks in our tree reusing the nest from last year. There's a group of 5 turkeys, tons of mallards, plus owls, turtles, frogs, fish, tadpoles, and even a few good sized water snakes. One huge snapping turtle is around someplace. The leeches gave me crawling skin even though I worked in waders. There's a pair of dogs from a few streets over that are ultra sweet and love to play and stop by every few days for a play date with our pupper. We've unofficially named them "Thelma and Louise."

But mostly, I gotta send a shout out to my boy Frogo Baggins...

IMG_20220403_155134407_HDR.jpgIMG_20220429_232820457.jpg

Attachments

  • IMG_20220421_143258786.jpg
    IMG_20220421_143258786.jpg
    674 KB · Views: 86
  • IMG_20220418_171217289.jpg
    IMG_20220418_171217289.jpg
    409.4 KB · Views: 86
  • IMG_20220413_121409234.jpg
    IMG_20220413_121409234.jpg
    404.3 KB · Views: 87
  • IMG_20220405_103902165.jpg
    IMG_20220405_103902165.jpg
    671.3 KB · Views: 86
  • IMG_20220404_204743941.jpg
    IMG_20220404_204743941.jpg
    207.3 KB · Views: 85
  • IMG_20220325_181500810.jpg
    IMG_20220325_181500810.jpg
    409.1 KB · Views: 86
  • IMG_20220424_194832590~2.jpg
    IMG_20220424_194832590~2.jpg
    1.2 MB · Views: 92

Rooftop Infinity Edge Build

My family has begun the journey of constructing a house which will have a pool with two infinity edges on a rooftop. The pool will be on technically the 4th level of the structure and is 33 feet by 13.9 feet and 4.9 feet deep. It will have a beach access of 8.2 by .94 feet deep and 27 feet long. We are completely clueless in this area and hope to learn, and yes we are that naïve.

I am attaching the pool deck and plan and the current state of the building. The house itself is 3 levels including the basement. The top of the structure as shown is the roof which is a bar terrace. The pool deck comes after the current stage has been slabbed.

Attachments

  • Swimming Pool-Model.pdf
    352.6 KB · Views: 222
  • IMG-20210121-WA0002 Current.jpg
    IMG-20210121-WA0002 Current.jpg
    394.6 KB · Views: 618
  • IMG-20210316-WA0000 pool Plan.jpg
    IMG-20210316-WA0000 pool Plan.jpg
    36.9 KB · Views: 449
  • Love
Reactions: Newdude

Test Results - Now What?

Tested with Taylor K-2006 Salt Complete (FAS-DPD chlorine).

I have a gallon of Liquid CYA, but confused how my salt level is higher than last time, and we haven’t added salt. Is it because the SWG isn’t converting the salt to chlorine (hence the low FC?)

Any suggestions what to do next? I typically run my VSP pump at around 2500 24 hours a day trying to get this pollen moving and caught in skimmer sock (we change it 2-3 times a day and it’s nasty).

Thanks in advance.

Attachments

  • BB0D7851-EA90-4636-9B99-2C0EA79E5084.png
    BB0D7851-EA90-4636-9B99-2C0EA79E5084.png
    524.5 KB · Views: 41

WE HAVE A WINNER! TFP Pool of the Month (May 2022); Theme - Family Fun

TFP members, it’s time to show-off your pool! The “Pool of the Month” contest for May 2022 begins now! Rules are as follows:
1. On the first of each month, a contest "theme" will be announced (i.e. water clarity, family fun, decking, custom features, lighting, scenery, etc)
2. Members have 5 days to upload ONE image for consideration; Photo must be related to the thread titled theme for that month.
3. Per general TFP rules, nothing profane, political, or insulting.
4. The first 5 days is the submission period. Posts are limited to images ONLY. No discussion posts yet. This will make viewing much easier for all.
5. Days 6 & 7 are the final voting period. No more uploads. Viewers now have a final opportunity to vote (or modify their selection) for their favorite upload.
6. Members are encouraged to use an emotion icon ("Like" or "Love") to vote for their favorite upload; it will be tough, but select only one favorite.
7. On day 8, emotion Likes/Loves will be tallied for a winner. In the event of a tie, we will create a poll on the thread to make a final selection.
8. Once a winner is announced, comments/discussions are welcomed. Winner and nominees can tell us all about their pool/photo/event.
9. A member can only be selected as winner once per calendar year.
10. Winner will receive a $50 gift certificate from tstestkits.net! Oh, and maybe some bragging rights. :poke:

This is our first such event, so there may be some learning curves and changes later, but this is a great opportunity to showcase your pool and hard work. Be creative and let’s see those pics! Have fun and good luck to those who apply!

Pool is finally done, time to show it off and ask some Getting Started questions

It took 55 Weeks from Signing to Filling, and a ton of yelling at the PB during all of that, but it's finally 'done' (still have the ole punch list). Overall we're thrilled with the final design/product, but still a little sore over all the issues we had getting it built and built right. Working on relaxing and letting all that hate go.

We're still piecing together all the landscaping/sprinklers/etc so once that's done I hope to have even more pictures, but man, it sure is nice to be here.

We're approaching the tail end of our 28 day startup and will be dosing the alkalinity up this weekend with MAYBE a filter cleaning planned too, that may get bumped til next weekend.

Couple quick questions for y'all. We're in Houston but the house gets decent evening shade. What CYA levels would you recommend and how much liquid chlorine would we reasonably expect to consume a week? I've been told to expect to consistently dump acid for the foreseeable future due to the new Wet Edge plaster. When will that begin to slow down?

Attachments

  • 20220408_202740.jpg
    20220408_202740.jpg
    311.1 KB · Views: 129
  • 20220408_195916.jpg
    20220408_195916.jpg
    579.2 KB · Views: 121

Leaking chemistry for the test kits

From time to time, there are posts concerning leaking chemistry either in the set or in the refill package. Let me say first of all that ALL the chemistry is harmless (Please don't drink it, use it as eyewash, food seasoning, pet medicine, etc.) so do not worry if you get some on your skin......just wash your hands......no rush.

Secondly, give us a call and tell us what leaked and if anything else got wet. We are exploring better options for shipping and would like it best of all if NONE of our chemistry leaked.......ever. That's our goal and we're working on it. We'll publish a number very soon that will give you easy access to us.

Clumped and darkened DPD powder

I'm late to the dance, but I want to comment on a couple of posts I've seen concerning DPD powder. Many of you notice the R-870 powder will darken to gray over time and has a tendency to clump. However (assuming you have chlorine in your pool) The solution will turn the same intensity of pink and the result is valid.

If your solution doesn't turn pink simply run the OTO comparator block test........those five drops of R-600 will turn yellow if there is chlorine in your pool The 870 powder turning to gray and clumping bugs us, too but it is the most precise test on the market and that test is essential for the methods we use to manage pools.

We're exploring possibilities for a better test that doesn't increase the cost and we'll keep you posted when we do

Doheny Discovery 5 year tune up!!

Almost five years ago, I bought my trusty Maytronics Doheny Discovery (S200, Triton, Active 20). It became a staple of having TFP clear water. In my case, I ran it 2 or 3 times a week, but as time went on, it seemed to spend longer and longer time in the pool. I'll admit it, I pretty much neglected my robot, but it still delivered time and time again, when I needed it to pick up leaves or even ash after we had local fires. When 2021 came around, I pretty much just figured I was getting a new robot, because my cord was toast and my Discovery was looking pretty shabby. But once again, the robot delivered, so I decided I would take my chances and order up the parts to give it a little freshening up. The heart of the robot is the motor. The motor is also the most expensive part and would decide whether I replaced the robot or not. Since it was still working good, I ordered the parts from Marina Pool & Patio that were necessary to get it back in shape.

Once again, a huge shout out to Marina's Pool and Patio, they were great and got me all the parts at a fair price in a week or less.


- *New no swivel cord* Since I never really had that much of a tangling issue, and I had a routine of unwrapping the cord, I did not get the swivel. This also saved about $50.00.
- *New Tracks* As you can see in the pictures, mine were pretty worn out and very loose in comparison to the new ones. I also switched it up by ordering parts specific to the Active 20, which are blue. Figured it was worth a change.
- *Non return flap* This is the cloth return flap attached to the basket. Mine was torn.
- *Rubber Strips* These are located on the bottom and all of mine were worn or torn off.
- *Active Brush Assembly* This is the smaller of the two brushes, that moves twice as fast when working. This assembly comes with new bearings. You can see in the pictures that the bearings on my old one were severly worn and the brush was really loose.
- *Wheel Tube Assembly* Larger of the two brushes. This also comes with new bearing assemblies which were worn down on my originals.
- *Wheel Kit* I debated getting these, but after comparing with my old wheels, I could see that mine had completely worn out bearings. These are the larger wheels in the front.
- *Rapid Drain Flap* This is the big rubber flap on the inside that allows all the water to rush out when you lift it out of the pool. Marina's made a mistake and gave me two sets of the rubber strips and forgot the return flap. It is an easy install and Marina made right with now issues. It was in the mail box when did the repairs and didn't think about checking.

All in, I spent $215 for the parts shipped to my door, which is way less than the $700 for a new robot.

Attachments

  • 5vpwk3.jpg
    5vpwk3.jpg
    290.7 KB · Views: 58
  • 20210226_112513.jpg
    20210226_112513.jpg
    268.6 KB · Views: 52
  • 20210226_112527.jpg
    20210226_112527.jpg
    107.9 KB · Views: 52
  • 20210226_112535.jpg
    20210226_112535.jpg
    101.9 KB · Views: 50
  • 20210226_112547.jpg
    20210226_112547.jpg
    212.7 KB · Views: 52

Repost: A Case for Not Wanting Blue in our Pools!

We all want our pools to be sparkly blue…..right? But believe it or not there are times when you don’t want to add “blue” to the water.

Let me first lay an old archaic English word on you- Vitriol. You may know that word to mean “caustic” or “bitter” and use it to describe someone’s personality.

But vitriol, and in particular Blue Vitriol is *not* something we want in our TFP pools! Blue Vitriol is another name for COPPER! And we sure don’t want to be adding that to our pools since we know it causes staining to our lovely pool surfaces, and it can cause our pretty blond swimmers hair to turn green!

So who would knowingly want to add that to their pool? The problem lies in that most folks are unaware that many pool care products do contain this sinister ingredient. Sure it is a good algaecide, but are the side effects worth it? Especially since we at TFP know how to keep our pools pristine and clean without this ingredient.

I go in to shop and see buckets of chlorine pucks that contain copper for sale by big name manufacturers and cringe when I see someone buying them. Looking at pool store ads I see a variety of products that scream out on the label how they do “6 in 1”, “Multipurpose” or “All Purpose” they are. Yet they don’t really spell out how this one product can do so many things?? So along with the chlorine we do like, they’ve stuck some copper in there too.

Rarely does a product spell out that it is copper laden. One national pool store product simply calls itself “Copper Algaecide”....truth in labeling! Many are labeled “BlueMagic”, “Xblue” or some other fancy sounding name. You think they’re talking about the pool water using that blue word. But *I* think they’re specifying a product line different from the copper-free ones they also make.

My entire point here is to please be aware of what is added to your water. Read the ingredients. Occasionally it will be listed and sometimes it just claims “Trade Secret Ingredients”, but if you dig around online, particularly in the SDS sheets, you may find that copper is indeed included.

Buyer Beware.

Maddie :flower:

Not the best at opening.

Kind of like that old pilot saying - any landing you can walk away from is a good one. So I guess my first opening was a good one. The good parts are that the air lock seemed to hold and I do not see any cracks from the freeze. That's a big one. Also, my pump came back on with no apparent issues. So in that respect, I'm thankful since last year was my fist DIY closing.

However, the water was less than hoped for. I haven't seen so much green algae in my pool since the stagnant water from the original build. Still, it wasn't like a green pond, but it wasn't good. Oh well, I'm sure I can have it back to TFP clear in a few days.

So far, I'll I've done is put a couple gallons of chlorine in it and brush. I also started the robot. All the green is gone and it just looks like a lot of dirt settling. My understanding is that is dead algae. For tonight, I'm done. I'll keep the pump on tonight and check everything in the morning. I'll also do a full test of the water to see what I need to do.

In retrospect, I think the issue was that at the end of last season, I was running low on CYA. My guess is that, without the stabilizer, there wasn't enough chlorine to get me through the winter. Thankfully, I opened a bit earlier than I was anticipating. I'm thinking in a week it would have really been a mess.

We have one more warm day, tomorrow, and then a cool down. I would think cool weather is a good time to do a SLAM. The chemistry starts tomorrow.

Thanks go to this site and those that helped me close last season for giving me the confidence to do this stuff myself. It's a little harder than writing a check, but I do get some pride of ownership out of it and I know it's being done properly. Thanks!
  • Like
Reactions: B.lu and markayash

Ten Guidelines for Quality Pool Plaster

There are proper steps to follow for the making of durable pool plaster. There are also improper practices that can lead to early deterioration or discoloration. Following is a ten-point checklist that will help achieve a lasting and discoloration free plaster.

1. The best cement/aggregate ratio is about one part cement to 1.5-1.75 parts aggregate (marble sand). If the plaster is too rich (cement-heavy), it tends to shrink and crack. If it's too lean (more sand), it will be less durable and potentially unworkable. Note: Always select high-quality and appropriate-grade cement and aggregate.

2. When mixing plaster, a thick mix is best. Shoot for a water/cement ratio of .48 or less. Both the American Concrete Institute (ACI) and the Portland Cement Association (PCA) maintain that lower water/cement ratios produce better-quality cement that can withstand occasional exposure to mild acids.

Lower water/cement ratios boost density while reducing permeability, porosity, shrinkage (craze cracking) and water movement within the cement product. Higher water/cement ratios, by contrast, cause excess shrinkage and cracking, and fail to offer adequate protection or long-term durability against the effects of water and the environment.

3. A plaster mix should be mixed thoroughly, but also not too long. It is recommended that if the plaster has been mixed for more than 90 minutes, the plaster mix should be discarded.

4. Plaster should contain as little calcium chloride set-accelerant as possible and never more than 2 percent to the amount of white cement. (Colored plaster, of course, should not contain any calcium chloride as it will lighten the color and become blotchy.) According to the PCA and other testing facilities, too much calcium chloride increases gray mottling discoloration and cement shrinkage. Several alternatives to calcium chloride that do not exhibit these characteristics are now available. The plastering of typical size residential pools shouldn't be completed in less than 4.0 hours.

5. Never add water to plaster surfaces while troweling. Both the ACI and PCA have found that this may increase porosity, shrinkage, and variable (white or light) discoloration. A little water to lubricate the trowel, however, likely will not harm the plaster surface.

Still, you never want to work, or force, additional water into the plaster surface when troweling. Doing so can weaken the surface and may accelerate deterioration and caused spotting or streaking discoloration. Dark colored plaster is even more susceptible to white spotting and streaking discoloration from too much water troweling.

6. Well-timed hard troweling can help produce a nice, dense plaster finish. But if the plaster becomes too hard before a smooth surface is achieved, continued hard troweling will often result in dark gray discoloration and spotting, especially when calcium chloride is also used.

7. Plastering in extreme weather conditions can lead to quality and durability problems. Industry groups specifically warn against using cement-based products in temperatures considered too hot or cold. The plastering process should take at least 4 hours to complete for typical residential pools.

One solution is "tenting" the pool, which protects the plaster surface (and the plasterers!) from the elements. In extreme dry heat, tenting the pool, and perhaps even directing air from an evaporative cooler beneath the tent, will help the plaster retain its moisture, and properly cure and harden without cracking.

8. Do not fill the pool with water too soon. Though conditions vary, water usually should not be added for at least six hours after the pool has been plastered and finished. This should be enough time for the plaster to harden properly before being submerged in water. It needs to be understood that the bottom or "bowl" area of the pool is the last and final section of the pool to be finished, and the walls are finished first. The bottom area of the pool needs to hardened before being submerged in water, whereas the plaster walls don't see water until many hours later, which is the way it should be. Even balanced tap water can dissolve certain plaster components if the surface has not adequately hardened. The end result is often greater porosity and early deterioration, which may take a few months to show up as a different shade of color on the bottom of the pool.

9. Soft or aggressive fill water can also deteriorate new plaster surfaces; and the effect is uniform. Ensure tap or fill water is balanced with sufficient TA and CH before using to fill the pool. Other new plaster problems such as drips, splotches, spotting, trowel marks, and hand- and footprints are the result of localized finishing errors.

Surfaces may be further damaged by aggressive (acidic) startup techniques, which can cause additional uniform surface loss. By contrast, baking soda startups can neutralize aggressive fill water while promoting a superior plaster surface.

10. Once the pool is filled, balance the water (and keep it balanced). Balanced water helps help preserve the plaster. Aggressive water causes uniform etching, while over-saturated water scales plaster. The Saturation Index is a good guide to prevent scaling or etching, water should have a saturation index value in the range of -0.3 to +0.5.

EDIT: It is acknowledged that adhering to quality standards will lengthen the time it takes to plaster pools. Generally, a plaster crew should spend at least four hours or more to plaster a typical residential pool. If it takes only three hours, that might mean it was done too fast and may result in plaster problems appearing later. During cold temperatures, it may take six hours or more to do the right job.

We emphasize that quality over quantity must prevail to ensure the rights of homeowners to quality products, and a responsibility to builders to ensure a commitment to quality of their projects.

With reasonably consistent maintenance, standard plaster has a life span of approximately 20 years. It is an inherently strong surface, and should be able to withstand real world chemistry and/or maintenance challenges.

Though pozzolans, blended cements and other materials are generating good results, there is still no substitute for solid workmanship. The above guidelines will benefit pool plasterers in the pursuit of a quality, long-lasting pool finish.


For how to personally supervise the plastering process, see this link: A Plastering 'Watch List' | Professional Watershaping | Watershapes

For further info on plaster discolorations and defects, see this post: Being Blamed for Plaster Discolorations? Don't Get Hoodwinked

Opening Numbers

I opened yesterday and had some algae so I put in some chlorine and today the pool looks a lot better. Will probably do a SLAM this week. My initial numbers are listed below. I think today I'll focus on getting the stabilizer up and throwing in a bag or two of salt. That's enough for a Sunday.

FC 6.5 (This is after adding chlorine once I opened. At opening, FC was zero.)
pH 7.2
TA 50
CH 125
CYA 20 (I'm guessing. I filled the tube and could still CLEARLY see the dot.)
Salt 2400

Off to the pool store for stabilizer.

  • Locked
Deep Cleaning a Sand Filter

This post will walk you through the anatomy of a sand filter, and then provide a video at the end for how to deep clean your sand filter. The filter used in the photos and videos is a Hayward S180T top mount sand filter. The images are of a similar filter. Obviously not all filters are configured in the same way, but this tutorial should get you well on your way.

This post is intended to provide a more in-depth look at how the filter works. This post is NOT a substitute for understanding how to perform the basic functions of your filter in the daily operation of your pool. Please see the Pool School article for that information.

Many new members with sand filters ask the question, "When should I change my sand?" The short answer is, usually never. Sand existed for millions of years before it ended up in your filter. A few years of working on your pool won't change it. While there are some rare circumstances where sand may need to be changed, in general a deep cleaning can do wonders for your filter's efficiency.

Anatomy of a Filter

Hayward S180T sand filter
13742666193_0f988b24bc_c.jpg

This is a picture of the filter. The Red circle is the "Intake" from the pump. The yellow circle is the "discharge" to the return. The orange circle is the waste port and the green circle is the sight glass.

Not pictured is the band collar that secures the multiport to the filter body.


13741399535_bbae6034a1_c.jpg

This is the top view of the multiport with all of the settings. These six screws will disassemble the multiport, not separate the multiport from the filter body. Disassembly is necessary only to get to the spider gasket (where serviceable). To disassemble, remove all six phillips head screws. This will reveal the key, cover, and handle assembly, as well as the spider gasket. The spider gasket on this particular multiport is not a serviceable item.


53107918987_97c0615ac8_z.jpg

This is the multiport, removed from the filter, as viewed from the bottom. Small leaks from under the band collar are usually explained by the blue o-ring not being seated properly or being damaged (if tightening the band collar doesn't fix the leak). The bottom of the multiport will be seated on the standpipe in the next picture.


53108694589_c898e5d07a_z.jpg

This is a bird's eye view of the filter with the multiport removed. The pipe in the middle is the standpipe. Notice the thin layer of debris on top of the sand bed. As you will see later in the video, this layer will be removed, followed by a deep clean of the sand bed, before reassembling the filter.


35566703442_9f2f697c1a.jpg
35566703262_9910ffe3d4.jpg

This is the lateral assembly removed from the filter. As seen in the second photo, the openings in the lateral fingers are each just thinner than a grain of sand. Always use extreme caution when working with the laterals to prevent damage. On this model, the laterals themselves do not screw in to the standpipe. The screws at the base of the assembly must be removed and the base separated to access each lateral. Other styles have each lateral finger threaded so that it can screw into the base of the assembly.


Sand Filtration 101

So how exactly does the water get clean? Remember those settings on the top of the multiport? Let's walk through them. Red arrows represent unfiltered water from the pool. Blue arrows represent clean filtered water. Green arrows represent dirty water.

WARNING - When you turn the handle, the water is diverted in different directions based on the settings chosen. All changes must be made with the pump off! Put another way, never turn the multiport handle while the pump is running.

Special thanks goes to Leebo for virtually cutting open then rebuilding my filter so you all can see the inside.

35566703672_3824e56f31_c.jpg

FILTER - Filter is normal operation. On this setting, pool water enters the intake and is sprayed on top of the sand bed. It travels through the sand bed under pressure, where the sand filters out particulates. This now clean water enters the laterals at the bottom of the filter, travels up the standpipe to the multiport, and out the discharge where it returns to the pool.


35348280030_4768a4d412_b.jpg

BACKWASH - As your filter cleans your pool, it becomes clogged with all of the particulate matter that was in the pool. Filter pressure will increase while flow decreases. Backwashing is necessary to clear out that sand and return the filter to normal flow. TFP recommends backwashing when filter pressure rises 20-25% above the clean pressure operation. In backwash mode, the flow is reversed from normal filter operation. Unfiltered pool water enters the intake and is directed down the standpipe, out the laterals and up through the sand bed. This action dislodges all of the dirt and particulate matter that has been trapped in the sand. This dirty water is sent out the waste port on the back of the multiport. Backwashing not only "washes" the sand, but also leads to resettling it in the next step, which is....


35566703082_b02a4855e3_z.jpg

RINSE - ....rinsing. Rinse is exactly the same as filter, except the filtered water is sent out the waste line instead of back into the pool. This step should always happen after backwashing for two reasons. First, any dirt and debris in the filter that did not get ejected during the backwash is now in suspension with the sand. Immediate filtering could put some of it in the pool. Second, the rinse helps resettle the sand bed for when the system is placed back in filter mode.


35348280170_8c1f1e1412_b.jpg

RECIRCULATE - This mode bypasses the filter completely, as if it was removed from the plumbing loop. Unfiltered pool water enters the intake, skips the sand, and immediately goes out the discharge and back to the pool. The most practical use of this setting is during the early stages of a SLAM overnight, where mixing of the pool water is desired, but filtration would reduce flow too quickly.


35348280120_89c01ce217_z.jpg

WASTE - In this mode, unfiltered pool water bypasses filtration and is ejected out the waste port. The most common uses for this mode would be "vacuuming to waste," or for draining the pool.

The final settings on this multiport (and pictures don't really help) are as follows:
WINTER - The multiport is intentionally placed between two settings, completely opening up the passageways. This setting is used while the filter is empty over winter.
CLOSED - This turns the filter into a giant ball valve, cutting off and blocking water flow between intake and discharge.


The Ultimate Deep Clean

Backwashing is a maintenance action that should be taken during the swim season (or the SLAM process) when flow slows down and pressure rises. Sometimes a backwash just isn't good enough. This is when a deep clean is required.

The deep cleaning should be done once a year at the beginning of your season to ensure the sand bed is settled properly. It will also help dislodge the debris from underneath the laterals at the very bottom of the filter. Finally, it is possible that filters get so dirty, packed and clumped together, small channels form in the sand. Water can take this route instead of through the sand, greatly reducing the cleaning power of the filter.

Waterbear gave us the following instructions from this post:

Open up the filter so the sand bed is exposed. Stick a garden hose into the sand and turn on the water. The sand should loosen up and all the dirt and gunk should float and overflow out of the filter. You might need to stir up the sand a bit. Keep this up until the water overflowing out of the filter is clean. If any sand is clumped together CAREFULLY break it up with something like a broom handle but BE VERY CAREFUL NOT TO DAMAGE THE LATERALS. You will be surprised at how much stuff this gets out of your filter than backwashing doesn't and I feel this 'deep cleaning' should be done yearly. This should take care of the channeling but if the sand has a lot of calcium deposits you might want to follow this up with an acidic sand filter cleaner from the pool store.

**WARNING -- Before starting this process, be sure that the filter is isolated from the pool plumbing. I filmed this video at the very beginning of the swim season, and my plumbing was not hooked up yet. If the filter is still connected, turn off valves, disconnect plumbing, or do whatever you need to do to isolate your filter from the system. If you don't do this step, as you fill the filter with water, the junk and crud will fall into the standpipe and go right back into your pool.**

The following videos show the deep cleaning.....

Login to view embedded media


How much do you do to check a business?

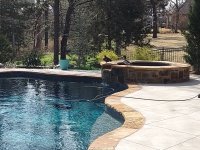
A recent thread shows how a business stole money from customers:


The question is: What due diligence did the homeowners do, if any, and would it have been enough to protect them?

Here is what I suggest:

The full legal name of the company as it is registered with the state, which might be the single sole proprietor’s name and any DBA (Doing Business As) names the company uses.

Full contact information for the company including website, email, physical address, phone, EIN, registered agent if any etc.

For any business with a “Fictitious” or DBA (Doing Business As) name, there has to be a state or local registration of the “Fictitious” or DBA (Doing Business As) name as associated to the full legal name of the company, which is the person’s name if a sole proprietor or a corporation or LLC or Partnership.

A business license if required (Link to verify that it is active and in good standing).

An Employer Identification Number (EIN) if required or available.

A sales tax permit if they will charge sales tax on products they itemize (retail) like chemicals, parts, supplies etc.

A contractor’s license if required by the city, state or federal government depending on the type and scope of work.

A trade license for any work requiring a trade license like plumbing or electrical.

All owner information including a comprehensive detailed profile of all qualifications, work history, background check verification including civil, criminal and traffic from all courts anywhere.

Check all reviews from any site like BBB, Google, Yelp, Porch, Thumbtack, Amazon etc.

You want insurance including:

General Liability.

Errors and Omissions for any professional work, especially if the work requires a trade license.

Umbrella (Preferred).

Commercial Auto.

Worker’s Compensation Insurance if the business has employees.

Surety Bond in an amount of the total cost of the job (Minimum).

Verify that a building permit was issued before the contractor does any work requiring a permit.

Some information is available online, but it can be complicated and time consuming to find what exact qualifications are required and if the company actually meets the requirements.

Worker’s compensation insurance information might be available online, but other insurance and bond verifications need to be provided by the company.

The Houston contractor search shows that the right to do business in Texas was revoked.

Epic Fiberglass Pools.

https://mycpa.cpa.state.tx.us/coa/coaSearchBtn

There are no requirements for a contractor’s license or a business license in Houston, which seems like a bad idea.

THERE IS NO GENERAL BUSINESS LICENSE ISSUED BY THE CITY OF HOUSTON.

Some permits (especially for GENERAL CONTRACTORS) must be obtained on a job-by-job basis.

PRIME AND/OR GENERAL CONTRACTORS ARE NOT PROFESSIONALLY LICENSED IN HOUSTON OR BY THE STATE OF TEXAS. THERE IS NO “GENERAL CONTRACTOR LICENSE”.


A recent thread indicates that a pool service is using the name Trouble Free Pool, which is probably a trademark infringement and the person is trading on the reputation of this site.


So, here is some information related to “Trouble Free Pool Service”, which shows that their “license is expired and not able to contract at this time”.

Further investigation shows that they have no worker’s compensation insurance, but they seem to have employees, which means that any employee that gets injured on a customer’s property could potentially create a liability for the homeowner.

UNIVERSITY POOLS INC. DBA (Doing Business As) TROUBLE FREE POOLS.

(760) 385-8722

2021-9010714


UNIVERSITY POOLS INC. DBA (Doing Business As) TROUBLE FREE POOLS


Contractor's License Detail for License # 1028787

This license is expired and not able to contract at this time.

D-35 - Pool and Spa Maintenance Contractor

California Code of Regulations

Title 16, Division 8, Article 3. Classifications

A pool and spa maintenance contractor installs, replaces or repairs pool motors, pumps, filters, gas heaters and any above ground piping in connection with pools; includes electrical switches, breakers, pool lights, diving boards, existing solar systems that heat pools, pool and spa acid baths and applies vinyl liners to existing surfaces.

Business Phone Number: (619) 797-6651

Entity Sole Ownership

Issue Date 07/10/2017

Expire Date 07/31/2021

This license is expired and not able to contract at this time.

This license is exempt from having workers compensation insurance; they certified that they have no employees at this time.

Additional Status

The license will need a contractors bond to renew active or reactivate.


https://troublefreepoolservice.com/

The “Testimonials” seem to be fake because the pictures associated with them as “Clients” are just stock photos copied from online sources.

Based on the available information, would you do business with this company?

What additional information could you check and would you check?epic fiberglass.pngJane Smith.png

Client "Jane Smith" is just a stock photo and probably a fake review.


Michael Fidanni also seems to be a stock photo and probably a fake testimonial.

Filter