Welcome to TFP.
I have given it multiple TFP black algae treatments over the past 3 years. The algae disappears in winter, but is already coming back in May with FC at 6 or higher and CYA at 65
Exactly what are the TFP black algae treatments you have done?
Current recommendations are:
This guide provides a step by step procedure for eliminating black algae in your concrete or gunite pool. Read full post here.

www.troublefreepool.com
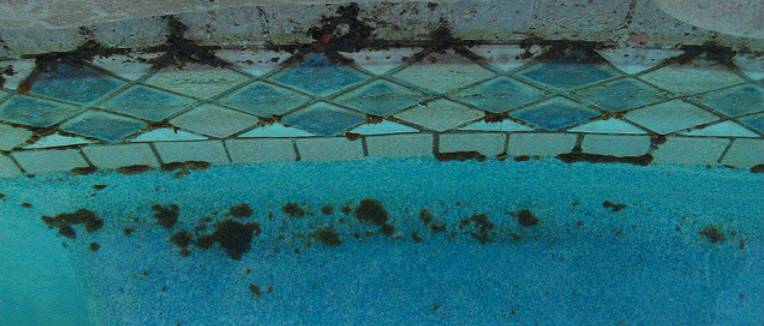
Gently scrape a sample of the suspected black algae with your fingernail and then smudge it on plain white paper. If the smudge scrapes off and is a greenish color, then it’s black algae.
For Black Algae, you will have to disrupt the surface of the algae physically. You can use a wire brush or if it is just a few spots, put on a mask and snorkel, go into the pool, and pick at it with a bamboo BBQ skewer.
If you have more than just a few spots, get in the pool with a weak pressure washer, and you can use that to blast away the BA.
After physically disrupting the BA, you should dose it with Liquid Chlorine. Get the strongest LC you can find, and if the BA is close to the edges, pour the chlorine down the side where it washes over where the BA used to be. If the BA is all over the place, you can fill a 1-gallon pump sprayer, get into the pool, and spray those spots. And yes, you can do this all underwater.
Then you must keep your FC at 20% of CYA for the next several weeks.
This is the part that sucks; run your FC on the high side in the future at a minimum of 12% of CYA; 15% is better to try and keep the black algae at bay.
Your one-stop shop for all things TFP to include: ABCs of Water Chemistry, Recommended Chemicals/Levels, Test Kits, Troubleshooting, and much more!
www.troublefreepool.com
www.troublefreepool.com


 .
.