Stenner liquid chlorine pump - How to choose and install

CHLORINE (LIQUID CHLORINE OR BLEACH) INJECTION SYSTEM

Overall comment: if you can use a salt water generator (SWG), you should. Bleach is harder to do.


Do you really want to use bleach? Will a SWG (generates bleach in the pool) work for you? If you have a variable speed (VS) pump, then a Stenner injection pump vs a SWG is not a significant economic issue either way. You should stop here and get a SWG. If you loathe hauling bleach, you should get a SWG. If you do not have any DIY abilities, you should get a SWG. There is likely an installer associated with a pool store near you who will come out and install a SWG. Not so with a Stenner. A Stenner injection pump is simple, but may be unknown to the pool store installer. A plumber could likely install it. If your municipality has restrictions on the discharge of salt water, or you don't have anywhere to discharge it you may want to go with a liquid chlorine injection system. The discharge of salt water can kill your grass or injure plants http://hort.cornell.edu/gardening/soil/salts.pdf If you have concerns over corrosion, you may want a bleach injection system.

After reading the above, if a liquid chlorine injection pump is for you, read on. Carefully consider the specifics of your situation.

Choosing pump

Most think that a peristaltic pump such as Stenner is the most reliable means to inject daily bleach. To correctly size, use Pool Math to calculate the volume of bleach needed to raise your FC by 3ppm. You want to add this within 4 hours or less or you will may have to run your main pool pump too long. (This is not an issue with a VS pump).

Example: 20,000-gallon pool, 3ppm is 125 oz 6% bleach. You would need to be able to pump ¼ of the bleach in 1 hour. That would make 31.25 oz per hour, 750 oz per day, or 5.85 gallons per day for 6% bleach. Using the links at the bottom from Stenner, choose a pump and tube combination that delivers 5.85 gallons per day (GPD) or more. In this example you could use the 45MFL2 pump which delivers 10 GPD. A digital lamp timer can be used to cut the Stenner pump on and off. This example uses the fixed head Stenner. The adjustable head Stenner will work but makes a loud clicking noise during the cycle and is not recommended. If you have already purchased an adjustable head pump, you may turn it all the way up to stop the clicking noise. You could choose the 45 series, the 85 series, Econ T, 25, 80, or 100 PSI: all will work.

Choosing timer

Choose a digital timer with 3 prongs (grounded). This timer should be programmable to the minute AND have a battery backup. Many of these timers have an internal battery backup and do not use replaceable batteries. These are often found as "lamp timers".

Choosing tank

A larger tank will store more chlorine and reduce your space requirement for bleach inventory. It's very nice to have a tank large enough to store a month's worth of bleach. A plastic barrel might work. The Stenner pump and tank combination units are very nice and the 30 gallon tank will fulfill the requirements for most residential pool owners. At the time of this writing, a Stenner pump with a 30 gallon tank, tubing, weighted strainer, and injection fitting could be purchased for under $400 including shipping.

Installation

Install your Stenner to pump bleach out of a tank. You should set up the tank in a cool and darkened area to prevent chlorine breakdown while the bleach is stored in the tank. An opaque tank will also help. The bleach tank must be vented (a tank from Stenner is already vented) with at least a small hole somewhere to prevent air lock. Use a Stenner weighted suction line strainer 3” off the bottom of your tank to prevent suctioning sediment. A Stenner injection fitting or a Stenner check valve should be used to inject the bleach into your plumbing circuit after the pump, filter, and heater. If you get the Stenner Check Valve injection fitting, you may remove the duckbill (check valve) as it is not necessary for the lower pressures of a pool system. I have discussed this directly with Stenner Pump technical support. They tell me that the check valve is not a necessity. Pool pressures are highest between the pump and filter. You can read this pressure off of your gauge. After the filter the pressure is less. At the point of injection the pressure should be less than 10 PSI. The liquid chlorine should be pumped in right before the water returns to the pool. You can put in a fitting such as a 2" slip x 1/4" female pipe threat x 2" slip Tee, install a PVC saddle such as "Pentair 2" Saddle Clamp Kit 521512", or use a 1/4" pipe tap to cut threads directly into PVC pipe or fitting (most pools will use either 1.5" or 2" PVC). If you cut threads or "tap" your PVC pipe or fitting to install the Stenner injection fitting DO NOT overtighten as you may crack the PVC pipe. Pipe threads are tapered and have a larger diameter the more you screw them in. Set the Stenner pump to run only when the main pool pump is running. Otherwise, the bleach may run back towards your heater/pump/etc.

Calibration

Before calibration, make sure your pool is "holding chlorine". This means that there is nothing alive in your pool that is consuming chlorine. After dark check your chlorine twice a couple of hours apart. If the chlorine level is not dropping, you are OK. A pool that needs to be slammed will use chlorine (in absence of sunlight) and your calibration will be inaccurate. Calibrate your Stenner pump set up by agitating your pool water and checking the FC after dark. In this manner there will be no breakdown of chlorine by the sun. If your test kit allows, use the larger sample size for improved accuracy. Run the Stenner pump for 60 minutes and stop. Allow the water to agitate for another 15 minutes or more and retest. This is how much FC your pump will add in 60 minutes. Divide 60 minutes by your change in FC and you will tell you how many minutes it takes to add 1ppm to your pool. You will have 1ppm=X minutes. You can now adjust your Stenner pump to add 1X (1ppm), 1.5X (1.5ppm), 2X (2ppm) etc. This will tell you how many minutes to put on your Stenner pump timer based on your FC demands. This is usually 1-3 ppm.

Example: Stenner pump runs for 60 minutes, FC goes from 3.8ppm to 5.0ppm. This gives a FC change of 1.2ppm.
1.2 ppm = 60min; divide both sides by 1.2 and you have 1ppm = 50 minutes. You’d run your pump 50 min for 1ppm, 75 min for 1.5ppm, 100 min for 2ppm, 125 min for 2.5 ppm, or 150 min for 3ppm.


Once your Stenner is calibrated, if you change bleach concentration, you can use the following formula: old run time x old concentration/new concentration = new run time

Example: Old run time: 1ppm=50min (6% bleach). Now you now have 8.25% bleach. 50min x 6/8.25 = 36min. Your new values: 1ppm=36min

Bleach choice
Bleach degrades fast. Factors affecting degradation are concentration (lower is better) , temperature (lower is better), pH (higher is better) , and light (darkness is best). Bleach half life at 90 degrees F: 15% - 48 days, 10% - 115 days, 5% - 371 days. The commonly available 6% has a relatively long half life. If buying 10% / 12.5%, you'd better check the birthday of your bleach. Choose plain beach, no scent, splashless, etc. Order bleach if necessary so that you don't have to buy frequently. It's not economical to drive around hunting for cheap bleach. Bleach still in the boxes that has not been unpacked stacks much better than jugs. Most bleach has a date of manufacture as a Julian date embedded in a number on the bleach jug. Julian date calendar: Julian Day Calendar

COVID update : I changed to bulk beach because of shortages. You can sometimes buy from a pressure washer or janitorial supply. Price in 2020 was $129/55 gallon barrel. 2023-2025 price $195/55 gallon barrel. This bleach is advertised as 12.5% but is often closer to 15% when I get it. I cut in half with water on day 1 because weaker is more stable. 4 grams of lye added to 1/2 barrel to raise pH of my fill water to 11 (also more stable).

https://www.landanc.com/wp-content/uploads/2023/07/2023-Chemical-sheet-04-03-23.pdf Bleach is on the bottom of page 2

Barrel pump: $33

You may test the bleach by using 0.1mL of the unknown bleach concentration in 1 liter of nonchlorinated water (do not use tap water if chlorinated). Agitate and test this with your pool test kit. The chlorine value you obtain is your bleach percentage.
Testing the chlorine percentage of your bleach

The barrel pump tubing is used in respiratory applications. You can find it on Amazon as "aerosol tubing" and use a piece of 1/2" PVC as an inside coupling to connect the tubing together. Make it as long as you need. Just remember that is is a siphon situation and the liquid must flow to lower level.
https://www.amazon.com/1-Pack-Westmed-Corrugated-Aerosol-Tubing/dp/B087JFR6LK/ref=sr_1_4?crid=23AX9GFVKMQT0&keywords=aerosol+tubing&qid=1687699218&sprefix=aerosol+tubing,aps,77&sr=8-4


Wiring

You may have your Stenner pump come on at the same time as your pump with synchronized timers, flow switches, pressure switches, or current sensing from your pool circuit, etc. The idea is for the Stenner pump to only be able to run when the pool pump is running.

Advantages over SWG

Pump run times (and electricity costs) less that required for SWG (8 hours of unnecessary run time per day with a 1500 watt pump at 13cent/kwh is $47/month); this disadvantage is significantly reduced or even erased if you have a VS pump
Can operate in low temperatures (not much of advantage)
More customizable: may mimic manual dosing, SWG slow dosing, or pulse dose multiple times per day.
Less salt to discharge when draining pool. Discharge of high salt pool water may be an issue with a SWG. This depends on your situation. Water with high salt content can kill plants / lawn, some municipalities have codes concerning salt water discharge.
May run VS pump at lowest setting and still inject bleach.

Disadvantages over SWG

Takes some do it yourself (DIY) ability to install .
Must shop/haul/store bleach and recycle jugs (THIS IS THE GREATEST DISADVANTAGE BY FAR)
Annual maintenance once a season (relatively easy), but you have to perform some maintenance on a SWG as well.
Must purchase weak bleach (6%) or keep up with age of bleach due to concerns over degradation for stronger (10-12.5%) bleach.
Requires space to set up bleach tank and to store bleach inventory.

Stenner maintenance (many YouTube videos)

Need to change pump tube annually. Apply Aquashield grease to bushing annually when changing tube.
Cut off 1/2" of tube and replace ferrules on any connecting nut you loosen. Only hand tighten tubing connection nuts.
Need to change sun exposed connecting nuts which break down in sunlight annually (or prevent by covering with foil)
Change all tubing every 2 years.

Parts required with Stenner part numbers
Stenner pump of correct size, ¼” connecting nuts UCAK100, ¼” ferrules UCAK200, ¼” tubing AK4010B, ¼” weighted strainer ST114, ¼” injection fitting CVIJ1/4, bleach tank with 1 month’s capacity, and grounded 3-prong digital lamp timer (adjustable to the minute and not necessary with Econ T Series). Plumbing fittings to allow injection check valve to screw into your plumbing right before water returns to pool.

Stenner Classic fixed head pumps
https://stenner.com/products/pumps/single-head-fixed-output-injection-pump/#boxtab4

Stenner Econ T series pumps
Stenner pumps Econ T programmable automatic timed dosing on a schedule

Stenner has good technical support
[email protected]
(800) 683-2378, (904) 641-1666

eBay often has pumps, both new and used as well as parts.

JULY 2018, with many edits since then.

Simple Fix for a Cracked Union Nut on a Pentair Salt Cell

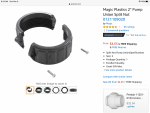
I’ve found the information on TFP very helpful, but didn’t see the need to participate in the forum until now. When I put the blank in place of the Pentair IC40 salt cell for this winter, one of the Union nuts cracked. Everything that I found in the forum, on-line and talking to my local pool company and Pentair made it sound like my only option was to cut into the plumbing and totally replace the unions. The cost was estimated at about $150. Then I found a split union nut and decided to order it on the remote chance that it old work. It arrived and yesterday I cut off the cracked nut with a Dremel, put the new split nut in place and was back up and running in less than an hour. Total cost was less than $5. Hoping that this post saves a lot of pool owners a lot of hassle and $$$. Attached is a screen shot of the part. Magic Plastics 2” Pump Union Split Nut part# 0121109020.

6/13/20 Update: When I first posted this, I was putting the blank on for the winter. I just tried to install the IntelliChlor Salt Cell this morning and found that you CANNOT fully tighten the nut, as it interferes with the flow switch cover. I was able to sand off enough of the nut to make it work. Not as easy as I thought, but still a lot easier, and cheaper than redoing the piping!


9319AB81-7412-4167-939F-0F15CE929C36.png

Intellicenter feature controlled autofill with sprinkler valve

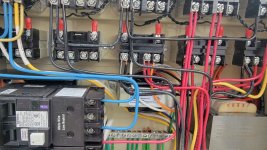
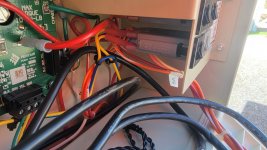
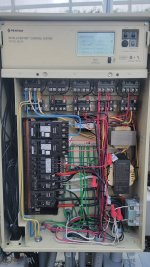
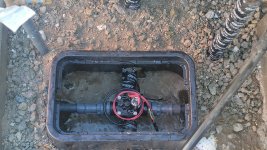
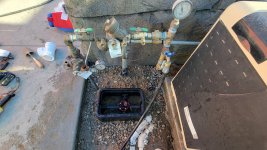
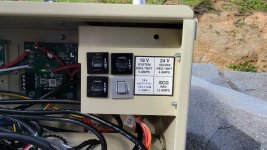
I had previously posted about my intellicenter controlled autofill modification but had an issue so decided to revisit it. Initially I had pulled 24v from from a valve header on the intellicenter which I ran to a free relay then on to the solenoid. This worked fine for about six months at which point it stopped working. I discovered the solenoid on the sprinkler valve had burnt out (either burnt out and shorted or shorted and burnt out) Not wanting to risk the spendy intellicenter boards I opted to reconfigure the whole circuit.
I ordered the following components:
24v transformer
5a panel mount circuit breaker

I drilled and tapped the enclosure below the 7th relay for the transformer which fit nicely
20230214_091258.jpg
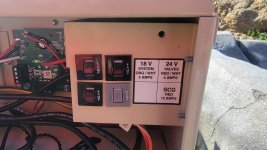
Added the low voltage circuit breaker into the extra spot on the intellicenter
20230215_134201.jpg
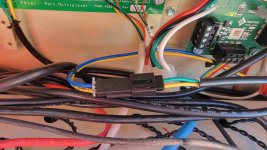
Wired the lv thru to the CB and then connected with some spare Delphi connectors I had because I'm "extra" lol
20230215_134211.jpg
20230215_134206.jpg
And like that it's done and working, no longer thru the intellicenter board.
Doing this allows me to control the time that the autofill runs which enables tracking water usage with my flume 2 monitor. The autofill is scheduled to run several days a week in the middle of the night when no other items should be using water.
20230214_145128.jpg
20220806_172933.jpg
20220806_172940.jpg
As a finishing touch , labeled the lv circuit breaker
20230217_093624.jpg

V-Green Installation, wiring, and automation details

Folks,

I thought it might be helpful to put everything I learned about my recent install of a V-Green VS motor installation in one place.

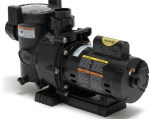
I started out with a Jandy FHPM 1.0- 2 pump:
1579198540868.png

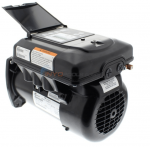
swapped the electric end for the square flange V-Greeen 1.65 motor:

1579198949724.png

And now I have my hybrid VS pump installed:

1579199407628.png

Here are the major things I learned that may help others doing this project:

Connections

  • Here's a look at the compartment:
  • 1579199724874.png
  • Notice the low voltage wires are on the left and HV is on the right. Use the left conduit hole for LV and the right one for HV. Figure out how to make the conduit connections work for this and be careful to select fittings that will allow you to get the bonding wire in place. It's VERY CLOSE (too close) to the conduit fitting. Make sure you check all this out carefully BEFORE you start pulling wire or you'll think you're done then have to disassemble and do it again.
  • There's a divider in the cover that fits between the compartments. Don't have any wires that loop between compartments like this or they will keep the lid from closing and the divider will pinch the wire:
  • 1579200110633.png
  • Here's a photo of the cover and divider:
  • 1579200289904.png
  • Here's how to route the wires for proper installation with the cover almost in position. Notice divider just to the right of the hold down screw:
  • 1579200563281.png
  • The compartment has a history of leaking and filling up with water. There's a tiny o-ring that is supposed to seal the screw in the well on top of the cover. Use liberal amounts of silicone pool lube on the sealing surfaces around the edge and make sure they're clean. Here's the o-ring (see what I mean by tiny... too tiny?):
  • 1579200831879.png

Automation

  • I want to set the pump up to run just fast enough for the chlorinator as the base speed then use "step speeds" as they're called in the manual to increase for certain conditions:
    • High speed anytime solar bypass is closed and flow has to make it to the roof.
    • High speed anytime the gas heater is on
  • I had no idea how I would access V-Green RS 485 from Pentair RS 485. So I put that aside for a potential future project.
  • At first, I though to use relays to trigger the digital inputs from signals I'd pick up on the Pentair board. Fortunately I had a "learning moment" from Jim R about this. It was really dumb to do it this way when the controller is so eloquent. Sort of like advancing from the stone age to the bronze age. The digital inputs are designed to handle any signal 12-30 VAC or DC. so all I needed to do is run a signal from the gas valve on the heater and a signal from the solar valve input to the "step speeds". So set as follows:
    • Step 1- duration 24 hrs, speed 1800 rpm
    • Step 2-duration 0 hrs, speed 3200 rpm
    • Step 3- duration 0 hrs, speed 3200 rpm
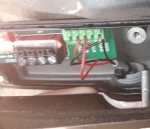
  • To accomplish this I had to combine the common wires from the two signal wires. I was concerned about this and still haven't confirmed if its OK to do this from separate transformers like the pentair controller and the heater. But I convinced myself it was OK since the common connection from all were tied to the same ground. Luckily it worked fine and no problems with a week of operation. Here's how the connections look, a little fuzzy but far left "Step 1 has no connection. It runs anytime the digital inputs are not energized and the default is the internal timer which is set for 24 hrs Step 1 speed. Step 2 and 3 are the solar and gas heater connections respectively. Common signals (black) are twisted together:
  • 1579202125872.png
  • I'd much prefer screw terminals instead of the cheap spring type connectors but I guess this is part of keeping costs down. They do work fine and I've used these types of connectors outdoor for years with no problem so long as there's no water intrusion.
Other Stuff:
  • The bonding connection and conduit connectors are a real pain. Be patient and get it right. It's worth the effort. I'm out of attachments so if you want to see what this looks like let me know and I'll PM it to you.
  • Use the foam pad they give you to put under the motor between the motor and original saddle if there's a gap. Works great and literally no vibration
  • Of course replace the seal in the pump when you do this.
  • Look into type 1 and type 2 lightning/surge protection if this is a risk in your area. A couple hundred $ is well worth it.

One last thing. thanks to all @Jimrahbe ,@ajw22, @JamesW, @jimmythegreek and all the otherr experts that helped me get another huge upgrade completed.

Chris

Attachments

  • 1579199682879.png
    1579199682879.png
    840.4 KB · Views: 22

New to pool math

Hey folks !!!

We have a pool math forum now so we can teach the ins and outs for new folks, and maybe even learn some new tricks for the existing folks.

To start it off, please watch the tutorial here : Pool Math

It's simple stuff and you can play with the various fields to get better acquainted with it. Every field asks you what you'd like to do, be it raising or lowering a parameter and its easy to do/undo.

Download the app here:
PoolMath

Or visit the old pool math web page here : PoolMath

We strongly suggest you upgrade to the premium version for only $8 a year (not per month). It will save all your logs and all the TFP helpers can spot trends from the past when things go south. It REALLY helps us help you, which you'll like too. :)

Fiberglass install started - NJ in the winter

It's almost time! Signed the contract in July, ordered the shell (14x30, but only ~9k gallons due to sun shelf). Got rid of my Frankenfence :) (per this post) and took down a beautiful oak tree :(. We were planning for an April build, but the shell arrived early and they'll start excavation possibly next week. Never owned a pool - anything to know about a winter install? PB said they will only fill to the closing level. Simple 3' concrete decking to follow at some point, so I am assuming there will be no winter cover this year and it will just be uncovered from now until winterization? Also getting an undertrack autocover which I guess gets timed with the concrete pour (though they haven't asked me my color choice yet...). I'm still trying to get the full info from PB.

What if it rains or snows and increases the water level above the returns (I think I'm using the correct terminology)?

im so excited saved by the bell GIF
  • Haha
Reactions: Newdude

New to Pools. Very High CYA

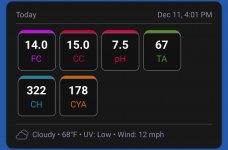
Screenshot_20221211_160341.jpg

High, I bought a house with a pool, and as probably most people, I was led to TFP by Google searches.

So I have noticed one of the cornerstones of TFP is CYA. So full disclosure I have not yet got my own tests (aside from water guru - yes I read the threads on that) the results above are based on two different pool stores. They had a marginal differences, so I pretty much assume my CYA is very high.

That being said, considering everything I read here, that should be the first thing I take care of.

What would be the best way, without breaking the bank.

Thanks!
  • Like
Reactions: Elian

UK Indoor Pool Refurbishment

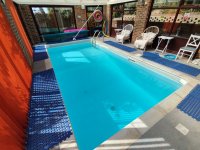
Just over a month ago I moved to a new house with a small "indoor" pool in the garden. I knew the pool needed a bit of work and definitely a new liner, but this restoration has snowballed into a much larger project. I'll be documenting the progress as I try to get the pool back to fully working order.
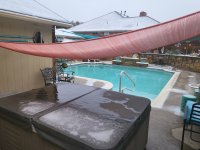
In the garden there is a 6x3m pool (around 25,000 litres) in an enclosed conservatory. This is how it looked shortly after moving in.
IMG_20220912_123008.jpg

I'd always heard that owning a swimming pool was a "money pit", and so far that's definitely what this project feels like. We were in a rush when buying this house and during buying process I didn't get someone in to do a full survey of the pool. This was definitely a mistake. I had tried contacting several pool companies (of which there are very few in the UK).
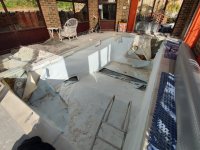
Here's where I am now

IMG_20221027_131643.jpg

The leak

I was warned the pool needed a new liner and had a minor leak but measuring top-ups (with a LinkTap) I discovered 150 litres was being lost everyday. The liner was in a very poor condition with many repair patches so it was my assumption that it was the main source of the leak. I read a few guides on the best techniques to identify potential sources of leaks so started testing.

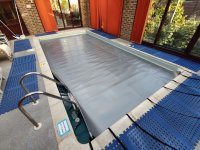
Water loss from evaporation? 150 litres definitely seemed like too much. I ordered a new cover and roller to replace the existing one which had suffered a lot of UV damage and was falling apart, and just to eliminate it as an issue. The new cover is an EnergyGuard GeoBubble for use in the colder months with less sun. It'll also reduce excessive humidity in the enclosed space.

IMG_20220922_153149.jpg

I bought some leak dye and looked for leaks around fittings and patches but this didn't show anything obvious.

Next onto checking if things got better or worse without the pump and filter running. No obvious change in the volume of water being lost every 24 hours.

Now blocking the returns, again no change.

A plug in the bottom of the skimmer.

Time to look more carefully and it appeared the pipework in the pump/filter enclosure was leaking in a few different places. Someone had attempted to make a repair to the sand filter which was leaking, along with a small leak from a flexible coupler used on the pipework to connect to a pipe right up against the concrete floor.

IMG_20220912_123028.jpg

IMG_20221001_152741.jpg
It was also clear at this point that the pump was very oversized (1HP) for a pool this size 25m3 / 6,600 US gallons. The small filter was just letting all the dirt straight through thanks to the powerful pump.

I decided I would tackle replacing the pump and filter to eliminate another leak source.

At this point I called several pool companies to get them to quote on
  • pressure testing the pipework
  • replacing the skimmer (as Kafko parts were going to be difficult to source)
  • replacing the main drain (as above)
  • replacing the light with an led version
  • replacing the liner
  • Like
Reactions: Newdude

Pool "opening"... Thanks TFP (and swg)

So, grandkids were over yesterday and the weather was nice, so we thought it was time to heat up the spa for some fun.
I haven't tested the pool in months. Christmas, covid, etc. But I've been running the pump, and I knew the chlorine had to be in the ballpark because the pool is crystal clear. Sure enough, FC 5.5, pH way high (as expected). Some MA (per Poolmath "effects of adding") and half an hour later we're heating the spa.
I'll do full tests today, and adjust other stuff as needed, but swim season here we come!

Softub motor cycling on and off repeatedly

We have a 220 gallon Softub recently inherited from the previous owner of our house, and just got it set up and running. The motor is turning off and on frequently and we're looking for advice.

The pump runs continuously as desired until the hot tub reaches the set temperature (100), after that the pump runs sporadically, turning on for a second or two, then shutting off for about 30 seconds, then on again repeatedly.
The display shows "P" when pump is off, and shows "00" when pump is on.
When the pump is running, one or both of the Filter and Heat lights turn on.
Pressing Jets button will run the jets for about 15 minutes, then it reverts to the previous behavior.

It's plugged directly into the outlet so I don't suspect there's an issue with the electrical supply. We tried hitting test and reset on the power cord, and tried unplugging it and replugging it in. Didn't try any more complicated fixes yet. Called Softub and they have a FIVE MONTH waiting list for service "due to the pandemic" so wondering if anyone has tips or troubleshooting ideas!

Thank you!
Jessica & Will

  • Locked
From brown to 😍😍. Thank you polyfil!

We filled our pool from our well. We knew the risks and knew we would have a battle when the water was 12" deep as it looked green from the metals. Our fears were confirmed when we added chlorine and the water turned brown almost immediately. Enter 5 gallon polyfil filter. It worked wonderfully! But with such a large pool, it would have taken forever to filter it all out.
Enter 55 gallon drum and a 10 lb box of fill. Running a submersible pump alongside a transfer pump, filtering 24/7, we went from brown water to sparkling clear in about a week. We vacuumed through our transfer pump that routed through the filter once daily.

and fyi: we do not have our pump and filter hooked up yet (waiting on electrician to finish). Will be wonderful to send through our actual filter, but feel good that most of it is out already.

Thanks TFP for the great advice along the way!
IMG_20200603_123411.jpgIMG_20200606_102409.jpgIMG_20200610_112522.jpgIMG_20200606_102356.jpg

How and why did you find TFP?

I thought it'd be fun to share what initially brought you to TFP and how you found it.

I'll share. i bought a house with my first pool. I previously had an above ground pool but had no idea how to properly care for it. The prior owner left an old TF100 test kit that had expired many years prior and i didn't pay much attention to it. I did what i knew....went and bought some test strips and trichlor tablets and a floater. Not just any test strips... probably the worst ones: Clorox brand. The strips told me my "hardness" was high and to add a bottle of their scale remover. So i did. I tested again and hardness was still super high so i added another bottle as recommended by their app. Little did i know, that little strip was never going to change and it would always recommend a new bottle. I quickly realized it was a complete joke and remembered the TF100 kit which had the website on the front. I bought a refill of the reagents, joined the forum, asked some questions and have had a completely trouble free pool from the beginning. I'm quite thankful the prior owner left the old TF100 kit. Otherwise, i may not have found TFP for many months, if ever and probably would still be doing the pool store dance.

Re: How to clean a cartridge filter

Re: How to clean a cartridge filter

After 7 years, I've replaced my 4 cartridges in my filter (I could have gone longer, but the straps were starting to break and I figured I had a good run with these cartridges). The replacement cartridges for my Jandy CL340 were from Unicel® and they had instructions with them that I thought were helpful and consistent with what we've been telling people -- note the specific instructions for Baquacil/Biguande as well.

Cartridge Cleaning Instructions for Chlorine Users

When should a cartridge element be cleaned?

For swimming pools, clean the cartridge when filter canister pressure reaches 8 PSI above the initial system or new cartridge starting pressure. For spas, establish a routine cartridge cleaning schedule based on the amount of spa usage. If Baquacil® is used as a sanitizer, the filter element must be cleaned with Baqua Clean® before any cartridge cleaner is used (Step 4). Please refer to "Cartridge Cleaning Supplement for Baquacil® Users."

What is the procedure to clean my cartridge?

  1. Remove the cartridge from the filter housing following the manufacturer's instructions.
  2. Use a garden hose with a straight flow nozzle to wash down the filter element. Work from the top down, holding the nozzle at a 45 degree angle, and wash all the pleats with emphasis between pleats.
  3. Rinse until all dirt and debris are gone.
  4. For all spa cartridges and elements used in swimming pools where perspiration, suntan lotions, and other oils are present, soak the element for at least on hour (overnight is most effective) in (1) a commercial filter cleaner; or (2) one cup trisodium phosphate (TSP) to five gallons water; or (3) one cup dishwasher detergent to five gallons of water.
  5. Rinse the cartridge again to remove oils and cleaning solution.
  6. If the filter has a coating of alage, calcium carbonate (residue from calcium hypochlorite), iron, or other minerals, soak the cartridge in a solution of one part muriatic acid to twenty parts water until all bubbling stops. WARNING: Failure to remove all oils and cleaning solution before acid soaking will result in a permanent restriction of water flow and cause premature cartridge failure.
  7. Rinse the cartridge clean and reassemble housing.

NOTE: Unicel does not recommend the use of diatomaceous earth (DE) with cartridge filters. DE particles will become trapped in the body of the media and shorten cartridge life. If desired, a cellulose fiber (synthetic DE) can be used in moderation.

Cartridge Cleaning Supplement for Biguanide Users

What should I know about cleaning my cartridge element if I use a biguanide system such as Leisure time FreeTM or Baquacil®?

Unlike chlorine which oxidizes the bacteria in the water, the active ingredient in biguanide systems, polyhexamethylene biguanide (PHMB), destroys the bacterial cells. PHMB locates and binds to the bacterial surfaces, and then attacks the outer bacterial wall. Once this wall has been compromised, the inner cell membrane (the cytoplasmic membrane) is destroyed. This destruction allows the cell contents to disperse into their surroundings where they are further broken down into their elemental parts by a non-chlorine oxidizer such as Leisure Time BoostTM or Baqua Shock®.

In addition, Leisure Time BoostTM and Baqua Shock® are mild coagulants which combine bacterial cells and other small particles in the environment into particles large enough to be trapped by the filter. The resulting deposit is a gray sticky film on the media which can only be removed with Leisure Time Filter CleanTM or Baqua Clean®. If trisodium phosphate (TSP) or any TSP type cleaner is used prior to stripping the film, the cleaner and the gray film will combine to form a gum-like substance. Once this occurs, the substance cannot be removed from the media and the filter cartridge must be replaced.

WARNING: Follow all manufacturer's instructions, warnings and cautions when using Leisure Time FreeTM or Baquacil® products.

Leisure Time® and Leisure Time FreeTM are registered trademarks of Advantis Technologies, Inc.

New Build - Las Vegas NV - Owner/Builder

Just starting a new build here in Las Vegas. We're on a one acre lot with a blank slate for a back yard. Before purchasing this house, we looked at one that had a pool layout that we loved, so we're copying most of the details with this one.

I do have a full size Cat backhoe and skid steer with backhoe attachment, so I will be doing all of the excavating myself, as well as trenching. I also hope to do the electrical and plumbing, but I'll cross that bridge when I get there.

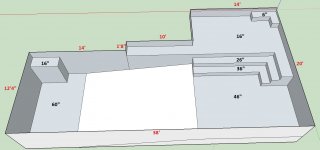
I've attached a picture of the current layout and dimensions (the depths are water depths). I'd like feedback - good or bad. The two goals with the pool are swim lane for wife and large lounge area. The plumbing/electrical is not shown.

This build will be extremely basic regarding automation. I work from home and have a very relaxed schedule. As much as I like Pentair, I don't feel we need a panel to accomplish my goals. Our last pool had an Intellitouch i7+3 and we really didn't use its automated features. Not only that, the 'wireless' remote wouldn't work unless it was plugged in to the wall, and about 30% of the time, it wouldn't work at all.

Already purchased -
Pentair 011056 VSF
Pentair 420 Clean and Clear
Circupool Universal40
Pentair Amerilites (2)

The pump will be programmed via its on board controller
The lights will be controlled via wifi switch
The SWG will activate via the flow switch (as recommended after speaking with Circupool)

Looking forward to posting progress pictures!

POOL Lot.jpgpool dimensions.jpg

Come show off your pool equipment contest time!


Kim :kim:
  • Like
Reactions: Texas Splash

Review of Recent Order from Pool Supply Unlimited

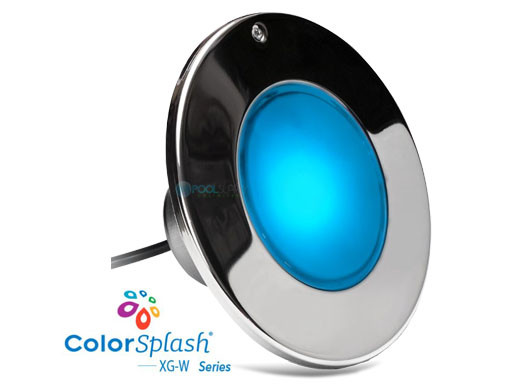
I ordered three J&J Electronics ColorSplash XG-W Series RGB + White LED Pool Lights from Pool Supply Unlimited.


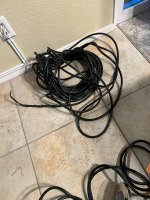
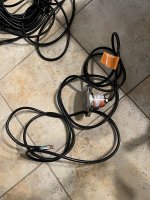
They arrived and I planned to install them this weekend. I opened the boxes to find one of the lights was clearly used! The cable was cut about 10ft in, and had electrical tape on it like someone had tried to install it! It also looks like water is inside of the lens.

I contacted Pool Supply Unlimited and am now waiting for them to get back to me with a resolution. I'm posting this so others can be aware and be careful with their orders.

I will report back what happens. I am mostly irritated because I had arranged for help installing this weekend. :mad:

IMG_9225.jpgIMG_9226.jpgIMG_9243.jpgIMG_9252.jpgIMG_9251.jpg
IMG_9253.jpg
  • Like
Reactions: CoachAlex

New build - Dallas (Prosper) - Decking stonework done

Hello all. I've been reviewing builds and information here for months. Dallas pool building is crazy right now and it's shocking how hard it is for the builder's to get through a design process. We are very close to signing a contract and are meeting with the builder today to clean up the design. It's close, but you will not random things that are off. The real goal of this design was pricing so that we could move forward. I was surprised by what impacted cost and simple changes to size had a dramatic impact. Skimmer/lights/steps/depths/etc will all be adjusted today. SWG will be discussed today but they already went down path of "no warranty".

This is a much more aggressive build than I was planning but this year has taught our family many things. It's time and if we are going to do it, let's make it something special and ideal for our family. Looking forward to your thoughts/suggestions/feedback. Every other builder used Pentair and I had a good feel for their stuff based on other builds on this site. Jandy, I don't have a clue. The bid is below.
Pool and Spa: 814 SF / 142’ Per.
Dimensions: 37’ x 24’ Depth: 3’6” X 5’ X 4’ EST. Gallons 20,111

Excavation:
  • Small track dig with access from side of property
  • 2 Hours pre-grade 6 hours of excavation
  • Access permission needed

Engineering:
  • On-site analysis of soil stability by licensed structural engineer, post dig, to test soil stability- engineer specializes in commercial and residential aquatics
  • Post excavation, pre gunite, chemical injections 10’ below excavation depth to minimize PVR (potential vertical rise) to =<1”


Steel:

  • 10” x 10” Grid of 1/2” steel in pool walls, floors, steps/benches, structure wall footings
  • 4 Bar box beam around top edge of shell, with 1/2" steel
  • 10”x 10” Grid of 3/8” steel in equipment pad, outdoor kitchen pad, retaining walls and deck steps


Gunite:
  • Lifetime Structural Warranty
  • Pneumatically applied, 6-sack mix
  • 6” Raised spa with 4” arm rest
  • Gunite footings for equipment pad, retaining walls, deck steps, and outdoor kitchen footer

Plumbing/Electrical:
  • Hand dug trenches with lines laid out flat to minimize settling over time.
  • No heating and bending
  • Schedule 40 PVC pipe all pressure tested throughout construction
  • All connections made using commercial grade, gray PVC glue
  • 2 1/2" Suction on filter pump drains
  • 2 1/2" suction and return from/to spa for increased performance >8 Spa jets
  • 2" Suction from skimmers (2), plumbed separately
  • Overflow drain placed in skimmer throat
  • Water fill line to nearest hose bib
  • 98’ Gas line to heater
  • 146’ Gas line to grill and line burner
  • All electrical lines in grey conduit housing
  • 1 Flood light at pool equipment on a on/off switch

Equipment:
  • Pro-Edge dealer warranty of 3 years, including parts and labor
  • Main circulation pump: Jandy Pro Series ePump2.7hp variable speed
  • Jandy “water polishing” CL 580 filter
  • Jandy Jxi 400K BTU gas heater
  • Polaris 280 automatic pool cleaner with ¾ hp booster pump
  • Polaris 1.5 HP air blower
  • 4. 12 W LED color pool/spa lights
  • 2. 6W LED color lights, in the spa corner in trough and in between stepping pads in pool
  • In-Line chlorinating system
  • Pool control: RS-PS4 with iAquaLink automation kit
  • Jandy never lube maintenance free pool valves
  • Brass or aluminum skimmer lids, available in round or square
  • 1. 84” manual ignition line burner

Stonework:
  • Choice of 2” thick stone coping or 3cm Travertine coping
  • Choice of stone veneer on all wall faces and stone cap


Tile:

  • Standard 1”x1”, 1”x2” or 6”x6” band of frost proof, ceramic tile on water line of pool


Interior Finish:
  • Pebble Sheen mini pebble finish (standard colors)

Decking:
  • 1,190 SF of 12”x6” travertine pavers (ivory, walnut, noche)
  • Laid over 4”-6” flex base made of crushed concrete material
  • 6”-12” Turndown on perimeter of deck where needed
  • Stone steps with choice of cap and stone veneer
  • 4” Brass drain caps with network of 4” PVC drain system under decking
  • 274 linear feet of synthetic turf in between deck
Outdoor Kitchen:
  • Permits
  • 104 SF of granite cap with veneer reinforced with CMU block on gunite footing
  • 3 electrical outlets
  • Gas line hook up to grill
  • Plumbing for sink:
    • Cold water
    • Under sink pump for drainage to cleanout
    • Sewer line
  • Hardware by homeowner
  • Appliances by homeowner


Structure:
  • 10’x16’ Overhang to overhang, 160 SF
  • Permits, and engineered plan
  • 6”x6” Metal post, metal frame with cedar slats on ceiling
  • 1 Outlets
  • 6 Dimmable can lights on a on/off switch
  • 1 Fan Kit
  • Cedar wall
Pool Start Up:
  • Pool cleaning tool kit: test kit, brush, pole, leaf net and vacuum head and hose
  • Complete pool start-up and pool school service by professional, certified and licensed pool service company


Yard Repair:
  • 4 Sprinkler zones repair included. ***Additional money may be needed for additional sprinkler zone repair at homeowners’ expense.
  • 5 Pallets of sod included Bermuda. ***Additional money may be needed for additional sod repair at homeowners’ expense
Fence:
  • Take down fence panels at access and re-hang after deck installation
  • Bring gates and fence to meet city codes

Attachments

  • D4_005.jpg
    D4_005.jpg
    634.1 KB · Views: 341
  • D4_004.jpg
    D4_004.jpg
    452.9 KB · Views: 338
  • D4_003.jpg
    D4_003.jpg
    541.3 KB · Views: 331
  • D4_002.jpg
    D4_002.jpg
    525.5 KB · Views: 351
  • D4_001.jpg
    D4_001.jpg
    619.7 KB · Views: 339
  • Like
Reactions: Mac3529

Air Relief Valve Leaking on Pentair Clean & Clear Plus After Replacing Filter Cartridges

We changed out our cartridge filters today and noticed after re-assembling everything and starting the pump back up that the air relief valve is leaking/dripping a steady stream of water. What is a possible cause for this and is it considered an emergency? Possible steps to fix it?

99778
  • Like
Reactions: Ignoramus

Intellicenter Users - Freeze Protection warning

Ok, I am not sure if this is across all Intellicenter systems or if it is just mine, but it appears that if there is a power interruption to the control system power, the freeze protection on the AUX circuits turns off.

The feature circuits do not lose the freeze protection, so any circuit in there, stays operating.

Well, I happened to check on the intellicenter this morning while at work, and I noticed that the freeze protection was not on. So I turned the freeze protection back on.

Shortly after I get a call at work from my wife saying the pool equipment was making funny noises. Have her check the pump basket because the web client says 3450 RPM and 0 flow. There is barely any water in it. Tell her to throw the breakers.

I rushed home (8 minutes away) and restarted everything. System started up in pool mode. Everything was fine. Because she had thrown the breakers, the freeze protection was back off. I came inside, and brought up the Intellicenter web client, and selected freeze protection again. Low and behold, about 15 minutes later, I get a no flow alert from my IC40 and the pump is trying to prime again. I killed the breaker and sat there thinking about what could be going wrong. It finally dawned on me that we had a power flash this morning around 6:30. If the freeze protection was turned off then, and I turned it back on about 2 hours later, because the pump lost prime, that the spa suction had to be the issue and is likely freezing/frozen. Got the system started again in pool mode. Got the heat gun and warmed the spa suction pipe up for a while. Reset my suction line actuator so it would always pull a trickle from the spa and pool. This should keep the line from freezing, even if the freeze protection gets turned off again.


TLDR; Check your freeze protection settings often on your Intellicenter as a power interruption seems to turn off the freeze protection to the AUX circuits.

--Jeff
  • Like
Reactions: RichAZ

Feb. contest time! See link below!


Show off what you hide your equipment in/behind as well!

Kim:kim:
  • Like
Reactions: Newdude

OB Fiberglass Pool in South Florida

Hi All,
I'm installing a 11x23 fiberglass pool in our backyard (it's a small one, hence the small pool). I had a contract with a pool company to do it a year and half ago but after 9 months of trying to get through permitting they came back to me and added 50% to the cost so we ended our relationship. After not being able to find someone capable to do the work I decided to do it myself.
I've got an excavator that's experienced with pool digs and a great concrete guy. Right now my biggest problem is the truck arrives on the 16th to deliver the pool and I can't find a way to get it off the truck. All of the equipment for rent and rigging guys are in Ft. Meyers for hurricane clean up (I'm in West Palm). The equipment the excavator has is too small but might be able to lift it and set it in the front yard until we can find something.
I've read for hours on this site and all over so I'm hoping I can pull it off. I've got time and I'm pretty handy so we'll see.

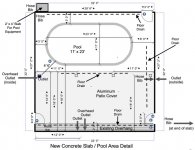
Right now I've been talking to the concrete guy about securing the collar. We're pouring all at once (collar and patio). No pavers, it'll be concrete all the way to the water. My mfr says we 'may use 3/8" rebar at 90 degrees to secure the lip to the concrete.' I've read on here about using fiberglass pins. Anyone know of anywhere I can get more info on that or pick up some of the pins? From what I've seen it seems like a better plan than the rebar.

I'll try to keep up with this thread as I go along so maybe something I learn along the way can help someone else down the road.

Thanks to everyone on this site for all of the info. I've learned a ton over the past few months and I'm sure the learning is just starting.

Cheers!
PatioAreaDetailjpg.jpg
  • Like
Reactions: Newdude

Speed Queen - The Way of Water

Hahah. Ok, I’m no James Cameron raking in billions on a cheesy Smurf remake movie, but I can be joyful and make some noise (see what I did there 😉) about my latest purchase -

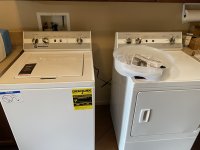
D8583D53-7738-4164-8253-D005B284AE5A.jpeg

Speed Queen TC5 washer and DC5 dryer set! Woooo hoooo!!!! Low complexity (love the knobs and buttons) and high reliability. I just got rid of my Maytag Bravo set that was 10 years old. Overly complicated machines with more cycles and options than anyone ever uses and an agitator-less design with a direct drive brushless motor. Nice machines but horribly complicated and expensive to repair.

These Speed Queens classics harken back to an older design philosophy that is more New York City laundromat style than elegant home appliance style. I prefer laundromat style!!

Looking forward to many years of service.

We Have a Winner! TFP Pool of the Month (February 2023); Theme - Equipment Pads

1. On the first of each month, a contest "theme" will be announced (i.e. water clarity, family fun, decking, custom features, lighting, scenery, etc)
2. Members have 10 days to upload ONE image for consideration; Photo must be related to the thread titled theme for that month.
3. Per general TFP rules, nothing profane, political, or insulting.
4. The first 10 days is the submission period. Posts are limited to ONE image ONLY. No discussion posts yet. This will make viewing much easier for all.
5. Days 11 - 15 the thread will be locked and is for voting only. No more uploads. Viewers now have a final opportunity to vote (or modify their selection) for their favorite upload.
6. Members are encouraged to use an emotion icon ("Like" or "Love") to vote for their favorite upload; it will be tough, but select only one favorite.
7. On day 16, emotion Likes/Loves will be tallied for a winner. In the event of a tie, we will create a poll on the thread to make a final selection.
8. Once a winner is announced, the thread will be unlocked and comments/discussions are welcomed. Winner and nominees can tell us all about their pool/photo/event.
9. A member can only be selected as winner once per calendar year.
10. Winner will receive a $50 gift certificate from tstestkits.net! Oh, and maybe some bragging rights. :poke:

This should be fun. Showcase your equipment pads. Let’s see those pics! Have fun and good luck to those who apply!

Filter