It Flies, It Dies

I am on my now seasonal "It flies, it dies" mission. I find if I spray every bug I see that flies we have a lot less of them during the season. mostly I am talking about carpenter bees and worst of all, hornets. A few wasps as well along with some yellow jackets. I'm getting pretty good with the raid can at 10 feet. I spritz and the hornets are down for the count but the carpenter bees need a few hits.

Anyone else use this bug control method?
  • Like
Reactions: cwescapexlt4x4

How the pool world can help the real World

beach.jpg

Light it up-safely. Grill out. Stay home. Save money. Love what’s important.

Times like these will clearly alter our daily lives and up coming Summer vacations. Many of you will likely forgo your trip out of town and instead choose to stay home. Many also will likely find the desire to clamp down on spending as the uncertainty grows. We'd like to share some tips on how to turn your pool into a low cost stay home resort. We'd also like to hear of some project's from our users how they're altering their backyard into a high class resort.

Want to spruce up your screened in porch or pergola? How about some inexpensive sheer curtains to dress it up. Use some leftover PVC, steel conduit pipes or plumbing fixtures to use as the curtain rods along with some inexpensive indoor curtains then add these lights: Amazon.com: Twinkle Star 300 LED Window Curtain String Light Wedding Party Home Garden Bedroom Outdoor Indoor Wall Decorations, Warm White: Home & Kitchen or plastic encased rope LED lights along the top to cast a soft glow on the while area.

Plants-You want gardens to look somewhat like nature may have grown these plants together. Potted plants should be in groupings, and if in the ground intersperse compatible plants together. Remember the rule of thumb for potted plants- you want a “Thriller, Filler and Spiller”. One particularly amazing plant such a tall plant, and then fill in the pot with another lower plant, and finally something that will spill over the side of the pot.
flower.jpeg


You can also make some thing like this: sprayer.jpeg
Here is a link to the thread about how do make this: Skippy's New Fountain

Now tell us YOUR ideas!

A special THANK YOU to @poolnoobgrandma for the "beach" picture and @YippeeSkippy for the picture and how to thread. :hug:
  • Like
Reactions: Arizonarob

For stainless steel grill lovers

I really like my outdoor kitchen. I love to sit in front of it with a glass of wine while I cook. But keeping the grill clean is a huge pain. Its outdoors and is partially covered but still gets some rain. In addition being in south Florida we have lots of little lizards that are everywhere. They really seem to like going on the grill and using it as a bathroom. So I frequently have to clean off lizard poop as well.

Two weeks ago I decided to detail the car and the hot new thing seems to be hybrid ceramic waxes. Turtle Wax has a new one that seemed to get good reviews on the detailing forums and its pretty cheap. So I bought a bottle and applied it to the car, and I like it. Not sure how long it will last but it was easy to use.

So I decided to hit the grill with it. Sprayed a bunch of degreaser and then gave it a good scrub with some barkeeper friend. A good hosing off. Then for good measure did a wipe down with some isopropyl alcohol. Finally applied the TW ceramic coating. Smelled nice and gave a nice smooth finish.

Two weeks later and the grill is still pretty clean and the lizards seem to be avoiding it. I dont know if they dont like the smell or if the finish is too slick for their sticky little feet. Just applied the second coat today for some extra protection. We will see how it holds up in the long term.

I figured I would share, and would love to hear how others maintain their outdoor kitchens especially all the stainless stuff, drawers doors etc.
  • Like
Reactions: cwescapexlt4x4

Shade Sail Project

My pool is in direct sunlight 100% of the time during daylight hours, so I've been wanting to add some shade over the pool as my pool temp from July through September can reach as high as 95 degrees. Screen enclosures are much too expensive in SE Texas, so I decided to install shade sails to try to help provide some solar relief. After finally getting approval for the project from my HOA board of directors at the end of July, I was able to start the project this past Friday and complete it in two days.

I installed two 24-ft equilateral triangle sails supported by 6x6x14' pressure treated pine posts, a strategically placed 6" eye lag bolt into my 2nd floor joists, and varying lengths of 2000# WLL chain. Here are some photos of the project.

This first photo shows the tow-behind auger I used to dig the three post holes. I wanted to go 48" deep, but I just couldn't get there with this auger and stopped at 42". I would have had to rent a skid steer with auger attachment to go deeper. Pro tip: If you have hard soil, use a smaller auger to get to the desired hole depth, then a larger auger to get to the desired hole width. I started with a 6" auger and finished with a 10" auger. And I also found out that a powered auger drills a hole 2" larger than the auger. So my 10" auger provided a 12" wide hole - exactly what I wanted.

Auger.jpg

The next two photos show the posts in the holes before being leveled and set using Secure Set instead of concrete. The posts were delivered as 6x6x16', but since my connection points were only 9' above ground, I cut off 2 1/2' while the poles were still on the ground, making the poles much easier to muscle into the hole. I also mounted the eyebolt (3/8"x6" stainless steel) while the poles were on the ground too. This made the overall above ground pole height 10' after accounting for the 3 1/2' in the ground.

West Post.jpg

Posts.jpg

As I mentioned above, I did not use concrete to set the posts; instead I used a product I found online called Secure Set (www.secureset.net). This is a foam product that ships in two liquid parts and is mixed like epoxy, then quickly poured as a soupy liquid into the post hole. The mix begins to rise as foam in less than a minute, and the hole was completely filled in about 2 minutes. The cool part about this stuff is that the pole braces can come off in 5-10 minutes, and the foam is TOTALLY cured and ready for tension in one hour. My project took 3 gallons (1 1/2 gallons of each part). So instead of moving over a ton of concrete mix (Quikrete website indicated EIGHT HUNDRED POUNDS PER HOLE!), I only had to move a few ounces of mix at a time. Since it expands and compresses against the soil (think of a blood pressure cuff) until it can't expand anymore, it is ideal for highly compressed soil like the hard clay we have in SE Texas. After applying full tension to the sails (approaching 1000 pounds), the posts are still perfectly plumb. The cost once you get to this volume is cheaper than concrete. Highly recommended. The photo below shows the foam in its final risen state; I have not gone back and trimmed the foam or backfilled the dirt up to the post.

Secure Set.jpg

At the house, I used a 1/2"x6" eye lag bolt as the final attchment point. I was able to determine where my 2nd floor plywood subfloor began, so I predrilled through the Hardiplank, sheathing, floor joists and into the subfloor plywood the full 6 inch depth. I think the side of the house would fall down before the eyebolt would come out!

Eyebolt.jpg

After the posts were set, it was just a matter of attaching each sail to the posts and to the house using 2000# WLL chain and turnbuckles, getting the chain as tight as possible by hand while leaving the turnbuckles totally extended. This is the first sail before being tensioned.

First Sail.jpg

I then used a ratchet strap to put tension on each leg of the sail (and moving the chain links up while doing so), until the strap was as tight as I could get it. I then used the turnbuckle to finish the tensioning. This photo is of both sails almost fully tensioned.

Untensioned Sails.jpg

Although the temp has not yet dropped from the 90 degree mark it was at when I started the project Friday morning, the comfort level just moving from the sun to under the sails makes the water much more tolerable. We are expecting rain here the next couple of days, so that will hopefully lower the water temp a bit and I can really see if it's going to make the difference I believe it will.

I have a video of the finished project, but it is too large to upload, so I'll try to edit it down some and post it later.

I would estimate that I spent about $650 on this project, including the auger rental. The only thing I would do differently would be to rent the skid steer auger.

Let me know what you think!

Night pools

Let's start a thread showing our night lighting of our pools! Just to brag or to provide ideas for folks in how their pool will look at night with certain types of lighting.

Here's mine -- 14' diameter AGP strung with 50 ft of IP67 waterproof fairy lights, solar powered.

109671

I have to admit, I'm astounded at how much light these little guys put out.

Splitting plants is a good thing

p0F725C5A-4C82-4749-AF12-009970310A6A.jpegA8E47774-E371-4B02-A2F7-0595BC6B8D26.jpeg47FB1889-088A-4EFA-9A2A-F6538D126E26.jpegB39EB15F-AC87-47B9-936B-F9404A3F02C6.jpeg
I posted pics last year of my plan to do around my pool. The idea was to be a mono color look you would see in an English garden with very easy care.

I split 9 daylilies that were 5 yrs or so old into over 42 plants.

It is not even 1 year later and check out the progress. Each new plant was a single stalk pretty much.

In the back are little limes. Daylilies are a white with slight yellow throat.

Outdoor kitchen build

After spending enough time poolside, wife and I decided we needed an outdoor kitchen to facilitate spending even more time outdoors. All I originally wanted was a place for my BGE and some storage. My dad convinced me I needed a sink too, but he’s the type you either go all out or go home. I wanted it against the house next to the pool, and seemed simple enough. Just one long bank of cabinets with my BGE, storage, and... a sink.

I started doing research last fall and was going down the path of building the cabinets out of king starboard and having a custom stainless top made. After costing it out, I found a cheaper option with premade stainless cabinets that were 100% all stainless... and I kind of fell in love with the look. So I called the company, got some dimensions and did some planning and placed my order.

I also knew I wanted to run water from the closest hose bib, sink would drain through the clean out in the wall already there and I’d run my electrical from an unused outlet on that side of the deck. Below is what it looked like before starting anything.

103310

So with the cabinets coming premade I decided to just build out a 4” deep “back splash” to route my water lines and electrical.

103311

Here you can see my treated lumber and cement board backer for my tile, my pex water line for sink and another hose bib on side nearest fence too. I added three electrical outlets and three lights on a waterproof switch next to the sink. All the lights and electrical outlets plug in to a gfci outlet I installed in the sink cabinet so was no need to have any permitting done. The cabinet layout has a space for an outdoor fridge, but I put an outlet in the space, tiled it, and use it to house my electric smoker.

103312

After the backsplash was built out, it was time to tile. I didn’t have much tile to buy so I went expensive and bought some travertine stacked stone to match the pool coping. My pool builder also gave me his account info so I could go to his coping supplier and buy matching travertine coping to use as the cap on my backsplash.

103315

I didn’t take as many build out pics as I thought, as I did must of the tiling over the winter when it was cooler. The above is the finished part before I realized I wanted an awning over it. I added black marine starboard skirting around the bottom to hide the legs and keep debris from blowing under the cabinets. I also forgot to mention the fun job of trying to level cabinets on the edge of the pool deck that slopes a lot to facilitate drainage.

I found a dealer who makes prefab aluminum and steel awnings and ordered a custom one in silver to match the kitchen area.

103316

That’s my mounting the awning above the kitchen. You also get a good feel for the nice silver color of the steel standing seam panels. All in all it went together pretty quick.

103318

I kept it shorter on the grill side so smoke wouldn’t collect underneath it.

103319

103320

All in all it turned out quite nice and we pretty much cook everything outdoors now. For non grilled things we use a plug in portable induction burner which we keep stored in the cabinet when not in use.

The cabinets have more storage then I thought when I ordered them. The space under the sink is large and I keep my cleaners, some chemicals, and pool testing kit there. The cabinet next to it has pull out trash bins, and ice bins and wine racks for entertaining pool side. The three drawer cabinet keeps all my grilling stuff, and bottom drawer holds a bin for charcoal.

It turned out quite nice, and probably last for many years to come. It nicely extends pool days into nice pool evenings. And just for fun here’s a pic of my TFP method pool that’s been crystal clear since start up in 2017 looking at it from the outdoor kitchen area.

103322

2019 Pitcher cocktails for parties

This was a great thread last year.


What large batch cocktails do you like to serve at pool parties?
  • Like
Reactions: pooldv

Spring TV Upgrade for Backyard/Pool

Decided I would get a better TV and started looking for a deal on a 43-50" TV. During the Black Friday sales last year I almost pulled the trigger on a 50" Samsung TV but decided to hold off as I didn't want to spend $279-$300.

We currently have a fairly low end 40" Toshiba LCD TV that I got on a good discount from Best But almost 4 years ago. Despite it living most of its life outside (with a cover on it when not used) it was still working, but I wanted something a bit brighter and if possible larger. I think I spent under $200 for this low end Toshiba TV which has made it through a couple of entire winter seasons sitting outside during numerous torrential rain storms and it is still working!

While looking for an upgraded TV I was hoping to find an IPS Panel TV for the better brightness and better off angle viewing, but I also have a aversion to LG branded products, so finding a lower end TV with an IPS panel is a pretty big challenge. So I kept my eyes out for any really good discounts.

A few weeks ago I finally saw a clearance deal posted on Slick Deals for a TCL Roku 49" TV at Target for only $185.99 - this 49S405 model TV has a VA panel with decent brightness, and while not a prefect TV, it will certainly work very well for an outdoor TV - especially for the bargain closeout cost.

Once I saw this TV back in stock at our local Target I sent my wife to pick one up on Friday. I was able to install it yesterday. Luckily it fits perfectly using our existing TV mount on our Pergola. The brightness upgrade (being a 4K panel) helps us see it a bit better in the bright outdoor location - and for the cost it is hard to beat. Plus, it isn't like my eyes are getting better as I age, so having a larger 49" panel is an extra bonus!

I normally use a Roku stick so having the Roku built in is a nice bonus.

I will post a picture once the weather gets better.

If anyone is looking for a good TV for the backyard - this is a great deal on a lower end TV that still gets the job done. I have a waterproof cover in the mail that will allow me to leave it outside during almost any weather so that I don't have to worry about it too much. If it fails after a few years I am only out $200 or so and can get another one if needed.
  • Love
Reactions: Wobblerlorri

What does your pool paradise look like?

I have been a long time member and owned a Intex inflatable ring type pool for a few years. I have since move houses and now have an inground pool. Over this spring my wife an I have done a lot to spruce it up. I have to take some photos this weekend but will post some teasers now.

What does your pool paradise look like? I would love to see tuns of photos of other members pools and pool side decorating in hopes to get some ideas for mine. I'm sure others would love to see as well.

To give some context to the photos Some are from the first opening of the pool this spring, the others are the installation of the safety fence and a few of articles around the pool currently. I will post more last this weekend.

CLICK TO SEE ALL PHOTOS Amazon Drive

001.jpg

002.jpg

Our backyard paradise is almost complete!

We have been working hard on our backyard redo since January. We added the pool and fire pit areas, painted the entire exterior of the house, added two porches - one of which is the outdoor kitchen area and bar, converted a small cabana into a pool shed, and added underwater lights in our (saltwater) canal. We still have to add outdoor sound, tv, redo some plumbing and run electric to kitchen/bar area. We have a dedicated 30 amp circuit for our toy hauler so for now we've run an extension cord off the camper when we've used the electric smoker or fryer. We also need to hang decorations. We live on the water right by the Gulf of Mexico so we spend most of our time outside. We've seen dolphins, manatee, turtles, all kinds of fish and even a sea otter in the canal. In fact we had dolphins just today! We wanted to feel like we are on vacation every time we step outside. The daytime pictures were before paint or porch additions. My favorite time is evening when all my party lights and underwater lights are on (they are on timers).


IMG_2780.jpgIMG_2783.jpgIMG_2781.jpgIMG_2699.jpgIMG_2632.jpgIMG_2629.jpgIMG_2782.jpg
  • Like
Reactions: vmaxed

New Pool in Florida - Color is Antigua

FullSizeRender[1].jpg
FullSizeRender[3].jpg
When I was building my pool it was hard to find pics of my selected pool color, so I thought it was a good time to post some pics and see if this helps someone else.
My pool was completed in January 2015. The pool surface is pebble aggregate in FreeStone Marbletite, and the color is Antigua. We are really happy with the color, and the builder was terrific. There were two co-workers at my place of business that had pools built by Craft Master Pools and recommended them to me, which is the best way to find a builder, I think. The pool is approx. 36 x 18.
I'll post a few more pics and I'll be happy to answer any questions.
  • Like
Reactions: Cindy Lou

Simple Sound Solution For Pool Area - Big Blue Party Speaker

Greetings. I am posting this simply because when I searched on the weekend in this forum for ideas for poolside sound, I did not see a reference to this relatively new product (2014) that solved my issue for a party. So I wanted to contribute an idea that didn't involve quite so much audiophile knowhow for folks looking for a plug n play approach ;)

I was looking for a simple but adequate way to have weatherproof sound in my pool area that was evenly distributed, wirelessly controlled, etc. without having to hardware, install an amp, etc. The beefy iPod/phone player I'd been using was not weatherproof, and was too loud on the deck, not loud enough in the pool, and constantly had to be taken in for preservation.

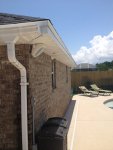
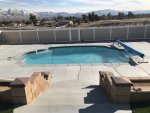
In the case of our yard, my "solution" may be working so well because the pool is located in a terraced "bowl" that acts like an amphitheater ;) That said, here's what I got, and I'm lovin it:

Brookstone's new "Big Blue Party" Bluetooth speaker at $299 kicks out awesome sound for what it is and so far has stood up to a torrential rain without a burble. It seriously contends with my Bose portable, though maybe not as "warm."
Here's a link http://t.brookstone.com/big-blue-party-indoor-outdoor-bluetooth-speaker

As with all Bluetooth devices, your player device (eg phone with spotify or some such) will need to be less than 30 feet away, and if you have a lot of people walking through the transmission path, you can get interference, which is resolved by simply locating the speaker and device together somewhere. Pairing is completely painless.

Caveats:
1. The rechargeable lithium ion battery is only good for about 5 hours, but in my case, this didn't matter as I had a nearby source to plug it in.
2. Because it has a lithium ion battery, you do not want to let it sit all day unsheltered in direct sunlight...again, in my case, I've located it in the terrace where there's shade. Someone without shade might be able to rig a partial protection box.
3. You cannot daisy chain two or more for true stero/surround -- in my yard, I don't need this...the sound is beautifully even and even at a party the output on this thing is more than adequate for my purposes.YMMV ;)
4. These are now back ordered unless you can find an in-store demo unit or someone with stock...they've sold like hotcakes. Shipping again July 30th as I understand it.
5. Because if like me you want to leave it out, you might want to buy the extended warranty just to be safe.

Here's the description from the website. Hope the info helps someone like me who goes looking for this type of solution. Over time, if it doesn't stand up, I'll post back :) hopefully it goes without saying this is NOT a commercial post, just a sharing of a new toy with which I am very happy!:


Powerful. Wireless. Water-resistant. Introducing Big Blue Party™, the latest—and loudest—addition to the Big Blue Audio® Family.

MASSIVE SOUND IN EVERY CORNER
4 full-range speaker drivers deliver powerful 360° sound.

INDOOR-OUTDOOR, WATER-RESISTANT
Take it anywhere—poolside, decks or even the beach.

EASY BLUETOOTH® PAIRING
Connects wirelessly to Bluetooth® devices up to 33' away.

NO WIRES, NO CORDS
Rechargeable battery lasts more than 4.5 hours per charge.

SUPER PORTABLE
Easy-grip carry handle, measures 6.3"w x 6.3"d x 15.8"h.

SPECIFICATIONS:

4 speaker drivers, subwoofer and passive radiator
Power: 72 watts (18 watts per channel, 36-watt sub)
Frequency

Our outdoor music solution

Here is what I did for our outdoor music solution. It allows us to sit out by the pool and play any of our MP3’s and radio stations (from ANYWHERE) using our iPhone or Android phone/tablets. We can even control the volume, make playlists “on the go” or play pre-made playlists.

We had an old computer sitting around that wasn’t used anymore – older P4 with 1.5 GB of RAM – PERFECT!

1. I downloaded and installed Ubuntu Linux. Don’t worry, it looks and feels a lot like Windows, but it’s FREE! You can get it at http://www.ubuntu.com
a. If you want to install it on a computer that you also want to keep running Windows on, it will create a “Dual Boot” and allow you to run whichever Operating System you want at any given time.
b. If you can spare a computer and dedicate it to your outdoor music, then this is PERFECT!

2. After getting Ubuntu installed, I then installed XBMC. The easiest instructions are here: http://www.noobslab.com/2013/01/install-xbmc-120-frodo-in-ubuntu.html
a. The instructions are on the bottom of the page in red.
b. You can also set XBMC to load automatically when Ubuntu starts. That’s how I do it and I don’t even need a monitor attached to the computer, plus I can turn off the computer with the XBMC app.

3. After transferring all of our MP3's to the Ubuntu machine, I then connected the audio out to my little $55, 75-watt amplifier, ran speaker wires across the attic to Yamaha outdoor speakers.
a. http://www.amazon.com/Pyle-2x75W-St...qid=1371833736&sr=8-5&keywords=pyle+amplifier
b. http://www.amazon.com/Yamaha-NS-AW1...33807&sr=8-2&keywords=yamaha+outdoor+speakers

4. Additional useful resources:
a. Adding streaming radio stations to XBMC: http://www.youtube.com/watch?v=TlzmfNDDaOs
b. XBMC: http://xbmc.org

Attachments

  • XBMC App.jpg
    XBMC App.jpg
    30.8 KB · Views: 842
  • Outdoor speakers.jpg
    Outdoor speakers.jpg
    71.8 KB · Views: 843
  • XBMC Box.jpg
    XBMC Box.jpg
    73.6 KB · Views: 839
  • Like
Reactions: robbegginer

Hot Tub Cabana? Tent? House?

So I have a standalone hot tub that we’ve had for several years prior to building our pool. When we built the pool we added a section of concrete rectangular in design to accommodate our current round hot tub. The idea being that we would probably replace our current hot tub with a larger square one in the future, the pad design would allow for the new hot tub to be pushed to one end of the rectangle and allow a few feet of concrete to enter/exit tub without being in the walking (no running) 3’ area around the pool.

This winter we kept the hot tub running but it was rarely used cause it was too windy and cold for it to be enjoyable. The long frigid walk back indoors was unbearable. We’ve started using the tub now that it’s consistently in the 50’s and the other day I had an idea. We’ve had a cantilever umbrella beside the hot tub to keep the sun off of it last summer. I raised the umbrella, got a tarp out of the garage, and huge it from the umbrella with a bunch of Large Black paper clips. It fell about 3’ short of totally enclosing it, and went all the way to the ground. The result was a much more comfortable hot tub experience albeit with no nighttime stars or moon, but also a feeling of seclusion/grotto/cavelike.

So I tell the wife, you know what would be nice, 4 posts and a roof with real (or fake plastic) thatching. Once permanent solid wall on the back and 3 removable semi solid walls on the remaining sides including a glass porch door (for the late summer/fall/winter/spring cold seasons).

So my thoughts are I have two options for installing the 4 posts.

1) Just outside the concrete rectangle I dig down and set the posts in concrete
2) I attach a galvanized steel base to the concrete and then attach the posts to that, much like a deck post can be attached to a footing.

My concerns are that by adding a roof, I’ve created a sail that could cause the whole thing to fly off in super high winds.

Option 2 would be easier, but posts would be attached to bases with just like 4 nails if I remember correctly.

As far as semi solid walls, I am looking for suggestions. I guess I was thinking something that would let a little light in, like maybe a frame with some sort of fabric on it. Semi cold also for ease of installation/removal/storage. I guess stopping the wind is more important that insulation properties. I figured if it was cold out I’d just go out open the cover and let the hot tub heat up the room for a few mins prior to using it. I have an electrical outlet near by that I could tap into for some lights.

Shelves and towel holders would be a must.

Filter