Instapark Betta review

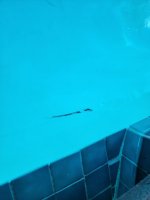
I thought I would post my impressions of the Instapark betta and my experience with it. The beta does an excellent job cleaning the pool, it is the only skimmer I found on the market that has a very large container for collecting debris. I get a lot of pineneedles in my pool and this feature was the main selling point for me. The beta also comes with a remote control that you can drive the robot around manually with, and provides a convenient means to retrieve it from the pool, and to spot clean. It has a total of five different modes, which are indicated by the LEDs on the back of the unit. In it’s autonomous mode, the LEDs on the back blink blue. When the robot is being controlled with the remote control the LEDs are solid blue. When the robot is running low on power the LEDs will turn red. If robot experiences a fault or a jammed basket, the LEDs alternate between red and blue. When it is completely out of batteries it enters a sleep mode and no LED lights will display on the unit. The batteries seem to last a long time, as it can run all day and all night. However you cannot charge the unit with an outlet. It can only charge via the sun. What I have discovered is that if I run the robot a full day then let it run all night and if the next day is cloudy the robot will run out of power. This will require that the robot charges in the sun all day before it can run it again. Because of this, I choose not to run it at night, and it always seems to have enough power to run several overcast days in a row. This isn’t unique to the betta though as other solar skim bots are designed the same way. I wish that it had the option to charge it via an outlet.

I have had several issues with the product and I am on my third unit. The good news though is that the company is very responsive and when you have a problem they will ship you out a new one immediately. They also are constantly making updates to their robots and I am hopeful that they will eventually resolve the reliability issues myself and other owners have reported experiencing. There are at least three different versions of this robot that I am aware of at the time of this post. The first version of the robot apparently was having issues with their motors and they would not recommend the robots for use in salt water pools. The motors were rusting and seizing up apparently. The first one I received was the first version that was released for use for salt water pools and I have never experienced any issues with the motors on my previous two robots. The issue my first robot had was that it seemed to have gotten stuck in it’s error mode. When I would power on the robot all it would do is blink blue then red. Instapark sent me a new unit to replace it with. This robot seemed to do better and had its programming updated. The first robot seemed like it would just swim along in the pool full speed until it hit a wall. The new robot would slow down and turn before it would hit the wall. It also seems to do a better job avoiding objects in the pool. The issue that I eventually had with this robot was that it started swimming around in circles, which was a common problem on the first generation of robots due to the motors freezing up. That didn’t seem to be the case with this one though. I noticed that the robot would stop spinning in circles if it took up rather violent whack into the side of the pool. When it would start swimming in circles, I could give it a whack or two around it’s sensors and it would correct the issue for several days. The other issue it seemed to have, was it would go into its error mode when it would stubbornly try to fight the currents from the return jets. Instead of turning around to avoid going headlong into the current, it would eventually just give up and would enter into its error mode and start to flash blue and red. When this would happen I would have to turn it off and on again or just wait 20 minutes as the robot restarts itself 20 minutes after experiencing a fault. I have received my third robot last night, and I’ve yet to use it because it needs to charge. This new robot seems to be a different revision, because it has a much smaller power button then all of the previous ones. I’m not sure what the reasoning is for this but it does indicate to me that the company is making changes to the hardware of the robot on a fairly consistent basis. The newest revision as of the date of this post has a smaller button and red propellors. I will update this thread when I have more experience with this new robot. I am hopeful that this one doesn’t experience any issues, as when it’s working correctly it does a wonderful job and keeps my pool free of all the pine needles that I experience every time I have a massive storm. It does an excellent job keeping the pool clean. If it didn’t have the issues that I have experienced, I would be more than happy with it, and would highly recommend it to anyone.67CD3419-E68A-4171-9EDD-B2D45CB11FD9.jpegEA7E450F-F50E-45B3-A4A2-B6570AAE1877.jpegBE272681-DA3E-48DA-89E8-7B905AB2A0F4.jpegF940C02C-70F6-42A5-9851-66E093C4451A.jpeg997602CD-BB5E-4F6C-8B90-E8D716DCB2B7.jpegB46417A7-C658-4C35-9D62-BF9E1C065F78.jpeg

Official 2023 BBQ, Smoking, Grilling, Baking and Beer thread

Happy New Year to all my TFP friends. Yes I am starting my Food thread and please all is invited to chime in. We traditionally have a nice meal to bring in the New Year and tD31CE765-215A-4863-A4BE-A2005891F03F.jpegEDF2DB12-6171-4701-82C9-32EB1F7DFCD5.jpeg0C7D6B81-F24E-423C-A000-7F46D870A4F9.jpeg1E4BF6E2-291D-48EE-BD27-224AA2969DDA.jpegC03D2C5B-6AC6-408A-9180-01F8B7383D6A.jpegC03D2C5B-6AC6-408A-9180-01F8B7383D6A.jpeg2F107530-8F8A-422B-991C-F930E14C983A.jpeg9C4E6D24-C8D8-4ED0-8063-9C1090581280.jpeg8534E042-3F64-48BB-B0DC-3D3150FE3DEC.jpeg0F1303E0-19E4-4C04-AF25-1CC67F49B19A.jpeg3A027575-9238-4477-A165-3732AAB65CB3.jpeg2F107530-8F8A-422B-991C-F930E14C983A.jpeghis year is no different. Appetizers are Crab Balls with Crab sauce, Rumaki.
Main course is Prime Rib with Au Jus and Horseradish, Duchess Potatoes, Carrot Soufflé, Roasted Brussels sprouts and Crescent rolls.
Dessert is Carmel Apple Upside down cake.
DW did most of the cooking and baking and of course I did the Prime Rib.
And of course all the Champagne you can drink :cheers:

Water Testing Instructions on One Page

I collected a bunch of testing info from around the forum and managed to put everything I wanted onto one page, and still kept a 10-pt font. Many thanks to JasonLion for reviewing it (twice!). Jason also suggested posting the text directly, as well as the one-page PDF, so I have done that. Enjoy!
--paulr

Water Testing Instructions
For kits using Taylor reagents, e.g. K-2006 or TF100, based on posts to TroubleFreePool.com.

General Info
CC = Combined Chlorine, the been-used stuff.
FC = Free Chlorine, available for sanitation.
TC = Total Chlorine, TC = FC + CC.
TA = Total Alkalinity, dissolved alkalines.
CH = Calcium Hardness, dissolved calcium.
CYA = Cyanuric Acid, stabilizer for chlorine.
Swirl = circular motion like stirring with a spoon.
Take samples 12-18" below surface (elbow deep).
Rinse mixing containers before and after testing.

OTO TC/pH Test (for K-1000 Test Kit)
This is the simple TC/pH "daily" test. The OTO chlorine test cannot be diluted to get a wider range; if TC shows > 5, use the FAS/DPD test to get a true reading.

1) Rinse and fill test-block cells to indicated marks (doesn't have to be perfect).
2) 5 drops R-0600 (yellow top) on the Chlorine side, 5 drops R-0014 (red top) on the pH side.
3) Cap and invert to mix.
4) Put a white sheet 2-3" behind the color blocks to make reading easier. Natural indirect light works best (e.g. outside in the shade). Match solution colors to the color blocks. Record as TC and pH.

The K-2006 kit uses R-0004 instead of R-0014; it works the same except it uses a bigger sample.

TC > 10 may cause pH to read too high (this gets worse as TC gets higher). You'll have to wait for the TC to come down to get an accurate pH.

FAS/DPD Chlorine Test
More complicated, but gives a wider range, more precision, and also separately measures FC/CC.

1) Rinse and fill sample tube to 10ml mark.
2) Use teeny blue scooper (hold the flat end) to put one heaping scoop R-0870 powder into sample, swirl to mix. (OK if not all dissolves.) Sample should turn pink. If it "flashes" pink then the pink disappears, add more R-0870. If there's never a hint of pink at all, skip step 3; FC=0.
3) Add R-0871 one drop at a time, swirling the sample continuously, 1-2 sec between drops. Stop when sample turns colorless. Multiply #drops by 0.5 to get FC. (If it turns pink again after a few seconds, don't worry about it.)
4) Add 5 drops R-0003, swirl to mix. If it remains colorless, CC=0. If it turns pink, again add drops of R-0871 (swirling continuously) until it turns colorless. Multiply drops by 0.5 to get CC.
5) CC > 0.5 indicates a need to shock.

For extremely high FC levels, you can use 5ml sample water and 5ml chlorine-free water (e.g. distilled water); then each drop of R-0871 counts 1ppm FC/CC. This can save on test reagent.

Total Alkalinity Test
1) Rinse and fill sample tube to 25ml mark.
2) Add 2 drops R-0007; swirl to mix.
3) Add 5 drops R-0008; swirl to mix. Solution should turn green or blue.
4) Add R-0009 one drop at a time, swirling continuously, 1-2 sec between drops. Repeat until color changes, and stops changing.
5) The last drop that caused a change is the drop count. Multiply #drops by 10 to get TA.

Calcium Hardness Test
Use quantities in [brackets] if CH is very high (>400) and you have trouble getting a clear transition to the blue endpoint.

1) Rinse and fill sample tube to 25ml [10ml] mark.
2) Add 20 drops [10 drops] R-0010; swirl to mix.
3) Add 5 drops [3 drops] R-0011L; swirl to mix. Solution turns red to indicate calcium is present.
4) Add R-0012 one drop at a time, swirl to mix after each drop. Repeat until color changes to blue (and stops changing).
5) The last drop that caused a change is the drop count. Multiply #drops by 10 [25] to get CH.

Cyanuric Acid Test
For cold water (<70F), let sample warm up first.

For CYA anticipated <90ppm:
1) Put sample in mixing bottle (up to the mark, ~ halfway).
2) Add an equal amount of R-0013.
3) Shake about 30 sec; let stand 2-3 minutes; briefly shake again.
4) Look down into C.A VIEW TUBE, slowly pour mixture in until the black dot just disappears. Natural indirect light gives the best readings.
5) Gradation closest to the fill level is CYA.

For CYA > 90ppm, repeat the test adjusting the procedure as follows:
a) Fill the mixing bottle to the lower mark with pool water.
b) Continue filling the mixing bottle to the upper mark with tap water.
c) Shake briefly to mix.
d) Pour off half of the contents of the mixing bottle, so it is again filled to the lower mark.
e) Continue the test normally from step 3, but multiply the final result by two.

After reading, pour mixture back into the mixing bottle and try step 4 again; repeated readings on the same sample will lend confidence in the result.

MOD ALERT: The attached pdf does not have the correct instructions for cya testing over 90 ppm! However, the test instructions in this post are now correct. Moderator Linen

Attachments

  • Water Testing Instructions.pdf
    10.3 KB · Views: 1,044
  • Like
Reactions: nanobooboo

SOLVED! Any plumbing mcgivers out there? how screwed am i

SOLVED with $20 heat gun from amazon. got it out like butter. Looks like female threads undamaged....i hope


Photo attached shows a solar pool heater inlet where the threaded PVC connection snapped off. Interior dimentions of solar portion i think ~1.5in. Interior dimension of the snapped off piece I'd guess 1 1/8 inch
What I've tried and failed....
1) building up a 1 inch PVC with duct tape so it can fit snuggly inside, then glueing it, letting it set x24 hours. (reason im building up with duct tape is the 1inch diameter is too little and 1.25inch too fat). Then trying to unscrew the broken piece out (failed)
2) sawing a portion of the broken piece out and prying it out w/ a flat head (failed as u can see in the picture)

I do realize i can just leave it and purchase $50 worth of connectors to simply go over exterior but id rather get t his broken threaded piece out.


TY

Attachments

  • IMG_4182.jpg
    IMG_4182.jpg
    596.9 KB · Views: 58
  • Like
Reactions: Leebo

All Spa Owners Should read this: Valuable Lesson Learned: ALWAYS Pull hot tub cover cores out and check them when you receive a new cover

This is a cautionary tale for anyone who buys or is about to buy a replacement hot tub cover and it provides useful information to all hot tub owners.

I just received my new Deluxe cover for my '95 Hot Spring Grandee. It has a 5" x 3" taper, 12 mil vapor barrier (2 separate 6 mil wraps) and a whole bunch of add-on features that ran the price up to about $620 CAD including an $85 surcharge for one dimension of the cover being over 96".

Acting on the advice of an experienced friend, the first thing I did after getting it unwrapped was pull the polystyrene cores out of the cover to inspect the quality of the deluxe 12 mil wrap I paid a lot extra for and ensure that I got the wrap I paid for. To my absolute dismay and horror I found that the vapor barriers on BOTH CORES had been accidentally cut with a razor knife and hastily repaired with a strip of 2" packing tape. The cuts went through both layers of the barrier. One was nearly 7" long and the other about 5.5" long. I have marked the extent of the cuts with colored tubing in the attached photos.

One of the packing tape repair jobs was very hastily done and completely shoddy. A lot of the tape was creased and wrinkled so it wasn't even sealing the cut. Water would've started infiltrating the core almost instantly. The other repair jiob was a little better but still not very good. Besides that, I doubt the packing tape would've held up very long under the conditions it would've been subjected to and since one of the cut locations was along the inside edge (i.e. inside the fold), I suspect that core wouldn't have lasted very long before becoming waterlogged. The other core was cut along an outside edge which is exposed to the environment so may have lasted a little longer before getting waterlogged. But let's be clear here: The quality of the repair job is not what's at issue here; covers should NOT be leaving a hot tub cover factory with cuts in the core vapor barriers no matter how well the repairs to the cuts are done.

I took numerous photographs of the cuts in the vapor barrier and also of the cover to show that the cover was intact and not cut to prove it was not us who had made those cuts when we were cutting the shrink wrap off the cover.

I called the company who made the cover and luckily the phone was answered by the owner. I explained the situation to him and he told me to e-mail him all of the photos I took in full resolution. I put all 20 or so of them in a zip file and sent it to him through WeTransfer.com's excellent free file transfer service. It was late on a Friday afternoon when all this happened. He downloaded them right away and wrote back a minute or two later to tell me he was going to have a "little chat" with production on Monday and would get back to me with a resolution afterwards. He'll have the whole weekend to fume over it before he talks to them Monday morning. Boy, I sure wouldn't want to be the employee/employees responsible for this problem on Monday morning. Guarantee it will be a real bad start to the week.

My question is how many of their covers are going out like that? Both my cores were cut and poorly repaired. I'm probably one of the VERY few customers and perhaps the only customer that has ever checked the cores/wraps upon delivery. If covers only go out like that "once in a blue moon", what would be the odds then that the one guy who ever bothered to check his cover would find the core wraps on BOTH cores were cut clean through and shoddily repaired? Astronomically low, methinks. But if covers are going out like that all the time then it wouldn't be so surprising that I found what I found, would it? I put that question to the owner as well. I bet that's got him thinking.

So the lesson for all of us hot tub owners is to always pull the cores out of your new hot tub covers to inspect the core and vapor barriers as soon as you take delivery of it. Who knows how common this might be? It might happen all the time but since virtually no one ever bothers to check, it probably goes undetected 99.999% of the time.

Attachments

  • 20190913_162647.jpg
    20190913_162647.jpg
    177.2 KB · Views: 200
  • 20190913_164250.jpg
    20190913_164250.jpg
    168.1 KB · Views: 192
  • 20190913_164416.jpg
    20190913_164416.jpg
    204.6 KB · Views: 191
  • Like
Reactions: Arizonarob

Lost in the rabbit hole of trying to pick a pool vacuum

Hey TFP,

I have been researching pool vaccums on and off for the past year and I feel like I haven't made much progress. With the decent ones starting out at $900+, I have a big fear of purchasing one that will frustrate me and regret my purchase. My current cleaner is a dumb Polaris 280. It gets stuck ALL the time in my table area(see attached).

My needs:
- Ability to pickup fine dirt/sand(I get a lot of this in my pool)
- Ability to NOT get stuck in my table area
- Be efficient

I talked to Margaret and she recommended both of the top of their lines (Active 60, Explorer e70). Of course that comes with a hefty price tag of $1600. I don't know what to do.

Does anyone have a similar setup with table/stools that has a positive robot experience they can share?

poolrend.jpg
  • Like
Reactions: Tbone2087

Review: New Pentair IntelliFlo3 VSF

Finally an opportunity for a little bit of give back on this forum. With some support and encouragement from my friend @Jimrahbe I purchased this new Intelliflo3 VSF pump mostly because the previous model was infinitely backordered. I am so glad I did, so far I love this pump! Here is my review and a few pics:

I have used Intelliflo pumps at my previous home and came to love these pumps. Theres plenty of information on the site about Intelliflo pumps in general, so rather than bore everyone with every detail I focused mostly on the difference from my previous generation IntelliFlo:

Pros:
  • Efficiency: At approx. 1200 rpm this pump moves 22GPM in my pool and uses only 135 watts!!! I expect a huge energy savings over the Hayward I am replacing.
  • Ultra quiet: I am used to quiet with my old Intelliflo at my previous house but at 1200 rpm I have to touch this pump to know if it is on. It is near silent up until close to 2000 rpm
  • Mobile Friendly!! If you are not using other automation this utilizes either blue tooth or wifi to control via the Pentair Home app right out of the box. Connection/setup was super simple. Scan the QR on the pump, download the software and it guides you through everything. No more squatting down over the pump mounted control panel!! There is an external WiFi antenna built in and the reception was excellent! I was able to get my 2.4Ghz nearly as strong as I can inside my house. Even if you are using automation, this pump provides real-time status, information and alarms through the Pentair Home app.
  • Automation friendly: As expected, with a 2 wire hookup (not included) this hooks up to Pentair automation which overrides the unit controls. If you put the Pentair automation in service mode, the on-board pump logic/programming will take over again.
  • Price: With the Covid backlog expected to continue through the summer the price of this unit is about $1500 resale, less than what I could get an old Intellflo VSF/VF for.
  • Flexible: Accommodates from 1 1/2" all the way to 3" in/out piping. Comes with all the adapters for different sizes. You can buy optional relays and use this as a basic automation system and program remotely through the app.
  • Install: Easy peasy. Uses the twist on couplings for easy removal = no leaks. Very accessible high and low voltage connections from the top cover.
  • Alerts: Through the Pentair Home app you can receive alarms and notifications and you can also have your pool pro notified. The catch seems to be that your pool pro must be a pentair registered pool pro to show up in the list.

Cons:
I'm hard pressed to find flaws with this pump. My previous Intelliflo was not a VSF so not sure if this was always a limitation but my VSF unit doesn't translate utilization to RPM through the Pentair Home app, which is what I was used to from my previous Intelliflo. You can however still use RPM based programming from the Pentair Automation and it will translate. Instead this pump uses % utilization or GPM. Honestly, I am getting more comfortable using GPM anyway because everyone's piping/flow is different. If my filter gets dirty and slows the flow, this will adjust itself automatically if set to GPM.

Just got this installed yesterday so if I find any more cons I will add them but to me this thing is Dang near perfect.

Attachments

  • IMG_6767.jpg
    IMG_6767.jpg
    497.4 KB · Views: 297
  • IMG_6768.PNG
    IMG_6768.PNG
    32.9 KB · Views: 281
  • IMG_6770.jpg
    IMG_6770.jpg
    563.4 KB · Views: 306
  • IMG_6771.jpg
    IMG_6771.jpg
    486.5 KB · Views: 293

  • Locked
High Power Wireless Link Kit for IntelliCenter -- success!

Wanted to post our experience with hooking up our new IntelliCenter via the new "high power wireless link kit," (not EnGenius) as we had some issues and failed to find answers when we searched.

First, we upgraded our EasyTouch 8 panel using the Intellicenter upgrade kit. We did this so that we could install the IntelliChem system to monitor and deploy muriatic acid on an as-needed basis.

We also wanted to be able to monitor things remotely. Pentair apparently no longer supports the ScreenLogic app (plus it sounds like it never worked well on android), and we understand there are issues connecting ScreenLogic to a Google mesh network.

So we decided to upgrade our panel to the IntelliCenter. The upgrade went smoothly and the IntelliChem system seems to be working great so far.

We did have some connectivity and setup issues with our new IntelliCenter though.

The system comes with an outside antenna that is connected to the IntelliCenter control board via an ethernet cable. This antenna communicates wirelessly to a receiver that plugs directly into our router (we use T-mobile high-speed internet). Once these units were powered (and the Enable Web & Mobile Interface setting on the IntelliCenter was set to ON), the IntelliCenter came online with its own IP.

We then tried to create a new account but kept running into problems. We were able to input all information for a new account, but kept getting an error when it tried to create the account. The error was "Unable to connect to WIFI device. Please check the WIFI device is powered, fully booted and the network cable is connected to the ethernet port on the back of the IntelliCenter main board (TCP_ERR)."

We tried to connect to our local network via the Network & Wifi Setup, but the IntelliCenter would search and search for networks but never find any. Simultaneously, we had an IP address and the IntelliCenter was clearly connected to the internet already. So it appeared to need a connection to the local network in order to complete the account setup, but since the new link essentially bypasses the local network, we could not create the account. Catch-22.

Anyway, we ended up bringing our router outside and connected an ethernet cable directly from the router to the IntelliCenter board itself, skipping both the antenna and the receiver. This allowed us to create a new account online. After that, we were able to log in via our mobile devices. After that, we returned the router back inside, reconnected the receiver and the antenna, confirmed that once again the IntelliCenter had an IP address, and everything worked great.

Moral of the story: If you have an existing account to log into, you'll probably be fine. But if you have to create a new one, you may need to hard-wire it in order to get that account set up.

I hope this helps someone!

####
  • Like
Reactions: Jimrahbe

Mustard Algae?

Hi all,
My father who took care of our pool recently passed so I’m coming here for help. We have a large stain on the bottom of the pool. One professional told us it was mustard algae while another professional said it was not. Regardless, I’ve attached pictures and wanted to see what the community thought it was as well as how to remove the stain. Not sure if this is useful but the pool is in California and is salt water.
Any help would be greatly appreciated! C6CDC45A-DF1D-4A4F-8480-B292E1D6E81A.jpeg17EFD77E-3F9E-4A77-BD56-3D9DCDED38CF.jpeg37EB1B81-BD79-4467-9833-D2FEA6A0404C.jpeg8D663A54-827E-4238-982C-050361D487F7.jpeg
  • Wow
Reactions: Mdragger88

A time lapse video documenting from start to finish of our pool construction

We broke ground in February 2022 and construction was completed in August. Who knew that editing a 2 minute video would take almost as long!

I designed the pool myself using Pool Studio then created the construction plans for the Pool Builder.
Acting as my own GC, I sub-contracted out all the work.

Login to view embedded media
Specs: Pool 18' x 40'
Depth profile:
Shallow end - 3.5' depth
Deep end - 7' depth
7 LED lights and 1 LED bubbler

Tanning Ledge
8' x 16'
2 LED lights and 2 LED bubblers

Spa
8' 6" x 7' 6"
Spillover into pool
8 jets and 1 LED light

Plaster:
WetEdge - Primera Stone
Color - Grigio Treasure

Coping: Silver Travertine
Pool and Spa deck: Brushed concrete
Patio and outdoor kitchen: Pavers

Programming Tips for upgrading from Easy Touch to Intellicenter

I will be upgrading from Easy Touch 8 to Intellicenter. I will have to get the new Intellicenter App and the logic board upgrade kit.

So I have to reprogram all the valves, pumps, schedules, etc from scratch or is there an easier way? Any tips on making the transition easier and making the inputting of data easier?

is the Intellicenter Alexa integration better than Screenlogic?
  • Like
Reactions: Leebo

New pool build in LV

Hi,

First I am super thankful for all the great help I got from this forum in the past! :)


I’m in the process of building a pool and added quite a few water features:
1x 6’ sheer (12.5’ radius)
3x 1’ rain sheer
6x deck jets
1x bubbler


Now I am trying to figure what kind of pump I will need to power all of them. I made the following assumption based on pentair specs:
6’ sheer = 72 GPM
1’ sheers = 12 GPM each
Deck jets = 5 GPM each
Bubbler = 20 - 40 GPM

So in total I need 158 - 178 GPM
Drain would be located around 4' deep and the tallest water feature is 2' heigh.

A 3HP pentair pump is able to push ~170GPM with little elevation. So I would max out 1 pump for the water features and then use another one to run pool, spa, filter and solar. I know that I am ignoring the water frictions in the pipe and I am not sure how to account for that. I assume maxing out the pump is not the best idea and running 2 pumps at 1/2 capacity would save some energy.

My idea is using 2x 3HP pentair pumps to run the water features: 1 for the big sheer and the other pump for the remaining features. And the 3rd pump for pool, spa, etc.

My PB who is only creating the plans said that 3x 3HP wouldn’t be able to run all features which doesn’t make much sense to me. She also couldn’t tell me if dedicated water feature pumps would be better for this use case - I am not sure how they would work with deck jets and sheers were you would want a certain amount of water (not too much and not too little) since you can’t adjust the RPM.


Thank you so much for reading my long description :)
  • Like
Reactions: Leebo

Dirty pool water after brushing - normal, or time to clean filter?

Hi all,

I just brushed the steps, walls and floors of my pool and disturbed a bunch of dirt that I didn't know was there. The water is now cloudy & dirty-looking, but it was clear before the brushing. This is the first time in about a month that I've brushed because we've had a lot of heavy rain. Normally, I don't see all this dirt when I brush on a weekly basis.

My question: is it normal that all this dirt has accumulated, or is it a sign that I need to clean my filter? My filter was last cleaned about 5 months ago and the pressure was 12. Today, my pressure is 16.

I'm running my vacuum now to help clear the dirt. Is there anything else I should do to clean it?

Thanks for the help!
  • Like
Reactions: Leebo

Variable Speed Pump RPMs

I’m looking at changing to a VS pump. (Hayward or Pentair most likely). I have a single speed 1 1/2hp Hayward Super Pump now. The low end RPM for the Hayward VS is 600 RPM. Couldn’t find that info for the other brands/types. Is 600 low enough? Should I consider a pump with ability to start lower ? Although, I’m guessing that most of the time I will need to run higher than the 600. My current setup gets only 48 gpm based on an inline meter.

Thanks
Rich
  • Like
Reactions: Leebo

Finally starting this project.

So over the last 5-6 years I have started and stopped the pool building process more times than I care to remember. I have started at least 2 build threads and eventually just let them die off. Well my wife and I found out about 2.5 years ago that we were having our 5th child (first 4 are in college) and modified our master plan. Instead of continuing to remodel our current house we went ahead and found a new 2.75 acre property 3 streets away and decided to buy it and build a house from scratch for the 1st time, our "forever home". Even though I have built lots of houses as an investor, I was not prepared for how difficult the proces has been, especially due to COVID and the insanity in the real estate/construction market, especially in my area. So the house itself started in February and has finally gotten to the stage of finishing framing now. Sloooooowwwww. So I am now devoting a ton of attention to the pool itself, which is probably tough everywhere right now, but it is an insane business around here. I have requested meetings and/or bids form no less than 7 pool companies over the last 4-5 months (one I started with back in January) and as of this past week I only have 2 written bids in hand. Crazy. They both need some tweaking so that I can compare apples to apples, but one of them is getting the job. ie- one did not have the screen in the bid yet. And of course they each highly recommend different brands, Hayward and Pentair. I have no preference on a brand anyways.
So my current concept drawing is attached, with the foilowing changes:
  1. we did push the steps out to the end of the tanning ledges
  2. we replaced the tweo small benched with one across the entire back
  3. we changed the Pentair fire bowls to a 12' raised wall with 3- 2' sheer descents in the face and a 10' long manual light linear fire feature on top (pic attached of the general idea we found on Pinterest.
Thoughts:
  • So first, anyone see any glaring issues with the design?
  • Both contractors have the spa and water features sharing a pump, but I think that they shoudl be on seperate pump and a seperate filter?
  • I have asked both to add and auto PH/acid dosing feature.
  • One has "clear view screen enclosure with solid beam construction and 12' openings, no chair rails, stainless hardware, and anbchors away screen track system" other is standard screen enclosure. I just have woods behind me so the larger openign aren't that big a deal to me bu the other fetaures of the first enclosure sound cool. I just realized I don't have a pic of where the pool is going but I will later today and will post later.
  • Both included Florida Stucco Pearl, and I have asked them to give option price to change to Florida Stucco Gem or Reserve. I am not completely clear on the differnece yet, other than the Gem Azure and Capri look incerdible in the photos.
  • One included Artistc Grantitelock 24 x 24 Pavers, which I know are super expensive, but we love the look. Asked other company to add to their bid instead of standrad Tremron pavers. Trying to get samples to see if Stearling Gray is too hot and if Arctic White is too light.
  • Since we have a new little one I asked both companies to price the option to go from 3'-5' depth to either 6' or 7' at deep end.
  • The two companies work in different markets in the general SW FL area, and their allowance for tile shows it. One has $6/ft and one has $15/ft. I just got samples from Lightstreams, which was a mistake because now I know my tile is goign to cost me $35/ft. It is simply incerdible looking. They were so cool on the phone and not only exppressed shipped me the 2 colors I requested, but also 2 more that she thought might be possibilities, and expessed shipped it without me asking. Leaning towards Intense Blue. See pic
Ok, so that enough to get started. I promise to update things as they proceed and take lots of pics.Ketchum drawing revised-1.jpg

6cf41a8ef84a836a1fb6c7e01ef6e2de.jpgIMG_1095[1].JPG
  • Love
  • Like
Reactions: Turbo1Ton and Leebo

Trying to lower pH

Hey everyone so over the last week, I've been trying to get my pH to an ideal level (7.6). For the last 3 days, I've been getting the same pH reading 7.9 despite adding about 4 oz per day for the last 3 days. I checked it today and the pH was 7.9 again with a TA 100. I've been cautious with adding the muriatic acid as I don't want to lower the pH significantly. Pool math says that I should be adding 12 oz based on what my numbers but today I just added 7 oz out of an abundance of caution. Are my concerns warranted? Should I have just went by what pool math is suggesting an added the 12 oz instead? Also, I've been adding the muriatic acid in front of my skimmer basket in the main pool but I've been collecting the water samples from the spa. Is that okay to do? The pool water should be cycling and shared between the pool and spa.

I apologize if this is a dumb question. It's my first pool and my first time managing the chemistry so I just don't want to screw anything up. I've added pictures of pool. It otherwise looks great and clear. Thanks everyone.1000004534.jpg
1000004535-jpg.470477
1000004537.png

Attachments

  • 1000004535.jpg
    1000004535.jpg
    312.9 KB · Views: 156
  • Love
Reactions: Newdude

If you’ve got iron in your fill water, use Polyfill to remove it

EDIT: Found out this method only works if your iron is oxidized already, meaning it’s got a dull or bright green tint to the water, or a nasty brown tint. If you know you have iron in your fill water, but it isn’t oxidized yet, bring your pool to shock level and it’ll turn the telltale green, then you’re ready for the Polyfill.


My well water has iron in it, enough that when I add chlorine into my pool, it oxidizes the iron and turns the water a dull green color. Everyone said I needed to add in a sequestriant to sequester the iron, but that it wouldn’t actually remove it from the water, and that I’d have to keep adding the sequestriant every month. Not wanting to add any more chemicals to my pool than I need to, I read about using polyfill to filter the iron out of the water. Not having a skimmer to fill with Polyfill, I rigged up a 5 gallon bucket to my pool ladder with some string, have a couple dozen 1/4” holes drilled into the bucket, and a large hole drilled into the bottom of the bucket. The bottom hole is just big enough to let the smaller end of a vacuum tube fit into and about 90% of the way down the tapered tube, it seals tight. I then got a piece of PVC pipe that just barely fits inside the return hose and the vacuum tube (both happen to be exactly the same size), connecting both the tube and the hose together. Not wanting to ruin the only hose I have for my pump, I wrapped the rigged up connection with duct tape, then sprayed rust-o-leum rubber spray around it and gave it 5 mins to set, and then wrapped that with duct tape again. I repeated this 7 or 8 times and, once pressurized by the water from the return hose, only leaks at a rate of a single drop every 8 or 9 seconds. Again, don’t want to ruin my pumps hose, so that was the best I could do. Also sprayed the rubber spray around where the bucket and vacuum tube connect. After half a day of drying time, I opened the bucket and stuffed it with as much polyfill as I could, which came to about half the big bag I got from Walmart. That stuff starts expanding when compacted pretty quickly, so had to carefully close the lid without any sticking out. Now set the bucket on the pool ladder (strings tied across underneath bucket if you can’t use the top rungs) and use another string to hold the bucket steady. If you have a small pump that might tip over or has short hoses on it, tie it down on top of another bucket filled with water (I used cat litter container). Also tie your hoses up to give some extra support if needed. Unstop your intake holes, prime pump, and then watch clean water come pouring out of the holes in the bucket. Let it run like this for a couple days depending on how dark the iron has made your pool water. You should notice a difference within a day. If its bad enough that it fills up the polyfill (not sure how you’d know without taking down the bucket and opening it since mine wasn’t bad enough to have to change the polyfill), replace the polyfill every couple of days. Soon, you’ll see the bottom of your pool, and then you’ll end up with clear clean water with the iron actually removed from your pool, without needing to buy something monthly for it.

I will end up fixing the bucket so I can hook up a garden hose to it to top off my pool when low, and filter out the iron then before it gets into my pool again. Also, as I experienced, if you turn off your pump or it loses power, when you turn it back on, some of the brown iron water will start pouring back out because of the iron settling down to the bottom when the water isn’t moving. 10 seconds later, the water coming out of the bucket was clear again and within an hour, all the brown water that had been dumped back in was filtered out again. When your pool is back clear, you might notice some iron deposits sitting on the bottom of the pool, be sure to brush those deposits so your pump and pull that through the polyfill filter.

When you’re finally done and have a clear pool again, have someone else stop up the intake holes while your turn your pump off and then quickly get the bucket down before it runs out of water. This prevents any iron from settling to the bottom and spilling out into your pool. As a warning, be careful taking the bucket down, since its now filled with iron and water and is probably heavier than you’re expecting.


I’m attaching photos of how I rigged up the bucket, what the water looked like when I turned off the pump to check the filter and some iron spilled back in, and what it looked like when finished.


Here’s a link to the Photos Album containing my pictures of my setup to filter the iron.


Didn’t think to take photos beforehand, imagine my entire pool that green color.


This is my setup with it finishing up cleaning out the iron.


This is the holes in the lid and shows what my water looked like after filtering.

Variable Speed Pumps Maximum Speed.

Variable speed pumps have a maximum speed of 3,450 RPM because the pumps are mostly just the same pumps as the original single speed pumps with a variable speed motor.

These pump designs are decades old and based on system designs that are no longer relevant.

The larger VS pumps can get up to about 90 to 100 feet of head loss, which is completely unnecessary for most system with a good design.

A well designed system should not have a total head loss of more than 50 to 60 feet at the highest flow.

In my opinion, the VS pumps really do not need to have speeds in excess of about 2,450 RPM for most applications.

This would allow the use of a bigger impeller for the same HP pump.

I would suggest that the pumps come in 3 models with maximum speeds of 1,725 RPM, 2,600 RPM and 3,450 RPM.

For example, a 3 HP pump with three models with three top speeds can come with a different impeller for each model and this will give 3 different head loss curves.

This will allow the pump to run slower for the same GPM.

This will allow people to choose which head loss curve best fits their system.

The 3,450 RPM will still be available for the people who want that, but it will give the people a choice to have a quieter pump if a lower top speed will work.
1674061039407.png
1674060714544.png

(The Woodlands, TX) Area Contemporary Build - Jan 2023

Hello Yall. My wife and I are in the North Houston area. We are family of 4 with 2 kids (7 and 10). We are looking to build a pool by summer 2023. We met with a few PB's around the area & after getting few designs/bids, we selected a PB that we liked. Attached are the renders and proposed bid from PB. Project cost 197k. Cost was a little higher than what we wanted to spend, but decided to get all items we wanted. Below are some of the Pool specs

Dimensions: 45 x 30 (45 x 18 excluding SPA/Ledge area)
12" Raised 360 overspill SPA and Tanning Ledges
Rain Curtain Water feature: 6ft tall, 16 ft wide
Sunken Firepit with Cantilever Pergola

This is our first time building a pool and this forum has been tremendously helpful. I would love to hear any advice, suggestions, thoughts and criticisms for the design or the proposed bid. Thank you

1.jpg2.jpg3.jpg4.jpg5.jpg6.jpg7.jpg8.jpg9.jpg

Attachments

  • Bid.pdf
    151.1 KB · Views: 239

I know better (pool store)...

Went to the pool store today to pick up Muriatic Acid. While I was there figured I would get "official" water testing done since it's been quite awhile (supposed to have "official" tests for any plaster claims is my understanding). So guy runs all the tests and then tells me I need to add 2.1 gallons of MA. o_O TWO POINT ONE GALLONS! I usually add 48 oz a week and admittedly I don't test after adding MA and then by the next week the pH is back up to 8.2 so I thought well, maybe what I'm calling 8.2 is really a lot higher. But I'm like, there's absolutely no way I am dumping that much MA in the pool at once...so I'll do in batches with testing after each addition of course. I poured approx 80 oz in and then waited awhile...pH is now 6.8 🤦‍♀️. I know, I know...don't listen to the pool store! Can you imagine what it would have been if I did what they said?! (Actually no need to imagine...looked at Effects of Adding calculator in Pool Math and 2.1 gallons would have dropped my pH to about 5. )🤦‍♀️

Helpful Hint for Dolphin S200 Style Robots

Ok, it could be just me, but I have a hard time opening the filter basket lid on my S200 style robots. I have three of them and they all operate about the same way.

It just seems like I have to pull on the catch-handle much harder than I should. The lid opens but it feels like I'm almost breaking the plastic.

After I cleaned the robot today, I was playing with the lid and found that if I used one hand to hold the lid down and used the other hand to pull up on catch-handle, the lid would open very smoothly.

Try this trick if you are having issues opening the basket lid on your Robot.

Thanks,

Jim R.

Building an OB Schedule

Folks,

A couple days ago I got a PM from a member asking if I would send him my OB schedule file using the open source software I had mentioned in the OB house project. A number of things delayed my moving forward on the pool until this week so I haven't actually started it yet but it's next on the list for me. Since I don't have one yet I suggested we do this as a thread instead of PM exchanges. Others may benefit and may wish to contribute. Building a schedule for any project is actually pretty simple:
  • List the activities
  • Establish duration for each one from experience or quotes from vendors
  • Configure the logic (what is a predecessor of what activity and)
  • Determine the critical path (one day delay causes the project to delay) and optimize where possible
  • Confirm duration and logic for critical path activities
  • Baseline the schedule. Which just means we use this to track actual project progress and make changes to execution where it makes sense.
It turns out Dave ( @Schwimmbad) is an IT project manager that knows a lot about scheduling so this should be helpful to all contemplating an OB pool. He's started a pretty good list of activities that I'll add here later today. Then we'll develop this into a schedule on this thread as we gather the data from bidding an procurement activities.

Chris
  • Like
Reactions: Leebo

Large crack in plaster after freeze

Happy Holidays!

Cleaning the pool today and noticed a large crack and peeling plaster about a foot below the waterline under the skimmer intake. Pics attached. It appears to be a little bubble that isnt finished flaking off...its hard to see in the pic, but definitely a raised area extending beyond the crack.
We have had some unusually cold days here in Houston, but not like the freeze of 2021. Power stayed on, pump runs 24/7, chemistry is good.
I have a Dolphin s300 robot. The pool was replastered in January 2020.
Also noticed another crack about 3 feet to the left of the large one, at about the same level.

Could the cold have caused this? Or maybe was Any ideas and/or suggestions for next steps?

Attachments

  • 20221226_134611.jpg
    20221226_134611.jpg
    116.1 KB · Views: 65
  • 20221226_134552.jpg
    20221226_134552.jpg
    112.4 KB · Views: 62
  • 20221226_134600.jpg
    20221226_134600.jpg
    125.5 KB · Views: 63
  • Wow
Reactions: HeyEng

Several issues to address

Doughboy above-ground pool with Hayward PowerFloLX pump - installed 7/28/2021

Swimline 87501 auto chlorinator installed October, 2022.


Here is a list of the issues we have been having. In no particular order:


1. Water is gorgeous and clear one day, and murky, green and gross a few day's later. Chemical levels don't appear off enough to produce this problem. We adjust as necessary and even installed an auto chlorinator so that we would not have to worry. Still no real improvements

2. Greenish water in pool does not produce discolored water during backwash/rinse. Seems strange to us.

3. Seeing air bubbles coming out of return jet.

4. Our pool cleaner (Baracuda Zodiac Ranger) loses suction after a couple of minutes. This may have to do with problem #3 since it had worked when we first had the pool installed. Yes, we do blow the air out of the vacuum hose before using it. The vacuum starts off strong but quickly slows down then eventually stops.

If any of you have ideas or solutions, I would appreciate your input. Thanks so much!

We Have a Winner! TFP Pool of the Month (January 2023); Theme - Outdoor Kitchens

1. Happy New Year! On the first of each month, a contest "theme" will be announced (i.e. water clarity, family fun, decking, custom features, lighting, scenery, etc)
2. Members have 10 days to upload ONE image for consideration; Photo must be related to the thread titled theme for that month.
3. Per general TFP rules, nothing profane, political, or insulting.
4. The first 10 days is the submission period. Posts are limited to ONE image ONLY. No discussion posts yet. This will make viewing much easier for all.
5. Days 11 - 15 the thread will be locked and is for voting only. No more uploads. Viewers now have a final opportunity to vote (or modify their selection) for their favorite upload.
6. Members are encouraged to use an emotion icon ("Like" or "Love") to vote for their favorite upload; it will be tough, but select only one favorite.
7. On day 16, emotion Likes/Loves will be tallied for a winner. In the event of a tie, we will create a poll on the thread to make a final selection.
8. Once a winner is announced, the thread will be unlocked and comments/discussions are welcomed. Winner and nominees can tell us all about their pool/photo/event.
9. A member can only be selected as winner once per calendar year.
10. Winner will receive a $50 gift certificate from tstestkits.net! Oh, and maybe some bragging rights. :poke:

This should be fun. Showcase your outdoor kitchens. Let’s see those pics! Have fun and good luck to those who apply!

Filter