• Locked
[UPDATE] When even the "Experts" don't listen to their own advice ...

I kinda knew this was going to happen but decided to do it anyway ...


You can see my PoolMath logs for the latest test results. I added an 8oz start up dose of SKILL-IT algaecide (BioDex) to see if it would help with wasp control. We have mud-daubers (paper wasps) around here and they LOOOOVE pool water. I get 2 or 3 wasps per day landing on the pool water surface many times per hour and then watch them as they fly off to their nests in the neighbors yards. Once I had a wasps nest INSIDE the bathroom exhaust vent pipe up at the roof. Had to spend quite a few days blocking off the vent, poisoning the the nest and then covering the roof cap with plastic so that they would all die. What a PITA!! So whenever I see a wasp at my pool, I always tend to watch it to see where it flies off to. If it heads towards my roof, I get up on the ladder and go on a wasp hunt. Thankfully no more nests up there since the last one.

The interesting part to me is that there are two theories to how SKILL-IT works - (1) either the chemical is displeasing to, or kills, the wasps when they draw up water, OR, (2) the primary chemical in SKILL-IT is both an algaecide and a surfactant and the surfactant changes the surface tension of the water enough to make the wasps not able to walk on the water.

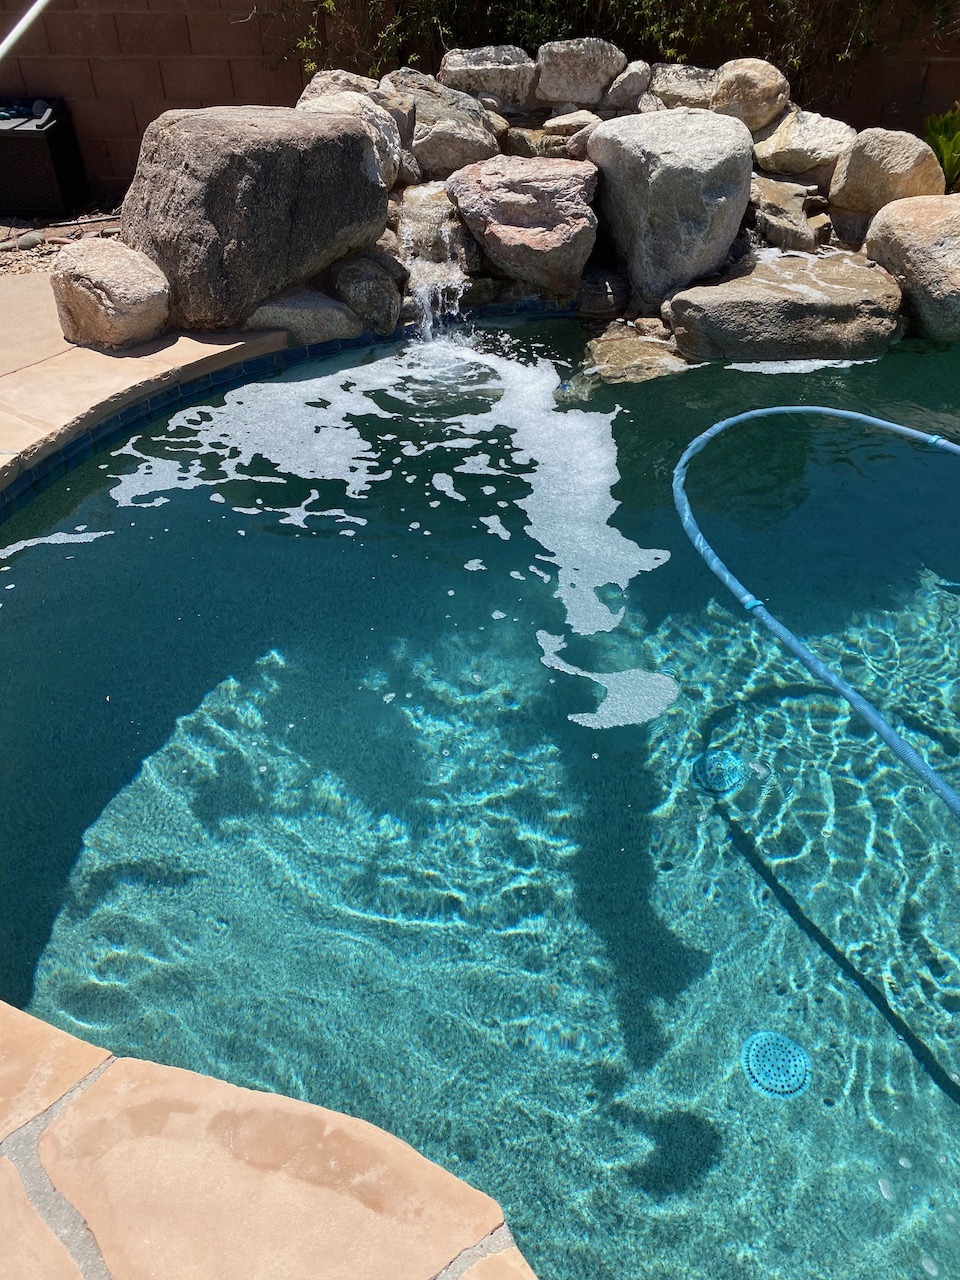
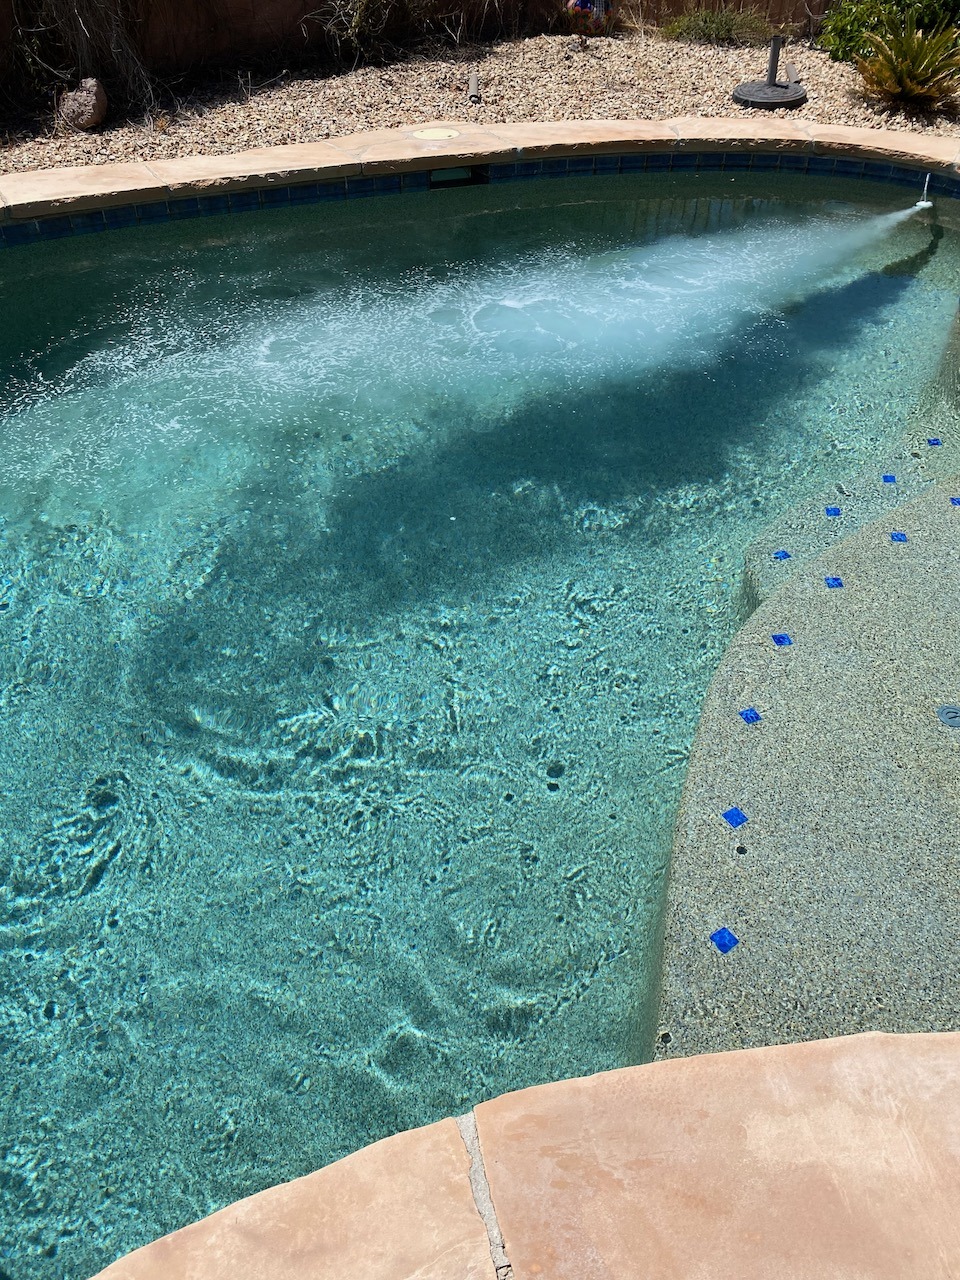
I won't have enough evidence to decide which is which, BUT, if you look at the photo with the aerator setup (its a Venturi aerator that I screwed into my waterfall's auxiliary return line), the bubbles being generated by it are champagne size and very diffuse. Before adding SKILL-IT, that aerator would simply put out huge, globular bubbles like the kind you get by blowing back through a straw in water. So the SKILL-IT definitely changes the surface tension of the water as that is the only way that you could get such a drastic change in bubble sizes.

Suffice it to say that the stuff pours like Palmolive dish soap ... and has nice fruity aroma ... not that I'm sniffing the chemicals or anything .... 🤪🥴😵‍💫😵

Note that this stuff is what TFP calls a "cheap, linear quat algaecide" and so it is known that these algaecides breakdown easily from chlorine and eventually dissipate. So even if nothing changes for me, the bubbles should be gone in a week or so as I tend to run the FC on the hot side.

CLICK HERE to Become a TroubleFreePool.com Supporter!

Trouble Free Pool is committed to assisting its members learn pool care and works hard at maintaining this free resource. As I'm sure you've noticed this Winter TFP has undergone a HUGE overhaul as we continue to push ourselves forward. All of our upgrades have been funded by your donations.

TFP is a registered 501(c)3 non-profit who displays NO advertising on our site nor is our advice compromised by financial incentives. We use donations from our users to pay for our servers and to continue to develop pool care. We ask that you please review the donations levels below and help support TroubleFreePool.com

Use and care for DE filters

Hi all, :wave: I've been meaning to write up my 'pearls of wisdom re. DE filters' for a while, with some of our members already firing up their pools, I figured I better get it posted :oops:

--------------------------------------------------------------------------------------------------------------------------------------------

Use and Care For most DE Filters:

(The units I have a lot of experience with are made by Hayward - so most of this applies specifically to them, but the principles apply to all DE filters)

1) Basics

A DE filter is one which uses diatomaceous earth (~ skeletons or fossils of prehistoric one celled plants) to remove all but the finest material from the water. The DE is a white powder which is mined in various places around the world which was formed by the evaporation of the water that these critters lived in. {NOTE: Do not use food-grade DE as it is different than the DE used for pool filtration} The DE is kept in the water flow of the filter because it coats the internal grids or fingers which make up the filters internal "nets" allowing dirt and debris to be captured by the microscopic paths created by the coating. Because of the nature of the "paths" through the DE coating, algae (which is the approximate size of the paths) can easily and quickly congest a DE filter, most DE filter owners find this to be the biggest drawback of owning one. The DE must be added to the filter via the skimmer, with the pump running, the amount to add is dependent upon the size of the filter. When adding DE to a filter, most manufacturers recommend mixing the powder with water before pouring it into the skimmer - I have found that adding the powder directly into the skimmer is equally effective, if you have more than 1 suction source operating at the time of addition. (having a second, or third, suction source allows the DE rich water from the skimmer to properly mix with "non-DE water" from the other source(s) to evenly coat the grids).

However, DE filters, while providing the finest filtration, DO have their downsides! If you do a "backwash" (discussed later) or do a thorough cleaning of the filter, you need to add more DE to it - and, if you add too much or too little, you'll likely have filter problems! Too much DE will clog the filter and decrease the efficiency of it. Similarly, too little DE will not catch enough (dirt, etc) and cause the grids to clog up with the debris, both of which require a manual cleaning of the grids and possibly a chemical cleaning of them. Also, "bleeding" the air out of the unit before adding DE is KEY! - the fresh DE can only coat the parts of the grids that are in water!

Knowing how much DE you are actually adding to the unit is VERY important! The best way is with a premeasured scoop - they are inexpensive and well worth the $ spent, any place that sells DE should have one available. DO NOT USE a 1lb. scoop or canister that is not specifically for DE (ie. A 1 lb. coffee can only holds ~ ½ lb. DE) If you have an accurate scale that will allow you to weigh the container first and then the weight of the DE when it's full, that's fine -- just be SURE to know ~ how much DE you add when you are adding it! {NOTE: It is a very good idea to weigh the DE in your scoop as it can vary tremendously based on how "packed" the powder is in the scoop. Doing this at least the first time will give you a better feel for how much DE the scoop holds using your methods}

2) Types

There are 2 different types of DE filters:

The first uses "fingers" (fabric wrapped hollow tubes, usually 100/filter) to collect a layer of the DE on. This style is also known as a "bump" filter because the DE can be "recharged" via the use of a handle which moves the whole assembly up and down to expose new pathways in the DE coating without having to replace any DE (I'll talk about "bumping" a filter in a minute.) (There are some "grid" filters which have a handle on the top connected to a plastic plate which operate the same way)

The newer models have a series of grids to collect the DE and either have a multiport valve or a "push/pull" valve (of which I will speak very little). These units allow you to "backwash" most of the DE out when the filter needs to be cleaned. (* some localities do not allow wasted DE to be flushed into sewers or even onto your own property - in that case a "separator" would need to be installed on the backwash line).

3) Start-Up

The fabric which holds the DE does very little to filter the water! As such, a DE filter needs to have a coating of DE on the grids/fingers as soon as the pool is started up. Your installer or pool tech should do this for you the first time and give you a complete lesson on operating your pool (called "pool school" - it's a lot of info all at once and it is very understandable that some of the info is forgotten by a pool owner). The amount of DE required by each filter is determined by the size of the filter - there should be a label on the filter identifying the size of the unit and how much DE it requires when completely clean. As said, KNOWING how much DE you are adding is key! Make sure to note what the pressure gauge reads when the unit is clean and freshly coated with the DE!!

4) Maintenance

Your filter should run anywhere from 8 psi to 20 psi with fresh DE put in it, depending on your pump, plumbing and filter system. Some setups, like with in-floor cleaners, may run at even higher pressures. When the pressure rises 20-25% of the clean pressure, it's time to clean the used DE out of it. (when doing any filter work, turn off the pump)

Bump filters:
1) Turn the pump off.
2) Open the air valve on the top of the unit for ~5 sec. and close (bumping with the unit full of water will harm the unit!)
3) Slowly push the handle down and quickly raise it up 4 - 6 times.
4) Now turn the pump back on and see if the psi went down, if it didn't drop more than 2 psi, you need to dump the used DE.
5) (if you need to dump the DE) - Open the drain outlet on the filter after doing steps 1 and 2 and run the pump for 20 seconds. Close the outlet and run the pump for a minute (don't do this if you have an algae problem! The uncoated parts of the fingers will collect algae too quickly and clog), then repeat the procedure (make sure you open the air relief while the pump is running until water comes out of it)
6) At this point, you have removed ~80% of the old/ used DE so only add 80% of the DE you would use in a new or fully clean filter!!

Grid filters:
1) Pretty much the same as bump, except you have a valve (either the on/off plunger or a multiport) which allows you to backwash the filter when the pressure rises 20-25%.
2) {Always!! Turn off the pump when changing the backwash valve positions!!} Turn the multiport to "backwash" and restart the pump, watch the view-glass or the end of the discharge hose to see when the backwashed water becomes ~clear. When it is fairly clear, turn the multi to "rinse" for 15 - 20 seconds, and then back to "backwash" until the water runs ~clear again. Repeat the "rinse/backwash" cycle until the water comes out clear when backwashing, add a short "rinse" and the filter is about as clean as you'll get it using the "backwash" function.
3) If the water in the pool is fairly clear, I'll throw in a 1 min filter cycle and do the "backwash/rinse" cycle(s) again.
4) At this point, you have removed ~ 80% of the old/ used DE so only add 80% of the DE you would use in a new or fully clean filter!!
5) Note: if you have the on/off plunger valve, you will alternate between "backwash" and "filter" instead of "rinse".

When bumping/ backwashing doesn't work:

Sometimes just "dumping" the old DE isn't enough to get you back to proper filter performance - this can be caused by algae (or some other fine debris clogging the DE), or neglect (you didn't clean the filter soon enough), or the grids/fingers getting clogged up.

At this point, you need to take the filter apart and manually hose them off (it's a wet process - so be prepared to get ~soaked). I recommend the manual hosing every year (I like doing it in the fall when the pool is being closed because, then you know the filter is ready for another season). For a walk-through on taking a grid DE filter apart, see the DE Filter Cleaning Tutorial sticky. If you have a cartridge style DE filter, see the QuadDE Tutorial.

If, when manually rinsing the grids, you notice that water is staying in the membrane for more than ~30 seconds, it's time for a chemical cleaning!

To chemically clean the grids/ nest:
1) Have a bucket/container large enough to hold the entire assembly - A large plastic garbage can works well.
2) #1 Add some TSP (tri-sodium-phosphate) to the water or some electric dishwasher detergent to the water and soak the grids for at least 3 hours - this will "de-grease" the membranes and is the first step in cleaning them, rinse with hose and get ready for step 3.
3) Dump the container, refill with water and add muriatic acid to the water so that you have a 10:1 water:acid mixture and soak the grids for at least another 3 hours, this will clean any calcium off of the grids. Rinse grids again and reinstall them in the filter.
4) Now, run pump and bleed off the air from the filter and add 100% of the DE the filter calls for.


I Hope that this is enough for most DE filter owners; if you have any questions, we'll be here to answer them!

----------------------------------------------------------------------------------------------------------------------------------
That's about the best I could come up with, having only 5 months to work on it :roll: :lol:

If any of you see any mistakes, wrong info, omissions or places where I'm less than lucid - please point them out so I can edit this and make it look like I used my 5 months well :p

Minor edits, jblizzle, 4/4/13
Added link to DE cleaning tutorial sticky, jblizzle, 7/15/14
Added link to QuadDe tutorial, jblizzle 4/16/16

Love this site, best pool advice... Please bring back the FC/CYA chart with shock numbers. The calculator is lovely but I prefer the table, both?

Love this site, best pool advice... Please bring back the FC/CYA chart with shock numbers. The calculator is lovely but I prefer the table, can we have both?
The way my engineering mind works is I like to see everting. Is there a link to it I can have?

  • Locked
My Intex 16x48 with custom deck and stairs

Here's some build pics of our intex pool we put up at the end of last season. We're very happy with the results and are getting a lot of good use out of the pool.

Leveling out the ground
IMG_1859.jpg
IMG_1860.jpg


We ended up using a very thick pond liner under the pool. It's under the blue tarp. It was very expensive, but it will keep grass or weeds from growing through the liner. We learned this the hard way very early on even though I was very careful to kill everything under the pool.
IMG_1861.jpg
IMG_1863.jpg
IMG_1864.jpg

Initial posts for deck
IMG_1865.jpg
IMG_1866.jpg

Beginning the framing
IMG_1867.jpg
IMG_1868.jpg

Custom made stringers. I made an excel spreadsheet that makes measuring and cutting stringers extremely simple if anyone is interested.
IMG_1869.jpg

Started decking surface
IMG_1870.jpg
IMG_1871.jpg

Ready for spindles
IMG_1872.jpg
IMG_1874.jpg

Meshing the decking planks
IMG_1875.jpg


View from the top
IMG_1877.jpg


Completed!
IMG_1878.jpg
IMG_1880.jpg
IMG_1881.jpg
IMG_1882.jpg
IMG_1883.jpg


The stairs that are in the pool are great. I think they were only $200 or something and are perfect. So much nicer getting in and out of the pool than ladders.

I'll post some new pics. New features include better landscaping, wiring at the pumps, and stained the wood. Also replaced the intex rope that holds the legs in place with a nice 1" nylon strap in gray. Next is pcv plumbing to get rid of the hoses and have some valves that will make maintaining the SWG system much easier.
  • Like
Reactions: ractis

Zero chlorine and 7.0 Ph

I’m trying to figure out what to do! First the crappy pump that came with this pool isn’t working so I pulled out another crappy one till my new one comes Saturday. I followed the directions on my overkill Taylor K-5005 lot to test Ph and combined and total chlorine. Ph is 7.0 and chlorine is non existent. I followed directions exactly and doesn’t even measure on the scale! First pic is Ph, 2nd is combined chlorine, 3rd is total chlorine. How do I fix this please? I have liquid chlorine and chlorine pool crazy clarifier. I really want to float tomorrow afternoon! Thanks for any help!

Attachments

  • IMG_1317.jpeg
    IMG_1317.jpeg
    318.1 KB · Views: 45
  • IMG_1319.jpeg
    IMG_1319.jpeg
    308 KB · Views: 40
  • IMG_1320.jpeg
    IMG_1320.jpeg
    387.3 KB · Views: 45
  • Like
Reactions: triplets&quads

Taking a while to get CYA up, okay to swim?

Hello everyone! As a new pool owner, I'm diving headfirst into learning all about pools, and I must say, TFP rocks!


Here's a little background on my pool: It's brand new, only three weeks old, and has a capacity of 18,000 gallons with diamond brite plaster. I plan to convert it to a saltwater pool in a few more weeks.

I'm currently facing some challenges with maintaining chlorine levels. I've been using three pucks in a floater for the past two weeks, but I haven't been able to get a reading. I'm also gradually increasing the Cyanuric Acid (CYA) level, and I recently purchased granulated conditioner from Leslie's to help with that. According to the Orenda App, I needed 7 lbs of granulated conditioner to raise the CYA level to 30-40ppm. I added it yesterday, but my CYA reading is still quite low, around 10 using the Taylor test kit. The water is overflowing in the test tube, and the dot just barely goes away. I've read that it can take up to a week for the granulated conditioner to fully take effect, although I wasn't particularly thrilled with the advice I received from Leslie's to use granulated conditioner (not impressed with Leslie's overall but that's another story).

Now, here's my question for the group: I've been adding granulated chlorine to the pool without any CYA, and it disappears within a few hours. After 2 hours, I get a reading of 2.5 FC, but by the 12-hour mark, it's completely gone. It's Memorial Day weekend, and my kids are eager to jump in the pool—I can't blame them, especially since we had it installed in the fall and haven't had much chance to enjoy it yet. My concern is whether it's safe for them to swim with the FC levels between 0-2.5. The water is mostly clear, and there's no sign of algae or any other issues so far.

Thank you all for your help!

pH: 7.6 (keeping that in check due to the new plaster)
TA: 75 (had to bring that up over the past week)
Calcium: 370

Hello! My name is Scooby and I'm an idiot.....

So long story short. Found our dream home that included a pool. Wife was on the fence saying it was alot of work. Of course wanting the pool myself I told her it was no big deal.

One leaking water heater, one dying pump, three days of the hottest weather, rain and a swamp later....

All in all it was good that the pump died. After getting in to replace the pump I found the wire insulation had been destroyed by the water/chlorine. The wires were pretty much bare right where it went into the pump housing.

Replaced the pump with a new Pentair Superflow VS, and also replaced the undersized sand filter with a 425 clean clear 4 element cartridge filter. Pool is a 30K Vinyl in ground, so I feel the upgrade was worth it. After getting the pump fixed and everything back together, the pool was a green mess. Shocked it was some stuff I bought at the pool store. It used Sodium Dicloro... something..... Everything I saw said use calcium hypochlorite. Found some 1lb packs of shock from the previous owner. Did a double hit of shock, and vwala.... pool was crystal clear and just in time for a hear wave. Finally got one good day to enjoy the pool.

Came hear to do some reading and learn something. Hopefully I can stop cleaning/maintaining and start enjoying the pool.
  • Like
Reactions: Christine W

Question on CH with Eco Finish - plus Mediterranean Blue install pics for clicks

Hi, I just had my pool refinished using Eco Finish in Mediterranean Blue. I am thrilled with how it came out. I will include some pics below.

As I get the water balanced I had a question about CH with eco finish. Should I be using the “vinyl” setting in Ideal Levels? I had the pool filled with fresh spring water and it is reading about 90 ppm CH currently using my Taylor kit. Eco finish suggests around 200 ppm, but based on what I have read about eco finish I am wondering if that is really necessary. Curious what TFP thinks. I know for vinyl anything above 50 is considered fine. I already have the CH as I picked up my typical start-up chemicals from my plaster days, but I’m wondering if I can return it.

Here are a few pics of the finish and the pool being filled.
9B549FA2-5DF8-46C1-9A34-CA5FB8E176D0.jpeg
45EDC362-9EA8-429C-9896-C4FB79F8EB2D.jpeg56EA0019-FDDE-4823-9722-4D09C2C61CF3.jpeg
  • Love
Reactions: Newdude

Day 3 of conversion

Hi Y'all - new member from Middle TN here. Have been doing a lot of lurking on the site and decided I needed some individualized guidance so created my profile and wanted to post a thread and hopefully get some guidance and feedback.

Decided to convert to Chlorine after reading a lot of the info on this site. 4 year old pool that's been on Baqua since day one, 3 part including CDX. I just finished dealing with my latest bout of pink slime and was doing some research on it which led me to TFP. Made the decision about a month ago, but I had some people coming in town for Memorial Day so I wanted to make sure the pool was open for them. I tried bringing the Baqua down as much as possible by not adding anymore and also draining about a foot and a 1/2 of water about a half dozen times and refilling, hoping to dilute the existing chemicals somewhat. Based on advice from pool store I added some non-chlorine shock into the skimmers and when the Baqua Sanitzer got down to high teens starting putting NST 70.2% Calcium Hypochlorite tablets in both skimmers. There was no reaction to the water and it remained crystal clear thru the holiday weekend even with a half dozen people using the pool pretty regular. FC levels never got over 1.5ppm but based on the water clarity I figured everything good.

Monday afternoon I added 3 1/2 gallons of 10% Sodium Hypochlorite liquid that I got from my local big box home improvement store. Got the emerald green reaction but based on the chlorine drop test didn't get much more than about 7ppm FC. Since then I have added a total of 22 gallons of 10% chlorine. I have never seen FC get above 10ppm. I did wake up this morning and first thing did a test which got to 6FC/2CC=8TC. After that test I added my last 5 gallons I had in 2.5 gallon increments waiting about an hour between.

Just ran a new test and came out to 8FC/2.5CC=10.5TC

Water is murky green, not the bright emerald green though that happened when I first started, and I have a lot of white particles suspended in the water. I have been brushing the pool and anything that was sticking to sides and bottoms seems to come off surface easily.

Now, where to go from here? Obviously need to pick up more liquid chlorine, probably buy another 20 bottles or so to start. I also have 7lbs of 98% Cyanuric Acid Hydrate, but initially wasn't going to add that until conversion complete and I had changed the sand in filter.

Other problem is I am leaving this Friday until Sunday night so will not be able to continue daily working on it over the weekend. I do have a bunch of the Calcium Hypochlorite tablets and was considering throwing some of those in each skimmer before I left.

Ok - so that's a lot but based on reading previous threads it seems more detail the better for feedback. Also attaching pic of current water.IMG_0582.JPGIMG_0581.JPG
  • Like
Reactions: Newdude

If I could do it all over again...

In another thread @KevMo said he could write a long post on lessons learned. That got me thinking of starting a thread on what people would do differently if they could do it all over. I know there are so many great resources on TFP like the pool school, wiki, and forums, that are based on lessons learned and experiences, it just seemed like folks sharing what they would change would be very interesting reading.

So... if you could do it all over again what would you do differently on your project? Hoping for both serious and entertaining responses.

To make your post immediately relatable, start your post with the job type (new build, resurface, liner replacement, renovate, etc) pool type (gunite, fiberglass, liner, above ground, etc) and build approach (pool builder, owner builder, etc)
I.e.
New build, gunite, OB
Renovate, gunite, PB

We Have a Winner! TFP Pool of the Month (June 2023); Theme - Water Clarity

Here we go people! Water clarity, it's what TFP is all about!

1. On the first of each month, a contest "theme" will be announced (i.e. water clarity, family fun, decking, custom features, lighting, scenery, etc)
2. Members have 10 days to UPLOAD ONE image for consideration; Photo must be related to the thread titled theme for that month.
3. Per general TFP rules, nothing profane, political, or insulting.
4. The first 10 days is the submission period. Posts are limited to ONE image ONLY. No discussion posts yet. This will make viewing much easier for all.
5. Days 11 - 15 the thread will be locked and is for voting only. No more uploads. Viewers now have a final opportunity to vote (or modify their selection) for their favorite upload.
6. Members are encouraged to use an emotion icon ("Like" or "Love") to vote for their favorite upload; it will be tough, but select only one favorite.
7. On day 16, emotion Likes/Loves will be tallied for a winner. In the event of a tie, we will create a poll on the thread to make a final selection.
8. Once a winner is announced, the thread will be unlocked and comments/discussions are welcomed. Winner and nominees can tell us all about their pool/photo/event.
9. A member can only be selected as winner once per calendar year.
10. Winner will receive a $50 gift certificate from tstestkits.net! Oh, and maybe some bragging rights. :poke:

This should be fun. Get out your GoPros, drones, or other camera devices. Let's see your TFP-clear water! We know they are out there. Have fun and good luck to those who apply!
  • Like
Reactions: jodyliebing

SWG Run Time Calculator

What is the SWG Run Time Calculator?
A tool that is designed to answer the common question of "how long should I run my pump/SWG". It calculates the run time of your SWG and Pump based on your pool size, the output of your SWG and your daily FC PPM loss. It is designed as a starting point, not the final answer.

UPDATE 8/25/2016: I have completed a number of updates and integrated a suggestion from BestJoeyEver to be able to calculate the SWG % based on the desired pump run time. Here is a quick summary of the updates:
  • Added change log
  • Changed table to increment by 5% vs 10%
  • Added calculation for SWG% based on desired pump run time
  • Added basic instructions

Before starting your SWG, it is recommended to use Pool Math and bleach to get your FC to at least the target level. A few FC higher would be better until you dial in your SWG and you know that it is able to replace the 24 Hr FC Demand. The idea is to keep your pool from going below the minimum while you dial in the % and run time.

DOWNLOAD HERE


----ORIGINAL POST-----

Ok, so I am somewhat new and I have read over and over that it is just trial and error but I am still trying to get my SWG % and pump run time figured out. The trouble is that with every 1 hour of additional time or X % change, I don't really have any idea how much more chlorine that will produce in PPM for my pool.

So with known variables and possibly a few assumptions, could a formula be determined?

The goal of the formula would be to determine how long to run the SWG at 100% to get a certain output of PPM.

The variables that we know:

-X PPM loss per day (this would have to come from testing)
-Output of SWG (for example: "Pentair IC40.... will produce approximately 0.45 Kg of free available chlorine per 24 hour period"
-Pump run time
-Pool Gallons
-CYA

Has anyone tried to come up with a formula? What am I missing? On the surface, it seems that it should be possible.

UPDATE:
For those of you that want to try to the beta version of a calculator to determine SWG/Pump run time, below is a link to a Excel spreadsheet. Your feedback is welcome. It is designed to be a starting point, not the final answer.

UPDATE 7/20/2016: Added a new SWG Run Time Chart to quickly see various run time values at multiple % output and multiple FC demands.

Basic instructions:
1. Enter Pool Size in gallons
2. Enter your Average 24 hr FC (free chlorine) demand. (this value will likely be between 1 and 4)
3. Enter the amount of FC that your SWG creates in a 24 hour period. If you don't know, consult your instructions/documentation or click the link.
4. Enter percentage output that your SWG is set to. Suggest to start at 100%, then you can change the value to see the change in the run time.

Before starting your SWG, it is recommended to use Pool Math and bleach to get your FC to at least the target level. Higher would be better until you dial in your SWG and you know that it is able to replace the 24 Hr FC Demand. The idea is to keep your pool from going below the minumum while you dial in the % and run time. Pooldv's post #8 has good info on this. Also recommend the the following link: Pool School - Water Balance for SWGs

Your feedback is welcome. Just post to this thread.

Just Venting / Example of why you should use TFP and not trust your maintenance company 🙄

Just here to say that I am so thankful for TFP and all I have learned from its members and forums. My pool company opened my pool 3 weeks ago, they come once a week to brush, vacuum and “test” chemicals… This week, the Friday before Memorial Day, I go to check the levels using my trusty Taylor kit, and I see zero chlorine. I call the company and ask if the worker noted adding salt bc I have no chlorine.. The lady on the phone tells me no he didn’t indicate anything (eventhough I specifically asked the worker to add salt being it was his second visit and they flocc’d and cleaned the pool on their first) She proceeds to question me on the need for more salt and tell me that well as long as the pool is clear it is an indication that’s it’s safe to swim in. I couldn’t believe my ears. People actually believe this! She said testing won’t pick up on chlorine from a SWCG bc it’s not chemical chlorine. She said they would add a bag a week until the low salt indicator turned off. Wow this was all just flat out wrong and mind boggling. I tested the salt level using my kit and it was 1200. I’ve since had to add six bags of salt on my own meanwhile I paid them for opening and maintaining the pool. Pool “professionals” and they don’t even know how to measure and add the right amount of salt to get the pool to generate chlorine. Such a joke. Again, thankful for all I’ve learned here - thanks for listening!

Burnt Popcorn in Microwave

Clueless 16 year old son burned popcorn in the microwave last night and with every fan running and lemon juice in a cup of water boiling in the microwave that smell is still strong in the house 12 hours later. Who has a hack to get the smell out? The boy is in deep sheet with the Mrs as she isn't pleased with this brain dead maneuver. I fortunately was out of the immediate blast vicinity in the basement getting the movie going. Any ideas to get that out of the house?
  • Haha
Reactions: Texas Splash

Hello, Awaiting 24' Round Install

What up gang! New to the group and about to be 1st time pool owner. I've read this site back and forth. I've been trying to do all the research I can. I'll have the T100 Pro test kit, liquid chlorine, Mule Borax, baking soda and liquid stabilizer on hand. Not super confident in which order to test and treat new water. I plan to filter the water I fill the pool with. It is city water I'll be using. I'd like to simplify chemicals as much as possible. I haven't quite grasped the idea of shocking and how/when it's performed. My pool is stated to hold 13,500 gallons. I will have to keep my cover on when not in use for a week, until I get my fence built due to neighbor kids. Any help and tips is appreciated!
  • Like
Reactions: Newdude

The Quest of Iron Man

Filled pool with about 6500 gallons of well water (garden hose with 1 micron whole house filter) at opening this year, and I really thought it worked! Once I got my filter setup and running and balanced PH I began my SLAM…and the whole pool turned brown in about 5 hours. Now I’ve got a skimmer sock full of polyfill in the skimmer and I’m running a sump pump to the whole house filter with a new 1 micron sediment filter that then goes into a polyfill filter I built. I’ve got 8 bags of polyfill ready to swap out, a fresh bag of DE, and 4 more of the 1 micron sediment filters ready to go. Fingers crossed….

Please re-assure me that this will work! SLAM levels are right on point but the brown water is driving me insane.

Attachments

  • 8F80F4EB-1B7A-48AB-A2E4-1EECBBDD4D87.jpeg
    8F80F4EB-1B7A-48AB-A2E4-1EECBBDD4D87.jpeg
    443.2 KB · Views: 23
  • 455CCF40-965E-4E18-8878-994F3C948E53.jpeg
    455CCF40-965E-4E18-8878-994F3C948E53.jpeg
    580.8 KB · Views: 23

Tingle/shock from pool

I am at my wits end. Last year we bought this home with a 20x40 inground saltwater pool. It had not been opened at all last summer and in late sept we had to open it for our home inspector to investigate prior to us making an offer. The home inspector was trained in pools and gave the pool a good inspection. Once we moved it, it was almost time to close the pool. My daughter and son both complained of feeling shocked when getting out of the water. Long story short, we were reading as much as 4 volts in the water. Called electricians who had no answers and also contacted the utility company. The utility company turned off all power to the entire subdivision and we still showed voltage. They added additional grounding and the levels dropped to below 1 volt. You can really only sense it if you have a break in your skin somewhere from a cut. We are still reading 0.2-0.4 volts with all power off and I am just scared to death of this and want it fixed. I have called another electrician out and he has no solutions. Talked to the utility company again and they suggest it is a problem with our bonding wire. There is a copper bonding wire and the original owner says the concrete deck is bonded. If you are touching the concrete deck and it is wet, then you touch the water with your other hand you get a tingle. I have called multiple pool companies without anyone who seems to be able to help. I’m scared for my kids or other family to use it. Any suggestions?
  • Like
Reactions: stanh

  • Locked
How do I use Bromine in my Spa or Hot Tub?

Originally Posted by waterbear
There is a lot of misinformation on the proper way to use Bromine so I hope this primer is helpful.

First, you need to establish a bromide reserve in the water. Bromine tablets can do it by themselves but it can take literally weeks until enough dissolves. Some people crush about 6 of them up and put them in the water on each water change to achieve this but it really is easier and cheaper to add a packet or two of sodium bromide! It is available from such companies as HTH, Leisure Time, Robarb (Rendezvous) and others. Bromine tablets contain both bromine and chlorine to oxidize the bromine into active sanitizer. (There is one that I know of on the market that contains MPS instead of chlorine but it works exactly the same way.) If you do not add the sodium bromide and just put in bromine tabs then you will be starting with a chlorine system until enough bromide dissolves in the water.

There are basically two ways to do a bromine system--2-step and 3-step. In the 2-step system you add the sodium bromide to the water to the proper concentration, then add oxidizer on a regular basis (usually chlorine, MPS or ozone or a combination of them) to oxidize the bromide ions into hypobromous acid, your active sanitizer. It's pretty easy but does require a bit of attention daily to maintain the bromine levels in the water.

A 3-step system is identical with the addition of bromine tabs in a floater. This will help maintain a more constant bromine level in the water with less maintenance but otherwise there is no difference. The 3-step system costs more since the bromine tablets are the most expensive part of this equation. The dimethylhydantoin in the tablets seems to have a similar (but not identical) function in a bromine system as CYA does in a chlorine system. It tends to stablilize it but, like CYA, too much is not good. Not that much info is readily available on the effects of dimethylhydantion other than that it makes the bromine more difficult to destroy, a consideration if you ever want to switch over to a chlorine system.

If you add sodium bromide to your water and have an ozonator you might be able to achieve the constant bromine level without the floater since the ozone is constantly oxidizing the bromide while it is on. However, you might deplete the bromide reserve quickly this way, leading to a shorter time between drain and refills. Also, ozone can cause bromates to form in your water. Bromates are a suspected carcinogen in drinking water.

You still need to superoxidize (shock), usually about once a week to destroy organics in the water whether you choose the 2-step or 3-step method.. I prefer plain, unscented laundry bleach (5.25%) for shocking a bromine spa. 1 cup per 250-300 gallons is about right. If you use Ultra bleach (6%) then you need about 3/4 cup. You can also use 12.5% pool chlorine at half the ultra bleach dose. They are all sodium hypochlorite, just in different strengths. If you do not want to use a liquid shock you can also use calcium hypochlorite granules (slow dissolving and will cause your calcium levels to rise), Lithium hypochlorite (very fast dissolving but very expensive, however my first choice for a granulated shock since it really has minimal impact on your water just like the liquid does), or MPS--potassium monopersulfate, also called non chlorine shock (will lower your pH and TA and add sulfates to your water). There is no advantage to using dichlor (stabilized chlorine) for shocking a bromine system but it probably wouldn't hurt. CYA (stabilizer) does not stabilize bromine.

Here is a step by step:
1) On each fill balance the water (adjust TA and pH. Add calcium if below 125 for acrylic spas or below 200 for plaster). More info here on balancing spa TA and PH, How do I use Chlorine in my Spa (or pool)?. If you have metals in your water add a metal sequesterant.
2) On each fill add sodium bromide to the water. (Follow manufacturer's directions on dosing. You will end up with about a 30 ppm concentration of sodium bromide.)
3) Shock with your preferred oxidizer (chlorine/bleach or MPS) and turn on the ozone if you are using it. Your bromine levels should now be above 10 ppm. Wait until they drop below 10 ppm before entering spa.

4) If using a 3-step system add your floater with bromine tabs and adjust it to maintain a 4-6 ppm bromine level. If using a 2-step system add your preferred oxidizer as needed (and adjust your ozone) to maintain a 4-6 ppm bromine level.

5) Shock weekly to burn off organics that collect in the water. (If you are using ozone and your bromine levels are staying at 4-6 ppm then you can shock less often.) Wait until the bromine level drops below 10 ppm before entering spa.

6) Test bromine and pH before entering spa each time. Test all water parameters (bromine, pH, TA, Calcium Hardness) weekly.

7) Drain and refill about every 3-4 months.

One final note. A good test kit is a must, just like with a chlorine system. IMHO, the BEST test kit for bromine is the Taylor K-2106 which has an FAS-DPD test for bromine and also tests for pH with acid and base demand, TA, and CH. If you already have a Trouble Free Testkit TF-100 (or are getting one for your chlorine pool) then use the OTO test (small comparator with yellow color blocks) for your bromine levels since you only want to know total bromine. The TF-100 has all the other tests you need also. Remember, you don't need to test CYA in a bromine system.

Happy bromine hot tubbing!

Opening my pool and want to do it real nice this time

Hello all. We have a 15 x 24' above-ground pool in NY. I am not the greatest when it comes to balancing my water chemicals. I use a floating chlorinator with the chlorine tab in it. I occasionally use baking soda powder when needed by pouring the powder into a bucket adding water mixing then spilling that bucket into the pool around the perimeter while the filter is on. That is really all I do besides adding in some clarifier every now and then. The pool looks crystal clear BUT the particulars like hardness and whatever else there is MAY NOT be GREAT. I backwash and brush and all the cleaning is done by me. I am pretty OCD BUT I am not the best at chemistry. I was looking on a site and they said they sell an item called pH Free and Clear that you add to the chlorinator and that is all you need to keep the pool crystal clear. An alternative product is Arm and Hammer Clear Balance which is less costly. Some sites said that BOTH of these products are ONLY baking soda. If that is the case what I am purchasing from Costo in the form of powder is better economically and does the same trick. is this TRUE? Please advise me on this. With all the chemicals that are available- pH bounce or increase to pH decrease to soda ash to calcium hardness etc- one can go broke with all this. One site said that the only chemicals needed for a pool are Chlorine, baking Soda and Chlorine Stabilizer(CYA)- BUT what product is CYA(chlorine stabilizer and when would you need it? As it is I almost rarely use Regular shock- I use a shock called GREENOUT. I use that and baking soda and the clarifier every now and then- is this OK??

I also vacuum the pool with my old robot - does OK. and also do it manually myself with the pole and the vacuum head at the end.

as mentioned I use a floating chlorinator with 2 tablets of chlorine in it.-as you can see by my attachments- I use BOTH- stabilized AND NON stabilized chlorine tablets AND the GREENOUT--which says
is a shock treatment and super chlorinator. is this combo OK- and if it is a super chlorinator- should I use "Fewer chlorine tablets floating weekly- to lower that chlorine level? I am trying to figure this out I want to prevent using or having to add CYA at all- and not have to have the problem of draining the pool etc if I add too much. What do you guys recommend? There can be a few scenarios I guess
1) Use the chlorine tablets WITH CYA stabilizer already in them and use REGULAR shock(NOT the GREENOUT version shock-which is super chlorinated)
2) use the GREENOUT ONLY with much FEWER chlorine tablets-(BUT which type- the combo tabs or the NON stabilized chlorine tablets.
Over the last few years- my pool has been CRYSTAL clear- by using JUST GREENOUT and chlorine tablets so if that is the case why should I change? I very rarely have had to use a clarifier to make the pool clear except when I open the pool at the beginning of the season. If I use the GREENOUT shock- what version of chlorine tablets would you suggest I use?

And can I save money by using Clorox bleach as my shock instead of the commercial bag shocks- since this has NO algicide in it like GREENOUT or POWER SHOCK(and how much would be needed for a 15 ' x 24' oval above ground pool)- which one site said I should not use regularly(only at closing of pool?) So many questions?

I guess that is all I have at this point- I will attach some pics so you can see my pol (before and after opening to see how it looks. Thank you
I tried to attach more pics BUT it said the attachment was too large-(how do I fix that?) So this pic is of the NON stabilized chlorine tabs in my floating chlorinator and the other no pic is called SLOW Tbas- which one should I use REGULARLY?

Thanks to all

Attachments

  • IMG_6020[1].JPG
    IMG_6020[1].JPG
    333 KB · Views: 156
  • Like
Reactions: Sarah and Nate

Opening day 2023

I looks like tonight is going to be our opening day. We usually open Memorial Day weekend but we want to get the pool ready, get my bearings with the SWG, put the solar cover on and hopefully have somewhat warmer water to go in.

I opened the winter cover to put the hose in and the water looked to be crystal clear - THANKS TFP!!👍👍

I was concerned about the Aquador holding through the winter (first time using this) but I struggled to get it off this morning so my concern was stupid! 😅

Got a couple of new pool tools so we should be all set. Hopefully no leaks on all the unions and everything goes smoothly!

Replace your own automatic pool cover.

This is a post that I hope will help others in the forum.

I have an undermount encapsulated Coverstar track system.

My Coverstar automatic cover fabric was dying after 9 years ( not a bad run for this kind of cover). As many of you know anything Coverstar does for you tends to be incredibly expensive. I watched a few years ago when one of their techs changed out a broken rope ( $800 thank you!). The hardest part was removing the plastic molding the secures the track into it's encapsulation.

To replace my cover Coverstar gave me a bid that I just couldn't live with. I found a vendor that would sell to me online. He could have sold me a Coverstar or PCS replacement cover . PCS was just easier and could ship to me directly. Coverstar would not. So I bought a PCS cover.

Understanding the rope system, replacing the cover was remarkably easy as long as you have some basic handyman skills. So far (about 2 months in) The new cover is working well, it is better bonded than what Coverstar did 9 years ago. PCS is 1 mil thinner than Coverstar, but actually glides more easily. (I have a kidney pool inside a rectangular deck). Both claim to have welded seems which PCS reinforces with stitching. Whichever company you choose doing the install yourself may save you 50% or more. It sure did in my case.

I was terrified to spend the money with an online vendor, but the vendor was very attentive and I got exactly what I paid for. I don't know if I should put his URL here so if you want the name of the company you are welcome to e-mail me privately through TFP.

Some Helpful tips:

There are Coverstar Installation manuals and parts manuals online-- include PDF in your search and you can save and download these files.
I found them helpful in planning the install.

I used this opportunity to replace many of the ball bearings in the pulley system after 9 years and I also replaced my Plastic encapsulation trim.
I replaced my sliders as well.

If you remove your inner tracks be sure the outer track is clean and be sure the inner track goes all the way in and up. The encapsulation shim will fit in much more easily that way ( the shim locks the inner and outer track into position).

The plastic encapsulation trim can be difficult to pry out if the tracks are tight. This go round I left tabs beyond the track to grasp onto. I find a vice grip helpful to pull them out.

PCS cover comes with built in ropes, The cover comes with sliders too, so you don't need to order another set. If your ropes and pulleys are intact you can use the old ropes to pull through the new ropes without having to remove your encapsulated track.

If the PCS ropes break you would just buy a set of Coverstar replacement ropes (which you can do online) and attach them to your sliders as coverstar does. I didn't understand that PCS covers came with ropes and sliders so I purchased these additionally but will save them for future repairs.

With both covers you have to make holes at the reinforced front corners to attach the cover to the sliders. My holes we a little far from the edge so the sliders were tight in the track. Solved this by making the holes a little bigger. Next time (hopefully in a decade) I will drill a bit closer to the edge.

The leading aluminum edge screws to the sliders from below. I found a shallow right angle Phillips screwdriver that made this easy.

The cover is intentionally wider than the tracks to allow some necessary laxity. On the take up roll Coverstar pleats the cover to allow for this extra width. Because my pool is a kidney within a rectangular cover at the take up end of the cover this created folds in the material which eventually created leaks through the fabric. In my own install rather than pleats I took up the fabric between screws on the take up reel much more slowly. As a result there are no major folds to fail now. This is probably not an issue for you if you have a rectangular pool and cover.

My old cover was not bonded to the leading edge or take up reel. I did bond it (just a couple of extra screws through a metal tape) in my install and properly bonded the tracks as well. Its all in the Coverstar install guide so I don't know why they didn't do it on my original cover install.

Coverstar wanted $100 to dispose of my old cover. I cut it into strips and squares and my trash guys took it away for nothing !

Anyhow,

You clearly need some knowledge about your own system if this post is to be of help, but I hope it saves someone else a lot of money. It sure did for me.

If you have questions feel free to contact me.

DIY Pool Caddy

Just bought a new Active 20 from Marina Pool and Spa and decided to build my own caddy versus paying $150+


1661897028484.png


20220830_164637.jpg


My analysis...

1) Don't need wheels and the $150 Dolphin's caddy's wheels are not that robust anyways
2) Don't want to leave power supply outside based on how many posts I've read about them going bad from heat/sun (but you could build something for this if desired)
3) Want to store the robot in the standard upright position so need solution that protects tracks and rollers from being compressed
4) Want to hang my cord neatly above robot
5) Will use 18" weber kettle grill cover for under $20 on Amazon on post Labor Day sale for added protection
6) Location - I have a dedicated spot for the cleaner under my covered patio - but this stand could go anywhere

I followed the idea of the Dolphin Caddy that uses 4 posts to raise / support the robot so the rollers and tracks dont touch the ground

Made with 3/4 PVC
* Used sponge that I placed (compressed) into PVC opening to cushion 4 support posts (may upgrade if needed to rubber cap)
* The lower back side support is designed as a guide for placing in the robot...when you back up against it, the robot is properly aligned.

Cost about $25 plus cover

Time about 60 minutes

Attachments

  • 20220830_164741.jpg
    20220830_164741.jpg
    792.2 KB · Views: 141
  • 20220830_164626.jpg
    20220830_164626.jpg
    778.8 KB · Views: 134

Solar Skimmer Robot Modifications

I know there are a lot of posts about solar skimmer robots, and specifically about the Betta, but wanted to post this about some modifications I did as to not take over anyone’s own threads on their experiences.

I had read a lot about the different solar skimmers, but these two threads in particular, were helpful to me in finally pulling the trigger on a Betta2 solar robot skimmer.

@Orion7319 review
Instapark Betta review | Trouble Free Pool

@Katodude review
Battle of the Solar Skimmers: Ariel vs Betta 2 Bake off!!! | Trouble Free Pool

For me, the biggest driver on the decision was my single skimmer in my pool is in the wrong spot, and the way the plumbing all comes together, I just don’t get enough skimming on my pool to always be clean. If I had joined TFP before my pool was going to be built, I would have known a lot about prevailing winds, two skimmers, proper return locations, etc., but alas, here I am. Trying to position the return eyeballs, a “vortex” type skimmer basket, all left debris floating on top that I manually had to scoop out. I do have an auto cover, so maybe not as much debris as I could, but more than I wanted. Some of my “pool friends” could not accuse me of being “lazy” because I don’t have to grab the net anymore, but I’m all for working smarter and not harder. I already have a pool robot, so I don’t manually vacuum the pool, why not introduce another robot to make maintenance even easier?

So on to Betta’s website, bought the Betta2 and the 3 year warranty (thanks again for all the advice on that), and $589 and 2 days later, it arrives at home.

It’s still early, and I can’t really say anything more about the performance of the robot than the other the two posts I linked above already have, but I have been happy with the results. We usually close the cover at night so the robot comes out, but when it gets as hot as it has been here lately, we keep it open to cool down a little overnight, and this morning the new robot was moving right along and had caught plenty of bugs over night.
Betta Mod8.jpg

Wanted to post a little bit of modification I did, and maybe can help others who come across the issues that may happen.

I have a sun shelf in the shallow end, so was already prepared to need to lower the legs. I had read in @Katodude thread about some modifications to the legs, and I think it was @Dirk who mentioned the plastic pieces, so I went right in.

As a lucky mistake, I didn’t even think, or remember, there were front and back legs that could extend, but knew without an extension, my new robot was going to get beached. So I saw the first legs, pulled them out, and started modifying them. These happen to be the back, and again, just by mistake, happen to be for me, exactly what was needed. With this modification, the new Betta hums right along and never gets stuck.

Found these at Home Depot, looked just like what I needed...
Betta Mod1.jpg
Really, the plastic pieces is what I was interested in, about $4, and some 1/4-20 nylon bolts and nuts

I took some schears, and trimmed the legs so the plastic extensions could sit flush against them. Not the cleanest cut, but will work just fine.
Betta Mod4.jpg

Drilled some holes in the legs, and attached the extensions....
Betta Mod2.jpg

Slid the legs back into the robot and away she goes...
Betta Mod3.jpg

I looked back at the other threads and realized later I probably could have done this to the front legs, and did swap them to the front, but it seems to bounce around a but more. Keeping my extensions in the back seem to work best for my pool, and this girl just floats around all day, and hasnt got stuck on anything once.

The kids named her "EVE-A" as our other robot is names WALL-E ;). Just aquic shot of Wall-E standing by while EVE-A does her thing.
Betta Mod5.jpg

The only thing that seemed to bother me at first, was EVE-A seemed to always want to hang around the steps. Like she knew she had to get up to the top. Seemed like every time I went out there, there she was and was missing the rest of the pool.
Betta Mod6.jpg

However, maybe that was just timing, becasuse when ever I did pull her out to clean the basket, it was full of crud, and the water looked clear, so go do your thing, I'll be sitting in the chairs with a cold one, admiring the TFP!

DIY Pool automation

Work in progress. I'll try to update this first post with progress / details, hopefully I can get this done in a way that's as plug-and-play as possible :)

# DYI Option list
## Hardware
### General
- cmc's v2 project
- katodude's project

### Components
- Pump Control
- - Waveshare ETH to RS485 Converter Adapter RS485 TO ETH (B) - Waveshare Wiki - good choice.
- - Waveshare USB to RS485 Converter Adapter Original FT232RL (https://www.amazon.com/gp/product/B081MB6PN2)
- - - yellow is +, green is - (or blue is for "B").

## Software
### Projects
- nodejs-poolController (working)
- raspipool project!

### General links
- CMC's Node-RED flows
- CMC's Youtube videos: Hardware / Node-RED programming
- Alternative Pool Automation and Sensor/Chemical Control and Integration

New EVO 614i Robot Pool Cleaner Review

About a month ago I needed a new robot pool cleaner and I contacted Margaret at Marina Pool and Spa. My initial goal was to buy another S200 "style" robot as I have been happy with them so far.

Margaret suggested that I might want to look at a new line of robot cleaners that Marina is now carrying, the Aqua Products EVO. I was intrigued and so I opted for the EVO instead of the Dolphin robot. I have been using the EVO for about a month now and here are my initial thoughts...


The New Robot in Town

I recently had the opportunity to use an AQUA Products EVO 614i Robot Cleaner. It looks like they are under the Zodiac Pool system brand.

I have been a faithful Dolphin robot user from many years, but I thought I’d give the EVO a chance to show me what it’s got.


Pic 1.jpg

On the surface it appears that both the EVO and the Dolphin S200 are about equally matched. In this initial review, I point out some of the notable differences. Not really a good and bad situation, just where I noticed different engineering.

1. Dual Drive motors. The EVO has a left and right drive motor. These drive motors can run forward or reverse. This means the EVO can spin on a dime, when the two motors are going in opposite directions. You notice this instantly when the robot makes its first turn.

2. Two Active Brushes. The EVO has Dual active brushes, while the Dolphin has one active brush.

3. Large Brushes with wear indicators. The EVO’s brushes are larger and appear to be much more robust than the ones that the Dolphin uses. Because there are two drive motors the brushes are split between the left and right sides. The brushes in the front are the same size as the brushes in the back. The Dolphin has a smaller brush in the back.

pic 2.jpg

4. Filter basket. The EVO’s filter basket is about half the size of the Dolphin basket. It has a one-piece screen-like filter vs. the Dolphin which has a 4-piece pleated filter. I initially thought this would be an issue, as I have always used the pleated Dolphin filters. But, after many cleaning cycles, I’m beginning to like the screen filter better. I think my dislike of the screen filters is because I used them on the Dolphin and they lasted about a month before they got holes in the them and became useless. As much as I like the Dolphin’s pleated filters, the EVO’s screen filter was much easier to clean. Although the Dolphin has a much larger basket, I am not sure it matters as I doubt the Dolphin can fill the basket due to its inlet design.

pic 3.jpg

5. Water Inlet Differences. The Dolphin sucks up debris into the center of their basket, through an open-ended cloth bag. The bag is to prevent the debris from leaking back into the pool when you pull the robot out of the water. It certainly helps contain the debris, but it does not stop everything. It has a negative side in that it can get clogged with large debris and then nothing can get sucked up into the basket. The EVO does it differently. It sucks up the debris through a tube and into the top of the robot and then drops the debris into the basket. When you pull the EVO out of the water, none of the debris go back into the pool.


pic 5.jpg


pic 7.jpg

6. Filter Area Design. The EVO has an almost water-tight area with the suction motor and impeller along with the filter basket. Not sure if this a plus or not. It does make the EVO harder to sink as it acts almost like a boat. You lower it into the water with the rear brushes pointing down. Where you can just throw the Dolphin in the pool, and it just sinks on its own. Edit.. To be clear the EVO sinks on its own, it just take a little longer than the Dolphin.

7. The Power Cord. The cord on the EVO is much larger in diameter and stiffer than the Dolphin’s cord. I had great hopes this would mean that the cord would not tangle. I was wrong. I have not had it long enough to know what will happen as it gets broken in, but running the EVO several times in a row, without removing it from the pool, induced the same basic tangle that I have seen in all my Dolphin robots. Edit. If I run the robot, like I normally do, and clean it after every run, the cable does not tangle.


pic 8.jpg

8. The Swivel. The EVO has a much more robust looking swivel compared to the Dolphin. The EVO combines the cable float and the swivel in one device. Neither swivel seems to swivel enough to keep the cable from tangling.

pic 9.jpg

9. The Power Supply Connector. The only thing on the EVO that appears a little out of place and rather cheap is the connector on the power supply end of the cable. It just plugs into the Power Supply with two little snaps. Maybe I’m just used to military cannon plug style connectors, but I like the Dolphin’s connector better. The EVO’s connector does appear that it could be replaced easier, while the Dolphin is more molded in place and does not look to be easily replaceable. Not sure I have ever seen bad one.

pic 10.jpg

10. DIY Repair. I have some experience with the assembly and disassembly of the S200 style Dolphins and it is very easy. At first glance I don’t see how to disassemble the EVO or if repair parts are even available. Not something I plan to investigate until the EVO is out of warranty.

11. Water Line Cleaning. When cleaning the water line tile, the Dolphin moves sideway because a gate turns and causes water to shoot out of a vent on the sides of the plastic housing. This forces the robot to move along the tile line for about 2 or 3 feet at a time. The EVO does not have any directional vents, but does move along the tile line. It appears to me that the robot floats at a slight angle and while the brushes clean the tile line, they also cause the robot to move along the tile line.

12. The Power Supply. The EVO’s power supply allows you to select either floor only, or floors and walls/tile line. The cycle time is 1.5 hours for floor only and 2.5 hours for everything. Both the EVO and Dolphin power supplies are water resistance. The EVO’s power supply has a Power Light that is on anytime the power supply is plugged into AC power. You would assume when you pushed the Start/Stop button that it would light up, but it does not. The Power light flashes once when you push the Start button. I find that odd as it is hard to tell if the Robot is on or off. If you have the EVO 614i, then the Power supply has a Wi-Fi button. Edit.. It appears the idea is to use the app to start or stop the robot.. It works fine from the power supply once you understand the start stop button does not light up.

pic 11.jpg

13. Wi-Fi Control. The EVO 604 and 614i are the same basic robot, but the 614i has Wi- Fi control. Not that it actually controls much. I am not sure what the App is for other than when you sign up for the iAquaLink app you need to give them just about everything including location of any birth marks. Quite invasive for what you get. The plus side is that it came right on line and connected once I entered the 80 pages of personal info. The app lets you change the cleaning mode from floors to floors and walls, and lets you start or stop the robot, but it does not allow you to ‘drive’ the robot around. It appears the drive mode is an option for the more expensive models. The app displays a big spinning clock showing how much time is left in the cleaning cycle. I pushed stop and it stopped. I pushed start and it did not return to work, it just started over. It does give you some info on the robot itself, like how may total hours run, S/N, F/W installed and other such info. I don’t see the value in what the app does, but it came with the unit. Edit... I'm told that the app for the 614i will be updated in the next few weeks to include the ability to drive the robot and to make it drive itself to the surface at a wall so it is easy to remove from the pool. I guess time will tell if this happens or not.

14. Warranty... Both the EVO and the Dolphin have a Two-year warranty.

15. Unknow life expectancy. Dolphin 3 to 5 years. Edit. This is key in my mind, but we won't know how reliably the EVO is for several years...

16. Main Drain Hang Ups. So far, I have run the EVO for about 50 hours and it has never hung up on the main drain. The Dolphin would hang up on the main drain about 10% of the time. I believe that because of the dual drive motors, that the EVO will not have this issue, but time will tell.

17. I did not find anything that would keep me from buying this unit again. See #18

18. I assumed you could run the unit on weekly schedule, but I now realize that is not an option. For me that is not an issue as I normally only use the robot two or three times a week, but it will not work for a lot of pool owners. You’d think it would be an easy App fix. I also do not see where you can control it from an automated electrical outlet. Edit. The app is supposed to be update (automatically) but my understanding is that the timer option is not part of this update. This makes no sense to me, but we will see.

Thanks,

Jim R.

Attachments

  • pic 4.jpg
    pic 4.jpg
    377.9 KB · Views: 490

Filter