Small BB size Hole in 18' AG metal pool wall

Hello,
I am new to taking care of this 5yr old 18' round above ground pool that was installed partially on a hill in our backyard. They cut into the slope and leveled the area. The pool was neglected this summer by my spouse and I had no idea what I was getting into when I said I was going to get it back to the blue color before I closed it for the winter. If this pool is fixable, I will be the one taking care of it as my spouse lost interest in it. I proceeded to drain it last week when we had 60's-70's degree weather in GA. I had no idea that it could hurt the vinyl liner. I refilled it 2" and went to pool store where they sold me a bunch of stuff that I didn't need. I even bought a patch kit as I thought the water level had went down over the summer. I didn't think I had a leak. I even found what felt like a small rock under the liner on the bottom (opposite side of wall with hole in it now) and patched that. I don't think the rock had went through as the 2" water was still there when I got back from store with the kit and other stuff. The kit had a dye tester and it wasn't leaking so I proceeded to fill the pool back up. I filled the pool within the same day so it wasn't empty long.
I did get the pool blue again but I have found a small hole in the metal wall about 2 inches from the bottom of the pool now. I'm so frustrated :cry: 
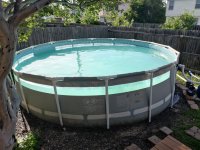
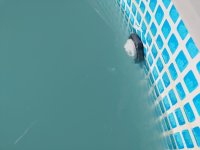
that I don't know what to do. It has increased from a pin size to a BB size in the past week. There is a soft spot in the metal wall about golf ball size around this hole. The water has went down about 3 inches since last week. Our temps have went back down this week in GA so I haven't got in the pool to patch the hole in the liner. I believe that the hole is directly in same spot as the hole in metal wall as I can stop the water coming out the metal wall if I put the plastic net on opposite side of wall flush with the liner. It is 33 degrees here right now and I am not looking forward to getting into the pool to stop this leak. I bought Boxer patch kit and the Dye leak test kit. I do have a dive suit but I dislike cold temps. Can I drain this pool a little so that I'm not jumping in 4 foot of ice cold water? Please advice of how to fix my leaking pool. What is my first step? Stopping the leak in liner? How do I know if the leak was from the hole in the metal wall or just a tear in liner? I read a similar post and got some ideas as to what could have happened. I just want to fix this properly and not make anything worse.
Thank you for any suggestions,
Tina
  • Like
Reactions: KeithP

Time to clean the HT!

I've been using liquid chlorine in my tub very successfully since I purchased it. I have to say this tub is the best investment I've ever made. Every day that I come home from work, I get in it to help with the 45 years of aches and pains. There were only a handful of times that I did not use it during the winter months because it was so bitter cold outside. I absolutely love using it mostly in the colder months at 102°. I decided to turn the temp down to 95-97° for summer time use. I may turn it down a bit more when it gets really hot. I didn't use it as much my first summer. Needless to say, someone else loves it too! :mrgreen: Im still so happy I did not put it down at the pool! LOL 20230527_201548.jpg20230506_194457.jpg20230619_084058.jpg

TFP Clear (with a twist)

Good morning all, I suspect lots of new members this weekend with the unofficial kick off of summer, especially for those of us in the North.

I soft opened my pool last weekend, pulled cover off, relubed all the gaskets got plumbing hooked up to get circulation going, water clear, tested FC at 10 still - 11th year in a row opening with TFP methods, clear water and plenty of FC.

A week later though my water just doesn't quite have TFP sparkle, but it's definitely clear. (I just tossed in the Dolphin to get good pic, I don't typically run it with lid open!)

20230526_193835.jpg

That's about 4 feet of water. Maybe my eyes are playing tricks on me. I have a "TFP clear" test which is sit underwater w back to the wall, mask on and I should be able to clearly see the details of the stone pattern on the other side. Did that test (after a jog, cold water!) and still after a week of circulation I wasn't seeing the stone pattern 30 feet away.

Well, it's only been a week, ducks have been making daily visits... but still. FC consumption has been only 1-2 daily the past week and it's never fallen below 6 (opened to cya of 40, now raised to 60ish) so nothing going on there.

Maybe my cartridge filter is wearing out, or maybe I accidentally put in the old back up that I've kept around for 8 years without ever using? Filter pressure hasn't moved much....

Open it up and.... mystery solved! Mind you, I lubed the O ring and lubed the lock ring (amazing hack I read here many years ago, I used to have to use a rubber mallet to loosen it) and was very deliberate in checking all the connections/unions, and yet somehow did not put the filter cartridge in!

20230526_193240.jpg

So after a week with no filter media my pool was still objectively clear using TFP methods! Good reminder for me to make a donation.

Running pump on high so should have my TFP sparkle back in a day or so.

Happy Memorial Day weekend TFP!

Paul

Polaris P9550 review...

I bought this on amazon prime from amazon for $1200 shipped to try it out. Ran it for 3 hours.

Pros: comes with caddy and a remote. Cleans well enough. Navigates the pool fairly well. Great at climbing walls and cleaning water line. Lift feature. Very easy to empty and clean canister. Ready to roll out of the box.

Cons: filter is not fine enough. Need to order silt filter for $60. Left some spots untouched. Rear exhaust lifts debris from the bottom. Cord tangled even with the swivel. Remote should have buttons for easier use. Does not climb stairs.
100717

100716
  • Like
Reactions: DjEclipse

Pentair QuickTouch II wireless remote losing connection.

Posting this to help others using the Pentair QuickTouch II 4-function remote for their automation system and finding that the remote seems to lose connection to the powercenter on occasion. Symptoms are a remote that lights on button press but won't switch on features and functions even though the powercenter manual controls work fine.

The first time this happened was during a rainstorm with a quick power outage that had me believing something reset the powercenter, but last weekend it happened while out at the poolside, working one minute and then remote stopped working at random. I called our pool builder who walked me through the Powercenter comm link reset process, which worked handily. This last time took a bit more troubleshooting, but got the job done. Full process steps listed below, and I hope it saves a call-out for someone using this equipment:

1- at the powercenter is a receiver (looks like a tan remora screwed to a nearby surface) pull up on the remoras "tail" and it will remove the rain cover. Now you can see the circuitboard housing the receiver electronics. On the lower left corner is a tiny blue or white switch which when pushed will reset the receiver encoding to listen for a transmitter. Push that button once, and a small red LED above it will flash three times, signaling that it's now listening. Now, push BOTH bottom buttons on your QuickTouch remote which correspond to Function 4 (both ON and OFF buttons) at the same time and hold them until the remote activation light on the remote flashes three times. Now release the buttons, and push any Function ON. If the function switches on, you're done. If nothing changed, go to step 2.

2- at the bottom of the circuitboard is a wiring block which has the command control wires screwed into it. This block removes if you pull straight out. Pull the wiring block free from the circuitboard and count to 10 (this kills power to the receiver). Plug it back in and perform Step 1, above. If no-go, try Step 3, below.

3- unplug the wiring block, and with it unplugged, enter the powercenter Menu - Settings - QuickTouch - Reset Wireless Address, and press the right arrow. This will kill the current address in use, and setup the receiver to listen for a new one. Plug in the wireblock, press the blue or white button, and finish up Step 1, from above. This fixed my connection issue, for now, anyway.

Caveat: if your system works today - DONT MESS WITH IT! These reset steps are a configuration attempt you can do yourself if you lose wireless connectivity and don't want to call a pool tech to work on it (likely for a fee). If they work for you, great! If not, it didn't break anything because it wasn't working anyway, and I guess your next call will be to your pool builder or pool tech...

If anyone has any thoughts on how the QuickTouch II interfaces with the powercenter, I'm all ears. I suspect it's some variant of 802.11x based on the antennas and ties to other automation apps. I'm hoping it's just a fluke that this happened twice in as many months, and hoping nobody's hacking into my wireless network and killing my connections.
  • Like
Reactions: PAVS342001

Pool & Spa Renovations and Resurfacing Journal

Hey folks,

I moved to this house last July and became a first-time pool owner with zero prior pool knowledge. I soon found this site and learned a vast amount of knowledge about pools, their equipment, and their maintenance. I maintain my pool using the Taylor kit to TFP standards and have never had any problems after doing the initial shock to remove the green algae after moving in.

Armed with many hours of new research and learning, I decided to redo the entire pad.

It was initially in very bad shape. Pump was on its’ last stride, heater did not work at all, blower was being held up by the pvc pipe, the filter was so full of algae that there was barely any flow, and the electrical was badly designed and in terrible shape.
IMG_0626.jpegIMG_0530.jpeg
Did not think back then to take better photos.

I replaced everything on a new pad and started working on a new shed to enclose the pad.
IMG_0764.jpegIMG_0761.jpegIMG_0770.jpegIMG_0776.jpeg

A few months after, I bought a heater and after learning about trichlor and CYA, I got rid of the Tablet feeder and chose to go with a SWCG.

IMG_2072.jpeg

Everything has been perfect ever since which brings me to now. The pool was built with the house in the late 1970s and the plaster has been redone once in the early 2000s so it is about two decades old. I have decided to have it resurfaced again but instead of smooth plaster, we are going with NPT StoneScapes MiniPebble in either Aqua Blue or Aqua White (and recommendations?). We are also changing the tile and the coping.

This thread will serve as a journal of the project and for comments and discussions.
  • Like
Reactions: MCMC and Newdude

Motel - New Pool!

I have a friend that works as a project manager for a roofing company. He came across this one... I asked him for the pic as I thought you all would enjoy it.

Motel - Freshly installed new pool! (Joking of course)
IMG_6142.jpeg

Yes, it is on the roof. Yes, I know, you can't do that legally (well advertise it as a pool for public use, at least I don't think?)

Edit: Proof of the roof thing:
satimage.png

PM me if you need a roofer in the area. Preferably without a pool on it.

Help! Problem with new filter after backwash

So not only did the oddball installer guy not fit the pressure gauge to our new Triton TR60 filter (per my previous thread), but I don't think he backwashed it initially either (and a fair amount of debris was evidently in the pipes and went into the filter) and now (a week after the install) I've tried to do a backwash and have a bunch of problems.

Firstly the filter has drained of water quite a bit, not sure if that's normal? But more importantly now it's back on Filtration (following 8 mins backwash and 1 min rinse), it just isn't refilling with water; even after about 20 mins.

The pump basket is full of water with no air in there. The air bleed in the top of the filter, if I open it little, it seems like there's a lot of pressure/air wants to release.

Do i need to release that air/depressurise, or if I run it longer willnit eventually come good? The old filter didn't have a manual air bleed and although it would drop water level a bit during backwash, it came good (full of water) very quickly afterwards.

Not sure what I'm doing wrong, or maybe whether the shady installer guy has done something shady that means it's not working as it should?

I've attached a photo of the general setup.

Attachments

  • IMG_5357.jpeg
    IMG_5357.jpeg
    444.3 KB · Views: 39
  • Like
Reactions: Furiousss

ICF 20'x40' Owner Built

Im a serious DIYer and I'm in the planning phase of building a 20'x40' 20x44 icf pool with autocover and SWCG. Going from 4' to 8' 3.5' to 8.5' depth with diving board. Trying to keep budget around 50k. Probably closer to 65k now at a minimum. Rebar and concrete are more expensive then I thought.

A couple years ago I built a 30x35 natural swimming pool / pond with upflow bog filter but its been tough to keep the string algae at bay and the wife would prefer a pool.

Design
Working with Pool and Spa Designs out of Scottsdale to help with some of the plans and parts lists and possible wholesale discounts although I have a wholesale contractor connection already.

Why ICF
I'm going with ICF for a few reasons: its DIY'able, insulation is a bonus, I can use my existing pond hole and not worry about it being overdug on the sides. I've poured lots of concrete over the years including flatwork and foundations. Planning on a monolithic pour using fab-form products. See icfguru.com and some of there builds. Challenge is the city requires stamped engineering and I'm struggling to find an engineer willing to help with an ICF pool.

Utilities
I already have a sub panel and power run for my pond so electric is ready to go but would need a long gas run if I want a NG Pool heater.

Heat
I'm thinking a pentair cool / heat pump will be the best route as it will save on utilities and the cost of running a gas line from the meter. (I already have a Pentair VSP). Not sure how effective a heat pump is though in Northern Utah. Summers get hot and the cooling feature would be nice lots of people in the area struggle to keep there pool cool in the summer. I realize i may not be able to heat much in the early spring and late fall. Autocover should help keep the heat in. Going with a gas heating for now.

Finish
I'm still contemplating the finish, likely will go with vinyl but I'm concerned about kids putting a hole in it. I will want to put something over the ICF to prevent denting like a base coat. I may splurge and go for plaster or pebbletec. If I go with a liner I think I will have budget for a separate spa.

Filter
I'm thinking a large cartridge filter will work best for me. I'm not sure what to do with salty back flow water if I were cleaning a sand filter and being able to use the hose to clean off the cartridge filter seams simple.

Other ideas
I plan on using a channel drain to reduce robot cleaner getting stuck on the drain.

Next Steps
Find someone willing to do the engineering (waiting on quotes) Engineering stamped and in hand
Get ICF and Fab-form materials Done
Get building permit from the city (summitted permit)
Drain pond and remove liner done
Decide on finish (pebblesheen if budget allows)
order equipment (autocover, diving board,)
Purchase pvc pipe
Purchase rebar
Excavate hole for pool Done
Geotech inspection Done
Deliver gravel for base of concrete (ordered arriving 6/17, they will have a "rock shooter" to spread the rock out)
Install floor insulation
Form up ICF
Brace ICF
Stub plumbing in ICF
Form equipment pad
Pour concrete
Gas line to equipment pad
Electric line to equipment pad
Trench for plumbing

Equipment (updated based on suggestions)
Pump - Pentair 011018 IntelliFlo 3hp VSP (own)
SWCG and Automation - intellicenter w/ Pentair IC60 (purchased)
Filter - Pentair EC-160332 Clean and Clear Plus 520 Cartridge (purchased)
Heater - Pentair 400K BTU (purchased)
Lights - Pentair MicroBrite's x 4 (purchased)
  • Like
Reactions: PoolTime2022

Testing salt with Taylor K-1766

My first time using this kit. I’ve never added salt before to the pool. I’m just sampling it prior to converting to a SWCG. I’ve learned here that my pool would probably have a measurable amount of salt even though I’ve never dumped any in.
The color change was pretty quick between drop #7 and drop #8.
At the 8th drop it changed from pale milky cloud to this salmon color instantly.
Does it sound reasonable that I already at 1600 ppm?
Here are pics at drop #7 and #8.
251ED18E-367D-46C1-ABD1-CEFC9B5F6FA7.jpeg

835E8CC2-D8D9-45C8-9B53-1066D17C2375.jpeg
  • Like
Reactions: wireform

Raypak R5350TI-E heat pump melting one of the spade connectors between the relay (with the incoming 240V) and the capacitor.

Strange question but it's the second time that one of the wires that's between the relay (with the incoming 240V from the house) and the main capacitor (I think it's a capacitor) melts / explodes at the spade connector (it's a thick blue wire). Just so it's clear, this is a wire that comes in the unit from the factory, not the incoming 240V power that's added and used to supply electricity. Last time, I just replaced the spade connector and it was working until now but has failed again a few days ago.
Has anyone experienced this? Should I maybe replace the wire with a heavier gauge one? (Can't do much with the spade connector since it's it's on the relay and on the capacitor). Any other suggestions?

The location.jpg picture shows you where they connect to the relay (both attach behind the red wire (which is the incoming power)) and the one that melts goes down to the top left of the capacitor. The wire.jpg picture shows the wire and the sheilding basically melted and stuck to the wire that's next to it.

Let us know. Thanks, Mike

Attachments

  • wire.jpg
    wire.jpg
    232 KB · Views: 10
  • location.jpg
    location.jpg
    388.7 KB · Views: 11
  • Wow
Reactions: JamesW

Phosphates Effect on SWG % setting?

Hi all,
This post might be more appropriate on the Deep End section, but I was curious so starting here :).

I test my pool water daily (sometimes twice a day lol) and it should all be available in my signature. I'm pretty diligent with most tests. FC and PH daily (since i know my ph rises quickly). Calcium and CYA less often. TA somewhere in between. (I Know my TA is a smidge high, I'm working on it, I have high TA in my fill water, and the cool nights + heater + lack of rain in the NE has lead to lots of re-filling lately).

I rarely test CC but when I do its with the 10ml measure, and if theres even a hint of pink I record 0.5 -- I doubt my CC is ever really that high, because I really have to strain to make out some pink in there. So if you see 0.5cc on a few of my test results, keep this in mind.

Went to <The store that shall not be named> to pick up some supplies today, and for giggles brought some water. They were surprisingly close on CYA and TA and PH, but they were lower on FC/CH than my taylor kit. I trust the taylor, not worried there. Was also happy to see 0.0 Iron and 0.2 copper (Which is the same levels it was at when I first filled my pool last year).

They also reported 4000 for phosphates. I know the general advice here is not to worry about them, and gather that if you're about 2500 you can treat *if you want* but its not necessary. I also know we don't *generally* trust "their" machines :). Is it worth investing in the taylor kit for phosphate ? Or should I just not waste my time?

Since i always keep my FC on the high end (Aim for 6-7ish) I've never had anything BUT crystal clear water (except this past weekend when we had a pool party with about 30 kids, it was cloudy after that and FC read 2.0, but I added some liquid chlorine to boost my FC back to 7 and it cleared up in a day).

I generally tweak my SWG % a few times a week as the levels rise and fall. I've found water temperature to have a significant impact on chlorine levels. And obviously bather load (We have a lots of kids over often).

So my question is: with Phosphates THAT high is it having *any* effect on my SWG output? For example, if I were to bring Phosphates down to 0, would I *in theory* be able to lower my SWG % and give my cell a little longer life? Assuming I maintain my FC where it belongs relative to my CYA? Or phrased another way -- do super high phosphates have any effect on the rate at which FC is consumed, assuming theres no noticable algae outbreak and FC is properly maintained and CC is 0?

I know this is a "loaded question" around here, so apologies in advance. I searched on the topic and didn't see anything that specifically answered what I was getting at :).
  • Like
Reactions: Newdude

Denver NC Build - Summer 23

Hello Everyone,

Really happy I found this community!! I'm a total newb but I have two young kids that love to swim and we've always wanted a pool. We spent a few months interviewing PBs and settled on a local company here North of Charlotte.

Basic specs:
16x32 free form with spa
18" raised rear beam across backside with 2 sheer decents
SWG

I'll be posting pics and questions as the build progresses!! Already read most of the pool school articles so I think I understand the basics at this point.

Here are a few pics of design. I'm trying to figure out how to reduce size of my other images to share

prabucki andrew_001.jpegprabucki andrew_004.jpeg
  • Like
Reactions: Supersix

More iAutomation challenges - using OneTouch effectively

I swear I'm a tech-savvy(ish) adult who is good at research and solving problems, but I continue to butt my head up against the iAqualink controls.

I have programmed the schedule I want - if I just let the schedule run, everything is great. But I have kids and the spa and pool get used at various times, so I'm trying to take advantage of OneTouch to let everyone have some "fun" when they want to. Right now I have two simple(?) challenges
1. I cannot get Spillover to work via OneTouch. I have SpillOver configured properly via the dip switches and it works: I have SpillOver in my daily schedule and it turns on properly, and if I select SpillOver on the Home menu that works, too. But I've tried configuring a OneTouch button every which way and it won't work. I see the Spillover device (if that's the right word) and I have it set to 'on' and I've tried it with various combinations of setting "filter pump" and "spa" both on and off for that OneTouch button, but while the button does some of what I've programmed, it never shows "Spillover" as having been activated, and it never actually works.
2. For the OneTouch buttons that are working (for example, I created a "My Spa" which turns on the spa, the jets, the lights and the heater - works just fine), when I turn that button Off I'd like things to go back to the schedule (that is, go back to whatever settings are set for "right now" in the schedule) but that doesn't seem to work. It seems like turning a OneTouch "off" will turn "off" all of the things that were previously on, and I also can't quite figure out what controls the VSP speed that the pump returns to when I turn a OneTouch off.

At a high level, I'm trying to figure out the best way to enable reasonably-responsible (but not completely responsible) teenagers to make use of the spa, heater, and spillover when they want to, without running the risk of them mucking things up. Eventually I'll enable the password/lockout options and limit what they can actually press, but right now the OneTouch buttons aren't modeling the behavior I want them to model when touched, and so it won't work for the kids. Is there a better approach?

Thanks - I very much appreciate the support this community has already shown!
jtf
  • Like
Reactions: WGpoolnewb

CYA Testing Update

I thought I would give those who are interested an update on some testing that I have been doing regarding CYA levels and chlorine.

First a summary of the testing that I did in this thread.

- Running my spa with the SWG at CYA levels from 45-80 ppm showed no change in chlorine production.
- Extinction rates seemed to improve better than what theory predicted for higher CYA levels.
- Unfortunately, I could not get consistent results from some of the extinction tests that I did.

So after the testing I did early in the summer, I lost exclusive use of the pool and spa since the kids were off from school :) .

About 3 weeks ago, I decided to raise the CYA level in the pool since at least some of the testing showed an improvement with higher CYA levels. At the time I thought my CYA level was around 45 ppm since that was what the last test showed me. I added 5 lbs of CYA which should have brought the level up to about 75 ppm but when I tested it again after 2 weeks, it showed only 50 ppm. Even after 3 weeks, it was still 50 ppm so I added another 5 lbs which brought the CYA up to 80 ppm. During the summer, I lost about 25 ppm of CYA somewhere. Still a mystery.

Anyway, after I raised the CYA in the pool to 80 ppm, I noticed that the chlorine level changed from 2.5 ppm to over 6 ppm. I have since dropped the SWG setting from 60% to 35% and the Chlorine level still increased to 8 ppm. Some of the increase was due to using the solar cover more often so I really couldn’t conclude anything from that change.

So I thought about an easy test I could run that would show how well different levels of CYA would protect chlorine without extraneous factors getting involved with the test. Since I am now at 80 ppm of CYA, I thought about dilution. Dilution would accomplish several things. It would reduce the CYA and chlorine levels by the dilution ratio while still keeping the chlorine to CYA ratio constant. According the Chemgeek formulas, this should keep a fairly constant level of HOCL independent of dilution ratio. It would also expose the samples to same sun exposure on the same day. So I used three 5 gallon buckets side by side with tap water for dilution, yes distilled water would have been better but I thought I would try this first:

First bucket: No Dilution CYA = 80 ppm, CL = 8 ppm
Second Bucket: 1:2 Dilution, CYA = 60 ppm, CL = 6 ppm
Third Bucket: 1:1 Dilution, CYA = 40 ppm, CL = 4 ppm

I let them sit in the sun for a full day and then tested the chlorine again.

First bucket: No Dilution CYA = 80 ppm, CL = 6.5 ppm a 1.5 ppm loss (19% extinction)
Second Bucket: 1:2 Dilution, CYA = 60 ppm, CL = 3.5 ppm a 2.5 ppm loss (42% extinction)
Third Bucket: 1:1 Dilution, CYA = 40 ppm, CL = 0.8 ppm a 3.2 ppm loss (80% extinction)

So even though the first bucket had the highest chlorine level, it still lost the smallest amount of absolute chlorine. If true, this is clearly a significant economic benefit to running higher CYA levels.

This means that you could run an 80 ppm CYA pool with half the chlorine cost as a 40 ppm CYA pool even though the residual is twice as high. However, the buckets are only 12" deep so the results for a 5' pool may be different.

I think the biggest revelation, unless I am missing something, is that this should be true for bleach run pools as well which kind of goes against current thinking.

I for one am pretty convinced that running at higher CYA is better but I am curious about levels exceeding 80 ppm. At some point there will be diminishing returns and possibly adverse effects. It may be possible to curve fit the data, one of the reasons I chose three buckets, to see if there is some point where the increased gain is so small it just doesn't matter that much.

If I have time, I may try it again with smaller containers and use distilled water instead of tap water.

Can anyone identify any flaws in the test or conclusions?

Also, would anyone else be willing to do the same test to verify the results.
  • Like
Reactions: KJB1

Moving Used AGP

We moved out of the house where are our pool was installed in 2006 and over to another house about an eighth of a mile away on the same family property 5 years ago and my husband's been promising to bring the pool over every year since the move "once he got some other things off his plate." Well I finally said the trigger phrase, "if we don't start on this job I'm going to pay somebody to do it." Lol We started today. Holy guacamole!!! What a big job taking the pool down. The pool has been sitting for 5 years plus and it had some water sitting in the bottom of the liner with a leaf net over the top. The walls didn't buckle but the pool did fill up with leaves and some other debris including cattails that took root on top of the leaf net sitting in the water.Ugg! What a mess. The leaf net weighed about 300 lb and we had to lay a wall down and pull it out with a four wheeler. It's going to be a really huge job going forward and I hope we can get it up before winter gets here. Stay tuned!!

Anecdotal evidence for importance of calcium hardness in vinyl pool

So just wanted to post real quick about my recent experience. I have a 22k 16x32 vinyl pool, that I've owned for about 8 years now. Over the last couple of years, when opening the pool in summer, I would perform a SLAM, and always end up with clear green water for a week or two and then it would clear up.

Last year I scoured this forum for answers and all roads seemed to lead to metals/copper in the water reacting to the high chlorine levels. Last year I just let the chlorine levels drop, and everything cleared up.

This year, same SLAM process, same clear green water, except this year, the green was a bit cloudy and has lasted for a month plus (Started SLAM beginning of May). I ran the SLAM chlorine levels for weeks, and then let them drop to normal levels, no change in slight green color in water.

I took a water sample to Leslie's (yes I know but I don't have a metal test kit), and they came back with some interesting results. Unfortunately I don't have the read out anymore, but the two interesting results were that I had about .3 ppm metals and 7ppm calcium hardness. The guy even commented on how low my CH was.

The Leslie's guy recommended some metal remover and the remover bags you put in the skimmer, and about 60lbs of calcium chloride. I ended up buying the metal remover stuff right away ($$$$$$$), but ignored the calcium hardness increaser based on the reading I've done on this forum around low calcium hardness not being important in vinyl pools.

Cut to two weeks later, no change in water color after metal treatments. I decided to tackle the CH issue because it was so incredibly low. I bought 50lbs of Pool Mate Calcium Increaser, and added 25 lbs of it last night to the pool.

Woke up this morning to completely clear ice blue water. Literally over night.

I'm heading back to Leslie's in a few to get updated test results, and I'll post those when I get them.

All of this to say that good water chemical balance across all chemicals seems to be more important than you think!

Maximum Flow Rates for PVC Pipes

I have long been skeptical of the flow limits placed upon PVC pipes. Many web sites would post arbitrary limits ranging from 5 ft/sec up to 10 ft/sec indicating that it is not a good idea to exceed these limits but none would explain why or what would happen if you did exceed these limits. I am a big advocate for rules of thumb but I also like to know where they come so I have some trust in them.

There are many often sited reasons for velocity limits in PVC pipe including water abrasion wearing down the inside of the pipe. However, PVC is one of the most abrasion resistant materials and pools generally have small amounts of particulate mater that make their way through the plumbing to the filter. After, the filter there is even less material so return lines should not have any velocity limits under this assumption. Either way it would take an extremely long time to wear down PVC pipe with the average pool water and given that I never heard of PVC plumbing failing because it was worn out, I decided to disregard this reason.

Another reason for the velocity limits is due to stress fractures. Turning the pump on and off over a long period of time will stress the PVC pipe. This appears to be the most likely origin of the velocity limits and being a self-employed engineer with clearly too much time on my hands, I decided to investigate this a bit further. Here is what I found.

Repeated stress cycling of PVC pipe will eventually cause failures according to this paper. The cycles to failure is directly dependent on the average pressure of the pipe and amplitude of surge pressure in the pipe. Surge pressure occurs whenever there is a significant change in the pressure within the pipe over a short period of time (e.g. pump or valve turned on). This creates a pressure wave in the pipe that can be several orders of magnitude greater than the average pressure. Several charts are shown in the Uni-Bell paper which would indicate that most failures occur at very high pressures or large cycle times. So using the formulas in Appendix A, the pressure rating of the pipe can be determined.

The specifications and pressure ratings for schedule 40 PVC piping can also be found here. The pressure ratings shown in the table are for 73 degree water and in the table below shows the correction factors for higher temp water. Again, these pressure limits are designed to lengthen the life of PVC pipe and to be resistant to stress fractures. Also on this site is a reference to the 5 ft/sec velocity limit as to avoid any hydraulic shock. Also on the same page is a method to calculate the surge pressure which is similar to the Uni-Bell paper.

If we assume that the pressure ratings of the pipe are not to be exceeded by a worst case surge pressure, the maximum velocity within the pipe can be determined. This of course assumes an instantaneous change in water flow. It is this transient pressure that I believe has been used to determine limits on velocity. So by cycling a pool pump on and off enough times can create stress fracture within the pipe. If the pool pump was left on all of the time, I do not believe that velocity would not be an issue at all.

Using the pressure limits for schedule 40 piping and assuming worst case water temperature of 105 degrees, the table below shows what the equivalent water velocity and GPM would need to be in order to create a pressure wave from pump cycling that exceeds the pressure rating of the PVC pipe.

Water_Velocity.gif


The range of water velocities is within what is seen on many web sites which validates the premise that cycle stress is the origin of these limits. However, the limits are based on a very large number of cycles to create a failure. While this method seems sound at first, there are several assumptions that are flawed. First, the required cycles to reach these limits would never within the lifetime of an average swimming pool. Second, the surge pressure requires an instantaneous change in velocity. Starting or stopping a pool pump has a ramp up and down affect on water velocity and is not instantaneous. Also, if surge pressure was as high as the pressure rating for the pipe, it would probably destroy the filter which is typically rated much lower.

After, reviewing the velocity limits, it became clear that many pools exceed these limits including mine. Water velocities in my 2" return plumbing section would definitely exceed the 80 GPM limit by almost 10 GPM. Looking at my filter when turning the pump on reveals that the pressure goes to about 30 PSI before settling to 19 PSI so there is definitely a pressure wave but not a very big one and no where near pressure rating of the pipe.

There are many pools with 2.5" pumps on similar plumbing configurations which would raise the flow to over 100 GPM in 2" pipe so I believe that these limits are exceeded by pools every day without much consequence. Also, for colder water, the limits are much higher so it is even less likely that the limits are exceeded.

It is my belief that the pool industry took recommendations from water distribution system, once again, and applied them incorrectly to swimming pool plumbing systems. So although it may be a good to design pool plumbing such that the velocity limits are not exceed, I believe that too much emphasis is placed on these somewhat arbitrary limits. In reality, a pool's plumbing will never exceed enough cycles and high enough pressures to create pipe fatigue and failure.

I would be happy to hear about any cases where a stress fracture actually occurred but so far, I haven’t heard of any. Most plumbing failures I hear about occur due to poorly welded joints and damage to the pipe from external factors (e.g. shovel).
  • Like
Reactions: lpmail

New bleach supplier in Katy TX.

With Napco not selling retail anymore, I had to find a new supplier, and it turns out we have a new one.
Patriot Cleaning Supply in Katy, off Mason rd. Daniel just started, and he is selling 12.5% bleach for $3/gal. Looks like he has a great operation selling to pressure washers and retail. Let's make him successful!

Endless Pool Pump Alternatives?

Hey folks,

I need some advice:

I have an above ground endless pool (9'x20'x 4.5' deep). I am having to replace the water circulation pump every year.. every two years max. I am wanting change out to something more durable.

Can I install a traditional pump/filter system designed for larger pools, or will that cause more issues than I am dealing with now?

Any suggestions?
  • Like
Reactions: lpmail

We got a swamp with the new house

Hello, guys! My family just moved to southern Texas and with the house we got a pool. Unfortunately the previous owners did not close the pool properly so the whole ground was covered in leaves and other gunk. As so many others before us we walked into Leslies and a very animated guy told us we could get free water samping done and they would send us home with a care package. That care package ultimately was granular shock because 0 FC in the pool. Since we didn't know any better we dumped it in the pool thinking great swimming next. But suprise suprise the shock did not do anything and the next time we went in they sold us more. So I started resaerching and am glad to say I found this site and some great info on what's going on in a pool and what components are relevant to pool chemistry. So I got the TF-100 now and it works great in combination with the Pool Math app. Another very frustrating thing about the pool is that the INTEX components (intake and returns) were just plugged together and the return would just randomly pop off spraying pool water through the whole backyard so I ended up replacing everything with 1.5 inch PVC and the throughput and water movement is way better then before. I still have one leaking gasket I have to replace but it does not loose a lot of water so not the biggest concern. I am thinking of getting a surface level skimmer though because the tree right next to and above the pool is shedding a lot of organic stuff :)

Unfortunately I did not take any before pictures but I have been slamming for 1-1/2 weeks now and there is good progress but the filter is working hard to remove the desolved stuff. So I guess it'll take a little bit more time to go for a swim.

Here are some pics
* the tape just covers some pretty sharp metal clamps
* last picture shows the intake being barely visible through the cloudy water
* outside cleanup and better cord management are planned but inside first :)

Attachments

  • P_20230501_180302.jpg
    P_20230501_180302.jpg
    948.9 KB · Views: 27
  • P_20230501_180315.jpg
    P_20230501_180315.jpg
    978.9 KB · Views: 29
  • P_20230501_180323.jpg
    P_20230501_180323.jpg
    931.7 KB · Views: 27
  • P_20230501_180328.jpg
    P_20230501_180328.jpg
    840.3 KB · Views: 26
  • P_20230501_180346.jpg
    P_20230501_180346.jpg
    403.5 KB · Views: 26
  • P_20230501_180419.jpg
    P_20230501_180419.jpg
    227.2 KB · Views: 27

Stuck Universal Vacuum Hose Cone Adapter

Hello all, new to TFP. I am using a suction pool cleaner through my skimmer. The vacuum hose is smaller than the skimmer intake pipe so my pool cleaner used a either plastic or rubber universal hose adapter cone so the hose would fit. When I went to take the hose out, I noticed the hose adapter cone was stuck in the intake pipe. It seems pretty lodged in there and I can't take it out by hand. The plastic connector pipe came off as I was trying to get the cone out. Any ideas on how I could get this cone out. The intake pipe is threaded and the cone seems pretty lodged in there. There's been no drop in suction power. Thanks for any ideas.
  • Like
Reactions: Aria

I knew this was going to happen! My turn for a SLAM.

I knew this was going to be the case!

I usually open my pool an Easter weekend, but this year I spent it in the hospital with my wife.
We just got home on the 16th of May, and I have been dealing with Hospice Care, and taking care of her.

As a result, I did not get the chance to open the pool until earlier this morning (2 months behind schedule).
It got to 92* outside today, and my water is sitting at 77*.
I opened to a LIME green pool! I got the plumbing all hooked up, and set the Stenner to run until told otherwise with a fresh 55g drum of 12.5% bleach.

I opened it at 11am and got it all running. I tested the water at 3pm the 4# of CYA had been dispersed. which would put me at about 40 for CYA (rough guess). My FC was showing at 10.5. (Gotta Love a Stenner!)
I set the timer to kick off at 7pm. I have it set to run for 2 hours in the morning. I will test it again after that run.

This is what the pool looked like at 3pm... I swear I can see an improvement already, it isn't the bright LIME green that I opened to!

pzQ7Wuw.jpg


:(

Diagnosing Pool Plaster Problems

Plaster Discolorations – New white pool plaster can discolor (darken or turn gray) from adding excessive calcium chloride set accelerator, from late hard troweling, from thin and thick areas due to an uneven shell, etc. Gray (or grey) mottled discoloration (also known as “water entrapment” or “hydration”) is smooth to the touch and difficult to lighten, may be remedied by acid washing, sanding, or torching the surface, but these processes are generally detrimental to a plaster finish and the discoloration often returns later. Late hard troweling can cause “trowel burn” which darkens the plaster color in localized areas. Severe mottled color variation from calcium chloride or finishing issues may occur quickly once filled with water, or take several months to become visible.
See these threads: How White Pool Plaster Can Turn Gray
How White Pool Plaster Turns Blotchy
Gray Mottling Plaster Discoloration

White Spotting and Streaking – New Plaster (white or dark colored) may develop smooth white (lighter color) porous (soft) spots and streaks (sometimes incorrectly termed as “spot etching”) resulting from the addition of water to the hardened surface during late hard troweling in plaster containing excessive calcium chloride. This late hard troweling disturbs surface aggregate, and added water penetrates around that aggregate and spreads laterally through the porous paste caused by accelerated shrinkage. Beginning as excess porosity around the disturbed aggregate, soft spots expand and sometimes coalesce into larger affected areas as cement components are dissolved away over time. Disturbed zones along accent or surface tile, around fittings, etc. may also display this non-removable deterioration. This type of problem usually takes several months to show up.
See this thread: White Spotting of New Plaster Pools

Whitened Discoloration of Colored Plaster – In time, integrally dark colored pool plaster may begin to show whitening (lighter color) either uniformly or in patterns. Uniform discoloration may be caused by using incompatible admixtures: specifically color pigments and calcium chloride. "Organic" and "Blue" pigments are prone to become bleached out by chlorine, and should not be used in pool plaster applications. These colored plasters may also be discolored (white streaking or spotting) from the addition of water to the surface or to trowels applied to the surface during finishing. These discolorations are permanent, unless major sanding is performed. White discoloration may be calcium scale developing due to imbalanced water, such as high CH, high TA, and overly high pH. Fortunately, the white scale can be removed by either sanding or an acid treatment.
See this thread: White Spotting of New Plaster Pools

Spalling – Spalling is the flaking or peeling of a thin layer (1/8 inch or less) of plaster, usually in small areas on steps and shallow end floors. It is caused by the over-troweling of the surface when the underlying paste is wet but the surface cement laitance is dry. It can also be caused by adding too much water while troweling. This usually results from improperly timed troweling, or from hot, windy or dry days. When water evaporates from the surface faster than mix water bleeding up can replace it, and then when that surface dry crust is troweled, a weakened subsurface zone is created that will be prone to spall. Spalling may occur immediately, or years later when the pool is drained, etc. Spalls may be sanded, although the pool may need to be replastered if large areas have spalled.

Delaminations – This is the separation of an entire new layer of plaster from its underlying substrate, whether that is old plaster, gunite or shotcrete, etc. Delaminations are usually first seen as a round surface area that has raised or pulled away from the wall, often with small cracks and nodules forming. This defect is usually caused by improper surface preparation to create a good bond during a replaster. It may manifest itself within a month or two or several years later when the pool is drained and the plaster dries out. Ground movement such as during earthquakes, can also initiate bond failure. Occasionally, some plaster areas completely pop off, exposing the underlying surface. Delaminated areas may be patched if small, but larger delaminations require replastering.
See this thread: Calcium Nodules in pools

Calcium Nodules – Nodule spots are a raised and rough form of calcium efflorescence that sporadically forms on a plaster surface. Nodules may be circular volcano-type formations or stalactite-like drips down the plaster wall. They are most often associated with plaster delaminations (as mentioned above), or with severe craze cracks, either of which allow balanced water to penetrate the surface and dissolve and bring calcium from the interior to the exterior of the pool plaster layer. Nodules may be removed by sanding or scraping, but generally continue to form again and again. See this thread: Calcium Nodules in pools

Craze Cracks – Crazing is an excessive amount of surface shrinkage cracking which can result from an overly-wet plaster mix, from excessive calcium chloride set accelerator added to the mix, from the adding of excessive water while troweling, or from excessive drying of the plaster before the pool is filled. Crazing often leads to other problems including calcium nodules, staining, and provide a home to black algae. Excessive crazing may require replastering.

Identifying Curing Effects on New Pool Plaster - Newly plastered pools must be filled at the right time, and any water exposure must be even and uniform. Filling a pool too early can result in a weakened and deteriorated paste surface, especially in the bowl of the pool where the effect is worse because it may be exposed to fill water mere minutes after final troweling. The optimum fill delay (time between final troweling and filling the pool) is at least six or more hours. (Moderate temperatures and sufficient humidity is also necessary for proper hardening and curing of plaster). This fill delay is often realized for the upper half of the pool, which may not be submerged for a day or longer depending on water pressure, while some plastering crews start the fill before they leave and thus compromise the lower areas of the pool.

Wetting of parts of the surface by rinsing down the deck, rinsing off pool steps or areas where debris falls, etc. must also be avoided, since the uneven exposure of fresh plaster to water makes permanent discoloration. The fill must also be continual – pauses in the fill may result in “bathtub ring” permanent discoloration.
Staining – Fill water containing excessive levels of iron, copper, or other metals can cause various colors of staining and should be filtered and removed, or at least treated before the pool is filled, or, if that is not possible, immediately upon filling the pool to the surface tile level. This kind of staining can usually be removed by acid washing, sanding or chelation. Some of these techniques are invasive to the surface, and avoiding staining is better than removing it later.

Scale or Etching from Improper Chemical Addition – Pool chemicals need to be added to the water in a manner that prevents aggressive/scaling amounts of chemical or imbalanced water from affecting the new plaster surface. Acid should always be pre-diluted before adding, salt should only be added after 30 days of plastering, and should not be allowed to sit as a solid on fresh plaster. Cyanuric acid and soda ash must also not sit as a solid on new plaster.

Water Balance, Scaling and Etching - Before filling a new plaster pool, the chemistry of the fill water should be determined. Tap water that is too soft (aggressive) can create plaster dust, and etch or weaken the new plaster surface, and should be balanced before filling. Of course, once the pool is filled, the Saturation Index (or CSI) provides an excellent guide for maintaining pool water in a manner which will minimize detrimental effects to the new plaster surface. Scaling is caused by overly scale forming (high positive CSI) water. Sanding or an acid treatment usually removes the white scale.

Etching (from low pH/alkalinity/calcium) and scaling (from high pH/alkalinity/calcium) are uniform effects across the pool surface, unless affected by areas of greater or lesser pool plaster surface porosity. The etching process can create a uniform rough and pitted surface, but does not discolor the plaster. Calcium scale on the surface is also generally rough to the touch, white, and uniform (much like sandpaper). In time, scale or an etched surface will attract dirt and minerals, and discolor. Although stains, dirt, and scale deposits can generally be removed by sanding, acid washing or chelation, etching is permanent and can only be moderately mitigated by sanding the surface.

Acid Start-ups – Swimming pools should never undergo the acid start-up process. Designed as a way to remove plaster dust without filtration, acid start-ups are too aggressive for fresh plaster and will etch the surface. Subjecting fresh plaster to water with a pH below 5 is not an appropriate substitute for doing things right in the first place. This just ages the pool plaster and will likely begin to show dirt and metal staining sooner than usual.

Plaster Dust in New Pools – This is the bleeding (loss) of calcium from a new plaster surface that may be caused by improper plastering practices and/or as a result of filling too soon or with too soft (aggressive) tap water. This dust can harden into a surface calcification and trap dirt or metals, creating further discoloration. Dusting from new pool plaster is preventable by properly mixing, troweling, curing the surface in moderate temperatures and with sufficient humidity, waiting at least six hours before filling, and then ensuring the chemistry of the fill water is balanced before being used to fill the new plaster pool. When necessary, the fill water chemistry should be adjusted by adding sodium bicarbonate, acid, chelating or sequestering agents, etc. through a slurry tank as the pool fills. Although plaster dust can be removed by brushing and filtering, the damage from the calcium loss from the surface creates porosity and is permanent.

Prevention is the key – proper plastering procedures, proper curing, and proper water balance result in a plaster surface that is both maintainable and aesthetically pleasing. Fixing errors after-the-fact is generally less than desirable, and some detrimental effects can only be remedied by replacing the plaster. Quality plaster that is maintained well and in CSI balance will generally last 20 years.

Also see these posts: Being Blamed for Plaster Discolorations? Don't Get Hoodwinked

ten-guidelines-for-quality-pool-plaster-t42957.html
  • Like
Reactions: clearpool lover

IntelliCenter Upgrade EasyTouch 4 (2007) with IntelliChlor

I’m posting my experience without much new information except the relatively minor issues I had with the Pentair High Power Wireless (HPW) Link Kit but I thought it might help to gather some of the URLs into a newer thread that might inspire someone else to upgrade to IntelliCenter.
Virtually all the information I needed was in the May 2021 thread by tclayton10: My foray from an EasyTouch8 to IntelliCenter

At the end of tclayton10’s thread was a helpful February 2023 comment/update by aholmes5 about bending the old-style SCG circuit breaker tab until it snaps off and making sure the new IntelliCenter transformer side holes are threaded (mine were full of paint, but already threaded and it helped to ream the threads before installation.)

Also very helpful information was in the 2020 MyAZPool thread: IntelliCenter Quick Reference/Information Guide[/FONT]and MyAZPool comments in other threads. There are other helpful comments in various threads by ajw22 and Jimrahbe. This wiki put together by ajw22 provides a nice IntelliCenter overview: Pentair Automation Systems - Further Reading

The main reason I upgraded was because we just got our pool replastered with a new Pentair IntelliBrite 5G Color LED pool light that replaced our ancient white incandescent light. However, when I went to fire up the IntelliBrite, there was only limited functionality with our 2007 EasyTouch 4. Even though we have a basic pool set up with a filter pump, IntelliChlor and a pool light, updating EasyTouch from 1.0.whatever wasn’t worth the money or the effort and ScreenLogic upgrade bundles were not significantly lower priced over the IntelliCenter upgrade, considering that IntelliCenter will probably be supported further into the future.

The other reason is that I like electronic gadgets and I like being able to control the pool equipment with my phone vs the clunky distance-challenged EasyTouch remote. Furthermore, all of the information provided by tclayton10 and others made it sound doable.

Using tclayton10’s parts list I purchased the following online:
  • Pentair IntelliCenter 522045 pool-only legacy (2003-2012) upgrade kit from epoolsupply.com for $800 which was nearly $200 less than the closest competitor.
  • Pentair Intellichlor 521218 SCG Surge Board was $249 at poolsupply4less.com
  • The Carling CTB-B-B12 circuit breaker was $11.25 shipped from Amazon (Pentair is still selling the same thing for $50!). It can be found cheaper with longer lead time.
I purchased everything on a Tuesday and the last part arrived by Saturday afternoon for a Sunday installation.

Everything went well using the steps laid out in tclayton10’s post. Even though my set up is so basic, I had some time delays caused by my cautious labeling, photographing and double checking due to lack of experience. It was also disappointing that the supplied Pentair instruction booklets were horrible grayscale photocopies of the OEM color instruction manuals (that are also posted online.)

One of the real time consumers for me was the High Power Wireless (HPW) Link Kit that replaced the EnGenius Wireless Access Point/Bridge. The Pentair instructions were confusing and there were a lot of parts for other installation scenarios that didn’t apply to my IntelliCenter upgrade. The instructions even referred to figures that didn’t exist and some valid references were misnumbered.

There was a HPW 2-sided instruction sheet apparently meant to supersede part of the 15-page instruction booklet packed in the same bundle. The instruction sheet proclaimed: “You only need the indoor and outdoor Transceivers, the Ethernet Cables and the AC Power supply.” However, the outside transceiver also requires the Power Module connector that has 3 places for connections: 1) Female ethernet cable connection to receive the ethernet cable from the HPW Outdoor Transceiver circuit board; 2) 24 VDC connector that goes into the dedicated 2-pin connection on the IntelliCenter circuit board; 3) male Ethernet connector from the power module into the IntelliCenter circuit board.

Mounting the stationary part of the outdoor housing was easy since it required the same screw locations I used for the EasyTouch antenna I was replacing. However, getting the 2 halves of the plastic housing case aligned and screwed together was a pain. Part of the problem was due to the ethernet cable connection to the HPW Outdoor Transceiver circuit board being off to the side of the board and not aligning with the centered knockout hole into the housing.

Note: The outdoor plastic housing case knockout hole did not easily or cleanly break away (poorly perforated.) I used a razor knife to create a correctly sized hole that would accept the provided knockout hole plug which the ethernet cable runs through. A rubber mallet helps to tap the knockout plug in, but this should be done before the ethernet cable is run through the plug. It was challenging to pull the ethernet cable back through the knockout hole plug.

The HPW indoor transceiver installation was a lot easier, and the wireless communication went well after I updated the firmware from v1.047 to v1.064 which supports Over The Air (OTA) updates, the IntelliCenter 2 app and website. (I will wait for TFP blessing before updating to the v2.00X firmware.) No significant wireless connections issues with a 65-foot line of sight through a chicken wire stucco wall.

Thanks to multiple comments by ajw22 in various threads, I had a good idea how the HPW 900 MHz matched indoor/outdoor transceivers speak to each other and I avoided the issues some others had when trying to connect to the home wifi, etc.

Programming IntelliCenter involved typical clunky Pentair non-intuitive menus and language. But I am getting used to it—like I did with EasyTouch. I really like being able to program and control from my iPhone wherever I am and the IntelliBrite pool light works great!

Below new transformer bracket before new Carling 12 amp circuit breaker installed in lower right slot
FD8D106F-39B7-4CD0-9A1E-CBC1BFB0A711_1_105_c.jpeg
Below EasyTouch Outdoor Control Panel (OCP) and uncovered high voltage compartment below.
87F78C2C-5259-4497-BF04-53A3CF6B790E_1_105_c.jpeg
Below is EasyTouch OCP folded down exposing EasyTouch 4 circuit board in foreground, old SCG board in the background to the left and rear of the 10A circuit breaker and tab. On the right is the EasyTouch transformer bracket with circuit breakers.
01707983-3EA0-408B-8232-D7FD9C3327D6_1_105_c.jpeg
Below is a closer view of low voltage (LV) compartment with EasyTouch circuit board removed.
See old IntelliChlor SCG board and 10A breaker/tab that will be removed.
4E3507EC-A51C-4954-BD5F-085F67405470_1_105_c.jpeg
Below is LV compartment after removal of SCG board leaving 2 screw holes at bottom of load center wall. The right screw hole is used to partially mount the new circuit board making it easier to mark the other 2 holes for the new board. New holes (not shown) need to be tapped. Bigger top hole is 10-32 and smaller low hole is 8-32 (see tclayton10's post url above). Also note the circuit breaker tab broken off with vice grips a la aholmes5.
1A2D31D3-B738-4C5E-9A81-31682B000B18_1_105_c.jpeg
Below with everything installed. IntelliCenter board up front, SCG board in back, new transformer bracket with circuit breakers and new transformer on right.
EF92B07C-6956-44C3-A103-CF4777F0173F_1_105_c.jpeg
Below IntelliCenter OCP screwed into place. The OCP panel face has pre-printed "IntelliChlor SCG" below the new 12A breaker.
4CE8C0B0-B8C2-4BEA-8257-5B5A72B8A00D_1_105_c.jpeg
Now I need an IntelliCenter decal to go over the old "EasyTouch" on the load panel door.
DE43857E-3476-49FB-8201-C2BBE1F679E7_1_105_c.jpeg
High Power Wireless Link Kit outdoor transceiver enclosure.
9986E435-33BD-4589-ADFA-E28A4928642D_1_105_c.jpeg
  • Like
Reactions: staestc and ogdento

Liquid chlorine date of manufacture

My pool runs year round. I went to buy some liquid chlorine today as mine was getting pretty old. Lowes and walmart are about the only two places nearby that sell high concentration. I went to Lowes and their dates were December 2022! Walmart had some dated May 26, 2023 for $2 cheaper per gallon. It makes a big difference, as my 6 month old chlorine was getting worthless. Check those dates!

Don't buy salt at Pool Store without comparing prices

I've always known that salt at pool store was expensive, but now I have the data.

I had to go to the Pool Store today to get a part. I also needed salt. I was planning on going to Home Depot for the next, but since I was there I thought I'd price compare. $16.99/40 lbs bag. I wasn't sure of the price at HD this year, but knew it was < $10, so I went to HD. $8.97/40 lbs bag for water softener salt. So, $8 a bag cheaper at HD. I needed 7 bags, so saved $56.

But wait, there's more. Because I bought 6 or more bags, they were $8.07/bag. And then bc hubby is a veteran, 10% off. $7.26. And one last kicker, the pool store is in a state with 5.5% sales tax and HD is in my state which has no sales tax. Total difference per bag all in was $10.66 and total savings was $74.63. That more than paid for the part.

I can't even tell you how happy this made me.

Filter