How to Close a Pool for the Winter
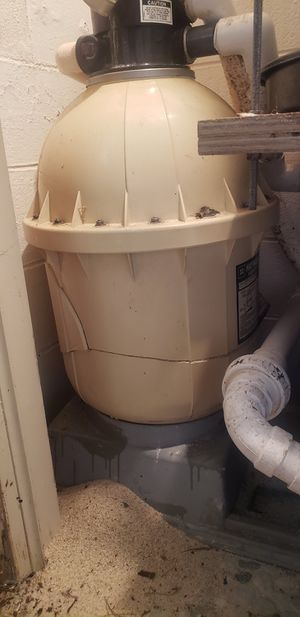
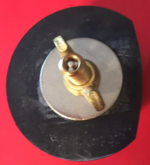
The picture to the right shows what happened to a sand filter that was not correctly blown out and winterized for the winter.
How to Close an Above-Ground Pool
When the pool season ends, you can leave it up and winterize it as seen in Closing an In Ground Pool in TFP Pool School.
You can also decide to take the pool down and store it. If you do, drain and clean the pool, then store the liner and frame in a dry place. If you can, store the pool inside or in a large receptacle for storage.
Be aware often, when pulling it out of the garage for the next pool season, people have discovered small holes from rodents chewing through the vinyl or even reports of mice families using it as home!
Cover the leveled area with a heavy-duty tarp to prevent animals from using it as a bathroom, and secure the tarp with additional cement pavers. If you have a pump, be sure it is completely drained and stored out of the elements.
How to Close an In-Ground Pool
Closing an In Ground Pool in TFP Pool School.
How to Close an Inground Pool Using the Cyclone Blower was done by member @poolgate showing how he closes his pool that has a main drain using a modified pump lid and cyclone blower.
The concept of closing an in-ground swimming pool
Winterizing Paramount's In-Floor Cleaning System.
TFP Video Discussion on Winterizing
How To Use Polyquat 60 in Pool Winterization
How To Use Polyquat 60 in Pool Winterization?
Connecting Air Through Pump
Modified Pump Cover to Connect Blower for Closing Swimming Pool
A modified pool pump cover can connect the air output from a blower to the plumbing. These modified covers are custom-made.
Here are a few tips when making your modified cover:[1]
- Go very slow, or you will bind up.
- Clamp it down, or it will go for a spin.
- If you order a new lid, use it for the pump and the old one for the modifications.
- Do not use silicone unless necessary. The fittings that go through the lid will have rubber gaskets to seal it.
- Make sure you get the correct 6' hose.
Modified Cover for Hayward Super Pump for Closing Swimming Pool and How To: Modify (Drill) Your Pump Basket Lid to Accept a Blower gives more details and a video on the process.
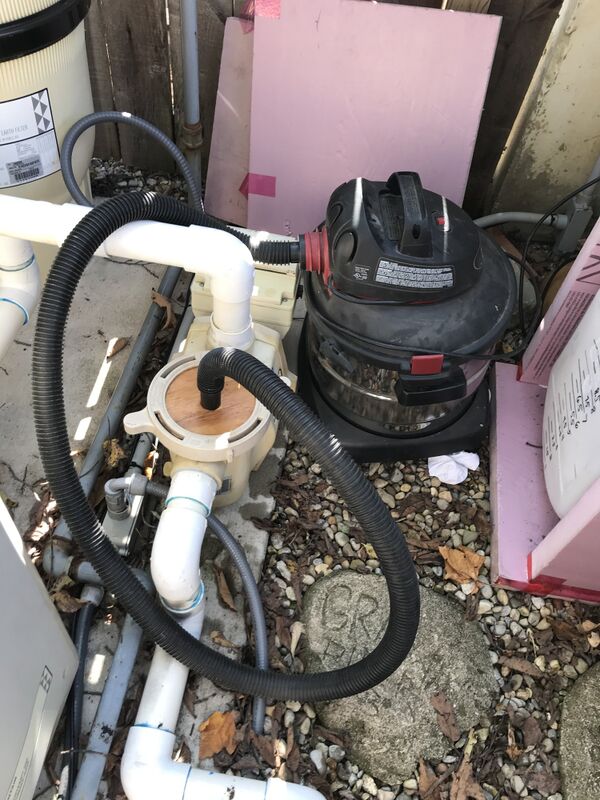
One creative member used the pump lid housing, replacing the clear lid with a piece of 1/2" plywood with a hole connecting the blower hose. The thickness of the plywood is equal to that of the lid and gasket; it seals well enough to get the job done.
You can find more pics of the plywood lid in this thread.
Connecting Compressor to Pump Using Drain Port
A compressor can be connected, using a male 1/4” NPT COUPLER, to the pump's 1/4” NPT drain port to blow air into the suction and return lines.
You can then isolate the suction and return sides with winter plugs. Plug the return side and work on the suction side. Then, plug the suction side and work on the return side.[2]
Remove the lid. Inside, the ports where the plumbing is attached are both suction and the return side—the suction (Main Drain and Skimmers are toward the shutoff valve). The back is the return side. The plugs that will fit are #8, #9, #10, or # 11. Plug the port inside the housing. Only plug the side you want air NOT to travel.
You can also use the shutoff valves to close off the air traveling toward the skimmers and main drain, but the winter plugs work best. There is no need to overtighten either; snug is fine as they are not going anywhere.
How Much Air is Required to Blow Out Lines?
Low pressure and high volume are best for blowing air through the lines. You only need 3.5 psi to clear a pipe 8 ft below water level.
Bursting due to air pressure is a non-issue. Typical 2" plumbing has a bursting pressure of 890 psi. Glue joints, if done correctly, should be just as strong, if not stronger, than the pipe itself because of the double thickness of the pipe wall at the joint.[3]
The Cyclone Blower will generate about 160 to 180 inches of water pressure, which is about 5.8 to 6.5 psi. One hundred eighty inches is 15 feet. So, that's the maximum water depth that it can blow out.
Pool Antifreeze vs. RV Antifreeze: What’s the Difference?
Pool and Marine RV antifreeze should be propylene glycol. It may also contain Ethyl Alcohol (Ethanol) or Glycerol.[4]
Engine coolant is different from Marine Antifreeze. It is usually Ethylene Glycol and should not be used in pools.
RV antifreeze is primarily used to winterize all portable water systems, including boats, trailers, recreational vehicles, vacation homes, and swimming pool/spa filtration and heating systems. RV antifreeze is not designed for long-term protection or use on operating engines.
It is always best to verify that the product is specifically designed for pool use by looking at the manufacturer's site or the label to see the recommended uses.
Techniques to Air Lock the Main Drain
Winterizing the main drain, if you have one, depends on the way the main drain is plumbed into your system. You do not, and cannot, clear the main drain of water. You want to clear the water down the pipe until close to or at the frost level. That gives a free column for any water and ice to expand into.
Valves
If your main drain has a valve, it should be air-locked with the shutoff valve, and then the air compressor immediately shut off.
First, shut off the main drain to clear skimmers. When done, close the skimmers with the valve and clear the main drain. After bubbling, shut the main drain and shut off the compressor so as not to create back pressure.
Foam Rope
If the main drain is connected to a hole in a skimmer, you can push a 4’ piece of foam rope into the hole and be done with it.[5] It takes patience and good fingers to push against the water pressure. Then, plug the hole with the foam rope. Hold the plug down with your pinky while pushing the rope in using your thumb and index fingers.
You may need to zip-tie the noodle/rope to a dowel as it pushes back after a couple of inches.
Skimmer Main Drain Pipe Airlock Valve
Use a reducer to a 1-inch pipe and ball valve to be able to blow air into the main drain pipe and then airlock it.[6]
Winterizing the Skimmer
Once the skimmer lines are blown out, the objective is to displace water from the skimmer so that if ice forms, the ice has room to expand up. Ice does not expand more than 9% and will go upward in the skimmer.[7]
People fill the skimmer with one or more of the methods below to provide a crush zone so that if the water freezes, the 9% expansion crushes the plastic or foam instead of cracking the skimmer.
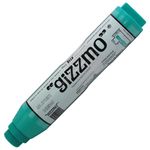
Gizzmos
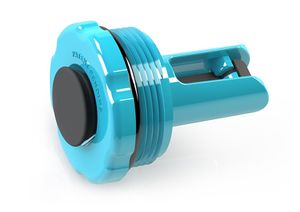
There are various sizes of Gizzmos for in-ground and above-ground pool skimmers. The Gizmo screws into the skimmer line. Many products are similar to the Gizzmo for absorbing ice expansion in the skimmer.
The Gizzmo needs Teflon tape on the threads to seal well.
Some Gizzmos have a blowout valve on the top to blow out lines. If you have a Gizzmo with an opening at the top and air is coming out of the threaded area, then the threads on the Gizmo may be stripped.
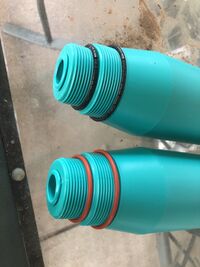
A member had the black rubber gaskets crack after one season and replaced them with silicone versions (tan) that may last a bit longer:[8]
- High-Temperature Soft Silicone O-Ring Width-1/8,ID-1 3/4,OD-2
- High-Temperature Soft Silicone O-Ring Width -1/8,ID-2 1/4,OD-2 1/2
Pool Noodles
- Pool noodles are made from closed-cell foam, which doesn't absorb water.
- Put 6" of "pool noodle" in the skimmer, just in case rain, snow, etc, fills the pool back up
- Cut an 8-inch piece off the end of a noodle. Place it in skimmer.[9]
- If you use pieces of pool noodles along with the Gizzmo's, wrap them around the Gizzmo in a circular fashion. The more you cover, the less water, which means more protection.
Plastic Bottles
- A One-liter plastic bottle filled up halfway with pool/RV (not automotive) antifreeze is fine
- Drop a plastic water bottle filled halfway with windshield washer fluid into the skimmers.
- Use a gallon jug of pool/RV (not automotive) Antifreeze with about 1/4 left in the jug. It fits in a skimmer perfectly, and add a little pool/RV (not automotive) antifreeze to the skimmer box
Winterizing Heaters
Follow the winterizing instructions in the heater installation manual. Different model heaters have different winterizing instructions.
Raypak® Winterizing for Gas Fired Heaters - Training Video
Winterization Plugs
Winterizing plugs are used to seal the return and skimmer holes. They can also plug the pump intake, outlet, and individual lines during the blowout process.
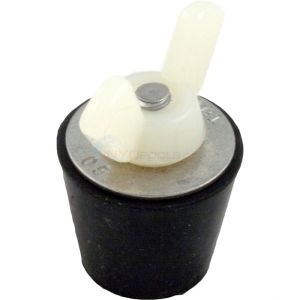
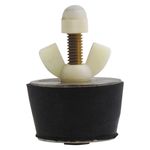
Rubber Expansion Plugs
Tapered rubber winter expansion plugs with a wingnut to tighten come in various sizes:
- 0 - 1/2" pipe tapered
- 1 - 1/2" pipe
- 2 - 3/4" tube tapered
- 3 - 3/4" pipe
- 4 - 3/4" and 1" pipe
- 5 - 1" pipe
- 6 - 1" fitting
- 7 - 1 1/4" pipe tapered
- 8 - 1 1/2" pipe tapered
- 9 - 1 1/2" pipe and 1 1/4" fitting tapered
- 10 - 1 1/2" fitting tapered
- 11 - 2" pipe
- 15 - 4" pipe
- 16 - 4" pipe
Also, extra long tapered plugs can cover #7 to #10 sizes.
Blow-Thru Valve Winter Pool Plugs
Blow-Thru Valve Winter Pool Plugs are tapered rubber plugs with a Schrader valve stem.
Most members with an air compressor usually connect an NPT fitting to the pump basket, then clear the lines with an air compressor or create some adapter and work from the skimmers, unions, etc. If you are working on the return side, this would mean that you will have to isolate the suction side to create enough air volume to accomplish the task and vice versa.[10]
With the blow-thru plugs, one can place them in a pump basket housing and use an air compressor to move water with air. This method would only require two plugs and an air compressor (One on the return side and one on the suction side)
They are also helpful for blowing out pipes, such as a main drain, where you don’t have a valve.
Threaded Return Line Plugs
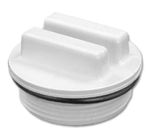
A threaded plug with an O ring will screw into return lines to seal them for the winter. It is the Hayward SP1022C 1.5" NPT Plug with O-Ring, White with similar plugs from other manufacturers.
The threaded plugs fit 1 1/2" return fittings. The Hayward SP1419T seat removal tool will remove the directional fitting to plug it during winterization.
Use Teflon tape on the threads and Pool Lube on the O ring.
This 1 1/2" threaded plug can replace the drain plug in XtremepowerUS, Hayward, and Pentair filter tanks.
Winter Duck Plugs
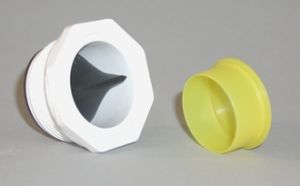
Winter Duck Plug (fits 1-1/2" Threads) is a one-way pool "duck-bill" valve allowing a large flow of air and water to be blown from the return plumbing but does not allow water back into the lines.
The double-seal system provides a watertight seal on the face plate or inside the fitting. The Winter Duck Plug provides adequate back pressure to clear all returns simultaneously without "burping." Once all the returns have bubbled for several minutes, you turn off the blower. Water will not enter the pipes from the pool.[11]
Bungee-Plug
The Bungee-Plug is a one-way valve with a bungee strap that stretches to allow air or water to flow freely when applying pressure. The bungee strap responds instantly to pressure relief and seals with a unique triple O-ring seal.
The Bungee-Plug replaces the return eyeball, and a hole in the center is plugged with a rubber stopper held in place by a strap coming off the back. When you blow air through the system, the strap stretches, allowing air to exit. As soon as the pressure is removed from the backside, the strap contracts, and the hole is plugged, sealing the return from the water.[12]
Shaw Plugs Mechanical Snap Tite expansion plugs
Shaw Plugs Mechanical Snap Tite expansion plugs are shown by Pentair to winterize the Colorvision bubblers. They can be found at Grainger.[13]
Winterizing a Cartridge Filter
- The drain plug should be removed and the filter drained for the winter
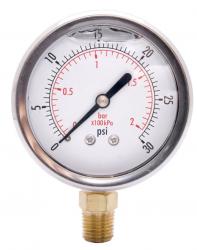
- The PSI gauge should be removed and taken indoors
- Cartridges should be removed and cleaned
- Cartridges should be stored indoors, not in the filter, and reinstalled at opening
Removing the Filter Pressure Gauge
Depending on the type of oil/filler in the gauge, often they get stuck, or their calibration gets thrown off.
Even then, it's easy to be safe and unscrew the gauge during closing, then re-attach it in the spring with 2-3 wraps of Teflon tape.[14]
What can happen is that a small amount of water gets into the bourdon tube, and due to the orientation of the gauge (especially back mount gauges), it doesn't drain out so during a freeze. The water freezes and deforms the tube, causing the gauge to read incorrectly or zero. This is especially true for back-mounted gauges mounted vertically.[15]
Some filters use back-mounted gauges mounted horizontally recessed into the top housing, which aren't as susceptible to holding water. Also, bottom-mounted gauges mounted vertically and nipple down are not as prone to holding water in them.
Some pressure gauges are cheap and can be replaced in the spring. Removed or not, the cheap ones rarely last a year.[16]
Winterizing Paramount In-Floor Cleaning system
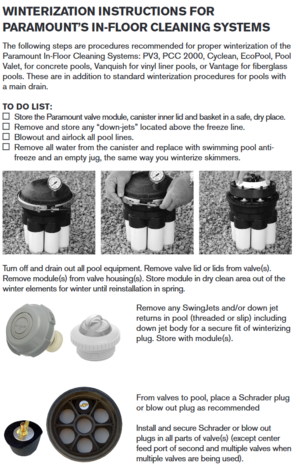
Manuals for the IFCS and other Paramount products are at Winterizing Procedures For: Paramount Pool Products and WINTERIZATION INSTRUCTIONS FOR PARAMOUNT’S IN-FLOOR CLEANING SYSTEMS
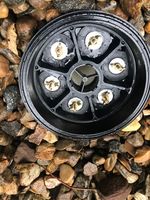
Paramount makes a proprietary shaped cylindrical plug with one flat side to fit the water valve with Schrader valve - Paramount Set of 1-1/2" or 2" Winterizing Plugs (6 Pack) 004-302-1672-00.
This thread discusses closing the Paramount IFCS.
- Turn off and drain out all pool equipment. Remove valve lid or lids from valve(s). Remove module(s) from valve housing(s). Store the module in a dry, clean area out of the winter elements for winter until reinstallation in spring.
- Remove any SwingJets or down jet returns in the pool (threaded or slip), including the down jet body, for a secure fit of the winterizing plug. Store with module(s).
- From valves to the pool, place a Schrader plug or blow-out plug as recommended
- Install and secure Schrader or blow-out plugs in all parts of the valve(s) (except the center feed port of second and multiple valves when multiple valves are being used
- Proceed to blow out lines through Schrader or blow out plugs to the pool.
- While blowing out the in-floor nozzles, you have accomplished an airlock once a good amount of air has come through the nozzle. (This procedure is similar to obtaining an airlock when blowing out the bottom drain in the pool.)
- Blow out the center port of the first valve back to the filter equipment and plug.
- Install and secure a regular winterizing plug while blowing out the down jets and air escaping through the in-wall hole.
- Repeat until all ports are blown out. In cases where multiple valves are in use, blow out the feeder port of the first valve into the center port of the second or multiple valve(s), install, and secure the plug.
- When necessary, pool winter anti-freeze solution should be poured into each line.
- Valve housing(s) should be wiped clean and dry of water; reinstall the top lid and secure.
Tips
- Look at the water valve risers for pipe size & check for reducers/bushings[17]
- Don't be a cheapskate & grind down a Schrader plug. It will fall down the pipe
- You must remove the floor heads for those too shallow to airlock & insert #12. For these, a cyclone will do since they get plugged
- Buy the Paramount removal wrench. After a couple of seasons of removing with improvised tools, the heads will be mangled
- The compressor is mandatory for the deeper ports that must be airlocked. Pour a little pool/RV (not automotive) antifreeze on top of the plug to make sure there are no bubbles- it usually takes about four cranks beyond hand-tight to seal these plugs
- That will get you through the Paramount pressure side. If you have a true system, is there is more fun to be had on the suction side of this
- Getting into features like these is best to have a pro do it
- These repairs are big bucks & failures are discovered at the apex of the busy season
Closing Pool With an Autocover
Auto-covers are designed to rest on the pool water. You will damage the auto-cover if you drain the pool and close the auto-cover.[18]
If you drain, you must fully open the auto-cover and use a separate winter cover for the off-season.
Closing Pool With Safety Cover
Safety covers are not designed to take the total weight of snow, and the water level has to be maintained as per manufacturer instructions, or the cover can become overloaded and damaged.
Some cover manufacturers recommend that the water level is not more than 12" below the deck. Others say up to 18". Check your cover manufacturers recommendations.[19][20]
Meyco says[21]:
Reduce the load – Meyco covers are very sturdy, however in cases of extreme snow load keeping the water level within 18” of the top of the pool is very important to reduce the stress on the cover and protect it from damage.
LoopLoc says:
Plugging the Skimmer Door
If you blow out the skimmer line and need to leave the water up to the skimmer due to water supporting the cover or a vinyl liner, then use a skimmer plug or an aquadoor skimmer faceplate to close off the skimmer.[22]
Freezing Precautions
When do Pipes Begin Freezing
Read The Physics of Freezing and Freeze Protection.
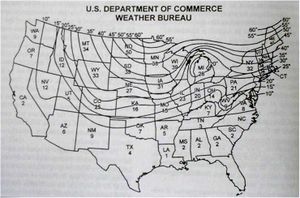
What Depth is Safe From Freezing
Consult the Frost Line map for your area.
Ice Shelves
Depending on your geographic location, some pools experience extremely harsh winters. The consistently cold/freezing temperatures result in the development of an ice shelf on the water's surface.
It is generally advised not to break or disturb that ice shelf once formed. Disturbing the ice shelf can result in the ice shelf and/or broken pieces shifting within the pool, thereby damaging the shell.
This is particularly important for pools with a vinyl liner that can tear easily by sharp ice. If an ice shelf has formed, leaving it until it thaws is best.
Also, with a plaster pool, the water level should not be left right at the level of steps or ledges. Water freezing right on the plaster can lift the plaster and damage it. Leave an inch of water above any steps or ledge so that any ice forming will float above the plaster.
- ↑ https://www.troublefreepool.com/threads/hayward-modified-pool-pump-cover-for-closing.194854/post-1717848
- ↑ https://www.troublefreepool.com/threads/closing-from-the-pump-with-compressor-need-help-on-a-few-items-please.195129/post-1719869
- ↑ https://www.troublefreepool.com/threads/blowing-out-main-drain-friendly-debate.107407/post-941666
- ↑ https://www.troublefreepool.com/threads/pool-antifreeze-vs-rv-antifreeze-whats-the-difference.273753/
- ↑ https://www.troublefreepool.com/threads/air-lock-on-main-drain.194948/post-1718724
- ↑ https://www.troublefreepool.com/threads/issues-with-blowing-out-main.284939/post-2496609
- ↑ https://www.troublefreepool.com/threads/help-needed-winterize-inground-pool-skimmer.195126/post-1719867
- ↑ https://www.troublefreepool.com/threads/replacement-gaskets-for-skimmer-gizzmo.243785/
- ↑ https://www.troublefreepool.com/threads/pool-noodle-and-skimmer.129875/post-1148109
- ↑ https://www.troublefreepool.com/threads/blow-thru-valve-winter-pool-plugs.174703/
- ↑ https://www.leaktools.com/winter-duck-plug-fits-1-12-threads.html
- ↑ https://www.troublefreepool.com/threads/bungee-plugs-anyone-ever-used-these.153172/post-1354700
- ↑ https://www.troublefreepool.com/threads/first-time-closing-looking-for-expansion-plug-for-bubbler-pentair-colorvision.303943/post-2654055
- ↑ https://www.troublefreepool.com/threads/remove-gage-when-closing.195301/post-1721607
- ↑ https://www.troublefreepool.com/threads/remove-gage-when-closing.195301/post-1721661
- ↑ https://www.troublefreepool.com/threads/remove-gage-when-closing.195301/post-1721668
- ↑ https://www.troublefreepool.com/threads/safety-cover-and-water-levels.153612/post-1359997
- ↑ https://www.troublefreepool.com/threads/drain-water-with-automatic-cover.194370/post-1713556
- ↑ http://www.glipoolproducts.com/Manuals/Instructions/SafetyCover_Instructions_Website.pdf
- ↑ https://www.propools.com/Manuals/54459_2014922114330.pdf
- ↑ https://meycocovers.com/support/winterize-storage/
- ↑ https://www.troublefreepool.com/threads/drain-water-with-automatic-cover.194370/post-1722623


