6. Equipment and Accessories Considerations
Depending on the specific setup or configuration, there are some basic pieces of equipment and accessories that will be required to implement the use of the nodejs-poolController if utilizing a Raspberry Pi. There are quite a bit of choices and options available here but I am listing the equipment that I personally selected for my particular needs based on my research and some recommendations that I received.
Note: I have yet to experience any problems or issues with any of the following items and I have listed the links where I purchased these items and the approximate cost of each item.
A. Raspberry Pi Computer: There are several different models of Raspberry Pi computers that are acceptable for the purpose of utilizing t
View attachment 161877he nodejs-poolController-dashPanel.
I happened to choose the Raspberry Pi 4B – 4GB model for my setup. If one were to plan on using the RPi for only the nodejs-poolController-dashPanel requirements, then the RPi 4B 4GB model may be a bit “overkill” I believe. However, I chose it for my needs based on the following requirements.
(1) It is currently the “latest and greatest” model and can handle much more workload if needed in the future.
(2) I am planning to use this particular RPi for additional tasks to include things like pH and FC sensors, Filter Pressure Gauge Transducer, MA dosing and water meter monitoring.
(3) Although I purchased my RPi, power supply and optional heat sink/fan kit, à la carte, there are also literally hundreds of various kits and bundles that are available as well. Just be careful when ordering various kits. Many bundled items within the kits do not appear to really be needed, or they are items that are inappropriate for this particular intended purpose.
Note: I am now personally using a USB to USB-C adapter in order to power my RPi(s) and I have completely ditched the “wall wort” type power supply.
B. USB Wireless Keyboard/Mouse Combo and Monitor:
It will be necessary to use a monitor, keyboard and mouse in most cases, at least during the initial setup. Once initial setup is completed, you can use remote desktop software to remotely access the Raspberry Pi and then you can use your normal desktop/laptop computer keyboard/mouse/monitor.
Regarding a keyboard, mouse and monitor. You can always use an existing keyboard, mouse and monitor that you already have, since it is NOT necessary to have dedicated I/O devices such as these.
However, I had no spares available to me and so I chose to purchase a USB wireless keyboard/mouse combo with USB dongle and a small 7” touch screen monitor. Especially in light of the fact that I figured that I would do a lot of playing around with other RPi’s (testing, experimenting etc) eventually.
Here again, there are hundreds of various options one can select, but the following are the I/O accessories that I happened to find and have consequently, performed well for me.
C. Raspberry Pi Accessory Options: The following are just additional options that I chose to purchase at the time because I had initially thought that I would be placing my Raspberry Pi at the equipment pad as explained above.
D. USB to RS485 Adapter: This is a necessary item when using the nodejs-poolController-dashPanel. A USB to RS485 adapter is
View attachment 161879necessary since there is a requirement for a physical connection between your Raspberry Pi and the RS485 bus of the IntelliCenter or *Touch. Here again, there are several different options that are acceptable. I have used all of the following adapters without any issues and will comment on each one below.
Comments: This was my first adapter. Super easy setup and good documentation. The connection and activity lights are adequate and handy to have. However, it is very large compared to the other two which I own and which could present a problem if using multiple USB adapters with your RPi. It’s also fairly “pricey” in comparison to the other two listed below.
Comments: I like this one as well. No documentation but that doesn’t matter since it’s illustrated adequately on its Amazon page. I will also provide the connection/pin-out instructions below.
Note: The “white” (clear) model allows for very bright connection and activity lights. This might be preferable for some, especially if mounting or placing the RPi outside. I use this adapter inside and it does not particularly bother me, but when my office lights are turned off at night, the blinking green activity light is VERY bright and flashing constantly as it communicates on the IntelliCenter RS485 bus.
EDIT: 5/7/21... THE FOLLOWING RS-485 ADAPTER IS NO LONGER BEING RECOMMENDED DUE TO IT'S HIGH FAILURE RATE. I HAVE USED THIS ADAPTER FOR A SHORT PERIOD OF TIME AND DID NOT HAVE A PROBLEM BUT MANY OTHERS ARE EXPERIENCING ISSUES WITH THE JBTEC, SO PLEASE BE AWARE. I CONTINUE TO USE BOTH OF THE OTHER ADAPTERS LISTED ABOVE AND I HAVE NOT EXPERIENCED ANY PROBLEMS WITH EITHER OF THEM.
Comments: I purchased this adapter for two reasons. I wanted to check it out because it is the adapter that is recommended on the GitHub, nodejs-poolController website (NO LONGER) and I will need additional adapters anyway for future pool-related automation projects.
This adapter is also the least expensive of the three that I have used so far. But it is also the one with the least number of features (features that are not particularly necessary for this application however).
What I like about this adapter is its simplicity and “slimness”. It can be used alongside other USB adapters on the RPi, without a USB port “space” conflict. It only has two inputs which is fine for this application. They are A (Data+) and B (Data-) and which are labeled on the bottom of the adapter. There is no consideration for a “GND” connection but that may not be an issue for most. There are no connection or activity light features. This is not a concern typically but activity lights on an adapter will provide the user with a visual indicator of communication traffic (“heartbeat”) between the adapter and the RS485 bus.
Also, here is another USB to RS-485 adapter that is getting good reviews and looks pretty cool.
Physical RS485 connection between the RPi and the IntelliCenter.
The following are the instructions to "make-up" the physical RS485 connection between the Raspberry Pi computer and one of the IntelliCenter COM PORTS on the IntelliCenter Control System Circuit Board (Mother Card) or the Serial COM PORT Expansion Board (520818), while utilizing a USB to RS485 adapter.
Note: Use UL approved conductor cable minimum 22 AWG (Cat-5e meets this spec). However use UL approved conductor cable minimum 18 AWG for distances longer than 200 ft.
Basically, this is the same as wiring most other pool equipment that uses a 2-wire COM/serial connection to the IntelliCenter or *Touch systems (pumps, high-end pool heaters, etc.)
There are two mandatory conductors (wires) that must be connected on the COM PORT RS-485A or COM PORT RS485B (on the IntelliCenter Mother Card) or on the optional Serial COM PORT Expansion Board (if applicable), and the USB to RS485 adapter.
On both IntelliCenter RS485 COM PORT terminals and the Serial COM PORT Expansion board, they are labled as “YEL” and “GRN”.
On the various USB to RS485 adapters, the terminal screw connections/pin-outs, may be labeled or indicated differently.
Here is the key for connecting the IntelliCenter RS485 bus to the USB to RS485 adapter correctly.
There is an optional third conductor related to this application, if desired. That is "Signal Reference" or Ground which is indicated by BLK,Black or GND.
Note: As noted in Section 5.D. above. IF, you are currently employing either an optional IntelliCenter Indoor Control Panel (P/Ns 522035, 523058 or 523059) or in the case of *Touch systems and are you are utilizing the ScreenLogic Protocol Adapter (with or without the Wireless Connection Kit) and/or one of the Indoor Wired Control Panels (P/Ns 520138 or 520548), then you should already have an existing RS485 connection within your residence. You would then only need to run a 2-conductor (3 if you prefer a ground) from one of these devices to your Raspberry Pi (or another computer if you prefer). This connection would serve as your physical RS485 connection.
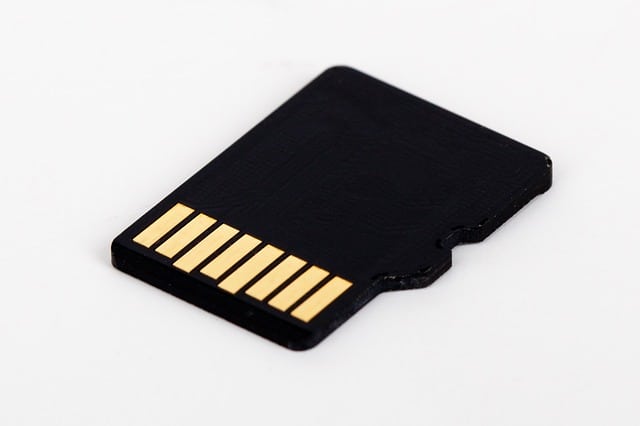
E. MicroSD Card: A microSD Card is also necessary since this is where all of the necessary files are stored for your RPi. Just think of this card as similar to your desktop/laptop computer hard drive.
Just like nearly every other piece of equipment or accessory noted within this instructional guide, there are many choices available in manufacturers and varieties here as well. You can purchase microSD Cards in 16GB, 32GB and even larger storage capacities.
Note: I had a lot of problems trying to load NOOBS and/or the RPi OS (formerly known as “Raspian”), initially for some reason on an existing 64G microSD card that I had. I really don’t know why, but I did find some information on the internet that suggested any cards larger than 32GB may experience issues with the loading of NOOBS and/or RPi OS. Just as soon as I tried a 32GB card, no problems loading the RPi OS.
If you are planning on running the nodejs-PoolController-dashPanel ONLY, on your RPi, then the 16GB microSD card should be sufficient.
The following link provides some additional information on microSD Card selection.
After using different Raspberry Pi SD cards, I have to say that the Best SD card for Raspberry Pi 3 must have excellent 4K random read and 4K random write,

safetomatic.com
Note: You can buy blank microSD cards and load RPi OS yourself or you can buy them pre-loaded with "NOOBS". NOOBS stands for “New out of the Box Software”. It is actually an “installer” that can be found pre-loaded on microSD cards or it can be downloaded to a blank card. I have not had good luck actually downloading NOOBS on to blank microSD cards for some reason (it just won’t load and execute). But I have had great success downloading the RPi operating system (OS) on blank microSD cards. Rpi OS will be explained in further detail in the next section.
Although I have not tried one, I understand that microSD cards with NOOBS pre-installed are a fantastic option (especially for the noob) and they are available from many distributors and independent retailers, including
Pimoroni,
Adafruit,
Pi Hut and
Amazon.
Note: I'm really not sure why I like to do things the “hard way” sometimes? Downloading and installing the RPi OS is not really that difficult but if the pre-loaded microSD card is just as good as the old-fashioned “download to blank card” variety, then why not.
More about NOOBS can be found in the following link.
This section includes some simple guides to setting up the software on your Raspberry Pi. We recommend that beginners start by downloading and installing NOOBS.
www.raspberrypi.org
Note: Another consideration when purchasing microSD Cards is having more than one. Just like any other type of computer application, backup is important. Once your microSD card is configured properly to run nodejs-poolController-dashPanel, you will want to back up the microSD card to an “image” file to your desktop/laptop. Also, having two exact images on two different microSD Cards allow you the latitude to have additional redundancy and to have peace-of-mind. Especailly if you decide to start experimenting within your RPi. If you goof something up, no worries. Just shut the RPi down, pop the card out, place the new card with the original image in, fire up your RPi and you’re “back in business”. See the section devoted to microSD card images and backup in the Miscellaneous Information and Instructions below.
Here is my current “blank” microSDC “card of choice”. I have had zero problems with these and I have six of them now that I have used. There are several different bundles available as well on Amazon.

")
 github.com