Newb OB with BYOP in Buckeye AZ - pebble and tile touch up suggestions

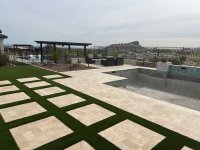
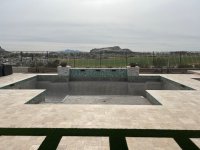
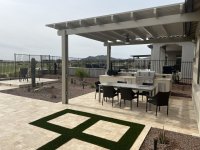
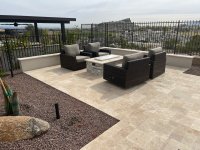
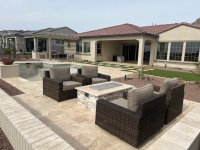
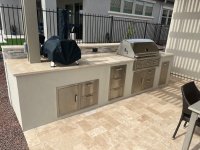
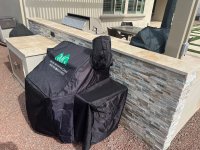
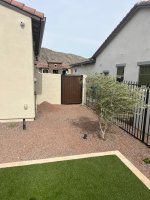
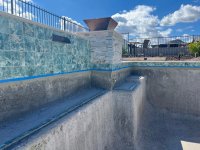
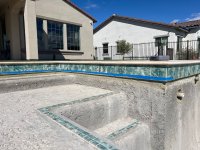
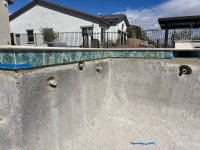
Backyard was finally done on 2/7! What a relief to have it finished. Even though I had a great contractor who I would recommend, I am not an easy customer and there are a number of nitpicky things that bug me. I think they did better than probably most in dealing with me.

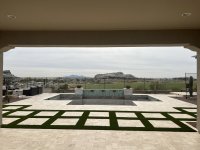
Anyway, thought I'd update the thread with a few pictures of our little oasis. We love it and that's a good thing since we have no more money left for any trips!

IMG_7254.jpegIMG_7255.jpegIMG_7256.jpegIMG_7258.jpegIMG_7261.jpegIMG_7263.jpegIMG_7265.jpegIMG_7264.jpegIMG_7257.jpeg
 
Backyard was finally done on 2/7! What a relief to have it finished. Even though I had a great contractor who I would recommend, I am not an easy customer and there are a number of nitpicky things that bug me. I think they did better than probably most in dealing with me.

Anyway, thought I'd update the thread with a few pictures of our little oasis. We love it and that's a good thing since we have no more money left for any trips!

View attachment 555148View attachment 555149View attachment 555150View attachment 555151View attachment 555152View attachment 555153View attachment 555154View attachment 555155View attachment 555156
This looks fantastic. What a beautiful transformation! Have to update again once the plaster is done.

--Jeff
 
  • Like
Reactions: Schwimmbad
This looks fantastic. What a beautiful transformation! Have to update again once the plaster is done.

--Jeff
Will absolutely update with plastering pics. Working on selecting that contractor now.

I still need to update the timelapse videos. I'll ultimately have three timelapses. One with everything start to finish, one for just the pool work, and one for the backyard work.

Once all this is done I'll be posting with my water chemistry and startup plans looking for feedback. That will be an entire new journey for me and I'll be throwing myself on the mercy of the TFP experts to guide me.

I don't use this one often, but you sir have earned it.

View attachment 555166
Wow! Thanks, what a true honor!
 
I would not ever go inside! I want to see that fire pit fired up!
That is the idea (except when it is > 105 degrees)! I'll be sure and post a fire pit video along with the fire bowls once the pool is filled, I think the reflections will add another element of
Awesome Sean Penn GIF
ness....

Below is an update to my to-do list as I get ready for plaster, which I'll get scheduled sometime in the next 1 to 3 weeks (sorta nice doing it at my pace when I'm ready). Anything missing?
  1. Paint back of feature wall and equipment screening walls
  2. Install gates on equipment screening wall and punch list items for fence
  3. Install auto close on our OXXO sliders and flip door handle and deadbolt on patio door (confirmed that with latch location 54" above the floor the bedroom windows don't need stops)
  4. Clean up mortar below waterline tile and apply waterproofing immediately below waterline tile to cover mortar
  5. Bond fire bowls to pool bond wire
  6. Call for final pool inspection
  7. Start research to get familiar with startup and ongoing chemical maintenance. Write out startup plan and ongoing maintenance schedule/plan (I have the mfg plaster start-up document). My reading list includes Pool Care Basics Archives, Just Filled Your Pool with Water? Here's What To Do Next - Further Reading, , Start-up New Plaster, any other key resources?
  8. Order TFP Pro test kit and test fill water
  9. Order attachments for my protuff pole (I figured I better spend the money on a lifetime pole now, it doesn't feel like much with all the $$ that are flying out of our bank right now)
  10. Get Intellicenter up and running on the network and update software/firmware (whatever is needed)
  11. Get pool chemicals (liquid chlorine, muriatic acid, CYA, salt, etc)
  12. Plaster
  13. Order robot, any recommendations? (this is a whole other area to get lost in doing research)
  14. Related by not needed for the pool at this time includes two remaining gas inspections and replace gas meter.

If you can remove all the extra under the tiles so the plaster will be the proper thickness at this joint.View attachment 540654
@AQUA~HOLICS thanks again for this tip. I went through the entire pool with a cold chisel and popped off the extra mortar below the waterline tiles.

you might consider at least slathering on a layer of it (or some other waterproofing that odd compatible with plaster) on the bottom side of the tile and mortar bed where it will meet the plaster.
I would do #3 before #2.

Those cracks are no problem
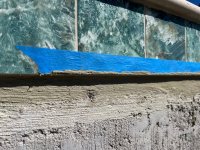
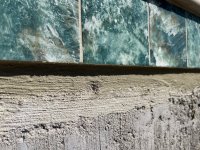
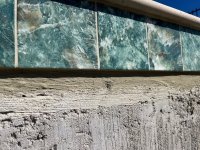
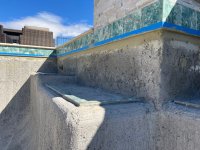
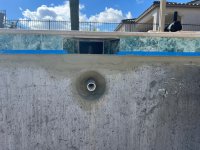
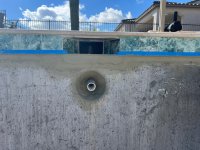
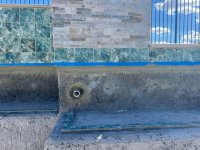
Thanks again for the suggestion @bdavis466, see pictures below. I applied two coats of basecrete and used blue painters tape to help keep the basecrete from getting all over the tiles. It worked out well, however I did have to go over the bottom of the grout lines between all the waterline tile to clean off the nub of basecrete (used a putty knife). Also had to scrape some basecrete off the face of the tile and below the tile so I didn't have a buildup. There were some locations where there were small gaps behind the tile so I tried to fill them with basecrete and let it dry an extra day before applying the second coat. I also used the basecrete to coat all the penetrations. The first plaster guy I spoke to said they also pack the penetrations with a water seal of some kind (didn't specify when asked).
IMG_7244.jpeg
Picture above after second coat of basecrete and before removal of blue tape
IMG_7245.jpeg
Picture above after removal of blue tape and before scraping nubs and bottom of tile
IMG_7246.jpeg
Picture above after scraping nubs and bottom of tile
IMG_7233.jpegIMG_7237.jpegIMG_7234.jpegIMG_7243.jpegIMG_7231.jpeg
IMG_7237.jpeg
IMG_7236.jpeg
 
Last edited:
-Storage for said chemicals. See this link:

Also here is something put together for right before plaster:

Some helpful hints for day of filling:

  • Do they have all the proper return nozzles and drain covers (type and color) to place after plaster installed
  • Have you tested your fill water? Are you filling with softened water or regular tap water?
  • Have your hose ready (and clean) as it will be laying in the pool.
  • Tie a sock or cloth around the nozzle so it does not sit on the plaster. Also, consider tying a plastic jug to the nozzle such that it will float up as the water rises.
  • Make sure the hose is put at the lowest part of the pool.
  • Do NOT stop the flow of water once it starts as it stopping it could cause a ring on the plaster.
  • Ensure you take note (or a picture) of your water meter reading before you start to fill
  • Be prepared to take note of your water meter as the pool reaches certain levels, i.e bottom of bottom step, top of bottom step, etc. (it helps in the future to know volume of your pool at certain levels - should you ever have to drain portion of it)
  • Plan to set an alarm every 4 hours (or so) to ensure hose is still in pool, no debris blew into pool, etc.
  • Take a picture of any chemicals they bring on site that they plan to dump in when they start to add water to pool
  • Continue to fill pool to center of water tile or center of skimmer. Take picture of water meter at end of fill
  • Get clear instructions from PB as what to do the day the pool is full - how often to brush, will the pump be turned on, etc.
Define with PB when he will be back out to set up water chemistry
 
Thanks @ajw22 and @kimkats for the additional references. Both of you (along with many others) have been a godsend as I've embarked on this successful journey to drain my bank account.

Have you tested your fill water? Are you filling with softened water or regular tap water?
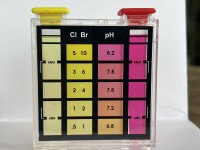
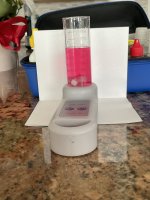
I ran my first set of tests on the fill water. Comments?
pH - 8.2, but seems higher (see pic)
TA - 130 (not sure how "red" the color should be, 120 was more pinkish and 130 was closer to a full red, but still seemed a bit pink to me, pic is at 13 drops)
CH - 275
IMG_6957.jpegIMG_1224.jpeg
  • Get clear instructions from PB as what to do the day the pool is full - how often to brush, will the pump be turned on, etc.
Define with PB when he will be back out to set up water chemistry
Since I was the PB I'll be asking the plaster installer what they want for when and how often to brush. I'll be using the plaster manufacturer's start up guide.
 
  • Like
Reactions: kimkats
Woo-hoo! I just got my pre-plaster city inspection approved!
Happy Andy Murray GIF by Tennis TV


Now it's all on me to get this thing finished off and started up.

I'm going with Finest Finishes Universal Mini Pebble Sand Color with 10% touch of glass. This should produce a light green water color. We expect our greenish tile choice should deepen the green color of the water a little, I guess we'll see.

I've been reading through the links about plaster startup that @ajw22 sent...
and I'm planning for the bicarb startup. Since the bicarb startup wants TA min of 200 ppm and the manufacturer's start up (which is the standard NPC startup) wants TA between 80 and 100 ppm I'm going into this knowing I'm giving up the manufacturer warranty. While I don't like giving that up, after reading what the manufacturer warranty actually covers I've come to the conclusion (guided by several TFP'ers) it really isn't worth much of anything and the applicator is much more important.

So, I'm calling @onBalance in the hopes he can do a quick check on my plans and offer any additional advice. I underlined my questions.

I tested my fill water 2 times:
1st time: pH - 8.2, TA - 130, CH - 275 (1/22/24)
2nd time: pH - 7.8, TA - 120, CH - 275 (2/27/24)

To see what Leslie's came up with for metals, I had them test the same water from my 2nd test:
Leslie's: pH - 7.5, TA - 127, CH - 164 (and they found CYA of 5 for tap water 🤣)
I know I can't trust anything they come up with, I just wanted to see what they found for metals. For iron and copper they found 0. I'll be adding sequestrant anyway, is this a good idea? And when is it added during the fill?

Ok, my combined TA + CH is right around 400 ppm (which is the minimum) and pH looks in range that doesn't require adjustment, but the TA is below the 200 ppm target. Based on 20,164 gallons on the design and needing to raise my TA by 85 (at the low end) using pool math I come up with 25 lbs of baking soda. Am I planning this out correctly? Bumping TA by 85 will get me close the upper end of the target range of 500 so it seems like a good place to shoot for. I'll be monitoring my pH as it fills to see if I'll need to add any acid to the barrel along the way.

Another question on the barrel set-up. I tested water flow from two hoses running simultaneously and got almost 16 gallons per minute. Is it likely that three gravity fed 3/4" discharge hoses from the barrel will keep up with this flow? I'll test this out before filling but hoping for an idea if 3 hoses would work. By the way, found a plastic barrel on facebook marketplace for only $10, score!

Lastly, the one applicator I am seriously considering installs the mini-pebble on day one and returns on day two to polish and expose the aggregate with a light acid wash. I talked through my plaster best practices document (attached) and he seems like he agrees with most of it. He could have just been giving me lip service, I will be seeing if I can go watch one of his jobs.

Any other comments or suggestions?
 

Attachments

  • Plaster best practices 2.pdf
    132.5 KB · Views: 6

Enjoying this content?
Support TFP with a donation.

Give Support
That is a standard installation for a pebble finish. You will begin filling on the second day after they finish the acid wash.

I am a big advocate for the bicarb startup, but I think the barrel method is needlessly complicated. What I have done is begin the fill and take a water sample every 3-4 hours and make adjustments as needed. Since your water is not that aggressive there would be nothing wrong with just filling the pool and not worrying about chemical additions until it is full and the pumps are up and running.

The barrel method is aimed more towards a fresh plaster finish that you wouldn’t want to be walking on while it’s filling. Pebble finishes are completely different since they are significantly harder at the time of the fill…it’s already handled an aggressive pressure wash and acid wash.

As for targets, plug your numbers into Pool math and aim for a CSI around +0.4- +0.6. The easiest way to get a higher CSI is to let the pH remain high (8.0-8.2). If your water temperature is warm enough, you may not even need to add any bicarb.

A metal sequestrant is cheap insurance, and I would absolutely plan on using it. It can be added at any time, but preferably sooner than later, maybe after a quarter of the pool is full. The biggest concern with high pH and TA is the formation of scale since calcium is a metal after all…

The initial 30 days is a perfect opportunity to use Trichlor pucks. They add chlorine, acid, and a small amount of CYA very slowly without any effort from you.

The only testing I would focus on is pH, TA, and an accurate water temperature. CH, CYA, and salt won’t really change at all during the first month.

You can check the chlorine level if you want but that isn’t all that important either, and does not affect the CSI during the start up. There will be a small amount in the pool, so long as you keep the pucks loaded up.

A word of caution, with high TA the pH will want to rise very quickly so staying on top of it will be needed. Acid will lower the pH, but will also lower the TA, which is a little counterintuitive when you are trying to maintain a higher bicarbonate level. This is why I mentioned before that the pH and TA tests will be what needs your attention.
 
Last edited:
I consider bdavis466 advise and perspective as "spot on" on all issues.
He is correct that the plaster will have hardened for 24 hours before filling which helps a lot.
I personally would add a little bicarb while filling to raise the TA to 150-175 ppm, just for some insurance.
You have certainly done your homework schwimmbad!
 
I can’t thank you enough @bdavis466. Your comments make a lot of sense. As I fill I'll probably run a test or two just to practice the testing and see how it's going. As I work through the first month I'll be posting updates to readings along with what adjustments I plan to make so hopefully someone can keep me between the guardrails.

And thank you too @onBalance for your comments. I'll take your advice and add some bicarb as it's filling. I'm thinking of mixing 5 lbs in 5 gallon bucket and pouring in a few times as the fill progresses.

I went to watch a plaster crew today and to my untrained eye things seemed ok. To me the finished product looked smooth (I didn't see anything that looked like trowel or swirl marks). I did notice some variation in color and the owner mentioned it is due to surface drying a little differently and that you wouldn't notice it after the polishing and acid wash the next day. I did check on their use of calcium chloride and it was minimal. They hand cast the glass. While I thought that was preferrable they mentioned it actually slows them down from finishing the troweling so they prefer to mix it in with the plaster, albeit it will cost about $400 more for my pool. He said it comes out more consistent and you have just as much at the surface.

I posted some videos on my youtube channel of the troweling and washing off the cream. I'd appreciate it if someone could take a look at these videos and let me know if see anything of concern.
Plaster crew vid6
 
I tested my fill water 2 times:
1st time: pH - 8.2, TA - 130, CH - 275 (1/22/24)
2nd time: pH - 7.8, TA - 120, CH - 275 (2/27/24)
Colorado River water.
It does have iron in it. Builds up over time due to evaporation. Just be ware.
 
Thanks @mknauss I wasn’t aware. More reinforcement to use a sequestrant.

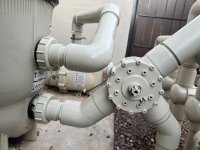
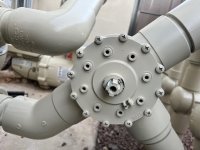
As I was going over my plumbing and start up plans I noticed the output from the filter does not go into the inlet of the 3 way diverter valve. The inlet for the valve is actually the branch that goes to the future heater (which is capped below grade). I assume this has to be fixed and just sent a txt to the plumber. I was wondering though, is it possible to take apart the valve and reconfigure it to change one of the ports to an inlet? From I’ve found so far it doesn’t seem like it.
IMG_7333.jpegIMG_7332.jpeg
 
Thanks @mknauss I wasn’t aware. More reinforcement to use a sequestrant.

As I was going over my plumbing and start up plans I noticed the output from the filter does not go into the inlet of the 3 way diverter valve. The inlet for the valve is actually the branch that goes to the future heater (which is capped below grade). I assume this has to be fixed and just sent a txt to the plumber. I was wondering though, is it possible to take apart the valve and reconfigure it to change one of the ports to an inlet? From I’ve found so far it doesn’t seem like it.
View attachment 555894View attachment 555895
That cap comes off and can be rotated. It only matters if you’re using it as a manual valve with the stops in place. If you’re using an actuator, then it doesn’t matter.

The plaster crew seems like a typical install. The color variation you mentioned is exactly why the acid wash is done the next day.

Adding the beads to the mix definitely makes it more uniform, but you will lose some of them that won’t be exposed on the surface. I would add as much glass as you can afford😂.

I forget which brand of Plaster you’re using but I would ask what type of additive (admin) will be used for the glass beads. Each brand has their own type of adhesive that’s used with glass because the beads will not adhere to a standard plaster mix. It’s bad enough to pay extra for the glass but imagine the feeling when you’re pulling those glass beads out of your robots filter basket.
 
Last edited:
  • Like
Reactions: Schwimmbad
Thanks for the comments @bdavis466.

I also talked to a Pentair rep and they said it's ok as is. I was curious if there is any additional head loss this way but forgot to ask. I'm guessing if there is any loss it's minimal.

I'm going with Finest Finishes Universal Mini Pebble Sand color. The plaster guy says he only uses the additive from the same manufacturer (Universal White Cement) for the glass. I plan to check out everything they have on their truck to confirm.

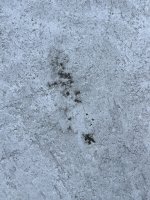
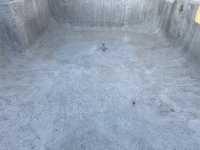
Today they are doing the pressure washing and prep work for the plaster tomorrow. I asked them to make sure to clean out the dark spots that look like some sort of grease, the ring from standing water that sat there for months, and some of the artificial turf fill that made it's way into a lot of the little nooks and crannies in the concrete. Not sure how critical all of that is, but guessing the grease is the most important to clean up.
IMG_7335.jpegIMG_7336.jpegIMG_7337.jpeg

I'm writing up a start-up procedure that I'll post today or tomorrow in hopes that a TFP'er can spot anything missing or offer some differences in approach.
 
  • Like
Reactions: pcollins22
Well my day got screwed up.

I got a call a little after 9am that afternoon job for the plaster crew got cancelled and they could do mine this afternoon. Well it screwed up plans for a party I was going to with my wife but weather was great today and tomorrow so I took the opportunity to get it done today.

I was there the entire time and made sure they pressure washed the entire pool and got the little grease (or whatever it was) stains cleaned. They had to go over it a couple of times. I was surprised how muddy the water looked!

Anyway, pool is plastered :) and I'm tired 😩, I'll post some pics/videos tomorrow. Overall I’m pleased with the job they did.

In the meantime, I thought I'd post what I put together for a start-up procedure since the polishing and acid wash is tomorrow followed immediately by the fill and I'm curious of any feedback.
  1. Prep to Fill Pool
    1. Unplug auto leveler line. Open valve to flush auto leveler line. Install float assembly.
    2. Unplug skimmer lines. Install skimmer doors and baskets.
    3. Turn valves to bypass water softener so soft water outdoor spigot can be used to fill with hard water.
    4. Clean 15’ of ends of hoses that will be in the pool.
    5. Place sock/towel on end of hoses with gallon jug zip tied near the end
    6. Fill with multiple hoses (start with front by water main, than turn on backyard corner).
  2. Filling activities – for water meter readings also get pictures of meter and pool
    1. Right before start ___________________ gals; Time ___________________
    2. At bottom lowest step ___________________gals; Time ___________________
    3. At top lowest step ___________________gals; Time ___________________
    4. Add sequestrant when ¼ full. Add enough for 10,000 gallons (10 oz)
    5. At top of 2nd from bottom step ___________________gals; Time ___________________
    6. Test for pH and TA
    7. Add 5 lbs baking soda. Pour in 5 gal bucket, add water, stir. Pour in pool while walking around deep end
    8. At top of lowest bench (NW) ___________________gals; Time ___________________
    9. At top of standard bench ___________________gals; Time ___________________
    10. Add 5 lbs baking soda. Pour in 5 gal bucket, add water, stir. Pour in pool while walking around deep end
    11. At top of shallow benches (SE/SW) ___________________gals; Time ___________________
    12. Add sequestrant when ¾ full. Add enough for 10,000 gallons (10 oz)
    13. At bottom of baja ___________________gals; Time ___________________
    14. At top of baja step ___________________gals; Time ___________________
    15. Test for pH and TA
    16. At center waterline tile _____________________gals; Time ___________________
  3. Start-up equipment and confirm operation/valves
    1. Open all return valves (including skimmer returns), close vacuum line and scuppers, close chiller bypass
    2. Prime circulation pump with water, open filter air relief valve
    3. Turn on breaker and start pump
    4. Water should come out of air relief valve within 30 secs. Once water comes out continuously, close valve and record initial pressure and pump rpms
    5. Check skimmer operation and make sure operating correctly. Run each skimmer independently as source with it’s return also on. Open valves for both skimmer sources once confirmed.
    6. Flush all lines and check for flow from all 7 returns. Record initial filter pressure at full rpms and 50% rpms.
    7. Confirm what each valve does and mark on valve.
    8. Reduce pump rpms to 25% and close all returns except chiller line and ensure flow to floor return.
    9. Run pump 24/7 for the first few weeks at 50% (xxxx rpms).
    10. Open all returns and adjust three-way valve for scuppers. Adjust valves behind wall to balance flow to scuppers.
    11. Close three-way valve to scuppers, leave the rest open.
    12. Open autofill valve at spigot and check/adjust float operation
  4. Initial Water Treatment
    1. Target CSI between +0.4 to +0.6 for 2 – 3 weeks with TA of 200 ppm or a little higher and pH ideally between 8.0 and below 8.2
    2. Take water sample for initial test for pH, TA, CH, and get temperature
    3. Add chemicals as required to get in range per bicarb start up guide
    4. Place pool on circulation
    5. Put trichlor pucks in floater and put in pool.
  5. Daily tasks (perform at 4pm)
    1. Take water sample daily, test for pH, TA, and get temperature (test for chlorine occasionally)
    2. Add chemicals as required to get in bicarb start up range
  6. Day 1 – 7 brush the entire plaster surface twice a day
    1. After day 7 check trichlor puck usage
  7. Day 7 – 30 brush the entire plaster surface once a day
    1. Day 21 begin to adjust to TA down to TFP guidelines
  8. Day 31 - Add salt (don’t do before 30 days after plaster is applied). Put robot in pool and run initial clean.
  9. After have proper salt content start up SWCG
 
Plan on the auto leveler being disgusting. Clean the bucket really well before hand and it might not be a bad idea to turn it on slowly and use a wet dry vac to clean out the nasty before it makes its way into the pool.

Your plan looks good 👍

Be prepared to go through a lot of acid and be mindful that aeration from the water features with a high TA will quickly raise the pH.

After the three weeks of the elevated TA, just target a lower pH (7.5-7.8) and the alkalinity will slowly drop on its own. There’s no reason to do it aggressively.

Congrats!
 

Enjoying this content?

Support TFP with a donation.

Give Support