COMPLETED: DIY Travertine Pool / Patio / Waterfall Remodel in AZ

COMPLETED: DIY Travertine Pool/Patio/Waterfall Remodel in AZ

Hi, I was a serious lurker on this forum for a couple years…many thanks to posters on this forum and other forums which I referenced for this project. This is a DIY patio/pool remodel that my wife and I undertook a few years ago. We actually finished it almost two years ago July (2014, time flies when you redo your kitchen and have two kids getting married in that period), although finished is a subjective term as there is always more to do. This is late, but I am posting so that others who may attempt something similar might get some inspiration and/or decide to save themselves the trouble…it was a LOT of work.

It started out as a remodel which we got a number of bids for. One of our biggest issues with contracting out the project was that we had to temper our desires with the cost of the project.

What we wanted “minimum”:
1) New travertine patio and pool deck, roughly 900-1000 sq ft (current patio just concrete, existing “cool deck” on pool was flaking and crumbling
2) New waterline tile and pebble type pool surface (current was 20+ year old plaster)
3) Expanded water feature (current “waterfall” not pretty, not in center, old fashioned)

What we “desired”:
1) Expanded patio and pool deck (bigger than the current footprint)
2) New travertine walkway to an outside basement stairwell
3) All patios/walkways/pool deck to be “level”…no steps or ledges at transitions, even to existing sidewalk, patio, basement stairwell
4) Eliminate the dated and boring “ cap tile ” that was a popular Phoenix area Shasta Pools invention built during the 1980s and 1990s
5) Expanded water feature that really makes the pool standout, remote controlled so that it didn’t have to be manually activated and deactivated
6) New Pool equipment
7) A landscaped “look” for the entire backyard that was yet undefined

We got 4 bids on different versions of the “minimum”. They differed in regards to travertine (at least one did not use it), amount of sq feet of patio decking (800-1100), size and type of water feature, differences in pool coping styles to deal with the “ cap tile “ issue mentioned above (we didn’t particularly like any of the solutions proposed). In any case, the bids ranged from $18K to $28K. The only “desired” feature in some of the bids was a slight increases in the deck/patio size.

A couple of the designers told us that it would be cheaper to have someone else do the patio portion, obviously pool contractors specialize in pools. The pool company would simply be hiring a subcontractor for the patio and then add an appropriate markup. We took this to heart and decided to break the project into two parts…patio and pool.

After some research, I decided that we would attempt the patio portion. About six months later, after some more research, I decided we could do the pool portion as well (but not the surfacing). I’ll try to document what we did…we started out gung-ho taking pictures of our progress; unfortunately that didn’t last and so there are some times when progress skips ahead.

Edited: SUMMARY OF COSTS and SNEAK PREVIEW

In some of the later posts in the thread, I have summarized the effort and cost (about $16,500) of this project. Here is a sneak preview.

BEFORE


AFTER


Another View

  • Locked
My Pool Has Turned Green

My pool has turned green and I don’t know why. My pool store says my levels are perfect and my test strips agree most of the time. Test results from the fancy machine at the pool store show my CYA is around 100 or so and the pool store guy said that’s good. I keep my FC at the perfect 1 to 3 ppm per the pool store test readout.

The pool store said my algae can be easily fixed with a few pool specialty products that they had on hand. They fixed me right up with some very expensive additives - algaecides, floc, balancers, clarifiers, phosphate remover, enzymes and some other stuff with descriptive names showing how effective they are for my pool problems. I’m not sure what’s in them or what they do but, hey, that’s what the pool store guy is there for right? Lol!

Here’s what I’ve put in the pool so far:

Green Aid

Yellow Out

LoChlor

Free and Klear

Phosfree

Yellow Treat

Bio Active

Clear and Perfect

Ultra Zyme

MiraClear

Last but not least, I poured in a whole bottle of No Mor Problems. The pool store guy said to only use half of the bottle but I really want to make sure I really have NO MORE PROBLEMS! I’ve dropped about $500 at the pool store now.

I would have thought that my pool would be clear and clean by now but unbelievably it’s still cloudy. Luckily I can always go back to the pool store though because the pool store guy said if this treatment didn’t work he has a few more things I can try. I have to go back to get some stain remover now anyway.

Is there anything else I can do? I need to get this cleared up quickly as we are having a big family party the day after tomorrow.

We Have a Winner! Photo Contest! TFP Pool of the Month (April 2024); Theme - Unique Pool Features

So easy! Post ONE pic related to the theme title above. I bet you have a good pic saved somewhere.

See the contest rules below.
Here are examples of previous winners. It's easy! What have you got to lose? You might receive a $50 discount code from TFtestkits.net.
  • Like
Reactions: Mdragger88

Right to Repair and Banning 'Parts Pairing'

The Oregon Governor signed the strongest Right-to-Repair bill yet, banning 'Parts Pairing'.


Hayward has begun chipping SWG cells so that only genuine Hayward SWG cells can be used by their latest systems. It sounds like that is a form of parts pairing that would be banned, at least in Oregon.

The bill also requires documentation and tools for repair to be made available. Maybe this will unlock repair information from Jandy, Hayward, and Pentair that they have made authorized dealer only.

It will be interesting to see how the pool equipment industry responds to this.

Solar Skimmers: Betta versus Ariel

I am looking at picking up a solar-powered skimmer to help with surface debris. Based on research here, it appears that the 2 viable candidates are the Ariel by Solar Breeze and the Betta by Instapark. I suppose that not many have owned both, given that both are somewhat new, but looking for opinions on these skimmers.

Based on my research I put together a quick list of pros/cons between the two, in no particular order. Please provide any feedback based on your personal experience.

Size of debris tray - Betta's seems a little bigger.
Customer service - Instapark which is China-based but has an office in CA gets good marks for issue resolution. Solar Breeze is based in AZ but have not found any experience.
Availability - Betta is currently available in 2 of their 3 colors, but Ariel seems to be on backorder.
Battery - Because these are solar devices this can be subjective, based on the pool's latitude and hours/sun/day. However it seems like the Betta will pretty much run 24/7 in a sunny climate such as mine. I have read that Ariel won't make it through the night, as opposed to its predecessor, the NX2.
Remote control - Betta's controls on/off and direction of travel. Not sure if Ariel has one.
Durability/Reliability- Ariel's owners have reported that because of its speed it tends to crash into walls, thus cracking the frame near the bumpers. Betta owners have mentioned that replacement parts (props, etc.) have been needed. Both have a one year warranty.
Cleaning capability - Both seem to clean very well.
Suitability for salt pools - Ariel: yes. Betta: yes I think. I believe their earlier version was not but the current one is.
Cost - Betta $589. Ariel $468???
Suction skimmer conflict - This relates to the tendency of the device to get pull away from the suction of the skimmer while the pump is running. It probably can't be evaluated due to various pump speeds. If I do have a conflict I may need to run my 2-speed pump on low speed (not a bad thing).

Thanks.
  • Like
Reactions: Bwilson88

Let’s see your water after removing winter cover!! **RESURRECTED FOR 2025!**

The title says it all. For those who close their pools for the winter and open in the spring, I wanna see your water right after you remove the cover and before cleaning, SLAM, etc.! Whether crystal clear or green swamp, let’s see it!
I posted pics of mine. Keep in mind, I closed November 1st and opened March 16th, LOL. My dark liner hides the dirt well, but I fished at least 20 worms out of there 🥴. Somehow my FC was 9 when I opened. Very strange. lol now it’s y’all’s turn. NO CHEATING!!!!!! 🤣

IMG_2995.jpeg
PoolMath numbers opening day after running pump for 4 hours or so…

IMG_2569.jpeg
Not too bad!

IMG_2573.jpeg
If you zoom in, you may be able to see some worms and specks of dirt lol

IMG_2994.jpeg
^^^^^ Liner is only on its third season and already fading. Oh well, I don’t like it anyways and want a different design. 😁


Keep this thread going! Whether you open in March, April, May, June, whatever! And again, no cheating! 😎

New Model Pentair MasterTemp Heater

@Jimrahbe @JamesW have you seen that Pentair has a new model MasterTemp heater according to the Installation manual Rev P 8/2020 currently on their website? It looks like Pentair again made significant changes to the model and kept the same name and SKU.

It looks like the manual has been significantly rewritten. And unfortunately the manual for the MasterTemp that most customers currently have is not on the MasterTemp page.

New manual is at https://www.pentair.com/content/dam...stertemp/Manual-MasterTemp-472592-English.pdf

Interesting changes seem to be....
  • Display is now 2 lines and shows error codes - page 46
  • No SERVICE HEATER or SERVICE SYSTEM LED
  • The diagnostic LEDs are not on the back of the board.
  • Page 45 shows the Fenwal module and it is different with 5 possible error states instead of 3.
  • Like
Reactions: JoyfulNoise

Playing Pool Boy For My Parents - Winter Garden, FL

Hey there fellow cement pond enthusiasts! Recent lurker, first time poster here.

My parents just filled their brand new, 20k gallon plaster pool back in January. Being that they’re retired, they decided to manage the pool themselves, which has turned into yours truly becoming the de facto pool boy. I’ve learned so much from this forum over the last couple of months as I try to wrap my head around this pool chemistry stuff, so thank you to all who have contributed.

I’ve already started using a Taylor 2006 kit as I quickly learned just how useless test strips and store results are. I think we have things dialed in pretty nicely, mostly just adding acid weekly to counteract rising pH and occasionally adding baking soda to correct the resulting lower alkalinity.

My next project is figuring out the best daily schedule for the VSP. It’s currently running at 2200rpm, 8 hours/day with the SWG (Jandy TruClear) set at 40%. I’m thinking of installing a flow meter because the SWG lacks a flow switch. I know it can chlorinate down to 20gpm, but I have no idea what our flow rate is at different RPM and I don’t want to rely on the gas trap to kill the cell if I go too low. I know the risk of a big ba da boom is low, but I don’t want the liability of blowing up my parents’ new pool equipment. 😬

Most recent test results below:

FC: 5
CC: 0
pH: 7.6
TA: 80
CH: 300
CYA: 60
Salt: 3200

And for no particular reason, attached are photos of my cats. You’re welcome.

Attachments

  • IMG_2171.jpeg
    IMG_2171.jpeg
    405 KB · Views: 14
  • IMG_1880.jpeg
    IMG_1880.jpeg
    283.5 KB · Views: 11

Anna, TX

I have been battling getting my TA down. 2 gallons of MA over the past week to get to around 90. PH has been 7.4 - 7.8 after everything settles. I tested the source water and TA is 140-160 ish. Will I constantly be battling this? Pool was completed last fall. Is this because of a new build. I have not had to use source water for a while, but since getting ready for opening I have been trying to lower TA. My source water TC 3.0 CC 0 PH 7.6 TA 140. Located DFW area. I have Brockovich water.

New to me Pool - First Timer

Hi All,
First time post from a first time pool owner, or soon to be. I am in the precess of purchasing a home in Massachusetts with an inground pool. See signature for details although it is not complete. The sellers are not the kind of people that take good care of things, they claim it has been winterized but who knows. It was not covered properly and the cover has now fallen into the pool. In any case, once I own it I want to hit the ground running. I will DIY all of the work and have been reading here feverishly to learn as much as possible. Can you please critique my plan? My short term goal is to get the pool usable this year without breaking the bank. Long term I would like to setup DIY automation, some super efficient solar electric systems, and making the whole thing as low maintenance as possible. Massachusetts has relatively high electricity rates in the neighborhood of $.26/KWH

Short term once weather turns of course
1) Become Gold member here and purchase a TF-Pro Salt with SmartStir
2) Possible buy robot like Polaris Freedom, I am not sure what cleaning system they have
2) Try to add a secondary DC pump motor (2hp treadmill) to the pump (Deleted link, Jim R.)
3) Fill pool and test systems (I have not read up on this yet but I am not sure how I will fill the pool yet, the house has a well and I assume a lot of water, sited in a generally wet area, I am having the well water tested now)
4) Use Chlorine at first to get the pool to a good state in the cooler Spring weather
5) Convert to salt water and install a Circupool RJ60 SWG

Long term
1) Try to fix the heater
2) Try to build a solar electric heater out of a heat pump water
3) Possibly replumb the systems

Thank you all for the great resource here and any advise.

Attachments

  • PXL_20240124_165553664.jpg
    PXL_20240124_165553664.jpg
    529.6 KB · Views: 77
  • PXL_20240124_165625633.jpg
    PXL_20240124_165625633.jpg
    470.3 KB · Views: 70
  • PXL_20240124_165627368.jpg
    PXL_20240124_165627368.jpg
    392.9 KB · Views: 67
  • PXL_20231117_195218442~2.jpg
    PXL_20231117_195218442~2.jpg
    914 KB · Views: 73
  • Like
Reactions: PNW-pool

Website Downtime

Over the next few weeks, you can expect to see forum downtime as TFP completes some of the final technical tasks in preparation for the busy Swim Season.

Later this week, expect the website to be down for approximately 30 minutes as we install updates to Xenforo to address some of those pesky bugs within the software. We do not foresee any noticeable features emerging from this update; rather, it's more about general housekeeping and applying fixes.

Then, on Tuesday the 26th, please anticipate TFP going offline for several hours as we migrate the website to a new server. It has been a few years since our last significant server update, and we're taking this step as we continue to grow. We expect the process to take a few hours as we back everything up and move everything from point A to point B, so please plan for the website to be down for an extended period.

We thank you for your patience and look forward to an exciting season.

My Automated Liquid Chlorinator Build

Umm, what's with the novel???

I wanted to write out my story on putting together a very functional (thanks to all the folks here) automated liquid chlorinator for three reasons: (1) I'm proud of it, and I want to thank the folks who helped me; (2) to share the problems I experienced to help others prepare well; and (3) to share specifically what I bought, so that others can use it as a reference when putting together their parts/purchase list to get a full picture ahead of time (note that YMMV for the parts, because your situation may be different).

I hope that I've organized it in a way that many can benefit based on their needs. I doubt many will read it all the way through, I'm completely good with that. If you get *anything* valuable out of this post, I'll be happy.

Without further adieu…

Why Build an Automated Liquid Chlorinator
If you just want to get to the story/problems/list, feel free to skip right over this section…

As with most DIY project, it starts with a need, or a desire to make something nicer or better. I wanted both! In my first full year of pool ownership, I used chlorine pucks and shock. Why? Because I didn't know any better. The pool was operational the first week of Nov, 2018--just in time to not use it. Around mid-summer 2019, I noticed the first signs of algae. It got out of hand very quickly, and I didn't understand why--I had all three of green, mustard, and black algae. I tried shocking it, to no avail.

This is when I discovered TFP! I performed the SLAM, which took about 2 weeks, and was very tedious. I read up on the theory of the SLAM and how I likely got to the point of algae (wasn't keeping enough chlorine to match my CYA, because no local pool company selling you products is going to tell you this). After seeing the results of the SLAM, I decide I was going all liquid bleach from then on out.

Over the next 8 months, proceeded to manually add liquid bleach about every other day in the swim season. I was very studious about it, but I'll admit, it got old after a while. Oh, I also had to do a water replacement this spring, because the CYA was around 90 from the previous summer when I had algae, and I didn't want to keep that much chlorine in my pool. Once COVID-19 hit, and I was working from home for months, I lost my routine and found I had a hard time remembering if/when I added the chlorine--a scary place to be for someone who had a battle with algae.

For some silly reason, I though, "you know, if I had a way to automatically inject chlorine at a certain amount and interval, that would be amazing--wait, that would be a great invention!" Thankfully, it had already been done, so I didn't have to invent anything--I could follow the lead of other clever folks around TFP!

Research & THANK YOUs
Now that I realized many folks had already done this, I started my research. I looked for different people who had created a similar setup (such as @GDN's full story). I also found folks that had automated systems already in place, like an EasyTouch8 (ET/ET8) from Pentair (such as @bdavis466, as well as @GDN's post here), which is what I have. I discovered from Marty (@mknauss) that chlorine loses it's effectiveness with heat (see this page and this post from @chem geek), so I found folks who had buried their barrel (like @RonsPlc posted here and here, and @jonpcar posted here). Once I'd gathered plenty of information, I started spec'ing out my build, because I wanted to ensure I got everything I needed (at least close to it) before I started, so that I could do it all in a day or two.

Planning Ahead, Parts List, and Ordering
I thought I did a pretty good job planning ahead, but there were still several things I missed. Maybe providing an explicit list here will help others.

I started with drawings and measurements to know how much of each material I needed. Then I ordered the items I couldn't buy locally, and started making a list of all the parts.
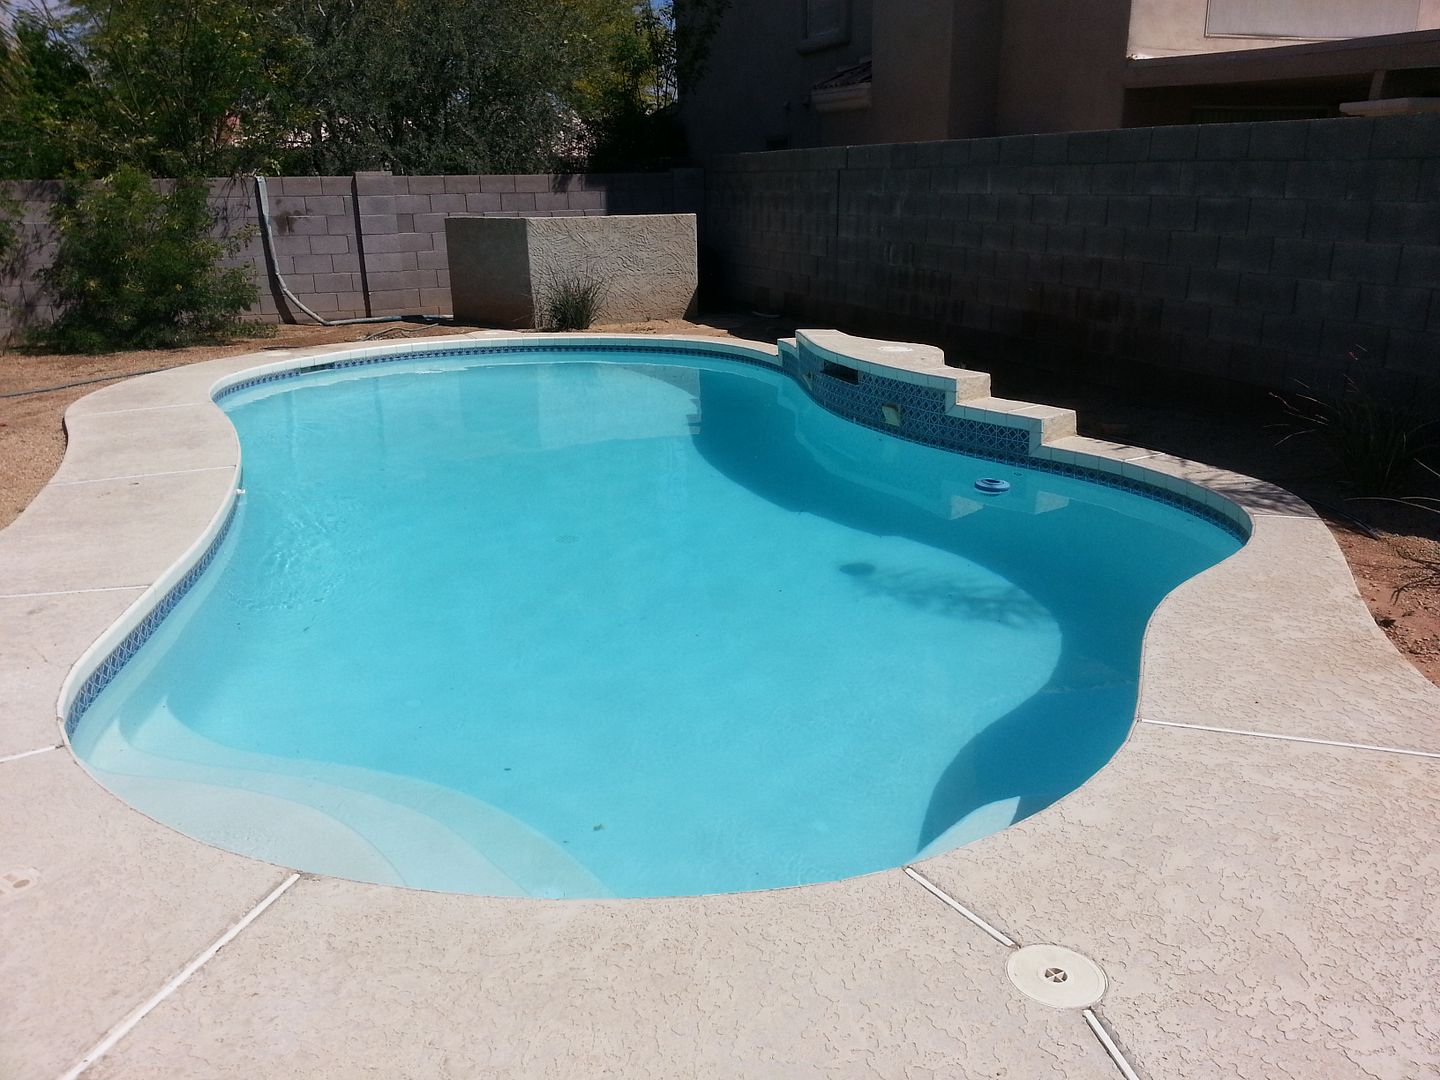
Here's the before pic and drawing...
Before.jpg
Drawing.jpg

Measurements
  • Estimated placement of chemical pump
  • Estimated placement of drum/barrel for chlorine
    • If burying, be sure to consider possible plumbing and electrical; might want to start this before you're ready to finish the project, in case you hit something and have to adjust the placement and then have to buy more materials
  • Estimated injection point for chlorine injection into plumbing lines
  • Measurement for conduit run to chemical pump
  • Measurement for Electrical run for power to chemical pump
    • Should be longer than the conduit so you have room to connect to receptacle and to ET8 breakers/relays
  • Measurement for placement of drum & suction line to chemical pump
  • Measurement for chemical pump to injection point into plumbing
    • NOTE: Based on your measurements, you may need to buy extra tubing for your chemical pump, so keep that in mind when buying/placing, because I was really close
  • One other thought: If you want to make the setup look clean, either make precise measurements up front along the exact path you want to lay the lines, or buy a little extra for headroom to make changes.

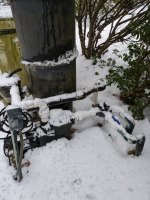
Plumbing - Pump & Drum
  • *Chemical Pump (Stenner 45MPHP10)
  • Rain cover for pump--you don't want this getting wet, so if you don't buy the cover, be sure you can place it in a location to avoid rain
  • *Extra tubing, if needed
  • Hammer Drill -> If you're drilling into brick, this is a MUST
  • Casing for tubing, if you want to cover it to protect it (see pic)
  • Tie straps (plastic)
  • *Drum for chlorine
  • Casing for drum (if burying)
  • Sand to put under drum (if burying)
  • For drum- Connector for chemical line injection (I got a reducing adapter and a rubber plug)
  • For drum - Adapter for the larger plug where chlorine will be poured. This was a threaded male to female slip adapter.
  • PVC pipe for connector above
  • PVC elbow (see pic) -> This was to make it easier to pour the chlorine
*These items may require ordering ahead of time and may vary in timing of delivery, so buy these early.

Plumbing - Injection
This was probably the most frustrating part of the project--trying to get all the connectors/adapters right for injecting into the pool lines. I measured correctly, but they didn't end up having certain connectors I needed (assumed existed), so I spent probably 1-2 hours trying to put together something that would work. You also have the option of drilling a hole into a pipe, which turns out might actually be easier, but I didn't want to do that. With that in mind, I'll list the parts here, and the explanation later.
  • Threaded cap to replace the rainbow chlorinator
  • Threaded male to slip female coupler connecting to the injection point of the rainbow chlorinator (so I didn't have to drill a hole)
  • 1" PVC pipe
  • Slip to threaded elbow (because I didn't have space to go directly into the line)
  • Reducing coupler for connecting the pump injector
  • Primer & cement for PVC pipes

Running power
  • 3/4" outdoor conduit (25')
  • 3/4" (2x) screw-type adapter to connect to the ends of the conduit for the ET8 & outlet
  • Outdoor weatherproof receptacle (to match 120v or 220v pump)
  • Outdoor receptacle housing
  • Outdoor receptacle housing cover
  • Cap to plug one of the receptacle housing holes to avoid collecting water
  • Electrical wire (yellow)
  • Screws to mount the housing cover to a brick wall
  • Brackets to mount the conduit against the brick wall
  • Screws for the brackets

Easy Touch 8 (ET8)
  • Plan your wiring/connection in the ET8 (you may need a breaker; I didn't)
    • I thought this would be straight forward, but it wasn't; thankfully, with the help of others on this forum as noted above, I was able to get up and running without extra materials
    • Think about whether you want to power the chemical pump no matter what, or if you want to chain it off of your main pain operation (will discuss why later). If you want to run it on separate power, you may need to add a breaker to the ET8.
  • Washer for connection b/w conduit and ET8 panel
    • I didn't originally plan for this, but when I punched out the whole, the outer ring became loose, so I added a washer to avoid having a weak connection here.
  • Wire for altering the internal wiring
    • I just used some of the black wire scraps I had from the electrical wire I ran for the receptacle, because I didn't want to pay extra money just to match the red wires

Final Touches at Drum
  • 4" x 4" x 8' weather treated wood post
  • 1/2" plywood
  • Screws / Braces for attaching legs and plywood cover
  • Sand for around drum
  • Rocks for around drum
  • Edging for around drum

Tools Used
  • Wire cutters
  • Wire strippers
  • Drill & drill bit for rubber plug
  • Hammer drill
  • Hammer and chisel/something to knock out the punch-out in the ET8
  • Shovel
  • Wheel barrow
  • PVC cutter or saw
  • Plumbing tape
  • PVC primer/cement

Problems Encountered
No project I do every goes according to plan. Thus, I figured it might be worth listing the things I didn't plan for.
  • I hit an electrical line when digging a hole for the drum. Thankfully, I didn't damage it, and thankfully, I didn't have to adjust my drum very far from my original location. Keep this in mind when burying, especially when planning materials.
  • Punchout ring in ET8 broke, so I had to go back to the store to buy a washer, so that the conduit could fit snug with the ET8 and avoid leaks.
  • Getting the electrical wire through the conduit was a serious pain. I didn't think it would be hard to go through smooth bends in the conduit, but it was practically impossible (probably would have been easier with 1" conduit, but that was more expensive.
    • I ended up removing the wall brackets and disconnecting the conduit from the ET8, stretching out the conduit so it was as straight as I could get it and fishing the wire through.
    • To fish it through:
      • I found a metal fishing tape/snake I had for plumbing clogs
      • Fished the metal line through the conduit
      • Once it was out the other side of the conduit, I wrapped one of the electrical wires and taped them off
      • Pulled the fishing tape back through the conduit, with the electrical wire attached
  • Wiring the outlet up to the ET8 wasn't as trivial as I thought. I didn't realize (stupid on my part), that I needed to connect to a 220v breaker, but I bought the 120v Stenner pump. So, I kept tripping the breaker every time I tried to turn the pump on, because I couldn't complete the 220v circuit.
    • See the "The Story" > "Part 3" for more details on this
  • Once I got it wired up, I wasn't sure how to get it connected to the main pump. Whenever the main pump was running, I didn't want to accidentally turn the power on to the chemical pump and be pumping chlorine into a stagnant line.
    • See the "The Story" > "Part 3" for more details on this
  • Plumbing connectors -> Don’t assume connections exist.
    • I was trying to avoid using pipe and cement to make my connections. This caused me to waste quite a bit of time.
    • Take the parts/connectors in with you when trying to find the plumbing connections.
    • Be willing to cement pipe with connectors and this will be MUCH easier.
  • If you seal off the drum, eventually, the pump won't be able to suck chlorine (conceptually). At a minimum, it will probably put more stress on the pump than desired. The "consider flooding" bullet below addresses this.
  • Consider whether you might have flooding. If so…
    • Leave your drum a few inches above the ground
    • You'll want to be sure the connections to your drum are sealed as much as possible, to avoid water/debris getting in
    • I used a rubber plug and drilled a hole in it and fed the tubing in it to "seal" it
    • I tapped and cemented adapters to the drum where I would add chlorine, and I capped the top of the pipe so that (1) it doesn't entirely seal the drum off; and (2) so that I could easily remove it to add chlorine
  • If rain can get to the drum, keep in mind that the dirt will eventually press against the drum, making it very difficult to remove.
    • I added metal casing around the drum, with sand under the bottom of the drum, to try to avoid this. The dirt will press against the metal casing, but I can still turn/remove the drum. This will (hopefully) be helpful in the future if/when I need to replace the drum.
  • Knowing how much chlorine to add isn't trivial. Even with calculations, it may not be exact, if you've run the chlorinator any additional time, or if the tubing in the drum has moved for some reason. I don't have a great solution to this so far.
    • If have easy access to the top of the drum, this isn't a problem. However, with what I built, I can't see into the drum. So, I have to use a "measuring" stick through my PCV pipe to determine when to stop adding chlorine.

The Story
I can't write this much without giving some form of a narrative. The idea for this is to walk you through the order in which I did things, and to provide a little more context for some of the info listed above.

Like I said, I planned more for this project than any other home project I've done. I did a ton of research and asking questions ahead of time, because I wanted to get through this as quickly as possible. Thus, I started drawing the plan, doing the measurements, making the list, etc., all of which is noted above.

Part 1 - Burying the Drum
The first step to took was digging the hole for the drum, because I knew that would be the most labor intensive. I measured out where to put it, spray painted around it to mark it off, and started digging. As mentioned in the problems list, I ended up hitting a line when digging, but I was able to adjust with little effort. Thankfully, I didn't hit any big rocks like every other whole I've dug in the past in my yard, which was a huge blessing. (Austin, TX has a lot of limestone.) This took several hours, because I dug a 24" hole. I did this in the afternoon of day 1. It hadn't rained in about of month, so of course, it flash flooded that night. This turned out to be a blessing as well, because it pointed out two things: (1) when water gets around it like that with little liquid in it, it floats; and (2) the dirt adhered to the sides of the drum, making it very difficult to get out, even though it wasn't fully buried. This is when I decided I would put a casing around it to avoid problem #2, and put metal edging around it and build a wood cover for it to address #1. I had to re-dig some of the hole because of the rain, but it didn't take long. I then added the sheet metal and sand, and dropped the drum in. Part 1 complete!
Drum_in_hole.jpg

Part 2 - Electrical
I then started to tackle the electrical portion. Honestly, I was hoping this would be relatively fast, because I've installed receptacles before, and running a conduit can't be that hard right? Mostly right, with the big caveat of fishing the wires through the conduit, and working out the breaker problems (see the problems section above). Rather than tell you what I did, I'm going to tell it as I would have done it to avoid the problems of fishing the line through. So, do NOT start with mounting the conduit. Start with fishing the wire through it. Be sure to leave extra wire on both ends for the outlet and for the ET8 connection. If you have trouble getting it through, use something stiff to fish it through. Once that's done, I then connected the line to the ET8. That way if I miss-measured, I'll have to adjust the placement of the outlet, but I won't have to unmount the outlet b/c it doesn't reach the ET8. Now, when I knocked out the punch-out to create the hole in the ET8, the ring which held the punch-out became loose. This made the connection unstable and showed potential for water getting through. This is when I had to go to the store to find something to cover that, but was thin enough to still screw down the connection. It's the top right connector in the pic below.
ET8_Metal_Washer.jpg

Next, I mounted the weatherproof outlet cover. Again, if you don't have a hammer drill, buy one, even if you never think you'll use it again. I've done 2 projects now trying to drill through brick without one, and it just didn't work. I finally decided to buy the cheapest I could find for this project ($22 from Harbor Freight), and it ate through the brick like butter! Didn't need to be fancy, just functional. Also, remember to keep your original measurements in mind. Once I got that mounted, I connected the conduit, cut the excess wire, and installed the receptacle. Finally, I put the plug in the top to keep rain water from standing. Probably not necessary, but I just didn't want to take any chances of a leak since that is a punchout type hole.

Now I mounted the chemical pump. Be sure to orient it the correct way, and if you have the rain mount, put that on. Once this was hooked up, and I finished the instructions from the pump, I tested the power and the pump. This brings me to the ET8 modifications.
pump_connected.jpg

Part 3 - EasyTouch 8 Configuration
As I stated previously, I didn't want the chemical pump to be able to run without power to the main pump. However, to test the outlet, I just plugged up the wires according to the diagrams I'd found. Note that what I'm about to describe DID NOT WORK, but I want to mentioned it in case anyone else were to try it this way, hopefully they'll find this in a search. I connected the neutral wire of my 120v chemical pump to the neutral bus bar, and one load line from the 220v breaker. This caused the breaker to immediately trip, because you can't steal power from leg of a 220v GFCI breaker. The fix was to plug the neutral wire into the neutral terminal of the GFCI breaker (which, with some reading online will complete a 120v circuit), and voila! We're up and running! However, I'm now hard-wired directly to the power, which is not really what I wanted, but I needed to ensure the outlet and pump worked appropriately. To make this change, I connected a new relay running the LINE side of the main filter pump relay to the LOAD side of the new relay. By using the LINE side of the filter pump, we ensure that no power will get to the new relay unless power was ON for the filter pump relay. I then ran the LINE side of the new relay to the chemical pump. Tested it out by turning the filter pump relay on, then the chemical pump relay, and it worked. Then, I left the chemical pump relay on and turned off the main filter pump. … And we're golden! For details on a full discussion on this troubleshooting and final setup, see this thread.
ET8_wiring.jpg

Part 4 - Chemical Pump, Drum, and Pool Line Injection
OK, outlet, pump, and ET8 are all installed and working properly. Now I'm ready to drop the line from the chemical pump to the drum. I needed to seal off where I was going to drop in the chemical line, so I used a threaded 3/4" to 1/2" reducer and a rubber stopper/plug. I drilled a hole in the rubber stopper (note that this took a while, because I didn't want it to be too big, but I needed to be able to pull the chemical hose through it). This was a bit of trial and error, slowly making the hole bigger until I could just barely pull the hose through it. Keep in mind the recommendation from the chemical pump instructions to not drop the line to the very bottom on the drum, so as to avoid debris. I then dropped this into the drum, fished the hose through the larger hole in the drum so I could add the filter to the end of it (my pump came with a filter to help avoid debris buildup), and then taped the reducer with plumbing tape, and screwed it into the drum. Chemical line set!
Rubber_stopper.jpg

Next, I connected the hose to the other side of the pump for injection into my plumbing line. Again, this wasn't as simple as it should have been. I wasted tons of time trying to make pieces fit without using cement and PCV pipe, because I thought I could get the right number/type of connections/reducers to connect the chemical pump injection check valve. Turns out, I couldn't. YMMV. Once I confirmed all the connections would work, then filled the drum with chlorine and tested the pump before connecting to the pool line. Once chlorine output was confirmed (didn't have any problems here), I connected the injection check valve and was good to go!
Injector_connected.jpg

For clean-up, I put the casing around the chemical hose and used the tie straps to keep the hose from moving around.

==> PROJECT "COMPLETE" !!!

Part 5 - Finishing Touches
At this point, the project was "done" from the perspective of an automated liquid chlorinator, but I wasn't done. First, I wanted to try to avoid rain/flood water from getting near the drum. Second, I didn't want to have to unscrew the larger cap to the drum every time I wanted to add chlorine, because (a) it was difficult to turn; and (b) every time I take it off, I run the risk of not sealing it well when screwing it back on; which leads to (c) I needed to seal it off well at the connection with the drum, but still allow it to breath, without having to worry about flood water getting in. So, I finished it out address these points.

First, I added the edging. I'd previously measured out how much I needed and bought the materials, so I shaped it as needed and formed a box around the drum. I then filled in around the drum with sand and rock to make it look nice. I now have a solution for general flooding, however, I this doesn't address rain water from the roof (don't have gutters in this area).

Next, I built a wood cover for the drum, so that rain water would run off before dropping into the area where the drum was, which would be a problem for build-up now that I have the edging in place. I created 4 legs with the 4"x4"x8', cut the right size from the plywood, and built a four-legged covering. It's not fancy, but it's good enough. This didn't go quite as planned, either, because I didn't realize my gas pipe for the heater was going right across where I'd planned one of the legs, so I got to redo that part. Wasn't too bad, though, and now I have my covering.
Final_product.jpg

Finally, to solve the sealing / adding chlorine annoyance. I measured how much PVC pipe to cut so that, after the elbow, the top would stick out just past the underside of the wood "cover" I built. I made sure to make it as tall as possible to avoid water, because I didn't want to cement the elbow, to make it easier to seal off at the drum (so I didn't make it tight, and then the elbow be pointing in the wrong direction). I cut the pipe, cemented the threaded/slip adapter to the pipe, and let it dry. Then, I taped the threaded adapter and screwed it into the drum. I then cut the next PVC pipe and put it into the elbow and the elbow on the pipe that's connected to the drum. Last, I added the cap.
Easy_pouring.JPG

And now, I'm done! :)

Result
I'm super pleased with how this all turned out. After only 4 weeks of the setup, I took a 1 week trip, and it worked flawlessly while I was gone. The only problem I've had since installation was miscalculating when I add chlorine to the drum, and I went about 12 hours with little to no chlorine in the pool. I won't make that mistake again. You can consider that USER error!

As far as the pump, the ET8, the schedule, and the chlorine, everything has worked without a hitch. I check the water every 2-3 days, and I adjust the schedule, if needed, but it really only took about 2 weeks to get it adjusted just perfectly.

One more thing to keep in mind--if you run the chemical pump during a time when people may be swimming, be sure not to change anything in your automation that would turn off the pump; or, be sure to make a manual adjustment for that day.

Well, if you made it here to the end, bravo! Thanks for allowing me to share my story, I'm quite proud of my automated liquid chlorinator, but I NEVER could have done this without the wonderful folks here on Trouble Free Pools. Thank you to each of you who helped me along the way. I hope this post ends up helping someone else!

Afraid of too much chlorine.

I'm hoping for many responses. I think that the only way I'm going to have any confidence in my water is hearing from many people that "high" chlorine levels are not risky or uncomfortable. I'm really concerned that I might harm my grand kids et al.

All my pool life, the warnings are the same: keep chlorine levels between 1 - 3 ppm and never exceed 5 ppm. Suddenly I'm told to double that. I've pushed my numbers to go as high as seven and as low as two ppm with a CYA of 50 ppm and seem to be struggling with green algae hiding behind my ladder.

Please tell me your experience swimming with CL levels as high as 8 ppm. Any effects? Are we OK? Will we turn green, shrivel up and. . . well you know.

Every thing else is perfect.
FC = 4
CC = .2
TA = 120
pH = 7.6
CH = 250
CYA = 50
OCLT = Near zero
Sparklin' clear.

Thank you very much.
  • Like
Reactions: GreenNot

Does anyone use the Spin Touch with the Water Link Solution mobile app

Hi,

I do have a pool and use this to maintain it. However I currently a student doing my masters and am looking for a couple of folk that would be able to give me feedback on the app. The class is on UX Design, this is part of the research part, planning on doing a partial redesign for the class.

Thank in advance,

John
  • Like
Reactions: surf

Jandy Neverlube Valves - question for those in the industry

Question for any others in the industry. I just completed and install of a heater for a customer and part of the job included significant rework of the plumbing to clean up a whole host of previous repairs. I went with Jandy Neverlubes and noted that right out of the box all 5 valves had what seemed to be stress cracks that were originating from the screw risers and down into the valve housing. I rejected the first batch and the second batch of valves had similar issues. The counter person mentioned on the first batch that they were seeing QC issues with Jandy‘s lately. When I rejected the second batch, the supervisor was called in and assured me I was crazy and they were “casting marks”. My objection to this theory is that the cracks were inconsistent in location and size and not uniform valve to valve. I went to a different branch of the same supplier just to see if their valves had similar issues. Sure enough there were similar cracks. To me the cracks appear to potentially be from the screws in the housing being overtorqued at the factory causing stress cracks. Is anyone else seeing this issue or am I just nuts? I’ve attached a few pics for example purposes but could load plenty more. Mods please move if I’ve posted this in the wrong area.


IMG_8173.jpeg IMG_8172.jpeg IMG_8170.jpeg IMG_8161.jpeg IMG_8165.jpeg
  • Wow
Reactions: Newdude

Leslie’s vs Taylor test

It’s pool opening time and I wanted to see if my reagents were accurate or not. Other than my chlorine I’m getting some vastly different results with my Taylor K2006 test kit compared to what Leslie’s got today. Is it my reagents or something else?

Attachments

  • IMG_1514.jpeg
    IMG_1514.jpeg
    812 KB · Views: 131
  • IMG_1515.png
    IMG_1515.png
    79 KB · Views: 118
  • Haha
Reactions: Newdude

A Spring Cyclone!

I know, I know: it’s a long time before it'll be time to close. Heck, I haven’t even opened yet! But I figured that “opening day” would be the perfect time to test out my rig for closing (since the filter is empty, etc). And since I’ve developed “pool fever” while waiting for the weather to warm up, I spent a bit of time setting up my Cyclone for the fall!

First, a HUGE THANKS to @Catanzaro whose plan I followed pretty closely (Modified Cover for Hayward Super Pump for Closing Swimming Pool). My lid came out very similar to what has been posted by @PoolStored and others. I was tempted to try out the DIY plywood adapter that was developed by @cincypilot — but I ultimately went the traditional route since I was slightly concerned that if the wood plate wasn’t seated perfectly flush with the cover ring when I turned on my blower, that the deltaP would smash the plywood upwards and potentially do some expensive damage to the pump (that’s probably a useless worry, so this isn't intended to steer anyone away form trying out that very clever setup).

For anyone else following in the footsteps of @Catanzaro , you might find that some of his links to the parts no longer work. So if it happens to help anyone, below are the Amazon IDs for the parts that I used (rather than posting links, just search on Amazon for these unique ASIN numbers):

Sampo’s Parts List (total spent: $456 with Cyclone):
  • Cyclone Blower ($356): ASIN B004BNR5DC
  • Jandy R0448800 Lid ($51): ASIN B008E6JJ7C
  • Hayward SP1023 1.5” FIP inlet return fitting with locknut ($12): ASIN B003ZTM0O2
  • Universal Combo Hose Adapter 1.25/1.5" ($8 for 3): ASIN B0BSVCLNLC
  • QuQuyi 1.5” Heavy-Duty PVC Flex Tubing ($29 for 6ft): ASIN B09L5W999V

Some lessons-learned:
  1. I first purchased a slightly cheaper (but non-OEM) lid for my Jandy pump (ASIN B0C1RZV174). But after test-fitting it, its connection didn't feel quite the same as the original part. It would have worked for the Cyclone -- but since I’d seen the clever/obvious suggestion on TFP to sacrifice the old lid and switch in the new, I wanted a perfect fit. I think the OEM part form Jandy was worth the few extra bucks.
  2. Drilling the hole through my old Jandy lid was a bit stressful -- since a mistake would have instantly cost $51. But I clamped the piece tightly to my drill press, went slow, and had no problems at all. I even sanded out the edges of the hole for a finished look.
  3. I first tried a short pool hose (ASIN B07PKD75JP) for this setup. But one end on that didn't mate with the supply hose adapters that I had bought. So I splurged on some heavy duty PVC tubing with a reinforcing steel coil and a listed 1.5” inner diameter: it was absolutely perfect.
  4. Some of this is probably a bit overengineered for the need (e.g., the reinforced flex tubing). But I'm very happy with this super-solid setup that should hold up for decades. In any case, this rig will save tons of money compared to hiring someone for closing!

Below is a picture of my final product. Thanks again to the TFP community for this great DIY plan!

“CYA later”

Sampo

Sampo's Cyclone.png

Getting Started Using the TF-100 Test Kit - My Experience

When I received the TF-100 (salt) test kit it seemed a bit overwhelming with the various chems so wanted to share my experience and thoughts, having used it for the first time today. It all really does make sense. In my opinion the instructions can be written a little differently, but I am a linear thinker which I know is not everyone's style. Either way, I compiled a chart that made sense to me and wanted to share it in the event it would benefit other first time TF-100 users. I seem to be unable to upload the Excel version so people could modify it to serve their needs. Sorry about that.
  • Before starting the testing I found it helpful to have a towel (to dry my hands after getting the pool samples), a paper towel (upon which to set all the test containers after rinsing them) and a pen/pencil. And reading glasses if you are of a certain age! I also grouped the chemicals into the tests for which they were needed.
  • To take a sample from a foot below the surface keep the test container upside down when dunking it in the pool and then turn it right side up at about the foot under water mark, which will fill the container. Shake it to splash out the water down to the necessary level.
  • Before getting started on the CYA test, the top of the mixing bottle dropper needs to be cut off with a sharp knife. Also, the R-0013 solution has a seal on the top which must be removed by unscrewing the cap.
  • Mixing the chemicals is not quite like swirling a wine glass. I found swirling it while on a table worked best.
  • It helped me to think about how many potential drops of chemicals I would estimate to be needed on the FC, TA, CH & Salt tests as the final result calculation is based on the number of drops to have the solution change color. For example, my FC was unusually high and used 32 drops. We aren't talking one or two, but would normally expect about 10. Be patient though when you believe you are getting close to the solution turning the necessary color. Swirl a little extra before adding the next drop.
It took me about an hour the first time going through the testing, taking my time to understand everything and ensure I was doing the tests correctly. I expect when I am more comfortable it will all take under 10 minutes from taking out the test kit to putting it away.

I hope this is in some way helpful to people getting started with the TF-100 test kit.

View attachment 491520TF-100 Chart.JPG

Crypto-Outbreak in Melbourne

Melbourne is currently dealing with an increased number of Cryptosporidium outbreaks in public pools, requiring them to close for "Hyper-Chlorination":


What does ""Hyper-Chlorination" in the Victorian regulations mean?

The recommended incident response in Victoria is described here (Appendix 6):


The steps are:

No CYA used (CYA not allowed for public indoor pools in Victoria):
1) Adjust pH to 7.5 or lower
2) "Hyper-Chlorinate" to achieve an FC contact time (CT) of 15300 ppm x min, e.g. 13 hours @ FC 20ppm or 26 hours @ FC 10ppm

CYA used (up to 100ppm allowed in public outdoor pools in Victoria):
1) Reduce CYA to 15ppm or lower
2) Adjust pH to 7.5 or lower
3) "Hyper-Chlorinate" to achieve an FC contact time (CT) of 31500 ppm x min, e.g. 28 hours @ FC 20ppm

The FC-CT of 15300 is a commonly found value for crypto for a kill target of 99.9%, so far so good. They added a factor of 2 when CYA up to 15ppm is used. Let's see if that makes sense.

As we all know, it is actually the HOCl-CT that matters, and not the FC-CT. Assuming that the FC-CT of 15300 ppm x min was derived at pH 7.5 without CYA where 50% of the FC is HOCl, then this would be equivalent to an HOCl-CT of 7650 ppm x min, which is our benchmark to compare with the CYA-scenario.

At CYA 15 ppm, the regulation tells us to use the 31500 FC-CT value.

Let's assume first that we want to "hyper-chlorinate" at FC 10 ppm, which would yield (calculated with chem geek's sheet) 0.75ppm of HOCl (or 7.5% of the FC). This would be roughly the HOCl concentration at TFP's mustard algae SLAM level. This means that the FC-CT of 31500 yields an HOCl-CT of only about 2350. This will actually only kill about 88% of the crypto population, rather than 99.9% (2348 / ln(1-0.88) x ln(1.0.999) = 7656).

When "Hyper-chlorinating"with CYA 15ppm at FC 20ppm (which is the example they give in above guidelines) we'd have 3.5ppm of HOCl (or 17.5% of the FC). This is nearly 5 times of our mustard algae SLAM level - note that at these extreme FC/CYA ratios, the HOCl concentration is no longer proportional to the FC/CYA ratio). This gives us an HOCl-CT of about 5500 ppm x min, killing about 99.3% of the crypto population (5500 / ln(1-0.993) x ln(1.0.999) = 7657), which is getting closer to the intended 99.9%.

I'd say their simplified approach of just doubling the FC-CT time to account for CYA seems to do the trick. The challenge would be to maintain FC at 20ppm for 28 hours in an outdoor pool with only 15ppm of CYA.

Feet of head, flow rates, horse power, potential new pump to save money?

Trying to wrap my head around all of this.

I have an 11,000 gallon Royal pool (new to me) and currently it has just a skimmer with about a 60' run back to the 1.25 HP pump in 1.5" PVC into a Hayward Proseries S-244T.

I'm reading poolpartstogo and it is confusing me on the size of the pump I should get.

Currently drawing almost 12 amps, so 1.44 kw at .12 cents a kw so costing me about 17.3 cents an hour.

I KNOW going variable will save me money, but budget is tight right now, so was wanting to run the numbers and see what the ROI would be and probably could sell it to the wife if the math maths. ;)
  • Like
Reactions: JamesW

Filled new pool in October. Add Salt & CYA now or wait?

I’ve already learned so much from this group and I’m so happy to have found you at the very beginning of my pool-care learning adventure. I love my PB but because of this site I knew better than to continue using the Clorox Extra Blue tabs he left me after startup. 🙂

I’m going to keep the pool open through winter and with my water temps in the 50s (F) I’ve been relying on liquid chlorine for sanitation (2-4 ppm). I’ll fire up the SWCG next spring when the water warms up. I was thinking I’d wait until then to add the salt and CYA (which I already have). Does this sound like a good plan? I’ve read that CYA reduces the harshness of chlorine but my current levels haven’t bothered us.

Thanks for the knowledge you’ve already bestowed upon me and I’m looking forward to learning more.
  • Like
Reactions: Newdude

Filter