Still got it!

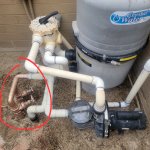
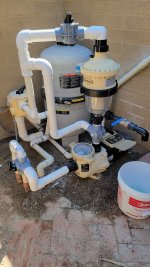
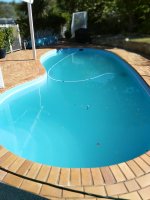
Recently returned to pool ownership after 5 years. The new place has an old pool that was terrible! The equipment was worn, valves were stripped, and it was filthy! Of course it passed everything on the home inspection :mad: ... So upgraded some equipment and got back into the TFP method and am now crystal clear! New setup is great with the prefilter from Leslie's. Totally recommend that thing.


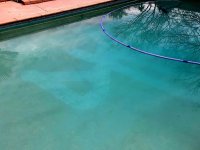
Old gear

20230219_154504.jpg

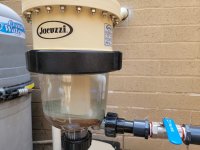
New Gear

20230308_112348.jpg

Vac now working with proper suction

20230225_135831.jpg

Day one in the pre filter

20230228_121236.jpg

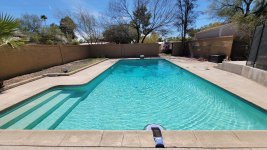
Now

20230307_121236.jpg

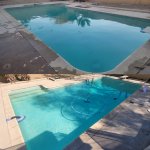
Before and after

IMG_20230309_152400.jpg

I should say the "before" was actually a couple days in. The bottom of the pool started as a pile of leaves. I bought a robot since my pump and filter weren't working right. The robot was great at debris but could not get the fine first and sand that had been accumulating in the pool. Nothing compares to suction for that.

Anyways, glad to be back on the forum and looking forward to learning new things from you all as always!

Does anyone know of a wifi-enabled filter pressure gauge?

Hello everyone,

At the moment, my pump and filter are still inoperative and I just filter my pool with my pool vacuum robot once a day...
But as I gear up to install my new pump and get my old filter to work again, I need to replace its broken pressure gauge.
I plan to run my pump on low 24/7, and foresee myself forgetting to check the filter pressure unless my pool turns green.
Does anyone know of a wifi-enabled pressure gauge that can send my phone an alert when my pressure goes up?
Or else anything that offers some sort of visual or audible alarm?

Thanks a bunch!

Gernot
  • Like
Reactions: our_hummel_abode

Grackle Season

For about 4 years now, my husband and I have had No grackle poop in the pool. We still have grackles, but my husband stays on it. Our yard has a border (neighbor) of some type of Evergreen trees, roughly 18ft. high. When they start to flock and gather in them,he gives them a few days, then goes out with a pole that is 18 ft. long and knocks down all the nests. The birds do a lot of hollering, but leave the nest! He does not kill the birds, just blasts the nests to the ground, picks them up and throws them away. He also wears a hard hat when he does this, for the few birds who want to put up a good fight. He also gets the nest down before eggs are laid. He now knows the difference between a sparrow nest and grackle nest. The grackle nest is Long. He checks these trees once a week. A little time consuming, but we are free of those disgusting poop balls!
  • Like
Reactions: DiverGirl1972

Alternative Pool Automation and Sensor/Chemical Control and Integration

Industrial Automation 8-Layer Stackable Card for Raspberry Pi Pool Automation and Sensor/Chemical Control and Integration
(nodejs-poolController / nodejs-poolController-dashPanel / relayEquipmentManager)

2020-12-05_08-13-53.jpg

- Table of Contents -

- Preface

1. Background, Purpose and Scope

2. Credits

3. Alternative Automation Enclosure and Related Hardware

a) Enclosure
b) AC Power Requirements and Related Support Equipment
c) DC Power Requirements and Related Support Equipment
d) Network Connectivity
e) RS-485 Connectivity

4. Sensors, Probes, EZO-Circuits and Hosts
a) Overview
b) Probes and Sensors
c) Sensor/Probe Mounting Considerations
d) Initial Sensor Setup and Configuration

5. Additional Miscellaneous Information
a) Calibrations
b) Atlas Scientific IoT Monitoring Software
c) Other Atlas Scientific Kits

6. Useful References and Links

7. Glossary

8. Additional Photographs with Related Comments


Preface –

This document concerns itself with advanced and alternative pool automation, sensor and chemical control and integration.2021-01-01_18-47-35.jpg

Nothing discussed in the initial posts of this thread are actually “necessary” for the provision or the operation of basic pool automation or control. All of the methods or procedures discussed below should be considered “above and beyond” what is necessary for the majority of pool owners considering pool automation and control

With regards to this newly completed project of mine, there are basically two major components that comprise the overall system - Hardware and Software. This document concerns itself with the hardware component of the system.

The software component is in the final stages of initial development and is currently in beta testing.

Once that beta testing is complete and the software is released by the developer. Then a follow-on companion document titled “Relay Equipment Manager (REM) and Integration with nodejs-poolController and dashPanel - Information and User’s Guide”, will be published.

A draft outline of the Information and User’s Guide is provided here for reference purposes.


1. Background, Purpose and Scope
Several months ago, particular discussions among several TFP members began to develop online and off-line. These discussions centered around the various design and implementation considerations of a more robust level of pool automation incorporating sensor/chemical control and applicable integration with existing automation systems.
2021-01-02_11-39-40.jpgThese discussions became more involved and detailed over time. Not only due to the fact that the nodejs-poolController and associated nodejs-poolController-dashPanel software had developed into much more comprehensive and dynamic platforms. But in addition, both were becoming more “mainstream” as well.
(Please refer to the glossary for definitions of nodejs-poolController, nodejs-poolController-dashPanel and REM)

Several members here (including myself) were having enhanced success with these two programs that by all accounts, were exceeding expectations.

Also, others were having increasing success from their own “DIY” or “homebrew” pool automation and sensor/chemical control systems as well.

The last element that served to enhance the progression of these discussions was due to the fact that several individuals were involved in an ongoing project to “jailbreak” or “crack-the-code”, with regards to the Pentair IntelliValve actuator and its RS-485 command structure. This brought several individuals into an off-line group with a synonymous goal. Consequently, various other alternative pool automation topics and discussions developed over time.

As these discussions concerning various advanced pool automation topics further developed, I began to seriously consider “upgrading” my current automation system. I started to imagine just what the possible end results might be. Especially since I had just recently upgraded my automation and pool control from merely using the Pentair IntelliCenter Web Client and iOS Mobile app, to using the more “user-friendly” nodejs-poolController-dashPanel. After many months of using this new controller, I really considered it to be a major “step up” when compared to that of the Pentair platforms and the many pitfalls that reliance on those pathetic platforms brought.

I began to realize however that if I opted to further upgrade my pool automation and control, it would indeed be a major undertaking. One thing quickly became clear to me. If this upgrade were to be performed in what I considered to be a correct manner, then not only would I be required to add many new and key components to my current automation “mix.” But, that I would also need to fully integrate the “new” with the existing.

That would require a major retrofit. It would require many modifications to my equipment pad as well as existing plumbing. It would also require modifications to both low voltage and line voltage circuitry throughout my equipment pad. And not only that, but my IntelliCenter OCP Load Center would also require some retrofitting/modifications as well.

Please refer to the following link for detailed information regarding the various modifications that I made to my equipment pad and the retrofitting of my IntelliCenter OCP Load Center.

Note 1: Much of the methodology explored throughout this discussion is based solely upon my own self-imposed requirements and personal experiences. Many times, there are different methods which one can utilize in order to arrive at the same solution. So if other options are not specifically mentioned here, it does not necessarily imply that they cannot be realized.

If you think that you might have an improved option or solution, explore it and then please share it here on TFP for the benefit of all.

Note 2: Throughout this discussion, I have provided photographs and/or illustrations where applicable. In addition, at the end of this document I will provide a number of photographs with related comments that illustrate some of the various activities that were performed during the course of this project.

However, due to some total image limitations and to provide for possible edits in the future, I broke this document up into several posts.

Note 3: In the near future. I plan to provide a “parts list” of items that were utilized during the course of this project and that were not specifically addressed or mentioned in this initial discussion.

Note 4: The information contained within this document is meant to be dynamic rather than static. In other words - a “living” document that is intended to reflect various future changes or improvements in methods, future equipment or devices, software/firmware releases, and to address any information that may become outdated with future edits and updates.

Note 5: A good deal of this discussion concerns itself with the installation, configuration and the use of chemical sensor/probes, pool chemical dosing components and their related monitoring, reporting and event driven software.

However, nothing in this document should be construed as to suggest that regular and timely “manual” pool water testing should ever be completely abandoned. On the contrary. Electronic components and software sometimes fail and just like with any other chemical controller - Complete and total reliance on automation and automated chemical control is NOT advised.

Chemical automation and sensor results should ALWAYS be reinforced or validated using industry-standard “manual” pool water/chemical testing. Especially when any doubt exists regarding the validity of any critical sensor readings (pH and/or ORP.) The same holds true for filter pressure transducer readings. “If in doubt, check it out.”

In addition, the discussions contained within are specifically applicable for outdoor / uncovered swimming pools. Indoor or covered pools require special or different considerations with regards to chemicals and swimming pool chemical management.

Note 6: And lastly – In my opinion, this project was a success and a huge “step forward” for me personally, as it relates to my pool automation and sensor/chemical control.

However, in the interest of “full disclosure,” I should note that things didn’t always go according to plan and yes there were setbacks. No project of this magnitude is ever without mistakes and miscalculations. That is the primary reason for the sharing of this information. In the event that others may consider a similar project, hopefully there are some beneficial “take-aways” here that can be realized by others.

As I will note in the following section, I had a lot of help. But, at the same time I was putting together many different components that some individuals had experience with and other’s may have had experiences with different components, uses or arrangements. In other words, there were times that I felt like I was “trailblazing” some new paths here. There were no real guidelines or instructions to follow. That’s really not an experience that can give you that “warm and fuzzy” feeling.

Sometimes there were “steps” backwards. And I won’t lie. At times, there was some stress involved. But no matter a minor “speed bump” here or there, there was always momentum forward and the train did continue to “roll down the tracks” to it’s final destination.

In the end, this project exceeded my expectations. And for the most part I really enjoyed myself throughout. Friendships were strengthened and I experienced a camaraderie with fellow TFP members who harbor the same specific type of pool automation interests as I do.


2. Credits
Although this thread has been initiated by me and I had the opportunity to assist where possible in some of the component and software testing (beta-tester). I am merely sharing my own particular experiences, methods and results. There is quite a bit of material contained within this discussion as well as the follow-on REM Information and User’s Guide, which is the direct result of advanced software programming work and/or the knowledge and expertise of others.

I’m creating this thread mostly for the benefit of others who may have similar ambitions in the future. However, I want to ensure that I don’t give a false impression that I am somehow responsible for the conception of this level of pool automation, sensor and chemical control. I’m not that smart by any means. ;) In the end, I am merely the beneficiary of other’s intense work, time and knowledge.

I would personally like to give credit and “shout-outs” to the following individuals for their amazing assistance to not only me with regards to this project. But to the many others that they have assisted as well, when it comes to alternative or advanced pool automation and related topics.

@cmc0619 and @Katodude These two TFP members were the “originals” who convinced me that there was pool automation “life” beyond the Pentair IntelliCenter. They have been exploring “alternative pool automation” for a while now and it is due to them mostly that I began this journey. They were the ones that initially pointed me in the direction of the nodejs-poolController and nodejs-poolController-dashPanel.

They were always there when I strayed and they have done well keeping me “between the lines.” Thanks much for all of the time and assistance guys! I have learned a tremendous amount from you two and I’m still learning.

Besides, they promised me cookies if I would explore the “dark-side” of pool automation and control. How could I resist that temptation?

@rstrouse and @tagyoureit These two software programmers are the developers of nodejs-poolController and its associated webClient, the nodejs-poolController-dashPanel and REM.

And they operate their own Pentair automation systems as well. Note: In my opinion, it’s a “win-win” for users when the developer of a product is also a regular user of that same product.

These are the “super-smart” guys that get all of the credit when it comes to the amazing development of these software products that several of us now or will in the future, reap the benefits of using.

I really can’t thank them enough for the sharing of some of their knowledge and their tremendously helpful advice and assistance to me throughout this project. Also for their development and continued upgrades of the above mentioned software platforms.

And certainly, for their patience and for “putting up” with a “noob,” who until 8 months ago or so, didn’t even know what a Raspberry Pi was. Heck, at first - I thought it was some sort of a desert that you baked in the oven. :p

Lastly, much of the work by @mcqwerty, @guinness, @segalion and his RaspiPool, segalion/raspipool (great work there), @jonpcar, @dradam and others too numerous to name here, have been inspirational to me regarding this type of advanced and alternative pool automation and sensor/chemical control.

Many, many thanks to all of the above for opening up this new world of “alternative” pool automation to me! It’s been quite the ride over the 2nd half of 2020. :thumleft:

2021-01-08_18-45-34.jpg

Note: Some images contained within this document are the courtesy of – Atlas Scientific Environmental Robotics


3. Advanced Automation Enclosure and Related Hardware
2020-12-29_14-35-06.jpg 2021-01-03_11-19-23.jpg

In this section I will explore my new automation enclosure as well as the hardware housed within.

Note: Here, you will find my own particular experiences. This will include the equipment that I ultimately selected to incorporate in this automation system and why. However, this was just “my way” and nothing here is intended to suggest that there are not different methodologies or different equipment that cannot be used in order achieve the same result.

a) Automation Enclosure

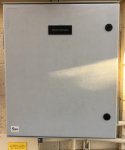
One thing quickly became apparent to me in short order if I was even going to get this project “off-the-ground.” I would be required to install a weatherproof enclosure at the pool equipment pad in order to house the required electronics.

I had initially inquired of others, if I could possibly “run” some of the sensor control cables to the house and then install the necessary Raspberry Pi micro-computer and related components there, instead of at the equipment pad. That idea was quickly discounted, as the distance for some of those types of signals from the sensors and probes would be excessive. Along with that fact, I had determined that I would not be able to house all of the required components within the existing IntelliCenter Load Center.
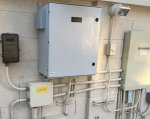
2020-11-29_20-12-03.jpgSo it was settled. The micro-computer and other key and related electronic components would require housing within a weatherproof enclosure. And the location of this enclosure would be required at the pool equipment pad.

After discussions and research that involved what components would be required. As well as considering provisions for enclosure cooling (I reside in central Arizona where summer outside temperatures are typically in the high teens). I then set to work to find the right enclosure for those requirements.

During the course of discussions with others, it had become apparent to me that I would require “DIN rail mounting” for the many components that would be housed within this enclosure.

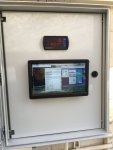
Based on some additional research, I determined that I should consider installing a small touchscreen monitor at the equipment pad as well. My reasoning was that this requirement would greatly facilitate some initial sensor configurations while I was physically at the pad. And in addition, I thought it might be helpful when sensor calibrations would be necessary.

Although not actually a “requirement” per se, I have indeed found the touchscreen monitor to be very useful at the equipment pad. I can control all of the sensors and devices from this touchscreen monitor to include REM and the IntelliCenter via the nodejs-poolController-dashPanel. I can of course, do the same thing from my Mac, iPad, iPhone, etc. however.
IMG_6471.JPG
Consequently, I decided upon Altelix as the manufacturer of a selected enclosure. This decision was based on recommendations, features and reputation.

Using my basic plans and requirements as my guide. And based on consultations with the Altelix sales team. I settled on a 24x20x9 Industrial DIN Rail Enclosure, Fiberglass, NEMA 3X, IP65 enclosure.

Unfortunately, this model did not come bundled entirely with the configurations that I required. Consequently, it would require some “a-la-carte” additions to it as well. The additions included items as listed below:

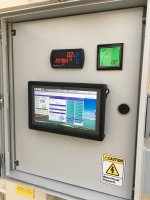
- An inner door where I planned to mount an Elecrow 10.1” 1920x1080p HDMI IPS Touchscreen Monitor as well as my existing Precision Digital ProVu Pulse Input Flow Rate/Totalizer Meter for the automatic pool fill/leveler.


EDIT: 7/6/21... Since the initial publication of this document, I have also added a FlowVis Digital to the mix. Hence, I mounted the FlowVis Digital Panel Display to the inner door and connected the 4-20mA outputs to the Sequent Microsystems Industrial I2C Automation Raspberry Pi Stackable Card.
C837FAC6-F4F0-4E5E-8909-B9D3327ACF7E_1_105_c.jpeg EE983755-8F11-448B-9301-E991B303ED59_1_105_c.jpeg

- Mounting Kit.

- A cooling fan setup to include two (2) each, 120/240 VAC 4” enclosure type fans. Associated Fan Filters, Guard Screensand two ABS Vent/Fan Shroud Kits were also required. A thermostat to control the fans was NOT included in this order however. I discovered that Altelix does not sell enclosure fan thermostats separately but only when bundled with certain “kits.” Consequently, I would be required to look elsewhere for the thermostat.

- Additional DIN Rail Mounting Kit which includes two DIN rails and hardware. Two rails and hardware are included with the enclosure but I had calculated that I would require an additional two.

Lastly, I had to assemble most of the above. That was not really a problem. In addition, I would have to cut the 4” diameter holes in the enclosure for the fan openings. That was just as well, as I had custom requirements in that respect. It made sense to me to have one fan as an intake fan at the bottom of one side of the enclosure and the second fan as an exhaust fan at the top of the other side. I determined that this setup should provide for maximum air flow and cooling within the enclosure.

As far as an enclosure cooling fan thermostat, I selected the - Penn/Johnson Controls A421AEC-01C Electronic Temp Control, SPDT. A bit more “pricier” than some others out there but it met all of my specifications and requirements. In addition, Penn/Johnson has a great reputation for quality, durability and performance. It was not DIN rail mountable however, so I would be required to fashion a DIN rail mountable device that I could attach the thermostat to. I also fashioned a manual enclosure fan “cut-off” switch with parts obtained mostly from The Home Depot.

The enclosure took about two weeks for delivery. So in the meantime, I continued to work on possible enclosure configuration drawings, equipment requirements, making the necessary modifications at the pool equipment pad, etc.

(Continued in next post)
  • Love
Reactions: plnewb and cmc0619

Caretaking pool, levels way out

I've been asked to caretake my father's pool while he is away for a week. His pool has always been cloudy in the times I have seen it so I've decided to do a water test while he is away and try to address the issue and have it clear by the time he returns.

I will preface this by saying my father does not have much knowledge in maintaining a pool, this is his second pool and I think all he ever does is pour a bit of liquid chlorine in once a week.

I've done a test

FC 0
CC 0
PH 8.0+
TA 110
CH 225
CYA 0

The pool is cloudy and I'm surprised it's not very green with the above results.

My goal is to get the water in balance and get it clear enough to see the bottom. Then provide him with a bit of knowledge and a test kit.

Where do I start with this? Add some acid then SLAM? What would you do?

I have experience with a salt pool but never maintained a chlorine pool before.

IMG_20230306_161739.jpg

Attachments

  • IMG_20230306_161739.jpg
    IMG_20230306_161739.jpg
    328.3 KB · Views: 8
  • Like
Reactions: Methuselah

Well, I did it too. I got a bad plaster job, and it is officially a nightmare.

Sometimes you read about the "bad job" and hope you never end-up in that nightmare. Well, I am officially in that movie.

I will try to make this brief, and still hit all the major points, but it is LONG. I am in limbo with plaster contractor and am at the end of my rope. I would appreciate some feedback on how to survive this! (Reply or PM is fine) I will not say who it is yet. I am not sure how this nightmare will end.

It all starts with the need to replaster our pool, I am afraid of ending up with a rough pebble finish, so I get bids for polished finishes. I decide I want to go with NPT's Polishedscapes in Skipping Rock. This finish is a Polished Aggregate product. The manufacture has guides on its installation. If interested see here: https://testmarketingassets.blob.core.windows.net/$web/dealer-portal/spec-sheets/psc_productspecificationsheet_0118 rb notes aug 2020 .pdf

This is a multi-day process.

Just so happens my neighbor was also getting his pool replastered (NPT mini-pebble, it is rough) and the contractor who did their pool (to their satisfaction) gave me a fair quote. I of course asked him if he had ever done this finish before and he answered emphatically “Yes.” In fact, they had just finished one recently all is great! This contractor used to work for a big plaster company in Texas; in fact, this other company helped the manufacture produce their installation video. Side note: I tried to contact this other company multiple times but never could get them to come out for a bid.

They have good reviews and all that jazz. I decided to move forward with him.

I will skip over the many delays and other ‘smaller’ issues and get right into the meat of the problems. I am going to try and type this quickly, so there may be some minor errors/discrepancies, but generally correct.

It was a full demo (full chip out). I wanted to full chip out even if it was not necessary. I wanted piece-of-mind and to start fresh. I plan to live here a long time.

Plaster Day has finally arrived! (Again, there were some things not done upto this point like I was told, but we were over 3 months into this job at this point, and I needed it done)

  • I confirm with the contractor that he has the right materials and pigment. I was pretty clear with my concern about the pigment because apparently the NPT pigment for Polishedscapes can come from a bottle that lists a different color for NPT’s Quartzscapes (he even called NPT on speaker to confirm the mixture infront on me).
  • They put a thin-coat of Quartzscapes on the walls (cheaper product). I had no prior knowledge of this, and he tells me that is just the “scratch coat.” Not happy, but not sure if that matters, and what am I going to do in that moment? Well, I wish I had stopped them!
  • They begin to plaster The Polishedscapes and they have a problem with their machine/pump and it stops the work at about 12-18% into the job! I am unfamiliar with how long a plastering delay can occur before it is too late to recover the job, but even in my ignorance I was getting very uncomfortable. I have it all on security camera footage and the problems caused a delay of over 1 hour. This is also on a day that will hit at least 100 degrees.
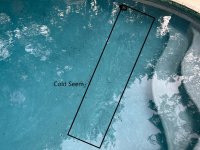
  • I am familiar with cold seems in concrete, so I ask the contractor/owner about the delay, and he tells me anything over ‘20 mins or so’ is a concern (he was not on site during the malfunction, so he didn’t know the delay was longer than that).
  • This contractor relies heavily on his Foreman for executing the work and his Foreman's past experience. I realized this the day of plastering and it is also concerning me.
  • They resume their work, after the 1+hr delay, and I am keeping an eye on things. The crew waits a bit after the initial plaster application and goes back into the pool to do the final trowel and etc. After the trowel, they quickly pack up and leave… They ran out of time to shoot the SPA, and the Foreman will return in the AM to plaster the attached SPA!? :cautious: More on this later!
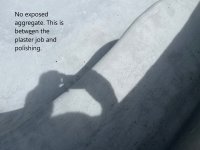
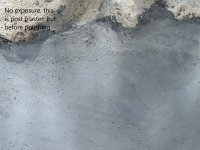
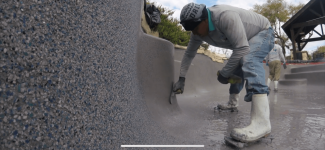
  • Anyway, beyond that, Oh Crud! 😧 This is where I know we are in big trouble (and I don’t even know the half of it yet)! We have gone really wrong. They applied the product sort of like a like a quartz finish. They never exposed the aggregate (see NPT picture below)! I immediately tell the owner this and tell him that it is wrong. He tries to assure me that this is how everyone does it (BS). I am sending him instructions/links from NPT that clearly show it is done differently. I ask why does he want to polish through the plaster’s cream to get to the aggregate!? I offer to pay (out of pocket) for an acid wash ASAP so that we can remove as much cream as possible. He contacts the Foreman and then gets back to me; they agree to acid wash it (more on this later).
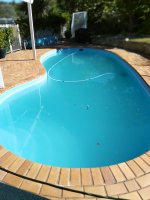
Pics of My Pool after plaster was ‘installed’ (no exposed aggregate)
no_exposure_big pool.jpg
no_exposed_aggregate.jpg
no_exposed_aggregate_close.jpg
Pic from manufacture NPT install instructions (exposed aggregate)
NPT Demo Install.PNG

  • In addition to the acid wash, I realize that they only planned to have one to two guys polishing the next day (basically 1.5 polishers)… There is no way one to two guys could polish this pool enough! They needed to get to the aggregate. I offer to pay directly for extra polishers to come, he agrees to hire a couple more guys (my treat).
  • SO, now what? Well, they tell me they won’t have enough diamond polishing disks for the workers! Apparently, they planned to just grab them from Home Depot/Lowes as needed and they are sold out… o_O I order diamond polishing disks to be overnighted-morning delivery (my treat).
  • Early the next morning the Foreman shows up with 4 gallons of muriatic acid and his significant-other to acid wash the pool. I assumed it was going to be a substantial acid job; they had a lot of cream to get through! I am not happy, but try to hold it together. You can barely tell anything was done, only in the deeper area where the water pooled showed any exposed aggregate to be polished.
  • The polishers show-up and he only hired one extra guy. He told me at least two more were coming and I authorized him to get 3 (remember, I am paying them).
  • I ask to see an area of the pool that would be the finished product. They eventually show me a step, and I am not happy (but polite). 😐 The Foreman wants to quit, and the owner offers to take me to the last Polishedscapes pool they did for me to see. We drive straight there together.
  • Upon leaving this other pool, I tell the contractor: “That is not the product I purchased (NPT Polishedscapes),” that pool was not correct. 🙄
  • He tells me he will contact a friend at the big company (the one that worked with NPT, the one he used to work for) and we’ll talk about it.
  • Soon after that call he comes up to me and says that he will completely repolish my pool (with the supervision of the friend at the larger provider). This person will be available to help in the off season (Oct/Nov). I feel pretty OK about this, and the contractor is trying to fix the problem. The plan would be do a proper treatment, and etc, and repolish. Not perfect, but I am now trying to make lemonade out of bad lemons. He emails me this commitment. 🤔
  • We are now filling the Spa and then Pool, it will fill overnight.
  • Things don’t ‘look’ right, but the spa and pool were plastered about 12 hours+ apart, I am thinking things change quite-a-bit while they are filling/curing.
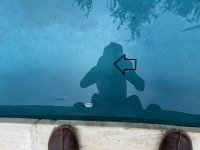
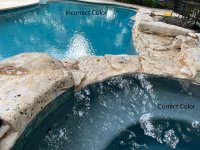
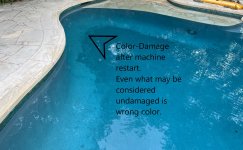
  • The next morning. 😲 Remember when they came back to ‘shoot’ the SPA plaster? OMG, the pool is the wrong color (not even close), the Spa is the correct color, and the pool is showing significant problems from the extended delay (see pictures!). I try to reach the contractor, it is Sunday, so I don’t hear from him for a while. I am astonished. The mixing crewman on the main day obviously miss-mixed the pool, and the Foreman must have followed the 'mix' correctly when he returned later to shoot the spa.
Pool and SPA are a vastly different color. Spa is the more correct color; pool is way off.
Wrong Color Plaster_pool.jpg

I finally speak to him. I tell him everything: wrong color, different colors, damage of color and obvious seams from delay (wrong color anyway). This is on top of they didn’t “install” the product correctly to begin with! He texts me that he is sorry, and they messed up (At least he is not trying to say ‘everything is fine!’).

Wrong Color (above)

Delay Damage
Damage From Delay (wrong color anyway).jpg

Seam where they restarted work (lighting/angle was not good for photo)
Machine Fail Point_arrow.jpg


Cold Seam
Cold Seam.jpg


  • We met next morning. I told him we would have to have everything clearly laid-out before we could move forward. On top of this, I think he is having cash-flow problems.
  • We speak about how to move forward, he wants me to sign a new document, but it doesn’t include everything to make me happy. I told him I couldn’t do that and had to make a couple of calls (I spoke with my lawyer). The contractor was supposed to get back to me with what the material cost him (maybe I’d pay for them and have them stored at my house type of thing), and we would discuss options to move forward, but I haven’t heard from him. Anyway, we have not come to an agreement on how this nightmare ends, but I am not sure I want to use him. The entire job has serious problems. I know in my heart I just need to pay my lawyer to end this nightmare, but I really want to avoid that route. It will just cost me more and the contractor even more (believe it or not, I like him as a person).
I also know in hindsight there are things I could have done better. Those opportunities are gone. I am curious if anyone has experience with a completely failed/incomplete plaster job, and what you/they did. What would you do now?
  • Like
Reactions: mnatale

My new automation system.

EDIT 8/18/2019:
Node-RED flows now stored on github.
Youtube videos here: Hardware / Node-RED programming
---
Hi all. I wanted to share my new automation system with someone. My wife and kids don't really care but I think it's pretty neat. :laughblue:

Today all it does is the web interface, pump, lights, blower and scheduling of them. But the rest of the parts (actuators, ADCs for temp, pressure, and current readings) are on order.

It's powered by a raspberry pi and Node-Red which is really cool software that makes it easy to do stuff like this.

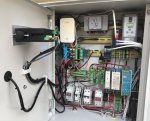
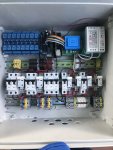
It replaced my load center so it's kind of big (16"x16"x8") but I was able to mount it on my existing post without too much trouble.

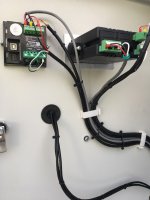
The picture is pre wiring. The wiring is ugly right now and I still have to re-run it to be prettier. Waiting on non-stranded copper so my bends will stay bent.

It uses an industrial style DIN rail to mount all the parts.

Features:
Scheduling and overrides (SPA/Pool mode and individual devices) from Web Interface
RS-485 adapter for integration with Intelli-series of pumps/chlorinators/etc. Node-red has a library for Pentair so this is fairly trivial to implement.

Power control:
16 relay board to drive mains power relays and actuators.
3 240v relays (Pump/Blower/TBD)
4 120v relays (SPA LED/Pool LED/Acid Pump/Chlorine Pump)
(All with supplementary circuit breakers)
1 Always on outside of box power outlet (120v) with weatherproof cover.
3 valve actuators (Pool/Spa intake/out valves and 1 to bypass filter when in spa mode, couldn't find a way to put an actuator on an MPV)
Raypak Heater control (basic dry contact relay)

Reporting/recording/alarming of:
Water/Air Temperature
Current Sensor for pump amp draw
Pressure of filter

To do:
pH testing (easy)
Chlorine testing (hard and/or expensive)

Image-2.jpgImage-1.jpgIMG_5681.jpgIMG_5674.jpg

Annual test kit sale

I just got an e-mail about the test kits going on sale. Wondering if someone could comment on what the differences are between the three different refill kits. I know when I bought my original kit, it came with the salt level test. Is there a particular test kit refill that would be best for a pool owner with a SWG?

Also, what do you do with any chemicals you have left from last year. A lot of my chemicals are going on two seasons (this one coming up with be three). Do you just throw them away? Pour them down the drain? The only ones I'm planning on keeping is the powder and liquid to test the chlorine level. I know I bought some of that last year and expect it will be fine for this season.

Thanks.
  • Like
Reactions: BMerrill

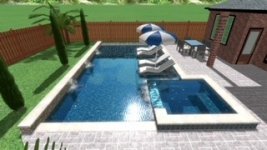
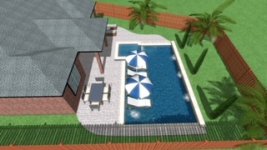
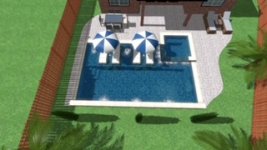
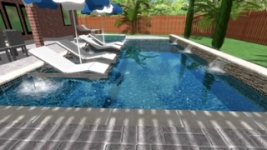
New quote - Cypress, TX

Getting ready to build first pool in Cypress, TX.
Narrowed it down to one builder.
He's done several in the subdivision and one neighbor who had good things to say.

Pool Dimensions:
29' x 17' Geometric pool
Pool Depth: 3.6' - 6'
Tanning Ledge with umbrella holders
Estimated time of completion - 35 days
StoneScapes Pebble and Quartzscapes included

Pentair valves
Filter: Pentair 420 Clean and Clear
Main Pump: Pentair Superflo VSP
Pool Cleaner: Pentair Prowler 920
Heater: Mastertemp 400,000 BTU Natural gas
Chlorinator PowerClean 3" Tab
4 LED Lights
8 Spa Jets
Spa Blower: 2HP Silencer

Spa is 7' x 7' and raised 12"

Pool Cost $65k
Outdoor Bathroom 6'x8' with toilet, sink, shower $16k

Thanks for reading...

Attachments

  • Stacy2.jpg
    Stacy2.jpg
    26.3 KB · Views: 126
  • Stacy5.jpg
    Stacy5.jpg
    33 KB · Views: 123
  • Stacy8.jpg
    Stacy8.jpg
    32.5 KB · Views: 114
  • Stacy4 - Copy.jpg
    Stacy4 - Copy.jpg
    32.2 KB · Views: 110
  • Stacy6 - Copy.jpg
    Stacy6 - Copy.jpg
    35.5 KB · Views: 116

Pool company discouraging SWG switch

I need help reasoning through getting a SWG and understanding why my pool people don't like them.

We're refurbishing our pool with new plaster (pebble from quartz plaster), resetting coping, etc. and I thought while we're doing that, maybe switching to SWCG. I really struggle with being consistent about liquid chlorine application and then I end up fighting algae all summer long, plus we travel for long stretches in the summer and I don't like having to ask my housesitter to mess around with jugs of chlorine (plus I hate the wastefulness of it).

It seems like most people here on TFP who make the switch to SWG are big fans and wouldn't go back, but then I talk to my pool equipment guy and he's not a fan. (FWIW, we do our own servicing... so it's not a matter of them losing our business... In fact, they're making more money off of us!) I told him my constant battle with algae and he suggested testing phosphates (we have a very tree-y yard), but then I look here and the thinking seems to be if your chlorine is on point, you don't have to worry about phosphates.

Ultimately, my pool guy's take was, "You're either testing and managing chlorine or you're testing and managing pH, CYA, etc... why would you add a device that needs expensive maintenance (cell replacements) only to have to still be maintaining your pool all the time?"

My thinking is, if all those other things get out of whack while we're on vacation for 3 weeks in August, I won't come back to a green pool and they won't have been out of whack long enough to actually damage anything as long as I get everything balanced again when we get home. Or better yet, have a service come once a week while we're gone and handle it. Whereas with liquid chlorine, I have to test and add a few times a week in the hottest months and I'm not paying a pool service to come that frequently.

I think I've talked myself into it just typing this out, but am I thinking right? If you have SWG, especially Texans who understand the weather I'm dealing with, what kind of maintenance are you doing weekly? How fast does your water get wonky? How much are you spending on MA to keep the pH down?

Thanks! - H

VOLT Garden Lighting

I've mentioned several times over the years my purchase of Volt Lighting for my garden lights. Their build quality is amazing. Beautiful. Solid brass. All sealed up with o-rings. I purchased them almost eight years ago (7 years, 10 months and 12 days ago).

I just had my first and only issue with them. Yah, eight years for low-voltage garden lighting without problems? Unheard of!!

One of my lights was flickering. I emailed VOLT about how best to troubleshoot that. I emailed them on March 1 at about 6:00PM. They responded the same day, Mar 1, 2023, at 4:59 PM! They went back in time to help me! OK, well, that's how their email header read. Maybe some sort of timezone thing I guess, point was, they got back to me FAST!

It took me a day to get around to performing their troubleshooting tip (just took a few minutes), and I responded last night that it appears to only be a bad bulb. I had forgotten that their bulbs have a lifetime guarantee. WHA?!? I just checked my email this morning and a new bulb has already been shipped, no charge.

I mean, come on, who does that?!? I couldn't say enough about the quality of their products before, but they have exemplary customer service to match!

If you're thinking about lighting up your garden (and you should), don't think about using anything other than VOLT.

Question about Ahhsome Aqua Clarity

@Ahhsomeguy

I saw you mention Aqua Clarity in an other thread and I went to look at the product on your website. One question, and one comment

You state that you use 3 oz of mixed Aqua Clarity to purge and 1 oz for maintenance. Does this replace the Ahhsome Hot Tub product for purging then. It there a benefit to purging at water changes with Ahhsome and then using Aqua Clarity for maintenance, or for using Aqua Clarity for everything, or does it not matter.

Just a comment, one of the "Laundry List" of benefits is that: "Water will smell fresh, look fresh and fee fresh" You also list "No longer forced to follow high maintenance protocols" as a benefit twice
  • Like
Reactions: Vtown

RoBot maintenance.

The motor assemblies get water in them and the internal drive motors die. They are not repairable and Maytronics actively keeps the internal components off the market. Therefore, after it fails outside of warranty, you are forced to either pay for a very expensive motor assembly replacement or buy a new robot. Motor assemblies right now cost $450 + tax & shipping.

Expect the average life of the unit to be around 5 years.
I saw this on another thread and didn't want to hijack it.

Is there any periodic maintenance we should do to mitigate this? Like, I try to change the seals on my pump every season.
  • Like
Reactions: mwemaxxowner

How to perform firmware upgrade on Pentair* controllers

Pentair* Controllers;
EasyTouch versions 1.0XX and 2.1XX, iLink version 1.0XX, Intellitouch version 1.1XX, Mobi version 2.1XX, and Suntouch version 2.0XX
Please verify that your programming port matches the picture in this thread.

Note - Pentair sells a kit P/N 520957 for $559.95 to perform this programming
http://www.sunplay.com/Pentair-Automati ... 520957.htm

Options in this thread are to save some of this cost.

Special thanks to TFP member Tinyavian who posted a parts list and schematic in this thread
pentair-firmware-programmer-t31354.html
Special thanks to Ggilpu for discovering software compatibility issues.
Special thanks to Sizzlechest for discovering earlier Prog12z program only has drivers which work in windows XP.
Special Thanks to Geobrick for discovering software discount and pictures of programming cable.
Special thanks to Ogdento for discovering that parallel port BDM-Multilink, Rev B programer works with Adelaide's v1.62 software (see post 63).
How I programmed two Easytouch outdoor boards

1) Ordered the following parts from Digi-Key;
P/N Qty Description
A26569 1ea 6 pin PCB header
WM1724-ND 1ea Plug Pentair programming port
WM1775CT-ND 6ea Crimp pin
V2025-ND 1ea PC board

Under $15.00 shipped

NOTE
Instead of these;
WM1724-ND 1ea Plug Pentair programming port
WM1775CT-ND 6ea Crimp pin

You can buy "Micro JST 1.25 T-1 6-Pin Connector plug with Wire x 10 sets"
on eBay for $6.99

This saves you the labor and pain of dealing with the extremely small crimp pins.


2) Built the programming cable and adapter board
Here is the schematic
[attachment=1:nypymh6s]Pentair to BDM Programming Adapter.jpg[/attachment:nypymh6s]
This is the completed adapter
[attachment=2:nypymh6s]Pentair BDM Adapter.jpg[/attachment:nypymh6s]
Close up of plug and port
[attachment=0:nypymh6s]Plug and Port.jpg[/attachment:nypymh6s]

To make a straight cable without circuit board, follow these pictures and pinout (Thanks to Geobrick)
I'm not using a board so I'm going to cut the ribbon cable and attach the wires directly from the USB BDM Multilink.


Pin-out-1_zpscxtyrfqu.jpg

BDM header cable pinout


Pin-out-2-IMG_2258_zpszryufx1m.jpg

Micro JST header pinout

8/6/2022 Added pictures from Geobrick post 41 as a PDF attachment

Here is the pin to pin for splicing a BDM cable to a Micro JST cable.
BDM header-------------------Micro JST (per the pictures above)
1-----------------------------------5
2-----------------------------------1
3-----------------------------------Not Used
4-----------------------------------4
5-----------------------------------Not Used
6-----------------------------------6

3) Software
You need the firmware from Pentair;
https://www.pentair.com/content/dam...-easytouch-easytouchlite-firmware-6.12.19.zip
and [the software for the programmer "prog12z_install"
Google "University of Adelaide prog12z_install.exe"
Note this is very early software (V1.62) which appears to only work with Window XP and either the Parallel port BDM-Multilink, Rev B, or the P&E Micro Multilink USB Programmer rev A programers (See post 63 and 38)]

The software for the revision B & C programmer is available from P&E Micro website for $169.00 (or $17.00 see next lline)
SPECIAL THANKS to Geobrick for discovering; That if you have a "Current Student ID" you can get this software for 90% off, or $17.00, this provides 3 licenses.
Go to PEmicro | Experts in Embedded tools for Flash Programming and Development click on "University Programs".

4) Programmers
Basically five choices
1) Multilink rev A from Ebay with Adelaide prog12z_install.exe software in windows XP with Pentair's EDITED scripts (.bat)
2) Parallel port BDM-Multilink, Rev B, works with Adelaide prog12z_install.exe software in windows XP with Pentair's EDITED scripts (.bat)
3) Multilink Rev B or C with Prog12Z software from P&E Micro for 169.00 (17.00 with student ID) is able to use pentair's scripts and windows 7 (But not XP, see 3a exception)
3a) USB Multilink (USB-ML-12) Rev A, B, & C are reported working (see posts 74, 75, & 111) in Windows XP with software Prog12z v1.71 ( Dead link in post 71).
4) Cyclone Pro rev C works in windows XP with Adelaide v1.62 prog12z_install.exe, and in Windows 7 (8) & 10 with Prog12z_cyclonepro Software, (Manual programming, or with Edited scripts / bats. See post 39 for manual programming steps. Scripts/Bat's editing, require replacing "Multilink" with "Cyclonepro" in each bat file, some path edits also) Cyclone software is a free download from P&E Micro, and with Prog12Z v5.25 paid version (Automatic programming, uses Bats) from P&E Micro website.
5) Thanks to Telemachus, USBDM Chinese programmer $12.00, see post #126 or attached PDF


5) The process of programming See post 39 for steps to manually program.
I will walk thru the process of the EasyTouch Outdoor 2.130 upgrade
Connect programmer
load software
On desktop open folder "Pentair Firmware"
Open "Release" folder, open "EasyTouch version 2.130" folder
Double click "Easytouch_Outdoor2130.bat" file
Cmd Prompt window opens, Cprog12z.exe window opens and displays progress or errors.
Wait for programming to finish

A walk thru of the automatic software scripts (.bat) (ONLY NEEDED TO UNDERSTAND AND CORRECT ERRORS)
The first .bat file (Drag .bat file on top of notepad to open) sets the delay, programming device, freq, and calls a configuration file.
The cfg file (Drag .cfg file on top of notepad to open) sets the "Algorithms" file which matches the chip being programmed and also set the firmware file to be used, an .s19 file.

Issues
1) The crimp pins are crazy small, very hard to work with, see NOTE above on buying pre-made "Micro JST 1.25 T-1 6-Pin Connector plug with Wire x 10 sets" from ebay.
2) I bought a P&E Micro Cyclone Pro programmer off of eBay (P&E Micro Computers makes a number of HCS12 programmers which will work with this software), so the first .bat file had to be edited from "USBMultilink" to "Cyclonepro" for Interface (device).
3) The BDM header on the Cyclone Pro programmer is keyed backward by P&E, "Always verify red stripe on cable and pin 1 location"
4) Cfg file had to be edited to change directory of Algorithms folder and name of .12p file for chip. It was scripted to look for .12p file named "9S12DT128_1X16X64K_128K_linear_16K_page.12p" whereas the file which existed was "Freescale_9S12DT128_1X16X64K_128K_linear_16K_page.12p"
5) The board being programmed needs to be powered, programmer will not power the chip.

Warnings
1) 6 pin BDM header cable will fit two ways, ONLY ONE WAY IS CORRECT, mark pin one, verify cables...
2) In general, when upgrading firmware, you should be on an Uninterrupted Power Supply, bad things happen if power goes out during programming.

Attachments

  • REVISED - How to perform firmware upgrade on Pentair post 126.pdf
    1.8 MB · Views: 153
  • Archive of pictures from post 41 by Geobrick.pdf
    181.9 KB · Views: 52
  • Like
Reactions: Rickito

We Have a Winner! - Pool of the Month (March 2023); Theme - Scenic Views

1. On the first of each month, a contest "theme" will be announced (i.e. water clarity, family fun, decking, custom features, lighting, scenery, etc)
2. Members have 10 days to UPLOAD ONE image for consideration; Photo must be related to the thread titled theme for that month.
3. Per general TFP rules, nothing profane, political, or insulting.
4. The first 10 days is the submission period. Posts are limited to ONE image ONLY. No discussion posts yet. This will make viewing much easier for all.
5. Days 11 - 15 the thread will be locked and is for voting only. No more uploads. Viewers now have a final opportunity to vote (or modify their selection) for their favorite upload.
6. Members are encouraged to use an emotion icon ("Like" or "Love") to vote for their favorite upload; it will be tough, but select only one favorite.
7. On day 16, emotion Likes/Loves will be tallied for a winner. In the event of a tie, we will create a poll on the thread to make a final selection.
8. Once a winner is announced, the thread will be unlocked and comments/discussions are welcomed. Winner and nominees can tell us all about their pool/photo/event.
9. A member can only be selected as winner once per calendar year.
10. Winner will receive a $50 gift certificate from tstestkits.net! Oh, and maybe some bragging rights. :poke:

This should be fun. Get those cameras and drones out and show us your gorgeous scenery. We know they are out there. Let’s see those pics! Have fun and good luck to those who apply!

Aquarite - Diagnose & Troubleshoot your own Main Board

So I just had this opportunity to replace a bad thermistor on the AQR board and would like to share the easy way on how to diagnose a faulty thermistor. First off, the board that I worked on belongs to a friend who doesn’t really know how to solder. So I came up with the idea of using a screw terminal (Digi-Key part# ED2561-ND) to mount the thermistor on. This should enable him to replace the thermistor in the future without having to solder. The original thermistor is AS32 2R025 which has a wider lead wire footprint but the available replacement on hand is SL32 2R025. The latter has a high failure rate due to overheating compare to the AS32. If your PCB footprint can accommodate both types, then you will be far better off using the AS32.

As observed, the thermistor solder pads are larger with multiple through holes to absorb the heat being emitted by the thermistor during normal operation. I had to bump the solder tip temp to 1200°F for this mod. I removed the plastic sleeves and positioned the screw terminals to accommodate both types of thermistors.

20180704_191734_A.jpg


Good Thermistor:
If the thermistor is good, the voltage reading on the display matches the measured voltage from the thermistor lead farthest from the Red terminal on the board as shown. Make sure the Blk test lead is on the Negative side (not Ground) which is the black terminal or to the R15 (.015 Ω) link as shown in the pic.

20180704_190055_B.jpg


Bad Thermistor:
The thermistor was intentionally removed to simulate or replicate a bad thermistor for this purpose. The measured voltage and the voltage reading on the display did not match the voltage reading across the Blk and Red terminals.

20180704_190342_c.jpg 20180704_190517_d.jpg

Hayward Aquarite vs SwimPure Plus PCB:
The Swimpure Plus model used Cantherm MF73T-1, 2Ω@18A, Ø20mm thermistor. As observed, I can touch and hold the thermistor on my SWP like forever during normal operation without getting burned. You may notice, the SWP board has an extra 24VDC relay labeled as “K4”. I have yet to dig deeper on that!
OTOH, do not dare to touch the SL32 or the AS32 series Thermistors when chlorinating, or you’re gonna swear by it. You’ve been warned, Thermistors on the AQR’s do overheat and too hot to touch. Unfortunately, I misplaced my handheld IR thermometer to give you the numbers. Also, the oil from our skin will adhere to the thermistor making it more susceptible to premature failures.
Personal Conclusion: If your Hayward SWCG has the PCB as shown on the right-hand side below then you will probably enjoy many years of chlorinating without having to replace the thermistor. Hence my vote, hands down!

20180704_184556_e.jpg

IntelliCenter Meeting

The week of the 6th, I have been given the opportunity to meet with several mid-level/senior management as well as coordinator types from Pentair Pool Products who are directly involved with IntelliCenter. We're going to meet up here at my home in the Phoenix area.

These are folks that I have had many discussions with via email and VTC's in the past. I view this face-to-face meet as a golden opportunity to discuss everything "IntelliCenter" with the people who can make a difference.

I have my list of items that I believe are key points to discuss, however my priorities may not coincide with yours. That said, if you have a topic that you would like me to bring up on your behalf, I would be more than happy to do so. This includes not only the OCP and firmware but user interfaces like the mobile apps, web-client, Amazon Alexa and Apple Watch, as well as interfacing with pumps, heaters, valve actuators, IntelliChlor, IntellipH, IntelliChem and remotes. The good, the bad and the ugly.

Please be specific with regards to your topic. And more importantly, please keep it constructive. Throwing "rocks" at these folks will get us nowhere. ;)

Thanks...
r.

Hayward AutoVac 650 Review - With video

Hello,

This is my first review and I tried to make it as detailed and fair as possible along with supporting videos. There were things I really liked about the AquaVac 650 and some I did not.

Hopefully it will give anyone looking for an AquaVac 650 a good indication if this is the right cleaner for you.

Background
At the beginning of the season my Zodiac Vortex 3 stopped working (again) and after I decided I no longer want to throw parts at it I started researching new cleaners. The AquaVac 650 looked very appealing with the 6 scrub wheels, the easy to empty push of a button canister, phone app via WiFi instead of Bluetooth and the Dyson style suction system. I waited a few weeks for it to become available, I am not sure how many others have given this cleaner a try.

Full Video review can be found below. It is recorded with my phone so it is a little shaky but I went over every detail of the cleaner I could think to show.

Full Video Review
Long but detailed. Excuse the shaky camera.

Unboxing
Pointless unless you are really wanting to see what is in the box and how it is packed. I don't know why these type of videos are so popular.

Cleaning Issues
Problems cleaning transition form floor to walls - 1
Problems cleaning transition form floor to walls - 2
Not Collecting Fine Dirt

Review

The AquaVac 650 comes with a caddy that is easy to assemble and holds everything including the removable control unit nicely. It is a nice looking cleaner with the 6 wheels / brushes and a large opening for all kinds of debris.

I put it together in a few minutes, plugged everything in and began the instructions to set up the Wifi with my Android phone.

Wifi Connect
This is when I encountered problem and drawback #1. It was not able to connect to my phone, even after multiple attempt's and a lengthy call into tech support. The phone finds the network but it fails every time saying "failed to obtain IP address". Tech support said they would look into the issue and get back to me the next day. This was Thursday and I have not heard back from them. I feel this is going to be a problem for a while until they get the software sorted. I was able to connect and use the app with my Ipad.

Wifi Connect Drawback - When I think Wifi connected App I am thinking the AquaVac 650 is connected to my router and see on on the network as a device I can access on the network such as a Printer, Stereo etc. This is not the case. In order to connect to the control unit you have to disconnect from your current network and connect to the control unit/s wifi. This means you have no access to the internet while using the app and you have to go through the steps of opening the app, going to your wifi settings, connecting to the AquaVac's Wifi, go back to the app and you can now use the App.

Once connected the app works very well, it is intuitive, the scheduling of the unit is very easy and the remote control of the Aquavac 650 works very well. turning on a dime and cleaning as you can manually drive it anywhere in the pool. There is also a bunch of light settings, colours etc.

Chord - No Swivel
It does not have a swivel chord but it does have an algorithm that helps keep it form tangling. You would see the cleaner doing a full 360 every so often to compensate for the turns it has done in the opposite direction. This works quite well and it stays pretty straight during the cleaning cycle.

The only time there would be a problem is if you stop the cleaner mid cycle and then restart it. It doesn't know the chord is slightly tangled in one direction so it can't take corrective turns to straighten it out. I would consider this to be user error rather than the fault of the 650.

Return to User - 3 tugs
In all their advertisement's they show the AquaVac 650 being pulled 3 times on the chord and returning to the top of the pool in the direction it was pulled. I thought this was a great feature as any modern robotic pool cleaner should have a way of getting to the top of the pool for easy removal. Note: The pool cleaner can not be in a cycle for this to work. It has to be paused or sitting dormant.

Unfortunately the 3 tugs did not perform as well as expected. I tried at least 30+ times and only got it to work twice. I was told by the rep it needs a specific type of pulls and they are working on an update to improve this. I am not sure why they didn't just put a button on the control unit so it can do this. Sometimes simple is better.

Full Canister Indicator
While there is an icon on the app and control unit that looks like a canister full indicator the AquaVac 650 does not have any sensors to tell you when the canister is full. The "canister full" icon light's up when the unit has completed a cycle.

Basket/ Canister Emptying/ Cleaning.
This is by far the best part of the AquaVac 650. The one button canister empty is great. It keeps a bunch of water in the canister so it can help flush out the canister when emptying. You give a few sloshes and everything comes out. No getting the hose out etc. Push the button and you're good to be cleaning again.

Cleaning
The most important part of a pool cleaner is to actually clean the pool.

The 6 scrubbing brushes and wheels go over floor drains no problem.

I ran the cleaner through at least 6+ cycles, mostly on the floor, wall and Waterline setting but also 1 water line only and 2 floor only as it missed a few spots and I wanted to see if it would get them. The AquaVac 650 is great at picking up large debris including leaves, worms, sticks and what ever else falls in your pool. It navigates the pool quite well, climbs the walls and seems to scrub the water line pretty thoroughly. The pool was very dirty when I first put it in and it went a long time before it stopped climbing the walls and was time to clean the basket.

It did have a few cleaning issues though.

1. It missed a few spots in the shallow end, even after running it a few times it would always leave a spot at the end of the shallow end not cleaned.

2. Even though I was told by the 650 rep the cleaner works best on dirt and sand due to it's cyclones (it suspends the dirt in the cyclone allowing it to drop down into the canister for collection) it unfortunately seems not to be able to collect the dirt and sand, it would shoot it out the top and back into the pool. It has no problem picking it up but it would not keep it in the canister.

3. It was not able to scrub and clean the transition from the floor to the walls at all. Our pool has a small radius instead of a 90deg angle when going form the floor to the walls and it would drive right over the area without picking up any of the dirt. I think this may be due to the location of the suction port and the brushes not being long enough to hit the pool at this transition. (The old Zodiac had no problem with these transitions, maybe due to the suction port being in the front just behind the scrub wheels).

This means I would have to go back and vacuum these areas manually or brush it and hope it lands on a flat spot to it can be picked up during the next clean.

Conclusion:

Positives :
  • Ease of emptying the canister.
  • 6 scrubbing wheels that ensure it never gets stuck on stairs or floor drains.
  • App works great, steering the unit via the app is very good.

Cons:
  • Does not pick up fine dirt and sand.
  • Doesn't clean transitions from floor to walls leaving you to clean this on your own (for my pool at least).
  • WiFi does not connect to your home network, you have to disconnect from your network and connect to the control unit meaning you have no Internet access while using the Aquavac 650
  • WiFi does not work with my android Galaxy s7 at the time of this review.
Unfortunately for me I am going to reluctantly have to return the cleaner as it simply does not clean the type of debris I get in my pool and can't handle the shape of the floor/ walls. It is too bad as I waited quite a while, was very excited for this cleaner and the ease of emptying the canister is so good.

If you don't have the above issues (ie. type of pool transitions or fine dirt/) sand I would say it would be a good cleaner.

On a side note does anyone have any idea on how well the Dolphin cleaners would handle my type of floor/ wall transition?

Update July 4th 2019:

Hayward called me today to discuss the issues I had with the 650 and sounded genuine when they asked for feedback good and bad.

They did say they may be able to correct the fine debris picking up and the missing dirt on the transition of the floor/ wall with firmware updates. But the updates will take a few months.

They are also working on the Android connectivity as well

Maryland - Catalina Builder Went Under and it Seems they are Leaving Customers to Fend for Themselves

Wow. Just got this letter from my builder. Looks like they are simply walking away from active jobs. I feel very bad about this for the customers. I have a "lifetime" shell warranty. I suppose that is null and void now as well?

Dear Customer:

The purpose of this letter is to inform you that on October 13, 2022, Catalina Pool Builders, LLC. (“Catalina”) ceased operations after being in operation since 2008.

This was a difficult decision for our family and was made over many months and after carefully reviewing many considerations. Catalina’s mission over the past 14 years was to build high quality swimming pools at an affordable cost for our customers.

World events over the past 3 years have made this process quite difficult, with shortages of material, employees, subcontractors and the substantial increase in prices to perform contracts that Catalina entered many months before incurring the expenses. The time frame of permitting and building swimming pools, due to the current world pandemic and ultimately the sharp increase in all costs involved in the process, has also led to our demise. Our owners invested substantial sums of money to maintain operations, but even those resources were not enough. While the future of Catalina is certain, the future of the owners and management is not as we search for new occupations. We wish you all the success in life, and we regret that you must search for others to finish your swimming pool project. We cannot do so because of the inability to pay employees, hire subcontractors and pay creditors.

Over the next 2-3 weeks, we will be reviewing all accounting records in an attempt to liquidate assets for potential distribution to approximately two hundred (200) creditors. Once this process is complete you will receive a letter from counsel to Catalina as to the liquidation of the few remaining assets.

We apologize for the inconvenience and harm to you, but we have exhausted our viable options.

CATALINA POOL BUILDERS, LLC

Finally Time for an In-Ground Pool! Fiberglass in Houston, TX. (Concrete Deck Poured)

Been a member here for a few years with Intex above ground pools. Finally biting the bullet and going in-ground.

We decided on fiberglass for the quick install and ease of maintenance. The available sizes and shapes were all fine with us.
Going with saltwater. I've had the saltwater units on the Intex pools too.
No heater yet, but we will be adding that before the fall.
We are in Houston, TX so the pool will never be "closed" and will be nice to get a little extended swimming time beginning/end of season.
Dig day should be end of this week. Supposedly they will be digging thursday and dropping the pool in friday, weather permitting.
Only extras we added is two deck jets along the long side. Plus the extra concrete and the salt system.
Model is the Dynasty 30 (14'6" x 30') in Exuma Silver.

Here's a couple pics. The "Before" shot, and a render I did showing concrete plan. Just the standard 3' perimeter with the extra concreted up to the back porch.
The circle is the old flat area where our most recent walmart pool was. You can also see we had to take down the dying tree... which was also partly in the way. We are on a corner lot with the street on the other side of that left fence so that is where the crane will be lifting the pool over the fence.

Will update this thread with plenty of pics as things progress!

20230219-DJI_0166-Pool-X2.jpg


Rendering-X2.jpg

Protection shed - ideas

Hello all
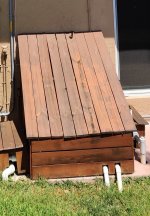
Years ago, I built the shed in the picture to protect my pool's equipment using pressure-treated fence boards.
It measures 51" wide by 71" long, and consists of 3 panels each consisting of 3 fence boards held together by a board underneath. I can easily remove 1 or all 3 panels to reach the equipment underneath.
While they're not the heaviest, I'd like to replace them with a lighter option that's affordable. In addition, they're starting to slowly decay and tear.

I came across vinyl/plastic wavy roofing as an option, but it looks weak and thin. I looked at composite wood, cedar, and others but the prices are high.

Do you have any suggestions?
Thank you

IMG_20230220_212157.jpg
  • Like
Reactions: Aldis

New pool build in NJ (2/16/23)

UPDATE 1: SEE POST #14 FOR FILTER PAD AND PLUMBING

Hello all,

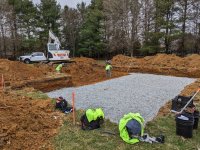
I am embarking on the pool building process. Excavation started and finished today just before some rain hit. Pool kit and installation comes next week. I will be asking tons of questions during this process. Appreciate everyones help and I hope this thread will help future pool owners. Will update thread as progress is made.

40' x 32' x 16' true-L vinyl liner pool with steel walls.

<iframe width="560" height="315" src=" Login to view embedded media " title="YouTube video player" frameborder="0" allow="accelerometer; autoplay; clipboard-write; encrypted-media; gyroscope; picture-in-picture; web-share" allowfullscreen></iframe>

pool excavation.JPG
  • Like
Reactions: Newdude

Dallas (Southlake) Area New Build - July 2022 - Construction Thread

UPDATE - We finally got started on this project. Link below to later post in the thread:


Builder: Aquaterra (best combination of bid+ experience +design aesthetic alignment)
—————————
Excavation - June 28 to July 8
Drilling piers - Unfortunately, drilling for concrete piers hit ground water at 9 feet, so had to redo the engineering and also switch to like 40 helical piers (increased cost +++, of course, also excavation cost of 2x).
Rough stub plumbing and electrical - July 16 to July 28
Rebar (double matte) - July 18 to July 27 - extended to August 2 to increase basin depths and then more work through august then to sept to work through new engineering certifications plus deal with cave-ins from excessive rain
Gunite 12" walls and floors - September 30
Gunite waterproofing and yard grading - October 4
Long gas lines run - Oct 9
Long plumbing and stub electrical, cut channel for acrylic panel - Oct 13
Acrylic panel installed - Oct 18
Electrical inspection - Oct 20
Basecrete application and begin feature wall and in step pad bases - Oct 20
Tile and Cabana framing - Nov-Dec
Deck framing and gravel done - Jan 2023
Drainage done and tied in - Jan 2023
Surge basin concrete cap done - Jan 2023
Footers poured - Jan 2023
Retaining wall excavation started - Jan 2023
Sport court excavation underway - rebar is next - Jan 2023
Sport court slab and retaining wall completed - Feb 2023
Waterproofing of feature wall and planters - Feb 2023
Deck in progress - Feb 2023
Mostly tile work - March 2023
- Feature wall tile in process
- In pool planters
- Fire pit surround tile
- Finish waterline tile
April 2023
- Grading, and more grading.
- Concrete pads formed up
- Rear steps roughed out
- Cabana step downs roughed in
- Infratech WD60 heaters and flush mounts boxed in (2 in cabana, 4 in existing patio)
- Existing patio demoed for new tongue and groove ceiling.

- Cabana cabinets roughed in
- Various tile work continues
May 2023
- concrete work, pads, and bases
- 24 foot water fall fixture
- stone step pads
- sport court installed
- stucco retaining and feature walls
July 2023
- pre plaster shell prep, cleaning and fittings
- landscaping started (beds, retaining walls, holly trees planted)
- irrigation almost done
- screening fences started
- cabana coming along finally (stucco in process, counters installed, and counter face tile done, t&g ceiling done, shade structure in fabrication)
- t&g ceiling done in existing patio
- plaster and acid wash

——————————

Howdy, y'all. We are are in DFW and we are bidding out our pool/backyard. I have been following this board intently as we finally finished design (fourth designer was the charm)

Sorry, I don't have render shots. I only have a screenshot of the plans and the video link ( Login to view embedded media ).

Advice, criticism and thoughts all solicited and welcome. We have one bid and it's pretty shocking (attached). We will be getting two more. Thoughts?

Pool - screenshot.PNG


  • Like
Reactions: Texasresident

Brown flakes in hot tub

Hello,
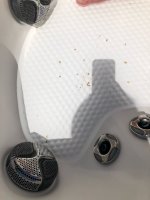
I have a Dimension One Dream model hot tub with a UV lamp and Vision silver ion cartridge for sanitizing. We use leisure time chlorine shock as required as well. A couple years ago the UV lamp failed, which took a while to notice because we don’t always use it regularly. At some point brown flakes started floating around.

No matter what I do I can’t seem to get rid of them. We got a new a UV lamp (the original one was 6+yrs old). Drained the water, new filter and silver cartridge. More flakes. Ran some Natural Chemistry Spa Purge. Didn’t seem to help much or at all.

I’m guessing it’s some kind of slime buildup inside the pipes, but I’m not sure what I can use to get rid of it. No matter how much skimming I do it never really goes away.

Are there different types of purge chemicals that more specifically or aggressively target this type of stuff?

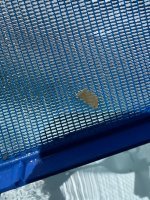
I have attached a couple pics of a chunk in my skimmer, and a pile of them at the bottom when I just recently drained it again. Any suggestions on what might get rid of this stuff for good would be greatly appreciated. Thanks.

Attachments

  • CC44AED9-54F3-4DFE-82D9-F0FC636BF1F0.jpeg
    CC44AED9-54F3-4DFE-82D9-F0FC636BF1F0.jpeg
    230.9 KB · Views: 31
  • 9DCD7982-79DF-40AD-A2B5-3FAEF7DCB9CF.jpeg
    9DCD7982-79DF-40AD-A2B5-3FAEF7DCB9CF.jpeg
    721.8 KB · Views: 33
  • Like
Reactions: agswimming541

Pool return direction

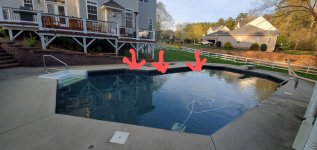
I've been battling cloudy water in my deep end. I am SLAMing, but I really think I've been creating a lot of my own problem by not circulating my pool properly. I've always aimed my pool returns directly at the skimmers opposite the returns. To make matters worse, I leave my pump on 100% skimmer 100% of the time, completely ignoring the main drains.

I'm toying now with 20% main, 80% skimmer, but I'm looking for opinions on which direction I should aim the return eyeballs. Maybe it's just me, but it really feels like aiming left vs. right makes very little difference when I feel the water pressure with my hand. It just feels like the water is blowing straight out.

Thoughts? Advice? The arrows in the image below point to my 3 returns. I think it's obvious where my skimmers are 😁


20210406_184536~2.jpg
  • Like
Reactions: Ignoramus

Liquid Chlorine Cost Increase @ Home Depot

Curious what you all are experiencing in other states. In AZ a box of two gallons of 10% early last year cost around 8.00, with the potential for additional discounting if the quantity purchased reached a bulk number. Today that same box is 9.98, with no option to capture bulk savings. What the heck is going on?

Filter