VOLT Garden Lighting

Dirk

Gold Supporter
TFP Guide
Nov 12, 2017
11,874
Central California
Pool Size
12300
Surface
Plaster
Chlorine
Salt Water Generator
SWG Type
Pentair Intellichlor IC-40
I've mentioned several times over the years my purchase of Volt Lighting for my garden lights. Their build quality is amazing. Beautiful. Solid brass. All sealed up with o-rings. I purchased them almost eight years ago (7 years, 10 months and 12 days ago).

I just had my first and only issue with them. Yah, eight years for low-voltage garden lighting without problems? Unheard of!!

One of my lights was flickering. I emailed VOLT about how best to troubleshoot that. I emailed them on March 1 at about 6:00PM. They responded the same day, Mar 1, 2023, at 4:59 PM! They went back in time to help me! OK, well, that's how their email header read. Maybe some sort of timezone thing I guess, point was, they got back to me FAST!

It took me a day to get around to performing their troubleshooting tip (just took a few minutes), and I responded last night that it appears to only be a bad bulb. I had forgotten that their bulbs have a lifetime guarantee. WHA?!? I just checked my email this morning and a new bulb has already been shipped, no charge.

I mean, come on, who does that?!? I couldn't say enough about the quality of their products before, but they have exemplary customer service to match!

If you're thinking about lighting up your garden (and you should), don't think about using anything other than VOLT.

 
Last edited:
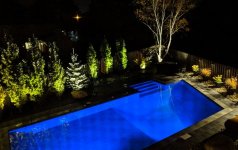
I can't shoot for beans at night with my iPhone, but this is my pool at night. It looks nicer "in person." There aren't hot spots like in this pic, that's the camera doing that. It's a bit more subtle. I used VOLT for the path lighting and the up-lights that light up my trees.

nighttime 3.jpg
 
Last edited:
Thanks! That's actually my spring/summer project, junk out all the old solar stuff and go back to a good low voltage wired. Good sealed light is imperative, as fire ants fill with dirt. But, the main thing the wife wants is glowing trees - she can't stand low light on trees, wants them heavily illuminated. Your up lights look to fit the ticket. What bulbs in your? Kit says led, which is must, as the halogen were pita with burnouts and wattage limits.
 
@Dirk - Thanks for posting this! I have VOLT lights around my backyard and I totally forgot they have a lifetime warranty! I have one of their hardscape lights that has quit functioning. I will email them now to see if I can get a replacement sent out!

--Jeff
 
  • Like
Reactions: Dirk
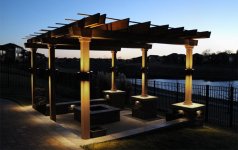
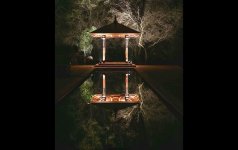
I'm impressed with the quality of their products and customer service. I used Volt exclusively in my back yard:

 
  • Like
Reactions: Dirk
VOLT is “top shelf” in my opinion. I have one of their transformers that I used to replace two smaller transformers that were total junk (red segmented LED displays on them failed after 6 months outdoors … I’m talking the old school red LED used to display 2 numbers or characters … the stuff that’s been around since the 80’s … how do you build something so that THOSE fail???). It’s worked flawlessly.
 
  • Like
Reactions: Dirk
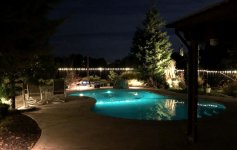
We used volt lights for all of our path lights and spot lights and have been very pleased with them as well. The first few sets we ordered from Costco as a trial run and then a ton more direct from volt. On a related note, all of their path lights are 20% off this week!
 
  • Like
Reactions: Dirk
Thanks! That's actually my spring/summer project, junk out all the old solar stuff and go back to a good low voltage wired. Good sealed light is imperative, as fire ants fill with dirt. But, the main thing the wife wants is glowing trees - she can't stand low light on trees, wants them heavily illuminated. Your up lights look to fit the ticket. What bulbs in your? Kit says led, which is must, as the halogen were pita with burnouts and wattage limits.
All LED. I've been through several systems, including halogen. They were all constant repair chores in waiting, until VOLT. They're not cheap, but worth every penny, especially considering their warranty support. It's like the last lights you'll ever buy. The brass is indestructible. The ones I have are not brass "cans," they're solid chunks of brass, very thick-walled. And they make liberal use of o-rings to keep out water and bugs. Really high-end.

My only regret was not getting a bigger transformer, so that I could add more lights! I'll eventually expand with another kit. You might consider getting more transformer than you think you need.

For the trees, get the lights you can focus. Placement is key, of course, but being able to fine tune the coverage is handy. I may be thinking of their path lights, but I think they have up-lights that are adjustable, too. I have some located very close to the trunk, so that they shine straight up and kinda light the tree from the inside out. Then others that are mounted well away from the tree and light up the outside. I like both effects, depending on the type of tree.

Here's my tip, and I think instrumental in my system's reliability. I used the waterproof wire nuts they provide, but I also soldered every connection. It was a pain to drag around the extension cord and iron, but worth it. The VOLTs are virtually corrosion proof, so the weak link is the electrical connection, which usually ends up laying in the dirt. By soldering each of them, then covering that with the water-proof wire nuts, I think I've eliminated any possibility of failure due to weak or corroded wire connections.

Tip two: run the main wire close to where you want the light, and then make a loop or two. Then connect the fixtures tail so that you're using very little of its length between the fixture and main line. The unused length and the loops will allow you to later move the location of the light without having to tear up the yard or add more wire. Plants grow, or get replaced, and where you first locate a light will likely not be where it stays forever. Build in some adjustability.
 
  • Like
Reactions: Toxophilite and pjt
I second the need to run the trunk line close and then keep a service loop at the fixture. I also ran 12/2 landscape wire everywhere, it's not significantly more expensive and gives ability for future additions.
For the electrical connection, i scoured YouTube for methods. I started with wire nuts and greese caps but ultimately did not like how they worked with the 12/2. In the end i used copper crimps and adhesive lined heat shrink tube, running the stripped wire long , crimping, then folding the long end over the crimp before applying a length of the heat shrink.
 

Enjoying this content?

Support TFP with a donation.

Give Support
Thanks, @Dirk . Great suggestion on the transformer, as well overbuilding the layout. Been constrained before with a system but not this time. Good idea about soldering and sealing, and the butane powered pen iron is perfect for yard work. Gonna research their up-lights, as 99% what mine will be, for the trees.
 
I second the need to run the trunk line close and then keep a service loop at the fixture. I also ran 12/2 landscape wire everywhere, it's not significantly more expensive and gives ability for future additions.
For the electrical connection, i scoured YouTube for methods. I started with wire nuts and greese caps but ultimately did not like how they worked with the 12/2. In the end i used copper crimps and adhesive lined heat shrink tube, running the stripped wire long , crimping, then folding the long end over the crimp before applying a length of the heat shrink.
+1. Forgot to mention that. 12/2 for sure.

The reason I like soldering over twisting or crimping is that it bonds the metal wires. Like fuses them. Even if the soldered connection gets wet, it won't rust or corrode or allow anything in to reduce conductivity. I can't quite picture what your describing, but I suspect moisture could get past the heat shrink tubing.

In addition to protecting the connection to the light, the other thing to protect is the overall resistance of the entire circuit. It's why VOLT transformers have two taps: a 12V and a 15V. The higher voltage tap is used when you have a very long run of wire, or you're getting reduced performance. Low voltage is susceptible to resistance which impacts the brightness and efficiency of your lighting. A long run of wire will do that, but so will corrosion between wire connections. Soldering itself won't add any resistance, and won't allow any corrosion in that could add any resistance.

I'm not saying your crimping will add resistance, but rather just explaining why it's so important to keep moisture from penetrating the connections. Even if most of the wire strands are still touching, corrosion build up can act like a little resistor, leeching power from the lights, even those no where near the corroded connection.
 
Thanks, @Dirk . Great suggestion on the transformer, as well overbuilding the layout. Been constrained before with a system but not this time. Good idea about soldering and sealing, and the butane powered pen iron is perfect for yard work. Gonna research their up-lights, as 99% what mine will be, for the trees.
Ha, you just sparked my memory. Most of the connections I soldered with an iron. But a few of the fat ones I just couldn't get hot enough, so I used a propane torch (which I don't recommend)! I'll have to look into a "butane powered pen iron," whatever that is, cause it's sounds like what I should have used. Thx.
 
Their hubs work great. No gaps in the wires, which greatly reduces potential points of failure.

 
  • Like
Reactions: Dirk
Their hubs work great. No gaps in the wires, which greatly reduces potential points of failure.

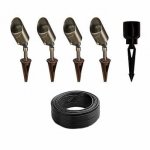
Probably just me (stuck in my ways), but I'm not impressed with that hub, not that it isn't well built. But it's just a plastic box full of Wago 221 connectors. They would be quite handy in some environments, but I think they would be prone to the corrosion I mentioned earlier. There doesn't appear to be much in the way of preventing moisture intrusion. And it looks as if bugs could crawl up into them as well.* And you'd need quite a few to cover a yard, at $26 a pop (looks to be about $4 worth of Wagos inside).

I like that they get the connections off the ground, but you could accomplish the same thing with a plastic stake. I'll stick with soldering and then covering with VOLT's "gooey" wire nuts.

* We've got a thread here troubleshooting a fried circuit board inside a pool automation chassis. Turned out to be ants shorting out the board. The fried ants were still in place, may they rest in peace (or pieces). 🐜🐜🐜
 
  • Like
  • Haha
Reactions: pjt and Newdude
Just to keep bragging on Volt. I sent an email last night around 10pm to their customer service email address. I had stated what troubleshooting I had done on the fixture, along with the part number and my original order information. I fully wasn't expecting anything until Monday. This morning I had a reply, saying they had started a return, and they sent me a UPS label to cover return shipping. They will send me a new light as soon as mine gets back.

So I don't have an end to the story yet, but based on the first half, I am expecting it to end well.

--Jeff
 
  • Wow
Reactions: Dirk
+1. Forgot to mention that. 12/2 for sure.

The reason I like soldering over twisting or crimping is that it bonds the metal wires. Like fuses them. Even if the soldered connection gets wet, it won't rust or corrode or allow anything in to reduce conductivity. I can't quite picture what your describing, but I suspect moisture could get past the heat shrink tubing.

In addition to protecting the connection to the light, the other thing to protect is the overall resistance of the entire circuit. It's why VOLT transformers have two taps: a 12V and a 15V. The higher voltage tap is used when you have a very long run of wire, or you're getting reduced performance. Low voltage is susceptible to resistance which impacts the brightness and efficiency of your lighting. A long run of wire will do that, but so will corrosion between wire connections. Soldering itself won't add any resistance, and won't allow any corrosion in that could add any resistance.

I'm not saying your crimping will add resistance, but rather just explaining why it's so important to keep moisture from penetrating the connections. Even if most of the wire strands are still touching, corrosion build up can act like a little resistor, leeching power from the lights, even those no where near the corroded connection.
The heat shrink I use is adhesive lined such that the adhesive melts and seals the connection.
 
  • Like
Reactions: Dirk
Probably just me (stuck in my ways), but I'm not impressed with that hub, not that it isn't well built. But it's just a plastic box full of Wago 221 connectors. They would be quite handy in some environments, but I think they would be prone to the corrosion I mentioned earlier. There doesn't appear to be much in the way of preventing moisture intrusion. And it looks as if bugs could crawl up into them as well.* And you'd need quite a few to cover a yard, at $26 a pop (looks to be about $4 worth of Wagos inside).

I like that they get the connections off the ground, but you could accomplish the same thing with a plastic stake. I'll stick with soldering and then covering with VOLT's "gooey" wire nuts.

* We've got a thread here troubleshooting a fried circuit board inside a pool automation chassis. Turned out to be ants shorting out the board. The fried ants were still in place, may they rest in peace (or pieces). 🐜🐜🐜
My costco volt lights came with a version of these. The thing I did not like is that they assume a "hub and spoke" layout which would use more wire. Their assumption is that you keep the 25ft of 18/2 attached to the fixture and run it to the hub. I believe I have 3-4 sitting in my "I'll never use them but they seem o have some value so I can't bring myself to toss them" pile 😜
imageService.jpeg
 
  • Like
Reactions: Jejunum and Dirk
And it looks as if bugs could crawl up into them as well.
I'll have to monitor for that! 🐜

They are a bit pricy, but I like the idea of having clean, seamless connections. I also have one or two empty slots in each hub, so adding an additional light would only take a couple minutes.
 
  • Like
Reactions: Dirk

Enjoying this content?

Support TFP with a donation.

Give Support
Thread Status
Hello , This thread has been inactive for over 60 days. New postings here are unlikely to be seen or responded to by other members. For better visibility, consider Starting A New Thread.