Had a very wet Saturday and so decided to take some time and condense one hour of time lapse video of the pool reno into 5 minutes! I figure the following 5 minute video contains about 180 hours of work to date. Lots has been accomplished, but still have a lot to do over the next few weeks. Totally can't wait to get this project finished!!

Pool Reno....
- Thread starter Burfcr
- Start date
You are using an out of date browser. It may not display this or other websites correctly.
You should upgrade or use an alternative browser.
You should upgrade or use an alternative browser.
As I understand it, the following is the order for the remaining items:
1 - Finish polishing the horizontal surfaces in the spa
2 - remove spa hut
3 - install gas line and electrical to the back corner for the firepit and landscape lighting (have purchased Pentair lighting that will match the pool/spa). Also do all gas/electrical and pool equipment hookup at this time.
4 - pool decking (including deck drains, water volleyball net anchor, basketball net anchor and pool railing anchor installation).
5 - install pool tile
6 - plaster
7 - finish landscape install
7 weeks!!
..and the spa shed is down! So nice to get that taken care of. We have run into a bit of a snag tho. Over the weekend I was asked to fill the spa and when I came back to check on it a couple of days later it had lost about 10 inches of water (Houston, we have a problem!). After much troubleshooting today, they discovered that one of the lines was punctured when the crew did the forming for the concrete pad for the equipment.
Thank goodness it was found before the pool deck was poured! It will be fixed tomorrow and work continues.....

Thank goodness it was found before the pool deck was poured! It will be fixed tomorrow and work continues.....
Last edited:
Bet you can guess what I am going to say...............................Because you have such a GOOD PB you/they found AND fixed the problem before it would be almost impossible to fix without a lot of wasted time, effort, and materials!!!
So talk to me..........how did they find the hole? Help me learn so I can use this knowledge on a future build.
Taking the spa shed down gave you back a lot of yard!!!
kim
So talk to me..........how did they find the hole? Help me learn so I can use this knowledge on a future build.
Taking the spa shed down gave you back a lot of yard!!!
kim

It took a bit of sleuthing, but they finally found it by pressurizing each line between the spa and the equipment pad. There are a total of six lines for the spa and they pressure tested each one looking for a minimum of 10 psi holding for several minutes each. With the one line that was punctured, they couldn’t get the pressure they were looking for and then one of the workers heard air coming from under the concrete pad.
Shovels were grabbed and the digging started where they found the offending hole.
So tomorrow we should be all good and fixed up in the piping and with the horizontal surfaces on the spa polished up and pretty much done. Work then focuses on the decking.
Some fun little things I learned today too. The structure for the hut covering the spa was actually forming that the crew uses when working on a new pool (it was being moved to a new site they are working on).
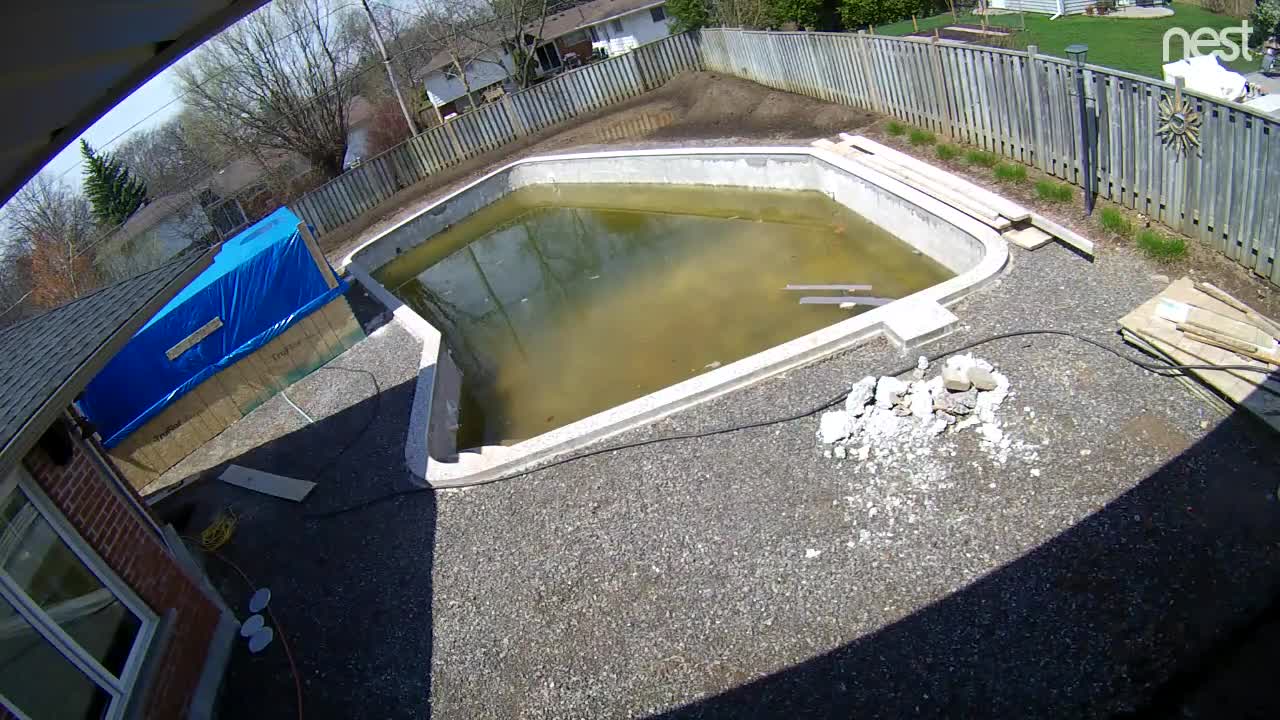
Also learned more about the decking and how it’s laid. Around the edge of the coping of the pool, the crew left a couple inches of the pool beam exposed. Turns out they use it to help support the decking so that one gets a nice clean transition between the deck and coping with no fear of settling over time. Not sure if this is standard practice or not, but it makes a lot of sense and impressed me! Here is a picture of the key/support/ledge, whatever you want to call it (you can see it on the left). I guess this will be important during the colder months when the backyard is in a deep freeze!

Shovels were grabbed and the digging started where they found the offending hole.
So tomorrow we should be all good and fixed up in the piping and with the horizontal surfaces on the spa polished up and pretty much done. Work then focuses on the decking.
Some fun little things I learned today too. The structure for the hut covering the spa was actually forming that the crew uses when working on a new pool (it was being moved to a new site they are working on).
Also learned more about the decking and how it’s laid. Around the edge of the coping of the pool, the crew left a couple inches of the pool beam exposed. Turns out they use it to help support the decking so that one gets a nice clean transition between the deck and coping with no fear of settling over time. Not sure if this is standard practice or not, but it makes a lot of sense and impressed me! Here is a picture of the key/support/ledge, whatever you want to call it (you can see it on the left). I guess this will be important during the colder months when the backyard is in a deep freeze!
Last edited:
That is brilliant right there! There are many older builds that has problems in that very area with sinking. This ledge should keep this from happening! SWEET! Hummm I wonder how much of a gap will be between the two and if they will put anything in it.
I bet they were digging fast and hard to find that spot! Great job guys!!
Kim
I bet they were digging fast and hard to find that spot! Great job guys!!
Kim
I have to admit that there were a few tense moments when they couldn’t figure out where the leak was (the piping in the spa is encased in concrete - no doing repairs in there!). They do constant testing before pouring concrete which is why they were totally puzzled as to why they were having this issue all of a sudden.
They do put some sort of foam material in the gap which will be under a quarter inch wide. They said that we could (if we wanted to) put in a caulking type sealer in after, but they don’t recommend it as they don’t have issues with their product (they have been in the concrete business for +40 years and figure I’ll take their advice).
I’m just excited to have a level deck finally - the old deck had shifted so much that some spots had sunk upwards of three inches. Take a look at this photo and you can see the major differences in height between the deck and coping and even between the different deck segments too.
Last edited:
How many people tripped on those bricks right by the steps?  MANY is my guess! Yeah that needed to be fixed.
Your PB has done so much right I WOULD take his advice on everything!! I would like to know the product they will be using in the gaps so I have that knowledge for down the road builds.
It almost HAD to be outside the spa!!! I bet they were sweating bullets until they found it OUTSIDE the spa ?I can hear them now.... please, please, please be outside the spa!! We can laugh about it now but..........bet there was not much laughing during!
Kim
I'll find out more details about the product when we get to pouring the concrete. Here is the video from yesterdays "Spa Reveal" and hunt for the leak....
Too bad there is no audio though I am SURE it would not pass the adult lang. filter!!!
Kim
Kim
RoyR
Bronze Supporter
Concrete expands / contracts with heat / cold...pool build methods do not recommend sliding the slab on the bond beam unless it’s cantilevered. May cause cracks in the bond beam without an expansion joint...but they have been in the pool business for 40 years, so I may not know what I’m talking about...
Yup - that’s why they do their work with an expansion joint between the deck and coping (to deal with expansion/contraction of the materials).


They will eventually be cut down to size and valves added to control the amount of air that gets mixed with the water once the spa is running.
Big day of forming for the deck!

Thread Status
Hello , This thread has been inactive for over 60 days. New postings here are unlikely to be seen or responded to by other members. For better visibility, consider Starting A New Thread.
Similar threads
- Replies
- 6
- Views
- 213
- Replies
- 13
- Views
- 406
- Replies
- 3
- Views
- 244