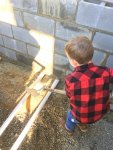
Try some couplings or sdr to dwv adapters to change the diameter to work for you. Years ago I spent a better part of the day with a dremel making something like this work, was a pain but came out good
Owner pool build started - fiberglass partially in-ground
- Thread starter TKR
- Start date
You are using an out of date browser. It may not display this or other websites correctly.
You should upgrade or use an alternative browser.
You should upgrade or use an alternative browser.
The last return line pressure test is done. It was the one I am using as conduit for the underwater LED. That light threads into a standard return wall fitting.
I posted a separate question here, but decided to test it with the light installed. To avoid blowing out the silicone between the LED housing and the face of the return fitting, I used 5 psi for 24 hours
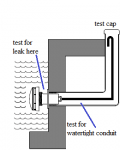
I posted a separate question here, but decided to test it with the light installed. To avoid blowing out the silicone between the LED housing and the face of the return fitting, I used 5 psi for 24 hours

Last edited:
I got approval on electrical/bonding rough-in and the trench inspections yesterday so I can cover all that PVC up now!
Rain coming again today. With the trench and piles of soil to collect water, the rain and mud have cost about 2 weeks since we started. Getting this trench covered and a rough grade for run-off will improve matters.
(I had a discussion with inspector about bonding the rebar in the pool retaining wall which I posted separately here)
Last edited:
I've been juggling my time between building the house and the pool so I'm late in updating the pictures.
Here is the plumbing entering/exiting the retaining wall before backfilling outside the wall.
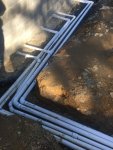
The trench got a little busier than I had planned for so it got filled in layers. I originally had it dug only 12" wide, thinking I'd need an 240v electrical conduit, drain pipe, skimmer pipe, returns, and an LED conduit/pipe.
After good advice here at TFP, I ended up running the drain, skimmer, 5 returns, LED conduit/pipe, a 240v conduit, and a 24v control conduit - and - before backfilling the trench I ran two spare 1.5" pipes and a spare electrical conduit inside the retaining wall for future use. I laid and filled the bottom layers of pipe, added caution tape, laid the spare pipes and second fill with more caution tape.
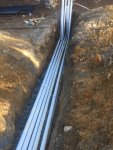
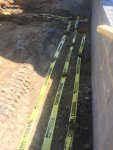
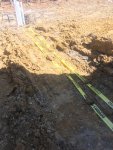
Here is the plumbing entering/exiting the retaining wall before backfilling outside the wall.


The trench got a little busier than I had planned for so it got filled in layers. I originally had it dug only 12" wide, thinking I'd need an 240v electrical conduit, drain pipe, skimmer pipe, returns, and an LED conduit/pipe.
After good advice here at TFP, I ended up running the drain, skimmer, 5 returns, LED conduit/pipe, a 240v conduit, and a 24v control conduit - and - before backfilling the trench I ran two spare 1.5" pipes and a spare electrical conduit inside the retaining wall for future use. I laid and filled the bottom layers of pipe, added caution tape, laid the spare pipes and second fill with more caution tape.


Last edited:
Today we got the backfilling/compacting finished inside the retaining wall. It took 6 truckloads of clean angular gravel. I originally set the pool on a gravel base, about 10" below rough grade, with 8-10" gravel added around it to stabilize. Then, a 4-ft retaining wall went up around the shell, leaving about 3-ft depth to fill between the wall and the pool.
We backfilled/compacted in three passes, waiting to keep the water higher than the gravel and checking thru-wall fittings for leaks.. I did not fill gravel to the top of the retaining wall, leaving about 6" for paver base.
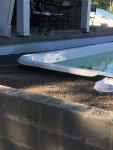
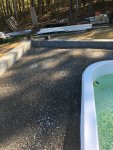
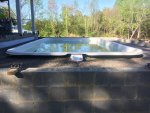
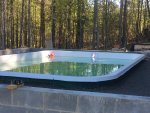
We backfilled/compacted in three passes, waiting to keep the water higher than the gravel and checking thru-wall fittings for leaks.. I did not fill gravel to the top of the retaining wall, leaving about 6" for paver base.


Last edited:
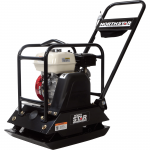 Used the loader on my tractor to hoist this plate compactor over the wall. That got the bulk of it compacted. Per advice from Jimmy the Greek, we stayed away from the wall of the pool. Then I used sections of 4x4 and 1x6 to tamp by hand along the wall and around the plumbing.
Hard part was under the steps and seats. I shoveled gravel in under them, then tamped horizontally with a short section of 2x6 and a small sledge hammer. The picture below, taken before the wall went up, shows the areas the compactor could not reach and had to be tamped this way.
Crude, but it worked
Last edited:
So what I see you saying is I can send anyone that need to compact something to you to show and tell them how to do it!!! WELL DONE!
Kim
Kim

Excellent job that's how its done. On a fiberglass pool it's a good idea to do a locking collar up top and use it to mortar your coping stones to. It's a pain but is the best way. A simple form accounting for overhang and staying a little short on back edge like half an inch is how we do them. 5 to 6 inches thick is plenty you can use the road base to hold the form. Cheap 1x6 is what I use or rips off plywood on table saw
Excellent job that's how its done. On a fiberglass pool it's a good idea to do a locking collar up top and use it to mortar your coping stones to. It's a pain nut is the best way.
Thanks! I really do appreciate the advice and experience shared here.
Jimmy... you've hit upon a main construction point that I wanted to achieve with this walled pool design since I started.....avoiding the concrete collar.
You addressed this early on when I posted my questions here on TFP. As the pool is now surrounded by gravel, a reinforced CMU wall and a positive daylight drain, the collar is not adding any significant "locking" or stabilization. But, as you pointed out early on, leaving it out creates a problem stabilizing the coping stones.
I still want to avoid the concrete. I went ahead and bought 16"x 24" coping stones, the largest 2" ones I could find (and lift
On the paver base..... I have landscaping cloth that I will put down first over the compacted gravel. The local quarry does not have a product they call "stone dust". The have "screenings" pictured below. The stuff is very fine dust with large pieces mixed in. The larger pieces crumble easily. Is this stuff stone dust aka paver base?
![IMG_1346[1].JPG IMG_1346[1].JPG](https://www.troublefreepool.com/data/attachments/114/114296-49c0e1e9d16541fdc34da63b8f44cb30.jpg)
Last edited:
With coping that big you will probably be ok. I personally would do a concrete footer just because its what I do and I cant leave work to chance unless it's my own project.
For the paver base what you have already is fine. Do your math on paver thickness and an inch of sand. Subtract that from final grade add 3/8" and set your screed pipe for proper pitch. You have a small area you can even screed your base then raise pipes and do sand. You want 1" overall outside diameter pipe, black gas opening the best for this but electrical conduit can work IF it's TRUE and straight. Dont use the stuff in pic and you dont need fabric either. You want concrete sand. Not masons sand or any stone dust. Concrete sand is like rice under a magnifying glass it locks together and locks the paver into place. Set them 3/8" high then hit them with a plate compactor and they will be flush. Then polysand add some water and your done
For the paver base what you have already is fine. Do your math on paver thickness and an inch of sand. Subtract that from final grade add 3/8" and set your screed pipe for proper pitch. You have a small area you can even screed your base then raise pipes and do sand. You want 1" overall outside diameter pipe, black gas opening the best for this but electrical conduit can work IF it's TRUE and straight. Dont use the stuff in pic and you dont need fabric either. You want concrete sand. Not masons sand or any stone dust. Concrete sand is like rice under a magnifying glass it locks together and locks the paver into place. Set them 3/8" high then hit them with a plate compactor and they will be flush. Then polysand add some water and your done
....you can even screed your base then raise pipes and do sand. You want 1" overall outside diameter pipe, black gas opening the best for this but electrical conduit can work IF it's TRUE and straight.
....You want concrete sand. Not masons sand or any stone dust.
....Set them 3/8" high then hit them with a plate compactor and they will be flush.
That all helps a lot in figuring out my next steps! I'll need to add more compacted stone.
I think I can cut some screed boards that will span from the pool to the wall. The pool was in place before building the retaining wall, so I had the masons set the top of the wall lower than the edge of the pool shell - enough to give me about 1/8" per foot slope. I could build one set of notched screed boards to pull the compacted gravel below grade, and another set to pull the sand 3/8" above grade.
Thinking about it now, a challenge in leaving out the concrete collar will be in compacting the coping stones with one edge of them sitting on the pool. Maybe I can compact them individually, by hand, before the adhesive sets.?
Last edited:
Bring the base up to where it needs to be just a tad low. Use a back butter of Portland cement on back of stones and adhesive on the front using a mallet to settle them in. The Portland will bite into the base and firm up nice. Then use back of coping as your screed. Make a screed with a notch thickness if paver plus 3/8" and ride it along the back of coping to wherever it needs to go on outside.
Bring the base up to where it needs to be just a tad low. Use a back butter of Portland cement on back of stones and adhesive on the front using a mallet to settle them in. The Portland will bite into the base and firm up nice. Then use back of coping as your screed. Make a screed with a notch thickness if paver plus 3/8" and ride it along the back of coping to wherever it needs to go on outside.
Nice! Thanks
DIY Update
It has been a long time since I've posted. After getting the pool set, the retaining wall built around it, plumbing and electric roughed-in, and backfilled with compacted pea gravel, I had to get back to building our house. I finally was able to start putting in some work on the pool again, in August.
With the warm weather the pool had become impossible to keep clean - it was more like green slime than water. So priority was on a temporary pump and filter hookup until I have time for proper equipment setup. I found some used Pentair equipment on Craigslist for under $400.
- Quad DE 60 filter
- Multiport valve
- 2-speed WhisperFlo pump (1.5hp WFDS-26)
- Suntouch system with remote
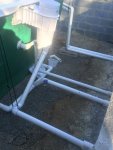
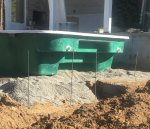
I needed an equipment pad but wanted that to be a permanent structure. Picture below shows where I brought up the returns, drains and electrical conduit about 30ft away from the pool.
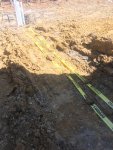
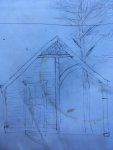
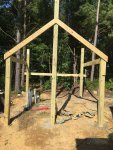
The equipment will be in full view from the pool deck so we decided it needed to go inside a small pool house. With no time right now to build one, I proposed dropping a pre-built shed over it but couldn't get that idea past the "designer" . I ruled out pouring a slab, wanting future access to the underground plumbing, So I decided on a post-type structure that I see used out here for barns and sheds. That way I could set the posts and fill-in a gravel/paver floor inside them to set the equipment on now. Later, I'll add a roof and wall-in the pool house. Anything under 12'x12'x12' does not require a permit here, so that's the size it would be.
My sketch for this idea was approved .
.
My crew and I started right away setting the posts
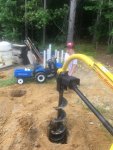

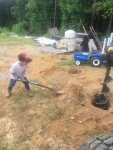
A dozen bags of concrete, a few gable boards, some chainsaw work, and it took shape...
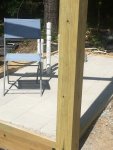
I boxed in the the left side with 2x12 P.T. splash boards using galvanized joist hangers. I filled it with compacted gravel and topped it off with some concrete pavers.
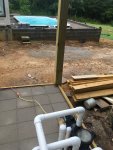
The WhisperFlo pump I bought is 240v, but I only have 120v from my temporary power pole. My neighbor came to the rescue and loaned me a 240/120v Hayward pump he had in his barn. After some PVC puzzle work I had the 1.85hp pump hooked to the skimmer line, and the Quad DE filter dumping into two of the 1.5" returns.. I primed the filter per instructions with the proper amount of diatomaceous earth. The filter gauge read 10psi when I started it up, then shot up to 30 psi within a few minutes of pumping green slime. 2 gallons of chlorine, 3 back flushes and 4 filter recharges later, it looked ready to jump in! The 1.85hp pump is way too big. It makes the pool churn like a hot tub.
It has been a long time since I've posted. After getting the pool set, the retaining wall built around it, plumbing and electric roughed-in, and backfilled with compacted pea gravel, I had to get back to building our house. I finally was able to start putting in some work on the pool again, in August.
With the warm weather the pool had become impossible to keep clean - it was more like green slime than water. So priority was on a temporary pump and filter hookup until I have time for proper equipment setup. I found some used Pentair equipment on Craigslist for under $400.
- Quad DE 60 filter
- Multiport valve
- 2-speed WhisperFlo pump (1.5hp WFDS-26)
- Suntouch system with remote
I needed an equipment pad but wanted that to be a permanent structure. Picture below shows where I brought up the returns, drains and electrical conduit about 30ft away from the pool.

The equipment will be in full view from the pool deck so we decided it needed to go inside a small pool house. With no time right now to build one, I proposed dropping a pre-built shed over it but couldn't get that idea past the "designer"
My sketch for this idea was approved

My crew and I started right away setting the posts


A dozen bags of concrete, a few gable boards, some chainsaw work, and it took shape...

I boxed in the the left side with 2x12 P.T. splash boards using galvanized joist hangers. I filled it with compacted gravel and topped it off with some concrete pavers.

The WhisperFlo pump I bought is 240v, but I only have 120v from my temporary power pole. My neighbor came to the rescue and loaned me a 240/120v Hayward pump he had in his barn. After some PVC puzzle work I had the 1.85hp pump hooked to the skimmer line, and the Quad DE filter dumping into two of the 1.5" returns.. I primed the filter per instructions with the proper amount of diatomaceous earth. The filter gauge read 10psi when I started it up, then shot up to 30 psi within a few minutes of pumping green slime. 2 gallons of chlorine, 3 back flushes and 4 filter recharges later, it looked ready to jump in! The 1.85hp pump is way too big. It makes the pool churn like a hot tub.

At this point I was ready to pick up on the pool work where I left off... PAVERS!!
Last edited:
SWEET! Love the crew you have working with you! They do good work!
Glad you were able clear the pool up so well!
Glad you were able clear the pool up so well!
Update on Pavers - Almost finished!
As discussed above, one of my main construction objectives with this fiberglass pool was avoiding the concrete locking collar. Mostly above ground and behind a reinforced concrete block retaining wall, the pool is surrounded by compacted pea gravel. I included a positive daylight drain below the gravel. It is not going anywhere. So, a concrete collar did not seem like it would add any significant locking or stabilization. But, omitting it did preset a problem stabilizing the coping stones which, without the collar to sit on, might teeter-totter when set on the top edge of the fiberglass. With the help of jimmythegreek here at TFP, I had a solution.
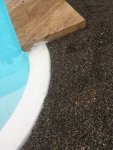
I first chose the largest coping stones available locally, 12"x 24" and 2" thick. Per jimmythegreek's suggestion, we applied adhesive for the pool edge and then bedded the rest of the coping stone into compacted pea gravel using a paste made from portland cement and water. Jimmy's idea worked very well. The cement grabs into the top layer of gravel, locking the coping stone. Of course they still could be lifted - but are very stable. They do not shift horizontally or give with weight.
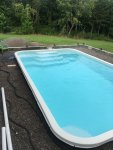
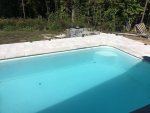
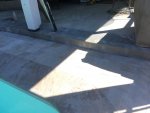
We started with a fairly level base of compacted stone, then built it up as we went, sloping away from the pool. I used the pipes on the right of this picture to drain away water that heads toward the patio, which is about 4" higher than the pool deck.
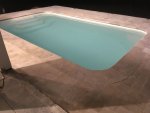
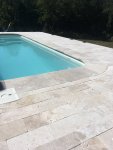
This is how the coping stones look when set. The only glitch was that only about a dozen on the pallet were 2" thick and the rest 2-1/4" thick. Adjustment was required but is not too noticeable.
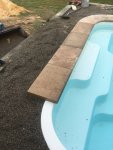
I had to get help from a local landscaper for this job as it involved ALOT of cutting - for the corners and to fit the rows of pavers evenly between the retaining wall and the pool.
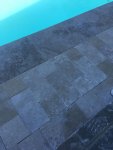
The pavers are 6X12x1.25" ivory tumbled travertine.
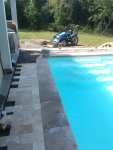
Next up is a railing and some poly-sand.
As discussed above, one of my main construction objectives with this fiberglass pool was avoiding the concrete locking collar. Mostly above ground and behind a reinforced concrete block retaining wall, the pool is surrounded by compacted pea gravel. I included a positive daylight drain below the gravel. It is not going anywhere. So, a concrete collar did not seem like it would add any significant locking or stabilization. But, omitting it did preset a problem stabilizing the coping stones which, without the collar to sit on, might teeter-totter when set on the top edge of the fiberglass. With the help of jimmythegreek here at TFP, I had a solution.
I first chose the largest coping stones available locally, 12"x 24" and 2" thick. Per jimmythegreek's suggestion, we applied adhesive for the pool edge and then bedded the rest of the coping stone into compacted pea gravel using a paste made from portland cement and water. Jimmy's idea worked very well. The cement grabs into the top layer of gravel, locking the coping stone. Of course they still could be lifted - but are very stable. They do not shift horizontally or give with weight.
We started with a fairly level base of compacted stone, then built it up as we went, sloping away from the pool. I used the pipes on the right of this picture to drain away water that heads toward the patio, which is about 4" higher than the pool deck.

This is how the coping stones look when set. The only glitch was that only about a dozen on the pallet were 2" thick and the rest 2-1/4" thick. Adjustment was required but is not too noticeable.


I had to get help from a local landscaper for this job as it involved ALOT of cutting - for the corners and to fit the rows of pavers evenly between the retaining wall and the pool.
The pavers are 6X12x1.25" ivory tumbled travertine.


Next up is a railing and some poly-sand.
Last edited:
SWEET! Love the crew you have working with you! They do good work!
Yes they do, and will work for chicken nuggets and lemonade
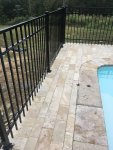
Update: Railing
The railing around the pool went quickly. I had previously embedded stainless carriage bolts to anchor the post bases into the concrete when we filled the retaining wall.

I used standard 4-ft powder coated aluminum fencing and cut the posts to leave about 1/2" clearance to the pool deck.
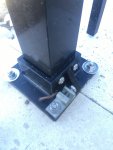
Here is a closeup on one of three post bases bonded to the retaining wall rebar and to deck bonding grid with copper wire pulled up through the pavers.
The railing around the pool went quickly. I had previously embedded stainless carriage bolts to anchor the post bases into the concrete when we filled the retaining wall.
I used standard 4-ft powder coated aluminum fencing and cut the posts to leave about 1/2" clearance to the pool deck.

Here is a closeup on one of three post bases bonded to the retaining wall rebar and to deck bonding grid with copper wire pulled up through the pavers.

Last edited:
Thread Status
Hello , This thread has been inactive for over 60 days. New postings here are unlikely to be seen or responded to by other members. For better visibility, consider Starting A New Thread.


