Newb OB with BYOP in Buckeye AZ - Short vacation pH and FC question

Yes we found a quite a few we really liked. We have about 30 Sq ft of feature wall and waterline along the back side that we will be looking at all the time and we picked tiles to put there (6 boxes worth). We also found about 15 tiles we didn't like and put them in a cut box.
 
  • Like
Reactions: kimkats
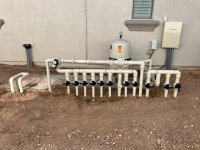
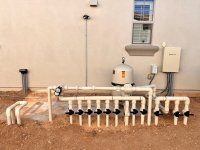
A few plumbing questions sprinkled in this paragraph here that are underlined. I hope I can explain this clearly (you might need to reference my plumbing diagram at the bottom of this post). He tied the plumbing from the chiller three-way diverter valve to the return header through the 2-way diverter valve I have between the pool return header and the chiller line. I'm not quite sure if this is a bad idea, but in effect it creates a 2" bypass for the SWG if for some strange reason I want to bypass it. Is this ok? He also moved the check valve in the main line to be between the future chiller and the SWG rather than after the filter and before the future heater. Any concerns with this location? I just noticed this morning that the stretch of pipe that has the intellichlor has 2" pipe. I'm asking them to fix that to 2.5" that I called for. He responded saying the SWG is 2" so it won't make a difference. Not knowing what is typical, I wanted the plumbing loop to the heater to also be 2.5" but the plumber is saying that is 2". Is it ok to leave as is with 2"? I updated my plumbing diagram to represent what was installed. Let me know if you have any questions or concerns with how it was installed.
Bumping in hopes I can get some feedback on the above questions and plumbing installation in general.
 
  • Like
Reactions: CaptainCrimson
Electric and general update:

The final plumbing was done last Monday and electric was on Tuesday. That was a mistake not leaving a day between the trades. I didn't have anyone lined up to backfill at the pad so I did it myself. I started at 6am Tuesday morning and it took me about 3 hours to place 2" of sand on top of the plumbing and then the soil up to grade. I'm guessing I moved 2-3 tons of material. I'm glad I did it, they would not have been able to do the work, with the mounds of soil in front of the panel and on the pad. Before and after pic (I didn't spend time grading since the equipment pad screening wall will dig up the area again).
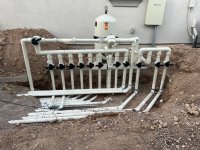
IMG_5835.jpegIMG_5846.jpeg

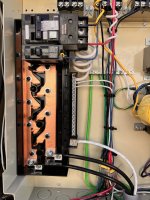
Electricians sent a crew of 4, which included one new tech who was learning on the job. They were watching over him fairly closely so I didn't mind. I think the flex to the light transformer and some of the wiring in the 120V compartment could have been installed a little cleaner, but it's not bad.
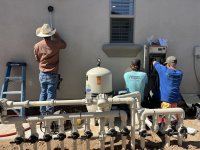
IMG_5841.jpeg

Flex install
IMG_5851.jpeg

Here is a pic of their guy installing the 1.5” threaded coupling for the microbrite.
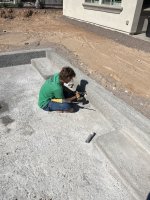
IMG_5840.jpeg

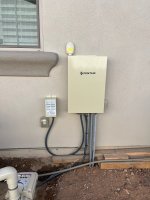
Intellicenter & closer view of the 120V compartment
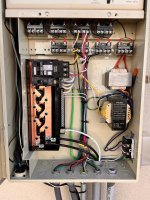
IMG_5982.jpeg
IMG_5983.jpeg
I had them run a 70amp circuit (they ran #4) so I'm set up at the Intellicenter for a heat pump if I ever decide to put one in.

I've got my equipment pad light installed (that was $230 for 16' of RMC, wire, and mount the box and light) wired to one of the relays (for now). While I'm entirely comfortable wiring and mounting electrical fixtures, my rigid conduit bending skills aren't that good. I originally thought I wanted a breaker for the pad light but the electrician said his boss would not be happy if they wired it up that way. Anyone know why that is? I didn't care that much so I let him wire it to the relay. It's an easy fix if I want to switch it to a breaker later.
IMG_5985.jpeg

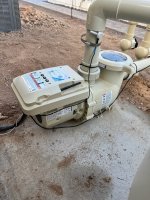
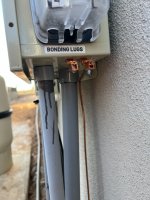
I asked about bonding the pump when they were nearly finished and they said they'd get to it. After they left I looked it over and found they missed it but did bond the panel. :rolleyes: I'm befuddled how contractors that do this work every day can miss this stuff. They could really use some attention to QC. Called them back and they came the next day to fix.IMG_5856.jpegIMG_5857.jpeg
The entire job took a couple hours and seems like they did a good job overall.

Had final plumbing and electric inspection on Friday and all passed! Yipee!! Only inspection left is pre-plaster.

Finalizing fence contractor now. I'm not in a rush now since my landscaper still has over a month before they start and they have about 2 months of work. Funny that I called the permit processing person to see if I need a permit for the fence, they said I did. I go on their website to submit it and it clearly says permit not needed for a residential fence under 7' tall. I submitted it anyway, we'll see what they say.

Working through the door and window barrier installations. As a follow-up from this earlier post, I found out that Buckeye still requires the barriers regardless of whether I have anyone under 6 years old living here or not. Oh well, worth a try. Found out I can get locks for my new Pella windows that can be installed to meet barrier requirements. Now I'm nailing down which one(s) are fire egress windows from the bedroom as those don't get the locks. I've got three windows that open from the master bedroom out to the pool area. Two are large that meet the requirements for fire egress, so I'm asking the inspector to confirm if both should be left without barriers. I'm going to have to get someone to install the autoclose/autolatch on the oxxo sliding door. I've got emails into the permitting department but from what I understand, Buckeye doesn't allow alarms instead of autoclose/locks.
 
Last edited:
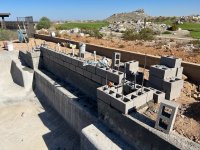
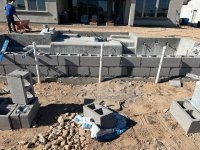
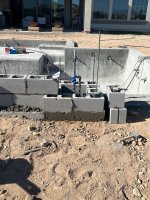
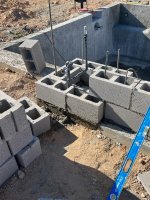
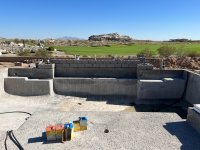
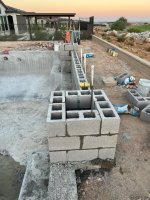
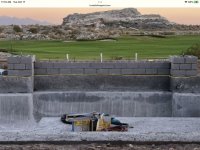
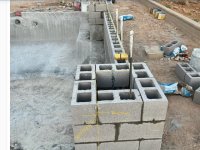
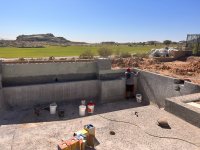
Mason/tile/coping contractor started Wednesday. Got columns and feature wall built. They spent a lot of time making sure dimensions were right and everything was plump and square. It turns out that one of the gas key valves is a little too deep inside the column (maybe ½ inch). I’ll have to see if I can get a longer sleeve (if that's what they call it).
IMG_5877.jpegIMG_5880.jpegIMG_5881.jpegIMG_5882.jpegIMG_5885.jpegIMG_5886.jpegIMG_5889.jpeg

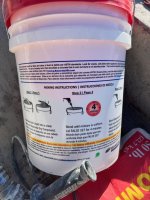
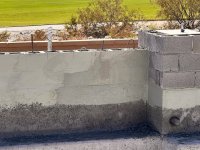
On Thursday they came to put the basecrete on the waterline and feature wall tile area. I was watching closely and I'm glad I did. The guy mixed some up and immediately took it over to start applying it. I stopped him. It's clearly labeled on the container to mix it to consistency just thicker than water, let it sit for 4 minutes (false set) and mix again for 1 minute. I explained it to him as best I could but he didn't speak English. I don't think he can read either as he was looking at the directions on the container and still doing it wrong. He followed my guidance for that first batch, and I instructed him again on the second batch. I figured at this point I didn't have to watch as close. The third batch he mixed he waited the 4 minutes, decided it was too watery and threw in more dry mix and mixed again, went to immediately apply it, decided it was still too watery and came back to throw in more dry mix and continue mixing. At this point I stopped him, threw out the mix he was working on and called his boss. That work is on hold until the field supervisor can be here on Monday to oversee the work. They finished the afternoon by grouting the feature wall and columns. They should be back up tomorrow with the waterproofing and I expect the equipment screening walls.
IMG_5906.jpegIMG_5911.jpeg

By the end of this week or early next I'll be done with all pool related construction (except plaster).
 
  • Like
Reactions: newdude and mbdesa
Yea!!!! on the care taken to keep make the wall plumb and true..........booooooooo on the turn key............I am sure you have done quite a bit of searching already. Have you found a new one?

GURRRRRRRRR on the guy NOT following the waterproof directions that were printed right on the container.............sigh and this is why I always say be there when any big work is being done
 
booooooooo on the turn key............I am sure you have done quite a bit of searching already. Have you found a new one?

I have searched, but I also contacted my gas contractor. They will send someone out here tomorrow.

One option I did find was:

By the way, I found out those are called an “escutcheon“, although some sites refer to them as a flange.

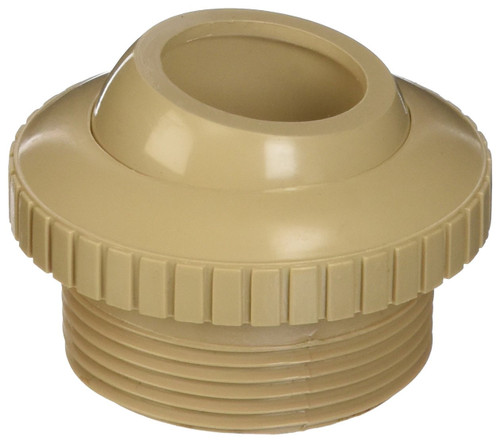
Off the cuff question, has anyone got a source for tan wall fittings? I can't seem to locate them through a variety of searches and my equipment supplier doesn't have them in that color. They would go well with our mini pebble sand color plaster. Need them for the 5 wall returns, 4 microbrite lights, 2 skimmer returns, and 1 floor return.
The fittings for the microbrites are just 1.5" female pipe adapters. Try this for tan fittings:
 
  • Like
Reactions: kimkats
I have searched, but I also contacted my gas contractor. They will send someone out here tomorrow.

One option I did find was:

By the way, I found out those are called an “escutcheon“, although some sites refer to them as a flange.

Off the cuff question, has anyone got a source for tan wall fittings? I can't seem to locate them through a variety of searches and my equipment supplier doesn't have them in that color. They would go well with our mini pebble sand color plaster. Need them for the 5 wall returns, 4 microbrite lights, 2 skimmer returns, and 1 floor return.
The extension is no big deal. It's just a 3/4" nipple in the length you need. They sell longer keys to access the valve
 
  • Like
Reactions: Schwimmbad

Enjoying this content?

Support TFP with a donation.

Give Support
The fittings for the microbrites are just 1.5" female pipe adapters.
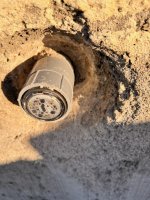
The microbrites have been installed in the female pipe adapters. Here are pictures of a couple of them. IMG_5996.jpegIMG_5994.jpeg

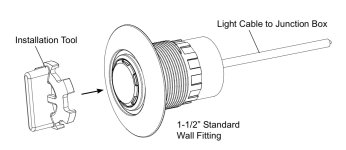
When I looked at the manual it shows some sort of fitting that has a flange like below. Is this not needed? I've seen pictures of microbrites installed without it, so is it just a matter of preference? I like the finished look so I'd like to find tan colored ones. The manual lists several variations of pentair, waterway, and cmp, and one hayward but I didn't see any in tan.
IMG_1131.jpeg

And thanks a bunch @1poolman1 for the tan return fittings, that is exactly what I was searching for. I was trying to decide what size eyeballs to get and searched the forum. Lots of topics on this one! After reading through several threads, I think I’ll start with 3/4” in the walls a 1” in the floor. Comments?

I have a feeling with every return having a diverter valve on them and being home runs I'm going to drive myself nuts tinkering with valve positions, eyeball sizes, and directions to point all the eyeballs.
 
That's interesting, I wasn't thinking about that at all. What is a good method to deal with this factor?

I doubt it matters for this interface, but I'll mention I am having both surfaces (shotcrete and CMU) waterproofed with basecrete and I am planning to use epoxy grout for the tile adhesive and tile grout.
 
The extension is no big deal. It's just a 3/4" nipple in the length you need. They sell longer keys to access the valve
The gas contractor had a nice solution. They cut the escutcheon in half with a small handheld metal pipe cutter, used a 3/4 nipple like you mentioned, and then screwed both ends of the cut escutcheon onto the nipple. Easy peasy. Here is a picture of the fix.

IMG_6003.jpeg
 
After a delay of about a week, the waterproofing for the waterline and feature wall went on last Friday and Monday.
IMG_6033.jpegIMG_6034.jpeg
The lighter color is from the application where I stopped their guy as he wasn't following the manufacturer's instructions. The waterproofing goes on in two coats, and these pics are from the first coat.

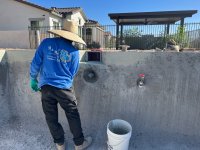
Today they are installing the scuppers and waterline tile. I have to say you really have to make sure you stick to your guns on the products you want used. I have sent several emails, txt messages, and verbally told them that I want to use Spectralock Pro Premium Epoxy Grout for the grout lines on the waterline and feature wall and for the adhesive I want to use Latapoxy 300. Their installer showed up today with their standard products they always use. Before they got started I stopped them and asked to get the stuff I wanted. The Laticrete rep said the Latapoxy 300 is overkill, but admitted it is a superior adhesive. He made a comment that we will need a jackhammer to get the tile off, not sure if that was in all seriousness or half joking.

I asked them to make sure whoever will be overseeing the installation of the tile and grout that they review the instructions, so they understand how to properly use these products. I even emailed some links below to try to be helpful. I fully expect I will have to go out there to make sure they adhere to the instructions.

For reference, below is the info I sent them. Probably overstepping a bit into their work, but after hearing from them that they hardly ever use epoxy adhesive and grout I think I need to keep an eye on things.
Laticrete Spectralock Pro Premium Epoxy Grout - Website
Laticrete Latapoxy 300 - Website

Installation Instructions:
ds-6815.ashx (laticrete.com)

Youtube video’s
  • Spectralock Pro Premium Epoxy Grout - The 11 minute video from Laticrete is very good introduction to the product, it’s mixing, and application. The video example is for a sample floor tile.
  • Laticrete Latapoxy 300 - The 8 minutes video is not from Laticrete, but seems good and covers the use of the product on a bathroom mosaic floor tile.
 
Last edited:
After a delay of about a week, the waterproofing for the waterline and feature wall went on last Friday and Monday.
View attachment 537416View attachment 537417
The lighter color is from the application where I stopped their guy as he wasn't following the manufacturer's instructions. The waterproofing goes on in two coats, and these pics are from the first coat.

Today they are installing the scuppers and waterline tile. I have to say you really have to make sure you stick to your guns on the products you want used. I have sent several emails, txt messages, and verbally told them that I want to use Spectralock Pro Premium Epoxy Grout for the grout lines on the waterline and feature wall and for the adhesive I want to use Latapoxy 300. Their installer showed up today with their standard products they always use. Before they got started I stopped them and asked to get the stuff I wanted. The Laticrete rep said the Latapoxy 300 is overkill, but admitted it is a superior adhesive. He made a comment that we will need a jackhammer to get the tile off, not sure if that was in all seriousness or half joking.

I asked them to make sure whoever will be overseeing the installation of the tile and grout that they review the instructions, so they understand how to properly use these products. I even emailed some links below to try to be helpful. I fully expect I will have to go out there to make sure they adhere to the instructions.

For reference, below is the info I sent them. Probably overstepping a bit into their work, but after hearing from them that they hardly ever use epoxy adhesive and grout I think I need to keep an eye on things.
Laticrete Spectralock Pro Premium Epoxy Grout - Website
Laticrete Latapoxy 300 - Website

Installation Instructions:
ds-6815.ashx (laticrete.com)

Youtube video’s
  • Spectralock Pro Premium Epoxy Grout - The 11 minute video from Laticrete is very good introduction to the product, it’s mixing, and application. The video example is for a sample floor tile.
  • Laticrete Latapoxy 300 - The 8 minutes video is not from Laticrete, but seems good and covers the use of the product on a bathroom mosaic floor tile.
Just went through this today. The install crew had no clue about the epoxy grout (even though the super said they did). It mixes and applies pretty easily. The cleanup was the issue. Lots of haze leftover. They used sponges only. In the manual, it said to use a Terry cloth rag( or something similar). This makes sense so that the epoxy "haze" can be removed from the tile.

I read you can use vinegar and water to remove the haze. I just spent an hour cleaning it off (half done). Works pretty well.

The haze was not detectable with the midday sun but if I ran my fingernail on the tile it would be felt and it showed there was something on the tile. (I have dark tile).

I do agree the latipoxy (I used 254) might be a bit overkill but the epoxy grout is(y)(y)(y).
 
Last edited:
  • Like
Reactions: Schwimmbad

Enjoying this content?

Support TFP with a donation.

Give Support