New Build - Rockwall, TX
- Thread starter rmontgomery
- Start date
You are using an out of date browser. It may not display this or other websites correctly.
You should upgrade or use an alternative browser.
You should upgrade or use an alternative browser.
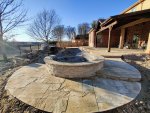
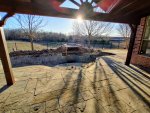
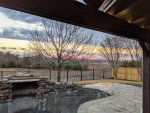
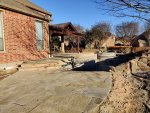
Pictures from yesterday. They did make some more progress today, but I haven't been able to get pictures yet.
Patio is done (except for staining), grotto in progress, weeping wall in progress, waterline tile installed, a lot of the wall stone is near completion also. Will have some more picts in a couple of days when it stops raining as the grotto and weeping wall have increased in size dramatically today. They should be installing coping this weekend along with more tile and around outside of spa. Paver install is supposed to start next week sometime if the weather permits.
Long time lapse video, sorry. Covers multiple days. I'll try to speed it up more when I get some time.
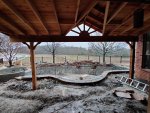
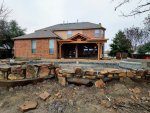


Man they are pushing it to get done! Working late as well! Sweet!
What are they going to use to fill on the void at the back of the pool? I see some stones there but there is a empty place under the shell. I would worry about big rain coming and washing it out even more.
kim
What are they going to use to fill on the void at the back of the pool? I see some stones there but there is a empty place under the shell. I would worry about big rain coming and washing it out even more.
kim

Currently they are just going to slurry the exposed concrete, but I will be doing some landscaping when they are done. I might go get some more rock and cover it, haven't really decided yet.
Need some advice from the experts if possible. We are putting in flagstone pavers for the decking. With the new patio extension shown in the picture above, we now have no gutters on that section of the house. We are going to put a gutter across the top of the second story to handle 2nd story runoff, but we are trying to decide if we need something on the extension once we cut-off the flow from the second story. The patio is not a steep slope and we would rather not have gutters hanging off the front of the extension if not necessary. From the rain we have had the past couple of days, none of the water from the roof is dripping into the pool and is all dripping where decking would be. I am just unsure of how this would affect our decking in the long term. We will have deck drains installed, so not too worried about the deck being wet.
Thanks for any advice you can provide!
Ryan
Thanks for any advice you can provide!
Ryan
I can see why you would not want a gutter there! Saying that think about how the Grand Canyon was formed.....years and years and years of water flow........over time the place were the water hits will wear. How do you keep it from happening? You don't BUT you can make sure you have extra stones to use to replace the worn ones over time. I would make sure they are kept outside somewhere so they will "fade" and get worn just like the decking ones.
Another idea is to put a row where the run off might hit to make an "accent" there. Make is something that will be easy to find and replace if/as needed.
Kim
Another idea is to put a row where the run off might hit to make an "accent" there. Make is something that will be easy to find and replace if/as needed.
Kim

My friend and I stained the patio last weekend. Grotto and stone around spa was completed. Pavers started yesterday. It has been raining again and it's tough to get good pictures with the short daylight hours and overcast.
Time Lapse First Day Paver Install
Time Lapse Second Day Paver Install
After first day of pavers...
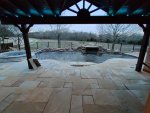
This picture is before pavers, but after patio stain and stone completion...

Time Lapse First Day Paver Install
Time Lapse Second Day Paver Install
After first day of pavers...

This picture is before pavers, but after patio stain and stone completion...

Last edited:
Looks like you had a AWESOME crew doing that work!! The cutting of the stone by just holding it up to the saw shows the skills he had! Nice job! Does it look as good in person?
That stain looks SWEET! Nice job! Good job on doing it BEFORE the decking! LOL So many don't plan ahead like that!
Kim
That stain looks SWEET! Nice job! Good job on doing it BEFORE the decking! LOL So many don't plan ahead like that!
Kim

Yes, pavers look really good. I will post some pics this evening after I get some good ones. They haven't filled in with the sand yet due to the pavers being wet yesterday. Expected to happen in a couple of days.
Pre-plaster inspection complete. Waiting on tile guy to finish spa and spillway then plaster should happen. Maybe later this week.
Ryan
Ryan
SWEET! Now were is my pic of the pavers? hummmmmmmmmm? LOL
Kim
Kim

Last edited:
Look at all of rock work!!! Man they worked hard on all of that!!!
SO close to being done!
Kim
SO close to being done!
Kim

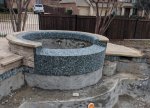
Spa tile completed today. Tomorrow they start cleaning out the pool to get ready for plaster on Monday. Then we fill.
I think the tile guy hates us now. That took him a while with 1" tiles, but it looks awesome and the only thing that really matters is the wife likes it.
Spa Tile Install Time Lapse

Ryan
I think the tile guy hates us now. That took him a while with 1" tiles, but it looks awesome and the only thing that really matters is the wife likes it.
Spa Tile Install Time Lapse


Ryan
LOVE the rolled tile! It really looks like he did a good job! Yeah it was some hard work but when done right should cause the artist to beam with pride on a job well done!
Kim
Kim

- Jul 16, 2012
- 7,282
- Pool Size
- 27000
- Surface
- Plaster
- Chlorine
- Salt Water Generator
- SWG Type
- Hayward Aqua Rite (T-15)
I really like the tile! Beautiful. I'm hoping that the tile setback on the sides of the vertical portion is enough to keep the water from wicking onto the stone. Water tends to spread out as it runs down. It doesn't really go straight down. I could have seen the tile going back to the pool coping on both sides. I'm no expert in this area but it's something I've seen happen on builds. I'd be very curious to see how it looks once the spa is overflowing. However, it's an easy fix even if it happens after the pool is full since it's all above the waterline and on the sides.
Agreed. We debated that a few weeks ago before the ledgerstone was installed. I had originally wanted it to diagonal out, but others had indicated water was more likely to follow the diagonal and possibly out of the pool. PB has definitely said that we won't really know how the water will flow until we fillI really like the tile! Beautiful. I'm hoping that the tile setback on the sides of the vertical portion is enough to keep the water from wicking onto the stone. Water tends to spread out as it runs down. It doesn't really go straight down. I could have seen the tile going back to the pool coping on both sides. I'm no expert in this area but it's something I've seen happen on builds. I'd be very curious to see how it looks once the spa is overflowing. However, it's an easy fix even if it happens after the pool is full since it's all above the waterline and on the sides.
Ryan
- Jul 16, 2012
- 7,282
- Pool Size
- 27000
- Surface
- Plaster
- Chlorine
- Salt Water Generator
- SWG Type
- Hayward Aqua Rite (T-15)
And I forgot to mention that the decking looks great with all the shadows created by the natural cleft surface and low sun angle. Should be great for wet foot traction too.
Received the TF-100 lot yesterday (3 days earlier than expected). Took some initial fill water tests just to try it out. Just wanted to add that the speed stir is worth it, wow.
Initial results:
FC - 5
CC - 0
pH - 7.8 (maybe higher)
TA - 99 (I think, may not have done it correctly)
CH - 400
They also added the final retaining wall yesterday. Forms a small flowerbed along the walkway around the spa. Wall guys did a lot more than the PB was expecting I think as it was drawn shorter in length than that ?.
Pool is also cleaned out and prepped for plaster Monday.

Last edited:
LOVE the wall around that area! What will you put in there?? Me? Big, pretty rocks LOL
Testing-did you look at the videos to see how to do them? Go to the link in my siggy below (TF-100) and watch the videos to see if that helps. For me I had to get a plastic, white plate to hold up behind the pH test tube. That really helps me match the colors better.
Kim
Testing-did you look at the videos to see how to do them? Go to the link in my siggy below (TF-100) and watch the videos to see if that helps. For me I had to get a plastic, white plate to hold up behind the pH test tube. That really helps me match the colors better.
Kim

Thread Status
Hello , This thread has been inactive for over 60 days. New postings here are unlikely to be seen or responded to by other members. For better visibility, consider Starting A New Thread.


