ICF 20'x40' Owner Built

Hey, where’s the photo to compare it with the one above? Kidding… good progress.
Haha you asked for it.. Posted above. While it doesnt look like much from the photo thats a lot of mud and clay pulled out of the hole. Excited to get gravel down and be out of the mud.
 
Icf walls going in, using 2x4’s and plywood for bracing and wire tying the 2x4 to the webbing. Hope to pour concrete in less than a week. Tripple digit weather has made it tough to work on but I push forward by imagining being able to swim when the weather is like this. Going to use a channel drain for the main drain with a valve that I can open to let in ground water if I have to drain the pool. Floors will have 10” thick concrete. Pouring walls and floor together. Lots of rebar at 12” on center. Floor will be all #5.3705E395-5613-4427-954C-14561CD8BEF4.jpeg
 
Last edited by a moderator:
Oh. wow, a monopour? I'd love to hear how that goes. Do you or someone you'll have onsite have experience with that?
Nope, I’ve got lots of flatwork experience but never icf or monopour. I’m a little nervous but doesn’t seem to complicated just need to have the first truck thicker to begin the wall pour and let it set up a bit before moving higher up the wall cavity.
 
Hoping to pour next week. Ran out of ICF foam (supplier didnt give me enough corners and didnt have anymore on hand) so had to use some extra straight pieces to form corners and then remaining with some plywood. 2" Foamular 250 for the floor ($50 bucks a sheet at Home Depot ouch). Lots of rebar to tie, need to form skimmer mouth, cut through pipe for lights and returns and true up wall with 2x4 screwed into the triangle brackets and anchored with a steel stake and install rebar chairs on the floor. Thinking about forming up 2 benches at the deep end corners that will be suspended by walls at the corner and some L shaped rebar inserted through the wall for reinforcement. I want the kids to be able to climb out easy after diving and don't like the idea of a hinged ladder that I have to raise lower whenever I closer or open the autocover.
Also spoke with the pebbletech contractor about application on ICF. They suggested troweling or spraying on scratch kote 2000. I tested it out with the compressor and a hopper gun and it stuck well to the wall. My ICF was yellowing in the sun so I wanted to get it covered soon. Probably will wait until after the pour to do the rest and will have to rasp off any loose yellowed foam when I get to that point. ICF surface turns powdery after sitting in the sun so it doesn't adhere well without removing the yellowed surface.
 

Attachments

  • IMG_5122.jpg
    IMG_5122.jpg
    700.3 KB · Views: 83
  • IMG_5123.jpg
    IMG_5123.jpg
    774.6 KB · Views: 80
  • Like
Reactions: kimkats
Questions?

1. I’m going to install an auto cover and wondering if I should pour the leading edge of the wall an inch lower where the cover goes in. I’ve been reading installation guides and some show a slant at the leading edge that’s about 3/4 inch lower to prevent the cover from catching.

2. Any suggestions on coping? Im considering doing a formed concrete coping but worry about messing it up. Precast would be easier but I’m looking at $60 per 12x24” from the pool supply store. Seems pricy. Where do people find coping?
 
Concrete was ruff!! Figured 47 yds but was short and by the time we got an additional truck in the unfinished floors where setup. Poured in the middle of the day in 100 degree weather with some family members. I had been trying to get concrete for a couple weeks but its been in really short supply in Utah. I’ve got to grind down some of the rough area and then figure out how to create a cove where wall meets floor. Didn’t have any blow outs on the wall which was good! Rented a stinger to consolidate the concrete. It would have gone better if it were cooler and if I had ordered enough concrete. Oh well glad to be past that.IMG_5444.jpg
 

Enjoying this content?

Support TFP with a donation.

Give Support
Wow! I thought I took on a big project when I did mine, but this is another level!

If you’re still looking for coping we got ours at Beehive Brick and Stone. We got Melville coping and it was about $13/piece.
 
Wow! I thought I took on a big project when I did mine, but this is another level!

If you’re still looking for coping we got ours at Beehive Brick and Stone. We got Melville coping and it was about $13/piece.
Thanks! Called up Beehive and they can order the coping. The edges look a little sharp on the Melville. How do you like your coping? I was originally planning on a bullnose coping but the laguna bullnose that they cary is $75 a piece compared to the $14 a piece.
 
I love it! Really like the more modern look of it, and it goes well with the look we were going for. I thought it would be a problem with the sharper edges (my wife especially), but honestly it hasn't been a problem at all. I have considered polishing the edges slightly, but since it hasn't been much of an issue it's moved down on my list and I may never do it.

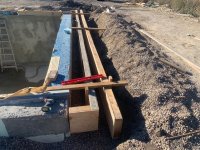
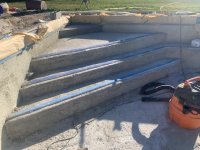
We looked at the laguna coping too, but as you found out it's much more expensive! One thing to note though, it was supposed to be 2-3/8" (60mm) just like the pavers, but ended up being about 3-1/2" (90mm). I would double check with them on the size - it didn't end up being an issue for us, you'll just need to be aware of it. And they are heavy - about 160lbs each!
 
Poured some cinderblock and concrete steps and bench. Still working on patching and grinding. Ordered some glass mosaic tiles for the water line and steps. Still trying to figure out the best method for attaching tile to ICF? Thinking I will spray on the scratchcoat then apply the mortar bed and thin set. Also will try precasting my own coping stones. I have some rubber bull nose form liner that I ordered to try out.
 
  • Like
Reactions: cmc0619
I've been busy but everything's taking longer then I thought.
  • I poured an equipment pad
  • finished most of the plumbing, still need to run conduit for the autocover and stub out a return for a future slide.
  • removed foam around pipe penetrations and applied hydraulic cement around the pipes
  • completed tile but then decided to pour an extra step and was told I need to tile the whole thing as the plaster company thinks the pebble wont be under enough water during the winter.
  • Waterproofing bondcoat 70% complete. Plaster company said it was too smooth so I have been spending most of my time applying a bond coat using "octo bond" and "scratch kote 2000" both the same product. Applying by spraying from a drywall hopper gun, rolling to a peak and then troweling when I have a few holes to fix. Its tough work. I did more bond coat work over the weekend as well
  • Began forming the autocover box. I realize now that I should have formed the cover box walls for 12" thick rather then 6 so I have a bit more work on the box forming.
TODO
  • Finish forming autocover box
  • Tile top step
  • Rent coping forms and form and pour the coping and concrete cover box.
  • Run gas line to heater
  • more backfilling
  • finish bondcoat
  • Schedule pebbletech
  • Fill pool
  • Form and pour deck
Unfortunatly the plaster company will not warranty the Pebbletec since they have never done it on icf before :cautious: When I began the project I had seen on the fox blocks site pebbletech being used and have seen another builder using pebble so hopefully it wont be an issue.

I would have been done a long time ago if I had done vinyl for the finish. Hopefully the pebbletech lasts. Hind site I probably should have gone with vinyl. It would be much easier and cheaper. The tile was harder then I thought due to having to build up a mortar bed so the plaster will be thick enough and the bond coat process has taken lots of time and money.

Im running out of steam but in the final stretch! Hope to get a swim in before winter but all the neighbors are winterizing there pools now.
 

Attachments

  • IMG_5708.jpg
    IMG_5708.jpg
    747 KB · Views: 72
  • IMG_5707.jpg
    IMG_5707.jpg
    101.8 KB · Views: 70
  • IMG_5705.jpg
    IMG_5705.jpg
    133.9 KB · Views: 71
  • IMG_5704.jpg
    IMG_5704.jpg
    124 KB · Views: 67
  • IMG_5703.jpg
    IMG_5703.jpg
    65.6 KB · Views: 69
  • IMG_5675.jpg
    IMG_5675.jpg
    640.6 KB · Views: 67
Consider holding off on the final bond coat and PebbleTech until the spring.

I would not plaster a pool and then immediately close it. First of all you have your 30 day startup period when you need to watch water chemistry as the plaster cures. And then you have to monitor the pH as it wants to rise with curing plaster and needs to constantly be lowered. Having 6 months or more between plastering and closing the pool to adjust the curing water chemistry is best.

You run the risk of high pH during the winter causing scaling on your new PebbleTech. And getting scale off the pebbles is especially difficult.


  • Like
Reactions: kimkats

Enjoying this content?

Support TFP with a donation.

Give Support
Thread Status
Hello , This thread has been inactive for over 60 days. New postings here are unlikely to be seen or responded to by other members. For better visibility, consider Starting A New Thread.