Goodyear, AZ (EMR) O/B Pool Deliberations - UPDATE - Pool is Filled!

You will love that step tile 😃. I can’t wait to see your plaster. It’s just a tad darker than mine. I want to see if you can tell. You will also love the micro. I’m so happy we went with it. I was totally against pebble until I felt the sample of the micro. I can’t stand regular or mini pebble. It’s just rough. This is not.
 
  • Like
Reactions: thewolf56
You will love that step tile 😃. I can’t wait to see your plaster. It’s just a tad darker than mine. I want to see if you can tell. You will also love the micro. I’m so happy we went with it. I was totally against pebble until I felt the sample of the micro. I can’t stand regular or mini pebble. It’s just rough. This is not.
Thanks, Nikki. We love the look of the pebble, but weren't sure how the micro will work out as we have never been in a pool with the micro.

We really tried to not copy your trim tile. I had the okay from my wife to get Lightstreams for trim tile, but we just didn't see a color we really wanted (but dang is that iridescent quality bright). Our top choices were 2 selections from Mineral Tiles, but the overall blend of the other one seemed too pale when next to the other material selections (especially the plaster). Even the employee at NPT thought the trim tile we decided on was a really nice compliment to our other choices, even though it meant not going with them. So, we honestly couldn't find a better choice for our combination that what you had already picked out!
 
  • Like
Reactions: Nikilyn
Another hurdle just popped up today. Electricians are out to wire everything up. I wanted each light (4 microbrites and 1 set of grotto lamps) to be on its own transformer, but my intellicenter doesn't have enough relay outputs :(. So, I asked them to wire up the 2 main pool microbrite transformers to 1 relay together for now. That way, I can add the add-on card and just rewire the transformer later on.

Now, I need to figure out what add-on I need.
 
We discovered at start up that we didn’t have enough outputs to turn the pool and spa on separately so we put them on the same one. We’re glad they are together. I don’t think there’s ever been a time we wouldn’t want them all on. If we are in the hot tub we like having the pool lights on for ambiance. If we are swimming, we want the spa light on because we are in that too.
 
Well, it has been a while since I have updated. No real movement on the pool until the tile started on Monday (2 days ago), but I have been busy!

I know everyone says to run conduit because it is cheap, but I don't know if "cheap" is still the correct word. I knew if I didn't run irrigation and conduit for low voltage (and 120v in a couple of places), it would be very difficult to do later on, so this was necessary.

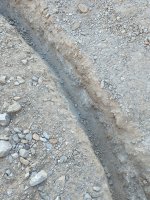
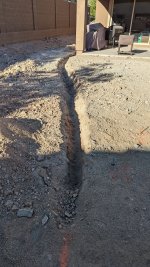
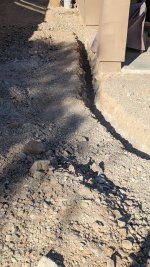
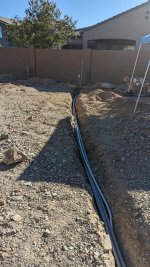
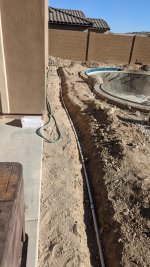
I have spent the past 2 weekends and every evening after work jackhammering trenches for conduit and irrigation pipe (using schedule 40 PVC for pipe and conduit). It is over a couple hundred feet of trenching after all is said and done. A few hundred feet in conduit and pipe (and some sizes were not easy to find).

Had to use a jackhammer to dig thanks to solid rock after a couple of inches down. Also with all of the rock that was compacted on my lot after blasting, getting a trenching shovel more than a couple of inches was almost impossible.

Trench 1.jpgTrench 2.jpgTrench 3.jpg

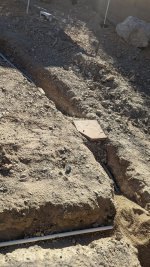
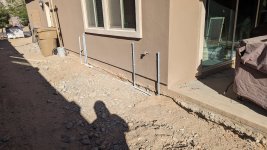
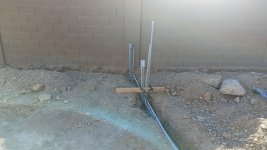
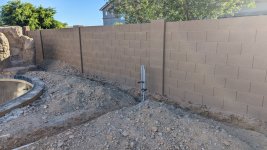
After digging down to 18" for the main trench, I laid conduit and irrigation pipe. Where I was going to run 120v outlets, I branched off trenches down to 12" burial depth (per NEC). and ran conduit. Also ran conduit for speakers, landscape lighting, conduit for HDMI at planned pavilion location, and conduit for misting tube for pavilion. I've been using a level to ensure the risers at the house are straight and I'll make sure the risers are straight when I backfill (each bump send the risers out of plumb as I add more conduit to a trench).

Conduit 1-resized.jpgConduit 2.jpgConduit 3.jpgConduit 4.jpgConduit 5.jpgConduit 6.jpgIrrigation Pipe 1.jpg

I will hopefully be finished with this part of my project in the next couple of days.
 
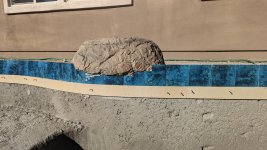
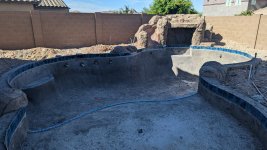
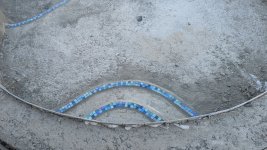
And tile started Monday and would have finished Tuesday, if we did not run out of waterline tile... Seems to be about 3 tiles short for waterline (at the skimmer). Our installer is going to check to make sure they delivered the amount ordered, as the amount ordered should have more than covered the installed amount (plus I want spares for down the line). Step and bench trim tile looks good (and there is plenty extra as I ordered 2 extra square feet). Still need to install the mosaics (waiting on one to come in still before we finalize placement) and coping is going to start tomorrow.

Tile and Conduit.jpgTile.jpgTile - Shallow End.jpgTile - Skimmer.jpgTile - Almost Finished.jpgTile - Steps-resized.jpgBackYard2.20220607_094448142.jpg
 
  • Like
Reactions: Nikilyn

Enjoying this content?

Support TFP with a donation.

Give Support
Your poor body and ears with all of that jackhammer work!!! Bet you have been hurting from all of that! BUT well done!!!

SO close on the tile!!! Here is hoping they have some on hand close by!
Thanks, Kim. I was prepared for the noise and bought a 50-pack of disposable ear plugs with a -30 dB rating, but I was not prepared for how much soreness (and in some areas, pain) I have. I used to work for a copper repiping company in my summers and weekends when I was in high school/ first years of college and would often trench water main lines with a jackhammer, but that was over 20 years ago! I was not prepared for this. o_O It didn't help that I kept coming up with new ideas that required more digging and conduit or pipe since I was already trenching.

Crossing my fingers they can get the tile. Apparently the color tile we picked runs out of stock quite often, but we just need enough for the bottom part of the skimmer.
 
I was not prepared for how much soreness (and in some areas, pain) I have.
The years crept up on ya huh? As they have on me.............what used to take an hour takes a bit longer due to taking breaks to cool off and such.
we just need enough for the bottom part of the skimmer.
If that is the only area you could use just about any blue tile as most people will not even see it! So long as it is close in blueness!
 
  • Like
Reactions: thewolf56
The years crept up on ya huh? As they have on me.............what used to take an hour takes a bit longer due to taking breaks to cool off and such.

If that is the only area you could use just about any blue tile as most people will not even see it! So long as it is close in blueness!
The years, the waistline, the distance between my fingertips and my toes... :ROFLMAO::ROFLMAO::ROFLMAO:

Sounds like they will be able to get enough to finish. Getting replacement tiles might be a bit harder though...

One other fun thing is that I learned how to bend PVC with a propane torch. Messed up the first couple of pieces, but after that, I didn't really have any hesitation of bending the pipe if I needed to.
 
  • Like
Reactions: kimkats and Newdude
Well, it has been a while since I have updated. No real movement on the pool until the tile started on Monday (2 days ago), but I have been busy!

I know everyone says to run conduit because it is cheap, but I don't know if "cheap" is still the correct word. I knew if I didn't run irrigation and conduit for low voltage (and 120v in a couple of places), it would be very difficult to do later on, so this was necessary.

I have spent the past 2 weekends and every evening after work jackhammering trenches for conduit and irrigation pipe (using schedule 40 PVC for pipe and conduit). It is over a couple hundred feet of trenching after all is said and done. A few hundred feet in conduit and pipe (and some sizes were not easy to find).

Had to use a jackhammer to dig thanks to solid rock after a couple of inches down. Also with all of the rock that was compacted on my lot after blasting, getting a trenching shovel more than a couple of inches was almost impossible.

View attachment 420928View attachment 420929View attachment 420930

After digging down to 18" for the main trench, I laid conduit and irrigation pipe. Where I was going to run 120v outlets, I branched off trenches down to 12" burial depth (per NEC). and ran conduit. Also ran conduit for speakers, landscape lighting, conduit for HDMI at planned pavilion location, and conduit for misting tube for pavilion. I've been using a level to ensure the risers at the house are straight and I'll make sure the risers are straight when I backfill (each bump send the risers out of plumb as I add more conduit to a trench).

View attachment 420937View attachment 420931View attachment 420932View attachment 420933View attachment 420934View attachment 420935View attachment 420936

I will hopefully be finished with this part of my project in the next couple of days.
Oh man... after hearing that, I will never complain about trenching again! lol. I too have been trenching irrigation lines, a drain line and some conduit the last week or so.... BUT my ground is pretty soft. It's all been with a pick and shovels. Yours is next level! Good for you for tackling it though... that's pretty awesome. You'll be glad you did when all is said and done.
 
  • Like
Reactions: thewolf56
It's been a little bit since I have last updated.

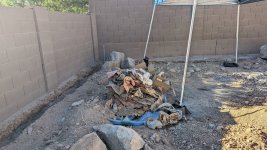
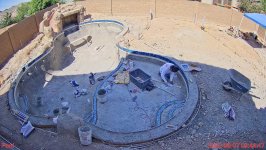
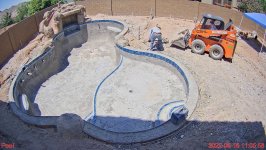
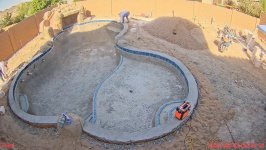
Last Thursday, the decking crew had a giant pile of sand and another pile of fill delivered to my house and used a bobcat to move the materials around. With every load of sand they would bring in to line the pipes in the trench, they would scrape a load of rocky dirt from around my yard to deposit in their trailer. At the end of the day, they moved the rest of the fill dirt to a big pile in the backyard. Only problem now is because the travertine was placed along the side of my driveway, there is a tone of bobcat tracks I need to figure out how to clean off of my paver driveway, but no popped pavers or other damage.

PoolTime.20220616_110600304.jpgPoolTime.20220616_154450294.jpg

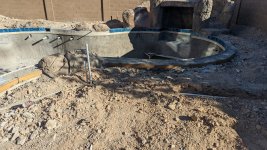
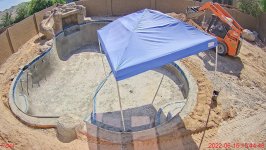
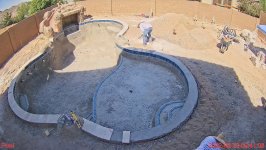
Yesterday, the coping crew came to lay the mortar bed on the bond beam for the coping and to shape the coping to bullnose (the 6x12 bullnose was out of stock at the time of order and they had the means to shape them). I left my pop-up out as I know it gets hot out here, so all of the progress of them working on shaping the coping could not really be seen from the camera. I took a look at the pile after they left and the shaping looked well done (couldn't tell it was shaped on-site).
PoolTime.20220622_134450315.jpg

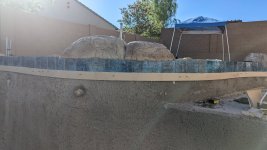
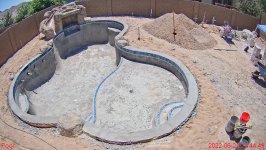
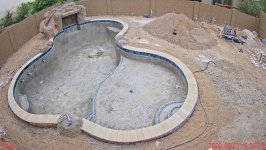
Today, the coping crew really got to work on laying the coping down. They started a little after 7 and worked until a little after 4. It was nice to take a look and see how meticulous they were when they were marking cuts. They did a dry fit of all of the coping pieces in each section between rocks before setting them permanently. Unfortunately, a dust storm started blowing through my area around 4, so they had to hurry and protect their stuff. My pop-up suffered a damaged leg from the wind, and we ended up having to break the leg off in order to close it otherwise even the sandbags I use to hold it in place will not guarantee that it would have stayed in place. (I had my gazebo pull the anchors out of the ground at my last house and ended up halfway in my neighbor's yard many ears ago and it is quite common for people to have trampolines fly into their yards from these winds). I feel bad that I won't have a pop-up for them tomorrow with the sun, so hoping I can pick another one up this weekend. I haven't been able to go outside and see the work or take pictures, but I will as soon as this storm is over. From what I can see so far, I think it looks good.

PoolTime.20220623_082020284.jpgPoolTime.20220623_094110283.jpgPoolTime.20220623_160240251.jpg

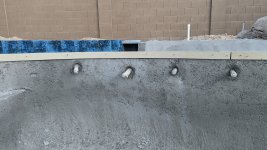
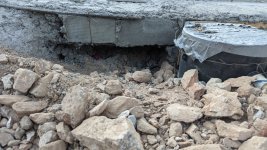
One bit of bad news though. After we pulled the form off around the skimmer and autofill, I found a void in the bond beam, so now Shotcrete will be out Tuesday to fix. There were no cracks on the inside of the shell at that area, luckily and the other surface cracks I had seen before passed the crowbar test, but I'm going to have them looked at as well while he is here.
Shotcrete Void.jpg
 
there is a ton of bobcat tracks I need to figure out how to clean off of my paver driveway,
Oh no! If you need helping figuring out the best way to get them cleaned up post up a pic and let us brain storm with you.


I took a look at the pile after they left and the shaping looked well done (couldn't tell it was shaped on-site).
SWEET!!! Nice to have artist with a big saw on site!
how meticulous they were when they were marking cuts.
Nice to see PRIDE in their work! How it should be!
I feel bad that I won't have a pop-up for them tomorrow
Can you stick a pole in it to make it work?
There were no cracks on the inside of the shell at that area, luckily and the other surface cracks I had seen before passed the crowbar test, but I'm going to have them looked at as well while he is here.
good! Keep an eye on them to make sure the fill it in good.
 
  • Like
Reactions: thewolf56

Enjoying this content?

Support TFP with a donation.

Give Support
Thread Status
Hello , This thread has been inactive for over 60 days. New postings here are unlikely to be seen or responded to by other members. For better visibility, consider Starting A New Thread.