How to improve sundeck jets

soleen

Active member
May 17, 2023
30
New Hampshire, USA
Pool Size
30000
Surface
Plaster
Chlorine
Salt Water Generator
SWG Type
Pentair Intellichlor IC-40
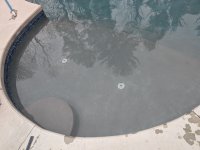
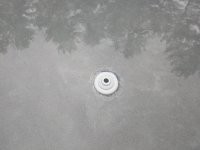
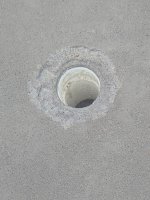
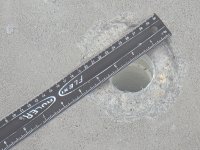
We have two jets on the sundeck that are not very aesthetically pleasing. The plaster around them has been damaged because the pipes were not properly sealed before plastering during the buildingprocess. Is there anything I can do to improve these fittings? Are there large 5" faceplates available (the largest I was able to find is 3.5")?


When the fittings are removed, there are 2" pipes with female pipe threads (FPT).
 

Attachments

  • 01.jpg
    01.jpg
    464.7 KB · Views: 31
  • 02.jpg
    02.jpg
    615 KB · Views: 32
  • 03.jpg
    03.jpg
    610.4 KB · Views: 31
  • 04.jpg
    04.jpg
    534.8 KB · Views: 32
Hi everyone,

I'm looking for some advice on how to temporarily remove water from my sundeck area. I need to do some repair work on the bubblers, which involves polishing the plaster with a grinder. I'd rather not drain the pool if possible.

My sundeck is about 12" deep.

Sundeck photos.
 
@
Can't. If you start using any kind of abrasive on that plaster you are going to end up with a mottled mess as the color will change to more like what you see around those fittings.

How about carefully smoothing just the part that was chipped, without touching the rest of the surface? Are there other suggestions on what can I do to improve these bubblers? I would use 5.5" faceplates, but I can't find anything larger than 3.5".
 

Enjoying this content?

Support TFP with a donation.

Give Support
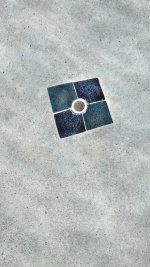
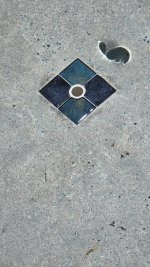
We had an issue similar to yours. Our pool builder drained below deck, cut out the plaster around the bubblers and replaced with tile.
This is an amazing idea! Would you mind sharing a photo, so I could show it to my builder? I think, this is exactly, what we are going to be doing, add some decorative tiles around the damaged area.
 
This is an amazing idea! Would you mind sharing a photo, so I could show it to my builder? I think, this is exactly, what we are going to be doing, add some decorative tiles around the damaged area.
 

Attachments

  • 20240502_124619.jpg
    20240502_124619.jpg
    497.8 KB · Views: 13
  • 20240502_124731.jpg
    20240502_124731.jpg
    650.3 KB · Views: 14
Thread Status
Hello , This thread has been inactive for over 60 days. New postings here are unlikely to be seen or responded to by other members. For better visibility, consider Starting A New Thread.