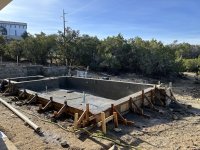
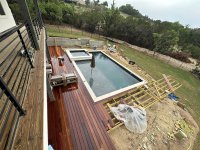
New DIY pool build - NW Austin, TX (filled!)

This is a picture of a 40’ X 7’ reef step with 3 return lines.
I would recommend a minimum of two return lines with your size of reef step.
Yeah mine is about half that size, so Im thinking 2 should be good.

Great. Ensure you purchase the covers for the added wall drains to match the pool main drain.
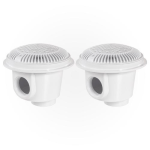
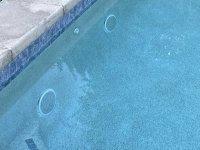
So these are what I have for the main drain(s):

1703958793003.png
This is the first time Ive seen wall-mounted suction lines, so can/should I use those same ones on the wall, or is there just a cover that can attach to the stub out the plumbers have there currently once plaster is done? They're 8" wide, which seems kinda big, but maybe thats a good thing?

I also got confirmation this morning from the plumber that the double stub out is in fact suction for the bubblers and the other is suction for the vacuum.
 
I also got confirmation this morning from the plumber that the double stub out is in fact suction for the bubblers and the other is suction for the vacuum.
It appears your plumber thinks you have a 2nd pump for the bubblers. Since you do not have a 2nd pump, just tie in that suction line to the pump As discussed above.
 
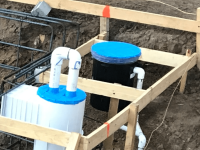
Been a slow start to the year so far. I went back and added 2 returns to the sun deck to make sure water is circulating properly and adjusted the layout of the pipes at the pad to better group suction and return lines.

Shotcrete was supposed to happen this week, but the weather hasn't been cooperating (rainy and/or too windy). While Im waiting for shotcrete to get rescheduled, is there a good list of things I should make sure are in place before the crew arrives hopefully next week?
 
Have a hydration plan for the shell in place.
Check the skimmers for levelness.
Confirm that the wire ties on the steel cage are not pointing outwards towards the inside of the shell but towards the dirt.
3” minimum clearance from cage to dirt.
Note pressure reading on the plumbing system as the crew arrives and before they leave.
Have a water source/garden hose available at the site.
Have all bonding wire locations from the rebar cage clearly marked on the outside of the bond beam forms and also tied to a secured object so not to be lost inside of the Shotcrete walls.
I personally like to cover the skimmers and auto fill cans with tape and not rely on the Shotcrete crews abilitys.IMG_5080.png
 
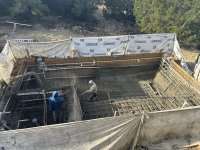
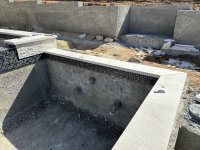
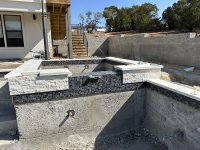
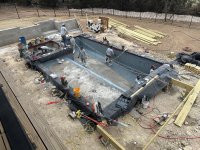
Shotcrete day has finally arrived! The crew was here before the sun was even up to get started this morning. This crew has been very meticulous; putting up the barriers, taping off the skimmers and drains (since I forgot with all the crappy weather we had 😅) and even checking to make sure all of the jet and light plumbing is level and plumb coming out of the wall.

IMG_7201.jpg
 
  • Love
Reactions: kimkats
SWEET!!! That looks great! Have you started bonding with it yet? aka watering it to help slow down the curing.

It is time for your set of links! The first set is all about what to do and ask about to get a great plaster job. The second set is all about how to care for your pool after you get the plaster.

Plaster links:
Ten Guidelines for Quality Pool Plaster Best one of all
All Plaster Finishes Should Last 20 Years
Not All Color Pigments are Good for Pools How to pick a good color for plaster.
A Plastering 'Watch List' | Professional Watershaping | Watershapes
Trouble Free Pool
Trouble Free Pool

Pool care links:
Print these out:
Pool School - Basic Pool Care Schedule
Pool School - Recommended Levels

Bookmark these:
Pool School - Recommended Pool Chemicals
Trouble Free Pool
Pool School - ABCs of Pool Water Chemistry

Now is also a good time to ask what test kit your PB will be providing so we can fill in any holes.

Kim:kim:
 
  • Like
Reactions: agjr85
SWEET!!! That looks great! Have you started bonding with it yet? aka watering it to help slow down the curing.
Sure have! The crew didnt finish till nearly 9pm last night, so I gave it a good watering first thing this morning (the retaining wall portion hadnt quite set up last night).

Now is also a good time to ask what test kit your PB will be providing so we can fill in any holes.
Since Im doing a DIY build, thats me! What would you suggest as the best kit to get (Im assuming I'll find it in the links you provided)

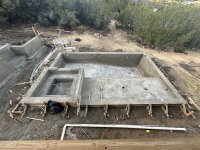
Here's some more photos of the finished pool and retaining wall (you can see the steam coming off the concrete right after I watered it):

IMG_7211.jpg
IMG_7215.jpg
 
  • Like
Reactions: Newdude

Enjoying this content?

Support TFP with a donation.

Give Support
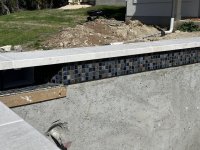
Well we've finally made it to the tile and coping install stage! Crew started on Monday afternoon and still have a little bit to finish up, but overall its looking great.

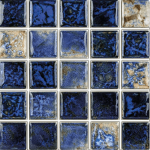
For tile we went with "Baroque Blue" from NPT.

1708621844556.png

And our coping is a travertine paver called "Platinum Ice"

IMG_7338.jpg
IMG_7337.jpg
IMG_7336.jpg

I was a little worried the limestone around the spa outside was going to be too yellow compared to the travertine, but they ended up looking great together.

Other things in progress:
  • Just about ready to mount the control panel and hook up the electrical
  • Currently waiting on a 3" adapter for my IntelliFlo3 pump since I didn't realize it came with one...
  • Final gas inspection is happening today now that the heater is plumbed
  • Dirt contractors are on day 3 of pushing dirt around to fix the grading of our yard and prep for sod
 
  • Love
Reactions: Newdude
I am late to the party but I will definitely be checking in on this thread. I have a boring vinyl liner and the only thing exciting when I got a new one was how much of a difference the beautiful blue made our backyard look compared to the old faded liner. It is really cool to see all the bare bones of the plumbing and rebar before the shot crete went in. The tile looks great as well.

I hope it's not too late to add a water slide from your 2nd floor balcony into the deep end.
 
  • Haha
Reactions: seanmcgary
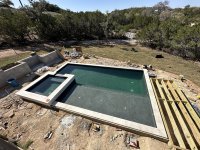
Plaster day has finally arrived! The crew showed up just before sunrise and immediately started their prep work.

We ended up going with NPT Stonescapes Midnight Blue mini pebble. We were going to go with something a bit lighter originally, but the wife wanted something darker and after seeing the color of the waterline tile in the sun, darker was definitely the way to go.

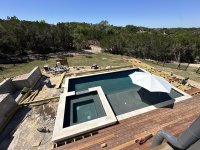
Since we decided to go the DIY route, we're going to have a functioning pool before I can get the decking done around the pool 😅. We decided to go with a wood framed deck topped with Cumaru ("Brazilian Teak") which should be arriving today and needs 1-2 weeks to acclimate anyway, so I should be able to get things most of the way framed out by the time its acclimated.

midnight-blue-mini.jpgmidnight-blue-mini (1).jpg

IMG_7411_sm.jpg
 
  • Love
Reactions: kimkats and Newdude
Any update on the progress of your build?
Slowly but steadily making progress! Turns out trying to do an 1100sqft deck by yourself takes a LOT of time. My parents were in town about two weeks ago and my dad was able to help me for 3 solid days with the framing. Right now Id say Im about half way done with the decking.

IMG_7619_sm.jpg
IMG_7649_sm.jpg

I was able to fire up the spa heater for the first time yesterday as well. The heater kept shutting off after about 30-60 minutes due to the internal water getting too hot. That's when I realized I need to adjust my bypass valve so that the inlet is to the right, otherwise only like half (probably less...) of the water is flowing to the heater. Planning on installing the salt cell this week too now that we're 30 days from when the plaster was installed.
 
  • Love
Reactions: Newdude

Enjoying this content?

Support TFP with a donation.

Give Support