Contracting Best Practices
Pool construction costs in the US typically range from $35,000 to $65,000. Many construction projects are very successful in terms of quality, cost and schedule while others fraught with problems. All construction projects can be impacted positively from best practices that have been developed and improved over the past 50 years.
One aspect of the best practices is the contracting process itself. Often prospective pool owners face as many challenges in this contracting process as they do in learning to care for their pool until they discover TFP methodology.
Contracting best practices are just as easy for the average pool owner as TFP pool care methodology. This post will document basic best practices in construction contracting as they apply to pool construction and pool renovation.
Develop Scope of Work
The first step in any project is to determine the appropriate scope of work. For pools this can be a lot of fun and a little frustrating. Here’s a good way to make it more fun:
- Start with a realistic amount you can afford
- Decide what the purpose is. Is this for the kids, adults, both? Lap-pool for exercise? Year-round, summer only? Budget driven – how much? This should be something you decide early since it will be important in making final decisions on scope
- Decide on your size and layout. There is software that can be useful just Google “pool design software”. Another good thing to do is to look at other pools in your neighborhood. What are the features you like and dislike? Start a post on TFP this site under pool constructions. You’ll get expert advice from people that are selling you nothing, but they get a kick out of helping you set the design specs for the best pool for you. A very rough estimate can be obtained using information at Home Advisor and other sites. You can also estimate at $100/sq ft. The exact price will only be known with a truly competitive bid from highly qualified contractors with a very well-defined scope of work
- You’ll be tempted to want to start talking to a pool builder, but you should resist until you’ve read this entire process and progressed to step 3. You’ll be in a much better position to engage with a pool builder after you know more about what you want and the contracting process itself. Then you’ll be taking them through a best practice bidding process. You should drive the process but unfortunately many are driving by the pool builder before the competition even starts.
- Inadequate scope definition is a prime cause of construction project failures. Make sure the following are decided BEFORE your bid documents are issued:
- Size, shape, depth and depth gradient
- Specify the depth of the pool every 2' along it's length so there are no disagreements later on slope. Regardless of what is said, there is no standard.
- Integrated Spa?
- Decking type (concrete, pavers, other)
- Equipment
- 2-speed or VS pump
- Filter type (sand, DE, cartridge0
- SWG?
- Controls (timer, automation, wifi?)
- Lighting
- Water Features
- Diving board or platform?
- Special Configurations like never-ending pool
- Pool Sub-Panel and capacity
- Pool finish type and color
- In pool features such as swim up table, sun table etc
- Rails, steps and ladders
- Site access limitations and obstructions
- Final grading and site completion requirements
Develop Bid Package
It is desirable to completely define the scope as soon as possible there are certain scope aspects that shouldn’t be finalized until after the bids are received. Hard scope are differentiated from soft scope in the bid documents. For example, the owner may decide they want a variable speed main pump. So this would be considered “hard scope” They may also prefer a manufacturer but want to see pricing for other manufacturers. So the bidders will have a pricing sheet that reflects this. One column lists all the required bid. Another will give the bidder an opportunity to provide a solicited alternate pump manufacturer. A starting point for the Scope of Work and Bid price sheet is given in Section 2. The final pricing sheet should reflect the owner’s preferences, soft scope, and hard scope.
Document Scope of Work and Pricing
The final step in scope development is to document it in tabular format. After all the decisions are made about scope, hard scope, preferences and solicited alternates there is one final decision. How do we want the pricing broken out? This is important if late changes are necessary since the more detailed the price break-down the easier it is to negotiate fair pricing for changes.
Successful bidding occurs when the following are accomplished:
- Scope of work is finalized and clearly documented
- Obligations of the contractor are clear and understood by both parties
- Obligations of the owner are clear and understood by both parties
- The best possible contractor is found and wins the bid.
Pool construction is complex and there are always some unpredictable events. When the points above are achieved there is a good foundation for cooperation of both parties and the outcome is always the best possible.
Contract Terms and Conditions
A lot of attention if often given in pool contracts to the specs around aesthetics and design preferences/choices. Unfortunately there's often little discussion about the commercial terms and conditions. These obligate both parties and are usually crafted by the builder's attorney. Naturally they are very one-way most of the time in the builder's favor.[1]
Owners can make significant changes to get a fair contract. If everything goes well using the builders Terms and Conditions don't matter. When things go wrong it ends up with the owner in a very poor situation. There a lot of details and it is best to consult an attorney.
The following are items to consider:
- Are the specs clear. What if something isn't available?
- How are design changes dealt with?
- Can the contract be terminated by either party and what reason's and remedies are defined
- Payment terms should be fair and well defined milestones that meet quality requirements also
- Fair payment terms means the builder isn't payed way ahead of progress
- What are the warranty provisions and how is it implemented?
- What are obligations of both parties for start up of the pool?
- Performance test should be defined and passed before final payment. Doesn't have to be complex. Just simply demonstrate everything works and the pool holds water plus specs are met.
- Are there indemnities and how are they handled. If present they should be two-way.
- Final clean up and waste disposal obligations
- Hidden conditions
- Who does permitting?
- Release of liens from subs where used
There are a lot of horror stories here about not so good builders and owners that agreed to absurd terms so they have no recourse. Many, many great builders are out there and they will make changes if they are fair. There are also quite a few examples of the opposite and they should be avoided. Owners need to realize they are buying a complex construction project that results in a pool. Things go wrong even when it's nobodies "fault". A fair contract helps a lot in this case and a big part of the benefit is the dialog that has to take place between the builder and owner.
Cantilevers
Cantilevers generally should only extend 1/3 of the overall length. If you want an 18" overhang then you'd need 36" completely supported behind it. The wider the ledge, the thicker it will need to be.[2]
Owner Build
After talking with Pool Builders and General Contractors you may be tempted to become your own General Contractor in building your pool. Many people have successfully done this and even when using a Pool Builder many owners have found they needed to get involved in the construction to ensure it met their specifications and quality.
Building your own pool can save 10% to 30% or more over a builders costs. In some cases you can save a little bit and get a lot more for your money. Your key cost is your time and effort in planning the build, contracting the various work, getting permits and approvals, coordinating the timeline and build process, acquiring materials, coordinating inspections, and assuming liability for errors.
There are many owner build threads in the Under Construction section of the TFP Forums.
Build Sequence
- Get a pool design and engineering
- Get bids and select contractors
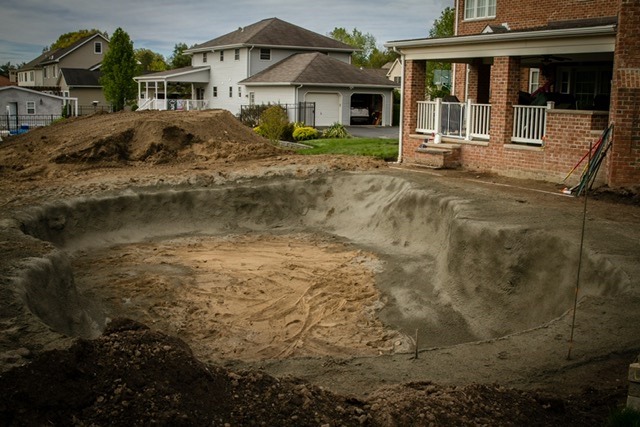
- Complete layout, dig, and steel
- Plumbing rough in
- electrical rough in
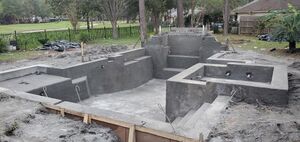
- gunnite
- Water edge tile
- finish electrical
- finish plumbing
- Plaster/pebbletec finish
- Decking and coping
- Pool fill and initial startup
Pool Plans, Permits, and Inspections
As the General Contractor you will need to develop and manage the pool plans or hire someone to develop them. Pool plans are generally simple drawings. Your building department may look at your plans and make suggestions over the counter. Some municipalities require an engineers stamp on the pool plans you submit for review and approval.
Inquire at your local building department about the approvals, permits, and inspections that will be required.
You will be required to meet all all local building codes that apply to your property. Also check what HOA approvals may be needed if you live in a planned community.
Finding Subcontractors
Most builders subcontract for most, if not all, of the work to the same group of sub-contractors in an area. You can go direct to those contractors.
To find subcontractors in your area you can get on the phone and start making calls. See a pool company sign in the yard? Ask them who is doing their work and if you see a trade truck write down their number and go from there. Once you start calling you find the same names (good or bad) keep coming up. Make a detailed list.
Call the Gunite companies around your area. There usually aren't many, and ask three questions:
- Do you work with Owner Builds?
- What's your price?
- Do you recommend a steel company?
Once you get steel companies, the steel guys also do the layout and excavation. Ask them for a plumber and an electrician.
After that you need a deck, tile and plastering company, there are plenty around. Look for pool renovations, that's all they do, they will also do the startup.
Check that your sub-contractors have the necessary licenses for the scope of work they are doing. For example, plumbing and electrical connections. Also check that the sub-contractors meet your personal requirements for insurance and workman's compensation coverage.
Communication with sub-contractors can a bit of an issue if you don't speak their language such as Spanish.
Subcontractor Payments
Establishing a payment schedule for each subcontractor is part of the price negotiations. In general a small down payment and progress payments based on completion of specific milestones limits your risk of a contractor having your money and not completing his work.
Consider obtaining a lien release with all payments made to contractors. The lien release essentially says that the contractor or supplier has been paid for his, her or its services and waives the right to file a mechanic's lien against the property.
Purchasing Equipment
The big 3 pool equipment manufacturers - Pentair, Hayward, and Jandy - have all restricted some or all of their equipment through the Internet. Some have models of equipment that is only sold by pool stores. Others have limited the warranty on equipment not installed by pool builders or "professional installers." This area is constantly changing and you need to look at the availability and warranty on the equipment you are considering.
While equipment may not be available on the Internet to click to buy, or have limited warranty if purchased that way, there are pool stores who sell pool equipment at discounts over the phone that can qualify for full warranties if installed following manufactures requirements.
Owner Build Resources
Codes and Standards
Various building codes and standards apply to residential pools and spas. You should always consult with the building department and inspectors to understand which codes apply in your jurisdiction.
References include:
- ANSI/APSP/ICC Standards published by the Pool & Hot Tub Alliance
- NFPA 70, National Electrical Code (NEC)
Equipment Pad Best Practices
See Equipment Pad Best Practices
Trench to Equipment Pad
18" deep minimum. You can start at the level the pipes come out of the pool, then 90 up to the 18" depth. The width should be wide enough that all the suction and return lines can lay horizontally side by side. If you have a spa or water features, the number of lines can add up quickly. A 36"-48" wide trench is not uncommon. A simple pool can be 12" wide.[3]
Placing 2" of clean sand above and below the plumbing will help to protect the pipes.
Gravel Use Around Pools
Soil Backfill and Compaction
When soil is excavated it is fluffed up and aerated. If you just dump it back in the excavation it leaves a massive amount of air space in the soil. Over time the soil will compress and fill the air pockets (settle). This can take many years depending on the soil type and how much moisture is introduced to the area.[4]
The proper way to place soil back in any excavation is to compact it in lifts. This means putting in a maximum of 12" of soil then running a compactor over it which Is rated for that depth of lift and soil type. Then place the next 12" in and rinse and repeat until you get to the top. The compactor compresses the soil to get the air pockets out.
Pools should be placed on virgin soil, never dug soil that was compacted. If areas are overdug they should be filled with the appropriate gravel.
When a Pool Builder dumps dirt for backfill in an area where a concrete deck is planned and they expect the concrete to span over any settling that may occur, the concrete will span settled areas for a while but it will not last. Long term it will be much cheaper and easier to do it right from the start with the proper compaction and gravel. You don't want to be looking at cracks or puddles in a few years
Gunite Spa Design
See Gunite Spas
Plumbing
Plumbing should be laid in trenches around the perimeter of the shell. The plumbing should not be in the wall.
The only plumbing in the concrete should be perpendicular to the wall for necessary plumbing.
Plumbing pipes that are parallel and embedded in the concrete create weak points. Plumbing pipes should never be embedded in the gunite/shotcrete swimming pool shell because the pipe creates a thin structural section at the pipe location where cracking can develop.[5]
Plumbing should be pressure tested between 25 psi and 40 psi, preferable with water instead of air, for at least 48 hours before trenches are backfilled.[6] Pressure test with air will vary depending on air temperature making slow leaks difficult to detect. It is best to leave the pressure test in place until the final plumbing hookups so any pipe damage caused by other contractors can be detected.
Pipe trenches should be free of debris and rocks/stones/etc. PVC pipes will move and shimmy with water flow and any jagged rocks near them can become potential sources of wear and tear on the pipe. Then, backfill the trenches with either preferably sand or smooth pea gravel to 2" below the pipes and at least 4" above the pipe (12" is better). If possible, wet the fill a little with a hose or let the sand settle for a few days.[7]
Some plumbers have been know to throw straw or hay down on top of the fill layer so that future diggers know that they've hit "something". If there are any gas lines in the trench (some counties have codes against running gas in the same trench as pipes), wrap the gas pipe in insulated copper wire (something small like 14 gauge) as that will give a future Blue Stake company the ability to find the pipes easily.
Finally, after doing all that, fill the trenches with native soil and compact as best you can (jumping jack compactors work nice but a simple water drum roller would do). Leaving the trenches exposed for several days to weeks before laying down any hardscape or decking will help to allow the soil to settle and give your hardscape guy a better time at final grade.
Rebar and Gunite
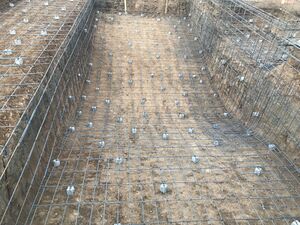
Concrete swimming pools are structures and, therefore, by code, require structural engineering. The exact rebar specifications should be designed by a structural engineer for a project.
Without getting into specifics, there is usually a range of specifications for things like rebar size, spacing of the rebar, concrete thickness, concrete strength, etc. At the lower end, the idea is to save money on construction. It is usually worthwhile to go above the minimum to help minimize long term problems.
It is best to inquire about the range of specifications, the cost differences, and the strength differences so that you can make an informed decision.
If you want to know what the specifications of the plans are, ask for a copy of the drawings and discuss them with the PB or the engineer. However if you disagree with the drawing, then you should probably be ready to scientifically / mathematically state your case about why you disagree and which building standard or municipal building code section your objection is covered under.
Try to refrain from requesting that x amount of rebar of your choosing be spaced at y distance. You will only alienate both the PB and Engineer with frivolous requests.
If the soil is an issue, you should get a geotechnical engineer to evaluate and advise. You may need piers if the soil is not considered stable.
For rebar engineering specifications read Reinforcing Steel and Swimming Pool Construction by Pool Engineering.
It's always best to have an engineer design a plan for your specific project. Using "standard" designs only works for nominally standard projects.
Pool Shell Design
The swimming pool is designed to withstand the forces exerted on the walls and floor by the water which will be in the pool. There are many factors to consider in determining how the wall should be built in order to support the load placed on it.
The size of the rebar, the slump of the concrete, the location of the rebar, the spacing of the rebar the size and grade of the rebar are placed in the pool so it is structurally sound. So it's entirely possible, and even likely, that any given pool will have an assortment of rebar at different spacings. Water exerts a known amount of pressure upon a pool structure and the structure will be designed to withstand that force.
There are special considerations in design if the pool is being built in difficult soils, on a slope, or in earthquake zones.
This is why concrete/ gunite pools are typically designed by an engineer and must meet the structural building codes of your municipality. Also, ANSI has minimum standards that a gunite pool should be contructed to.
After the building plans have been drawn and have all sorts of specifications and info included it's reviewed by an engineer in the building permit department, a building permit is issued if it meets the building code for structural, hydraulic and electrics. The building code guy is there to protect you, and as much of a PITA they can sometimes be, they generally do a good job of protecting us from ourselves as well as keeping our towns and neighborhoods safe from things that could make our lives miserable in the long run.
Soil Survey
In many parts of the country, builders already know if the soil is clay, loam, sand, rock, or whatever the case is, and generally how stable it is, and what the water table is. People in the business usually skip a geo-survey and just go ahead and design the pool based upon geographically known conditions and a knowledge base of experience from prior projects.
A soil engineer may need to be involved if you are building on a slope or in an area that has been filled as part of prior construction.
Typical Rebar & Gunite Specifications
- Rebar - #4, grade 60 on 9" to 12' centers
- Number 3 rebar is 3/8 thick and number 4 is 4/8 thick.
- Some builders use number three and some use number four and some that use number 3 beef up the steel in certain places with number 4.
- While rebar can be helpful, tight spacing and big diameter can increase "shadowing", which is where concrete does not get behind the rebar properly and creates weak spots. That is why number 5 rebar is the maximum to be used on pool shells.
- Concrete, 8" to 9" thickness with a strength of 5,000 psi
- Generally speaking, concrete walls are about 8 inches thick and the floor is 6 inches thick. This assumes the soil it's being built on is stable and not located in an earthquake zone.[8]
- Rebar must be supported off the ground and walls by "chairs" so that gunite/shotcrete can encapsulate the rebar.
Role of the Rebar
Reinforcing bars (Rebar) used in structural concrete are reinforced stell poles that have raised deformations on it, which helps keep the reinforcing bars locked inside the concrete.
Rebar supports the concrete which would move or break if set against the soil without rebar. Rebar doesn't really prevent cracking unless rebar is prestressed because rebar doesn't really begin to help until it's under tension.
Rebar will help reduce the size of cracks and reduce the separation of the concrete either opening or shear sliding.
Care needs to be taken to make sure the reinforcing bars are clean of any debris (such as caked-on mud or rust) to allow them to function properly.
Types of Rebar
There are different types of rebar in different diameters:
- Standard steel rebar
- Galvinized steel rebar
- glass-fiber reinforced polymer (GFRP) fiberglass rebar
Galvinized rebar or GFRP can be used in moist conditions where standard steel rebar can be prone to rusting such as coastal areas with high water tables where the pool shell may be submerged in water.
GFRP has more cost than standard rebar, but compared to galvanized and coated rebar it’s comparable if not lower in price.[9]
Use of Rusting Rebar
It’s perfectly fine using “rusty” rebar that is coated in mill-scale and is not genuinely rusted. Mill-scale has even been shown to improve the adhesion between rebar and concrete.[10]
Section 12 of ASTM A 615-96a, "Standard Specification for Deformed and Plain Billet Steel Bars for Concrete Reinforcement," says that rust shall not be cause for rejection provided the weight, dimensions, cross-sectional area, and tensile properties of a hand-wire-brushed test specimen aren't less than the ASTM specification requires.[11]
Section 7.4.2 of ACI 318-95, "Building Code Requirements for Structural Concrete," has a similar statement indicating that reinforcement with rust shall be considered satisfactory, provided the minimum dimensions (including height of deformations) and weight of a hand-wire-brushed test specimen aren't less than applicable ASTM specification requirements.
Gunite Application
After rebar is placed and before shotcrete/gunite is shot:[12]
- confirm all pig tails are pointing towards the ground
- paint all four bonding wires at the forms for easier identification and tie the ends to a object like a wooden stake away from the shell so the Shotcrete crew will be less likely to bury them in the process
- check the elevations of the any bubblers after Shotcrete is finished around them to insure they are evenly elevated, you can do this easily by running a string across all three
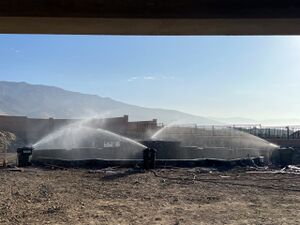
- have your hydration plan in place to keep the new shell hydrated for at least seven continuous days.
Gunite or Shotcrete
Gunite Versus Shotcrete in Swimming Pool Construction Summer 2018 | Shotcrete Magazine.
All things considered in a swimming pool, either option will produce a strong shell. The skill and knowledge of the applicator and crew will far supersede any negligible differences between the two.[13]
Shotcrete has the advantage of having larger aggregate in the mix and the yields are typically higher in compressive strength given the same precured cement content. Some may also argue that more pneumatic force can be applied to Shotcrete during application yet produce much less rebound.
Shotcrete can be ordered with the cement, aggregate, and water content (slump) specified which are then measured by a computer and generate a ticket that shows each of those parameters and the batch mix time so you know how long it's been in the truck. On very hot days, plasticizers can be added to replace/reduce the water needed for application without decreasing the ultimate cured strength.
Gunite is much different. It is preferred to have the mix brought dry in a cement truck for the same reasons mentioned above but not all contractors do this. Contrators can dump sand in the street and shuttle it to their equipment with a skip loader where it is then mixed with cement and carried to the nozzle by compressed air. In this scenario the cement/sand ratio is nothing more than an approximate, as is the water/cement ratio as the nozzle applicator controls it basically by sight. The finishers prefer a wetter mix because it's easier to trowel and smooth but this yields a much weaker product that is prone to shrinkage cracks and reduced compressive strength.
Gunite produces significantly more rebound which should be discarded but is rarely done. The rebound is often used in steps and stairs where it will end up causing problems down the road.
You should specify in writing to the Builder or Gunite Contractor that all rebound will be removed from the site. Otherwise the Gunite Contractor may dump the rebound in pipe trenches like done in this thread.
A good gunite/shotcrete job should have clean sharp edges and few, if any, voids.
Flashing Shotcrete
When there is a delay between the dig and the shotcrete application there is a risk of walls caving in if there are storms. Flashing will put a thin layer of shotcrete along the perimeter to stabilize the soil and then the contractor will come back and apply the complete thickness on another day. The hole can be flashed before or after rebar has been placed.
If done correctly, there should be no problem. Shotcrete has no cold joints, it’s a monolithic application due to the force of the product application. There are specific requirements for this to happen, such as the flash coat must be power washed, have a rough finish (minimum 1/8”) and be Saturation Surface Dry prior to the the second application of Shotcrete whenever that would be, there’s no time limit between applications.[14]
Cold Joints
Cold joints in shotcrete (gunite) are in some ways a myth. Laboratory testing has shown that multiple layer shotcrete has no anisotropic weakness (cold joint) when the layers are applied within 7 days of each other. In the real world a plane of weakness often develops between layers, but it's almost always due to improper surface prep. Dust, dirt, and rebound from shooting adjacent areas will accumulate on the first layer during/after the shoot, and if not thoroughly removed prior to applying the next layer a plane of weakness will develop. If the first layer is troweled smooth it can also impede bonding of the second layer. If too much time passes between layers a cold joint is possible, but in that case the reduction in strength is pretty minimal as long as the surface is properly prepped.[15]
Gunite/Shotcrete Application With Rain
Shotcrete needs to be protected from rain until it obtains its final set, usually 4 or 5 hours. Following final set, it should be wet cured for at least 4 days, preferably 7 days if possible.[16]
Cold Weather Gunite/Shotcreting
Shotcrete is concrete and the same rules apply with respect to cold weather applications.[17]
Cold weather is defined in ACI 306R, “Cold Weather Concreting” as “a period when, for more than 3 consecutive days, the following conditions exist:
- the average daily air temperature is less than 40°F (4.4°C) and
- the air temperature is not greater than 50°F (10°C) for more than one-half of any 24-hour period.”
ACI 306R is an excellent reference that provides recommendations for cold weather concrete placement and protection. A copy of ACI 306R can be purchased online at ACI’s Web site, www.concrete.org, from the Bookstore and Publications tab.
You can also download articles regarding cold weather placement from ASA’s Web site www.shotcrete.org from Shotcrete Magazine. Go to Products/Services Information pull down menu, then Archive Search, and type in “cold weather.”
All surfaces receiving shotcrete should be above freezing. The mandatory requirements of ACI 506.2-13, “Specification for Shotcrete,” specifies:[18]
“3.4.5 Cold weather shotcreting—Unless otherwise specified, shooting may proceed when ambient temperature is 40°F and rising. Stop shooting when ambient temperature is 40°F and falling, unless measures are taken to protect the shotcrete. Shotcrete material temperature, when shot, shall not be less than 50ºF. Do not place shotcrete against frozen surfaces.”
You can purchase the ACI PRC-306-16 Guide to Cold Weather Concreting for $75.00.
Gunite Over Multiple Days
The pool shell can be poured over multiple days. There will not be a cold joint if they prepare the unfinished edge correctly. This is common on very large pools and commercial projects since you simply cannot shoot enough gunite in one day.[19]
Shotcrete Testing
Shotcrete Testing— Who, Why, When, and How Shotcrete Magazine - Summer 2011.
Watering New Gunite and Concrete
See Watering New Gunite and Concrete
Proper Construction Techniques for Cantilevered Deck
Infinty Edge Pools
On infinity edge pools with a long edge a test run is typically done by filling the pool with water after Shotcrete and before tile to ensure levelness within 1/16 tolerance. Then any inconsistencies can be corrected.[20]
Sequence of Tile, Coping, Deck for Plaster Pool
The consensus seems to be to do tile, then coping then deck although it can vary with the shape, materials, and contractor preference.
Simple logic is you always build from the bottom up not the top down. In a pool you want the tile to set perfectly level so the water line looks correct all the way around the pool. If the coping is set unlevel then they need to adjust the tile and the seam in between the tile and coping will not be uniform and basically throw the whole tile install off.[21]
If coping is installed first then coping forms are set with a laser transit and set from the highest point of the bond beam. Then checked numerous times before the pouring of concrete. A key point is that coping or tile needs to checked for level numerous times during the process in order insure it’s being maintained.[22]
It can be done either way and seems to be a regional preference. If you ask the actual installers most of them would prefer the tile first then coping.
If plaster is done after deck then the deck should be protected and covered with plastic sheets.
Here are some things to consider:
Tile
- Do the tile before coping on gunite pools.[23]
Coping
- The coping will set the elevation for everything else around it.[24]
- A professional should be able to take one tile/piece and figure out the measurements.
- You want everything to drain away from the pool therefore you should start at the pool.
- With natural stone coping you lay it first. Don't let anyone tell you otherwise.[25]
- You cannot make demo saw cuts to round the backside for curves with concrete in the way. It can be done but it is not by choice and way more work.
- Coping thickness and setting bed thickness varies. You let the coping set the elevation and work from there.
- You want 1/8" pitch away from pool in all directions and plan ahead for drainage
Deck
- Why would you want the coping crew to work on top of your nice finished concrete deck if you don't have to?
- They could lay down a protective layer of some kind, but they probably won't.
Travertine Quality and SWGs
See Travertine and Limestone Corrosion
Coping
See Expansion Joints and Coping
Waterline Tile
See Waterline Tile Installation
Plaster Installation
See Plaster Installation and Maintenance
Well Pit Pipe
- going down to depth of pool is the best way
- make hole twice the size of pipe[26]
- 24-30" hole for 13" pipe
- use woven heavy septic fabric
- hang strips of filter fabric down the sides of the hole
- perforate the pipe with a drill to a foot below the top of fabric
- zip-tie fabric to the pipe
- place pipe in the middle of hole
- add some more stone a few inches up then backfill
- backfill with clean 3/4 stone
- pipe the discharge and electric underground
- put a skimmer lid on it or an end cap depending where it is
Concrete Deck
- While a sand or gravel base is not needed it is helpful over clay. At the very least you want to make sure the subgrade has been compacted.[27]
- Removal and replacement of highly expansive or unstable soil. Fill has to be properly compacted.
- Installation of a 6 inch gravel base to minimize vertical movement from moisture variations in the subbase and frost heaving.
- "Typical" rebar spacing for deck/sidewalk is #3 (3/8" rebar) at 18" spacing. You also see a lot of welded wire fabric for residential sidewalks but don't settle for that in the decking. *Fibermesh (small fiberglass fibers in the concrete) should just be used as a compliment to the rebar and not as a substitute.
- Prior to the pour, water the subbase just short of puddling the water.
- Use 3500 psi fiber reinforced concrete @ a 4.5 inch slump and 6% air. Never exceed a 5 inch slump as this is by far the largest cause of concrete cracking
- Consolidate the concrete with a jitterbug or vibrating screed.
- Bull float and hand float the slab. Never use wood floats on air entrained concrete. Tool or install contraction control joints at this time. These should be a maximum spacing of 2 times the width of the slab or 12 feet apart which ever is less.
- Control joints (either sawed or tooled) will give the concrete a weakened point to crack. Sawed joints give a cleaner look
- Wait until the concrete slakes or skins over before finishing with a magnesium float and steel trowel. Attempting to finish prior to slaking will just lead to overworking the surface. Never splash water on the surface to aid in troweling.
- If you are pouring against coping or existing concrete (foundation, sidewalk, garage, etc) you will also need expansion joints. These are typically black fiber board or redwood. The expansion joints have some compression give and will allow the concrete to expand and contract against to prevent cracking and movement.
- When it is time to install try to have them pour before noon before it gets to hot and they have to add more water to keep the concrete workable (which could result in small hairline shrinkage cracks). If possible, check the time on the concrete ticket to see how long the truck has been on the road, more than an hour is unacceptable and grounds to reject the load. The longer it has been on the road the more water will have been added to it.
- Protect the finished concrete from severe temperature swings or dehumidifying conditions such as wind, sun, hot or dry ambient air conditions etc. with plastic, burlap, concrete blankets, sealer etc. Do not use plastic on dyed concrete. As Henry said, you want it to chemically cure, not dry.
Concrete can expand and contract as much as 3/4 inch over a 100 ft distance with a temperature swing of 40 degrees. With this in mind you can determine placement of expansion joints and control joints.
Expansion joints are the full depth of the slab and should be placed against other foundations such as the pool bond beam and coping, house foundations or abutting slabs. On a rectangle pool you should use expansion joints where slabs are perpendicular. On a continuous run they should a maximum of 48 ft apart.[28]
Control joints aid in preventing shrinkage and contraction cracks and should be a minimum of 25% the depth of the slab and located as previously mentioned.
Automatic Pool Cover
Some factors to consider in the design:[29]
- A cover well that is designed with good drainage and easy access so that the cover can be rinsed as-needed and no stagnant water can build up.
- Connecting the track to the pools bonding wire system. If the track is aluminum then you should have an additional wire attaching it to a magnesium anode buried in moist soil. If your soil is heavy clay or dries out quickly, then the anode should be bagged in a cotton bag with an appropriate media mix to surround it and retain moisture. You could also install a drip irrigation emitter nearby or locate the anode near a sprinkler so that the soil stays moist. Copper wire (unsheathed bonding wire is fine) should be used to make the connection.
- If the track is to be screwed into the coping or fastened with screws, the fasteners should be nonferrous (aluminum) or a corrosion resistant stainless steel.
Automatic Pool Cover with a SWG
You need to look at the specifics of the auto-cover design. Most are aluminum tracks which can be susceptible to corrosion from the higher chloride concentrations found in SWG pools. All chlorine pools will have higher chloride concentration (disinfecting chlorine breaks down into chloride ion) but SWG pools start with a higher overall level (typically around 3200ppm versus < 1000ppm for traditionally chlorinated pools with winter/rain dilution).[30]
Find out who the manufacturer of the auto-cover is and call them to see what they recommend. There may be specific installation requirements for the track and cover well that need to be in place for an SWG pool.
Fences
See Safety Fence.
Inspections
Most areas require several inspections performed during pool construction for rebar, plumbing, electrical, bonding, etc.
Checking the rebar before the gunite is applied is one of those inspections.
Final inspections can include:
- fence height
- bonding grid
- gas/electrical connections
- soil/hill shoring up
Its always good idea for you to be there during the inspections in case you have any observations, concerns, or questions. The inspector should be able to ease your mind about them.
How to Repair Rebar Stains
Read Pool and Spa News:How to Repair Rebar Stains.
.
- ↑ https://www.troublefreepool.com/threads/new-build-dfw.288002/post-2541605
- ↑ https://www.troublefreepool.com/threads/starting-the-ob-process-queen-creek.194956/post-1722645
- ↑ https://www.troublefreepool.com/threads/trench-to-equipment-pad.193942/post-1709507
- ↑ https://www.troublefreepool.com/threads/newnan-ga-new-pool.195146/post-1725905
- ↑ https://iibec.org/wp-content/uploads/2016-bes-holmer-phifer.pdf
- ↑ https://www.troublefreepool.com/threads/acceptable-psi-pressure-test-on-plumbing.44665/post-372490
- ↑ https://www.troublefreepool.com/threads/backfilling-trenches.131142/post-1159143
- ↑ https://www.troublefreepool.com/threads/thickness-of-shotcrete-and-rebar-size-and-placement.87787/post-752312
- ↑ https://www.troublefreepool.com/threads/florida-keys-ob-pool-build.288036/post-2529103
- ↑ https://www.troublefreepool.com/threads/rusty-rebar.286243/post-2509209
- ↑ https://www.concreteconstruction.net/how-to/acceptable-rebar-rust_o
- ↑ https://www.troublefreepool.com/threads/dig-complete-plumbing-questions.277119/post-2506932
- ↑ https://www.troublefreepool.com/threads/shotcrete-or-gunite-warranty.196278/post-1730820
- ↑ https://www.troublefreepool.com/threads/new-build-dfw.288002/post-2541129
- ↑ https://www.troublefreepool.com/threads/shell-all-1-pour-or-2-stages.194352/post-1713535
- ↑ https://shotcrete.org/faq-items/we-are-having-a-swimming-pool-built-with-shotcrete-our-question-is-what-is-the-required-curing-time-for-shotcrete-prior-to-exposure-to-heavy-rain-we-are-trying-to-plan-the-shotcrete-installation-wh/#:~:text=Shotcrete%20needs%20to%20be%20protected,preferably%207%20days%20if%20possible.
- ↑ https://www.troublefreepool.com/threads/too-cold-for-shotcrete.286995/post-2516863
- ↑ https://shotcrete.org/faq-items/aci-506r-16-discusses-surface-preparation-requirements-for-various-substrate-surfaces-and-notes-that-for-earth-surfaces-shotcrete-shall-not-be-placed-on-frozen-ground-there-does-not-appear-to-be-any
- ↑ https://www.troublefreepool.com/threads/shell-all-1-pour-or-2-stages.194352/post-1713384
- ↑ https://www.troublefreepool.com/threads/uneven-infinity-edge.279270/post-2448132
- ↑ https://www.troublefreepool.com/threads/flagstone-coping-done-before-concrete-deck.194414/post-1718311
- ↑ https://www.troublefreepool.com/threads/revisiting-construction-sequence.266396/post-2331127
- ↑ https://www.troublefreepool.com/threads/flagstone-coping-done-before-concrete-deck.194414/post-1714774
- ↑ https://www.troublefreepool.com/threads/flagstone-coping-done-before-concrete-deck.194414/post-1713995
- ↑ https://www.troublefreepool.com/threads/flagstone-coping-done-before-concrete-deck.194414/post-1714452
- ↑ https://www.troublefreepool.com/threads/well-pit-pipe-to-p-or-not-to-p.193553/post-1706381
- ↑ https://www.troublefreepool.com/threads/prevent-concrete-from-cracking.190845/post-1681779
- ↑ https://www.troublefreepool.com/threads/pool-deck-rebar-or-no-rebar.17733/post-147972
- ↑ https://www.troublefreepool.com/threads/pb-finally-ready-to-start.196185/post-1730195
- ↑ https://www.troublefreepool.com/threads/pb-finally-ready-to-start.196185/post-1729829


