Return pvc pipe leak at the joint, how easy is it for zero plumbing exp guy?

ShinDiors

Well-known member
Jul 16, 2021
227
Northern VA
Pool Size
20500
Surface
Plaster
Chlorine
Liquid Chlorine
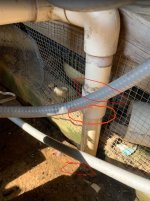
Noticed water leaking through the upper side of the joint, not sure if that is the only place as the water seems to be running a bit more than it feels on that joint (upper side leak). I have never done any pvc plumbing job, more of a electronics guy, soldering and stuff. I guess the repair is to cut the fitting and replace with a new one?

Questions I have:
1. What type of tools I need for this type of job, I have mechanic tool sets mostly, have a saw too.
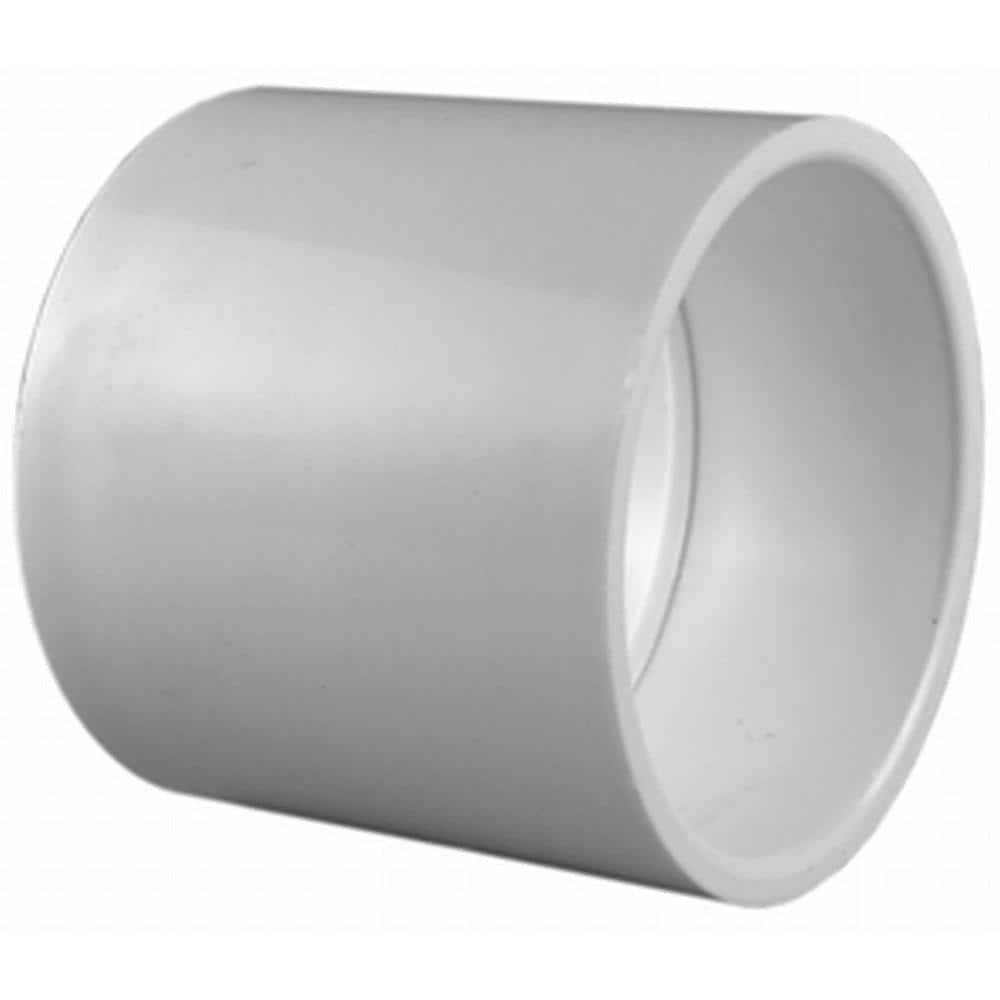
2. What type of PVC part should I get? Does this type of joint come with "pressure rated" and "DMV non pressure rated" variation as well?
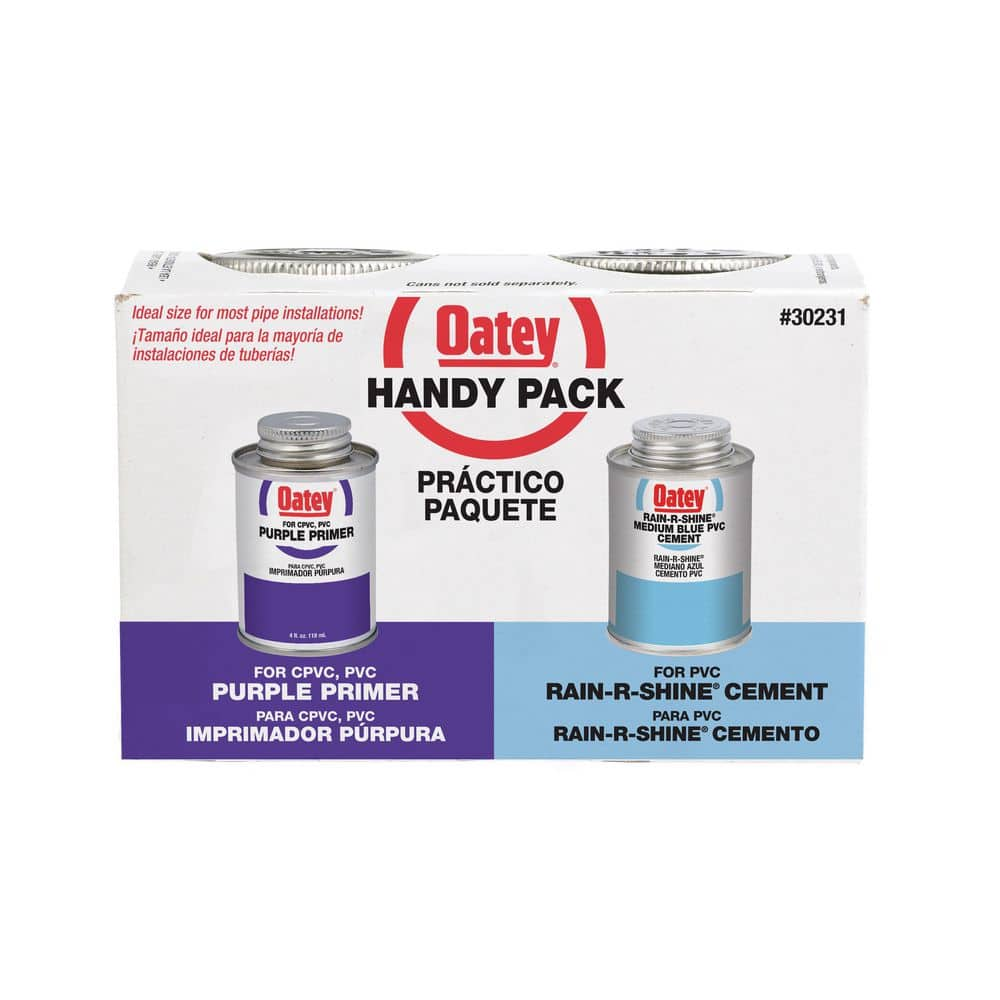
3. What type of glue, chemicals is needed for this?

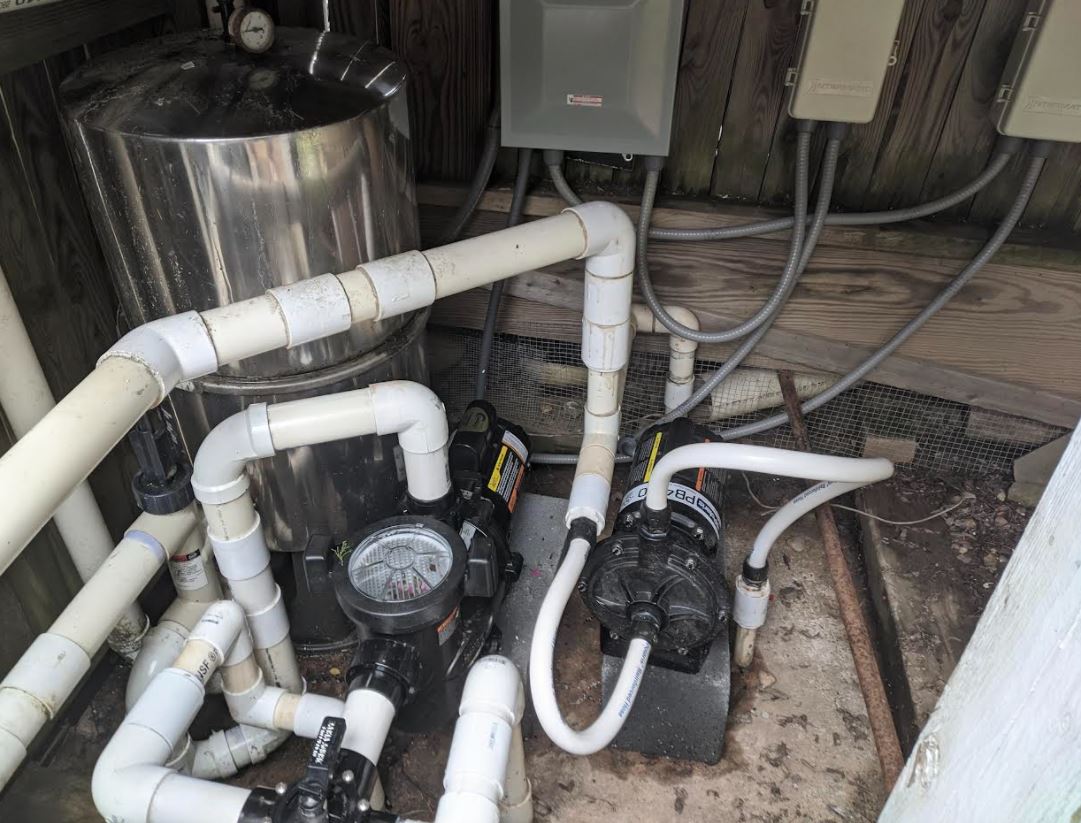
This is a 30 year old pool, not used for at least five years, recently replastered, new pumps, but the lines are mostly original. Every week, it was something new, heater leaking (had hoped it would work, 20 yr old probably), power outage 24 hours, now this... I'm over anxious what would turn bad next (that we did not know and anticipate...)

Thanks a lot in advance.
 

Attachments

  • jt.JPG
    jt.JPG
    123.2 KB · Views: 85
This is certainly a DIY type project. A good saw to cut the plastic PVC, some spare PVC and fitting (depending on how you elect to re-join everything) and PVC glue. If you don't have room above or below to manipulate the pipe to get a new section and couples in the same spot, you can build a "loop" to perform the same function.
 
I guess the repair is to cut the fitting and replace with a new one?
If that’s the only leak, you cut the coupler out, install one higher and lower and a short piece of new pipe between them. I’d gently dig down and prove the rest of it ok first, because otherwise you’ll be redoing your new doing shortly after. If there’s another leak further down you will do similar with a longer pipe in between to bypass them both.
 
Is there any PVC 101 videos? I roughly know the process, cutting, sanding, then mixing the glue, etc.

Also, is this type of leak fixable by the "marine epoxy" mentioned in the pool school?
 
There are PVC 101 videos all over YouTube. The process is fairly simple - cut-out old PVC, clean ends, measure new pieces for replacement, then use PVC primer followed by the glue to connect. Adding a shut-off valve would be ideal to control water flow.
 
A few more noob question,

Is this the coupler I should use, and the size should be larger than the pipe itself or it is already considered (2 inch coupler is the one fit 2 inch pipe already)?

And the PVC pipe has no "schedule 40" variant correct?

I probably need two couplers and a very short pipe? How tight should I plug the pipes into the coupler at dry fitting?

And this should be all i need regarding primer and cement, right?

Also, since the pipe needs to be extended into both the upper and lower coupler, it should be quite a bit longer than the spacing between the two couplers? How do I go about insetting it into the upper and lower coupler as their positions are pretty much fixed (how much wiggle room can I have?)
 
Last edited:
When you go to the local hardware store (HD for example), you'll see in their plumbing section lots of Sch 40 PVC pipe. It's all designed to fit snugly into the Sch 40 fitting (elbows, couplers, etc). Do not use the DWV type fittings you see in the isle for indoor plumbing. But the Sch 40 stuff is all designed to fit well together. The PVC glue will be in the same area. It's not too expensive, so grab a few extra fitting just in case you make a mistake and decide to start over.
 
How do I go about insetting it into the upper and lower coupler as their positions are pretty much fixed (how much wiggle room can I have?)
The upper pipe should flex a bit once it’s cut. Right now it’s held tight. You can also dig down to allow the lower half to wiggle a bit as well.
Also, since the pipe needs to be extended into both the upper and lower coupler, it should be quite a bit longer than the spacing between the two couplers
Your middle pipe should be measured to fit to the stops of the upper and lower couplers. When you dry fit they won’t seat all the way but they will once the glue lubes them.
 

Enjoying this content?

Support TFP with a donation.

Give Support
The upper pipe should flex a bit once it’s cut. Right now it’s held tight. You can also dig down to allow the lower half to wiggle a bit as well.

Your middle pipe should be measured to fit to the stops of the upper and lower couplers. When you dry fit they won’t seat all the way but they will once the glue lubes them.
One 2inch 45 pvc fitting, one 2inch 90, one coupling and pipe, some baby powder. Use the baby powder to mock up your new install untill your ready to break it all down and glue one fitting at a time. The baby powder makes the fittings side right on tight and right off much easier.

Cut as low as you can down into the ground, primer/glue your coupling there to start. (But only that coupling. Baby powder every thing else until you have mocked up everything tight and looks finished without the glue.) Next cut about 2inches away from the top 90 in the upper right in your pic to get the old 90 off the wall up there and give you room to work.

Run your new pipe up to where the old 90 is going into the ground was. (use what you cut out to measure, or go by eye.) Baby powder, tap it in good.

Now add the next elbo on to the top of your knew pipe dont glue yet. Tap it all the way down and face the 90 more backwards towards you but still to the other side. Measure.
Put a pipe in the 90 coming from the ground to spin it, that pipe should be longer than the last pipe because now you will be coming backwards or towards you more about 6-10 inches. The point of this is you will be mocking, and gluing from the top right side of your picture into the ground. Use that 45 to connect the two pipes on the left and the (now longer pipe) 90 to connect the top to the bottom. measure cut mock from the top left down.

Next once your fully mocked (no glue) mark each pipe and fitting from your very first side of the job to the last side all the way down. If you don't you will be starting over.
1/ is the pipe you put the fitting on,
2/ is the side of the fitting your putting the pipe in.
3/ is the other side of the fitting the pipe is coming out of,
4/ is the side of pipe coming out the fitting etc. Draw a line down the middle of the 45 and the 90 on to the pipe so you know which way they are facing, how far they go in (all the way), which way the 45 and 90 is turned, and how far.

Break it all apart clean and prime each fitting and pipe ends, and glue in order according to you numbers and spin those fittings to the lines you drew on them and the pipe. Now you should have one large peice to glue in all at once. primer/glue your bottom coupling and 45 then press them in at the same time.

If you do it that way you will not get backed into any corners with no flexablity.
Thanks for the detailed instruction. Here is my lack of pvc experience question: why do i want to cut as low/down to the ground to begin? I seem to have a concrete pad (although covered with dirt, it is hard surface), what if later on the lower joint (close to the ground) need to be cut, I won't have too much pipe out of ground to work with right?

Also I get your point of using elbows and such to move the pipe away from the tight space, but I fear that would get into my way when handling the DE filter. I attached another pix of the plumbing here. It is a pain to work with some 30 yr old plumbing and a tight space...
full
 
I got the parts and this ball valve https://www.lowes.com/pd/AMERICAN-VALVE-PVC-SCH-40-1-1-2-in-Socket-PVC-Ball-Valve/1000339581

Upon measuring, it seems that I have enough PVC pipe left for this valve (socket depth is around 1.25") if I cut the leaking coupling out exactly. I assume to install this type of ball valve is the same prime/glue process correct? I think I can try with this valve first and if not working, I can still fall back to the traditional way (two couplings and a pipe)? Does it sound like doable?
 
I don't think you want to use that ball valve. The plastic ball valves are notorious for breaking. I'd recommend a Jandy or Pentair 2-way valve: Custom Molded Products 2 Way Valve 1 1/2 Inside / 2 Outside 25912-154-000 - 4724 - INYOPools.com
You might also want to verify the size of the pipe that has the leak. It looks smaller than 2", more like 1", maybe 1 1/2"?
To gain more room to work, you can disconnect and move the booster pump that's right in front of the leak (just make sure power is off if you disconnect the electrical).
I know it's not ideal, but for a small leak, I'd consider trying to seal it from the outside with something like Flexseal. I did a temporary fix using waterproof tape on a slow leak in a section of plumbing I
plan to redo after the pool is winterized this fall.
 
  • Like
Reactions: borjis
Thanks for the suggestion, i did buy the 1.5 inch valve, wrong link though. i tried to use marine epoxy, not working.well as that place is always wet even pumpis off, my eqip pad is below water level. would flexseal work in this case
 
Another question, how accurate should my measurement be when considering the length to be inserted into the coupling sockets. Does the pipe absolutely need to be inserted all the way touching the socket?
 
The Flex Tape is supposed to work in wet environments... The pipe doesn't have to be inserted all the way, but you'll get the strongest bond if it does.
 
My equipment pad is below water level, and I only have that Jandy valve in the entire water path. Do I need to plug the return line ports (I have three) and also the suction lines holes at skimmers in addition to turning that Jandy Valve 180 degree?

When pump is off, that leaky spot is still wet just not leaking as fast as when pressure is on, so that pvc pipe is full of water. I don't want to cut the pipe open and find myself in a huge water loss mess.

Thanks a lot.
 

Enjoying this content?

Support TFP with a donation.

Give Support
Thread Status
Hello , This thread has been inactive for over 60 days. New postings here are unlikely to be seen or responded to by other members. For better visibility, consider Starting A New Thread.