- Dec 26, 2019
- 1,995
- Pool Size
- 14500
- Surface
- Plaster
- Chlorine
- Salt Water Generator
- SWG Type
- Pentair Intellichlor IC-40
We are just finishing up with our pool build. Here are the specs...
Anywhoooooo... I am assuming, like on my tractor forum, that "THIS THREAD IS USELESS WITHOUT PICS!"
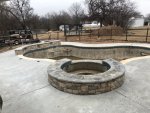
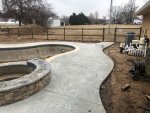
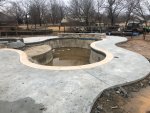
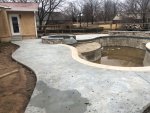
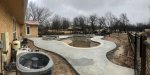
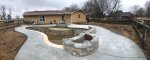
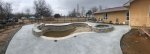
- Basic Design: 100lf perimeter, 3’6”-5’ depth swimming pool with benches, steps and tanning ledge with 5 bubblers, umbrella sleeve, volleyball net sleeve. 18" raised wall with 3 - 6" copper scuppers. Fire pit attached to raised wall. Pool size is 19’x35’ freeform per plans, with a capacity of approx. 13,500 gallons. Pool is 557sq ft. 7’ round spa.
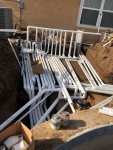
- Layout: 2 skimmers, 3 Pentair LED lights in pool, 1 light in spa, 2 main drains in pool, 2 returns in pool. 8 jets in spa
- Equipment: Pentair Intelliflo Variable speed filter pump (2), Pentair Clean & Clear cartridge filter, 2hp spa air blower, Pentair Mastertemp 400,000btu gas fired heater, Pentair Intellicenter control system iP8S, IC-40 SWG, Paramount Ultra UV2, and Clear O3 systems, A&A infloor cleaning system w/ Leaf trap and venturi skimmers
- Colored concrete coping
- Salt finished concrete decking
Anywhoooooo... I am assuming, like on my tractor forum, that "THIS THREAD IS USELESS WITHOUT PICS!"
Attachments
-
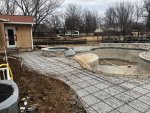
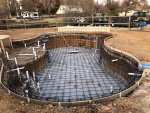 Rebar and forms 2.JPG567.9 KB · Views: 152
 -
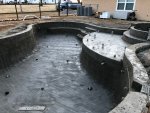
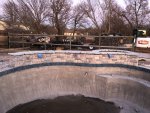
 gunite.JPG450.7 KB · Views: 150
 -
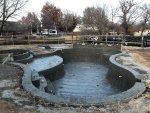
 From deep end.JPG317 KB · Views: 145
 -
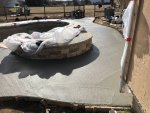
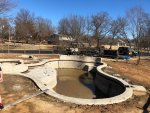 ready for tile.JPG499.8 KB · Views: 151
 -
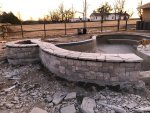
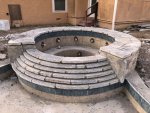 hot tub stone.JPG345.7 KB · Views: 147
 -
 Wall stone.JPG448.5 KB · Views: 155
 -
 backside of wall fire pit.JPG399.9 KB · Views: 165
 -
 equipment pad manifold.JPG410 KB · Views: 174
 -
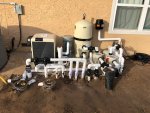 equipment set.JPG410.9 KB · Views: 174
 -
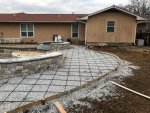
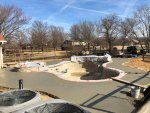
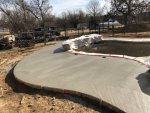
 decking formed.JPG528.4 KB · Views: 159
 So yeah we NEED pics! The more the better for us.This what we feed on!!