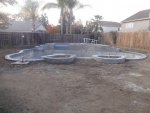
Next up was the deck layout. This was somewhat challenging due to the wide variety of design features being incorporated into my plan. Some areas were formed with typical bender board, tiled areas were formed with cantilever styrofoam molds, and the stone areas all had to be formed with extended-cantilever styrofoam forms. The styrofoam at the base of all the stone-faced 6" step areas was undercut to keep the styrofoam from leaving unfinished concrete underneath the thinner pieces of stone veneer. Road base was then brought in and tamped to form a solid base for the slab. Patio areas will all be 3-3.5" thick, but the edges will be 6-8" thick all the way around to keep dirt from being washed out from underneath the slab. The area surrounding the pool has a rebar grid for bonding, the rest of the patio will be relying on fiber mixed into the concrete. A little nervous about it, but my contractor assures me he has had excellent results with the fiber.
Overall view of the entire pool area and raised planters.

End view of the pool.

Acapulco deck with my covered patio area in the background.

In order to keep my existing patio cover intact, I had to saw cut a square around the base of each post. My old patio was sloped incorrectly and these remaining pieces of the old patio will actually be sticking out above my new concrete. I'll be building boxes around the bases of the posts to hide the ugliness...

A view of the fire pit area. You can see there is going to be a large planter a few feet in front of it. The entire front wall will be a bench for people to sit on with their backs to the fire pit.

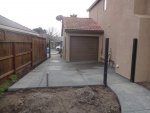
This is my "utility" area. I'll be building a shed here as well as a partition wall so I'll have an area to work on projects that is out of view of the pool area. I installed two sets of 1/4" thick, 4" square steel posts in the ground to serve as my gate posts. I never want to have to worry about breaking up my pretty new slab in order to replace saggy posts!

My equipment pad. My plans called for walls to be built on three sides with the extended corners used to construct shelving for small item storage. I went back and forth with my contractor on the necessary size of this slab and I finally caved-in against my better judgement. Can you guess whether or not I ended up with room for my shelves?

My new gas meter is such a beast I had to bump the walkway out an extra foot just so I can get my garbage cans around them!


