New Pool Build and Backyard Remodel in Central California

So now that gunite was done, we needed to finalize our color selections. We started off by picking the Fujiwa Patina 7 - 6"x6" from Fujiwa for our waterline tile. We then chose the NPT Bark Ledger Stone for our stone work, but later agreed to use MG Copper Classic as it has a similar appearance but purportedly works better with the cantilevered concrete deck we chose as the panels are thicker than the NPT product. Spillway tile was another debacle along our pool building journey, but once we finally toured some of our contractor's pools, we found a spillway that we really liked that was built using NPT Unglazed Raven Black - 2" x 2" tile. Finally Polyblend Dove Gray grout was chosen as it almost exactly matched the Raven Black spillway tile and also looked nice with the waterline tile.

IMG_1107.jpg
 
Yeah but you don't need the test kit until you are very close to getting water so I am hoping your ordering now means you are close to or already have water!

How exciting that you got your picks out of the way. Some times that seems to be the hardest part!

Kim:kim:
 
Time for a few more updates...

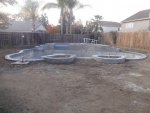
Here are some pictures of the finished gunite work. As I had mentioned, not only were the pool and spa shot with gunite, but also the raised patio area around the spa. After the gunite had cured, they came back and filled in the patio area with fill dirt.

Overall shot from the "front" of the pool.

DSC01686.jpg

Overall shot from the "end" of the pool nearest the house.

DSC01689.jpg

Steps and gunite retaining wall forming the outline of the raised patio area surrounding the spa.

DSC01693.jpg

The spa looking back toward the house and the Acapulco deck.

DSC01674.jpg

Better view of the large spillway into the pool.

DSC01675.jpg

Front view of the spillway and tiled waterfall area. There is a bench immediately below it so you will be able to sit under the waterfall.

DSC01677.jpg
 
And as I had mentioned previously, the entire fire pit/patio area/seating was shot with gunite as well. My salesperson affectionately calls it my "spaceship." Same thing occurred here, all the walls outlining the patio area were shot and then the center was filled with dirt after the gunite had cured.

Front view of the spaceship. First step looks big, but that's because the surrounding dirt has not been brought up to grade yet. The red rectangles are where the built-in step lighting will be.

DSC01687.jpg

Side view. Runs parallel to the fence, 3 feet away on either side of the patio. The obtuse angle my fence lines create is actually what the entire layout was based upon. The first time they did the layout, they pulled all the radius points off the same points they used when laying out the pool. Needless to say it didn't match the fence lines correctly so I had them redo the layout using the corner as the starting point.

DSC01695.jpg

The other side. And incidentally the view from my future BBQ area as well.

DSC01698.jpg

And an overall aerial shot of how everything is situated in the yard.

DSC01666.jpg
 
Next up was the deck layout. This was somewhat challenging due to the wide variety of design features being incorporated into my plan. Some areas were formed with typical bender board, tiled areas were formed with cantilever styrofoam molds, and the stone areas all had to be formed with extended-cantilever styrofoam forms. The styrofoam at the base of all the stone-faced 6" step areas was undercut to keep the styrofoam from leaving unfinished concrete underneath the thinner pieces of stone veneer. Road base was then brought in and tamped to form a solid base for the slab. Patio areas will all be 3-3.5" thick, but the edges will be 6-8" thick all the way around to keep dirt from being washed out from underneath the slab. The area surrounding the pool has a rebar grid for bonding, the rest of the patio will be relying on fiber mixed into the concrete. A little nervous about it, but my contractor assures me he has had excellent results with the fiber.

Overall view of the entire pool area and raised planters.

DSC01707.jpg

End view of the pool.

DSC01715.jpg

Acapulco deck with my covered patio area in the background.

DSC01717.jpg

In order to keep my existing patio cover intact, I had to saw cut a square around the base of each post. My old patio was sloped incorrectly and these remaining pieces of the old patio will actually be sticking out above my new concrete. I'll be building boxes around the bases of the posts to hide the ugliness...

DSC01667.jpg

A view of the fire pit area. You can see there is going to be a large planter a few feet in front of it. The entire front wall will be a bench for people to sit on with their backs to the fire pit.

DSC01703.jpg

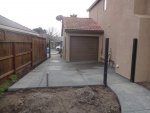
This is my "utility" area. I'll be building a shed here as well as a partition wall so I'll have an area to work on projects that is out of view of the pool area. I installed two sets of 1/4" thick, 4" square steel posts in the ground to serve as my gate posts. I never want to have to worry about breaking up my pretty new slab in order to replace saggy posts!

DSC01725.jpg

My equipment pad. My plans called for walls to be built on three sides with the extended corners used to construct shelving for small item storage. I went back and forth with my contractor on the necessary size of this slab and I finally caved-in against my better judgement. Can you guess whether or not I ended up with room for my shelves?

DSC01711.jpg

My new gas meter is such a beast I had to bump the walkway out an extra foot just so I can get my garbage cans around them!

DSC01729.jpg
 
And finally pour day arrived! It was a cool, overcast, and almost foggy day. Just what I was hoping for as there was a lot of concrete to be poured and formed, not to mention stamped. I had been concerned about the pour being on a hot day and having the guys rush the finish work in order to get it done in time. It was decided ahead of time that my pour would be done over the course of two days due to the size of the job. Day one would be all the raised patio areas, steps, and the caps on all the planters and benches.

First order of business was pouring the raised patio area surrounding the spa.

DSC01730.jpg

Next up was pouring the fire pit area.

DSC01731.jpg

After that, the small caps around the planters were poured and then the guys took a quick lunch break while the concrete started setting up. Before I knew it, forms were being stripped and the finish work had begun!

DSC01738.jpg

DSC01737.jpg

DSC01741.jpg

- - - Updated - - -

And the finished product at the end of day one... All caps were broomed, all steps and patio areas were stamped with a random stone pattern.

DSC01774.jpg

DSC01777.jpg

DSC01772.jpg

DSC01781.jpg
 
So, the next source of major frustration for me...

In the pre-deck check list that I went through with my contractor, it very specifically stated that the contractor was not responsible for the placement of expansion joints and that the homeowner needed to be present if they wanted to provide input. Having learned my lesson about meddling with the workers earlier in the project, I had kept my distance while watching very closely. I had spoken with the lead concrete guy previously and it seemed he was a details type of guy. I watched him place the joints on the first of my two raised planters. He carefully measured the length of the planter, divided it into equal pieces, scratched in radius lines at equal distances, and then proceeded to make the grooves. This set my mind at ease and I dropped my guard. I should have known better, but the results are as they say "set in stone" now...

Do you see my frustration with these two equally sized planters? If not, you're probably like most and never will notice. If you do, then I don't even need to explain...

DSC01769.jpg

DSC01770.jpg

Even less likely, you may notice my frustration with the fire pit area...

DSC01775.jpg

Oh well, what's done is done and as my wife keeps telling me, once more features are added to the yard I probably won't even notice anymore. She can keep on telling me all she wants... :D
 
Day two of the pour came and went while I was at work. These pictures were taken about a week later after the remaining forms had been removed and the concrete had begun to lighten in color.

Pool area as seen from the fire pit.

DSC01793.jpg

Large patio area in the middle of the yard. This will be where the dining area will be.

DSC01792.jpg

Fire pit area.

DSC01788.jpg

This bump out will serve as my BBQ area. No plans for a fancy built-in, I just had a natural gas line plumbed into the planter area so I can hook up my Weber. The conduit sticking up out of the slab will be the electrical supply for my bar island fridge and blender. :D

DSC01787.jpg

And my utility area. Just plain ol' broomed finish with a central drain. Nothing fancy, but already being utilized regularly.

DSC01786.jpg
 
So much has happened! WOW!

Love the shape of everything. The thought put into it is very evident! That spill over and spa are purrfect!

Good move on the turning of the firepit spaceship (CUTE) so it was even with the fence.

What is done is done but man I really like rebar but have also heard of the fiber. Here is hoping it lasts forever!

LOTS going on with the forms-this here, that there...........skills!

Many adult words said with the close cutting for the cover supports I bet! Well done! I am sure you will make the prettiest box around them!

Well done on the gate posts being set ahead of time! Good job thinking ahead!

I am hoping you get to keep your shelves on the equipment pad. Why did he not want to do it your size?

That gas meter :shock: Good thing you measured!

I like how they did it in two day. Good idea and purrfect weather for sure!

LOVE the stamps!!! NICE!

I see ya on the front planters BUT since they have slightly different shapes it is all good. I also see the firepit BUT no one else will even notice so let it go! LOL It is set in stone as said! It looks fine so all good!

So much info I had another window open so I could scroll down to comment on things that caught my eyes! I love it all!!!

Kim:kim:
 

Enjoying this content?

Support TFP with a donation.

Give Support
RE: The Concrete Faux Pas

These are known around here as pool birthmarks. Every person has 'em. Every pool has 'em. Embrace them. Mine is on my face. My mom loved me anyway!! ;) Love your pool for who she is. She is a living, breathing thing (literally). She's not perfect. She'll go through all the phases of growing up (new born is the worst). She'll need lots of care and attention and feedings, every day. She'll need some cosmetic help along the way. Maybe even a surgery or two. And she'll grow old and become less attractive with age. If you think of it as this perfect thing, that's supposed to be perfect and stay perfect, you're only going to be disappointed...

The planters will be obscured with plants. I hesitate to mention anything about the fire pit area. There's at least two that I can see, but if you've only found the one I won't point out the other! Or am I just kidding?!? You'll never know!! ;)

Your build is awesome, the pool and surrounding areas are going to be amazing!!
 
Have a look at this post, and see if you're interested.

Getting the Frogs Out, Kids In

If so, then these, too:

Getting the Frogs Out, Kids In

new pool in tucson az - Page 5

For your setup, I'd think about doing the pool first, and capturing that number, then the spa second. You probably will treat the water as one body, when it comes to testing and dosing, but you never know. Having the two numbers might come in handy someday.

The pool first to avoid the possibility of any water overflowing out of the spa down the walls of an empty, new pool. You definitely don't want that to happen.
 
That concrete looks great! I like your choice of stamp and your whole set-up. Don't worry about the joints. What you said is so true...nobody else will ever notice. Plus you probably won't either once you have them planted and looking beautiful. Not to mention that you won't be looking at that because you'll be admiring that awesome pool!
 
Shoot, I didn't catch this 'till just now. Too late? Has anyone mentioned?

CCP420 Cartridge Filter, Pentair VST pump, EasyTouch/ScreenLogic2 Panel

Be sure your EasyTouch does not have an "L" in its model number!! Muy mal!!!
 
Thanks for all the great feedback everyone! And yes, there are at least two major issues with the joints on the fire pit area. Just wasn't sure if they'd be obvious due to the size and image quality of the picture... :D

Time to go look at the model number on my EasyTouch, before I start reading and get myself all worked up!
 
As for the water metering, that has been on my mind for many weeks now. At first I was considering buying one of the expensive in-line meters, lately I've been leaning towards the $15 variety at the hardware store and doing a few bucket tests to see how (in)accurate it is. The house water meter thing is probably an option (need to go look in the box out front to make sure) but I was concerned with household water usage skewing the numbers during the fill. I know for certain though that I'm going to do something to measure it as I'd like to get as accurate a figure as I can for the chemical calculations. That kind of stuff is right up my alley.

In one of the posts you had mentioned the main water meter as a good solution because it allowed the use of multiple hoses. I was just reading through the fill/brushing instructions from my contractor and they sate that multiple hoses are OK if you have Pebble or white plaster, but to only use one hose if it is colored plaster. I'm using colored Wet Edge Altima, so I'm guessing I fall into the colored plaster category. Not sure why they say this. Seems to me if both hose ends were kept under water, it shouldn't be a problem. I was however thinking of replacing my hose bib with a "Garden Valve" so I could increase my fill rate. Much bigger orifice inside the garden valve which should equate to a higher fill rate. Seems to me the faster the fill, the less likely you would be to get rings?

And don't worry Kim, I'll be getting back to the equipment pad, but at the moment my presence is being requested for a game of laser tag with my daughter who is home "sick" from school today... :eek:
 
The area surrounding the pool has a rebar grid for bonding, the rest of the patio will be relying on fiber mixed into the concrete. A little nervous about it, but my contractor assures me he has had excellent results with the fiber.

Nothing to be nervous about as long as the road base was properly compacted. I do a lot of design, QA/QC, coring, and laboratory testing of shotcrete and fibercrete. In general, fibercrete is better at resisting contraction cracks and other issues caused by improper curing, and worse at resisting major cracks from substantial differential settlement. But if you have substantial differential settlement, there will be major cracks in either type of concrete, they'll just be a little smaller in the case of rebar. Hopefully they used synthetic fibers instead of steel being in such close proximity to water.

Do you see my frustration with these two equally sized planters? If not, you're probably like most and never will notice. If you do, then I don't even need to explain...

I do, but due to the different shapes of the planters, I don't think it's a big deal. Wouldn't really bother me too much, and I'm pretty OCD about such things.

And yes, there are at least two major issues with the joints on the fire pit area. Just wasn't sure if they'd be obvious due to the size and image quality of the picture... :D

I could only see one issue, and as I said, I'm OCD about those kinds of things.
 

Enjoying this content?

Support TFP with a donation.

Give Support
Thread Status
Hello , This thread has been inactive for over 60 days. New postings here are unlikely to be seen or responded to by other members. For better visibility, consider Starting A New Thread.