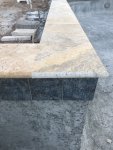
Need help and feedback on coping/waterline tile install

livinwell

0
Gold Supporter
LifeTime Supporter
Jul 29, 2007
115
Apache Junction, AZ
Surface
Plaster
Chlorine
Salt Water Generator
SWG Type
Pentair Intellichlor IC-40
I have a thread for our build but wanted to start this as a specific cry for help/thoughts.

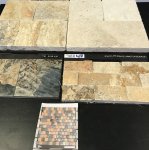
PB started coping and waterline tile installation while we were out of town. Yes, we knew this would begin. We (hubby and I) didn’t realize that we had not provided updates to tile and coping selection. When the bid was first requested we provided generic (travertine and NPT tile name) for pricing.

This is what we have:
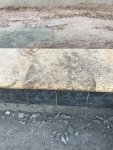
BDD89594-06F3-455D-807D-1568CCFAA733.jpeg

This is what we wanted:

FCF0BDDB-EEE7-4351-8FCA-0562CC519392.jpeg

2nd - if I leave as is (ugly) when should the forms be removed?

3rd - spacing between the coping - should there be noticeable differences
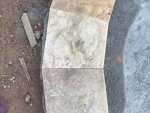
C75ADB6A-4221-4FAD-8876-D2FFFB7D70D6.jpeg

4th - bull nose coloring?
2E68C132-F4CE-49F2-B6BF-FFFC098649F5.jpeg

5th - how is the decision made for “cuts to fit”, so all looks uniform? The two short pieces is at step entry and very noticeable to me.
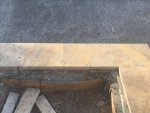
BD1AF24D-71D7-4B66-B3A9-622D49C345B1.jpeg
 
@jimmythegreek
@kimkats

Anyone else with thoughts?

meeting with installer today and want to know if I’m being to picky (anal).

Also we looked at contract and coping did say travertine (color to be determined). So my going in position is that it needs to be removed. I can be happy with the waterline with a different (lighter off white travertine) coping.
 
I like the water line tile. It is not the same as you picked out but it is a very pretty one...................

That coping needs to go. It is poorly done (spacing) and the color difference is too broad. That edge REALLY looks off. It is almost like they ground it down or something. That cutting could be done MUCH better on the small pieces. IF they cared they could cut a bit off of each one so they are all evenly sized. It IS extra work but if they care.......................
 
That style of coping is suited to a square pool. You will never get the look you want as far as even piece spacing with radius turns. Those would have to be custom made for the radius. Smaller 6x12 are universal they can do anything. That coping cannot be re-used I doubt he will eat it and redo it at his expense. If it's in the contract and never updated he did what was proposed unfortunately. That edge was done on site they will/should polish it to match. Those gaps are gonna be there it's nearly impossible to butt that style and have the overhang perfect unless you make templates first which involves ALOT of time and skill. I would make it clear what you are after and want in a finished product. Good for him is not good enough for you and you should let him know. He should have explained all this or his sub should have spoken with you to avoid issues like this. Prior work pics are worth their weight in gold
 
@kimkats
@jimmythegreek - is there a % of application per square foot that I can use to ball park what the removal cost should be? Is it more work to remove it. I would think maybe more effort, less skill? We are going to keep the waterline tile to save cost but as Kimkats said, "that coping needs to go" . :)

Thank you both for responding.
Thank you @ajw22 for calling in backup.
 
The skill will come in with them using care to NOT chip or mess up the water line tile. I would be of half a mind to try to remove it myself. Chisel and a hammer???? from the decking side. See what happens and how hard it is.
 
Not easy to do well....
.. but the trick is at the coping joint in front where it meets the tile grout. What happens is the coping gets set first to establish the finished level. The tile gets set to meet the coping but in reality the top of tile is above the bond beam backing up to the coping mud bed its stuck down with. So when you pop the coping you disturb the tile mortar as well. I cut the tops with a diamond wheel carefully under coping front and help free that joint. After removal you chip out the mud base but often leave a little up front where it meets the tile. You then mud the coping down using the existing front edge as the guide to height and a dab of glue on the front for insurance while the majority of coping sits in the new mud bed. Then clean up the grout joint and regrout the top section of tile.
 
  • Like
Reactions: kimkats
Not easy to do well....

We’re going with the other guy! He’s going to fix, redo and handle the decking and sheer wall. He started one to show us the effort and did start with the front. He also mentioned that he’d send a couple of guys, tomorrow or Wednesday, with their saws, to help the process.

Thanks again. I’ll continue in my build thread. Hubby started saying it’s so late in the year, we should hold the cash over and start up again next year, but I said :rant: lovingly.
 

Enjoying this content?

Support TFP with a donation.

Give Support
Thread Status
Hello , This thread has been inactive for over 60 days. New postings here are unlikely to be seen or responded to by other members. For better visibility, consider Starting A New Thread.