Is this stand pipe for a spa blower and would it be good to install one?

Back on the blower. I just got the actual blower delivered (AirSupply Silencer 1HP). It comes with a check valve. The documentation doesn't show exactly where that is to be installed. Can I install it immediately below the blower (the check valve connected to blower on one side and to pipe on the other)? Or should I separate it from the blower with a bit of pipe?

I don't have the option of putting the CV closer to the spa as the pipe is underground and then encased in gunite.
 
Update: my OFCLT passed losing 0.5PPM over about 8 hours last night. My CC is still zero and my water is crystal clear. I'm calling off the SLAM and will let the FC fall back down though I do plan to keep it elevated between 15%-25% FC/CYA for the next couple of weeks per @JamesW suggestion.

I have a pool guy coming with a cyclone blower today so we can blow all the water out of that air line and make sure there are no other obstructions. Then, I'll be installing the Silencer blower soon.
 
Update 2 for today: pool guy came and we blew out the pipe. Good news is that it all appears clear. Air flowing very well through all six jets, etc. Bad news is it introduced even more nastiness into the spa. This time it's more brown than green. I'm hoping most of what was alive in there is already dead since I flushed the pipe previously with chlorine. And also, this time I kept mostly contained in the spa and I'm pumping the nasty water out to the cleanouts instead of just running it (wish I would have thought to do this last time). All that said, I'll probably keep the SLAM going today and see how things look overnight once more before I call it good.
 
  • Like
Reactions: Newdude and JamesW
Interesting note just documenting -- now with the blower line cleared there is suction on the line at the equipment pad when the spa runs. The venturi effect must be working and drawing from this line.

I went ahead and put the check valve that came with my blower on the line to (hopefully) hold the air in place and prevent water from filling the pipe again. The suction from the venturi is strong enough to open the check valve a bit when the spa runs. I'm hoping this will also help dry out the pipe until I get the blower installed.
 
  • Like
Reactions: JamesW
Do you run your spa jets daily for 5 minutes?
The way my system is set up, when in "Pool Mode" it actually sends half the return to the spa (through all six jets) and half to the pool, creating a constant spillover. So, the spa jets are running pretty much any time the pump is on. That said, we use our spa quite often -- probably at least every other day, through most of the year. So, I don't have the Spa on a timer, though I sometimes add one if we are in a period when we're using it less.
 
So, the blower installation is proceeding but I'm such an amateur it's very slow going.

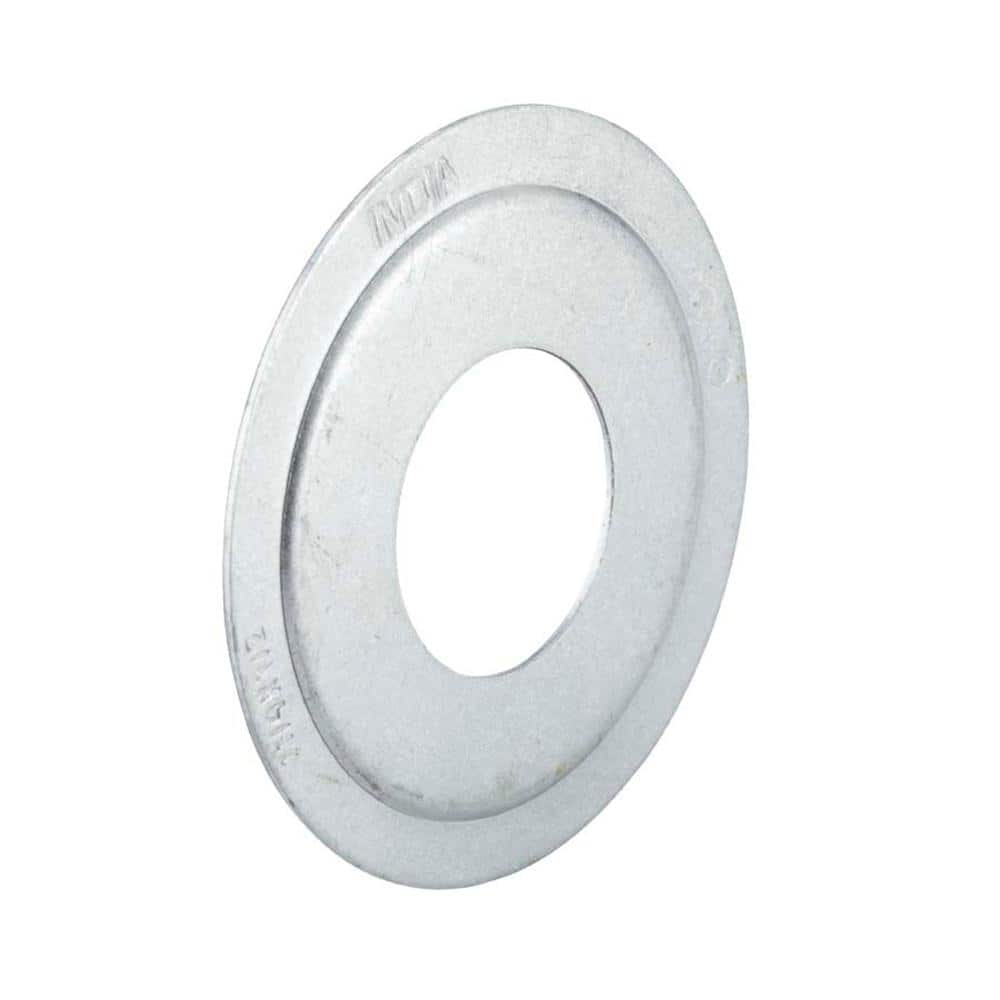
Today's issue that I'm hoping someone can guide me on -- when I went to knock out the knock out at the bottom of my Ecommand subpanel, the 3/4" circle came out instead of the 1/2" inner circle I was wanting. All of my liquid tight conduit is 1/2" and the connection at the blower is 1/2". So, I'm trying to figure out how do I make this connection work at the box. I found some metal reducing washers at Home Depot that work for this purpose, but it seems to me that using these might mess up the liquid tight nature of the connection at the box. I didn't see any reducing washers that were specifically "liquid tight".

I do have another knock out available and I could try to get the 1/2" circle out of that one, but I'd need to plug the open one with something and I wasn't even sure if that's allowed.

Can anyone offer any guidance on how I can resolve this? Surely I'm not the only one who has ever knocked out the wrong sized knockout??
 
You can use this to seal the 3/4" hole...

Amazon.com

Or this is much cheaper...


And then carefully knock out a different 1/2" knockout.

--Jeff
 
  • Like
Reactions: dailygenesis

Enjoying this content?

Support TFP with a donation.

Give Support
You can use this to seal the 3/4" hole...

Amazon.com

Or this is much cheaper...


And then carefully knock out a different 1/2" knockout.

--Jeff
So, the plug doesn't have to be specifically liquid-tight?

Also, can you give me any guidance on how to carefully knock out the 1/2" ?? What's the best procedure for that?
 
So, the plug doesn't have to be specifically liquid-tight?

Also, can you give me any guidance on how to carefully knock out the 1/2" ?? What's the best procedure for that?
No, the panel isn't liquid tight.

I would attempt to drive a flat edge between the 1/2 and 3/4 knockout, from the inside. Not sure how to explain that any different. You could also press down on the 3/4" knockout ring from the inside, while you hit the 1/2" from the outside, to keep the 3/4 from lifting. Does that help?

--Jeff

Ok thanks.

I was sort of doing what you are saying when the 3/4 popped out (using flat edge from inside the box). I am wondering if the knock outs in my box are designed to be hit from the outside to remove the inner circle. I'm just hesitant because this is the last 1/2" knockout available I need to get it right!
 
They are in fact, designed to be hit from the outside. That is kind of what I was explaining with the second part of my comment.

--Jeff
 

That’s what I have on there now but my concern is whether that would maintain the liquid tightness of the connection. Is using these ok?
 

Enjoying this content?

Support TFP with a donation.

Give Support
Thread Status
Hello , This thread has been inactive for over 60 days. New postings here are unlikely to be seen or responded to by other members. For better visibility, consider Starting A New Thread.