Iowa DYI In-ground Vinyl Pool Build

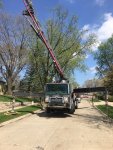
Pool showed up, R&L carriers did an outstanding job on the delivery. Had to hand unload half a pallet as he could not get it on the lift gate. I am impressed with the quality of the Hydro Pool construction. Our garage is officially full!!!:eek:
 

Attachments

  • IMG_5679.jpg
    IMG_5679.jpg
    53.7 KB · Views: 120
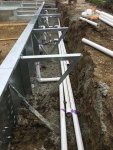
I recommend you get some 3/8 rebar and cut it down to 16-18" for the wall panels. they give you enough bar to do each panel in the middle but there are several holes in each panel and the braces have a stake but have 2 holes also. I pinned everything everywhere I could so nothing moved when I poured concrete, my inspector wanted 8" minimum as thats what was on my engineered drawings. Make sure you have some processed gravel on site to tamp under panels where you need to bring them up. You can shim them and let the concrete fill the voids too, but be sure to set a benchmark when you shoot grade and decide where the wall panels will set and make sure the whole shallow area is at that mark or slightly deeper and the same with the panels
 
  • Like
Reactions: jeflogan
Permit is issued unfortunately I will have to spend $700 on a land survey. I spent all weekend locating my pins with a tape and metal detector and only found 4 of the 7. Can't believe the expense of a survey. I am on 2 lots which may increase that for me.
 
that really stinks. whats the caveat of needing to have the survey done if you have permit in hand? are you that close to your property lines? you can often triangulate off of the 4 pins you have and come up with the location of the others, and your survey should give you some good info if its not that old. dont know about your state but the town hall keeps the latest survey and sometimes previous ones on file, I was able to use mine and establish my boundaries with a surveyors tape measure. they are pricey, average here is 400ish for a single lot so a double at 700 is about right. do you need the other lot done? cant get away with just the single?
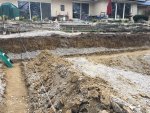
 
Yeah I spent some time on the phone with the building department pleading my case since I have an existing fence and 3 of the pins where located near where the pool would be located. They stuck to their guns and said I need them all exposed.
Even though I will not be putting in a new fence they need to make sure the pool is 10' from the property lines so I need that inspection before we can dig.
Inspections:
1. Fence Setbacks/Property Pin
2. Electrical Pool Bonding
3. Electrical Rough In
4. Final - Building Department
 
Pool digging started Friday. We have a lower level that had rock and we used our dig dirt to create a new space that we are going to seed. Sunday after looking at our elevations we decided that we need to lower the pool by 18 inches. We are going to do that ourselves lucky he over dug so we could put rock in to help when it rained. Here is a portion of the timelapse I did on day 1. Dig timelapse
 
Last edited:
You will never think 18" is a small amount after you dig it out!! So do you want the pool lower or deeper?
We are going to go lower to eliminate the need for a retaining wall and steps when you first walk in through the pillars. I had originally asked him to level the yard then dig, but he was concerned that we would undermine the retaining wall. He overdug so we only have to lower it 6-7" by digging and we were able to get almost half done yesterday. If you look at the picture, we were going to have the pool 2" above the last step.
We are now going to pour a footing at the base of the retaining wall to keep it from pushing outward toward the pool and add another step down from the patio.
96885
 

Enjoying this content?

Support TFP with a donation.

Give Support
Made some progress this weekend by hiring some general labors to help with the panel install. There are a lot of bolts in the tanning ledge/stair combo. 97480 9748197482
 
make sure to get a bunch of extra rebar and pin each panel in every hole not just the middle like they want you to. I ended up getting about a dozen sticks and cut them down to size and pinned every hole and every hold in the deadman on top of the spikes that go in. if its at all wet when you pour your collar the panels will move a little. I also threw 2x4s nailed together across the bottom short way in the pool in 4 equal spots to keep things square. nothing worst than taking all the time to square it up and make it good and then having it move on you. looks good so far I went thru the same ordeal. I ended up having tons of cave-ins from weather and took a panel out in shallow end and borrowed a mini excavator and got the hopper and inside of pool perfect before I did my collar. was way easier than hand digging it all out and came out nice
 
  • Like
Reactions: Chickinvic
Thanks for the tips. Hope to have the collar poured early next week. Progress this morning below. Plans for the bench were not complete so it took sometime to figure out which panels went were.

97610
 
Took Wed - Friday off of work to continue on the pool construction. Hired a company to pump the concrete for the bond beam and that was the best decision I have made to date. Also had my main panel upgraded and a sub panel run for the equipment pad. Rain here Sat, too muddy to work on the pool bottom Sunday but still was able to get some of it done. Have the pool crete guys coming May 4th. Plan is to start filling with water the week of the 13th. No recent pictures of the plumbing.
Bond beam - done
Pool equipment pad - done
Plumbing - 95% complete
Pool bottom 75% complete
99199 99203
 

Enjoying this content?

Support TFP with a donation.

Give Support
Thread Status
Hello , This thread has been inactive for over 60 days. New postings here are unlikely to be seen or responded to by other members. For better visibility, consider Starting A New Thread.