
Hayward or Intex sand filter to buy and use ti with Intex salt system. Anyone can help, please?
- Thread starter chandra5103
- Start date
You are using an out of date browser. It may not display this or other websites correctly.
You should upgrade or use an alternative browser.
You should upgrade or use an alternative browser.
If you want a quieter pump then you could also find a Hayward or Pentair pump for above ground pools. A two speed pump would be best, as you run it on low for filtering and only use high speed for vacuuming. Lower run speed = quieter pump.
Actually, this one is for above the ground pools: Hayward W3S210T93S ProSeries 21-Inch 1.5 HP Sand Filter System
Stopped on Hayward 18", 1.5 HP. Will post here the story of assembling the maze altogether. ETA for the pump to come: 19-24. Will start leveling the ground tomorrow, I guess.
One more time - THANK YOU all who replied to my request.
Appreciate!
One more time - THANK YOU all who replied to my request.
Appreciate!
Received today Hayward pump with filter .. OHH, what a monster! ))) After this Intex set looks like a toy )))).
The motor looks and FEELS like it can be used for airplane, haha.
Instead of renting a tiller, made research and bought Sun Joe TJ604E 16-Inch 13.5 AMP Electric Garden Tiller/Cultivator, Black on Amazon. We will definitely use this machine for other projects, so completely made sense to make this purchase. Reviews were great, besides we already have another Sun Joe machine, dethatcher and really impressed with the quality. Gonna water soil today and start leveling/tilling tomorrow. The challenge is not too complicated because we simply enlarging the 12' cycle to 18'. Pictures will be uploaded later.

Gonna be a total girl and say I love the lime green!my bad .. here we go:
That tiller sure looks like a mantis. I bet they make it and sell it under the other name either directly or in some sort of partnership.
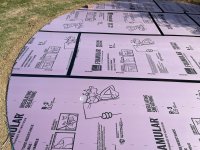
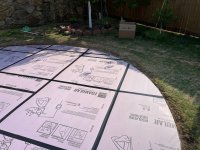
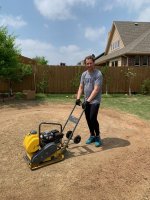
levelled the ground with the tiller as step #1. planning to rent a Vibratory Plate Compactor on weekend and be ready to put FOAMULAR 150 foam (1/2" or 1" .. not decided yet which one) liner then.
The good thing with the tiller + clay gound: tiller brakes ground into small pieces so, watering slightly in the evening and using compactor in the morning, will do a solid base for placing foam on top. The bad thing - not exact levelling BUT very close to what is needed )))). Hope foam plates will do the rest for better levelling. Decided not to go with sand on top of the clay. Spent around 5 hours on this exercise.
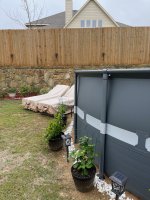
First picture - where I ended on the second day, the second one - not-finished-yet job.


The good thing with the tiller + clay gound: tiller brakes ground into small pieces so, watering slightly in the evening and using compactor in the morning, will do a solid base for placing foam on top. The bad thing - not exact levelling BUT very close to what is needed )))). Hope foam plates will do the rest for better levelling. Decided not to go with sand on top of the clay. Spent around 5 hours on this exercise.
First picture - where I ended on the second day, the second one - not-finished-yet job.
That's awesome! I'll be doing the same thing next weekend. My 16' intex arrives tomorrow. Im a total rookie at this, so i've been debating between a intex filter and pump or another brand such as the haywards.levelled the ground with the tiller as step #1. planning to rent a Vibratory Plate Compactor on weekend and be ready to put FOAMULAR 150 foam (1/2" or 1" .. not decided yet which one) liner then.
The good thing with the tiller + clay gound: tiller brakes ground into small pieces so, watering slightly in the evening and using compactor in the morning, will do a solid base for placing foam on top. The bad thing - not exact levelling BUT very close to what is needed )))). Hope foam plates will do the rest for better levelling. Decided not to go with sand on top of the clay. Spent around 5 hours on this exercise.
First picture - where I ended on the second day, the second one - not-finished-yet job.
View attachment 316869
View attachment 316870
I actually didn't know haywards came with pump so after reading this thread i might go with hayward instead of the intex 3000gph pump and baby pump with .75hp that it comes with.
Do you mind posting a pic of your final setup with the pump?
much appreciated
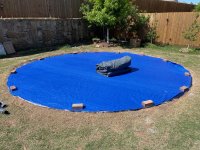
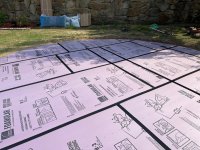
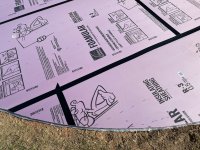
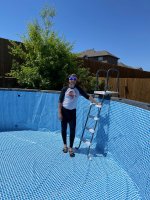
Actually, I've completed my project 4 days ago!!! )))))))) The first batch of photos related to grounding/leveling steps. I have used 0.5 " foam from HomeDepot. Gorilla tape rocks but if you move several times the attached to each other sheets, the thin layer of film on top of foam cover starts to pill off, so try to avoid that. The last picture is showing up rotary laser I was trying to use to level bricks for pool vertical bars ... disappointed with that tool. The picture with the meter is showing up how I did a perfect 10" circle to cut the foam ... simply made a hole with a nail on the 10" mark, insert the nail in that hole and use some pressure on the end of the meter as you can clearly see it on the picture. The rest is an easy task ))) to cut the perfect round circle.
Attachments
-
 IMG_0589.jpeg933 KB · Views: 22
 -
 IMG_0575.jpeg645.8 KB · Views: 20
 -
 IMG_0574.jpeg643 KB · Views: 20
 -
 IMG_0573.jpeg648.5 KB · Views: 20
 -
 IMG_0572.jpeg739.9 KB · Views: 19
 -
 IMG_0570.jpeg682.9 KB · Views: 17
 -
 IMG_0569.jpeg618.6 KB · Views: 14
 -
 IMG_0558.jpeg654.8 KB · Views: 19
 -
 IMG_0633.jpeg740.5 KB · Views: 19
Last edited:
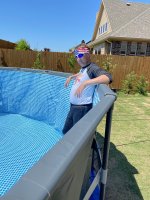
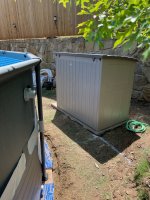
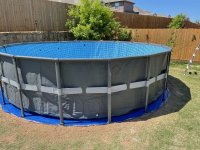
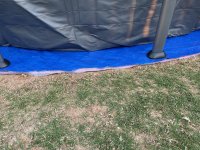
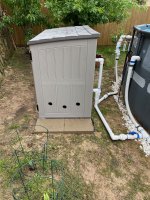
I've put a tarp right over the ground, then foam, and then one more tarp layer. The next photos are about the pool installation. It was an easy step other than making holes for the bricks to support vertical legs. I've bought a plastic shed to keep the Hayward filter and a motor inside. Looks good for me ") . Will do photos of pipes (PVC+hoses) installation tomorrow. Every 2-3 hoiurs was checking the position of all legs. I can say there is a tendency to move them outwards when the water level becomes higher. Keep it in mind doing the initial placement of legs on the bricks. This is important!
. Will do photos of pipes (PVC+hoses) installation tomorrow. Every 2-3 hoiurs was checking the position of all legs. I can say there is a tendency to move them outwards when the water level becomes higher. Keep it in mind doing the initial placement of legs on the bricks. This is important!
. Will do photos of pipes (PVC+hoses) installation tomorrow. Every 2-3 hoiurs was checking the position of all legs. I can say there is a tendency to move them outwards when the water level becomes higher. Keep it in mind doing the initial placement of legs on the bricks. This is important!Attachments
-
 IMG_0603.jpeg712.5 KB · Views: 27
 -
 IMG_0601.jpeg906 KB · Views: 25
 -
 IMG_0671.jpeg760.1 KB · Views: 24
 -
 IMG_0670.jpeg692.7 KB · Views: 24
 -
 IMG_0669.jpeg576.1 KB · Views: 25
 -
 IMG_0668.jpeg675.9 KB · Views: 24
 -
 IMG_0662.jpeg435.5 KB · Views: 25
 -
 IMG_0598.jpeg907.6 KB · Views: 27
 -
 IMG_0594.jpeg638.9 KB · Views: 26
a few more photos ... more to come tomorrow
Attachments


Last edited:
- Jun 1, 2018
- 16,012
- Pool Size
- 26000
- Surface
- Vinyl
- Chlorine
- Salt Water Generator
- SWG Type
- Hayward Aqua Rite (T-15)

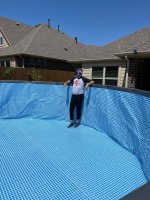
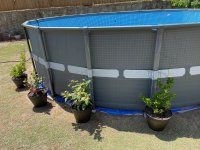
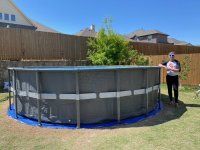
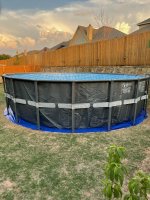
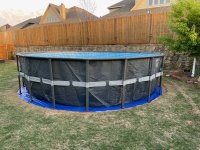
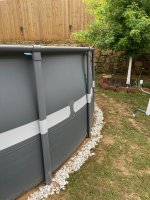
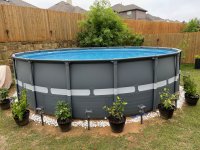
the rest of the photos I promised .... This is how the pool looks now. The first picture is showing 2 legs that moved from the vertical position after the pool got filled in 100%. It is somewhere around 1" but still placed on the brick.
Attachments
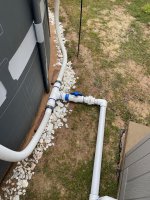
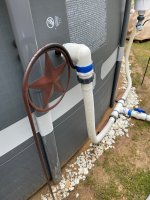
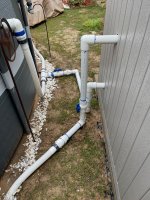
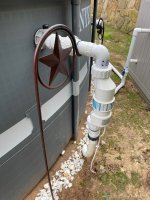
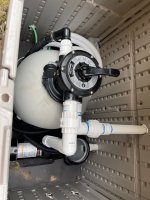
Here we go with Hayward SWG installed and PVC/hose piping. My wife gave an idea with what might be used for pipes support and we came to some stuff we bought at Homedepot))). Works like a charm! For me it was important to keep hoses in a "natural" position, meaning I didn't want them to be twisted, so from there I came to the current position of all piping system.
Attachments
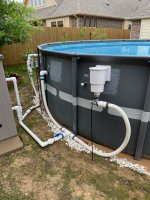
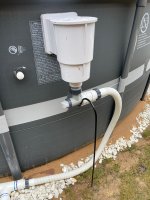
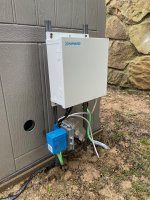
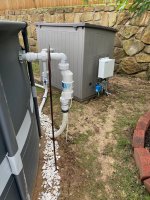
Final photos:" filter placed in the box. Also, I want to mention that there was a slight leak after starting the motor, like one drop within 5-6 seconds and I decided not to do anything with that for a while and this helped - no leaks now. Also, I would strongly recommend this type of gaskets for flexible hoses: https://www.amazon.com/gp/product/B07CZLCZL1/ref=ppx_yo_dt_b_asin_title_o03_s00?ie=UTF8&psc=1
Attachments
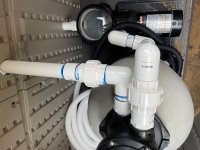
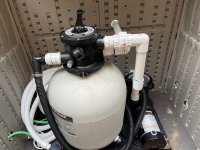
Very nice! Can you get another 1/4 turn on the filter pressure gauge? It will be much easier to read facing up.
Thread Status
Hello , This thread has been inactive for over 60 days. New postings here are unlikely to be seen or responded to by other members. For better visibility, consider Starting A New Thread.