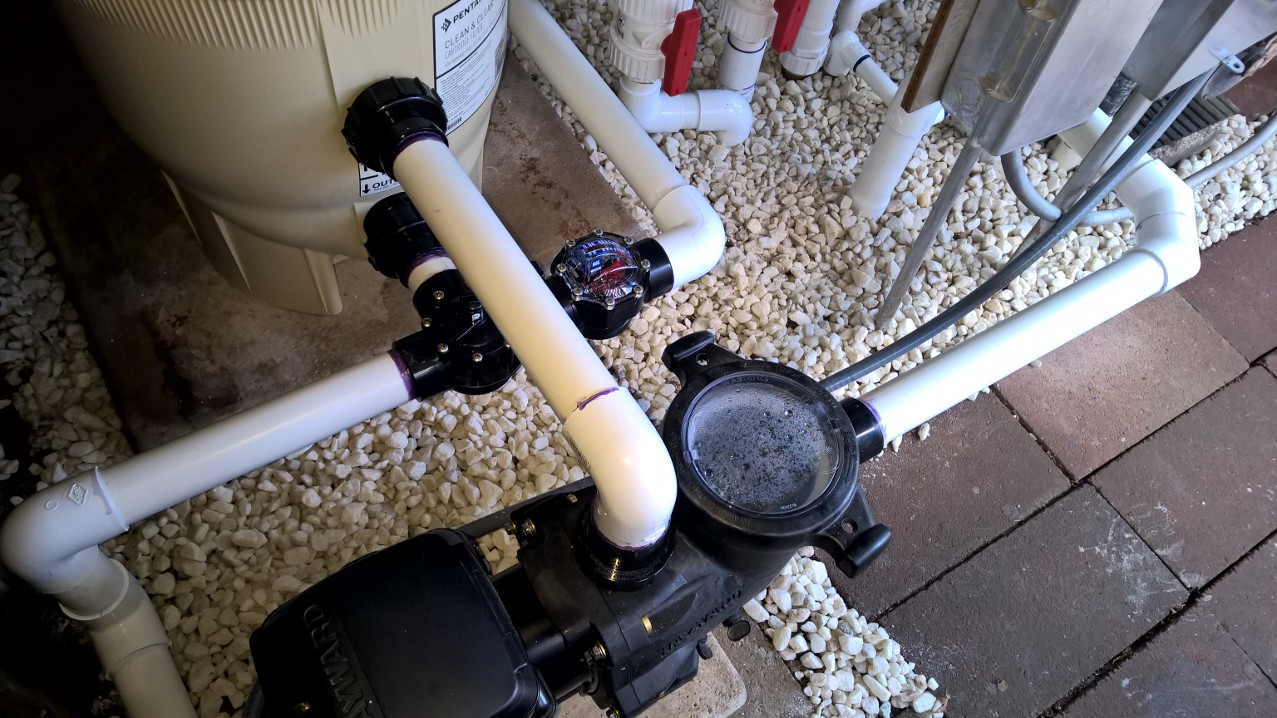
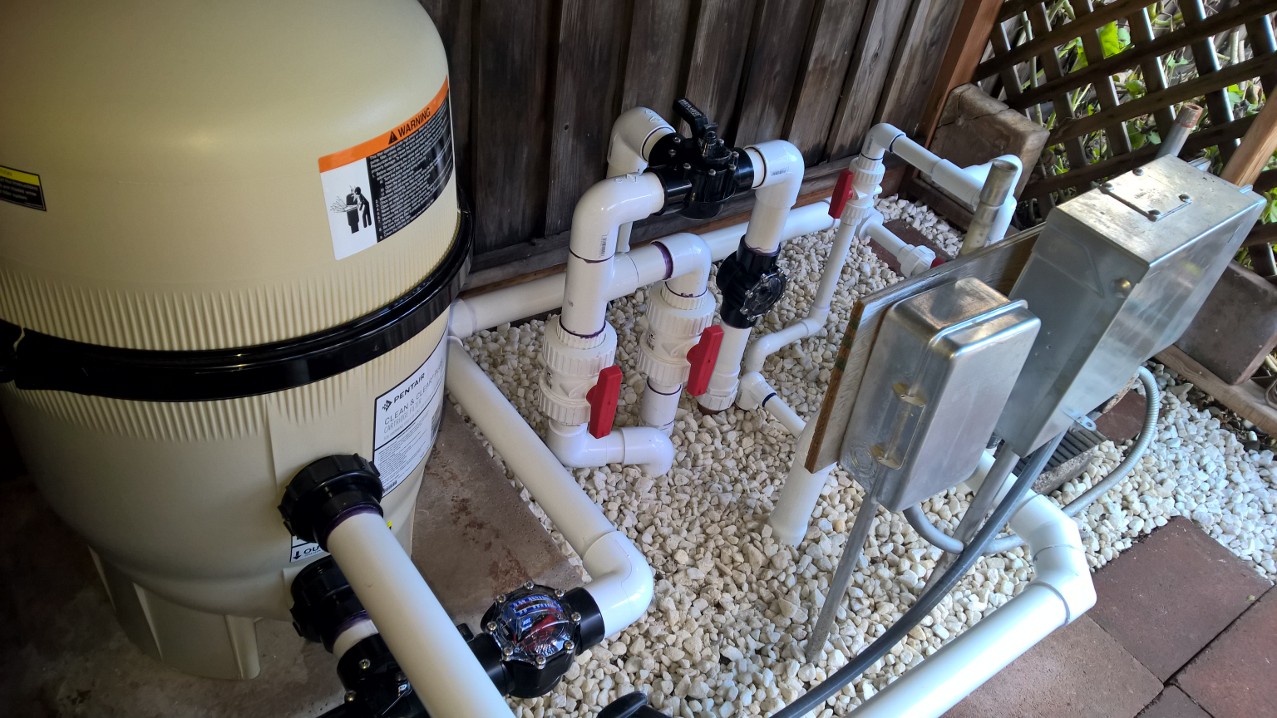
Post a picture of your pool equipment layout and plumbing. I'm looking for some layout ideas and would love too see what people are working with. Any issues with your current layout you'd change?

Equipment Pad Pictures.... Lets see them
- Thread starter teribble1
- Start date
You are using an out of date browser. It may not display this or other websites correctly.
You should upgrade or use an alternative browser.
You should upgrade or use an alternative browser.
Teribble, you can always go mining in the under const. threads. It will take some time as you scroll through the thread to find the pics.
I can give you some ideas for your pad. Make sure you have plenty of room all around. That way you don't have to play twister to work on things. Make sure you have unions on everything for when you need to work on the equipment.
Do you have your equipment yet? You can set it out and we can help you configure it.
Kim
- Oct 18, 2009
- 3,637
- Pool Size
- 6000
- Surface
- Plaster
- Chlorine
- Salt Water Generator
- SWG Type
- Hayward Aqua Rite (T-15)
Hi Look at my pool build in the the sig bar for pics of our pool pad. It is quite large and I love it, so my suggestion is to go big.
Look at this thread What Does Your Pool Equipment Pad Look Like?
Hope this helps
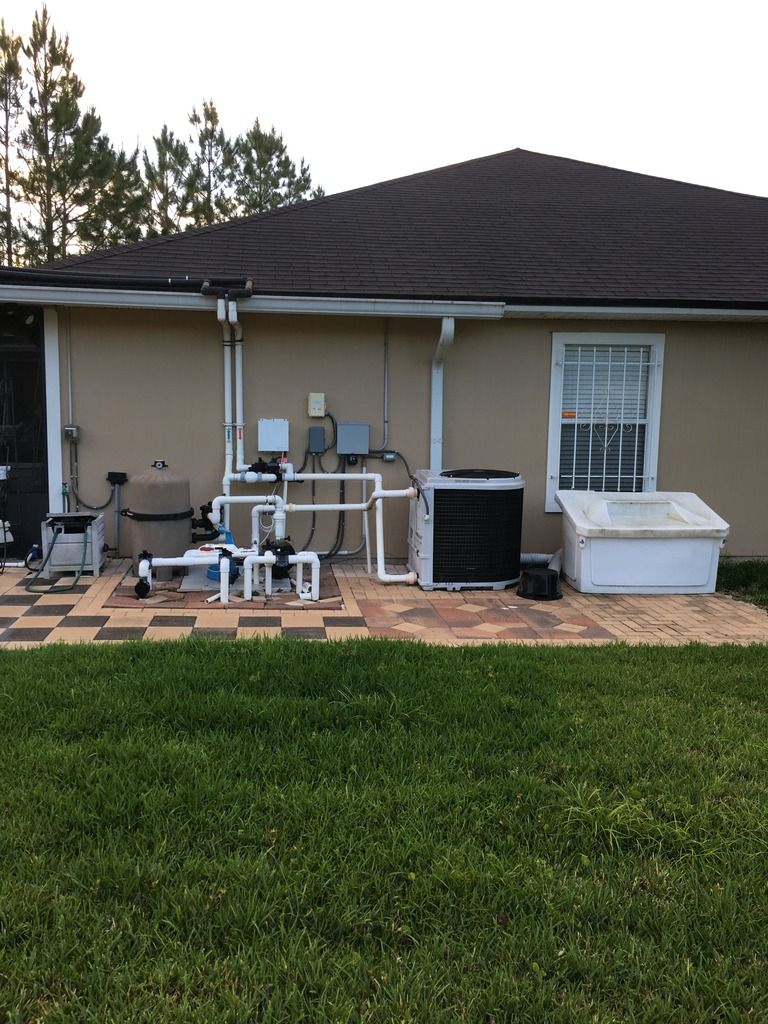
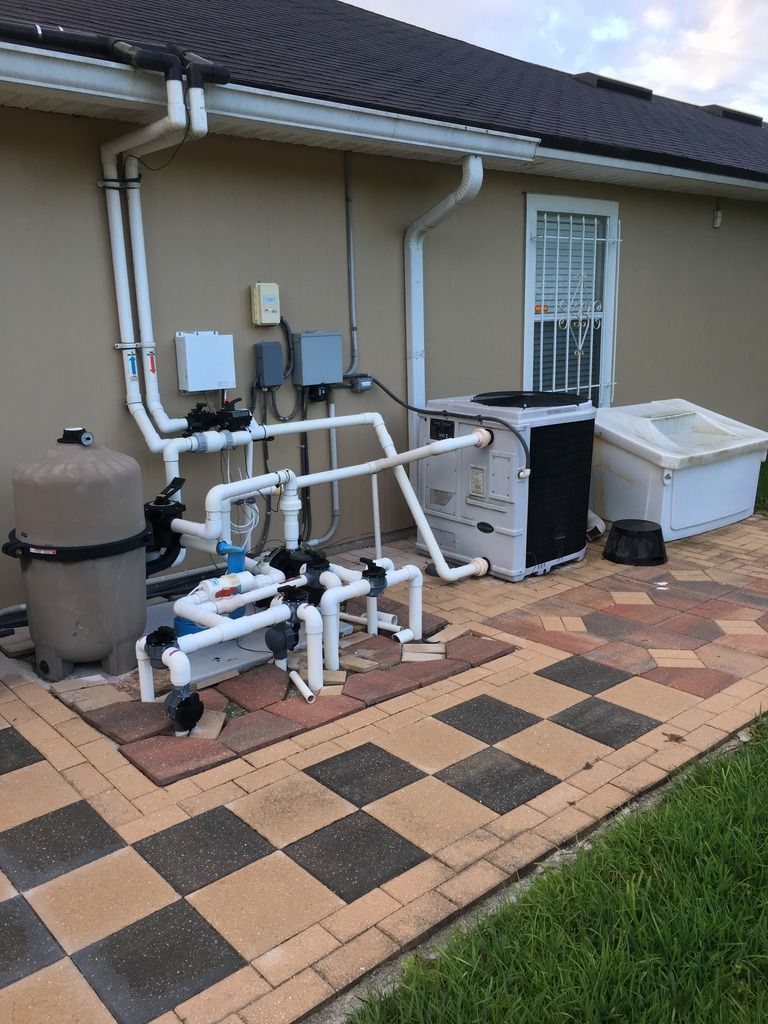
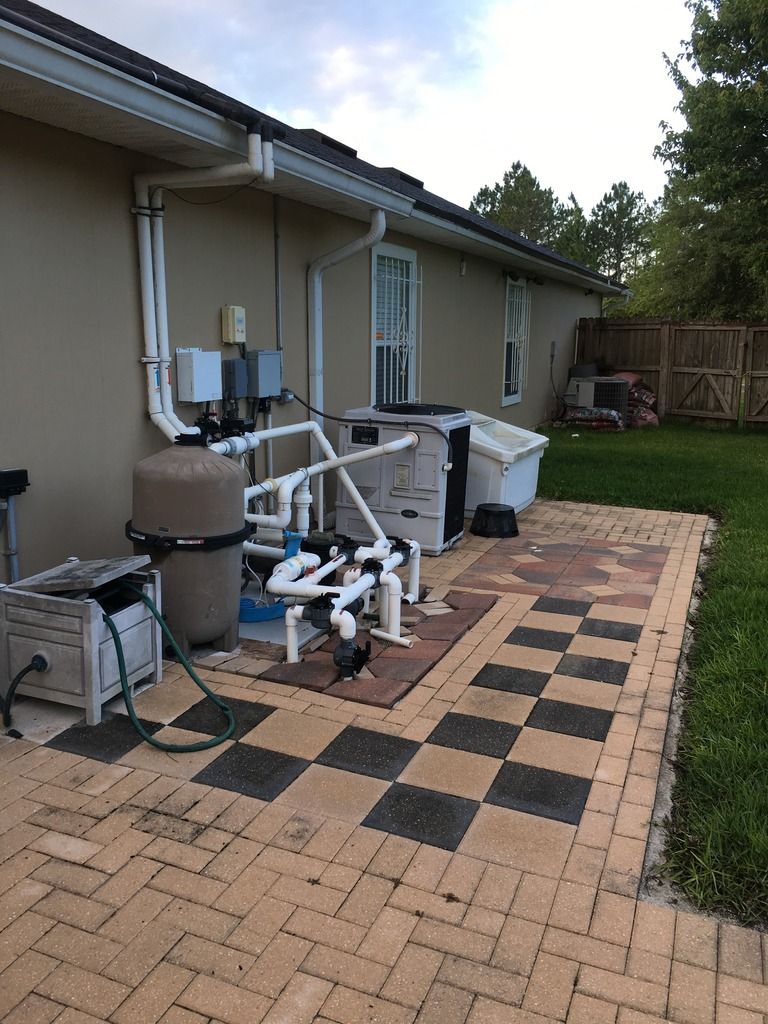
Here is our Pool Equipment Pad it measures 9 ft x 19 ft. I wanted it to be 10 ft x 25 ft which would be the perfect size but we ran out of pavers, so we will just have to live with this")
Look at this thread What Does Your Pool Equipment Pad Look Like?
Hope this helps
Here is our Pool Equipment Pad it measures 9 ft x 19 ft. I wanted it to be 10 ft x 25 ft which would be the perfect size but we ran out of pavers, so we will just have to live with this


- Jun 7, 2017
- 9,177
- Pool Size
- 29000
- Surface
- Plaster
- Chlorine
- Salt Water Generator
- SWG Type
- Jandy Aquapure 1400
These are great. I've seen some super nice layouts and some not so great. I was just hoping to get a thread for everyone to see how builds have optimized their plumbing layout. I think Jandy makes a very nice new setup that streamlines their equipment. The Jandy Versa plumb system really makes them shine.


- Oct 18, 2009
- 3,637
- Pool Size
- 6000
- Surface
- Plaster
- Chlorine
- Salt Water Generator
- SWG Type
- Hayward Aqua Rite (T-15)
See the equipment pad on the pavers gave me a great idea.. I'm pretty sure my PB spec'd a plastic pad, but our previous owners left a 1/2+ pallet of pavers on our property. Definitely would prefer a aggregate pad or a poured pad over plastic, maybe i'll take that project on..
Jeffnhelen
Silver Supporter
- Jun 2, 2018
- 107
- Pool Size
- 12690
- Surface
- Plaster
- Chlorine
- Salt Water Generator
- SWG Type
- Pentair Intellichlor IC-40
I would love to see equipment pads also. I'm hoping more for clean lines and less hamster pipe maze After watching some videos on how to do a DE backwash on the Pentairs, I see that some thought could be put into the filter placement in regards to the drain line...not fond of it just dumping water all over the pad.
After watching some videos on how to do a DE backwash on the Pentairs, I see that some thought could be put into the filter placement in regards to the drain line...not fond of it just dumping water all over the pad.If the pad is big enough then things will be easier for you. It is good to think about it now! We will help you. If you work with your plumber and electrician you can have the pad you will not have to play twister to use!


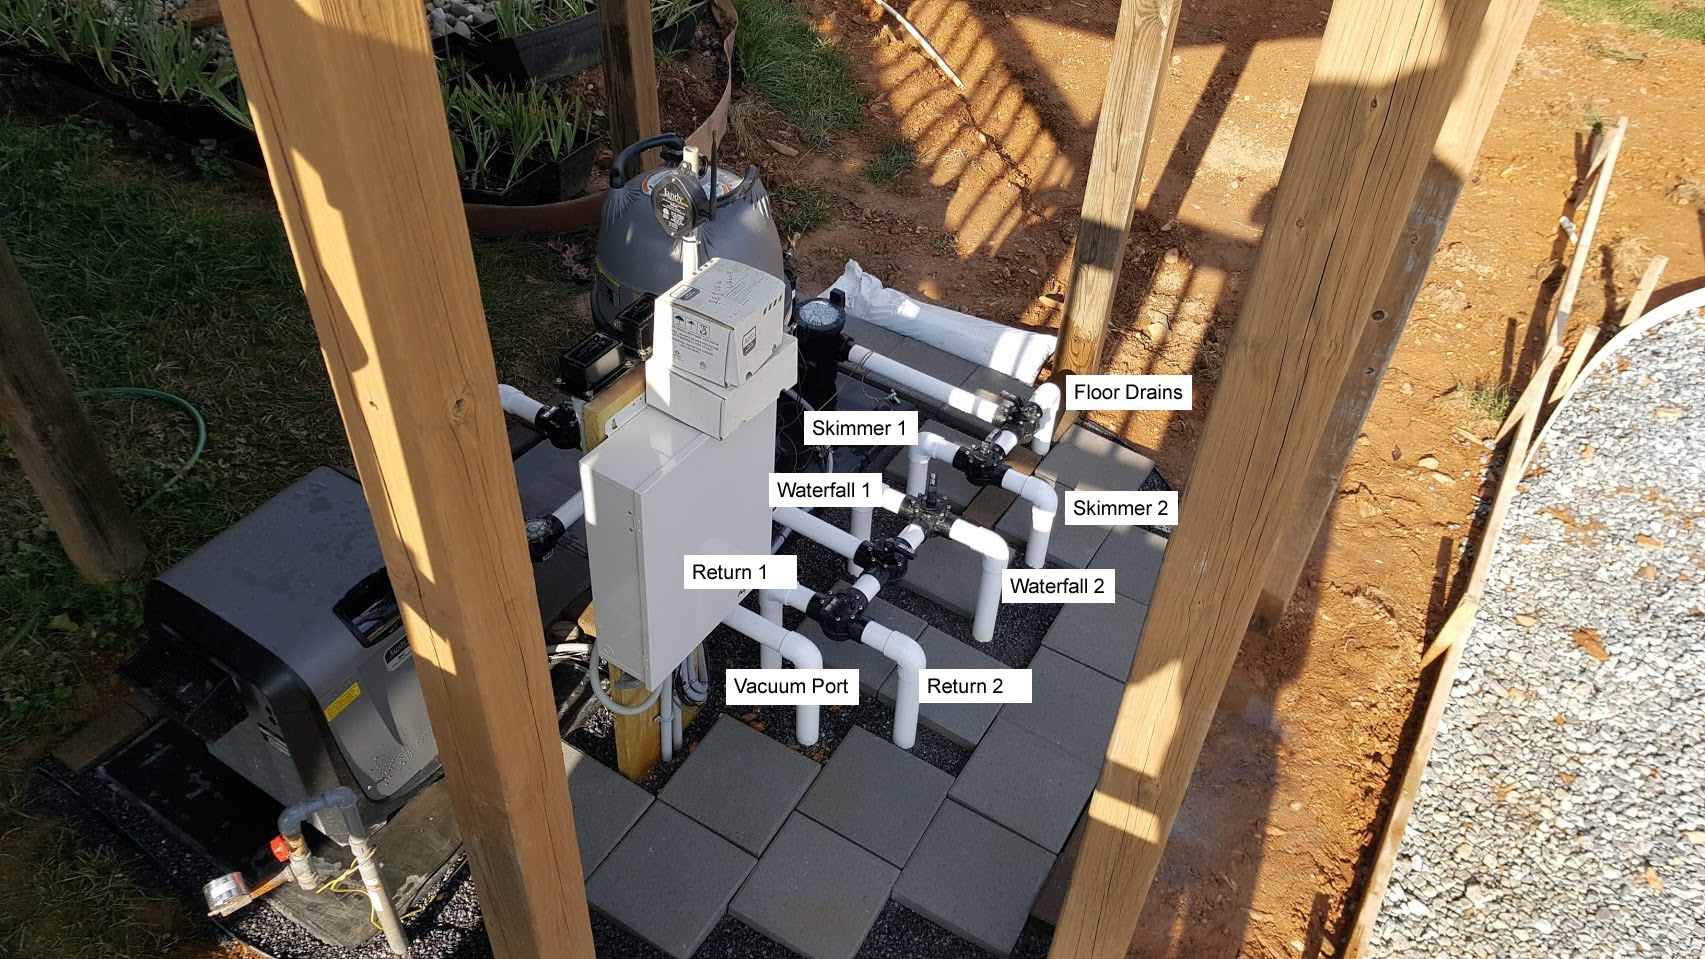
The constraints for my pad were such that I had to fit a lot of stuff in a 38" wide pad, but I had plenty of length. The total length is 19', with about 12' being used for equipment and the other 7' being used for storage and my robot. I used AutoCAD to lay everything out (along with the entire pool plan, including plumbing, electrical, drainage, etc.). I went through about 10 different iterations before settling on the final plan for the pad. And even then, I've modified the layout a bit since completion. I must say it was absolutely nerve wracking making sure the 7 risers were in the exact right location, which was necessary since they were going in concrete (no chance for error). I must have measured and adjusted them another 10 times before pouring concrete, but in the end, it worked out thankfully!
Obviously, I strongly second Kim's suggestion to use unions on all risers at grade as well as equipment (which usually come with them anyway) and also anywhere else it may make sense (i.e. ozone injection manifold in my case). It makes it so much easier to work on your equipment and make modifications later if needed. One tip for these is to invest in a rubber strap wrench for tightening/loosening. Also make sure the o-rings and faces of the unions are clean and in good shape before tightening.
I will also mention one thing (in hind sight) I wish I would have included is a pump-down line off the discharge of the waterfall pump that ran out to the ditch behind my house to allow for a quick(er) way to lower the pool level during a real heavy downpour/hurricane. Currently, I hook up a hose to the hose bib on top and run it to the back ditch. It's a 10 minute effort and I only have to do it once every 4-6 months, but being about to throw a valve instead would have been much nicer and worth it.
Killer95Stang
Well-known member


Jeffnhelen
Silver Supporter
- Jun 2, 2018
- 107
- Pool Size
- 12690
- Surface
- Plaster
- Chlorine
- Salt Water Generator
- SWG Type
- Pentair Intellichlor IC-40
Do you drain your cartridge filter housing with the bottom drain plug or do you just separate the two halves? Most I see have the plumbing coming out of the side, thusly the drain is on the side. I would think that would make it more difficult to access for draining the filter during cleanings?
tstex
Silver Supporter
Terr,
Here are some guidelines that you can use on any equipment pad:
* Place all of the equipment that needs to be stationary on a cement/solid base. All of the piping to and from should be just off the pad, w the least amt of permanent pieces around pipes. ie, loose gravel or river rock, pavers, etc
* Make sure you have a 1 ft distance minimum from whatever covers the PVC outward. This prevents lawnmowers and anything else that could damage your PVC from hitting it.
* Make sure you have full and clear access to your pool panel/electrical boxes and automation panel. Many times in cities, it is code that the path to these types of panels are 100% equipment/PVC/other free
* Have plenty of room to access your filter and pumps for maintenance
* Put all heaters on the end away from all equipment, with fumes/discharge downstream of the majority of your prevailing winds.
* Have an option for overhead lights to view your pad when needing access in night for any emergencies
* Have option for strategically placing where fencing is possible on all sides of equipment, also where you can lock gates -the least amt of people you have accessing your equipment means less chance for errors or other...this is an educational process for curious people too
I'll try to post some pics later...good luck
Do you drain your cartridge filter housing with the bottom drain plug or do you just separate the two halves? Most I see have the plumbing coming out of the side, thusly the drain is on the side. I would think that would make it more difficult to access for draining the filter during cleanings?
When I had a cartridge filter I would close the valves coming from the pool (remember I have an above ground pool) then open the valve used to drain my pool equipment on the pad. I found I could NOT even open the two halves with it full of water. The suction was too much.
Kim
- Jun 22, 2010
- 14
The constraints for my pad were such that I had to fit a lot of stuff in a 38" wide pad, but I had plenty of length. The total length is 19', with about 12' being used for equipment and the other 7' being used for storage and my robot. I used AutoCAD to lay everything out (along with the entire pool plan, including plumbing, electrical, drainage, etc.). I went through about 10 different iterations before settling on the final plan for the pad. And even then, I've modified the layout a bit since completion. I must say it was absolutely nerve wracking making sure the 7 risers were in the exact right location, which was necessary since they were going in concrete (no chance for error). I must have measured and adjusted them another 10 times before pouring concrete, but in the end, it worked out thankfully!
Obviously, I strongly second Kim's suggestion to use unions on all risers at grade as well as equipment (which usually come with them anyway) and also anywhere else it may make sense (i.e. ozone injection manifold in my case). It makes it so much easier to work on your equipment and make modifications later if needed. One tip for these is to invest in a rubber strap wrench for tightening/loosening. Also make sure the o-rings and faces of the unions are clean and in good shape before tightening.
I will also mention one thing (in hind sight) I wish I would have included is a pump-down line off the discharge of the waterfall pump that ran out to the ditch behind my house to allow for a quick(er) way to lower the pool level during a real heavy downpour/hurricane. Currently, I hook up a hose to the hose bib on top and run it to the back ditch. It's a 10 minute effort and I only have to do it once every 4-6 months, but being about to throw a valve instead would have been much nicer and worth it.
This is one of the more organized and nicest looking setups. Nice job! My OCD side likes the all black look, especially the all black coordinated chlorine bucket. I had a hard time figuring that out at first as it looked like it was attached to the PVC pipes at first.
DeanP66
0

Just finished mine. Still need to do landscaping.


Is your equipment on a composite/plastic pad? That's what I'm supposed to be getting, but I'm weighing prepping the area with pavers.
Is your equipment on a composite/plastic pad? That's what I'm supposed to be getting, but I'm weighing prepping the area with pavers.
Yes it all sits on the composite pad, but the pad sits on concrete pavers.
Thread Status
Hello , This thread has been inactive for over 60 days. New postings here are unlikely to be seen or responded to by other members. For better visibility, consider Starting A New Thread.
Similar threads
- Replies
- 17
- Views
- 659
- Replies
- 7
- Views
- 101
- Replies
- 4
- Views
- 184
- Replies
- 7
- Views
- 90