Waxahachie, TX Owner Build - A race to beat the baby!

Rarely ever do we regret trusting our guts. It's going to be beautiful!!


Do you have pictures or a build thread? I'm looking at Prism Matrix too.


Sent from my iPhone using Tapatalk

Hi! Yep, I have a thread with pics for my renovation. I'm getting plastered on Monday, and I'll be sure to post a bunch.

I have a link to my renovation thread in my signature (I think...if it worked...).
 
Last edited:
FWIW, we used to keep valves like that clean by putting a scrap of landscape fabric (weed mat) in the hole under the valve and up the sides of the access. If you also stuff a couple of bunched up scraps down each side, and a big bunched up bit on top, nothing much gets in (other than a few little critters). Handy for seldom used valves.
 
Thanks for all the support and reassurance about our original color choice. I have loved all the photos on TFP of completed pools with The Tropics Blue and that's how we picked the finish and the trim tiles in the first place. Plus, we've always been concerned about the pool getting too hot, so steering away from the darker finishes makes sense. I'm sure we will be very happy with our choice. It's just an amazing blessing that we will have a pool at all, so I am very grateful.

FWIW, we used to keep valves like that clean by putting a scrap of landscape fabric (weed mat) in the hole under the valve and up the sides of the access. If you also stuff a couple of bunched up scraps down each side, and a big bunched up bit on top, nothing much gets in (other than a few little critters). Handy for seldom used valves.

Thanks for this tip. I think sounds like the easiest solution for now. We have some landscaping fabric on hand, so it shouldn't be too hard.
 
Thanks for all the support and reassurance about our original color choice. I have loved all the photos on TFP of completed pools with The Tropics Blue and that's how we picked the finish and the trim tiles in the first place. Plus, we've always been concerned about the pool getting too hot, so steering away from the darker finishes makes sense. I'm sure we will be very happy with our choice. It's just an amazing blessing that we will have a pool at all, so I am very grateful.

I feel the same way! Just grateful and blessed.
 
It seems like it's been a long time since I've had any updates, but the guys surprised us this Saturday and were here working on the trim tile when we got home. I had been told it would be Monday or Tuesday, so it was good they were ahead of schedule, but I was a bit miffed that they came unannounced and jumped the fence whose gates we had locked for the kids.

I think I'm officially entering the stage of this pool build where I just need to be done. It is not safe for anyone for a hormonal 7+ month pregnant lady to be dealing with all these final details! ;-) That being said, let me know what you think about these pictures:

In this one I'm not too thrilled about the corners:


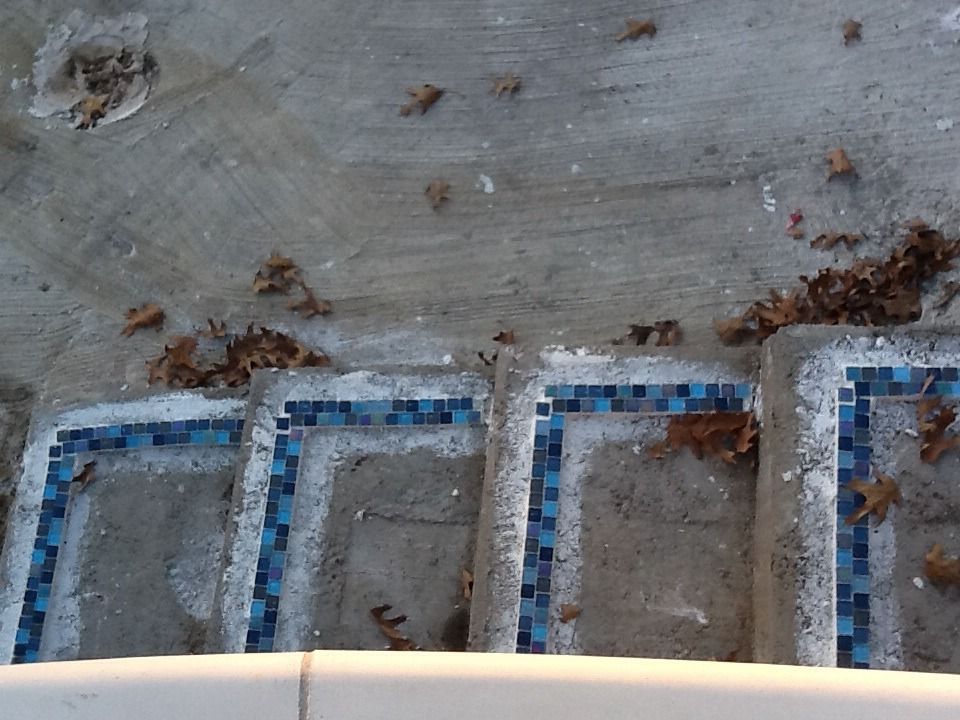
This one shows how they just butted up straight sections of tile as they long as they could at slight angles to make the curves of the ledge.


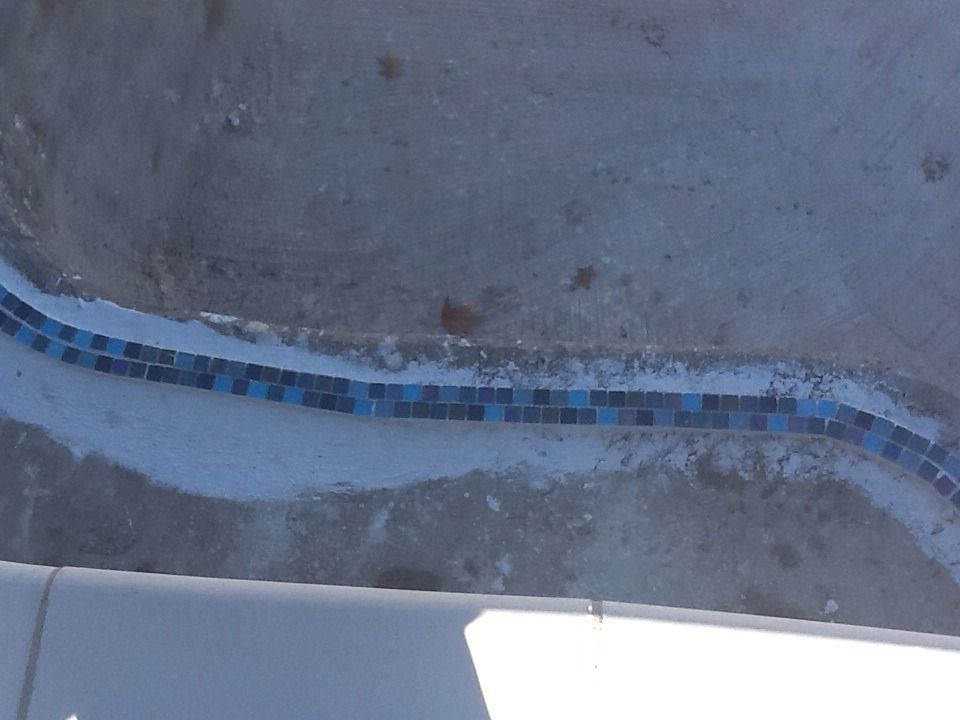
This one actually isn't too bad, and shows the tile in the sun.


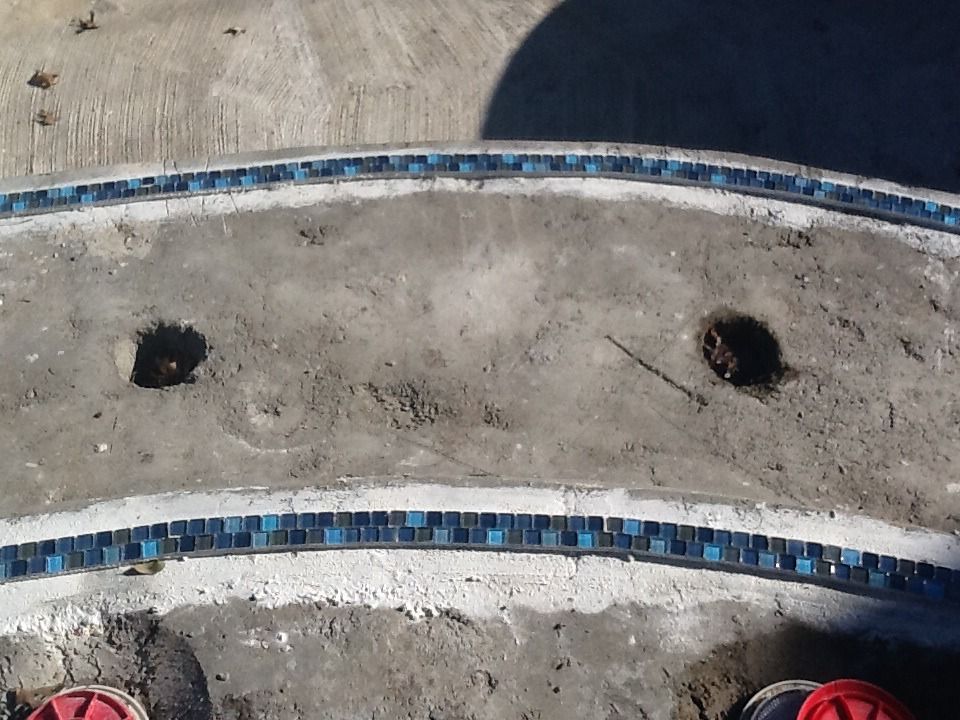
Maybe I won't notice these things as much when the pebble is in, but right now they bother me. But, it could just be me, I admit!

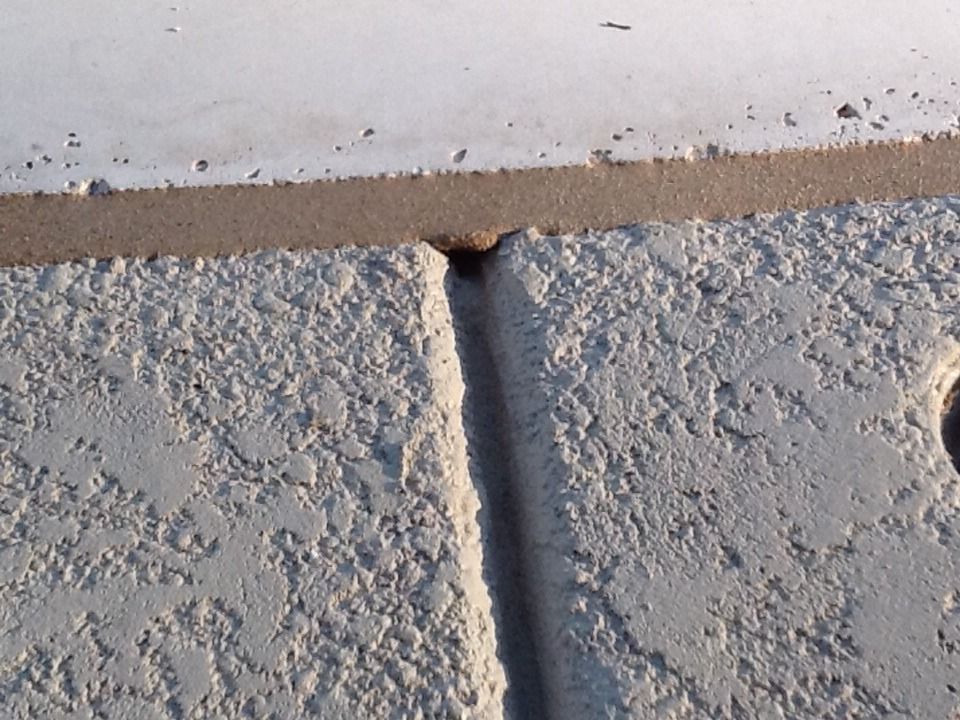
Finally, here is an issue I have with my mastic where the tooled joints in the concrete meet up with it. Since the sand was thick under the mastic and the concrete joint was filled with sand to prevent the mastic from running into it, once the extra sand was removed when the mastic was dry, the mastic in that groove doesn't actually seal to any concrete. The sand under the mastic is exposed and water can get under the mastic at most of the joints. I've emailed the guy to find out if they can seal the mastic at these spots. I was concerned at the time with the amount of sand the worker was using in the joint between the coping and concrete, but he told me it was normal. Now I have issues. Hopefully they can fix them.
 
I agree, yours look much nicer. I think the problem is that mine are square corner steps, so they tried to square the trim tile too. It just doesn't work as well. If I had anticipated this problem, I would have curved the corners of the steps like yours. Yours look fantastic!
 
The problem is how they ran the tile from opposite ends to meet at the corner instead of butting up at the corner and placing them out to the ends. I personally could not live with that. I would have to have them redo it.

Love be the look of the tile on the steps in general. Beautiful tile!
On the long runs of straight tile following the curve, I think if they are redoing the steps, that should also be redone to more closely follow the curve by using smaller straight runs. I'm sorry, Jamie. Hormonal or not, I'd be upset they jumped my fence, came unannounced and then did a sloppy job on top of it all.

- - - Updated - - -

I agree, yours look much nicer. I think the problem is that mine are square corner steps, so they tried to square the trim tile too. It just doesn't work as well. If I had anticipated this problem, I would have curved the corners of the steps like yours. Yours look fantastic!

It should have been EASIER to place your tiles since they are square and your steps are a square edge. I have laid LOTS of tile. A radius with square tiles is more difficult.
 
Thank you, Denise! I'm in the middle of composing an email to the head guy, with these pictures, expressing my dissatisfaction and desire to have it fixed. I think part of the problem with how the guy did this was that he just cut double strips of tiles from the sheet and laid them down. Each row is offset from the one above, so you just can't butt up the corners at a right angle and have it meet properly. You have to indidually place the tiles to compensate for the inner and outer lengths, while trying to keep the grout lines someone consistent. Of course it takes more work, but it would look 100% better! This is why it peeves me that I wasn't able to be here while they were working since they came unannounced. I could have said something while they were working and avoided this in the first place.
 
I went back and looked more carefully and definately see the offset now. All they had to do was individual strips. Really not much more labor intensive at all.
So far all the mess ups on your build have turned around or worked in your favor in the end. I believe this will be no different! Blessings!
 

Enjoying this content?

Support TFP with a donation.

Give Support
Yes, terrible at the corners and not good on that one arching stretch. Definite redo if it were me...and I'm one to let some things go under the "it was hand done" / "natural variation" concepts.
 
Thank you, everyone, for the support and encouragement. It is especially helpful to diagnose exactly what went wrong and how they can fix it, and I included that in my email. I'm confident it can be fixed, and glad to get the reassurance here that I am not out of line for wanting it fixed. I'll keep you posted on what happens.
 
Oh, ADULT WORD NO! That is not even close to acceptable! They should have started at the corner and worked their way to the end. Your kids could have done a better job! Lazy, lazy, lazy! Do the REALLY want to put their name on that???????

The sanded grout.........Not good but I bet it is an easy fix. (at least I hope so)...........

Oh and jumping the fence?????? Hummmm they did not want you to see them and their work?????? Well guess what guys I will see you and be watching as you lay down each piece......."I want this piece here, this piece here" LOL Guess I need to fly to TX to stand over them....anyone care to pay for a plane ticket!! LOL

Kim
 
...Guess I need to fly to TX to stand over them...

That's we call "The Nuclear Option" at TFP :D

That is, the sub gets ONE more chance to make it right, then Ms Kim gets called in...and believe me, you don't want to mess with the kindergarten teacher... :hammer:


Sent from my iPhone using Tapatalk,16k gal SWG pool (All Pentair), QuadDE100 Filter, Taylor K-2006
 
Oh, ADULT WORD NO! That is not even close to acceptable! They should have started at the corner and worked their way to the end. Your kids could have done a better job! Lazy, lazy, lazy! Do the REALLY want to put their name on that???????

The sanded grout.........Not good but I bet it is an easy fix. (at least I hope so)...........

Oh and jumping the fence?????? Hummmm they did not want you to see them and their work?????? Well guess what guys I will see you and be watching as you lay down each piece......."I want this piece here, this piece here" LOL Guess I need to fly to TX to stand over them....anyone care to pay for a plane ticket!! LOL

Kim

Haha Kim! I'm with Matt... Hopefully they will see the error of their ways before it comes to flying you in for backup... But if they need any persuading, I'm sure even the hint of your coming will get them to think twice!

The sanded grout... That is just adhering the tile to the gunite. Is that a problem too? It is not filling the spaces between the tiles; those will be filled with plaster cream. Should they have used something different?
 
Opps I meant the mastic not filling in that hole/gap area. That does need to be "fixed so water does not get in there are cause problems. Even a small glob of color silicone would work BUT not look as good as using the real stuff.

I fix computers at school just by walking into the room............"But I tried that before!!!!!" "Well I was not in the room" LOL

I can clear a Kindergarten playground (75+ kids) in under one minute! LOL When I blow my whistle a certain way all of the classes have been taught to RUN to their teacher. We do it as a fun "race" so as not not worry them BUT it is something they need to know how to do for just in case.

Just think what I could do with some tile setters that caused our Jamie to worry! hehe Although I have a good idea she can handle them just fine on her own! She has her SUPER MOM skills!

Let us know what they say.

Kim
 
There aren't many great ways to make a 90 joint with staggared 1" tiles. They should just cut the sheet so the tiles line up evenly with each other. Just in case they need direction attached is a picture you can provide!!!

tile_zps7bzb0ypa.jpg
 

Enjoying this content?

Support TFP with a donation.

Give Support
Thread Status
Hello , This thread has been inactive for over 60 days. New postings here are unlikely to be seen or responded to by other members. For better visibility, consider Starting A New Thread.