New Build in Central Texas - Patio Build Out

Hi, how did the Sundek turn out? I love watching your build!

Hey ... It turned out great! They finished late last night, so I wasn't able to get any pictures yet. Then early this morning we had a big storm roll through, and it's still raining now. I'll grab some pictures later today and post an update :)

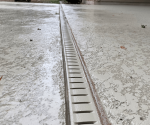
The crew was really good. They floated out our existing covered patio slab to correct the pitch (there was a low spot across the whole thing, about 18" back from the edge, where the deck-o-drain is now located), then shot the texture across the old and new, and left. They came back 6-7 hours later and applied the color, calking, mastic, and sand.

I was impressed to see the attention to detail they applied toward the seal between the coping and the deck. They pushed the foam down (to act as a backer rod), then poured sand into the joint, then poured mastic in, then added more sand on top of the mastic. It produced a very nice looking joint seal :)
 
  • Like
Reactions: TexasRain
So right after I was done typing that, the rain stopped LOL

Here is the result of the Sundek

From under the covered porch:

1598104132849.png


From the other side ... We really like how the tile, coping, and Sundek color (Sanfriscan Tan) work with each other ... Being colorblind myself, I wasn't much help to pick the colors out, so all credit goes to the wife on this one :)

1598104181761.png


Here a closeup of the joints. I really like how these came out

1598104334135.png

1598104369191.png

I am surprised they didn't put mastic on the left side of the deck drain though. They only did the sand/mastic treatment on the right side for some reason. I'll have to ask my construction manager about it
 
That looks sweet! :goodjob: Here in SA we're FINALLY getting some much needed wet stuff from above. Good day to sit back and look at the pool get a fresh top-off. Your project is looking fantastic.

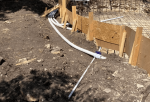
Thanks man! We really like it too :) ... and ya, the rain is definitely needed up here too. I just hope it doesn't delay our plaster, especially with the gulf storms approaching early next week.

1598105304709.png
 
Just a small overflow project today, as I prepare for the fill dirt to be spread around the pool.

Here's the overflow setup ... just a 3/4" pipe running out

1598209935422.png


So I dug an 18" hole where the 3/4" pipe ends, and filled it with left over crushed stone from the deck forms

1598209969570.png


Then I took a scrap 2" PVC pipe, with cap attached .... notched the bottom and drilled several holes through it

1598210029088.png


I then inserted the 2" cap over the 3/4" pipe, just barely past the notch, and glued the two together

1598210093353.png


Then just covered it all with more crushed stone

1598210144975.png


I may grab a scrap piece of flagstone and place it on top, so the fill dirt can't penetrate into the crushed stone ... not sure if that's necessary though.

You can also see my small project from yesterday in the back, where I stacked two irrigation boxes on top of each other, to provide access to the waterfall cutoff. Not sure why there's a cutoff here, as the equipment pad has a Jandy valve for it ... but since it's there, I wanted to maintain access.

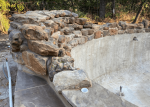
My plan is to backfill right up to the bottom of the moss rock, and grade it out into the yard. So these two small projects get me ready for that.


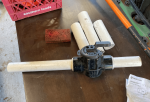
On a side note ... I happened to look in the trash box, as a Pentair manual caught my eye, and decided to grab some of the scrap 2" PVC to throw in the shed for future small projects. And when I grabbed what looked like a long piece of 2" PVC, it had a 2-way Jandy valve attached LOL ... nothing wrong with it, works perfectly. I wonder if the plumbers placed it in the wrong location, and just decided to cut it out and toss it?? Either way, I grabbed it and will keep it on hand in case it's needed ....

1598210506034.png
 

Enjoying this content?

Support TFP with a donation.

Give Support
That deck drain doesn’t look removable. Those tend to get clogged up and stop functioning and look pretty terrible after a while. If you could still swap in a removable one..may not be worth it at this point though.
 
That deck drain doesn’t look removable. Those tend to get clogged up and stop functioning and look pretty terrible after a while. If you could still swap in a removable one..may not be worth it at this point though.

Ya, good point ... I wish I had thought of that when we were spec'ing out the drain :( it's a Deck-O-Drain, and doesn't look like the top is removable. Fortunately, one side is open on the side of the decking, and on the other side, I connected a 1.25" PVC to the output, and extended it (in a straight line) all the way to the ends of the forms, before the deck was poured. So while the top can't be removed to clean it, I'll be able to fish a plumbing snake straight through the entire thing really easily, since there's no bends in the drain plumbing. I hope that'll make it fairly simple to maintain.

So yesterday, the mason finished his work ... final touches on flagstone mortar, finished the trim tile installation, and capped the waterfall off. Plaster was originally scheduled for today, but has been pushed to tomorrow. So the mason crew is coming back today to clean the site and spread the back-fill dirt. I'm hoping the hurricanes in the gulf don't bring rain to us and delay the plaster again.

Final flagstone mortar in place, and water fall capped

1598361354440.png


Have I said how much I like these Pour-a-Lids? LOL ... this one has a piece of flagstone in it (instead of the SunDek), to blend better with the stones. I guess I should have gone with gray on this one though, instead of the beige.

1598361447947.png


Umbrella sleeve in the coping at the deep end bench, and a closer look at the waterfall profile.

1598361524721.png


Just a view from the other side, showing the trim tile on the deep end bench

1598361610696.png


I'm really glad we opted for the trim tile. We feel it was a $275 well spent! :)

1598361691533.png


I think it'll look great up against the Pebblesheen Blue Surf ...

1598361764881.png
 
  • Like
Reactions: Lineman7
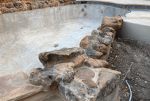
We're going to use moss rock on top of this footer, to create a planter where the 4 trees are. On this side of the footer, will be flagstone decking, stretching from the deck step (on the right) all the way to the deep end pool step (on the left).
On the off chance that you didn't already know, make sure you do not change the ground level near those trees (i.e., don't fill in the planter or raise the ground level outside of the planter). If you were to make a planter and fill it with dirt the trees will die in a couple of years.
 
On the off chance that you didn't already know, make sure you do not change the ground level near those trees (i.e., don't fill in the planter or raise the ground level outside of the planter). If you were to make a planter and fill it with dirt the trees will die in a couple of years.

Thanks, we had originally planned to build a wall on that footer, to the same height as the decking, and fill in the area with soil ... but I spoke to an arborist a couple of weeks back and he warned me not to do that. He sent me a bunch of great info on caring for trees and how important it is for the root flare to be exposed. So we changed our plan to have that footer just contain a single row of moss rock, and we will just use some mulch in the planter. We actually went in and dug out the area, to expose the root flares of those 4 trees after reading what he sent :)

We're going to have the mason face the exposed gunite, and the side of the deck, with thin moss rock ... to create a perimeter of moss rock around the tree planter area.

1598367674603.png

1598367810766.png
WOW, that looks great! You should be swimming in no time now!

Thanks! We certainly hope so! :D
 
Were the channel drains provided by the builder or did you but them yourself? We are wanting to go with something like that for where the pool deck meets my outdoor kitchen and the builder has round drains in the drawing, so we will be changing it. I can order the drains myself, just wondering if you found a good deal on them because Home Depot seems really high.
 
Were the channel drains provided by the builder or did you but them yourself? We are wanting to go with something like that for where the pool deck meets my outdoor kitchen and the builder has round drains in the drawing, so we will be changing it. I can order the drains myself, just wondering if you found a good deal on them because Home Depot seems really high.

The builder provided the drain. The round ones are the more modern approach, and as I understand them, they connect to drainage pipes under the deck. I haven't done a ton of research between the two approaches though, so am not sure of the pluses/minuses of using the two different types .. other than the round ones look nicer and allow for different grading of the decking with out having to have it broken up by long stretches of plastic drains.

So you could have several low spots with the round drains, spread around the decking, instead of the entire deck pitched towards one side with a long continuous drain at the edge.
 
I have the piping already in place for our french drains, so that may be why he wanted to go with that. I just want to make sure that I am not going to start getting water into my outdoor kitchen after the pool goes in
 

Enjoying this content?

Support TFP with a donation.

Give Support
Thread Status
Hello , This thread has been inactive for over 60 days. New postings here are unlikely to be seen or responded to by other members. For better visibility, consider Starting A New Thread.