• Locked
Our DIY Cheap Leaf Dome to keep leaves out of our pool

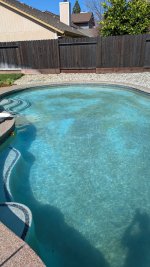
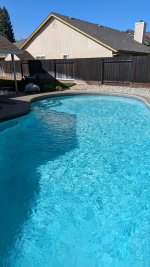
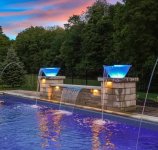
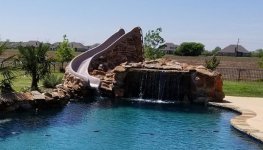
Thought I would share our creation with anyone interested in keeping the fall leaves out of your pool without having to spend tons of money to do so. My husband made me this homemade Leaf Dome to prevent leaves from entering the pool. It may not be for everyone but it certainly has prevented all leaves, acorns and debris from entering our pool. As you can see in the pictures, the leaves fall onto the netting and eventually blow away in the breeze. This has saved me a tremendous amount of time and labor everyday. Its so nice to walk out and take a pool water sample and not spend 25 minutes dipping out leaves.
full

full

full

full

full
  • Like
Reactions: BLPT

Expert in Cordless Pool Cleaning Robots – Tips & Recommendations for Purchase and Discussion

Hello everyone, I am a professional in the swimming pool robot industry.

I have purchased robots from various brands for research, including Aiper S1 Pro, Wybot s2, Beatbot Aquasense PRO, as well as some smaller brands like Lydsto, Smorobot, Poolpure Aquaguard, etc.

In my daily work, I spend a significant amount of time comparing the data parameters of different robots and dismantling models from brands like Beatbot, Wybot, Aiper, and others. I also test robots from different brands in various pool environments, including green pools, to observe how they perform in real-world conditions.

Additionally, I’ve compiled some knowledge and insights about using swimming pool robots, which I’d like to share today.

If you are considering purchasing a swimming pool robot, feel free to tell me about your pool’s characteristics, such as:

  • Outdoor or indoor pool
  • Does the pool have stairs or steps?
  • Is there a lot of fine sand,dirt to clean or big leaves to clean?
Based on your specific situation, I can offer recommendations to help you choose the most suitable pool robot.

Looking forward to discussing and sharing experiences with everyone!

Installing a longer power cord in a CircuPool RJ+

The CircuPool RJ+ units come with a power cord that is about 48 inches long. In my case that was far too short, and installing a junction box was far more complicated than changing out the power cord. This post is just for reference in case somebody else faces a similar situation.

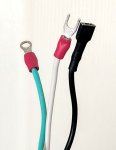
The stock power cord is a fairly standard 18-3 (18 gauge, 3 conductor) cord.

2020-07-18 10_12_26-Photos.jpg

16-3 will fit, but you'll have to fight it through the strain relief at the bottom of the RJ+ control module. I used 16-3 just to add a little extra safety margin for the longer length. I used 10 feet of this cord, available by the foot from Home Depot, to replace it.

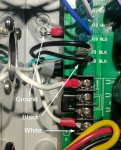
Each conductor is terminated with a different connector inside the RJ+ unit: black is terminated with a 1/4-inch female disconnect, white is terminated with a spade terminal, and ground is terminated with a ring terminal.

2020-07-18 10_08_30.jpg

All connectors are standard crimp connectors in 22-16 size. I used these:
The cord enters the RJ60+ through a strain relief connector at the bottom of the controller and runs under the PCB and is wired like as seen below.

2020-07-18 09_49_20-Photos.jpg

With a little creativity I was able to feed in the replacement cord without removing the PCB, being careful not to just shove it any old way and potentially damage any solder joints on the PCB. After crimping the connectors and feeding it through the strain relief, wiring it up was a relatively simple process.

Hope that helps somebody who faces a similar situation as I did.

Final plumbing outcome

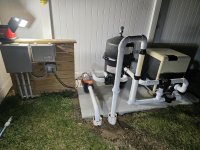
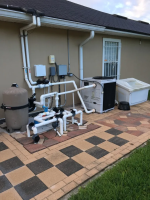
I figured Id share my setup since I did it with a lot of info obtained here.

The pump and filter were originally done with some cheap hoses. I built the pad, added the heater and buried everything. This is my first time working with PVC piping and pool equipment so being an amateur is an understatement. The equipment is probably the cheapest of the cheap because that's what it came with. Over time, ill do the filter and pump but this years priority was the heater. Next year ill add the chlorinator.

Considerations were:
1 make it functionality correct
2 keep it as simple as possible
3 make it easy to disassemble for winter storage
4 keep room to work on equipment
5 have a bypass on the heater
6 have the recommended 3ft between heater and future chlorinator
7 have future chlorinator installed vertically per manufacturer recommendation

The only thing I would really have done differently is extend the pad another 6" out to keep all of the plumbing over the pad. I may to a paver border to address that.

Attachments

  • 20250325_220241.jpg
    20250325_220241.jpg
    699.9 KB · Views: 45
  • 20250325_220341.jpg
    20250325_220341.jpg
    699 KB · Views: 42
  • Love
  • Like
Reactions: Newdude and pjt

Lowering Total Alkalinity (TA) Quickly with the Acid Aeration Method

Thought I'd make a post that might help others. We've had quite a few members this year with high TA, and I've been typing the same information over and over. I'm going to post this so I can link it to help others.

High TA can cause rapid pH rise. High TA is typically caused by high TA fill water. For some, this results in very frequent muriatic acid additions.
You may also want to lower your TA rapidly, for example when you have a new fill in a plaster pool, and you want to lower CSI rapidly.

This is intended for those individuals that have high TA fill water (>~150), and face daily or multiple acid additions weekly. If your fill water is above this threshold, this might be the solution for you. If your fill water is below 150, just manage your pH, keep it in the 7s, and your TA will come down, and pH rise will slow as TA nears 80.

First, check out the TFP guide: Lower Total Alkalinity

Now that you have the basics...
  1. Muriatic acid lowers TA and pH.
  2. Aeration raises pH, without raising TA.
Here are the tricks with aeration:
  1. If you want pH to rise quickly, so you can lower pH and TA again, you need to make LOTS of VERY TINY bubbles. LOTS of VERY TINY bubbles accelerates CO2 outgassing and pH rise. Waterfalls and other forms of aeration raise pH also, so if you have them, use them too.
  2. CO2 outgasses the fastest when pH is between 7.0 and 7.4 (Well, 7.0 and 7.2 is fastest, then 7.2-7.4 is next...you get the idea). So lower your pH to 7.0, when it gets to 7.4, lower pH again.

When I first came to TFP, my TA was high due to prior owner's keeping it artificially high due to the use of acidic pucks (my fill water is 80). I found this aerator, that the member made and put on their return:

I didn't want to have to swap this contraption with the return eye. I also wanted something that was portable and easy to use. I got a sump pump, and built the same thing with 1.25" PVC. A 1/3hp pump is plenty big and typically come with a 1.25" male thread. Get a 1.25 Female to 1.5" SLP adapter and thread it on the sump. Build up from there. The elbows are 45s, and the end caps are drilled with 5 to 8, 1/4" holes. The sump pump is put in a bucket to protect the pool surface. I tied a rope to the handle of the bucket, and used electrical tape to attach the power cord of the sump pump to the rope, so the rope has all the tension when lowering and raising the bucket. Make sure you purchase a sump pump with a 12' cord, to keep the connection to any extension cords away from the pool. As always, when there is an electrical device in the pool, PLUGGED IN OR NOT, NO SWIMMING! Sump pumps can fail. We do NOT want electrocutions!!! NO EXCEPTIONS!

In my 30K gallon pool, I can reliably lower TA by 10, in 12 hours. If your pool is 10K, you should be able to reduce TA by 10 in 4 hours (get the connection?) I cycle between 7.0 and 7.4, because CO2 outgasses at the highest rate with this pH. As the guide indicates, 7.6 is fine for the top end too, but as @Newdude says, "I'm 'extra'." When your TA approaches 80, STOP forcing pH down so low. With a TA between 60-80, pH should be fairly stable around 7.8 to 8.0, which is just fine!

LCD Screen on Pentair IntelliFlo gone bad

Hello. I have had my Pentair intelliflo VS pump just over 2 years now. I just noticed that the LCD screen is blank. it does not show anything. the pump works fine however. I cannot program anything since i can't see what it is i am programming. i check out to replace the screen i need to replace the entire drive kit which costs $600.00. is there any way to fix just the screen or maybe use some external device to program it? thanks
  • Like
Reactions: Jo3216

Anyone tried uploading / downloading firmware from Hayward GLX-PCB-MAIN boards?

Hi everyone, I'm new around here, but so far I can't find an update to my Hayward automation system (Aqua Logic AQL, software Revision 3.00). What software version do you have?

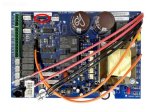
Inside, I have one of these "main" boards.
197632.jpg
Here I noticed that J12 header (located at the top left corner, between wireless antenna connector J9 and Local Display connector J7) is a standard pic programming port (matching pickit well)
PICkit3.jpg
(Pin 1 is located to the left, closer to J9 connector, pin 6 is unused and thus J12 has only 5 pins)

For this, you will need a microchip PicKit 3 programmer, available via official channel for $48 here (link), or Amazon has some knock-offs for less here (link), though why so many of them are more than $48 are beyond me.

The microchip in question is PIC18F2620 and you can interact with it by:
  1. Install a free mplab-x from here (link)
  2. Lunch mplab ipe (integrated programming environment), which was installed along with mplab-x
    • ipe.PNG
  3. Go to Settings > Advanced mode (password is "microchip")
  4. Under Family, choose "Advanced 8-bit (pic18)"
  5. Under Device, choose "PIC18F2620"
    • pic18f.PNG
  6. Make sure that target board is not powered (main circuit breaker is OFF or the board is removed from the assembly), working with a live board is risky
  7. Back in IPE, Under Power tab, Choose 5.0 as VDD voltage and "Power Target Circuit from Tool" option (If you don't see power tab, check step #3)
    • power.jpg
  8. Go back to Operate tab and click Connect
    • The first time you are connecting, IPE may update your programming tool, it is normal
  9. First thing you NEED to do upon successful connection is click "Read" which is located in the middle of all the options
    • read.jpg
  10. After a successful read command, identified by a blue, time-stamped "Read Complete" status line on the output:
  11. Choose File > Export > Hex and SAVE the file somewhere safe (you may want to even email yourself this file). It will allow you to restore everything if all else has failed.


What I hope to accomplish is to get this community involved and allow us to finally update our automation controllers without the need to purchase the whole new Main Board, as seem to be the going suggestion to date (link).

By sharing the firmware, we can use the similar method described above to load more up-to-date firmware (via File > Import > Hex) and Program command instead of Read.

As I've mentioned, I only have access to version 3.0 of the firmware, which I will be happy to share as soon as I had a chance to cooperate with other members on data within EEPROM. I don't want someone loading out of date firmware and potentially breaking their controllers.

Anyone out there with a pickit handy and a more up to date firmware on their device?

Cheers,

eePool
  • Like
Reactions: mgdtm

  • Locked
Just finished my Hotspot energy FPH install, An honest review AMA

Wanted to give my thoughts for anyone looking at one of these.

First, shoutout to Devon at Hotspot who answered my many questions. Im sure he is sick of me by now.

My take:

This system while it gives you free heat for the pool is incredibly complicated for a heat pump installation. You basically have to incorporate a second reversing valve into an already pretty busy condenser system. I have a 4 ton HVAC unit which moves 48K BTU plus whatever losses. lets call it 50K BTU to be easy. I am in the south so I get plenty of run time on the AC system.

My biggest take away before purchasing this unit is ask hotspot if anyone has purchased a unit in your area and see if they know the installer who did it. I called 10 HVAC places and nobody would do the work. Everyone told me to call a pool company, or outright declined after looking at the manual. I ended up doing all of the mechanical and system wiring (24VAC and sensors) work myself because I could not find a tech or company in the area who wanted to take the time. I think I realistically spent about 4 days on and off working on plumbing, fitting, brazing, wiring, etc. They claim it's a 4 hour job, maybe if you don't have a heat pump system it's 4 hours and you are highly competent working with HVAC. I have a degree in Mechanical engineering and love working on stuff, but even with that It took a lot of time to complete. this is not considering all the YouTube university time invested to learn the trade. (side note, I will no longer be paying my HVAC company 300 dollars every 6 months to maintenance my system after I learned what they are actually responsible for).

For a heat pump:​
The system involves the addition of a specialized reversing valve for the liquid cooled condenser, a special dual check valve solenoid thing (for heat pump operation), control box, an additional transformer, and an additional liquid receiver to match the capacity of the air and liquid cooling condensers (for me that was an additional 15 feet of 7/8" tubing).​
For a standard AC, I think it is just adding the reversing valve, transformer, and additional tubing (easy with the extra space in the condenser).​

To quote my wife "if nobody has it or will do the work, is it actually as good of an idea as it sounds"

She's a smart woman, smarter than me. Was she right? time will tell. The system is working and does indeed heat the pool. It's a trickle compared to a 400K gas unit, but it's enough to maintain heat and it doesn't cost you any additional money once operational. The system was 2300 dollars from Hotspot and I have probably another ~750 dollars in parts and materials (R410A isn't cheap), so call it about 3K all in.

If I had to give it a rating...

1 out of 10 for install difficulty
This thing sucked to install on a heat pump system, plus I have a reversing valve energized to cool which borked their programming, which they are still working on fixing the bug (message me if you want to know more about that)​
5 out of 10 for documentation
I found some inaccuracies in their manual, overall decent but with the complexity this is not a DIY job​
9 out of 10 for operation
It does what it says, it heats the pool with your AC and cools your house very efficiently. I found a workaround for the issue above, but I had to resolve it myself using my working knowledge of electrical systems (only an issue with heat pumps that power the reversing valve for cooling mode, which of course I have)​
Overall Score
6 out of 10
  • The system is complex
  • Absolutely voids your warranty on a HVAC system (convince me im wrong)
  • If I sell the house gods speed to anyone who takes over because I doubt anyone will be willing to troubleshoot or maintenance this thing
  • Has a fatal flaw in my system arrangement without fix applied
  • Trickle heats the pool
  • Makes your AC near silent because it stops the fan while in pool heating
  • It's cool as heck to show people. Anyone technical will love it
  • Controller interface is super simple. Set the temp you want the pool to be and it does the rest.
In retrospect, liquid cooled condensers is more common in commercial HVAC applications. You might have luck contacting a commercial outfit vs residential. A tech that might want some extra work on the side may be interested in taking this job. I would have paid up for the labor, if I was able to find it.

Would I do it again... I don't know, probably because I'm a geek and love cool stuff while saving energy.

Hi from Texas

Hi all - wife and I are owners of a brand new 11,282 gallon fiberglass chlorine pool. We have a Hayward 120k heat pump but the rest of the equipment is standard stuff. I have been religious about taking a sample weekly to Leslie’s and adjusting with baking soda and dry acid. I just downloaded the Pool Math app but am struggling to understand how to load my recent test results. From what I have read so far - it seems I need to get a good test kit, likely the Taylor k-2006 kit. As a new owner (only been in the ground a few months) my biggest concerns are;

1) Consistently elevated levels of pH. Not terrible, but normally 7.9-8.1.
2) Calcium Hardness - Leslie’s tells me every trip that I do not need to be concerned about this since we have a fiberglass pool. I did a bit of my own research and found that extremely high hardness can be damaging to heat pumps. Ours is consistently low - usually around 135. Do I need to address this?
3) cya - having only owned the pool a few months I don’t have the experience yet to fully grasp how our trichlor tablets (from Doheneys) affect the cya. So far, it has been on a slow and steady rise from 0 to where it is at now, 44.
4) Chlorine is still a bit confusing to me. I am currently sitting at 1.19. I have seen some mention of liquid chlorine. Is there some reason I should be using that instead of the tablets in my auto chlorinator?

With all of this said the pool looks very gorgeous and clear. I have a Hayward QC robot which I use nearly every other day. I also have a Betta solar powered robotic skimmer that runs 24/7. I very much enjoy managing the chemicals and maintenance of my pool by myself. It is very calming for me to be outside manually scrubbing the safety ledge or sides of the pool. I have a very flexible schedule and want the pool to be in the best shape possible. I am willing to put in as much time as needed for daily tasks. I look forward to learning more from this site.

Take care!

aqua plus not working

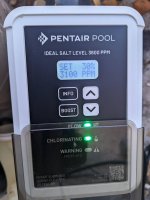
I had a hayward aqua plus automation installed last year. Every morning the panel says check system low salt by dinnertime the salt level reads 3100 ppm I had the t15 cell cleaned and checked at the pool store all is good I checked my salt level with the Taylor kit and it's 3200.hayward tech support was not much help. Any help would be appreciated thanks
  • Like
Reactions: FallingSky

First look at Pentair's new IntelliChlor Plus30

So after having some issues with Pentair and my old SWG unit I was given the opportunity to give the new Pentair PLUS SWG platform a shot and ended up with an IC30+, which is part of their new model line of salt water generators.

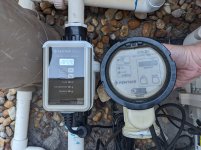
PXL_20250312_212231493-EDIT.jpg

PXL_20250312_212327600.jpg

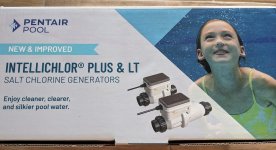
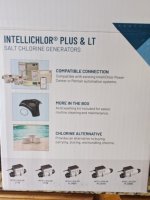
I'm not cool enough to do an unboxing video so instead here is a picture of the box telling you what's inside.

PXL_20250312_222446663.jpg

Check out that new acid washing kit. Pretty fancy.

I was told this is a drop in replacement for their current line of SGWs and I would be able to take the old one out and put the new one in. I'm coming off an IC30 so moving to an IC30+ was marketed as being easy to do if you already have the plumbing. The box also comes with adapters if you have their other sized units.

PXL_20250312_222401742.jpg

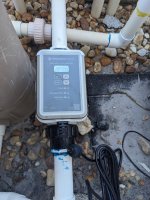
Turns out they were right. It's the same size as what I had and installation consisted of unscrewing the unions, taking the old one out, putting the new one in, and screwing on the unions. I don't have much more to say about the install other than that because that's all that it took. I did give the o-rings a coating of lube since I was in there and might as well since it was exposed. I have a Power Center and this one plugged right in, same size 4 pin connection on the end of the cord so nothing much to say there either. Overall the install was as promised, a direct drop in.

I don't have a before picture so lets just pretend I posted that, instead here is a side by side after.

PXL_20250312_230322304.jpg

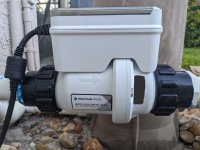
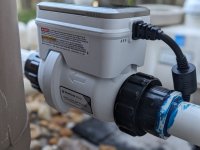
A couple more action shots from the side

PXL_20250312_225510335-EDIT.jpg

PXL_20250312_225536634.PORTRAIT.jpg

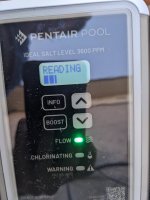
Powering on the unit it now shows a boot up reading sequence.

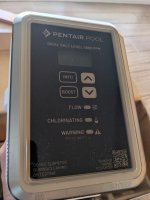
PXL_20250312_220722223.jpg

To access the buttons there is now a slide down cover instead of a pop up lid

PXL_20250312_220831028.jpg

The unit now will also tell you the current reading on the salt levels, which apparently my pool could use another bag, and if you scroll through the info also can get an easy reading on temperatures, run time, voltages, other warning states, model, and software versions. I think the old one did this as well but I never pushed whatever buttons were required to do so. Now there is a big INFO button right there so you can't not just go push it and see what happens.

PXL_20250312_222210745.jpg

It's only been a half hour since I got it set up so these are just initial impressions. Tomorrow will be the first full day run so I'll be going out there to see how it's working. Ran it tonight for a little while, made sure there were no obvious leaks, set it the chlorination up, watched it blink a few times, and set it back to my daily schedule. I do not have any automation but I do have a Pentair pump hooked into the Power Center with it's communication wire so the two units talk to each other enough that the SWG only runs when the pump is running.

Hopefully this first look is interesting to folks as I am not sure who has these style units yet.

New to me pool - Progress pics

Hi all! I just purchased a home and have started my journey of educating myself on poolchem.

I am really grateful for the guides here, especially the Ascorbic Acid guide.... See pics below for how it transformed my 30year old pool that had iron slowly deposit over the years.

PXL_20250301_193814071.jpg

Before pic, I noticed the equipment (nozzles) had an orange tint to them, and thought it was odd. I did a little test to see if it was Iron, by using an Emergen-C packet, and pouring it on one of the steps.

PXL_20250301_193626356.jpg


You can clearly see the blue circle where the vitamin C cleared the iron off. Mind you, this pools water is perfect, and I had scrubbed it with a brush. We were told by the sellers to get it replastered as "it was due".
Seeing the vitamin C work, I sourced and ordered about 4lhs of it, and using the Ascorbic Acid guide on TFP, I started the process.

PXL_20250301_194625056.jpgPXL_20250301_205325829.jpg

At this point, I ran out of Ascorbic acid, and had to order another 4lbs. The iron stains were old and severe. I applied the second bucket, and make the decision to drain and refill after 24hrs instead of using a sequestering agent to contain the iron in solution. So, I drained the pool, rinsed it out, and patched a thin spot or two on the plaster, then refilled it.


When I got home from work yesterday, the pool was nearly filled, and honestly I was completely shocked by how severe the iron contamination was.

PXL_20250304_220638136.jpg

After the water filled, I balanced ph, added CYA, Chlorine, and salt. Today I'll check those balances, then add some calcium and call it good.


My next project will be replacing the 35 year old equipment, so I'll be taking some pics and making a thread for advice on that. Fortunately the previous owners kept all the documents for the pool, blueprints, dimensions, pipe sizes etc so that really takes out much of the guessing work. I'm aiming to either replace my SWC or upgrade the whole unit, replace the pump with a variable speed one, and am looking at if I need to replace the filter assembly or not.

Thanks for the guides here!

Thank you TFP.

I’ve had a pool in my homes since I was 10, I’m now 48.
All have been SWG based with either a cartridge or sand filter (Apparently DE is banned in Australia due to carcinogens).
The amount of time, and countless thousands I’ve spent at the various pool shops, I can only imagine. Every second or third weekend I’d say.

The things I’ve been told by pool store clerks blows my mind. My favourite being that the build up on the SWG cell is calcium and it collects there because the plates vibrate with the flow of water.

This site has allowed me to firstly understand the water chemistry and the chemical interactions that are poorly explained, if at all, by shops or paid pool men.
Secondly, it’s allowed me to tame the green beast that has been bane of my existence since its install 5 years ago.

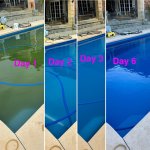
I’ve just successfully completed my first SLAM and can honestly say I don’t think I’ve ever seen a pool as clear, or as nice to be in as mine is now, after just a week.
I thought it was done at day 5 but it kept getting clearer and clearer.

I am shunning the pool shops ‘service’ from now, using them only to purchase acid, salt and liquid chlorine and will ignore everything they say.

They don’t know.
Not like you knew, and I now do.

I will be spruiking this site and it’s methodology to anyone with a pool that’ll listen from now on.

Thanks to everyone involved, honestly.
Every question I’ve had, I found the answers here already asked and addressed by someone else.
I’m hoping for a truely trouble free pool from here on out.
To say thanks I’ve chucked in some pics of the Kangaroos that hang out in my backyard every day next to the pool.

Cheers
Adam
49D0C49D-8F5E-48EF-BBDC-FC09DF3BC653.jpegIMG_6547.jpegIMG_6536.jpegIMG_6544.jpeg

Warming profile for a closed versus open pool (and when should I open)?

I've been wondering about the insulation and warming properties of my pool cover. The combination of the solid safety cover and the underlying air-gap clearly provides significant insulation in the winter: on occasional checks, my water seems to have maintained a temp of around 40-44F despite our cold winter in Southeast Pennsylvania, well above the average air temperatures. I have only a rough understanding of the thermal physics of how this is happening (direct insulation versus protection from radiative loss to space, for example). But I suspect that a big part may be the blanket of warm air that stays trapped below the cover -- which itself is heated by sunlight on the dark plastic. But however it works, there is always a balmy jungle-like atmosphere of steam beneath whenever I peek below the cover.

As Spring starts to near, the lengthening and decreasing obliquity of daylight will naturally increase this effect: the air below the cover will get ever hotter, and that (along with rising soil temperatures) will start to pre-warm my pool. But at some point, such heating must be slower than having a springtime sun shine directly on an open pool. That is, at some point, the pool cover would impede the warming of my pool.

So I am curious: how might we estimate when this switch occurs? That is, when does the warming profile of an open pool exceed that of a closed/covered pool? Or simply, "if I want my pool to warm up as fast as possible for the season, when should I open it?". Maybe the answer is as simple as -- when the average air temperature exceeds that of the water. But I bet that there are many on these forums who have a deeper understanding of these mysteries -- please share your wisdom!

I've usually opened at the end of March. I don't have an active pool heater. But since last year, I've been using a solar cover to speed up the warming (or rather, to slow its cooling at night). Since my pool is surrounded by a significant number of trees, it's a bit of a race against time until the leaves fill out by the end of April. So when should I start that race?

"CYA later" -- and welcome back to all to another pool season!

Sampo
  • Like
Reactions: Newdude

We Have a Winner! TFP Pool of the Month (March 2025) - Unique Pool Features

So easy! Post ONE pic related to the theme title above. I bet you have a good pic saved somewhere. See the contest rules below to enter.

PLEASE READ OUR (UPDATED) RULES BEFORE POSTING! ----> TFP Pool of the Month Contest Rules

Pool 2.jpg

Photo contests are announced on the first of each month. There is a 5-day submission phase. Days 6 & 7 are for voting. Winner announced on day 8. Winner eligible for a $50 prize.
Pool 1.jpg


It's easy! What have you got to lose? You might receive a $50 discount code from TFtestkits.net.

Click Here to See Some Previous TFP Monthly Contest Winners

  • Love
Reactions: Stephs2125

Brand New Pool - So many questions

Good morning.

We installed an 18x36 vinyl liner saltwater pool in the fall. It was complete at Thanksgiving, and our pool builder did not put the salt in it and told us to wait until spring. The temperatures here in GA are 65-70 for the foreseeable future, and I want to get my pool ready for swimming. I have been manually vacuuming the dirt from the bottom for a couple of weekends. I have not ordered a better vacuum, yet, but I do plan to do so in the next week or so.

My question is: WHAT THE HECK DO I DO FIRST?

I THINK I should add the salt, and I know I need to get the pH down - my little floating thermometer/pH reader says it's at 9.0.

MY thoughts were, I was going to add salt tomorrow and then add muriatic acid - and then go have it tested. I do not have a test kit, YET - will also be ordering that this weekend, but is this what I should do first, or do you have better ideas?

WHO LET ME JUST HAVE A POOL? I feel like I did the first day I went home with my first born!

FREE 3 Blue Ultratemp boards - and a Solartouch

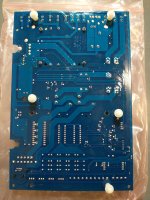
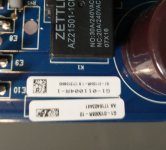
I got 3 Ultratemp boards in an auction lot with a Solartouch (and various Intellicenter bits that I kept)... some miscreant spray painted them blue, probably in attempt to prevent somebody else from reusing them. I've soaked other painted boards in IPA and cleaned them up, but it was tedious.

Anyway, free to anybody that wants to tinker with them... the "inside" of the 3 Ultratemp boards are paint-free, as was the solartouch (I tossed the cover). I did power up the solartouch but of course there was nothing connected to it.

pm me if interested

IMG_20250207_124644452.jpg IMG_20250207_124653130.jpg IMG_20250207_125249885.jpg IMG_20250207_125558070.jpg IMG_20250207_125609329.jpg

  • Locked
Automating my spillway - Seeking Advice

Hi All,

So I've had my pool for a number of years now and one thing that has always annoyed me a little is that the spillway from my attached spa into the pool is always active when in POOL mode. I'd like to only run the spillway a fraction of the time when the pool is running (say an 1-2 hours at most) to reduce aeration as well as cutdown on the amount of evaporite and efflorescence that forms on my spa tile face. The spillway runs like this because the return flow to the POOL side is split between the three returns in the pool and the one return in the spa using a manually actuated 3-way valve. There's nothing wrong with the plumbing, per se, it's just in order to have all the water return to the pool (and shut off the spillway), I have to walk back to the equipment pad and turn the valve. Here's a picture of the return side of my plumbing -

IMG_3149_zpszlymwsiv.jpg


The actuator in the picture controls the water return for SPA Mode versus POOL mode from my EasyTouch 8 automation panel. The manual 3-way valve is what splits the POOL return water between the pool returns (3) and the spa return (1). Depending on my filter loading and pump speed, I typically split the valve 60/40 (spa/pool side) in terms of return water. That produces this picture of my spillway -

IMG_3150_zpskou6k9qq.jpg


That's more than enough return flow to the spa and, because there is just one return in the spa (separate from the spa jets), I don't want to push all the water through that single return as I have a 3HP Intelliflo and filter pressure will go really high from the head resistance. So, here's my thinking -

1. Buy another CVA-24 actuator and install it on the 3-way splitter valve;
2. Adjust the internal stops on the CVA-24 so that switch position #1 is 100% POOL return and switch position #2 is 75/25 split return to actuate spill way. I've not opened one of these actuators before but I assume there are mechanical limit switches for the position stops.
3. Attach the CVA-24 to VALVE-B inside my EasyTouch panel (I think VALVE-A is often held in reserve for Solar heating which is something that might happen in the future).
4. Program one of the EasyTouch AUX relays to actuate Spillway and then use a schedule to set the times of the day when the spillway relay will go off. Again, a little fuzzy on this part if I should program it as a AUX relay or a Feature circuit??

Any thoughts or critiques on the above would be most welcome.

Thanks,
Matt
  • Like
Reactions: ranger052

Another StaRite SR400NA heater Question

My control board is probably toast, thanks to mice. Repaired the partially chewed wire under the control membrane pad, prior to which I was getting LED lighting. Now, no LED lite. Fuses are good, I tried jumping the fireman’s switch, and the pad seems fine . . . and voltage readings from the transformer are good. I believe power is getting to the board as my proximity tester lights up when I place it next to the control boards two 24VAC pins that I assume would rule out lack of pwr to the board (admittedly not optimal diagnostics).

I’ve read in prior posts that LEDs won’t lite if there is no call for power, so am wondering if that is my issue (likely not). My question is: when pressing the Heater button on my PS2 panel, the pool/spa valve doesn’t turn like it normally would, so could this possibly indicate there is no call for heat coming from the PS2 (wiring from which to the heater have continuity and are secure in the PS2 bar). FWIW, the red diagnostic lite doesn’t lite/flash. Zilch.

The board is 14+ years old, and it was working 6 months ago, so am not holding out much hope. How I found the problem in the first place is that the heater fired up by itself one morning along with the LED flickering. BTW, I did mice proof it years ago (wire mesh at every possible opening), evidently, there was a breach or spot I missed.

To mice in my area: challenge accepted. Full and possible lethal counter measures will be implemented. Appropriation of defense funding submitted to wife and awaiting final approval.

Got CYA?

Spring is typically the time of year I need to top off my CYA. So I set up a repeating calendar event to ping me on the first Monday of February, each year, to check my supply of CYA. I happen to be low this time, so I just ordered some more. I set the date a bit early, just in case CYA happens to be in low supply. Gives me a month or so to find some.

How's your supply?

Speaking of reoccurring calendar events, I just recently added a weekly one to test my pool light's GFCI outlet. I don't regularly test any GFCI component, and never have. Just one of those things I don't think about (but should, of course). Following the advice I gave someone else here, if there's one to test regularly, it's the pool GFCI! So now I do. It's now part of my regular weekly maintenance, and considering the outlet is inches from the other things I use during my maintenance routine, and the fact that it takes seconds to test, it's pretty silly not to...

  • Locked
GONE - FREE Hayward Aqualogic boards - unknown condition

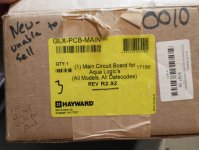
I found a box with two Hayward Aqualogic boards (GLX-PCB-MAIN)... Free to anybody who can use them. I don't know if they work, but if they don't I'm sure they can be repaired... I'm never going to use them, they're taking up space, and I don't want to throw them away. Somebody here must be into Aqualogics!

I suspect one board may actually be good, and the other has the traditional burn mark at the relay. But I don't have a way to test them (my pool is Pentair). Anyway, check out the photos, pm me with any questions

This is the suspected good board (it doesn't appear to have ever been installed):
IMG_20250207_210344563.jpg IMG_20250207_210402116.jpg IMG_20250207_210433750.jpg

This is the suspected bad board (note the typical relay burn mark):
IMG_20250207_210555264.jpg IMG_20250207_210609146.jpg IMG_20250207_210615006.jpg

These are, well, self explanatory ;)
IMG_20250207_210724576.jpg IMG_20250207_210734274.jpg

Attachments

  • IMG_20250207_210627487.jpg
    IMG_20250207_210627487.jpg
    466.7 KB · Views: 26

18 x 33 x 56" Semi-In Ground NJ

Good morning all,

SOUTHERN NJ HERE. So I made the mistake of asking on a facebook group and that was more useless than anything, few good points made but other than that is was the people bashing what I want to do 😂. Have been trying to get quotes for about a month for a May installation and due to their communication and info they provide I really liked Niagra Pools & Spas in Turnersville NJ. The 3 others I contacted either never contacted me back or once they did it was like phone tag to get ahold of them, not something I want to deal with during installation! Pricing from Niagra Pool quote are below, this is semi-in ground approximately 30":

$17,595 -Pool Package: 18' x 33' x 56" Sharkline* Oasis EAW (Extruded Aluminum Wall) pool, Liner, 1.5hp 120v variable speed pump and filter, skimmer, 1 return port, cover, and maintenance/cleaning kit
$1,100 - Salt chlorinator system w/salt
$350 - Wedding cake steps
$200 - Wall foam
$2,900 - Pool Installation
$22,145 total cost for pool

Site Work Quote:
$5,000 - Excavation and haul away of soil in addition to about 5 yards of fill that's in a pile at our property
$3,200 - Backfill of pool using excavated soil: will need to be moved by hand due to space

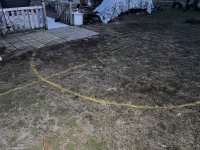
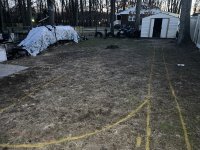
If your anything like me you probably pooped a bit with the number for site work lol, I will say the guy that came out to do a site visit told me moving dirt is expensive, not bashing them at all, labor aint cheap!! Highly considering doing the site work myself, pool guy told me that isn't an issue with any of their warranties and they will come out to check when it's done for right depth/level. Sunbelt was under $3,000 for a week rental of a 6 ton mini excavator, 7 yard Dump, and ground protection pads. Don't think it will take a week but quote that for worst case. Before anyone says it, I know this is around 70 yards of dirt, I know it's not easy, and as far as operating I dug the foundation for my garage (blue building in the pic) and my patio by myself for the most part, I'm no expert but I can operate, I own a transit and a laser level; just getting all that out there because that's what everyone wanted to comment on with the FB post 😒🤣.

With all that being said I had a few questions for additions and backfill

Backfill:
-Sandy soil in my area, good to just use what comes out of the hole for backfill?
-Recommend any barrier between ground and exterior of pool wall?
-Was also thinking pavers OR rubber mulch/river rock/pebbles 24" around pool

Install/Pool Add-ons:
-Liner pad OR Perlite on top of sand base
-Foam coving
-Additional return jet on far wall
-Hard pipe everything (would be extra for pool Co. to do
-Larger pump? is a 1.5hp good enough for 20k gallons?

Anything else that you would recommend is appreciated. We aren't rich but we aren't broke either lol. We are kind of doing the bare minimum for it this year with a small exterior entry step with plans of doing landscaping, lighting, larger entry deck/step, and some other add-ons NEXT season or winter since we are already doing some fencing this year during the install.

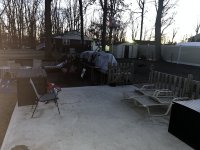
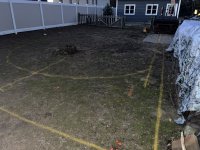
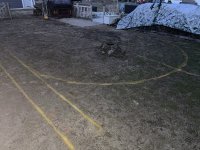
Thank you for the help! Site pics are attached, sorry they are crappy I was outside last night marking. And the yard will be spotless prior to starting! Have to move the wood pile and purge some 💩 out to the curb! Also, setbacks are correct and marked on the pics along with the pool shape. Out township requires 6' from p[roperty lines and we have a 20' utility easement on the far side.

Site 1.jpgSite 2.jpgSite 3.jpgSite 4.jpgSite 6.jpgSite 7.jpg
  • Like
Reactions: Mdragger88

Cost Comparison of Chlorine Sources

I originally posted the following on another forum (I thought I also posted it here, but can't find it).

First, I describe exactly what is in chlorinating liquid and bleach as far as we know. I'll use 12.5% chlorinating liquid as an example. This link is a typical example. Though they do not list the amount of salt (since it doesn't affect the lifetime of the chlorine), this is known to be equivalent to the amount of chlorine due to the way it is manufactured (by adding chlorine gas to a solution of lye). The "12.5%" chlorinating liquid is a "trade %" which is not the same as a weight percentage and is why that's a different number below. Also, the salt and chlorine are in the same quantity in terms of numbers of molecules, but these molecules differ in weight which is why the percentages of chlorine and salt differ below.
Code:
Chlorine (sodium hypochlorite)   11.3%  (10.8% weight % of available chlorine; 12.5% volume % of available chlorine aka Trade %)
Lye (sodium hydroxide)            0.3%
Salt (sodium chloride)            8.9%
Water                            79.5%

Now let's look at the ingredients in Lithium Hypochlorite where I'll use this link for Burn Out 35 as an example.
Code:
Chlorine (lithium hypochlorite)   29%  (35.2% weight % available chlorine)
Sodium Sulfate                    13%
Postassium Sulfate                 6%
Lithium Chloride                   4%
Lithium Carbonate                  2%
Lithium Chlorate                   2%
Lithium Hydroxide                  1%
Salt (sodium chloride)            36%
Water                              7%
It looks like Lithium Hypochlorite contains extra salt, just like Sodium Hypochlorite. It's about the same in molecular quantity as chlorine so I suspect that the process of making Lithium Hypochlorite is injecting chlorine gas into a solution of lithium hydroxide (a form of lye, but with lithium instead of sodium). This is also not as pure as chlorinating liquid or bleach with regard to chlorates and especially sulfate. Cal-Hypo also contains salt, but not as much as other sources. Only Trichlor and Dichlor don't add salt, though they add CYA.

The following table compares the weight % of available chlorine for different sources of chlorine in ascending order. I also show what else it adds for every 1 ppm Free Chlorine (FC):
Code:
5.25% Bleach               5.0%  (also adds 0.82 ppm extra salt)
6.0% Bleach                5.7%  (also adds 0.82 ppm extra salt)
10.0% Chlorinating Liquid  8.8%  (also adds 0.82 ppm extra salt)
12.5% Chlorinating Liquid 10.8%  (also adds 0.82 ppm extra salt)
Lithium Hypochlorite      35.2%  (also adds 0.76 ppm extra salt)
48% Cal-Hypo              47.6%  (also adds 0.71 ppm Calcium Hardness, CH; 0.2 ppm extra salt?)
Dichlor Dihydrate         55.4%  (also adds 0.91 ppm Cyanruic Acid, CYA)
Dichlor Anhydrous         64.5%  (also adds 0.91 ppm Cyanruic Acid, CYA)
65% Cal-Hypo              64.5%  (also adds 0.71 ppm Calcium Hardness, CH; 0.2 ppm extra salt)
73% Cal-Hypo              72.4%  (also adds 0.71 ppm Calcium Hardness, CH; 0.2 ppm extra salt)
Trichlor Tabs/Pucks       91.5%  (also adds 0.61 ppm Cyanuric Acid, CYA)
Chlorine Gas             100.0%
So just looking at the above list one might think that chlorine gas is best, but it's very toxic and dangerous to handle. So what about Trichlor? It contains more chlorine by weight than almost any other product. But it also adds to CYA which does not make it bad, but it does mean you are adding two chemicals to your pool every time you use it and therefore need to account for that. Same with Cal-Hypo that also adds calcium. Chlorinating liquid adds extra salt (I say "extra" because all of the above chlorine will get converted to chloride ion, salt, when it gets used), but salt does not affect chlorine effectiveness (as CYA does) nor calcium carbonate saturation (as Cal-Hypo does). These are not bad -- they are just chemical mixtures and are not just chlorine.

So if one were choosing chlorine solely on the basis of carrying the least amount of weight home from the pool store, then Trichlor would be the choice (chlorine gas would have to be in heavy tanks). But people do not normally choose solely by weight. I looked at the Leslie's website to get prices for as many of the items as I could and this is what I found (prices are before tax):

Trichlor Tabs/Pucks (3") ... $77 for 35 pounds so that's $2.20 per pound
Dichlor ... $104 for 40 pounds so that's $2.60 per pound
73% Cal-Hypo ... $120 for 50 pounds so that's $2.40 per pound
Lithium Hypochlorite ... $150 for 25 pounds so that's $6.00 per pound (from this website since Leslie's doesn't carry it online as far as I could tell)
12.5% Chlorinating Liquid ... $3.25 for 1 gallon from my local pool store (9.7 pounds -- product is 16% denser than water) so that's $0.336 per pound
6% Bleach ... $1 for 96 ounces (6.75 pounds -- product is 8% denser than water and 96/128th of a gallon) so that's $0.15 per pound

Notice how much less expensive per pound the chlorinating liquid is. It had better be because most of it is water, so what we really need to see is the cost per available chlorine and that is as follows:

Trichlor Tabs/Pucks ......... $2.20 / 0.915 = $2.40 but $3.83 when accounting for Washing Soda to adjust pH
Dichlor .......................... $2.60 / 0.554 = $4.70 but $5.73 when accounting for Washing Soda to adjust pH
73% Cal-Hypo ................ $2.40 / 0.724 = $3.31
Lithium Hypochlorite ....... $6.00 / 0.352 = $17.05
12.5% Chlorinating Liquid . $0.336 / 0.108 = $3.11
6% Bleach ..................... $0.15 / 0.057 = $2.63

The above cost is for the same amount of chlorine. That is, if you added the amount of each product required to raise the FC by the same amount for all of these products, then the above shows the relative costs (the costs above are for amounts that would raise the FC by 12 ppm in 10,000 gallons). You can see that Trichlor and bleach are roughly comparable in cost [EDIT] if ignoring chemicals needed to adjust for pH [END-EDIT] while Cal-Hypo and chlorinating liquid is a little more expensive and Dichlor a little more expensive than that. Lithium is much, much more expensive. Not just twice as much (as with Dichlor vs. Trichlor), but over 7 times as expensive as Trichlor.

[EDIT]
The above did not account for the fact that the various chlorine sources vary in their effects on pH and need compensating chemicals. If we assume that a pool is balanced at an appropriate TA so that there is minimal rise in pH over time from the outgassing of carbon dioxide, then the hypochlorite sources of chlorine are essentially pH neutral and the above prices are correct as is. On the other hand, Trichlor and Dichlor need to be adjusted. For the above amounts to raise the FC by 12 ppm in 10,000 gallons, Trichlor needs 57.8 ounces weight of Borax to compensate for the acidity of chlorine addition and consumption. Dichlor (dihydrate) needs 41.3 ounces weight of Borax. Amazon.com sells 20 Mule Team Borax for $4 for one box (76 ounces), so this adds $3.04 to the price of Trichlor and $2.17 to the price of Dichlor.

If one uses Arm & Hammer Super Washing Soda instead of Borax for raising the pH, then it takes 29.2 ounces weight for Trichlor and it takes 20.9 ounces weight for Dichlor. Amazon.com sells Arm & Hammer Super Washing Soda for $2.70 for 55 ounces (shipping is high, but some grocery stores had it for this price as well), so this adds $1.43 to the price of Trichlor and $1.03 to the price of Dichlor. Note how much more economical Washing Soda is compared to Borax, but remember that it increases TA twice as much as Borax for the same pH rise. If a pool has sufficient aeration, then a balance can be obtained.

Another alternative for raising pH and similar to Borax in not raising the TA as much is Lye (Caustic Soda) which can be obtained for around $3 per pound. For the amounts as indicated above, Trichlor needs 11.8 ounces while Dichlor needs 8.5 ounces, so this adds $2.21 to the price of Trichlor and $1.59 to the price of Dichlor. So this is less expensive than Borax, but more expensive than Super Washing Soda.
[END-EDIT]

Richard
  • Like
Reactions: SouthernAlaPool

We Have a Winner! TFP Pool of the Month (February 2025); "The Nerve Center" - Equipment Pads

So easy! Post ONE pic related to the theme title above. I bet you have a good pic saved somewhere. See the contest rules below to enter.
PLEASE READ OUR (UPDATED) RULES BEFORE POSTING! ----> TFP Pool of the Month Contest Rules

1738415180662.png

Photo contests are announced on the first of each month. There is a 5-day submission phase. Days 6 & 7 are for voting. Winner announced on day 8. Winner eligible for a $50 prize.

1738415279699.png

It's easy! What have you got to lose? You might receive a $50 discount code from TFtestkits.net.

Click Here to See Some Previous TFP Monthly Contest Winners

  • Like
Reactions: Mdragger88

Filter