We Have a Winner! TFP Pool of the Month (October 2024); Theme - Landscaping

So easy! Post ONE pic related to the theme title above. I bet you have a good pic saved somewhere. See the contest rules below to enter.

PLEASE READ RULES FIRST ----> TFP Pool of the Month Contest Rules

1727779508254.png
Monthly themed photo contests are announced on the first, with a 10-day submission phase. Days 11-15 are for voting, with the winner announced on the 16th, eligible for a $50 prize.

1727779636174.png

It's easy! What have you got to lose? You might receive a $50 discount code from TFtestkits.net.

Click Here to See Some Previous TFP Monthly Contest Winners

  • Haha
Reactions: RDspaguy

Operation of Infinity Edge and Zero Edge Pools

Folks,

May of this year we filled up our brand new OB pool with a combination infinity edge and zero edge. I'm finding there are a few things that are a little different about its operation so I thought it might be helpful to others that I start this thread as a place where we can assemble learnings and tips specific to these types of pool. Here's my first entry:

My pool has a zero edge around all the edges and infinity over the back edge closest to the lake behind our lot. (recent photo below) 3' below this edge is a catch basin that has two large suction fittings in the bottom which is another 3' below. It's also 2' wide. I was very concerned during the design phase about how to control level since this little basin holds only ~1500 gal compared to the pool volume of 28,000 gal. Turns out it's very easy to control since there's way less time delay when people enter the pool and displace water over the infinity edge. I had planned to use a high level normal level and min level with some unnecessarily complex control. Turns out it's very easily controlled with a single simple float switch type level control set normally about 8" from the bottom. I use this to add water from my irrigation well pump via a pipe that fills the basin directly and it has a simple, inexpensive sprinkler valve. So long as the basin has plenty of volume to handle a lot of people this works great. Each time somebody gets in they displace 23 gal of water over the back edge. So even 5 or 6 is way less than my 1000+ gal capacity. For people that use the smaller horizontal buried surge tanks this could be a bigger issue. So while I was all consumed (over-consumed) with the level control response time I didn't think much about what happens if the level switch failed closed. Right after I added 3500 ppm salt and before I turned it on I had to take a business trip for a week. So I left and my wife just added liquid chlorine. I looked at the pool each day through the security camera that I accessed with my phone. After a few days the pool changed from it's normal gorgeous crystal clear to slightly greenish then deep green. We had massive amounts of rain that often happen this time of year in S Florida. So I had her add 4 ppm chlorine. This helped but didn't solve it so we doubled the addition. This cycle repeated till I was adding 10 ppm per day. This was LOT of chlorine since the pool is 28000 gal. But it was barely enough and 10 ppm is SLAM level for my CYA level (still low for this newish pool). When I finally got home after the flights from H**L we get these days it was 2 am so I went straight to bed. Woke up next day and thought I heard a pump running but that's normal for the irrigation pump. So I got up slowly, had a few cups of coffee and eventually wandered out to look at our gorgeous pool from the patio... only it was now really deep green and the back of my yard below the pool was flooded! Not from rain but from my pool. The level control had failed and ran the irrigation fill all week long 24 hours per day! The green color came from the tannins in the well water that are yellow until oxidized with chlorine. Yellow plus blue background from the plaster = green. Thanks @JoyfulNoise noise for that tip from construction when we first started it up. I quickly went to a manual mode on the level control and am now incorporating a high level shut down plus a low level shutdown to prevent pump damage. Very easy to do and yes, necessary for this type of pool.

I hope this is helpful to someone with a similar pool.

Chris

1727521743693.jpeg

1727521533022.jpeg
  • Like
Reactions: Leebo

Iron stains

Not sure where to post this, but here goes.

After 9 years, our pool was staining. Walls, floor, sunshelf. Iron stains. We followed the TFP protocol as we saw it:

1. Slammed the pool (first time in 9 years!) Took chlorine pretty high in case mustard algae was staining the pool
2. Reduced phosphates bc it was 2000+ (my guess is air pollution in Maryland)
3. Reduced chlorine to 1, pH to 7.2. Took a long time to get chlorine to drift down!
4. Added 1 quart ascorbic acid (15,000 gallon pool)
5. Stains still present but lightened. Added 1 quart citric acid. I know! It was accidental! I thought the bottle was ascorbic!
6. Stains lifting but still visible
7. 24 hours later, chl = 0, pH < 7
8. Added sequestrant recommended by tfp. Remaining stains lifting.
9. At noon, started correcting pH to 7.2.
10. At 2pm, started reintroducing chlorine at 1 quart per hour. Stopped when we hit 2.

We would never have attempted this without TFP. 🙏 Thank you so much!!
  • Like
Reactions: Texas Splash

RIP to my Nautilus CC plus. Exactly 7 years of service.

Just lost my robot early March. Bought it from Amazon March 2017, Died March 2024. Just got the call from local repair store, new power cord and motor is needed: $680. I think I rather just buy new.

But anyway, now that I am in the market for a new one, I am leaning towards buying the same exact model since it served me so well. I know that it doesn't guarantee me another 7+ years, but it left my pool spotless. $800 on Amazon

But its been 7 years and I haven't kept up with new things, so I am wondering what you guys recommend. And since I'm leaning to buying the same one for $800, then thats my budget.
  • Like
Reactions: sinotech

Polishing Pebblecrete?

We recently had our pool redone with Pebble Sheen. It's rougher than we'd like. I'd like to polish/grind it to smooth it out a bit. I did a small section in the spa (which I can drain) using a diamond polishing pad on an angle grinder, and it worked quite well. It results in a terrazzo like effect. It would be quite labor intensive to do the whole pool. Any advice regarding tools or tricks to get a good result?
  • Like
Reactions: joepaiii

O/B in Gilbert, AZ for 2nd time

I finally get to start my build thread :). We just got our plans back yesterday and started getting bids today. 🥳

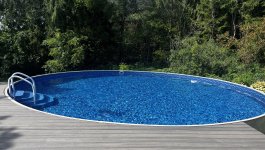
Background, back in 2006 we built our own pool, which we sadly only had for 2 seasons before moving. Our friend's brother consults o/bs, draws their pool, gets it engineered, sent our plans to subs, sends the permit to the city, orders our equipment wholesale, and guides us thru the process. We used him last time and are using him again. Last time we got our pool done in 3 weeks from dig, but we aren't expecting that this time. We aren't expecting that since it's super busy in the pool building world. We do hope to get done in time to use the hot tub before it heats up for next summer. This is our first time having a hot tub. At first we weren't going to do one, but when we started realizing that our kids are mostly grown, this will be something that they will want to hang out in. We have kids ranging from 33 down to 10 and grandkids from 15 down to 1, so all parts of the pool will be utilized. The little ones will love the Baja step and even the hot tub will become a baby pool in the summer. Our boys loved jumping off the waterfall before. My husband taught them how to jump off the fence last time :oops:, but I have vetoed that this time.

We will be getting quartz because I do not like pebble, and we will also be getting some form of cool deck/acrylic lace. I've been in friends' pools with travertine and don't like how slippery it is. It is gorgeous, but I really don't mind the look of cool deck and I like that it isn't slippery. These are some of the few times my preferences are the cheaper ones ;). As for waterline tile, I will make up for that because I want a glass 1x2 subway tile.

We did have the hot tub at 18" high, but thanks to Kimkats, we lowered it to 6" and I know I'll be much happier. She pointed out that we didn't want anything to block our view of the deep end so we lose sight of little ones swimming. Thankfully I had him change it at the last minute. I will feel much better now not having the view blocked.

We will have a pool fence that goes around the deck and there will be a double gate at an angle between the existing patio and deck that will open up wide for parties.

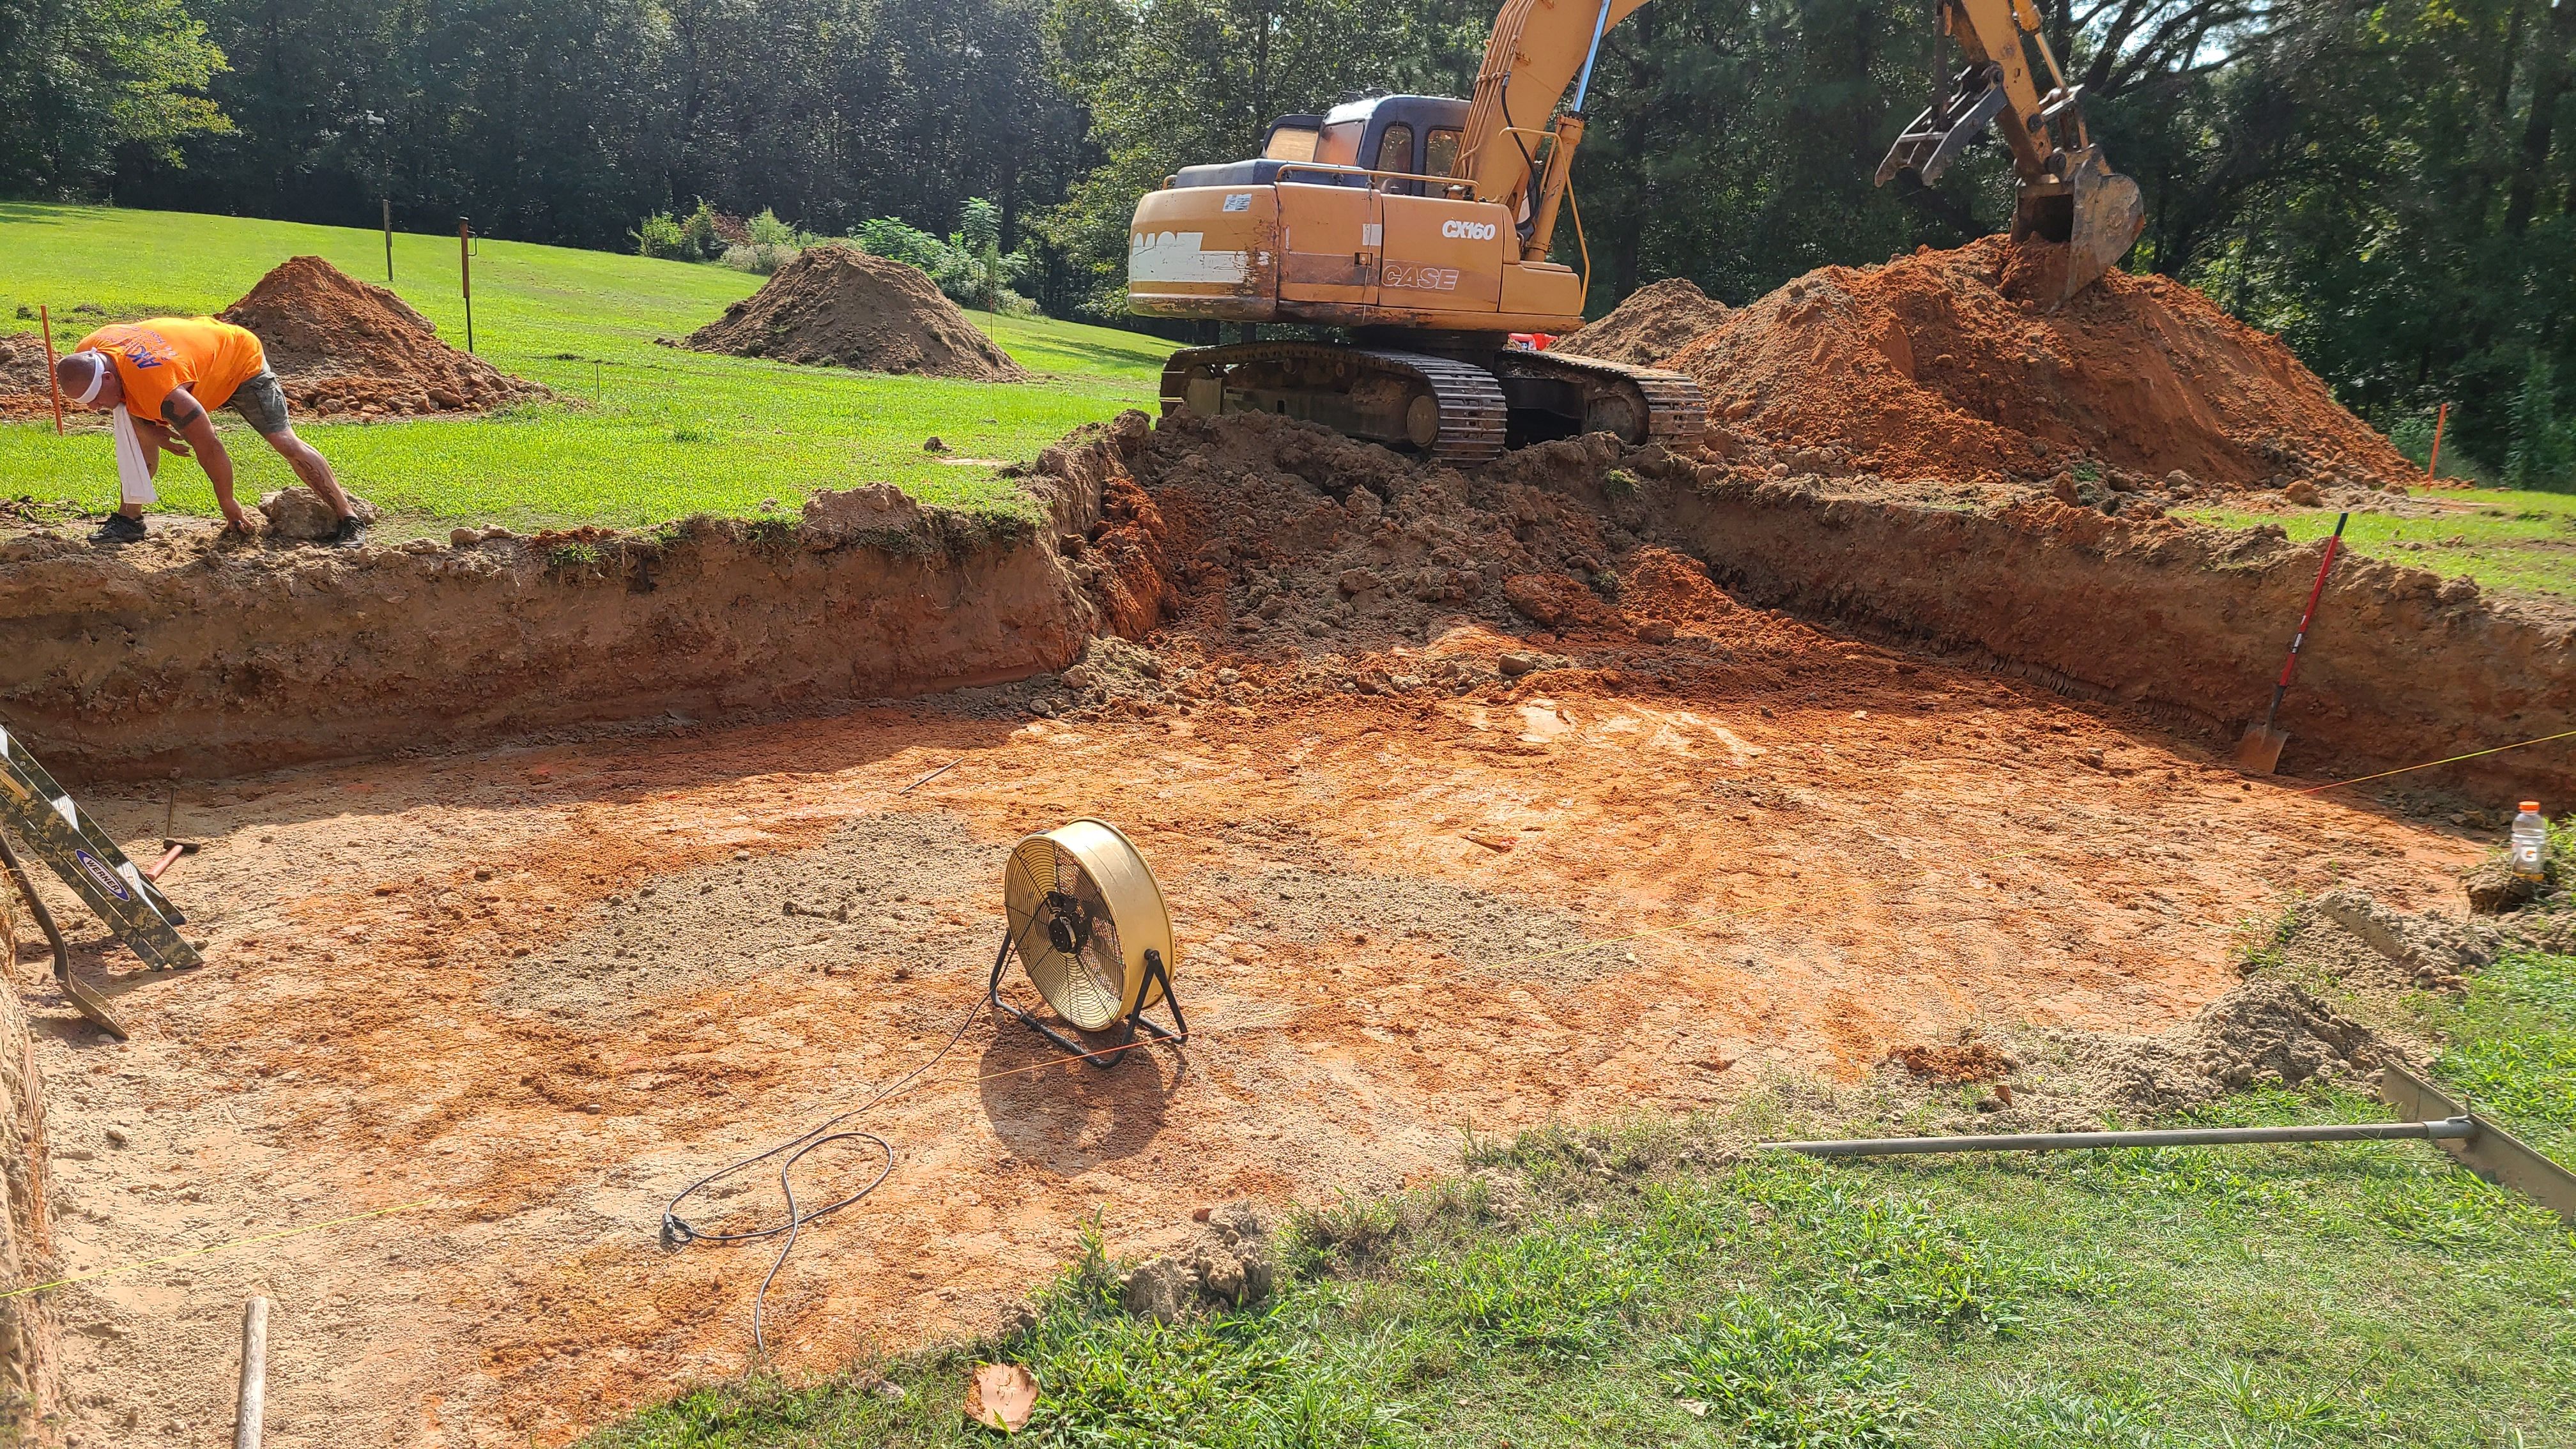
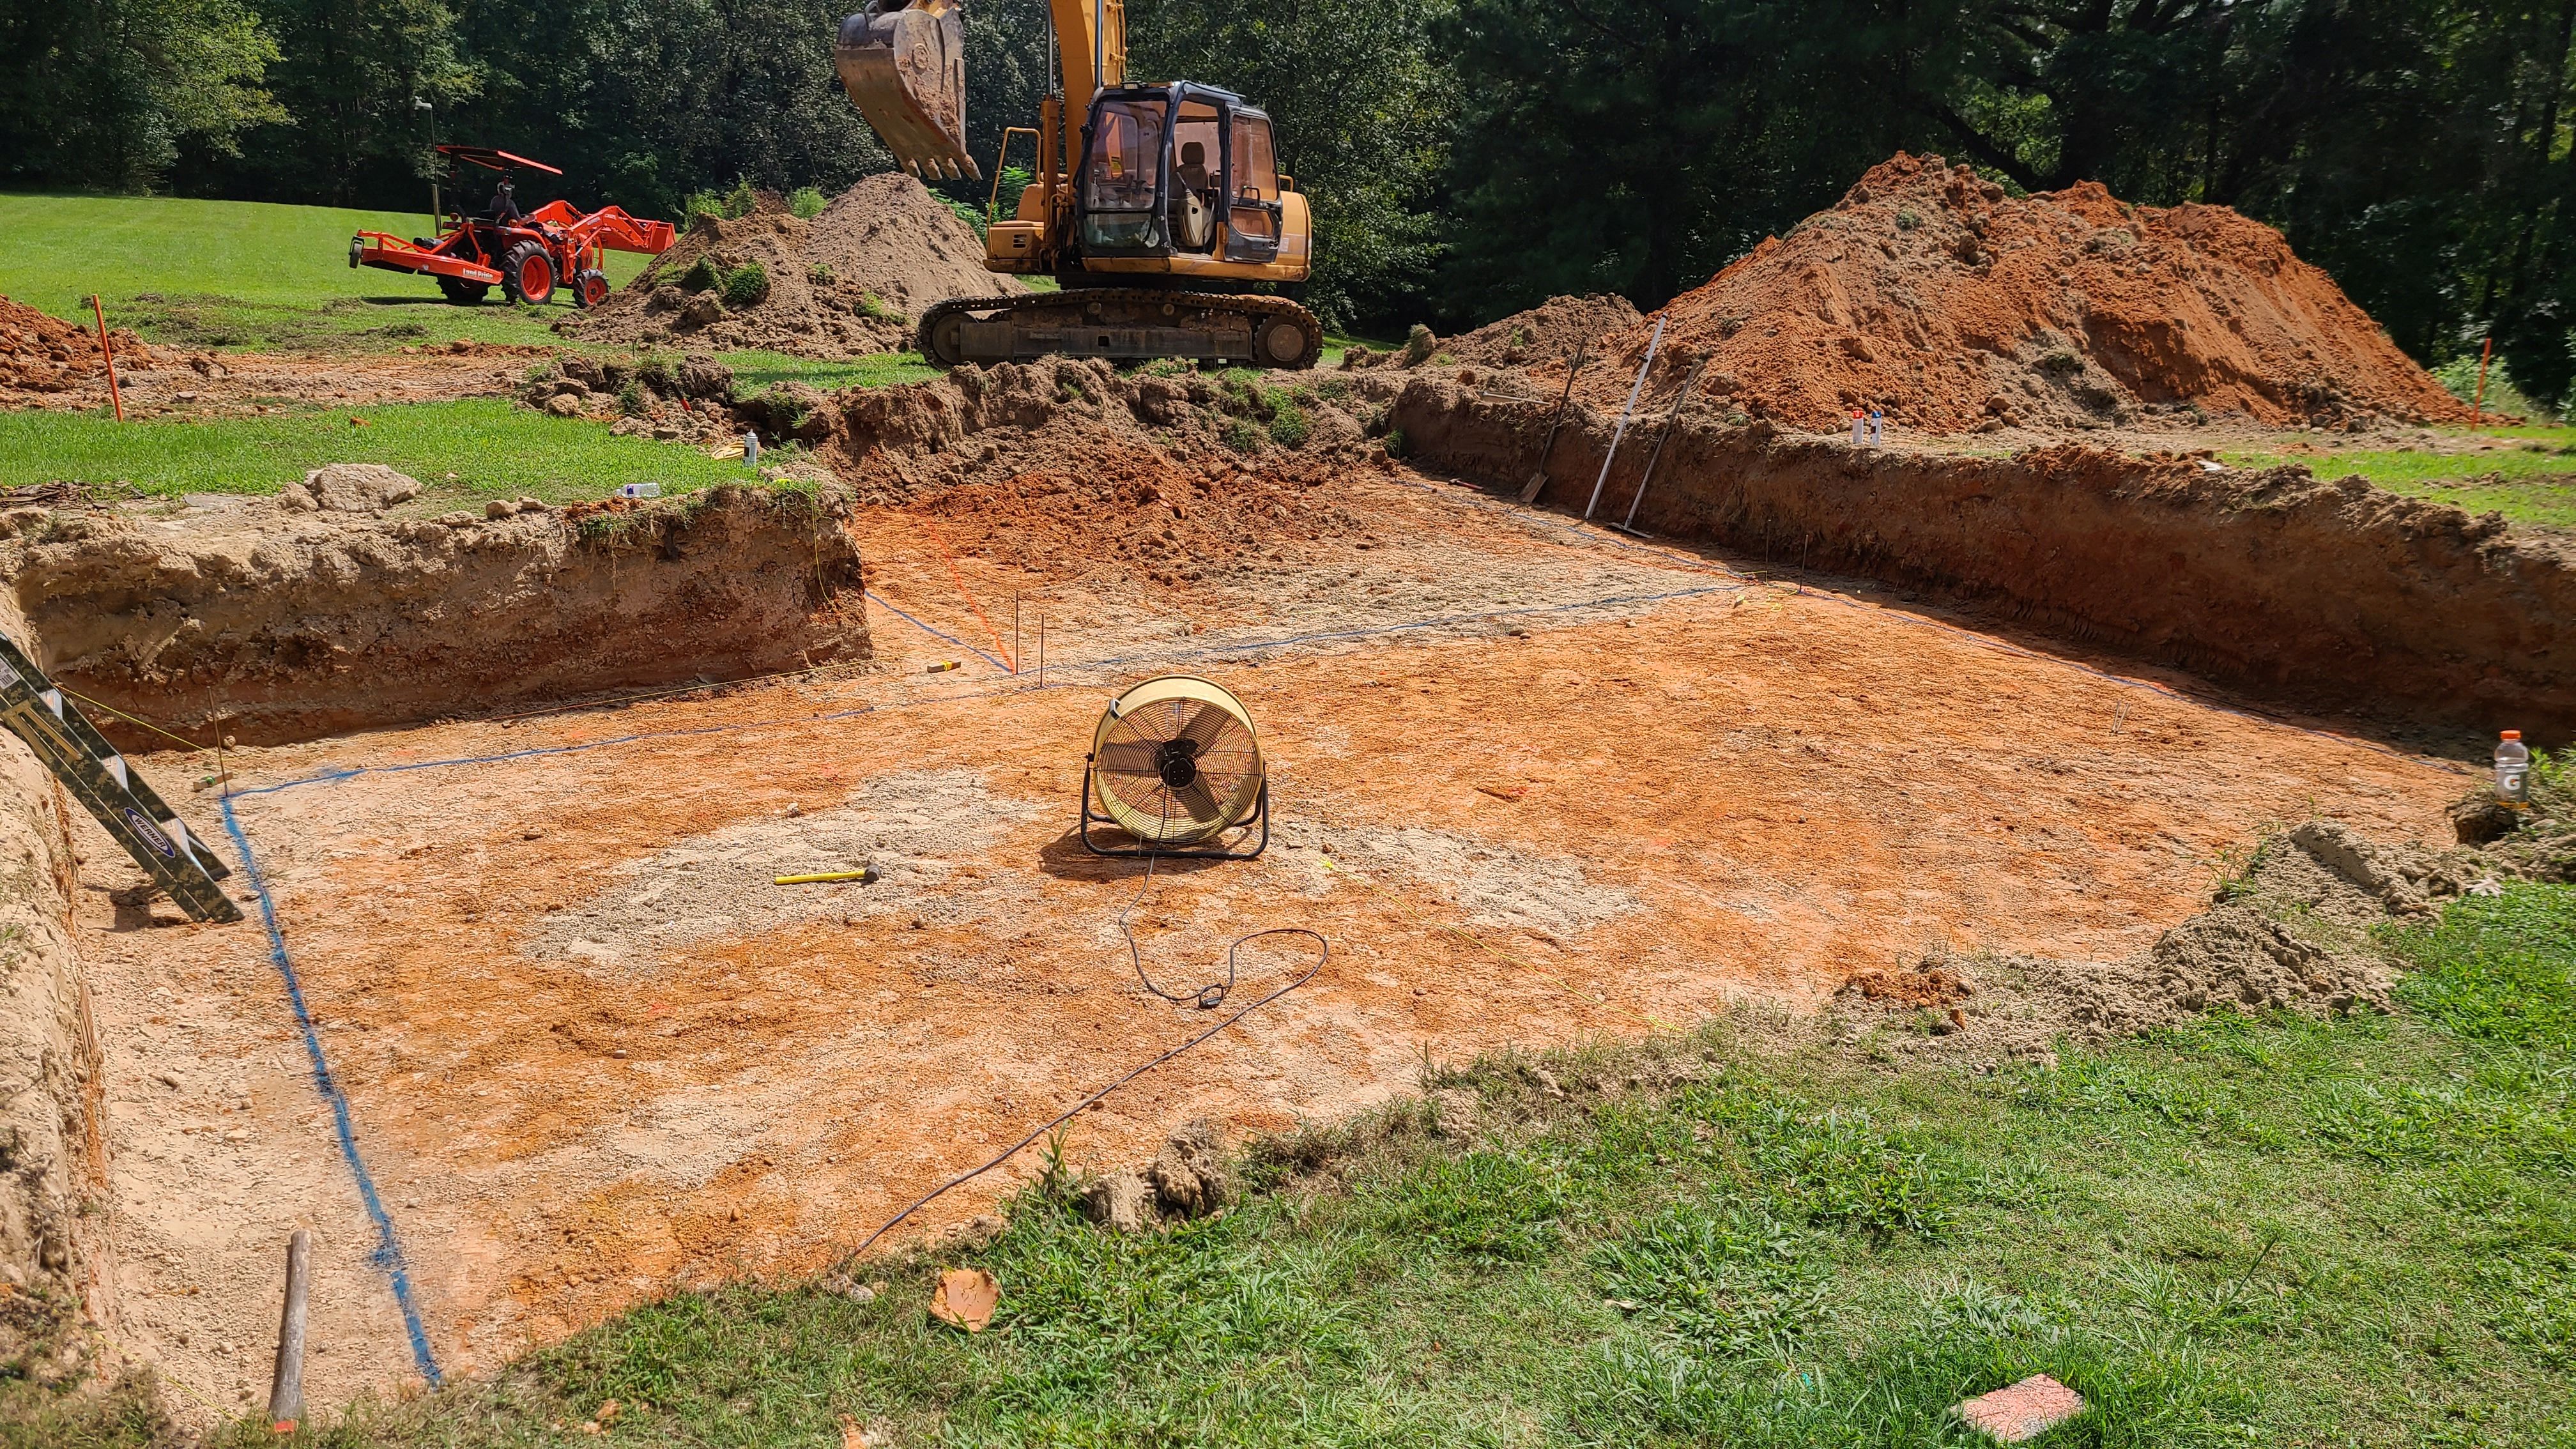
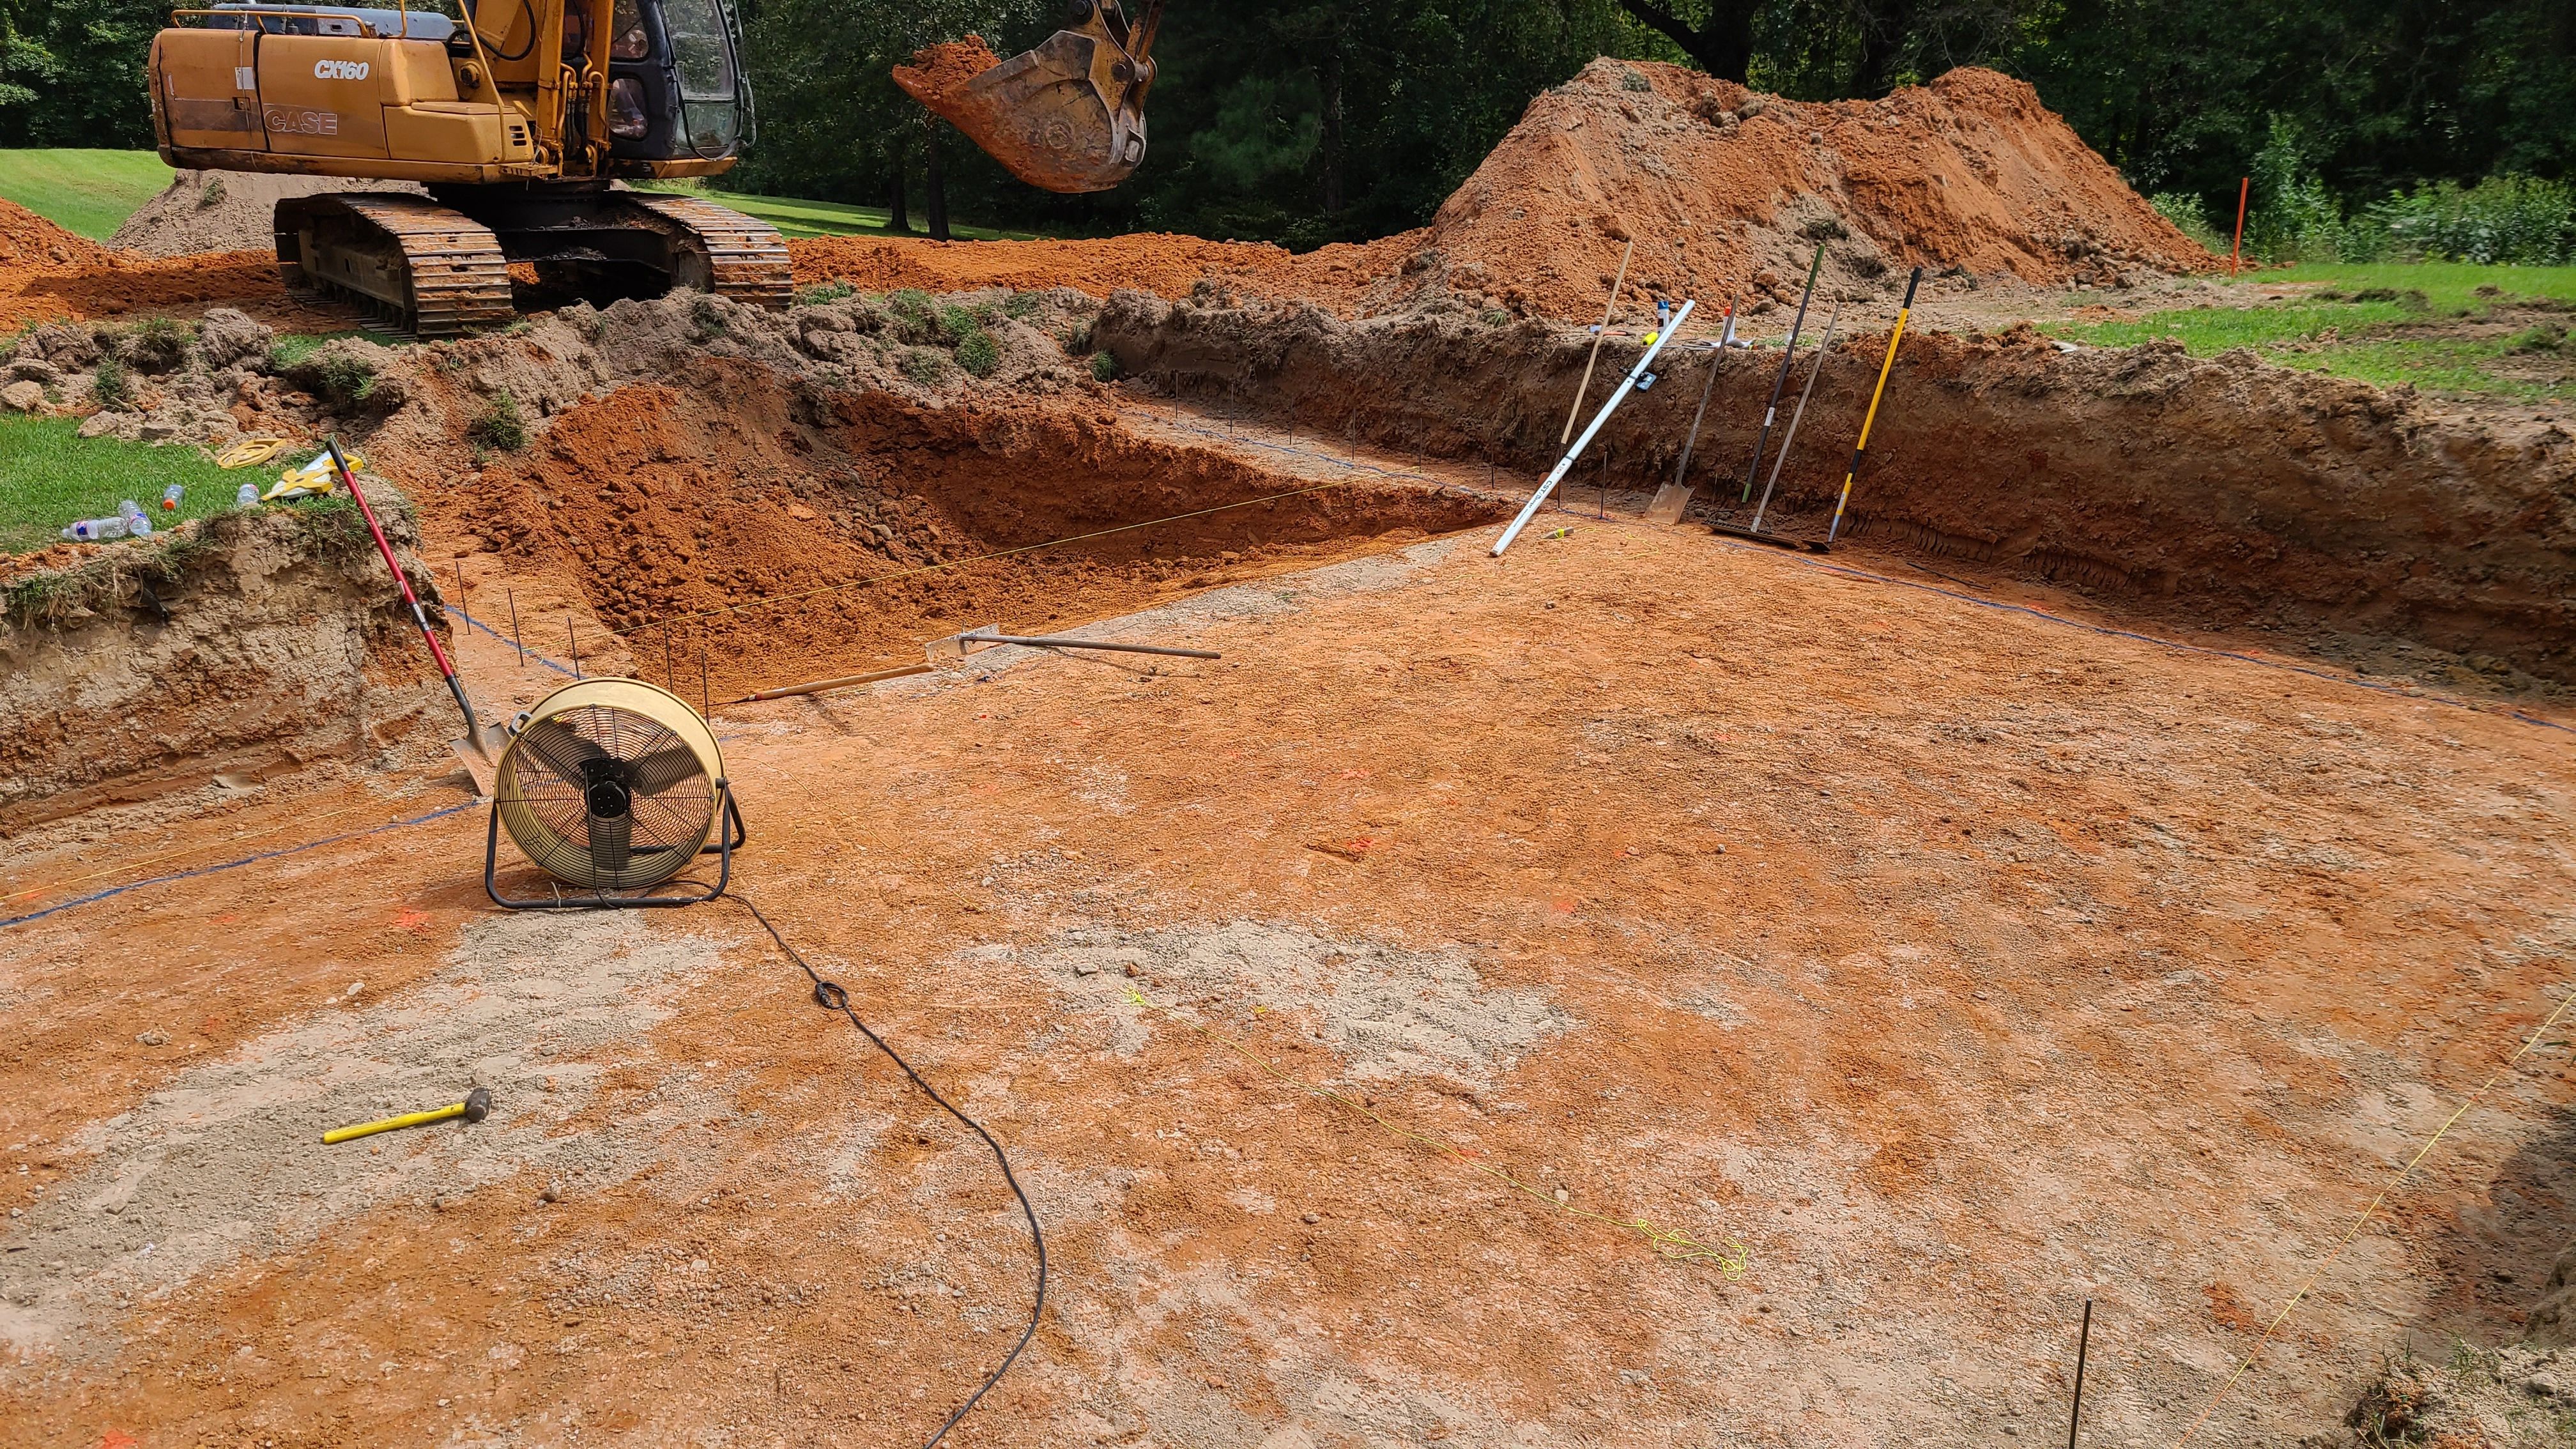
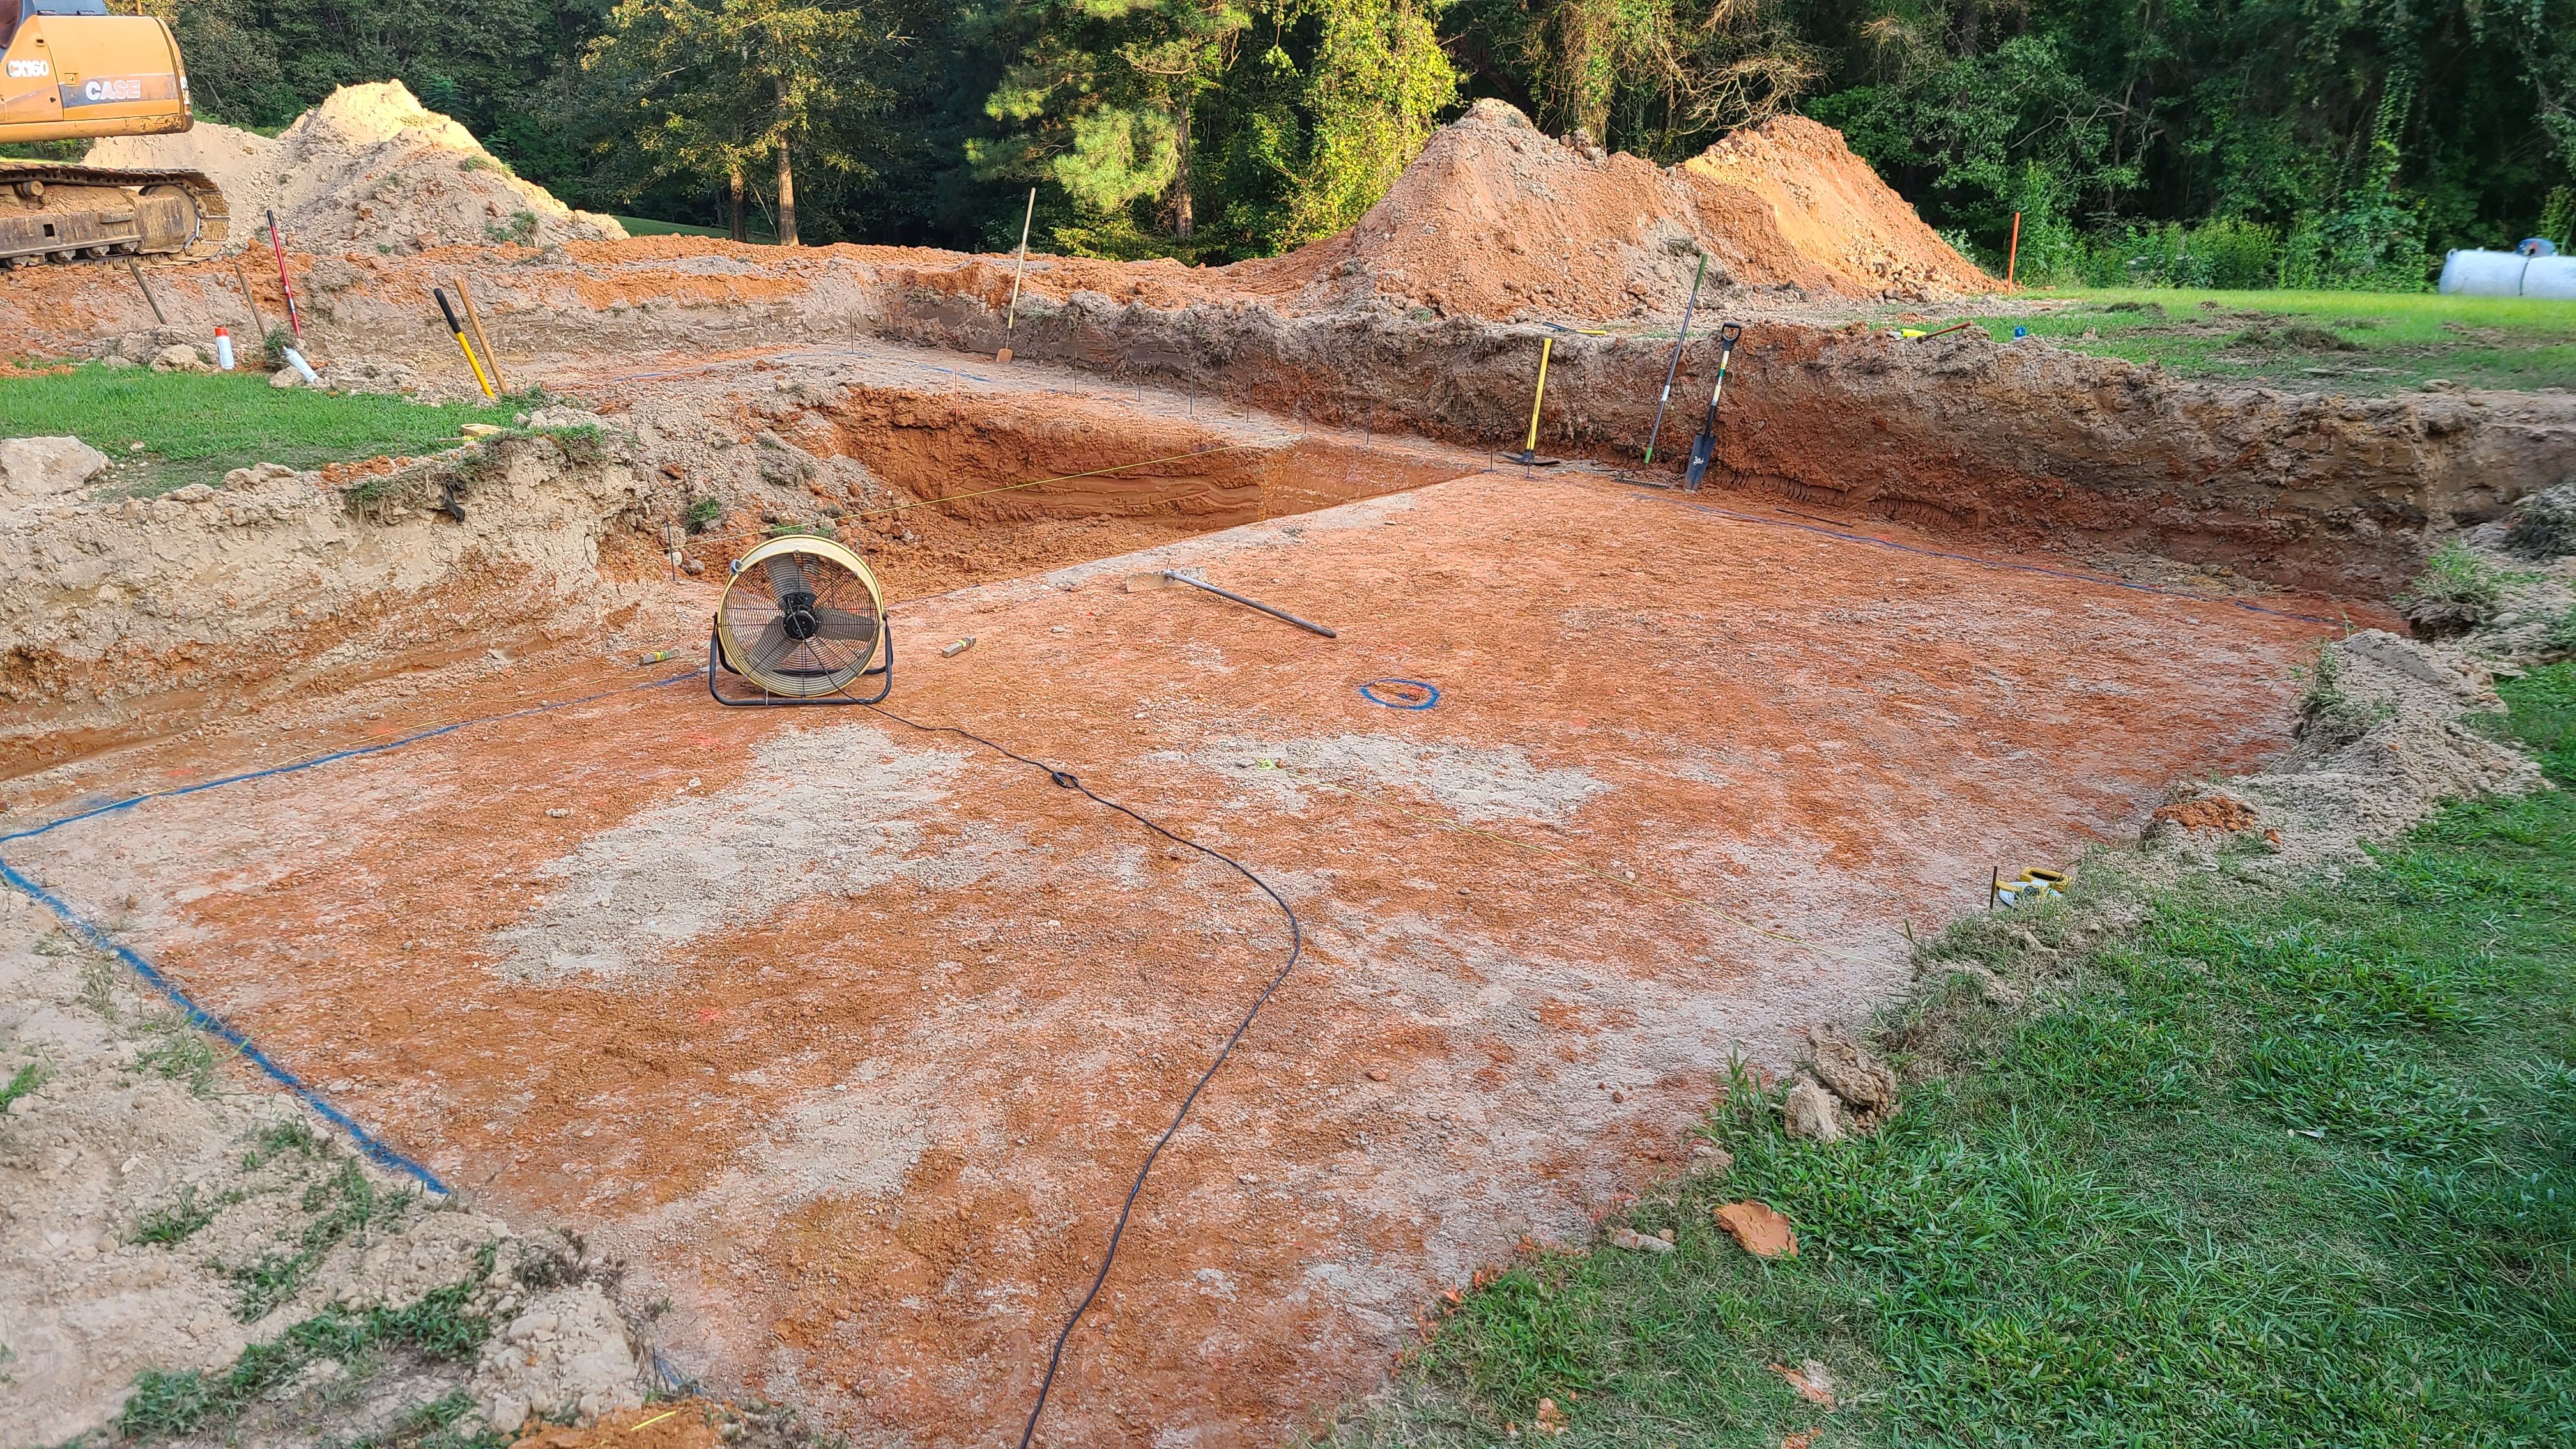
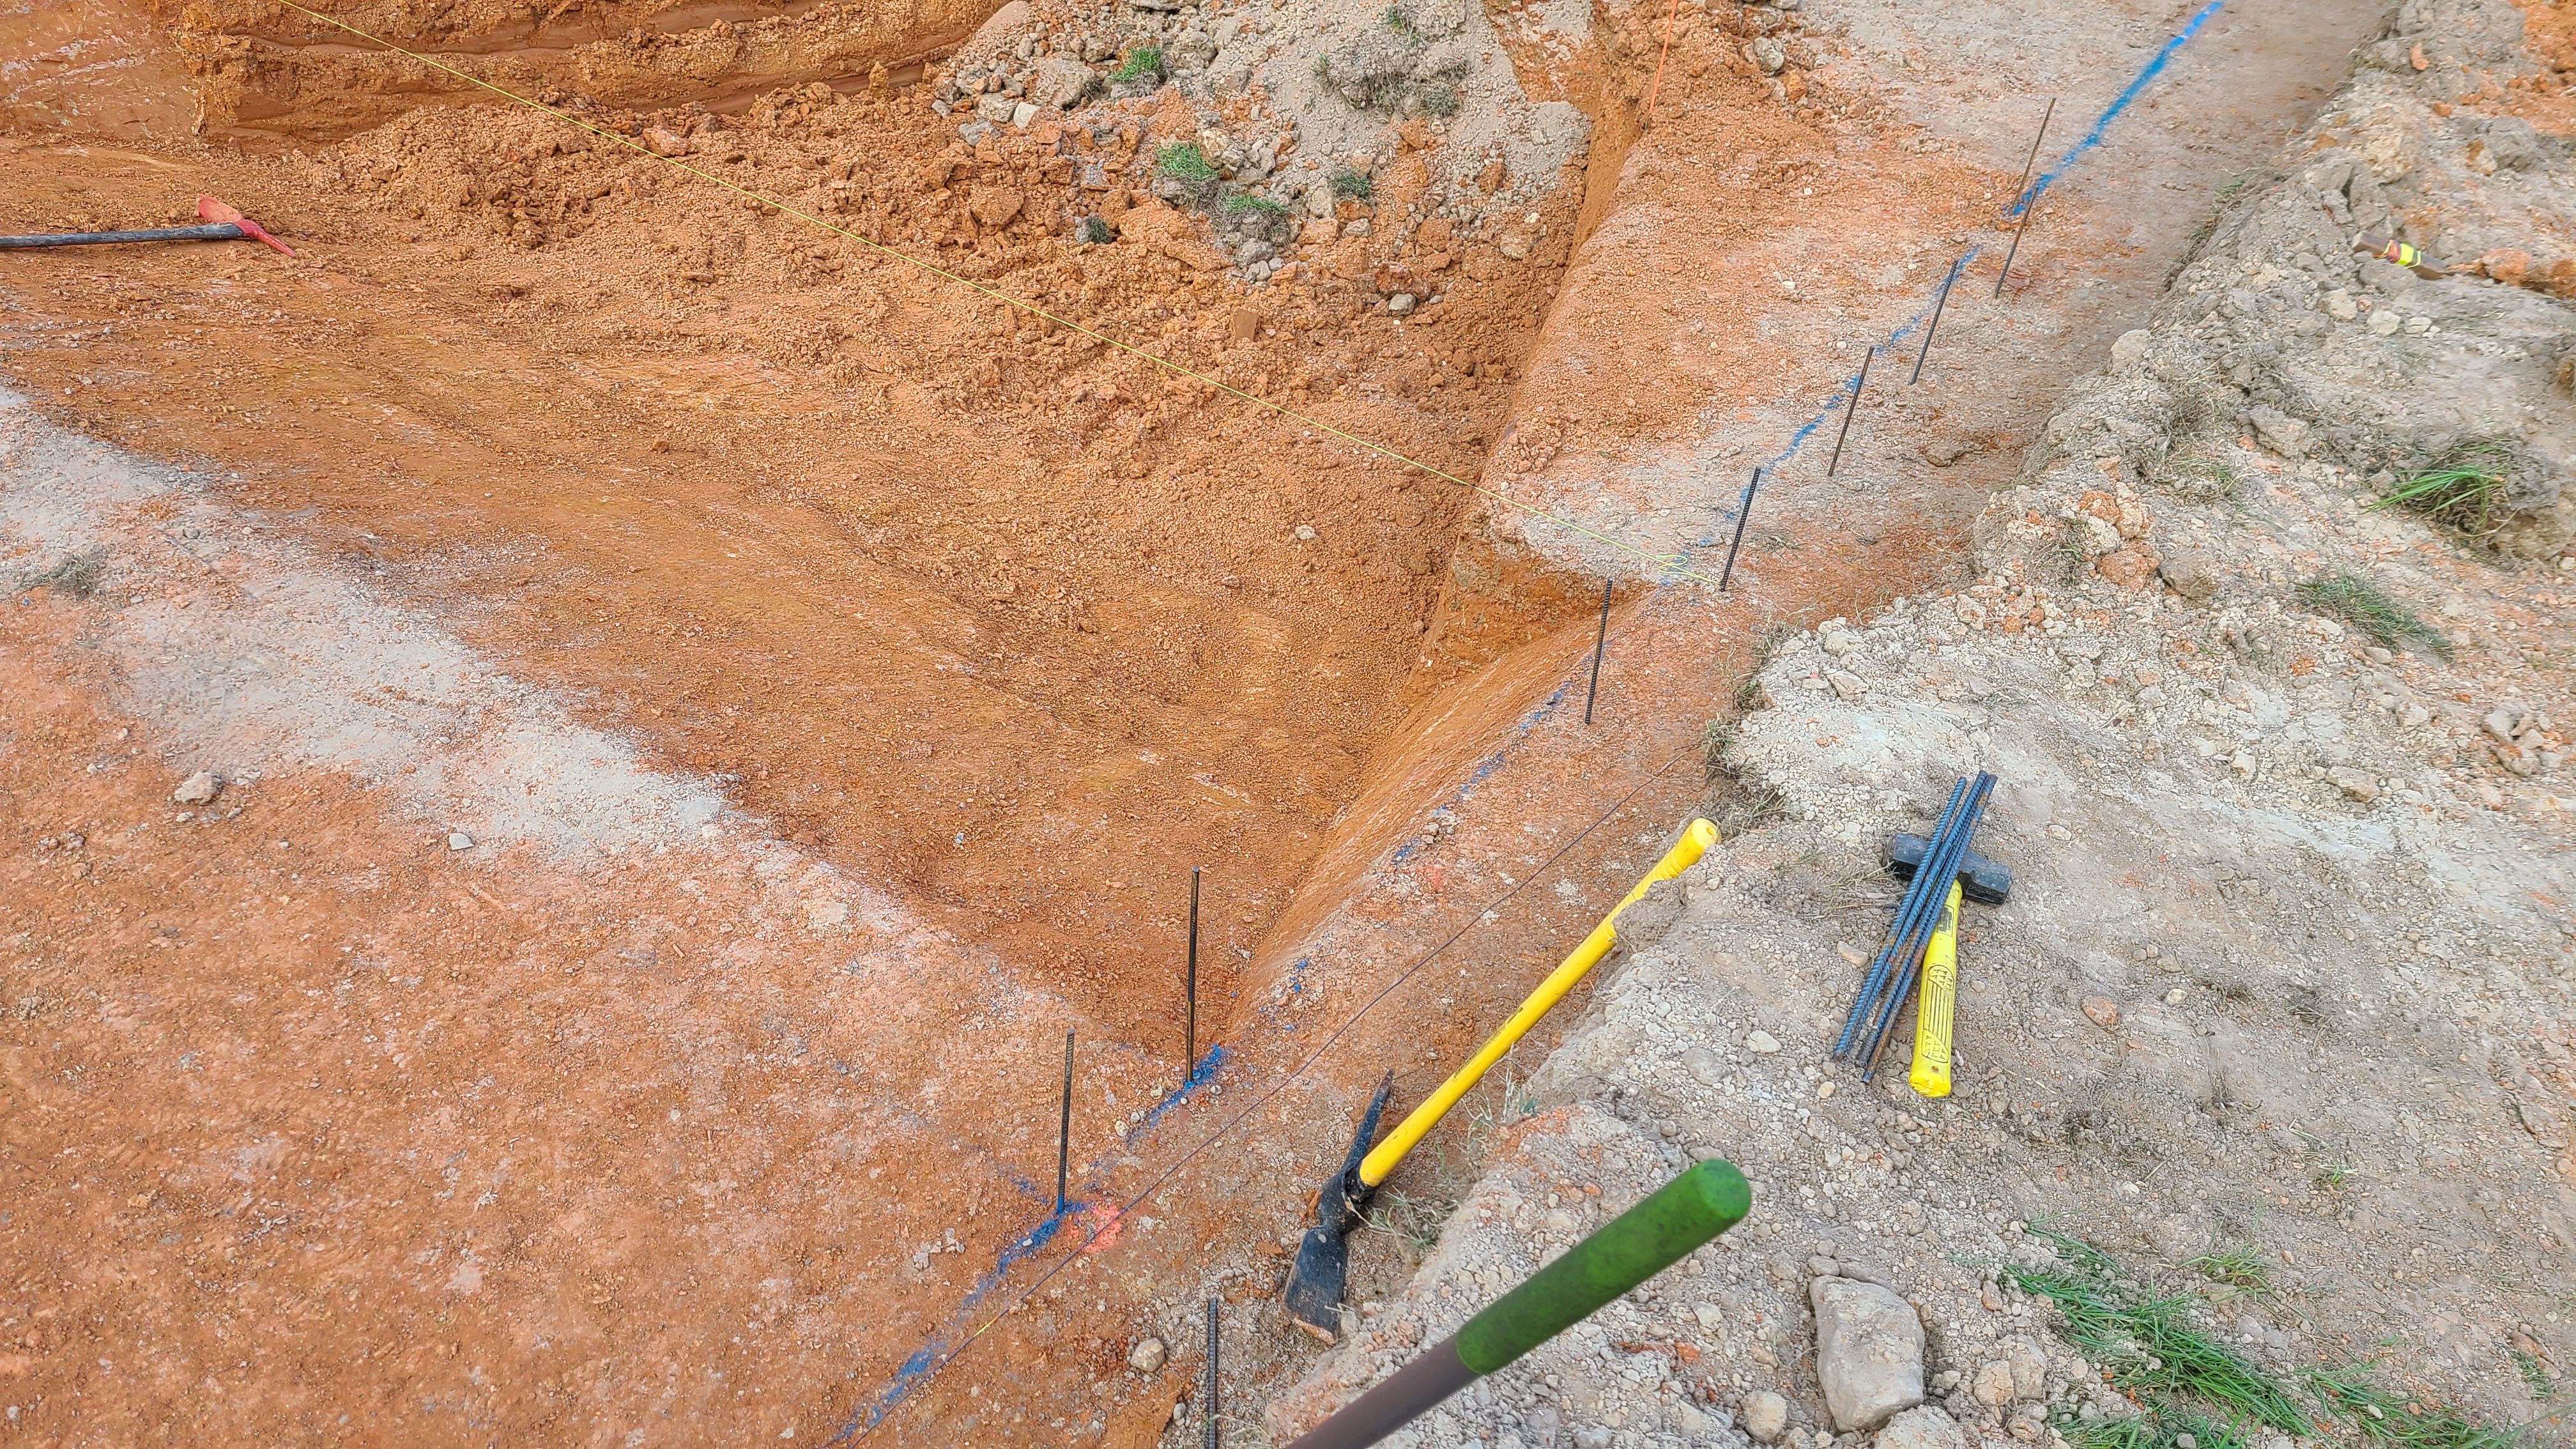
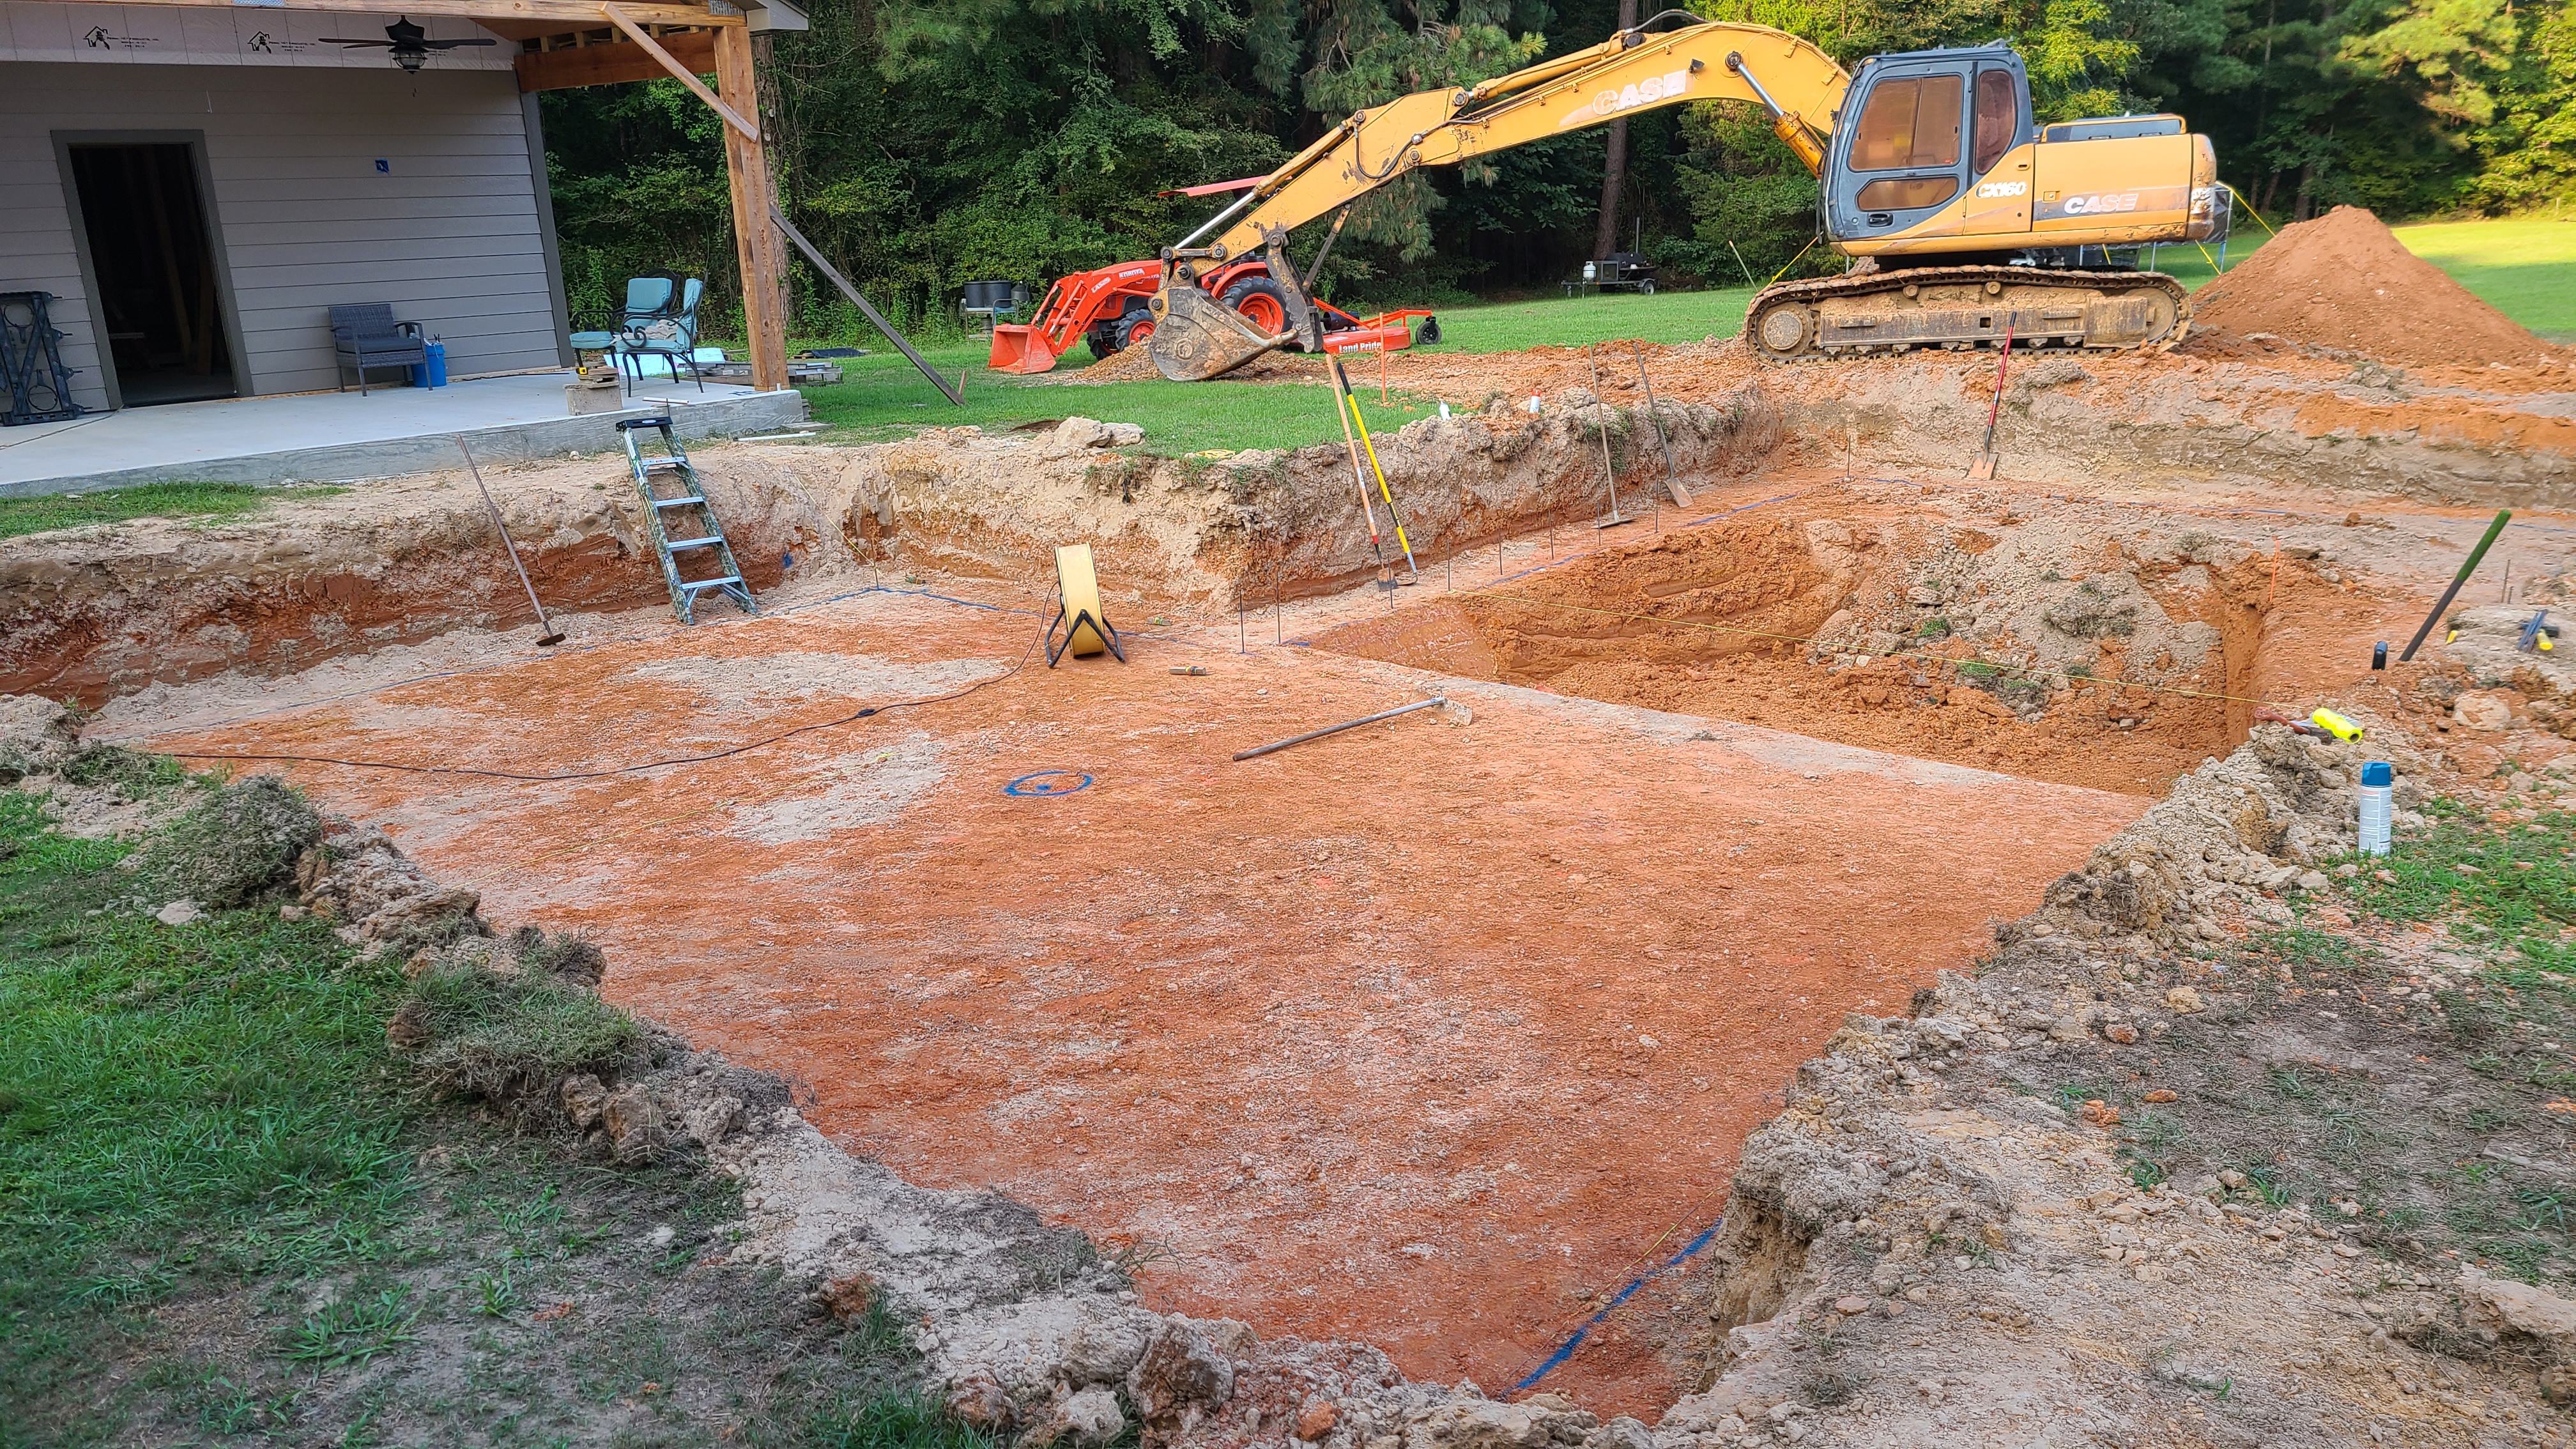
Our consultant will be getting a list to us later this week of the pool equipment and I will post it then. Tomorrow I will take pictures of the backyard of where it will be.

My husband is the UPS driver for our neighborhood and he saw 2 pools getting dug today and many more being built. He was even noticing the ones doing the digging are on our list of subs. Funny how you notice so much when you're going thru it.

Attachments

  • Pool specs.jpg
    Pool specs.jpg
    470.8 KB · Views: 248
  • Like
Reactions: Vukota12

Water Line Tile Restoration

We have a fiberglass pool, 10 years old, with waterline tile using cement-based grout. Pictures below.

The issue is that about 40% of the grout has failed. Some I have replaced over the last several years with silicone grout (Novagard) – the picture with the tan/brown grout below. I am contemplating several paths to replace/repair what we have.

The first path would be to remove it all. Replace the tile with new and regrout the entire thing with silicone grout. I am not sure I wish to tackle that and finding anyone locally I would trust to do that is not likely.

Second path is to remove all the existing grout, even that which not compromised, and replace with NovaFlex silicone grout. Some of the tiles are loose and will be reapplied using marine grade silicone adhesive. This would allow for the grout to match throughout but is more work.

The third path is to remove the comprised grout but leave that which is stable. Matching the grout color will not be perfect using the Novaflex, but it will reduce the volume of work significantly. I am of course leaning towards this path.

I am looking for advice on the viability of removing the grout. I plan to get an oscillating tool and use a grout blade to remove the grout. The small amount of existing silicone grout will be removed with a cutter, etc. Does anyone have experience removing grout with this method? The application of the silicone grout (Novaflex) I feel comfortable with. I will use scrub pads recommended by Novagard.

The pool will be fully drained for this project. It is time to do an iron removal (our Colorado River water has small amounts of iron and after 4 years of not draining it is showing on the walls) and the CH has climbed even with the use of an RV water softener for the fill water. We evaporate about 2.5 pool volumes a year so 4 years of not draining is astounding. Draining a fiberglass pool in our area is of no concern.

I will likely not use all 24 tubes of grout I have to buy (direct from manufacturer – not available retail anywhere I can find) so I will update this thread when done on what it looks like and how much I have left if anyone is interested.

Non Compromised Cement Grout
Tile3.JPG
Compromised Cement Grout

Tile5.JPG
Tile8.JPG
Novagard Silicone Grout used for Repair several years ago
Tile6.JPG
  • Like
Reactions: Newdude

Amerilite Pool Light Leaks. A Fix and what I've learned

One of the first things i noticed on my first pool at teh house I just moved into was that the shallow end pool light was not functioning I did a bit of research and ordered the new gasket and lamp. Installed it and everything went well for about 3 minutes when "Blooouup" a big ol bubble arose. That left me into further research and investigation. I dried everything out for a day, and put it all together again, being more careful this time to make sure everything was in alignment. Once again, the bubbles arose. Yesterday I went through the procedure again, but this time I held the lamp underwater while it heated to see where the leak was actually coming from.

Eventually I saw a steady stream of bubbles emanate from the strain relief where the cord goes into the fixture. Here's the fix I devised.

I had some west system G-flex epoxy which is a 2 part epoxy that retains some flexibility and will bond do almost anything. I mixed up a batch and coated the juncture of the strain relief and cord, trying to get as much in the crevice as I could. Let it cure, and re-tested this morning. It worked like a charm! I was in too much of a hurry, but here would be my suggestion for doing a better job of the fix:

First I'd make some sort of ",old" around the cord to hold the epoxy in while it cures. You could to this with tape possibly or with some sort of plastic tube that you could hot clue to the fixture. Or you could even hot glue some cardboard to make a box around the cord, This would allow you to make a bigger chunk of epoxy around the leaking area. Mine is definitely not pretty, but it did seem to work, so I left it alone.

Other notes:

Before I tightened the retaining wire around the gasket assembly, I turned the lamp on and let it heat up the air inside a bit. I've read a lot about NOT doing this, but my thinking is that a big part of the problem is the expanding air inside the fixture which seems to leak out, breaking the seal and then invite water back in when the lamp cools.

When I put the lamp housing / gasket assembly back together, I did it with the lens facing up. This let the hooks hang down and was easier to get the wire around all the rings, and made it easier to get everything aligned. If you put it together lens down, the trim ring is hanging down below the curved lens and its harder to get back together.

Hope this helps someone in the future. Now I'm wondering if G-flex epoxy might be the answer for my leaking skimmer boxes
  • Like
Reactions: bobhatfield

GPM not RPM

We’ve had our 40,000 in ground for 4 years now and I have finally stumbled across ‘the answer’ for the most efficient use of our Pentair variable speed pumps. If you google what to set them at there are all sorts of discussions related to RPM; set it high, set it low, run it all day, run in short bursts….all very confusing.

I was trying to balance running enough water through the filters and Intellichlor whilst still conserving electricity. Setting an RPM just wasn’t balancing all of those needs….until I realized forget the RPM’s and go with the GPM setting on my ScreenLogic app. It will take care of the RPM’s. After all, it’s all about the amount of water you run through the filters and Intellichlor that keeps your pool sparkling.

After making this revelation and using GPM settings I sleep a lot better knowing the pool is being properly ‘turned over’, pumps are running efficiently for electrical use and algae growth is not a problem.

Here are my settings: I run the pumps from 10pm to 10am at 25GPM. This is the most efficient for electrical use as these are the cheapest hours for kw’s. During the day, if the pool is being used, I ramp the GPM up to 60 as this maximizes the water running through the skimmer (especially helpful when the German Shepards are playing fetch) and increases chlorine output. Every once in awhile I will SuperChlorinate during these periods for an added boost on hot days. Running at a high GPM during these periods is also beneficial as electrical use is entirely provided by our solar.

So far, other than having to add some acid every so often in order to bring down the pH (a common side effect to a salt water pool) the GPM method seems to be the way to go.

My new mantra is GPM not RPM!
  • Like
Reactions: mishtxswg

Pool renovation - new liner

Hi all! Today I woke up to a bit of a surprise, my pool builder called saying they were on their way with my new liner!

How did this happen? I ordered it a few weeks ago, but while on vacation last week I apparently missed their call letting me know they were coming today!

Here's hoping that's the ONLY surprise of the day 😁

I'll start off with some before shots, and hopefully by end of day today I'll have some nice photos for what it looks like all completed.

Attachments

  • 1000002687.jpg
    1000002687.jpg
    498.3 KB · Views: 28
  • 1000002681.jpg
    1000002681.jpg
    637.5 KB · Views: 27
  • IMG_20240609_092707.jpg
    IMG_20240609_092707.jpg
    572.1 KB · Views: 29
  • IMG_20240609_092717.jpg
    IMG_20240609_092717.jpg
    656.3 KB · Views: 32
  • Love
Reactions: Newdude

Feeling grateful

Hi all,

I’m going to say in advance that this will be a tad bit of an emotional post, so feel free to stop reading now if you’re not up for that. I’ll try not to make it too long🙂 
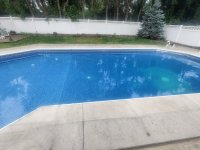
I’d also like to preface by saying I’m not fishing for sympathy…just wanted to offload some thoughts.

A year and 5 months ago my husband and son (14 at the time) were on the way home from baseball practice and were hit head on by a drunk driver. My husband died within minutes, but my son, thank God, survived. He was broken from head to toe and required multiple surgeries & spent weeks in the hospital followed by months of rehab. I’m happy to say that he’s now doing very well & back to playing baseball despite having rods in both femurs and hardware in his left wrist. He’s a tough kid.

Needless to say, the first year+ was extremely difficult and overwhelming. I followed the “rule” of not making any major changes for the first year and have been able to keep things pretty normal for my kids (now 14 & 16), which I’m very grateful for and proud of.

I have wanted a pool my entire life but I could never get my husband on board. He didn’t really care to spend money 😋 and I never pushed too hard, so it remained a dream. I kept thinking about it and thinking about it, and finally decided in the spring that I was going to go for it. Once the deposits were made & contracts signed I definitely had some doubts. I worried that I might be biting off more than I could chew as I have so much to take care of already, but it was happening.

Well I knew that I would enjoy it, but man oh man, has that pool brought me so much joy! My grandpa always told me not to love anything that couldn’t love me back, but I LOVE it! I love looking at it, I love putzing with it, I love the smell of it, I love being in it. It’s been so therapeutic for me. My kids laugh at me for always being out there fussing over my pool☺️. I am really grateful that I came across this site. It and its members have been so helpful in my learning how to care for it, and I’ve managed to get all my levels balanced thanks to the info provided and the pool math app. I hope to be enjoying my pool for years to come! Thank you all!

(deck railings and landscaping yet to be done, but I’m so happy with how the deck turned out!)

Attachments

  • IMG_5382.jpeg
    IMG_5382.jpeg
    767.3 KB · Views: 53

winterizing with a sand filter

I tried to do a search but it said the words sand and filter were too common. I've read a couple dozen threads but don't see the answers. We have a hayward sand filter that holds about 250 lbs of sand. So I'm guessing that stays where it is right? Do I take anything off of it other than the hoses that the water goes through? I know to take off the drain plug but otherwise it's all fine to stay outside right? We live in north central Indiana-it gets well below freezing all winter long. We're planning to put the pump and all the hoses and fittings in the basement. Do we need to take the top off the filter too? I don't know what the multiport/spider gasket is but I suspect it's beneath that handle that I use for the different settings on the filter? In order to remove that gasket do I have to remove that whole top thing? There are pictures of our filter and pump in my signature. Thanks and sorry if this is a repeat.
  • Like
Reactions: Eauclaire

New DIY Inground pool build - Arkansas (Picture Heavy) - Outdoor Kitchen Complete!!!

Ok...well I am a little late starting this thread. We decided last spring it was time to take down the above ground pool and put one in the ground. I had been planning to do an IG pool for 5 or 6 years. I had a local pool company give me a bid even though I was 90% sure I was going to do it myself. The bid was way high and they could not even start till October, so that was out the window. I ordered my pool kit from poolwarehouse on June 4th and due to COVID the shipping day was estimated to be 8+ weeks out. We decided on a 18x43x30 true L pool with a full width sun deck across the end of the L. The wait begins.

I had planned to build a pool house with a bathroom, kitchen, storage and outdoor kitchen to go along with the pool...so since the pool was going to be awhile, I started on the pool house. The pool house with porch was drawn up and I was ready to start. Ended up being 24x30 with 12' of the 30' being a covered porch.

Here is the layout:
Capture.JPG

I figured out where I wanted the pool and pool house to be located and then figured the elevations on everything to match up to my existing patio. Once I knew the elevations I started building on the pool house.


I was making good progress on the pool house, almost had the outside finished and on August 24th my pool kit arrived. After doing an inventory, I was missing a few items related to the sun deck. It took about 2 weeks to get in the missing parts and another week to get a track hoe lined out to start the dig.


I took a week of vacation the day the dig started so I could get a good jump on it.
Day 1


Well, that's unfortunate ...

Today was a case of the sadz for me ... my IC60 appears to have moisture escaping from the seem under the top cap that holds the membrane pad. The electronics and membrane pad are potted into the top of the PVC body and thermally sealed. It’s not a great design. I was out there a week ago and noticed a salt crust around the edge of the plastic sun shield. I wiped it clean but it came back. On top of that, one of the union nuts is cracked. I have spare unions, but that means PVC work to fix the cracked nuts. Some pics -

IMG_3669.jpeg
IMG_3668.jpeg
IMG_3666.jpeg
IMG_3667.jpeg

The bummer is the unit is only 4 years old and I paid just around $990 for it back in the day. A new IC60 so far is $1800. Gotta love COVID-flation ...

So far nothing is dripping or spraying water. The nut is holding for now. I plan to get a replacement split-nut for the coupler to avoid PVC pipe reworking. As for the cell, the option is either do nothing until it springs a solid leak OR clean up that entire edge and seal it with RTV or Epoxy. Sealing it might drive whatever water is weeping there somewhere else and considering the electronics under there that will probably result in a short or some other electrical catastrophe.

The sad part is the cell is generating perfectly fine, lots of life left on those plates. So when it does finally let go, it'll be a premature death.

More info to follow ...

Planning my first build

Hey folks,

I am planning to do my first DIY pool build and have put together some designs to make it easy to describe what I'm trying to do. I am simultaneously doing a home addition and attempting to use some of the same methods to simplify the build process and do similar things at the same time. So, that being said, is why I am planning this as an ICF pool - ICF is also what I'm using for the addition foundation. I've been relying heavily on advice across this forum to design and plan the build and I'm hoping that some of the experts here would be willing to take a brief look over my plans and advise if I'm messing anything up or doing anything glaringly poorly. I also wanted to ask, with an ICF pool - do I need to backfill and fill the pool at the same time, or is it OK to do one or the other whenever desired? With the lack of lateral support across the top, as there would be in a home foundation - do I need to design the footers similar to a retaining wall (extended footers around the outside) or would a typical 2x1 rule of thumb still apply and be reasonable in this case? Thanks for any insights or advice folks can share! In either case this forum has been a great help with my planning to this point.

One thing I am still on the fence about is including the auto-cover. From what I've seen these don't work well as winter covers and I am in the Northeast so I will likely have some snow days. I might just skip that and go with a standard winter cover+solar cover. Additionally, I am planning to put some pool foam under the liner on the floor to keep that area more comfortable and take the liner out of contact with the concrete. Also considering adding something thin and rigid on the ICF interior walls to help prevent deformation if someone kicks or pushes off the wall fairly aggressively.

Excited to hopefully break ground in a week or two! Will share photos as the project progresses.

[Edit] Adding photos directly as requested:
View1.JPG
View2.JPG
View3.JPG
View4.JPG
View5.JPG

Have a great day,
Frank
  • Like
Reactions: kimkats

Cause for concern?

New pool build in Fl. Broke ground mid July. 11x20 in ground gunite. I've had several questions throughout and I've just taken the PB's answers as the correct ones. But I'm starting to get a bit concerned that I'm spending a huge chunk of money and getting subpar construction and it's freaking me out. I'm OCD and things stick out to me very easily. I was concerned with the elbow of the PVC being over a layer of other PVC before burying and the weight of leveling done before laying concrete deck. PB said it wouldn't add any stress to cause any cracks.? Then there was my concern for retention wall not being high enough with the grade of ground behind. He agreed to raise it (added cost) and in doing so he added concrete ontop of the gunite. I read that wouldn't bond correctly but PB said it would be fine and it's called a cold joint. Now cage is being installed and the frame is not even on the coping. Cage guys are saying frame of pool is off not the cage frame. Which doesn't make sense to me. They have a 1" space on one end and it goes to almost 2" space, then next level same thing starts 1" space and goes to 2" in corner. I don't know what to do at this point. This to me is noticeable especially when cage comes almost to end of coping on inside in some areas. I have taken tons of pictures but posted some on the issues mentioned.
  • Like
Reactions: StuartBound

Free offer for a TFP member

I'm around here so much that every once in a while I briefly forget what an amazing resource this place is for me as a pool owner. I can be helping people for days because I'm not slaving over my own pool. I'd like to give back a little so I'm offering half a gallon of last year's Muriatic acid for pickup in Suffolk County NY. I had to use half the bottle that one time I dosed because it's the weak stuff. Anywho by the time I need it again, I won't remember where I left it and i'd rather it went to a good home.


20240910_170609.jpg

:lovetfp:

Apple Forced Obsolescence

Gotta vent, the wife's Macbook is 10 years old and runs flawless but Apple of course pulled the plug on supporting it anymore (mine is next year) which I get to a degree. So I get her a new Macbook Air and now in lieu of 7 ports you get two USBC ports and a headphone jack. So to connect the ethernet I needed a new ethernet to usbc adapter and now none of the external mice will work as the dongles are now USBC so that's another purchase. I can afford it but man the folks that have tighter budgets its being cheap. At least keep a USB port for legacy connections like external disc drive, mice, camera's etc. Anything that isn't USBC you are SOL and need a new adapter. I know someone will say well that's what you get with going Apple. Now in defense never a virus or a day the laptop didn't work where we needed to reboot it or worried about malware or other Crud so that is appreciated. I just think forcing folks to have to buy all new accessories is messed up.

Pool heater "time to heat" and "cost to heat" calculations >

Here is a way to determine how long it will take your heater to heat your pool water, and how much it will cost you if you are using an electric heater.

This of course won't tell you how much it costs to keep the temp at a certain level once warm, but it will give you an idea as to how long it will initially take to heat the pool.

This is based on my in-ground pool, but you can figure in the parameters of your individual pool to get your correct numbers.

Be advised .. This is only an estimate .. These calculations only reflect the required heating of the water, and do not take into consideration the heating of the cold pool walls or any associated equipment in the pool.

If you don't agree to these calculations, please feel free to respond.
_____________________________________


9,000 Gal. Gunite Pool
104,000 BTU Electric Heat Pump (5.5 KwH power consumption)


Determine Time Required to Increase Water Temp 1 Degree F:

1. Multiply the total gallons of water in the pool by 8.3
This will give you the total weight of the water
(9,000 gal x 8.3 = 74,700 lb)

2. Divide the weight of the water by your heater's BTU
This will give you the hours it takes to raise the water temp 1 degree F
(74,700 lb / 104,000 BTU = .72 hrs)


Determine Total Time Required to Increase Water Temp the Desired Amount:

1. If the current water temp is 65 degrees and you want to raise it to 80 degrees (15 degree increase) ..
Multiply 15 degees by the time it takes to raise the temperature 1 degree F
(15 degrees x .72 hrs = 10.8 hrs)


Determine the Cost of Electricity you Will Use:

1. If your heater uses 5.5 KwH, and with a 10.8 hr run time, it will use 59.4 KwH of electricity
(5.5 KwH x 10.8 hrs = 59.4 KwH)

2. Using 59.4 KwH, and a cost of electricity in your area of 12 cents per KwH, it would cost $7.13
(59.4 KwH x .12 cents = $7.13)
  • Like
Reactions: Blackdirt Cowboy

Seriously need help- CYA and Chlorine

I need help! (please). I am about 5 months in as a new owner of a jacuzzi swim spa. All of a sudden my Total and free Chlorine were off the chart high I tested with a different test strip and Total was off the chart high but FC normal.. I started reading here about CYA. Only the new test strip had CYA and it showed it was at zero. Sooooo, I bought Cyanuric acid and started adding it. ..... nothing. Did not raise the CYA and did not change the chlorine profiles with either test strips. I ordered the TF Pro test kit. it arrived yesterday. I tested my CYA and it is well over 100 (meaning it does not even get half way up to the 100 mark). I have to assume that the test strips were bad/not working when it read that CYA was 0? Now I am totally at a loss. I assume I need to drain my spa, but that is not easy. I'm in NH. It's cold. A complete refill is not really feasible. I could probably partially drain and fill from my well if I have to but that will introduce high iron and manganese creating a whole new set of problems. I'm losing sleep over this. I hope I didn't totally trash my new swim spa.
  • Like
Reactions: labrene

So much rain...

We're getting pretty inundated here on Florida's west coast. I have a new rule of thumb... Any time I've had enough rain that I need to drain the pool, I drain it and add a gallon of chlorine. I know I should do a full test, etc., but with this much rain I'm not going to carefully balance the water anyway (and then drain the new chemicals away with the next flood). The gallon just helps the swg keep up, and helps with whatever gunk is coming in with the rainwater. This weekend is going to be dryer, and I'll do a full-up test and chemical adjustment.

Bond beam repair

I recently purchased a house with an in ground pool where the tile was loose around 1/3 of the pool, and a lot of the coping sounded hollow. After removing all of the tile I discovered bond beam damage in several places. As such, I have removed the coping stones, and chiseled out the bond beam until no more hollow sounds exist.

Original installation of the coping caused the mortar below to go flush against the deck which I assume caused the beam failures. I have chipped out that old mortar and cleared out behind the bond beam to give it the correct space to move. Unfortunately about 25% or more of the deck has 2-3" of empty cavity. Pool deck has no cracks and is in overall good condition except being hollow underneath. Does anyone have suggestions of how to fill this gap safely without pressing on the backside of the pool?

Couple more questions: at which point does the bond beam repair need rebar placed in to help hold the cold joint? I have attached pictures. Also, in places where the plaster has been chipped out below the tile line to remove loose material, I am assuming I will not need to repair the bond beam below the original tile line since the pool is getting re-plastered?

Thank you

IMG-1579.jpgIMG-1578.jpgIMG-1577.jpgIMG-1576.jpgIMG-1575.jpgIMG-1574.jpg

Attachments

  • IMG-1579.jpg
    IMG-1579.jpg
    636.6 KB · Views: 299
  • Like
Reactions: mikes112

3 years, that's it for Nature2/Jandy Salt Cell 1400 Series

I am on my 3rd cell. Pool is 7+ seasons old. They seem to last right around 3 years. The original lasted 3 seasons (1 month end of the build season then 3 more full seasons) then right as the warranty was expiring (36 months) it went out and I got a free one under warranty. That one went out the end of last season (7th season). This season I got a used one from a forum member. It came USPS damaged and now has also "mostly" failed. I am running it at 100% in hopes it can keep up for the remainder of the season. I don't count this one since it came damaged. I actually used parts of the damaged cell along with plates and frame from another failed cell to jury-rig together a functional cell.

I'm getting 125 and 194 errors.

Anyone get more than 3 seasons out of these? My water parameters are perfect and always have been. I run the cells at 55% 24x7 for 6 months.

6 months = 183 days
183 days = 4380 hours
4380 hours * 55% = 2409 hours
2409 hours * 3 = 7227 total hours.

So I am below the "generally accepted" 10000 hours. Probably should get 4 seasons out of these.

Looks like I am spending $700. :mad:
  • Wow
Reactions: JamesW

Pool Closing for First Time

I have used this forum for the last 6 years since.I bought my house, which came with a pool. I have learned to do mostly everything by reading the forum, and this year, I am finally going to try to close it. I read through the various recommended posts relating to closing a pool, and I believe I have a pretty good understanding of how to go about doing it. I purchased a Cyclone that I intend to use to blow out the lines. I have a couple of questions regarding sequence and method of blowing out the lines. I made a PVC adapter to connect to the union that holds in the SWG. In other words, I intend to remove the SWG, and connect the adapter to each union that connects to either side of the SWG and blow out the return side first followed by the suction side. I have attached a photo of the adapter. I have also attached photos of the equipment pad showing my pipes and valves and a photograph of the pool where I labeled the returns (5 in pool returns + 1 fountain), 2 main drains, and skimmer. My equipment pad has 5 valves (main drain, skimmer, middle return, other returns, and fountain). As mentioned, I intend on blowing out the returns first. My question is, should I leave all 3 of those valves open when blowing those out (middle return, other returns, fountain) or should I close 2 valves and only do 1 at a time? Does it really make a difference with the Cyclone or is there enough volume for it to handle all 3 being open? My thought was if I left all 3 open, I would not have to worry about pressure buildup between the time I plug the final return on each valve and the time I shut off the Cyclone (though I did reach that the Cyclone does not build up enough pressure to cause any damage). After plugging the returns, I will shut off all the return valves and connect to the suction side by the SWG union, which would essentially blow water back through the heater, through the filter and into the skimmer/main drains. Will the Cyclone have any issue pushing water through that path? I intend to blow the skimmer out first (I will be lowering the water below the skimmer first). Should I close the main drain valve to blow out the skimmer or keep both valves open, put a gizzmo on skimmer when it blows out, and wait for air bubbles through the main drains and then air lock by closing the main drain valve and then also close the skimmer valve? Thanks for your help.

Attachments

  • 20240831_013530.jpg
    20240831_013530.jpg
    404.6 KB · Views: 26
  • 20240831_013732.jpg
    20240831_013732.jpg
    330 KB · Views: 24
  • 20240827_223242.jpg
    20240827_223242.jpg
    500.3 KB · Views: 27
  • Like
Reactions: Mdragger88

We Have a Winner! TFP Pool of the Month (September 2024); Theme - Pool Toys

So easy! Post ONE pic related to the theme title above. I bet you have a good pic saved somewhere. See the contest rules below to enter.

PLEASE READ RULES FIRST ----> TFP Pool of the Month Contest Rules

Pool 2.jpg

Monthly themed photo contests are announced on the first, with a 10-day submission phase. Days 11-15 are for voting, with the winner announced on the 16th, eligible for a $50 prize.

Pool 1.jpg

It's easy! What have you got to lose? You might receive a $50 discount code from TFtestkits.net.

Click Here to See Some Previous TFP Monthly Contest Winners

  • Like
Reactions: Mdragger88

Looking for help with SR Smith PT 6002 and Mod Lights

Firstly, thanks for clicking on my post.
I am hoping some forum members could help me out as SR Smith has been zero help and they don’t have any warranty support near my zip code.

I have a PT 6002 and 4 Mod lights which worked fine until this season.
This season the remote no longer works for the PT (inductor light on remote lights up and battery has been replaced) but the PT doesn’t responded.
Secondly my lights won’t sync up to the same color and one light sort of flickers when changing.

Does anyone have any recommendations on what I can look into to fix this. Thank you!
  • Like
Reactions: m_cat12

Filter