Security Cameras

The trick to the patching is to not use sheetrock tape. That ends up needing a lot of layers of mud, and sanding and smoothing and blending... a 6"x6" hole becomes a 2'x2' patch, that'll take three or four days of drying, too! And a huge mess! My miracle material is Fix-It-All. It used to be called Fix-All. It's a spackling compound that dries like rock. So:

You use a sheetrock saw and carefully cut out the square. Smaller isn't better, because you have to get your hand in there, or a drill. Don't be shy. I'll cut out as big as I need to work comfortably. I'll save the cut out. When cutting through a wall, you have to be careful towards the end so that you don't lose the piece down the inside of the wall!

Come patch time, I'll cut two pieces of soft wood, a few inches longer than the patch is wide. So for a 6x6 hole I'll cut two 10" long pieces of wood. 1"x2" pine works great. I'll screw a sheetrock screw into the middle of flat side of each piece. That's a handle. Then I'll work the piece into the hole, and use the screw handle to pull the wood up tight to the back of the sheetrock. If the hole is big enough, you don't need the handle, you can just use your fingers to pull it tight. Then you screw through the sheetrock to fix the wood to the back of the sheet rock. Do that with the second piece. Now you can screw the patch to the wood and that will flush it up nicely with the wall. Mix up some Fix-It-All and smoosh it into the joints, smooth and flush with the wall. Don't leave any beads sticking out, as they are very hard to sand. Let that dry. Only takes a half hour or so.

That'll seal up the patch to the wall. Fix-It-All won't crack or shrink. It's stronger than the gypsum inside the sheetrock, and sticks to it permanently. I've never had one of these patches fail or later reveal. I've done it hundreds of times. Then you might need a light coat or two of mud over that, to just smooth over the Fix-It-All. Some light sanding between coats and you'll end up with a super smooth wall. Undetectable. Add texture to match the existing wall, prime and paint (don't skip the priming, it's not worth it). I can usually do all that in one day, with some hours between coats, depending on weather and how thick I had to coat things.
I have had to pull plenty of wires and repair plenty of leaky pipes in walls or ceilings. Patching drywall is easy, what really stinks is when you can’t get a good paint match to the existing wall paint and wind up having to repaint an entire room. Yes always prime, for fresh drywall mud you don’t need the expensive primer the cheap stuff will do just fine. Also I personally don’t use fix it all or quick drying mud. I just use the regular stuff and dry each layer of mud with a heat gun. I find that using a heat gun makes for quicker dry times then about anything else.
 
  • Like
Reactions: markayash
Also I personally don’t use fix it all or quick drying mud.
I like Fix-It-All because it's so much stronger than mud, and dries in 30 minutes. Mud can shrink and crack and would fail if you push on it hard enough, especially if the joint you're filling is wide. That's why you need to tape a joint when you use mud. Fix-It-All is superior if you're going to fudge and skip the tape.
 
prime and paint (don't skip the priming, it's not worth it)
The priming is needed to saturate the patch material so the paint drys with basketball like bumps to match the rest of the wall. Otherwise the paint gets sucked in and is glass flat on the basketball like wall and will be seen from any off angle. 3 or 4 coats of paint have the same effect or one coat of the thicker primer and then one of paint.

It took me forever to figure out. I’d patch as smooth as could be and still see it. On the 2nd room color change they would all disappear.
 
I like Fix-It-All because it's so much stronger than mud, and dries in 30 minutes. Mud can shrink and crack and would fail if you push on it hard enough, especially if the joint you're filling is wide. That's why you need to tape a joint when you use mud. Fix-It-All is superior if you're going to fudge and skip the tape.
Yes, I like to use the fiberglass tape personally. Three coats of mud drying with a heat gun between each coat. Last coat I use a 12 inch knife. To me the fix it all or spackle just seems to leave some bad flashing that always seems to require several coats of primer. I could see using those products for the first couple of coats and a finish layer of mud, but honestly I have never tried that. Next time I might try that with the fix it all, if it eliminates the need for tape then you should be able to use thinner and fewer layers of mud.
 
Last edited:
Great summary (Ok, not summary) of that process. I don't think I was missing anything logically, and now confirm why I have wireless cameras. I'm not opposed to patching, but that volume of patching exceeds my dislike for latency in this scenario. And now I have several versions of step by steps to refer back to when needed.
 
  • Like
Reactions: Dirk
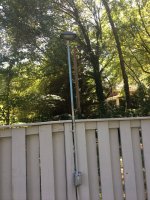
In response to the original subject. I am happy with my ring cameras and doorbells and the one blink camera I have. Another security measure I use is smart outdoor lighting. I have Alexa set to turn all my exterior lights on at sunset and off and sunrise. I have lots of outdoor lighting so my backyard is very well lit at night.
 
  • Like
Reactions: Dirk
Yes, I like to use the fiberglass tape personally. Three coats of mud drying with a heat gun between each coat. Last coat I use a 12 inch knife. To me the fix it all or spackle just seems to leave some bad flashing that always seems to require several coats of primer. I could see using those products for the first couple of coats and a finish layer of mud, but honestly I have never tried that. Next time I might try that with the fix it all, if it eliminates the need for tape then you should be able to use thinner and fewer layers of mud.
Tape and mud is the correct fix, exactly as you describe, I wouldn't try to talk you out of that. (I thought in your earlier post you were talking about just using mud alone, which will fail.) But the Fix-It-All is my shortcut to the tape'n'mud. Usually one thin coat of mud on top of the Fix-It-All is required, to fill-in the pin holes and what-have-you. Two coats if you're compulsive like me. But one or two, they're both thin and dry fast.

Newdude explains perfectly why I said skipping primer is not worth it. You'll either be unhappy with the result, or have to use coat after coat of [more expensive] paint to get it to look right.

Last time I did this I was rerouting some Romex. Took me seven holes to snake past all the blocking and fiberglass. I can Fix-It-All seven almost as fast as one. If I taped each one, it'd turn into a week!

Bottom line, walls are not works of art. Close enough is close enough. I was working late one night and happened to shine my head-light across the wall. Like when you first turn on your pool light at night across your new plaster... most walls are pretty lumpy. Not so much the splatter-knock-down, but any hand finish is rife with imperfections. The balance to my compulsiveness about getting everything perfect is my attention span. I'll do whatever it takes to get something perfect, and whether I get there or not, it's completely forgotten about the next day! 🤪
 
In response to the original subject. I am happy with my ring cameras and doorbells and the one blink camera I have. Another security measure I use is smart outdoor lighting. I have Alexa set to turn all my exterior lights on at sunset and off and sunrise. I have lots of outdoor lighting so my backyard is very well lit at night.
Same here. With LEDs, lighting is pretty inexpensive security. Counting my mini-bistro lights and garden lights, I can blaze my yards front and back with over 400 lights for about 100 watts.
 
  • Like
Reactions: Orion7319
Tape and mud is the correct fix, exactly as you describe, I wouldn't try to talk you out of that. (I thought in your earlier post you were talking about just using mud alone, which will fail.) But the Fix-It-All is my shortcut to the tape'n'mud. Usually one thin coat of mud on top of the Fix-It-All is required, to fill-in the pin holes and what-have-you. Two coats if you're compulsive like me. But one or two, they're both thin and dry fast.

Newdude explains perfectly why I said skipping primer is not worth it. You'll either be unhappy with the result, or have to use coat after coat of [more expensive] paint to get it to look right.

Last time I did this I was rerouting some Romex. Took me seven holes to snake past all the blocking and fiberglass. I can Fix-It-All seven almost as fast as one. If I taped each one, it'd turn into a week!

Bottom line, walls are not works of art. Close enough is close enough. I was working late one night and happened to shine my head-light across the wall. Like when you first turn on your pool light at night across your new plaster... most walls are pretty lumpy. Not so much the splatter-knock-down, but any hand finish is rife with imperfections. The balance to my compulsiveness about getting everything perfect is my attention span. I'll do whatever it takes to get something perfect, and whether I get there or not, it's completely forgotten about the next day! 🤪
Blocking... I have yet to own a home with blocking. I’m glad they don’t really construct our homes here with that method. I’m the guy that family always gets to hang their TVs on their walls, and I have hung so many in my current house and previous houses. I always run a new outlet behind the tv and just tap the outlet below. Always a straight shot and never any drywall repair :) Dealing with blocking seems like a PITA!
 

Enjoying this content?

Support TFP with a donation.

Give Support
Same here. With LEDs, lighting is pretty inexpensive security. Counting my mini-bistro lights and garden lights, I can blaze my yards front and back with over 400 lights for about 100 watts.
LEDs are awesome! I made these lights for my fence. The fixtures are rated to last 50 years, they are as bright as street lights.
 

Attachments

  • A995B93B-9A88-4813-BACF-168691013783.jpeg
    A995B93B-9A88-4813-BACF-168691013783.jpeg
    731.9 KB · Views: 15
Blocking... I have yet to own a home with blocking. I’m glad they don’t really construct our homes here with that method
Pretty sure it’s National fire code to have blocking to slow the burn about waist high. Most municipalities adopted it for new construction in the late 90s early 2000s. Anything previous is grandfathered of course
 
  • Like
Reactions: Orion7319
Pretty sure it’s National fire code to have blocking to slow the burn about waist high. Most municipalities adopted it for new construction in the late 90s early 2000s. Anything previous is grandfathered of course
My current house was made in the 60’s and it’s doesn’t have blocking. My last house was built in 2005 and it also didn’t have it, just open space between the studs. The current house has all kinda 60s weirdness going on in its construction, some good some not so good.
 
  • Like
Reactions: Newdude
My current house was made in the 60’s and it’s doesn’t have blocking. My last house was built in 2005 and it also didn’t have it, just open space between the studs. The current house has all kinda 60s weirdness going on in its construction, some good some not so good.
My house is about 10 years old and for the most part only has blocking in the bays next to doors, so I've only run into blocks a few times. Thankfully.
 
  • Like
Reactions: Orion7319
If you have access to power these cameras are great, don’t let the low price scare you, Wyze is turning the market upside down.
I have several of them, the cam plus option alerts you for just people vs pets etc.
I also have their $50 smart thermostat


Thread Status
Hello , This thread has been inactive for over 60 days. New postings here are unlikely to be seen or responded to by other members. For better visibility, consider Starting A New Thread.