New Inground Pool - Built in Massachusetts

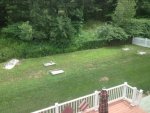
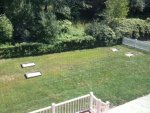
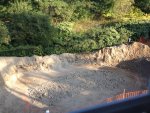
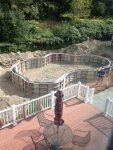
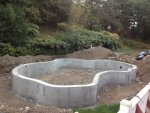
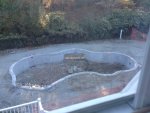
Ok, so the process has officially begun. Below is a before picture of our backyard where the pool is being built. You can see the existing black chainlink fence along the woods line and the white vinyl fence along the right. We removed 4 panels and 4 posts of the vinyl fence b/c it is not pool code. The mesh on the chainlink will also need to be replaced with pool code mesh. We are going to surround the pool with its own aluminum fencing/gate (keeping the existing vinyl fence for the rest of the yard) to keep our dogs out and avoid removing a vinyl fence that we purchased only 1 year ago. This will also keep us from having to install an alarm in our house since the pool will be completely enclosed in its own fencing.

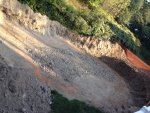
Also notice the rock on the left. We are choosing to keep the rock (not sure if its ledge!!) and work it into the landscaping.
 

Attachments

  • photo 1.JPG
    photo 1.JPG
    155.3 KB · Views: 148
This picture shows the layout of the pool spray painted on the lawn to show where the pool would go. It was left while the pool company went to the town to get building permits. After a while I asked them to shift the left side 2' back giving with the idea of giving more room between the back deck and the pool stairs.
 

Attachments

  • photo 3.JPG
    photo 3.JPG
    180.5 KB · Views: 142
On October 2nd the digging began....BUT they hit ledge in the deep end. Our options were to get more equipment in at $3000/day to hammer away at it with not knowing how long that could take or shift the entire pool 5 ft to the left (getting closer to the rock that might actually be ledge :|

We decided to shift the entire pool 5 feet to the left and luckily we did not hit anymore ledge but we can only go 7 ft. deep in the deepend because we do hit ledge there. We were indecisive anyway about how deep we wanted to go so anywhere between 6-8' was good with us. :-D
 

Attachments

  • photo 6.JPG
    photo 6.JPG
    210.6 KB · Views: 143
  • photo 7.JPG
    photo 7.JPG
    208.3 KB · Views: 139
Next, the steel forms were assembled so the concrete could be poured. The electrician also came in at this point to ground the pool in 4 places and obtain electrical permits.
 

Attachments

  • photo 9b.JPG
    photo 9b.JPG
    187 KB · Views: 141
  • photo 9a.JPG
    photo 9a.JPG
    166.7 KB · Views: 141
The pool was then backfilled/compacted and the deepend was dug. Truck loads of sand/stone dust were hauled in as backfill and the stairs and cuddle cove (swimout) were poured. This is how it will stay until Spring. So far, I am very happy with the pool company we picked! :goodjob:
 

Attachments

  • photo 15.JPG
    photo 15.JPG
    167.5 KB · Views: 148
  • photo 17.JPG
    photo 17.JPG
    178.6 KB · Views: 140
  • photo 18.JPG
    photo 18.JPG
    160.8 KB · Views: 142
Thread Status
Hello , This thread has been inactive for over 60 days. New postings here are unlikely to be seen or responded to by other members. For better visibility, consider Starting A New Thread.