Industrial Automation 8-Layer Stackable Card for Raspberry Pi Pool Automation and Sensor/Chemical Control and Integration
(nodejs-poolController / nodejs-poolController-dashPanel / relayEquipmentManager)

- Table of Contents -
- Preface
1. Background, Purpose and Scope
2. Credits
3. Alternative Automation Enclosure and Related Hardware
4. Sensors, Probes, EZO-Circuits and Hosts
5. Additional Miscellaneous Information
6. Useful References and Links
7. Glossary
8. Additional Photographs with Related Comments
Preface –
This document concerns itself with advanced and alternative pool automation, sensor and chemical control and integration.
Nothing discussed in the initial posts of this thread are actually “necessary” for the provision or the operation of basic pool automation or control. All of the methods or procedures discussed below should be considered “above and beyond” what is necessary for the majority of pool owners considering pool automation and control
With regards to this newly completed project of mine, there are basically two major components that comprise the overall system - Hardware and Software. This document concerns itself with the hardware component of the system.
The software component is in the final stages of initial development and is currently in beta testing.
Once that beta testing is complete and the software is released by the developer. Then a follow-on companion document titled “Relay Equipment Manager (REM) and Integration with nodejs-poolController and dashPanel - Information and User’s Guide”, will be published.
A draft outline of the Information and User’s Guide is provided here for reference purposes.
1. Background, Purpose and Scope
Several months ago, particular discussions among several TFP members began to develop online and off-line. These discussions centered around the various design and implementation considerations of a more robust level of pool automation incorporating sensor/chemical control and applicable integration with existing automation systems.
 These discussions became more involved and detailed over time. Not only due to the fact that the nodejs-poolController and associated nodejs-poolController-dashPanel software had developed into much more comprehensive and dynamic platforms. But in addition, both were becoming more “mainstream” as well.
(Please refer to the glossary for definitions of nodejs-poolController, nodejs-poolController-dashPanel and REM)
Several members here (including myself) were having enhanced success with these two programs that by all accounts, were exceeding expectations.
Also, others were having increasing success from their own “DIY” or “homebrew” pool automation and sensor/chemical control systems as well.
The last element that served to enhance the progression of these discussions was due to the fact that several individuals were involved in an ongoing project to “jailbreak” or “crack-the-code”, with regards to the Pentair IntelliValve actuator and its RS-485 command structure. This brought several individuals into an off-line group with a synonymous goal. Consequently, various other alternative pool automation topics and discussions developed over time.
As these discussions concerning various advanced pool automation topics further developed, I began to seriously consider “upgrading” my current automation system. I started to imagine just what the possible end results might be. Especially since I had just recently upgraded my automation and pool control from merely using the Pentair IntelliCenter Web Client and iOS Mobile app, to using the more “user-friendly” nodejs-poolController-dashPanel. After many months of using this new controller, I really considered it to be a major “step up” when compared to that of the Pentair platforms and the many pitfalls that reliance on those pathetic platforms brought.
I began to realize however that if I opted to further upgrade my pool automation and control, it would indeed be a major undertaking. One thing quickly became clear to me. If this upgrade were to be performed in what I considered to be a correct manner, then not only would I be required to add many new and key components to my current automation “mix.” But, that I would also need to fully integrate the “new” with the existing.
That would require a major retrofit. It would require many modifications to my equipment pad as well as existing plumbing. It would also require modifications to both low voltage and line voltage circuitry throughout my equipment pad. And not only that, but my IntelliCenter OCP Load Center would also require some retrofitting/modifications as well.
Please refer to the following link for detailed information regarding the various modifications that I made to my equipment pad and the retrofitting of my IntelliCenter OCP Load Center.
 www.troublefreepool.com
Note 1: Much of the methodology explored throughout this discussion is based solely upon my own self-imposed requirements and personal experiences. Many times, there are different methods which one can utilize in order to arrive at the same solution. So if other options are not specifically mentioned here, it does not necessarily imply that they cannot be realized.
If you think that you might have an improved option or solution, explore it and then please share it here on TFP for the benefit of all.
Note 2: Throughout this discussion, I have provided photographs and/or illustrations where applicable. In addition, at the end of this document I will provide a number of photographs with related comments that illustrate some of the various activities that were performed during the course of this project.
However, due to some total image limitations and to provide for possible edits in the future, I broke this document up into several posts.
Note 3: In the near future. I plan to provide a “parts list” of items that were utilized during the course of this project and that were not specifically addressed or mentioned in this initial discussion.
Note 4: The information contained within this document is meant to be dynamic rather than static. In other words - a “living” document that is intended to reflect various future changes or improvements in methods, future equipment or devices, software/firmware releases, and to address any information that may become outdated with future edits and updates.
Note 5: A good deal of this discussion concerns itself with the installation, configuration and the use of chemical sensor/probes, pool chemical dosing components and their related monitoring, reporting and event driven software.
However, nothing in this document should be construed as to suggest that regular and timely “manual” pool water testing should ever be completely abandoned. On the contrary. Electronic components and software sometimes fail and just like with any other chemical controller - Complete and total reliance on automation and automated chemical control is NOT advised.
Chemical automation and sensor results should ALWAYS be reinforced or validated using industry-standard “manual” pool water/chemical testing. Especially when any doubt exists regarding the validity of any critical sensor readings (pH and/or ORP.) The same holds true for filter pressure transducer readings. “If in doubt, check it out.”
In addition, the discussions contained within are specifically applicable for outdoor / uncovered swimming pools. Indoor or covered pools require special or different considerations with regards to chemicals and swimming pool chemical management.
Note 6: And lastly – In my opinion, this project was a success and a huge “step forward” for me personally, as it relates to my pool automation and sensor/chemical control.
However, in the interest of “full disclosure,” I should note that things didn’t always go according to plan and yes there were setbacks. No project of this magnitude is ever without mistakes and miscalculations. That is the primary reason for the sharing of this information. In the event that others may consider a similar project, hopefully there are some beneficial “take-aways” here that can be realized by others.
As I will note in the following section, I had a lot of help. But, at the same time I was putting together many different components that some individuals had experience with and other’s may have had experiences with different components, uses or arrangements. In other words, there were times that I felt like I was “trailblazing” some new paths here. There were no real guidelines or instructions to follow. That’s really not an experience that can give you that “warm and fuzzy” feeling.
Sometimes there were “steps” backwards. And I won’t lie. At times, there was some stress involved. But no matter a minor “speed bump” here or there, there was always momentum forward and the train did continue to “roll down the tracks” to it’s final destination.
In the end, this project exceeded my expectations. And for the most part I really enjoyed myself throughout. Friendships were strengthened and I experienced a camaraderie with fellow TFP members who harbor the same specific type of pool automation interests as I do.
2. Credits
Although this thread has been initiated by me and I had the opportunity to assist where possible in some of the component and software testing (beta-tester). I am merely sharing my own particular experiences, methods and results. There is quite a bit of material contained within this discussion as well as the follow-on REM Information and User’s Guide, which is the direct result of advanced software programming work and/or the knowledge and expertise of others.
I’m creating this thread mostly for the benefit of others who may have similar ambitions in the future. However, I want to ensure that I don’t give a false impression that I am somehow responsible for the conception of this level of pool automation, sensor and chemical control. I’m not that smart by any means. In the end, I am merely the beneficiary of other’s intense work, time and knowledge.
I would personally like to give credit and “shout-outs” to the following individuals for their amazing assistance to not only me with regards to this project. But to the many others that they have assisted as well, when it comes to alternative or advanced pool automation and related topics.
@cmc0619 and @Katodude These two TFP members were the “originals” who convinced me that there was pool automation “life” beyond the Pentair IntelliCenter. They have been exploring “alternative pool automation” for a while now and it is due to them mostly that I began this journey. They were the ones that initially pointed me in the direction of the nodejs-poolController and nodejs-poolController-dashPanel.
They were always there when I strayed and they have done well keeping me “between the lines.” Thanks much for all of the time and assistance guys! I have learned a tremendous amount from you two and I’m still learning.
Besides, they promised me cookies if I would explore the “dark-side” of pool automation and control. How could I resist that temptation?
@rstrouse and @tagyoureit These two software programmers are the developers of nodejs-poolController and its associated webClient, the nodejs-poolController-dashPanel and REM.
And they operate their own Pentair automation systems as well. Note: In my opinion, it’s a “win-win” for users when the developer of a product is also a regular user of that same product.
These are the “super-smart” guys that get all of the credit when it comes to the amazing development of these software products that several of us now or will in the future, reap the benefits of using.
I really can’t thank them enough for the sharing of some of their knowledge and their tremendously helpful advice and assistance to me throughout this project. Also for their development and continued upgrades of the above mentioned software platforms.
And certainly, for their patience and for “putting up” with a “noob,” who until 8 months ago or so, didn’t even know what a Raspberry Pi was. Heck, at first - I thought it was some sort of a desert that you baked in the oven.
Lastly, much of the work by @mcqwerty, @guinness, @segalion and his RaspiPool, segalion/raspipool (great work there), @jonpcar, @dradam and others too numerous to name here, have been inspirational to me regarding this type of advanced and alternative pool automation and sensor/chemical control.
Many, many thanks to all of the above for opening up this new world of “alternative” pool automation to me! It’s been quite the ride over the 2nd half of 2020.

Note: Some images contained within this document are the courtesy of – Atlas Scientific Environmental Robotics
3. Advanced Automation Enclosure and Related Hardware
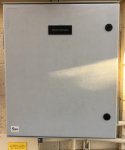
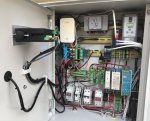
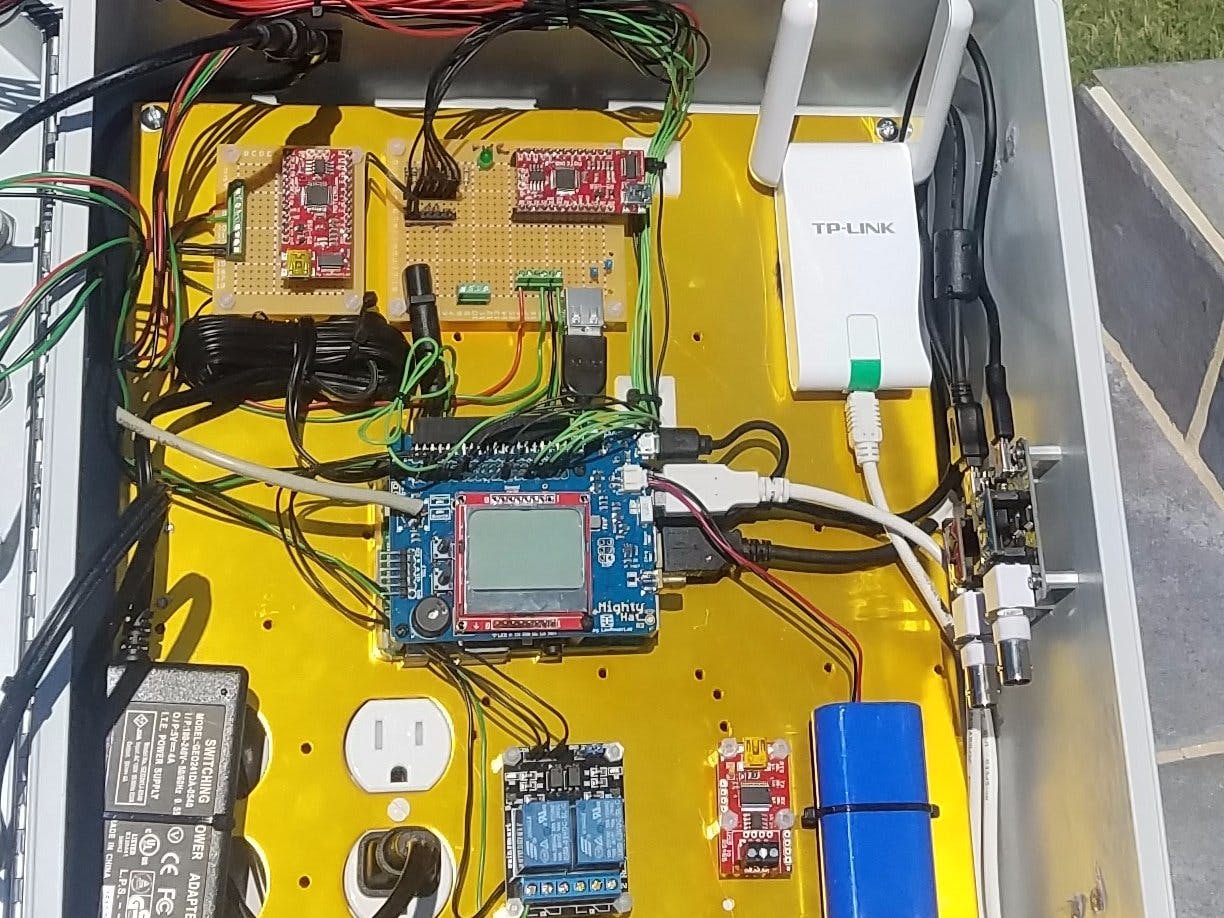
In this section I will explore my new automation enclosure as well as the hardware housed within.
Note: Here, you will find my own particular experiences. This will include the equipment that I ultimately selected to incorporate in this automation system and why. However, this was just “my way” and nothing here is intended to suggest that there are not different methodologies or different equipment that cannot be used in order achieve the same result.
a) Automation Enclosure
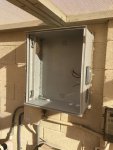
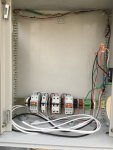
One thing quickly became apparent to me in short order if I was even going to get this project “off-the-ground.” I would be required to install a weatherproof enclosure at the pool equipment pad in order to house the required electronics.
I had initially inquired of others, if I could possibly “run” some of the sensor control cables to the house and then install the necessary Raspberry Pi micro-computer and related components there, instead of at the equipment pad. That idea was quickly discounted, as the distance for some of those types of signals from the sensors and probes would be excessive. Along with that fact, I had determined that I would not be able to house all of the required components within the existing IntelliCenter Load Center.
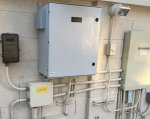 So it was settled. The micro-computer and other key and related electronic components would require housing within a weatherproof enclosure. And the location of this enclosure would be required at the pool equipment pad.
After discussions and research that involved what components would be required. As well as considering provisions for enclosure cooling (I reside in central Arizona where summer outside temperatures are typically in the high teens). I then set to work to find the right enclosure for those requirements.
During the course of discussions with others, it had become apparent to me that I would require “DIN rail mounting” for the many components that would be housed within this enclosure.
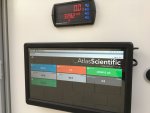
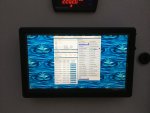
Based on some additional research, I determined that I should consider installing a small touchscreen monitor at the equipment pad as well. My reasoning was that this requirement would greatly facilitate some initial sensor configurations while I was physically at the pad. And in addition, I thought it might be helpful when sensor calibrations would be necessary.
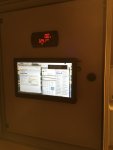
Although not actually a “requirement” per se, I have indeed found the touchscreen monitor to be very useful at the equipment pad. I can control all of the sensors and devices from this touchscreen monitor to include REM and the IntelliCenter via the nodejs-poolController-dashPanel. I can of course, do the same thing from my Mac, iPad, iPhone, etc. however.
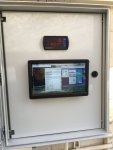
Consequently, I decided upon Altelix as the manufacturer of a selected enclosure. This decision was based on recommendations, features and reputation.
Using my basic plans and requirements as my guide. And based on consultations with the Altelix sales team. I settled on a 24x20x9 Industrial DIN Rail Enclosure, Fiberglass, NEMA 3X, IP65 enclosure.
Unfortunately, this model did not come bundled entirely with the configurations that I required. Consequently, it would require some “a-la-carte” additions to it as well. The additions included items as listed below:
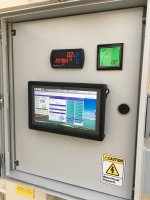
- An inner door where I planned to mount an Elecrow 10.1” 1920x1080p HDMI IPS Touchscreen Monitor as well as my existing Precision Digital ProVu Pulse Input Flow Rate/Totalizer Meter for the automatic pool fill/leveler.
EDIT: 7/6/21... Since the initial publication of this document, I have also added a FlowVis Digital to the mix. Hence, I mounted the FlowVis Digital Panel Display to the inner door and connected the 4-20mA outputs to the Sequent Microsystems Industrial I2C Automation Raspberry Pi Stackable Card.
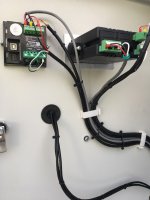
- Mounting Kit.
- A cooling fan setup to include two (2) each, 120/240 VAC 4” enclosure type fans. Associated Fan Filters, Guard Screensand two ABS Vent/Fan Shroud Kits were also required. A thermostat to control the fans was NOT included in this order however. I discovered that Altelix does not sell enclosure fan thermostats separately but only when bundled with certain “kits.” Consequently, I would be required to look elsewhere for the thermostat.
- Additional DIN Rail Mounting Kit which includes two DIN rails and hardware. Two rails and hardware are included with the enclosure but I had calculated that I would require an additional two.
Lastly, I had to assemble most of the above. That was not really a problem. In addition, I would have to cut the 4” diameter holes in the enclosure for the fan openings. That was just as well, as I had custom requirements in that respect. It made sense to me to have one fan as an intake fan at the bottom of one side of the enclosure and the second fan as an exhaust fan at the top of the other side. I determined that this setup should provide for maximum air flow and cooling within the enclosure.
As far as an enclosure cooling fan thermostat, I selected the - Penn/Johnson Controls A421AEC-01C Electronic Temp Control, SPDT. A bit more “pricier” than some others out there but it met all of my specifications and requirements. In addition, Penn/Johnson has a great reputation for quality, durability and performance. It was not DIN rail mountable however, so I would be required to fashion a DIN rail mountable device that I could attach the thermostat to. I also fashioned a manual enclosure fan “cut-off” switch with parts obtained mostly from The Home Depot.
The enclosure took about two weeks for delivery. So in the meantime, I continued to work on possible enclosure configuration drawings, equipment requirements, making the necessary modifications at the pool equipment pad, etc.
(Continued in next post)
(nodejs-poolController / nodejs-poolController-dashPanel / relayEquipmentManager)

- Table of Contents -
- Preface
1. Background, Purpose and Scope
2. Credits
3. Alternative Automation Enclosure and Related Hardware
a) Enclosure
b) AC Power Requirements and Related Support Equipment
c) DC Power Requirements and Related Support Equipment
d) Network Connectivity
e) RS-485 Connectivity
4. Sensors, Probes, EZO-Circuits and Hosts
a) Overview
b) Probes and Sensors
c) Sensor/Probe Mounting Considerations
d) Initial Sensor Setup and Configuration
5. Additional Miscellaneous Information
a) Calibrations
b) Atlas Scientific IoT Monitoring Software
c) Other Atlas Scientific Kits
6. Useful References and Links
7. Glossary
8. Additional Photographs with Related Comments
Preface –
This document concerns itself with advanced and alternative pool automation, sensor and chemical control and integration.

Nothing discussed in the initial posts of this thread are actually “necessary” for the provision or the operation of basic pool automation or control. All of the methods or procedures discussed below should be considered “above and beyond” what is necessary for the majority of pool owners considering pool automation and control
With regards to this newly completed project of mine, there are basically two major components that comprise the overall system - Hardware and Software. This document concerns itself with the hardware component of the system.
The software component is in the final stages of initial development and is currently in beta testing.
Once that beta testing is complete and the software is released by the developer. Then a follow-on companion document titled “Relay Equipment Manager (REM) and Integration with nodejs-poolController and dashPanel - Information and User’s Guide”, will be published.
A draft outline of the Information and User’s Guide is provided here for reference purposes.
1. Background, Purpose and Scope
Several months ago, particular discussions among several TFP members began to develop online and off-line. These discussions centered around the various design and implementation considerations of a more robust level of pool automation incorporating sensor/chemical control and applicable integration with existing automation systems.
 These discussions became more involved and detailed over time. Not only due to the fact that the nodejs-poolController and associated nodejs-poolController-dashPanel software had developed into much more comprehensive and dynamic platforms. But in addition, both were becoming more “mainstream” as well.
(Please refer to the glossary for definitions of nodejs-poolController, nodejs-poolController-dashPanel and REM)
Several members here (including myself) were having enhanced success with these two programs that by all accounts, were exceeding expectations.
Also, others were having increasing success from their own “DIY” or “homebrew” pool automation and sensor/chemical control systems as well.
The last element that served to enhance the progression of these discussions was due to the fact that several individuals were involved in an ongoing project to “jailbreak” or “crack-the-code”, with regards to the Pentair IntelliValve actuator and its RS-485 command structure. This brought several individuals into an off-line group with a synonymous goal. Consequently, various other alternative pool automation topics and discussions developed over time.
As these discussions concerning various advanced pool automation topics further developed, I began to seriously consider “upgrading” my current automation system. I started to imagine just what the possible end results might be. Especially since I had just recently upgraded my automation and pool control from merely using the Pentair IntelliCenter Web Client and iOS Mobile app, to using the more “user-friendly” nodejs-poolController-dashPanel. After many months of using this new controller, I really considered it to be a major “step up” when compared to that of the Pentair platforms and the many pitfalls that reliance on those pathetic platforms brought.
I began to realize however that if I opted to further upgrade my pool automation and control, it would indeed be a major undertaking. One thing quickly became clear to me. If this upgrade were to be performed in what I considered to be a correct manner, then not only would I be required to add many new and key components to my current automation “mix.” But, that I would also need to fully integrate the “new” with the existing.
That would require a major retrofit. It would require many modifications to my equipment pad as well as existing plumbing. It would also require modifications to both low voltage and line voltage circuitry throughout my equipment pad. And not only that, but my IntelliCenter OCP Load Center would also require some retrofitting/modifications as well.
Please refer to the following link for detailed information regarding the various modifications that I made to my equipment pad and the retrofitting of my IntelliCenter OCP Load Center.
IntelliCenter OCP Load Center / Equipment Pad – Modifications and Retrofit
IntelliCenter OCP Load Center / Equipment Pad – Modifications and Retrofit - Table of Contents - - Purpose and Scope - Planning and Other Considerations - Junction Boxes (Line, Low, Actuator/Sensor/Sanitation/Chem) - IntelliCenter OCP Low Voltage Compartment and Raceway - IntelliCenter High...
Note 1: Much of the methodology explored throughout this discussion is based solely upon my own self-imposed requirements and personal experiences. Many times, there are different methods which one can utilize in order to arrive at the same solution. So if other options are not specifically mentioned here, it does not necessarily imply that they cannot be realized.
If you think that you might have an improved option or solution, explore it and then please share it here on TFP for the benefit of all.
Note 2: Throughout this discussion, I have provided photographs and/or illustrations where applicable. In addition, at the end of this document I will provide a number of photographs with related comments that illustrate some of the various activities that were performed during the course of this project.
However, due to some total image limitations and to provide for possible edits in the future, I broke this document up into several posts.
Note 3: In the near future. I plan to provide a “parts list” of items that were utilized during the course of this project and that were not specifically addressed or mentioned in this initial discussion.
Note 4: The information contained within this document is meant to be dynamic rather than static. In other words - a “living” document that is intended to reflect various future changes or improvements in methods, future equipment or devices, software/firmware releases, and to address any information that may become outdated with future edits and updates.
Note 5: A good deal of this discussion concerns itself with the installation, configuration and the use of chemical sensor/probes, pool chemical dosing components and their related monitoring, reporting and event driven software.
However, nothing in this document should be construed as to suggest that regular and timely “manual” pool water testing should ever be completely abandoned. On the contrary. Electronic components and software sometimes fail and just like with any other chemical controller - Complete and total reliance on automation and automated chemical control is NOT advised.
Chemical automation and sensor results should ALWAYS be reinforced or validated using industry-standard “manual” pool water/chemical testing. Especially when any doubt exists regarding the validity of any critical sensor readings (pH and/or ORP.) The same holds true for filter pressure transducer readings. “If in doubt, check it out.”
In addition, the discussions contained within are specifically applicable for outdoor / uncovered swimming pools. Indoor or covered pools require special or different considerations with regards to chemicals and swimming pool chemical management.
Note 6: And lastly – In my opinion, this project was a success and a huge “step forward” for me personally, as it relates to my pool automation and sensor/chemical control.
However, in the interest of “full disclosure,” I should note that things didn’t always go according to plan and yes there were setbacks. No project of this magnitude is ever without mistakes and miscalculations. That is the primary reason for the sharing of this information. In the event that others may consider a similar project, hopefully there are some beneficial “take-aways” here that can be realized by others.
As I will note in the following section, I had a lot of help. But, at the same time I was putting together many different components that some individuals had experience with and other’s may have had experiences with different components, uses or arrangements. In other words, there were times that I felt like I was “trailblazing” some new paths here. There were no real guidelines or instructions to follow. That’s really not an experience that can give you that “warm and fuzzy” feeling.
Sometimes there were “steps” backwards. And I won’t lie. At times, there was some stress involved. But no matter a minor “speed bump” here or there, there was always momentum forward and the train did continue to “roll down the tracks” to it’s final destination.
In the end, this project exceeded my expectations. And for the most part I really enjoyed myself throughout. Friendships were strengthened and I experienced a camaraderie with fellow TFP members who harbor the same specific type of pool automation interests as I do.
2. Credits
Although this thread has been initiated by me and I had the opportunity to assist where possible in some of the component and software testing (beta-tester). I am merely sharing my own particular experiences, methods and results. There is quite a bit of material contained within this discussion as well as the follow-on REM Information and User’s Guide, which is the direct result of advanced software programming work and/or the knowledge and expertise of others.
I’m creating this thread mostly for the benefit of others who may have similar ambitions in the future. However, I want to ensure that I don’t give a false impression that I am somehow responsible for the conception of this level of pool automation, sensor and chemical control. I’m not that smart by any means.
I would personally like to give credit and “shout-outs” to the following individuals for their amazing assistance to not only me with regards to this project. But to the many others that they have assisted as well, when it comes to alternative or advanced pool automation and related topics.
@cmc0619 and @Katodude These two TFP members were the “originals” who convinced me that there was pool automation “life” beyond the Pentair IntelliCenter. They have been exploring “alternative pool automation” for a while now and it is due to them mostly that I began this journey. They were the ones that initially pointed me in the direction of the nodejs-poolController and nodejs-poolController-dashPanel.
They were always there when I strayed and they have done well keeping me “between the lines.” Thanks much for all of the time and assistance guys! I have learned a tremendous amount from you two and I’m still learning.
Besides, they promised me cookies if I would explore the “dark-side” of pool automation and control. How could I resist that temptation?
@rstrouse and @tagyoureit These two software programmers are the developers of nodejs-poolController and its associated webClient, the nodejs-poolController-dashPanel and REM.
And they operate their own Pentair automation systems as well. Note: In my opinion, it’s a “win-win” for users when the developer of a product is also a regular user of that same product.
These are the “super-smart” guys that get all of the credit when it comes to the amazing development of these software products that several of us now or will in the future, reap the benefits of using.
I really can’t thank them enough for the sharing of some of their knowledge and their tremendously helpful advice and assistance to me throughout this project. Also for their development and continued upgrades of the above mentioned software platforms.
And certainly, for their patience and for “putting up” with a “noob,” who until 8 months ago or so, didn’t even know what a Raspberry Pi was. Heck, at first - I thought it was some sort of a desert that you baked in the oven.
Lastly, much of the work by @mcqwerty, @guinness, @segalion and his RaspiPool, segalion/raspipool (great work there), @jonpcar, @dradam and others too numerous to name here, have been inspirational to me regarding this type of advanced and alternative pool automation and sensor/chemical control.
Many, many thanks to all of the above for opening up this new world of “alternative” pool automation to me! It’s been quite the ride over the 2nd half of 2020.

Note: Some images contained within this document are the courtesy of – Atlas Scientific Environmental Robotics
3. Advanced Automation Enclosure and Related Hardware


In this section I will explore my new automation enclosure as well as the hardware housed within.
Note: Here, you will find my own particular experiences. This will include the equipment that I ultimately selected to incorporate in this automation system and why. However, this was just “my way” and nothing here is intended to suggest that there are not different methodologies or different equipment that cannot be used in order achieve the same result.
a) Automation Enclosure
One thing quickly became apparent to me in short order if I was even going to get this project “off-the-ground.” I would be required to install a weatherproof enclosure at the pool equipment pad in order to house the required electronics.
I had initially inquired of others, if I could possibly “run” some of the sensor control cables to the house and then install the necessary Raspberry Pi micro-computer and related components there, instead of at the equipment pad. That idea was quickly discounted, as the distance for some of those types of signals from the sensors and probes would be excessive. Along with that fact, I had determined that I would not be able to house all of the required components within the existing IntelliCenter Load Center.
 So it was settled. The micro-computer and other key and related electronic components would require housing within a weatherproof enclosure. And the location of this enclosure would be required at the pool equipment pad.
After discussions and research that involved what components would be required. As well as considering provisions for enclosure cooling (I reside in central Arizona where summer outside temperatures are typically in the high teens). I then set to work to find the right enclosure for those requirements.
During the course of discussions with others, it had become apparent to me that I would require “DIN rail mounting” for the many components that would be housed within this enclosure.
Based on some additional research, I determined that I should consider installing a small touchscreen monitor at the equipment pad as well. My reasoning was that this requirement would greatly facilitate some initial sensor configurations while I was physically at the pad. And in addition, I thought it might be helpful when sensor calibrations would be necessary.
Although not actually a “requirement” per se, I have indeed found the touchscreen monitor to be very useful at the equipment pad. I can control all of the sensors and devices from this touchscreen monitor to include REM and the IntelliCenter via the nodejs-poolController-dashPanel. I can of course, do the same thing from my Mac, iPad, iPhone, etc. however.

Consequently, I decided upon Altelix as the manufacturer of a selected enclosure. This decision was based on recommendations, features and reputation.
Using my basic plans and requirements as my guide. And based on consultations with the Altelix sales team. I settled on a 24x20x9 Industrial DIN Rail Enclosure, Fiberglass, NEMA 3X, IP65 enclosure.
Unfortunately, this model did not come bundled entirely with the configurations that I required. Consequently, it would require some “a-la-carte” additions to it as well. The additions included items as listed below:
- An inner door where I planned to mount an Elecrow 10.1” 1920x1080p HDMI IPS Touchscreen Monitor as well as my existing Precision Digital ProVu Pulse Input Flow Rate/Totalizer Meter for the automatic pool fill/leveler.
EDIT: 7/6/21... Since the initial publication of this document, I have also added a FlowVis Digital to the mix. Hence, I mounted the FlowVis Digital Panel Display to the inner door and connected the 4-20mA outputs to the Sequent Microsystems Industrial I2C Automation Raspberry Pi Stackable Card.


- Mounting Kit.
- A cooling fan setup to include two (2) each, 120/240 VAC 4” enclosure type fans. Associated Fan Filters, Guard Screensand two ABS Vent/Fan Shroud Kits were also required. A thermostat to control the fans was NOT included in this order however. I discovered that Altelix does not sell enclosure fan thermostats separately but only when bundled with certain “kits.” Consequently, I would be required to look elsewhere for the thermostat.
- Additional DIN Rail Mounting Kit which includes two DIN rails and hardware. Two rails and hardware are included with the enclosure but I had calculated that I would require an additional two.
Lastly, I had to assemble most of the above. That was not really a problem. In addition, I would have to cut the 4” diameter holes in the enclosure for the fan openings. That was just as well, as I had custom requirements in that respect. It made sense to me to have one fan as an intake fan at the bottom of one side of the enclosure and the second fan as an exhaust fan at the top of the other side. I determined that this setup should provide for maximum air flow and cooling within the enclosure.
As far as an enclosure cooling fan thermostat, I selected the - Penn/Johnson Controls A421AEC-01C Electronic Temp Control, SPDT. A bit more “pricier” than some others out there but it met all of my specifications and requirements. In addition, Penn/Johnson has a great reputation for quality, durability and performance. It was not DIN rail mountable however, so I would be required to fashion a DIN rail mountable device that I could attach the thermostat to. I also fashioned a manual enclosure fan “cut-off” switch with parts obtained mostly from The Home Depot.
The enclosure took about two weeks for delivery. So in the meantime, I continued to work on possible enclosure configuration drawings, equipment requirements, making the necessary modifications at the pool equipment pad, etc.
(Continued in next post)
Last edited:


