Great reading here! Couple of things... dye in the water in the water level makes it much easier to see. Also, confession. I have never used blocks under my pool legs. BUT, my pool is a lot smaller - only 6000 gallons.

26' Intex - Planning, Install, Upgrades, and Landscaping Thread
- Thread starter jseyfert3
- Start date
You are using an out of date browser. It may not display this or other websites correctly.
You should upgrade or use an alternative browser.
You should upgrade or use an alternative browser.
Curious, what sort of base did you have under the pool? Without foam, and a type of soil sufficiently hard, they probably aren't needed... Intex doesn't call for them on the round pools, only for the retangular pools.Also, confession. I have never used blocks under my pool legs. BUT, my pool is a lot smaller - only 6000 gallons.
I won't skip them on furture pools myself though, and don't recommend skipping them to others. I just see how, like in your case, in can work okay.
I’m in Florida, so soil is relatively sandy. But when we leveled we went down to undisturbed earth, and it was surprisingly compacted and hard. This is 3rd or 4th year for this pool, and it’s held up pretty well.
When I go to a regular AGP, probably next year, we’ll do it right.")
When I go to a regular AGP, probably next year, we’ll do it right.
Sneak preview of the Intex Auto Cleaner. Much less junk at the bottom of the pool now!

Don't get me started on where that pic belongs. You know dang well it belongs in the 'TFP clear' thread.
I added a skimmer without draining the water. The whole thing went smoothly. I have pictures...but it's 90 °F out, the water is 86 °F. Which means I've no motivation to post pictures at the moment...
I will later, I promise!
I will later, I promise!
Skimmer install! You see people doing this upgrade on Intex pools, but at most you get one or two pictures. I give you...32 pictures of the process. I did not drain the pool during this install, and everything went smoothly.
You will need:
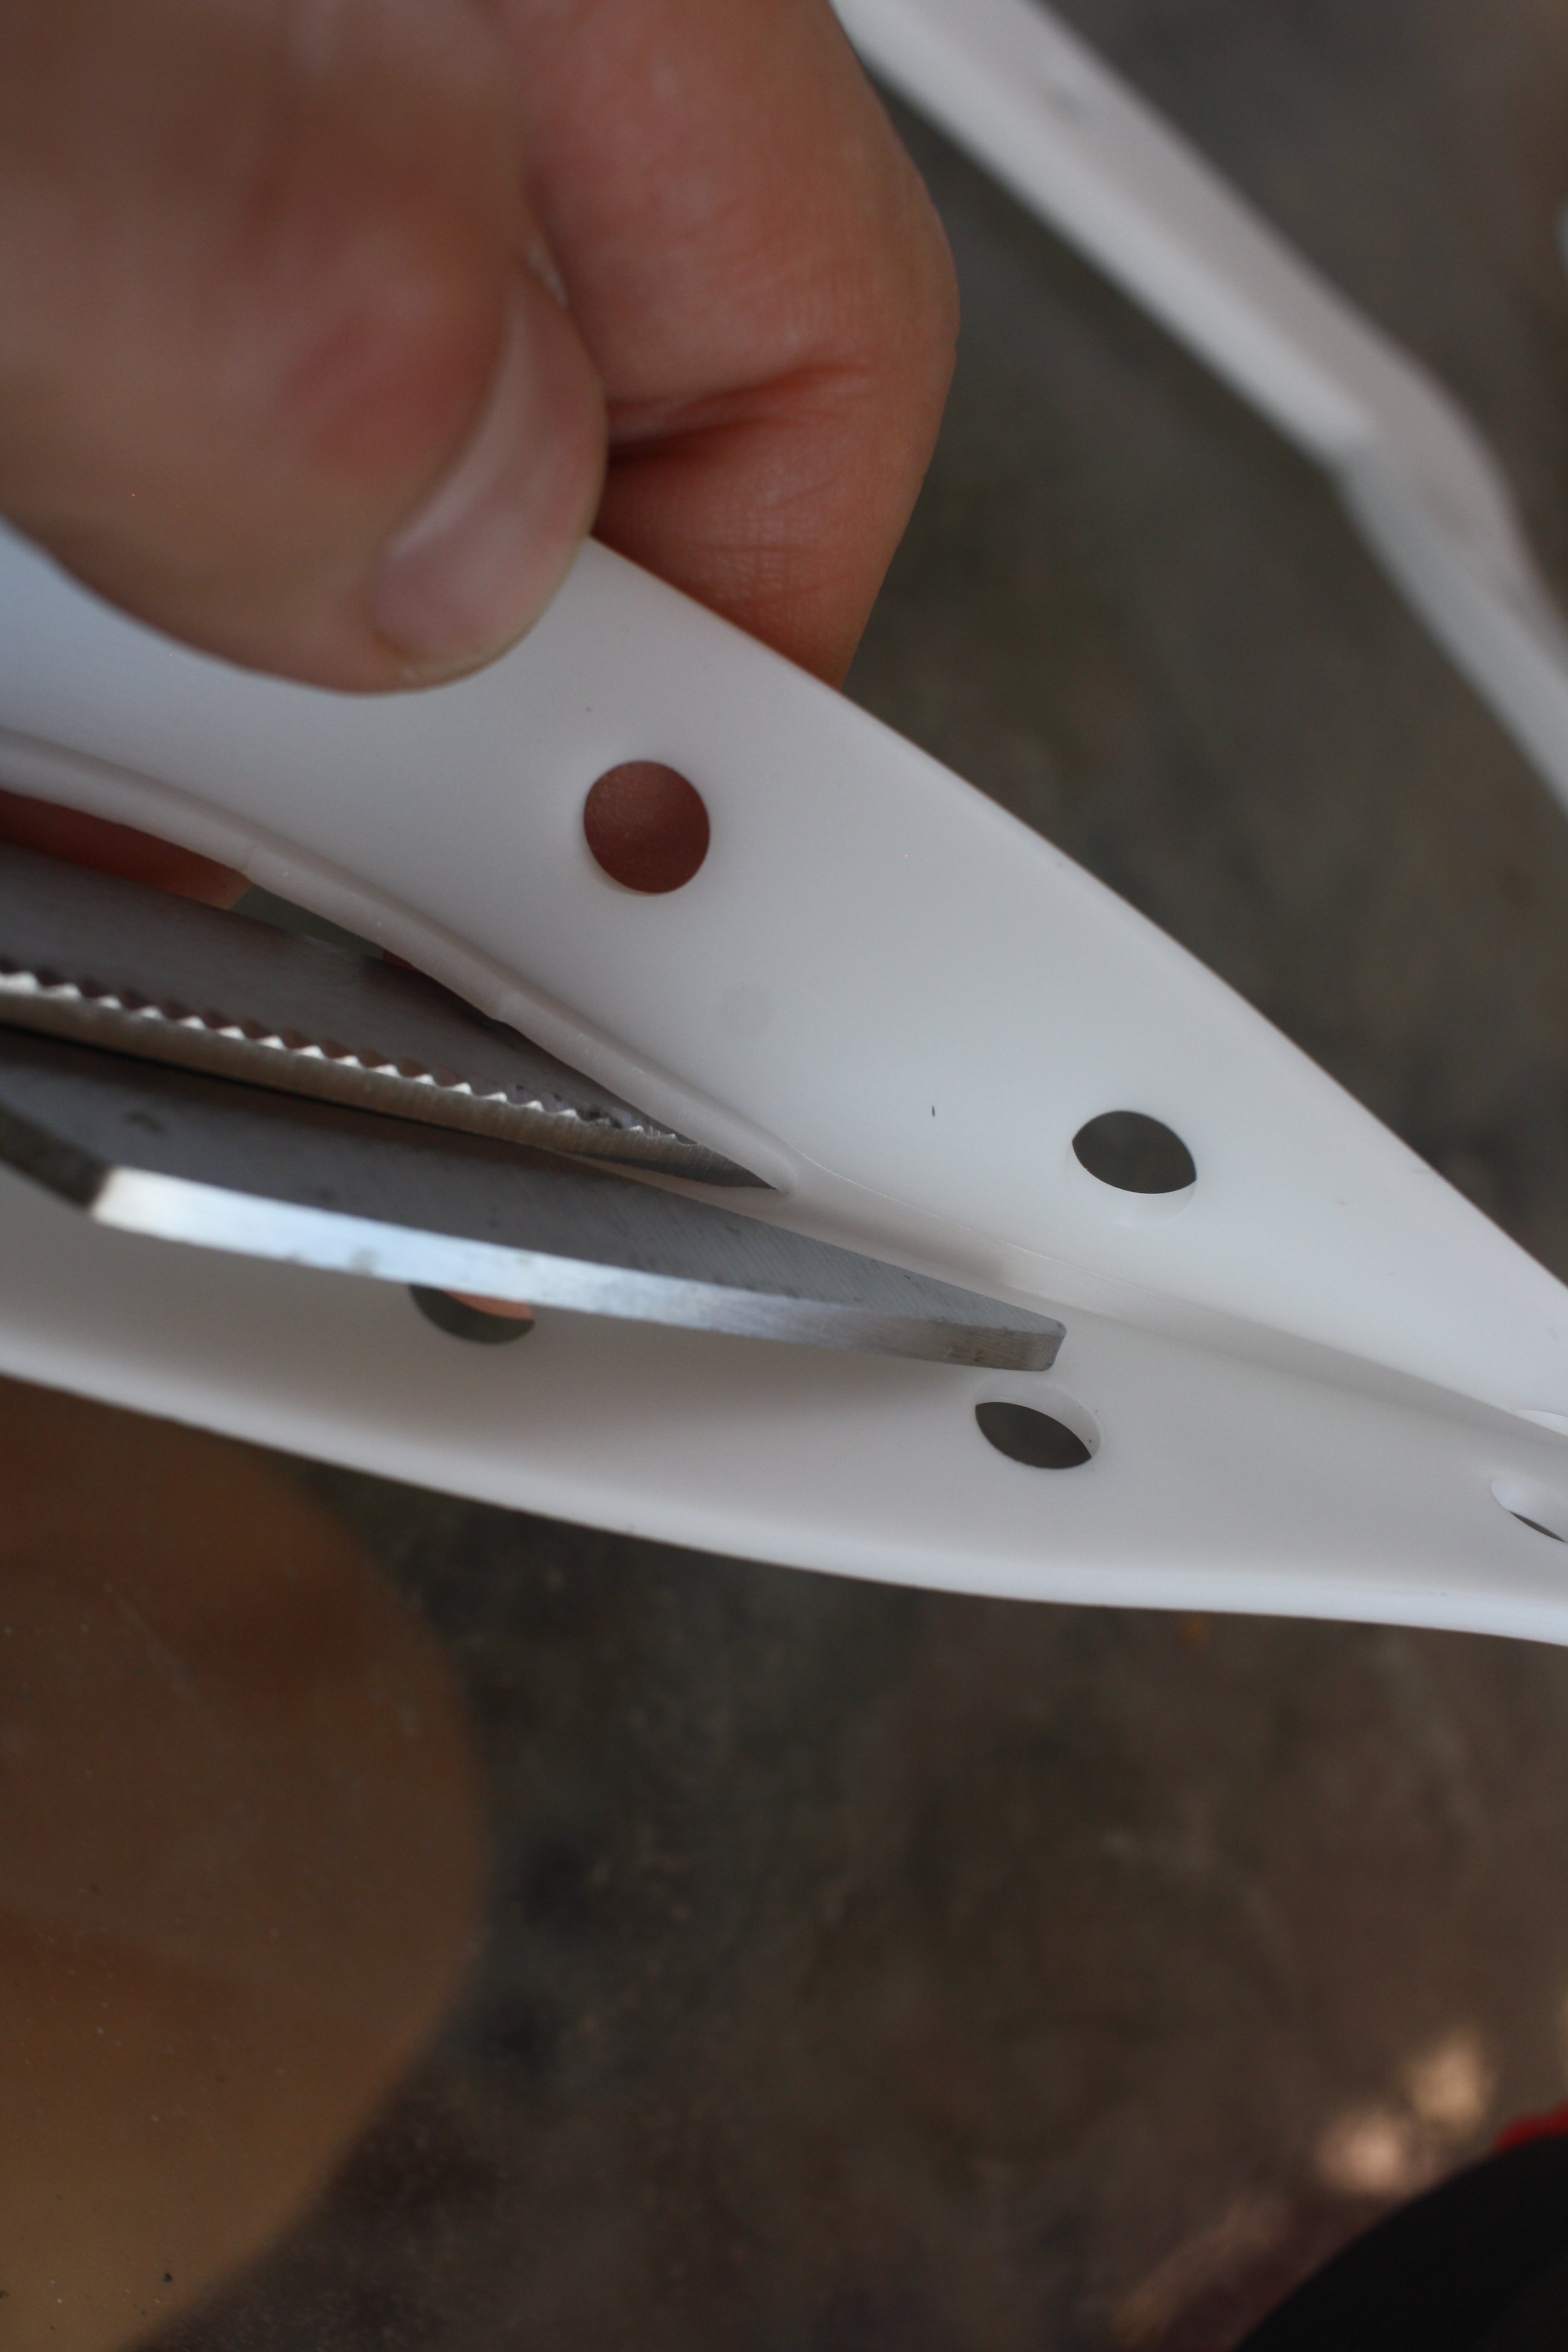
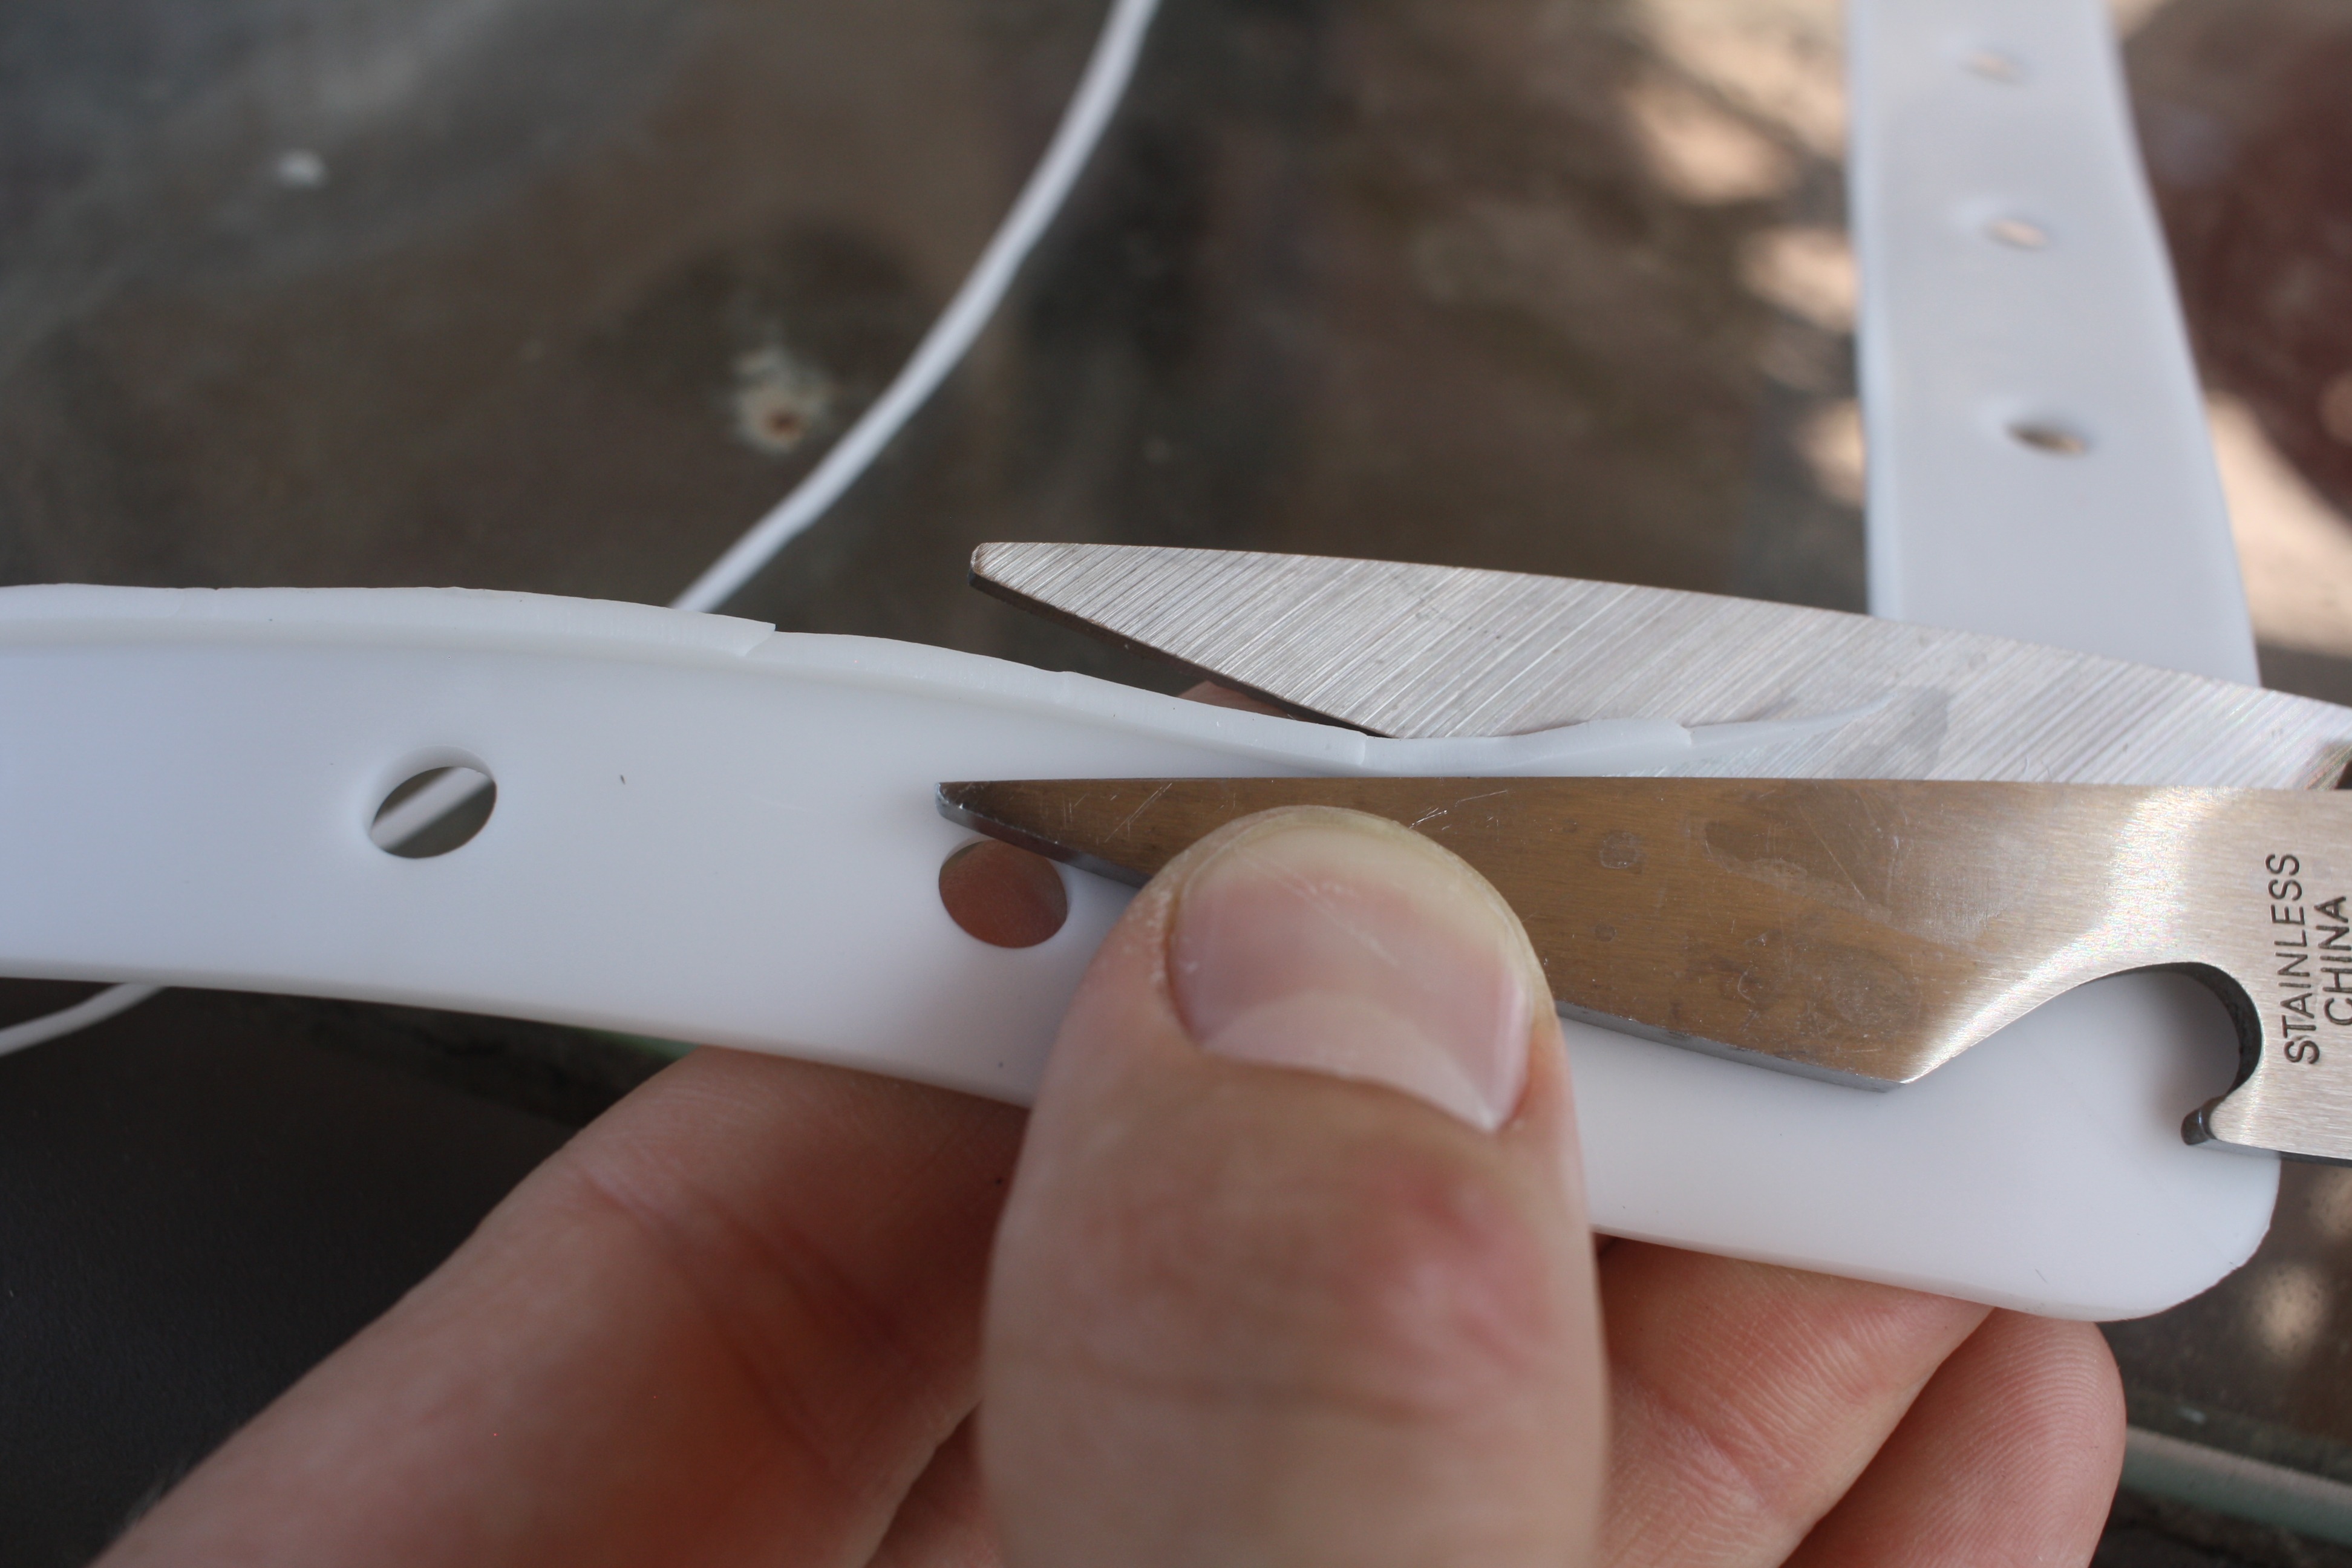
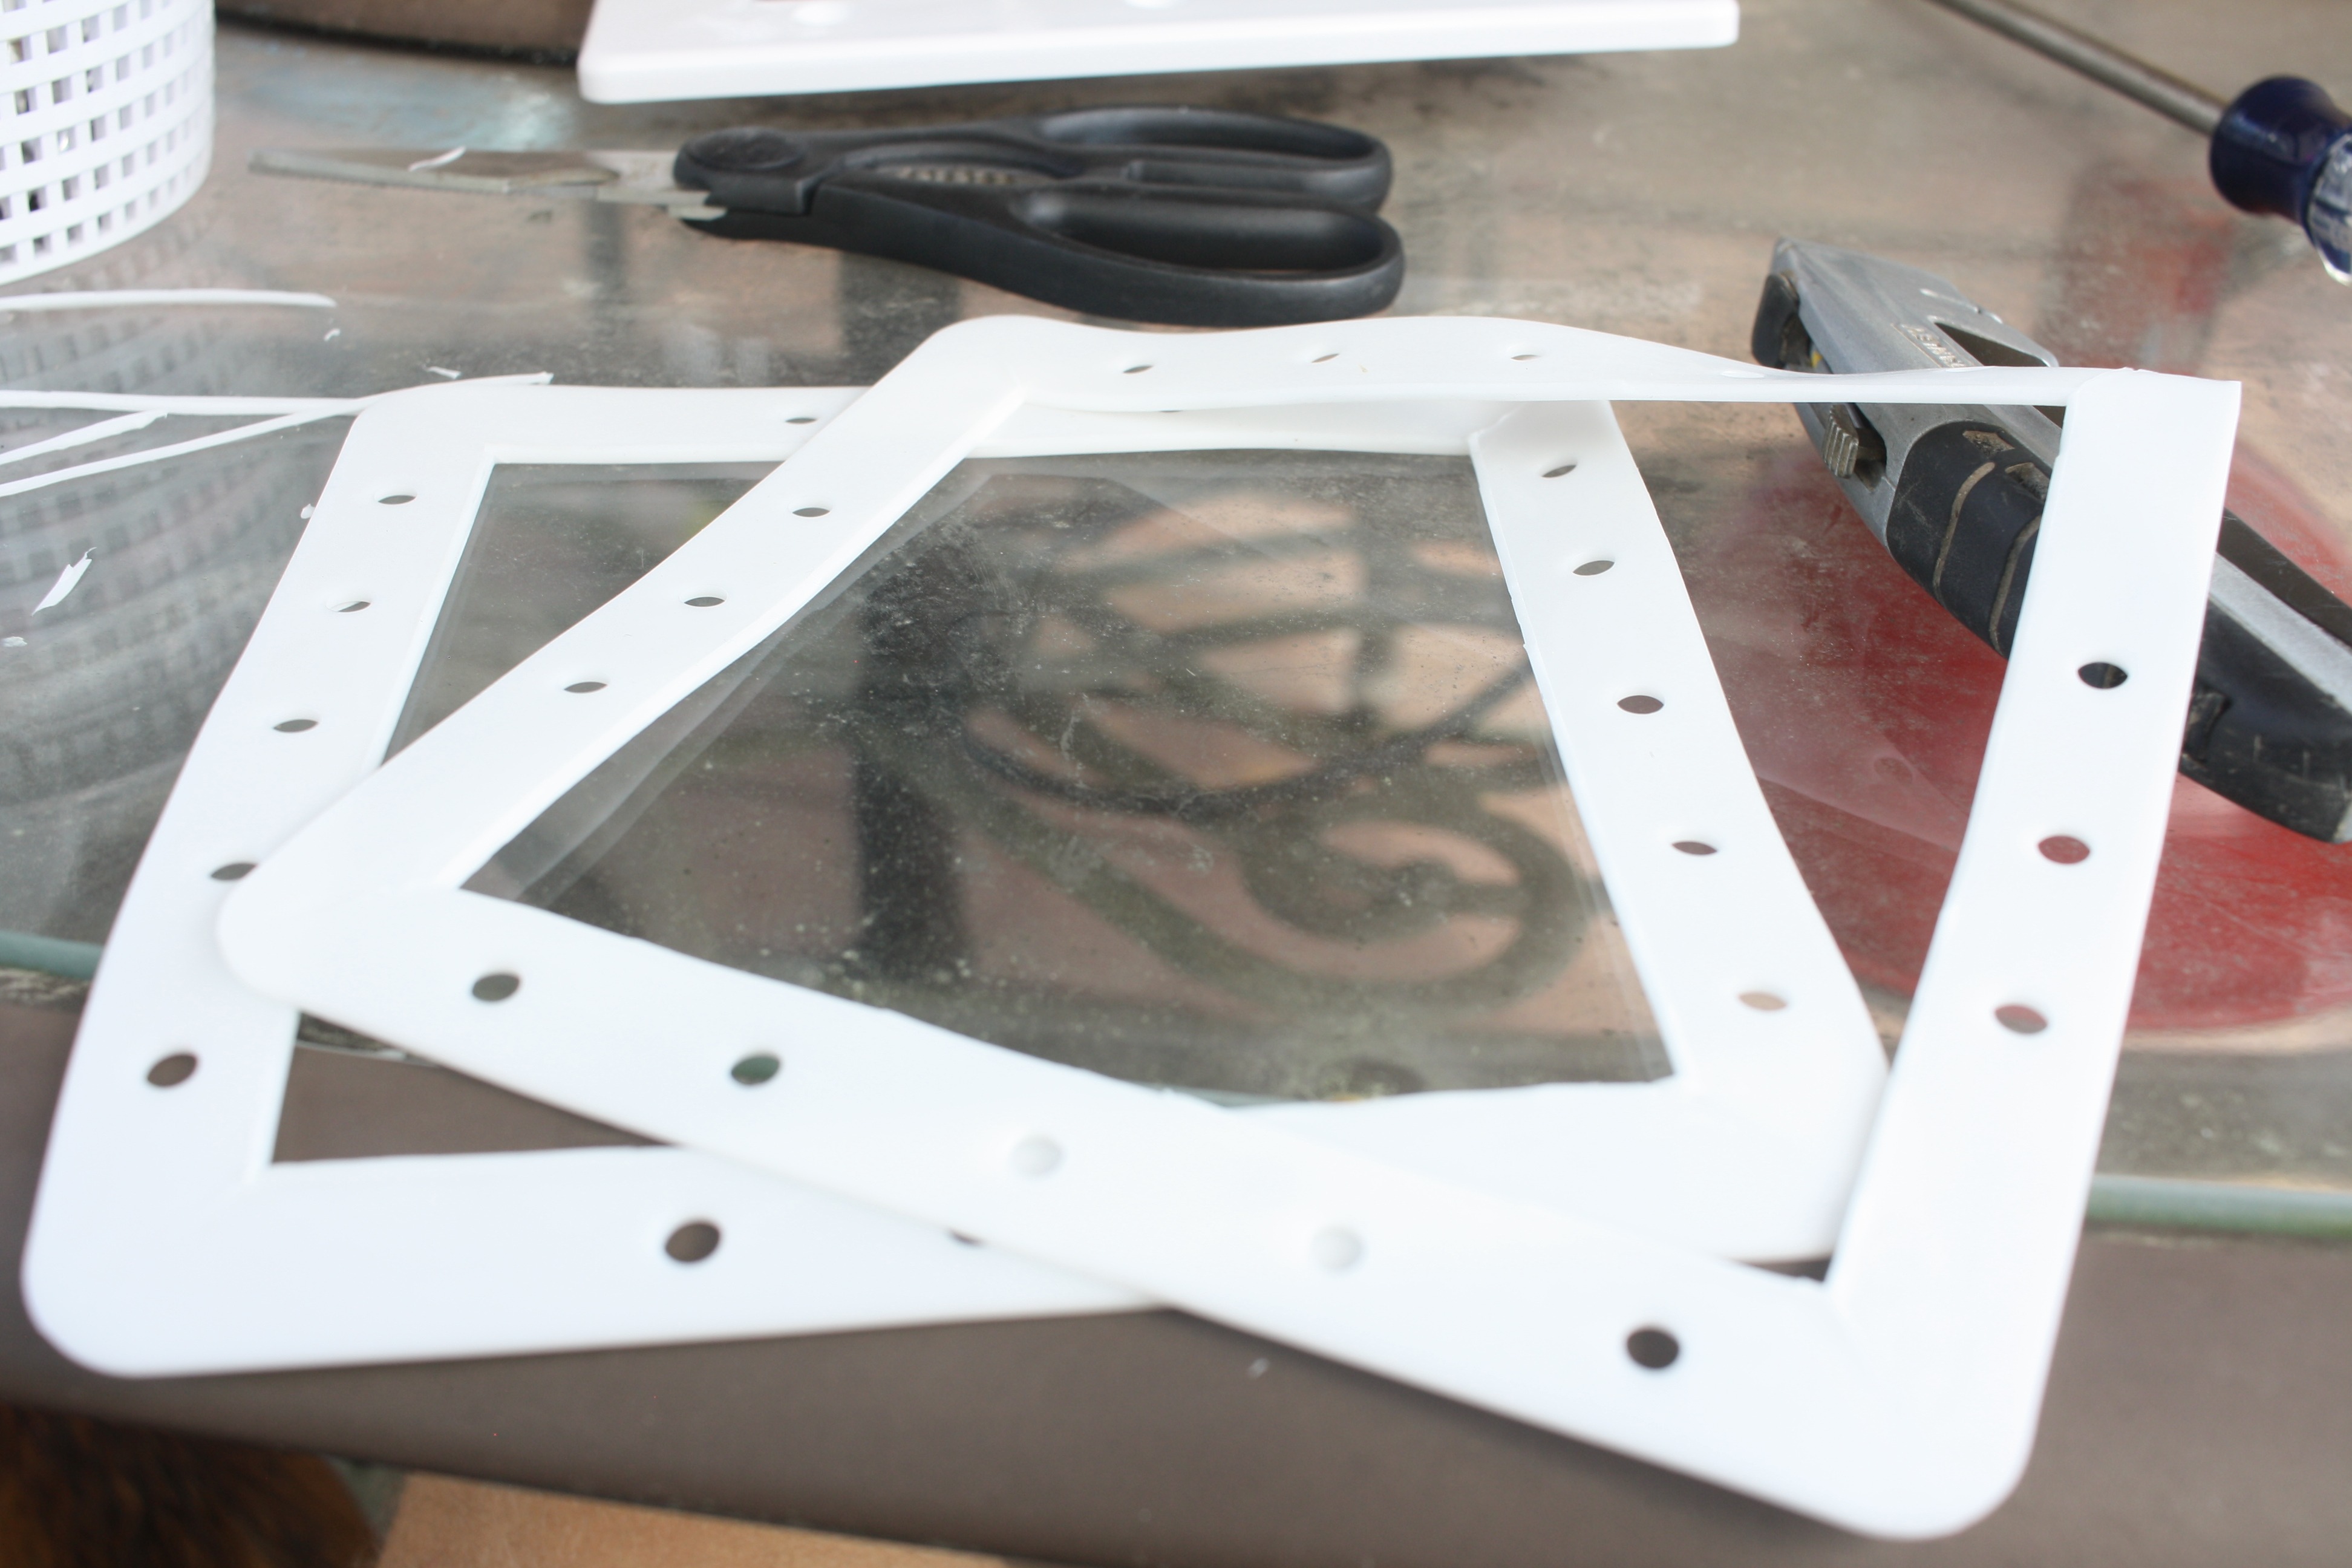
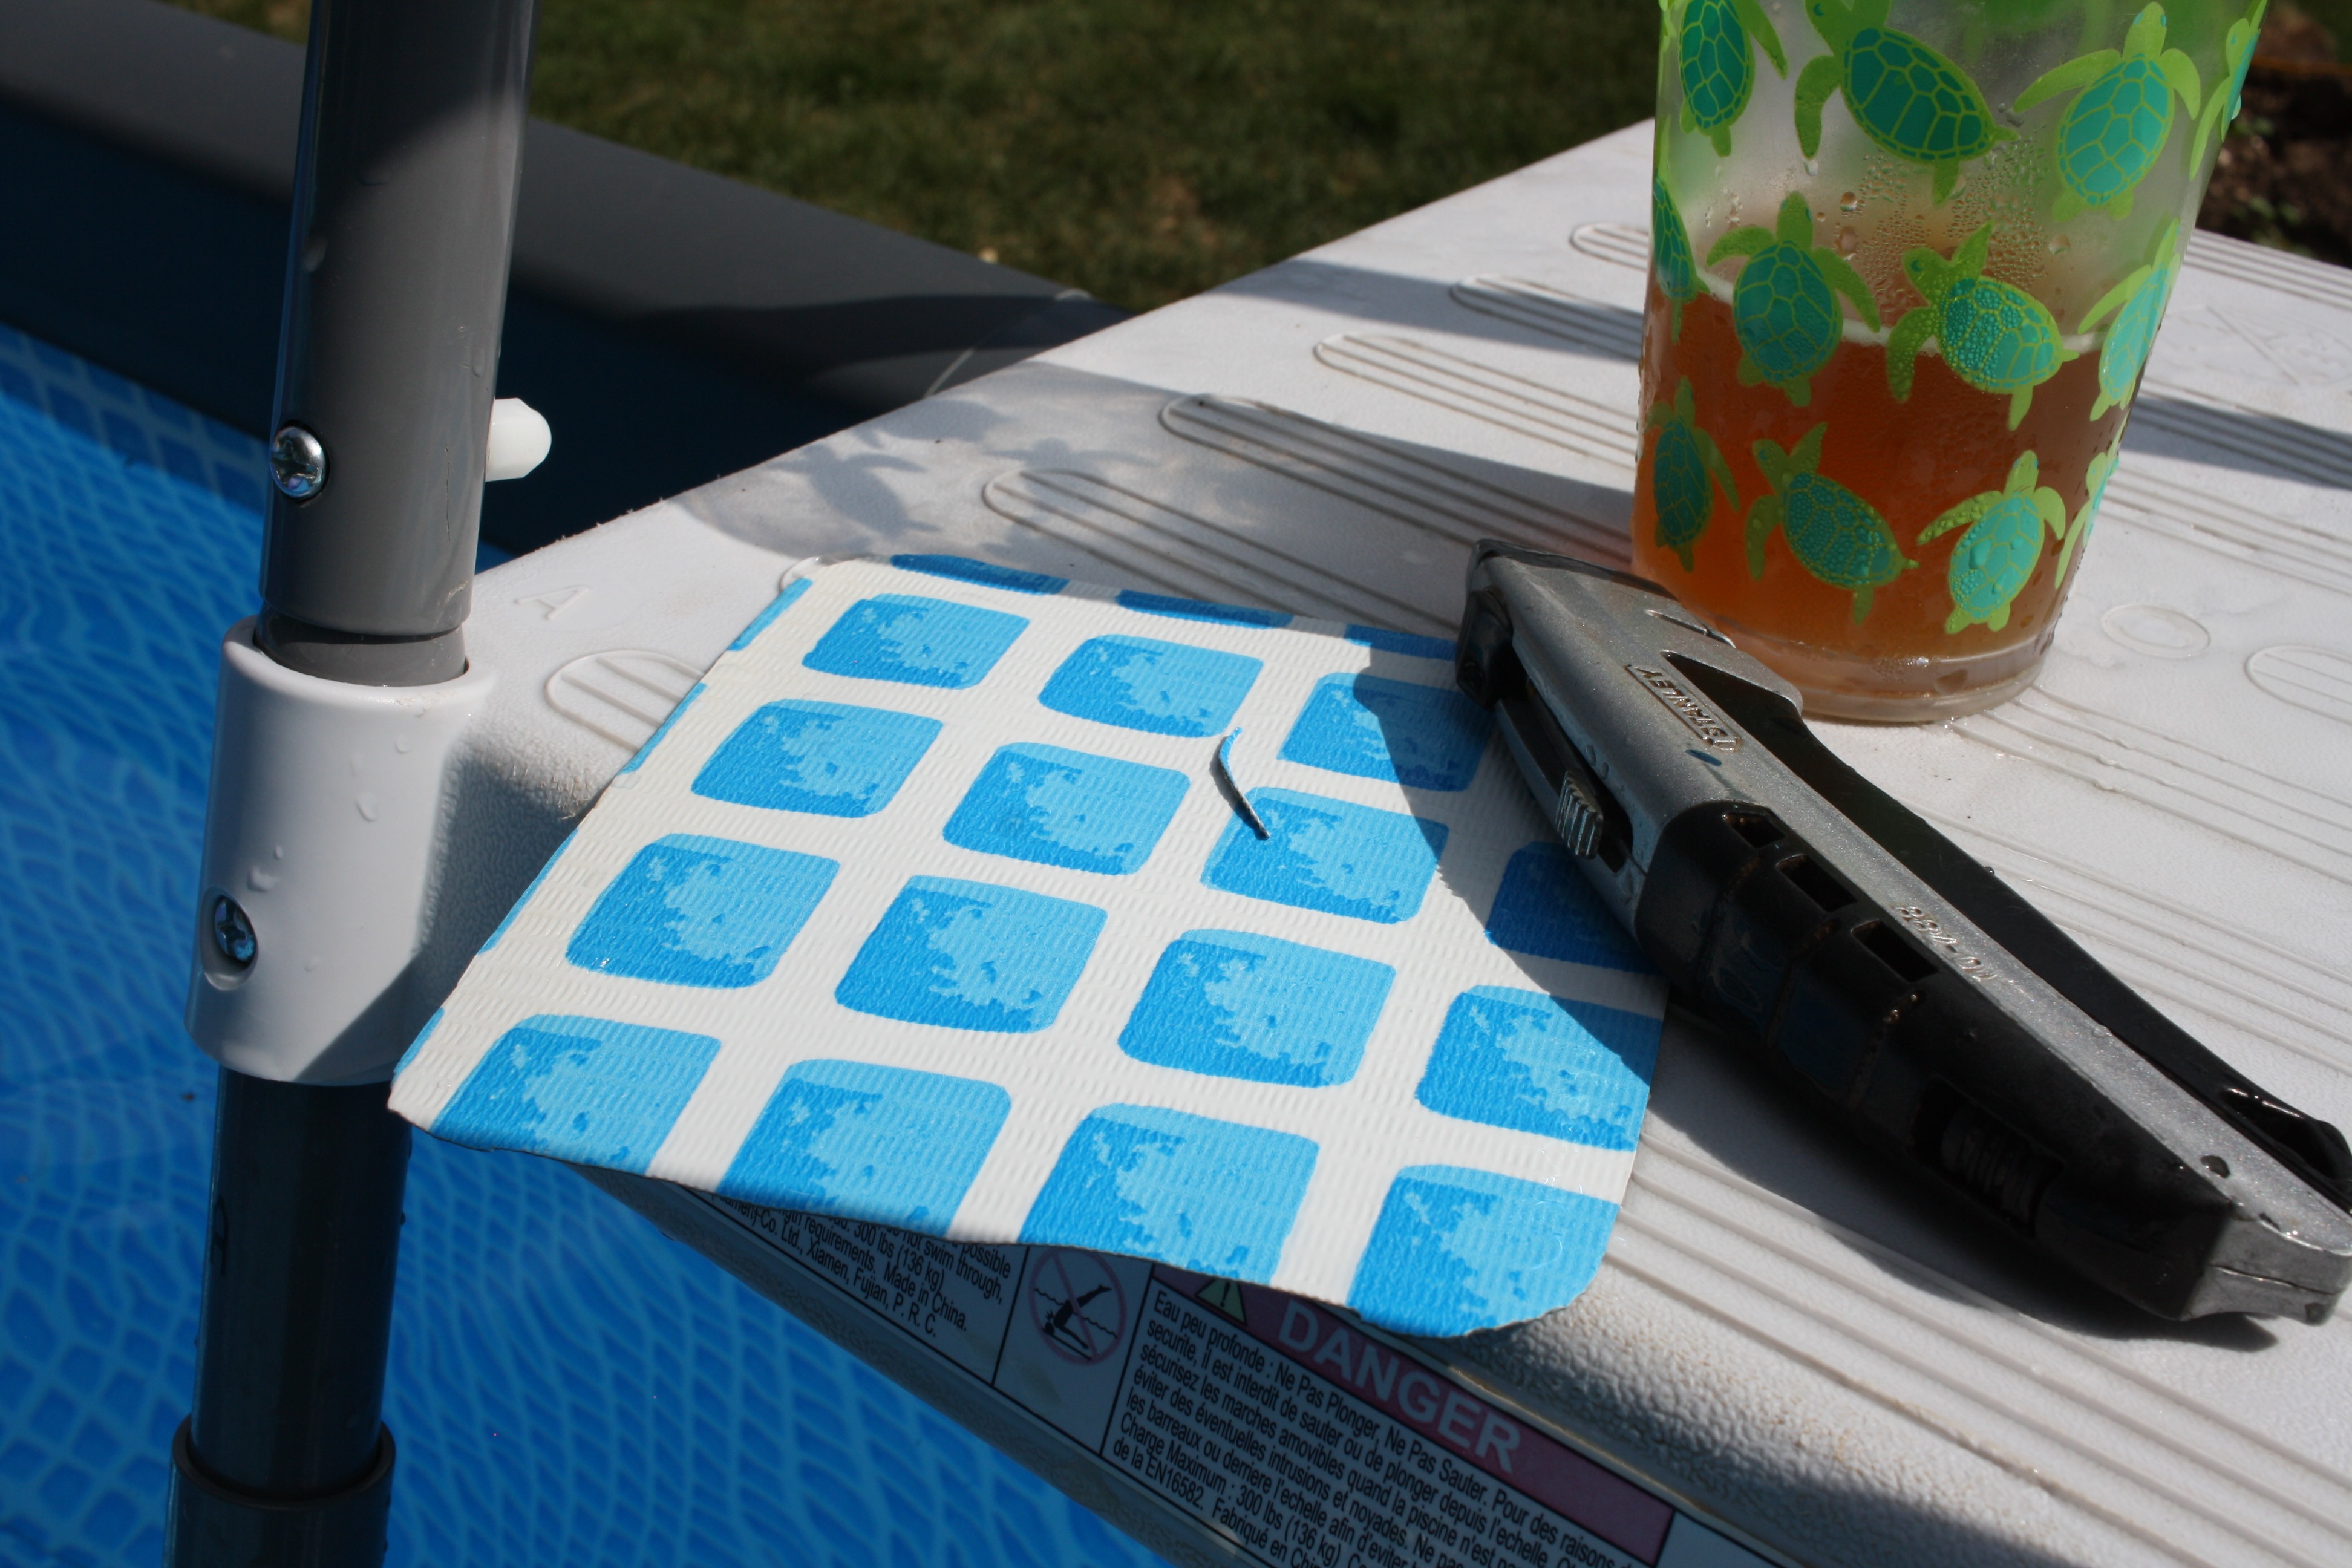
When finished, you have two gasket halves, one of which has a ridge of stuff "sticking out".
I used the scissors again to trim this off.
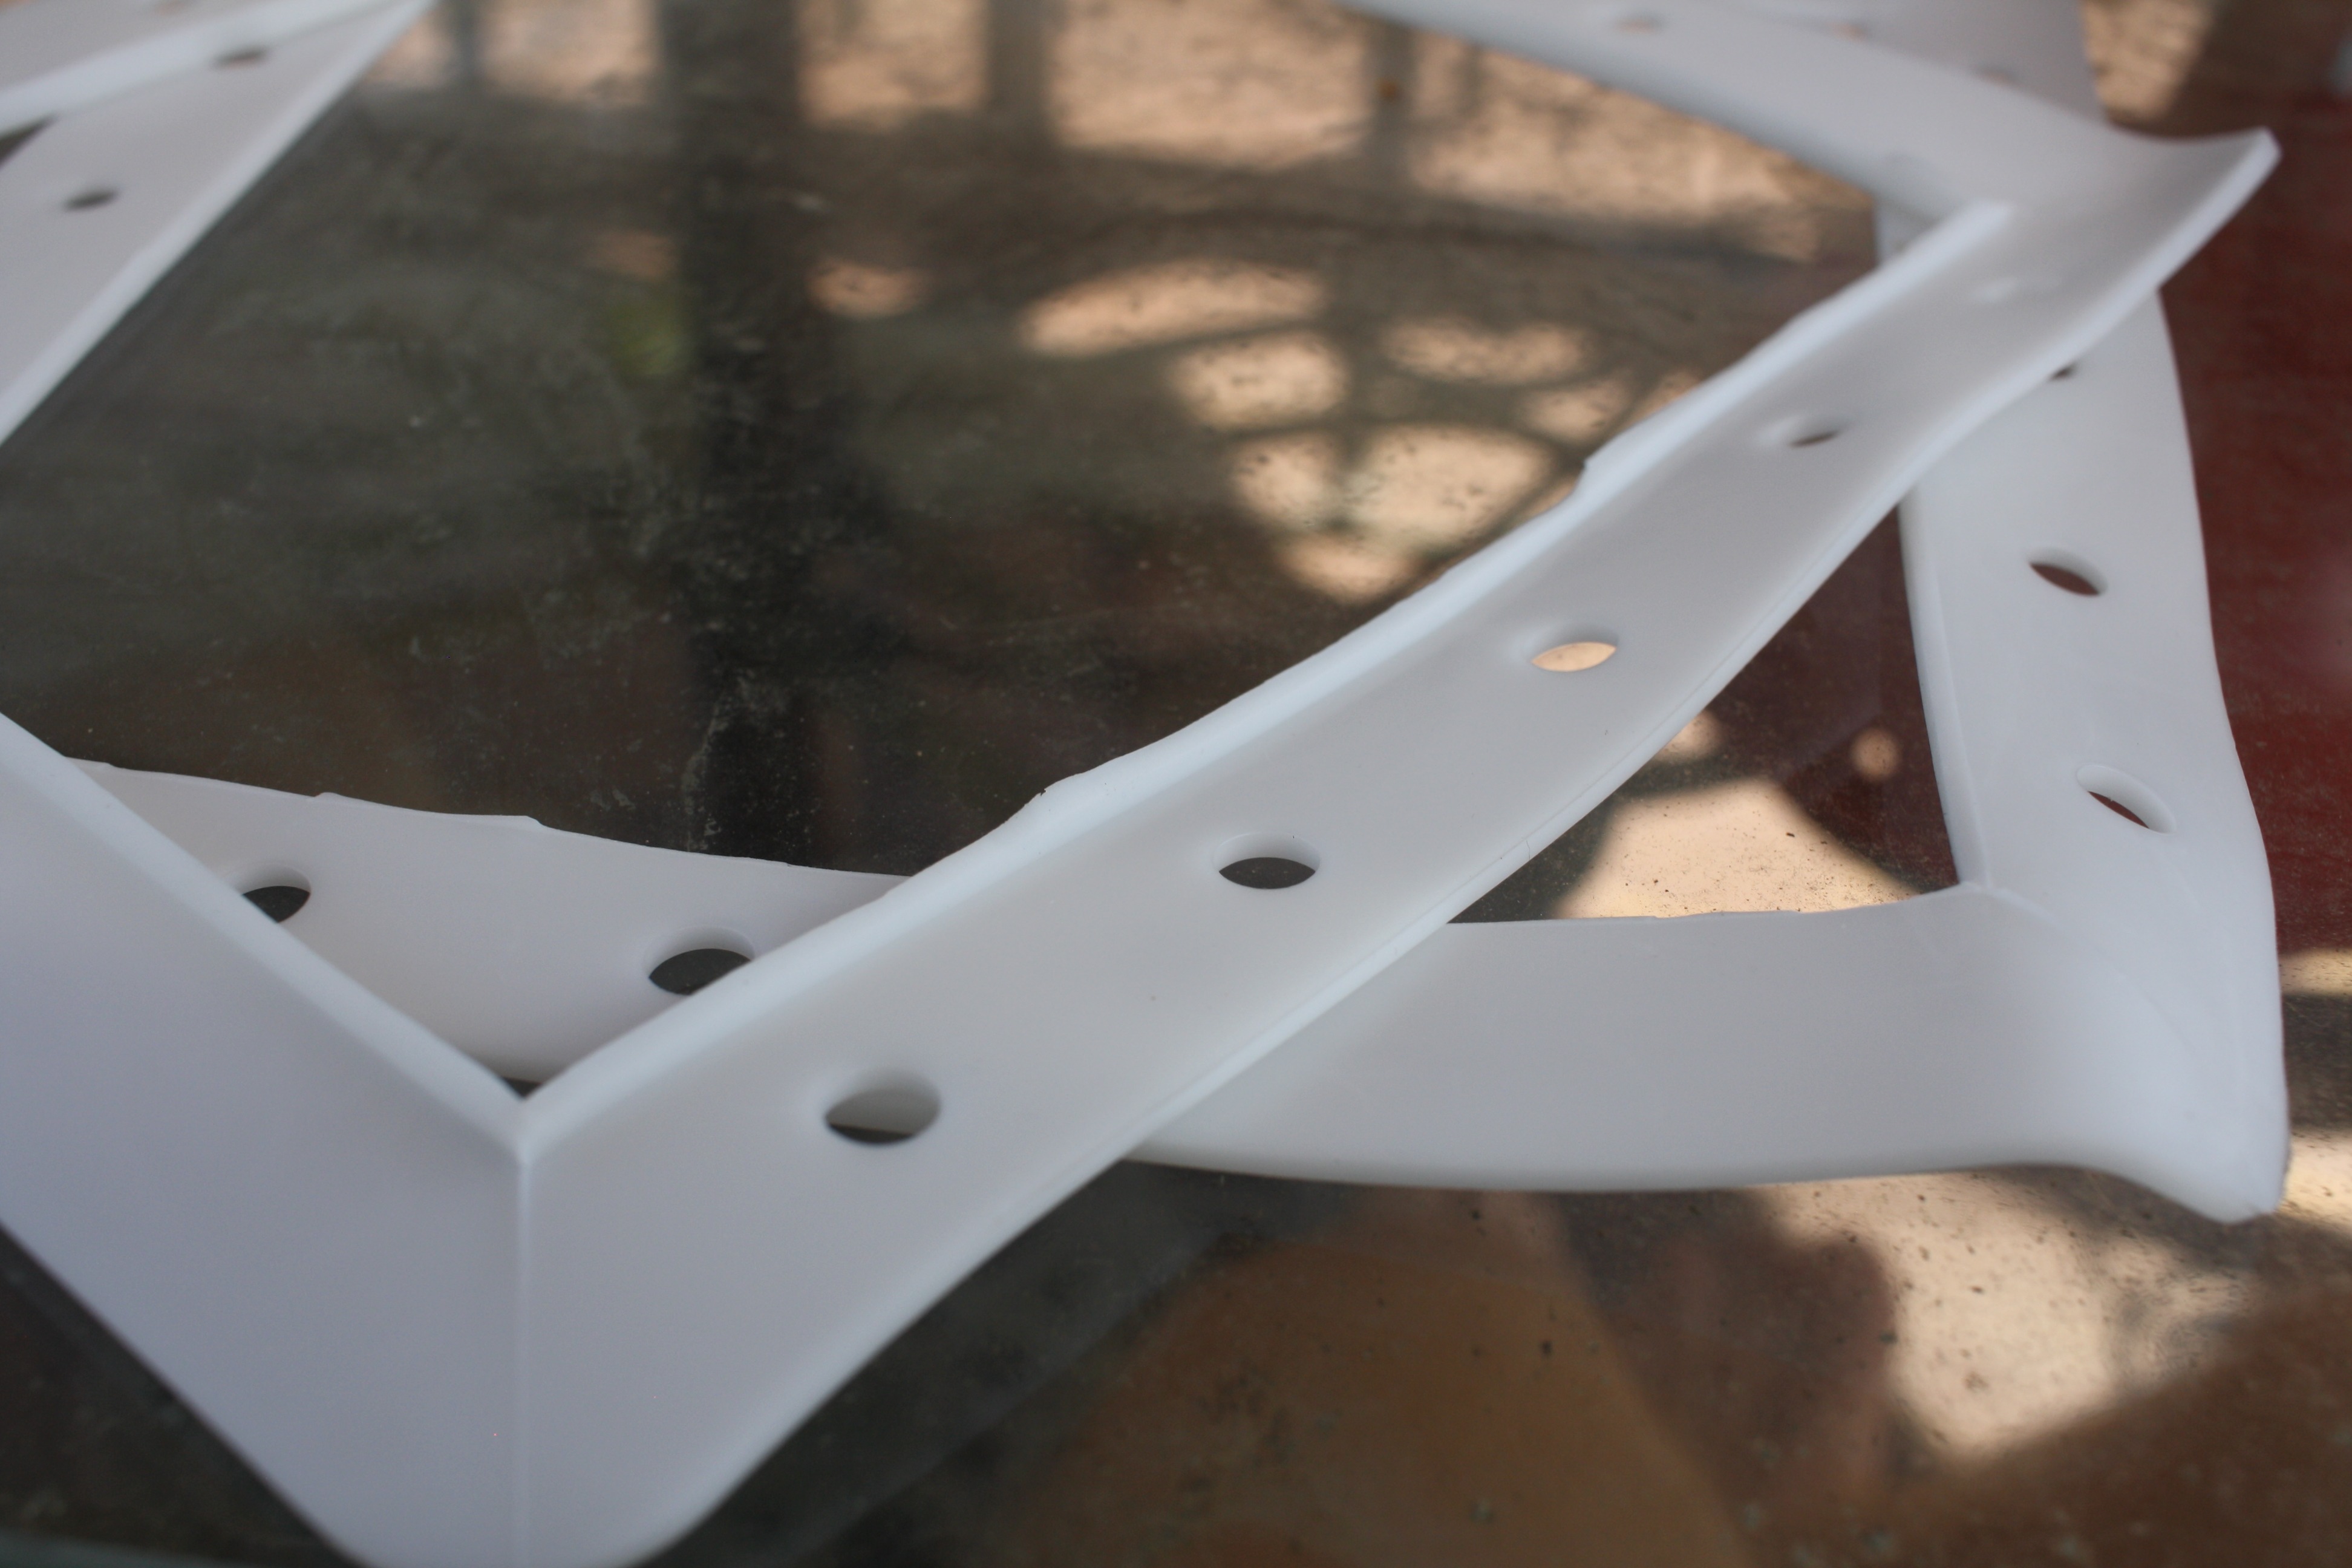
Which left me with two flat gasket pieces.
Sort out the screws. The round head ones you don't need. I tried to use them, and while someone helpful, can also not be very helpful, and caused me to do more work. I'd skip them. You need all the countersunk screws though (ones on the left). And a #3 screwdriver, not the standard #2!
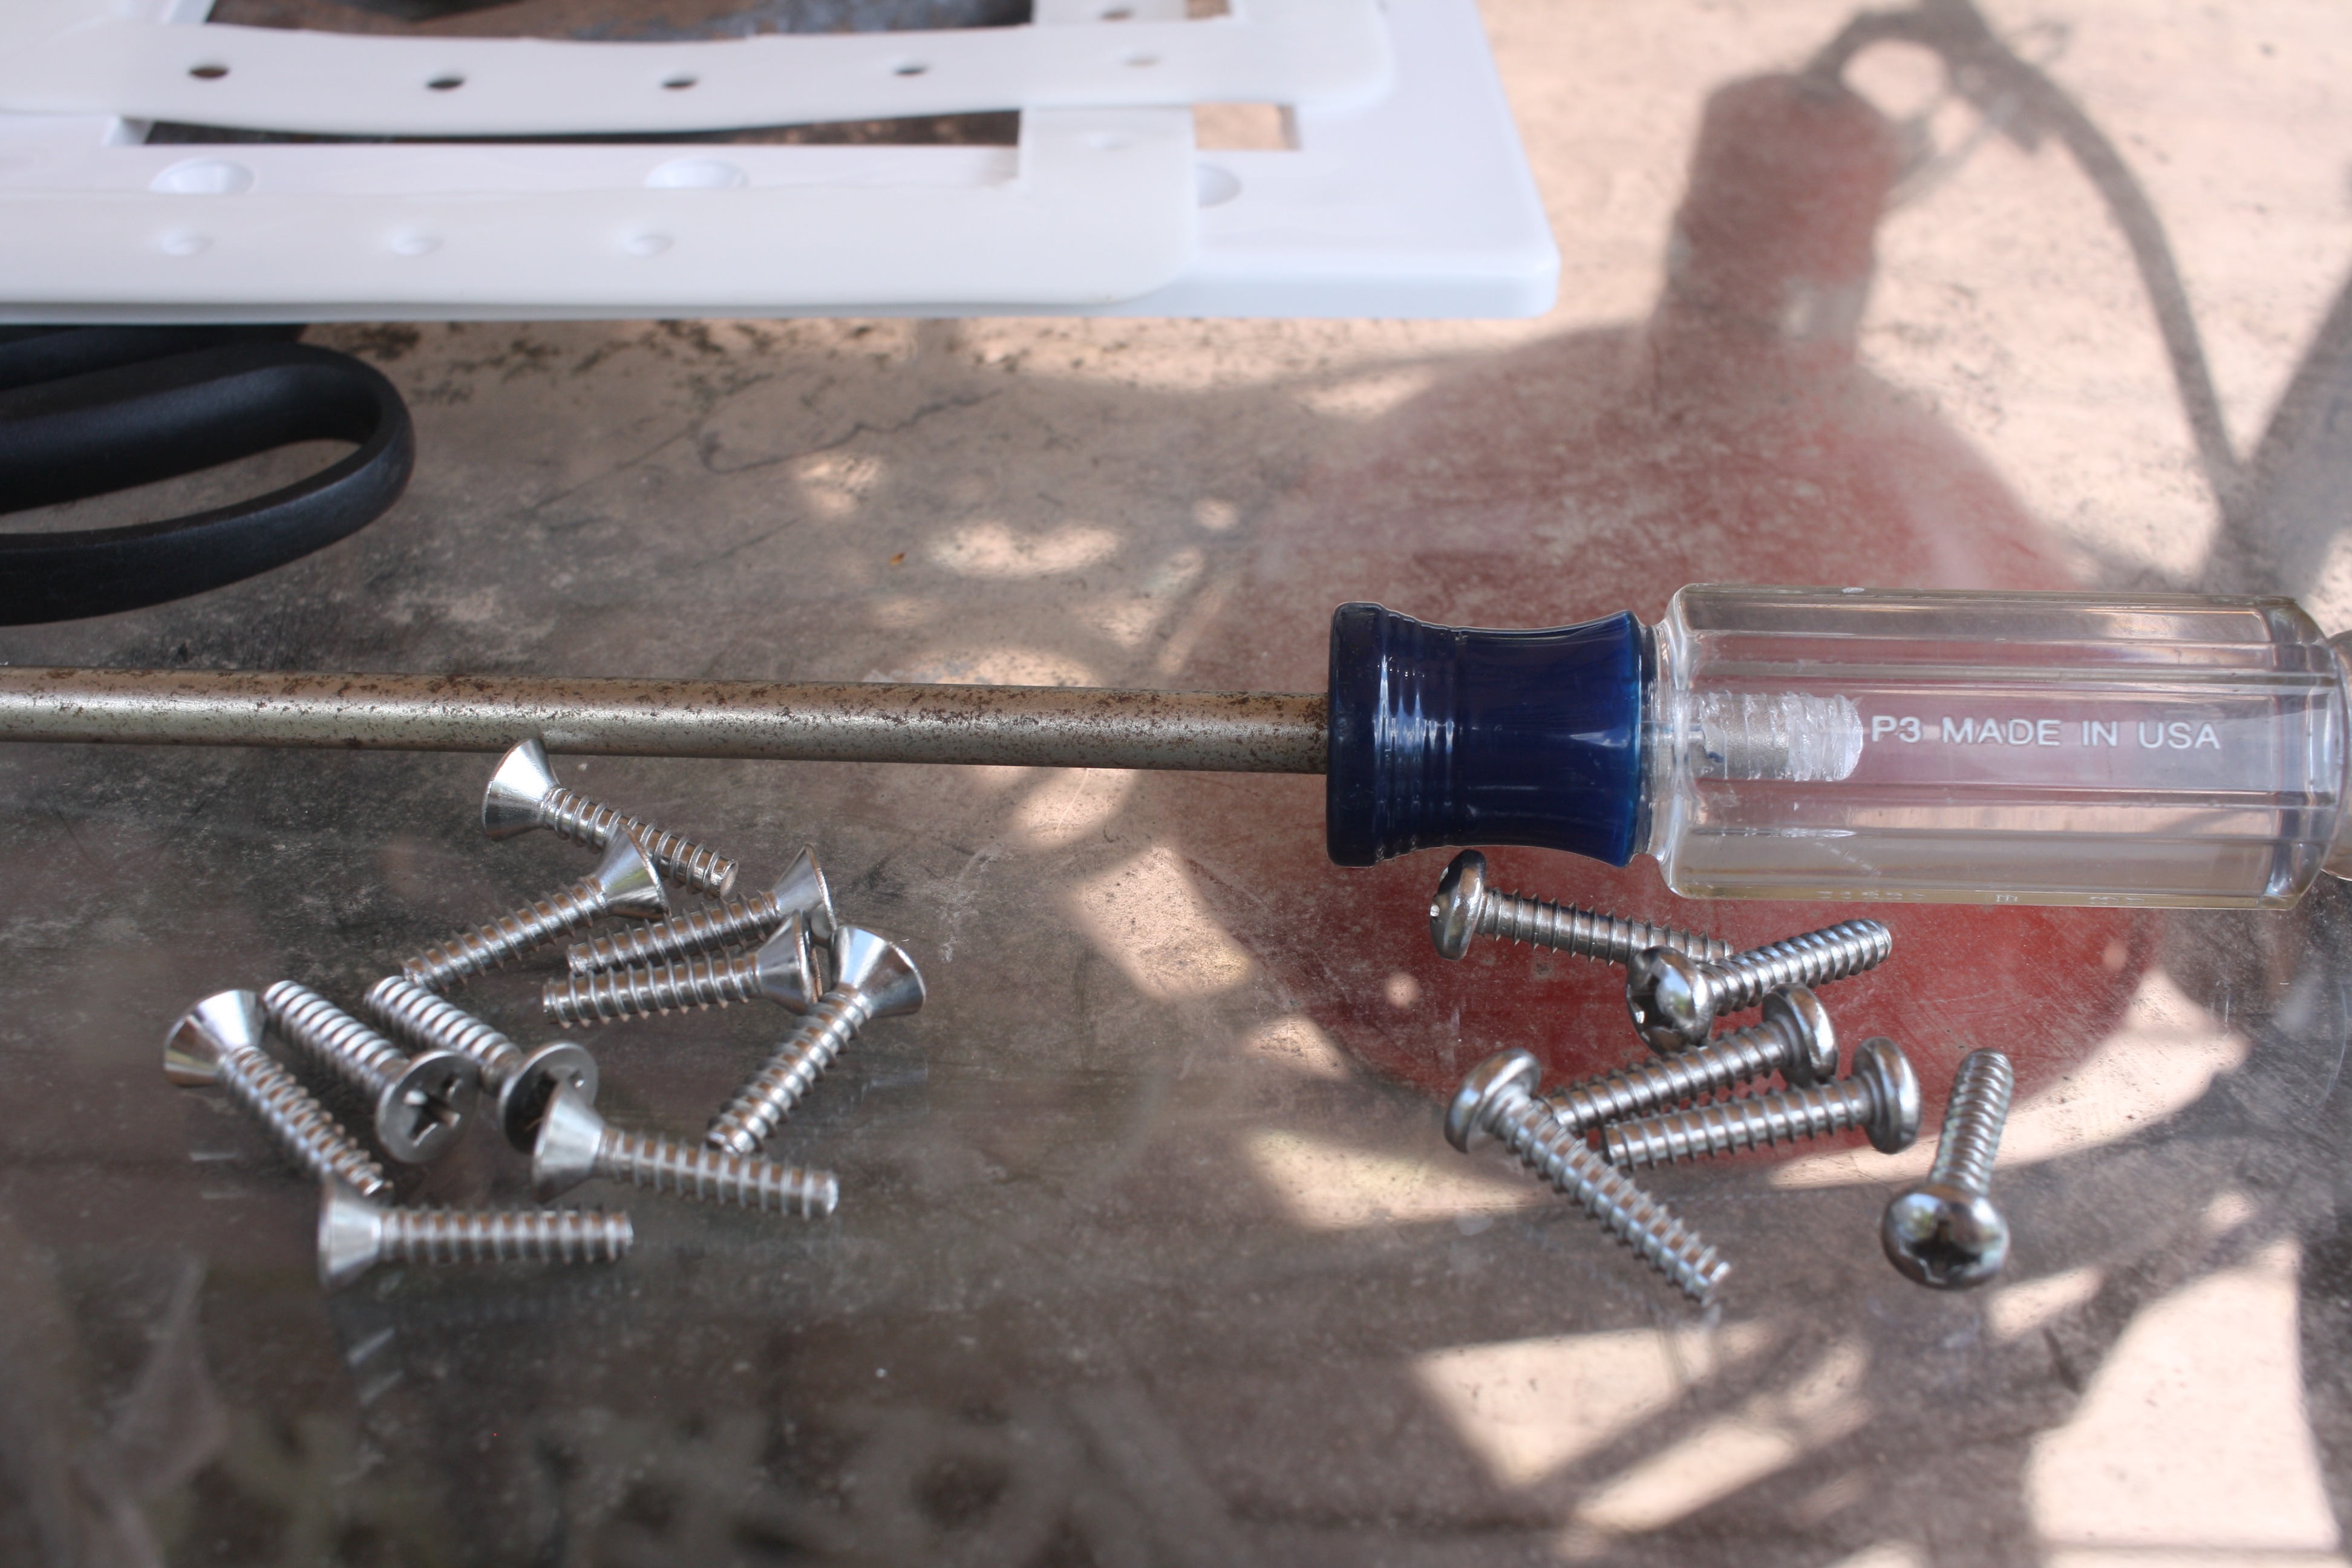
Put the parts somewhere easy to grab. I stuck the screws in the skimmer basket.
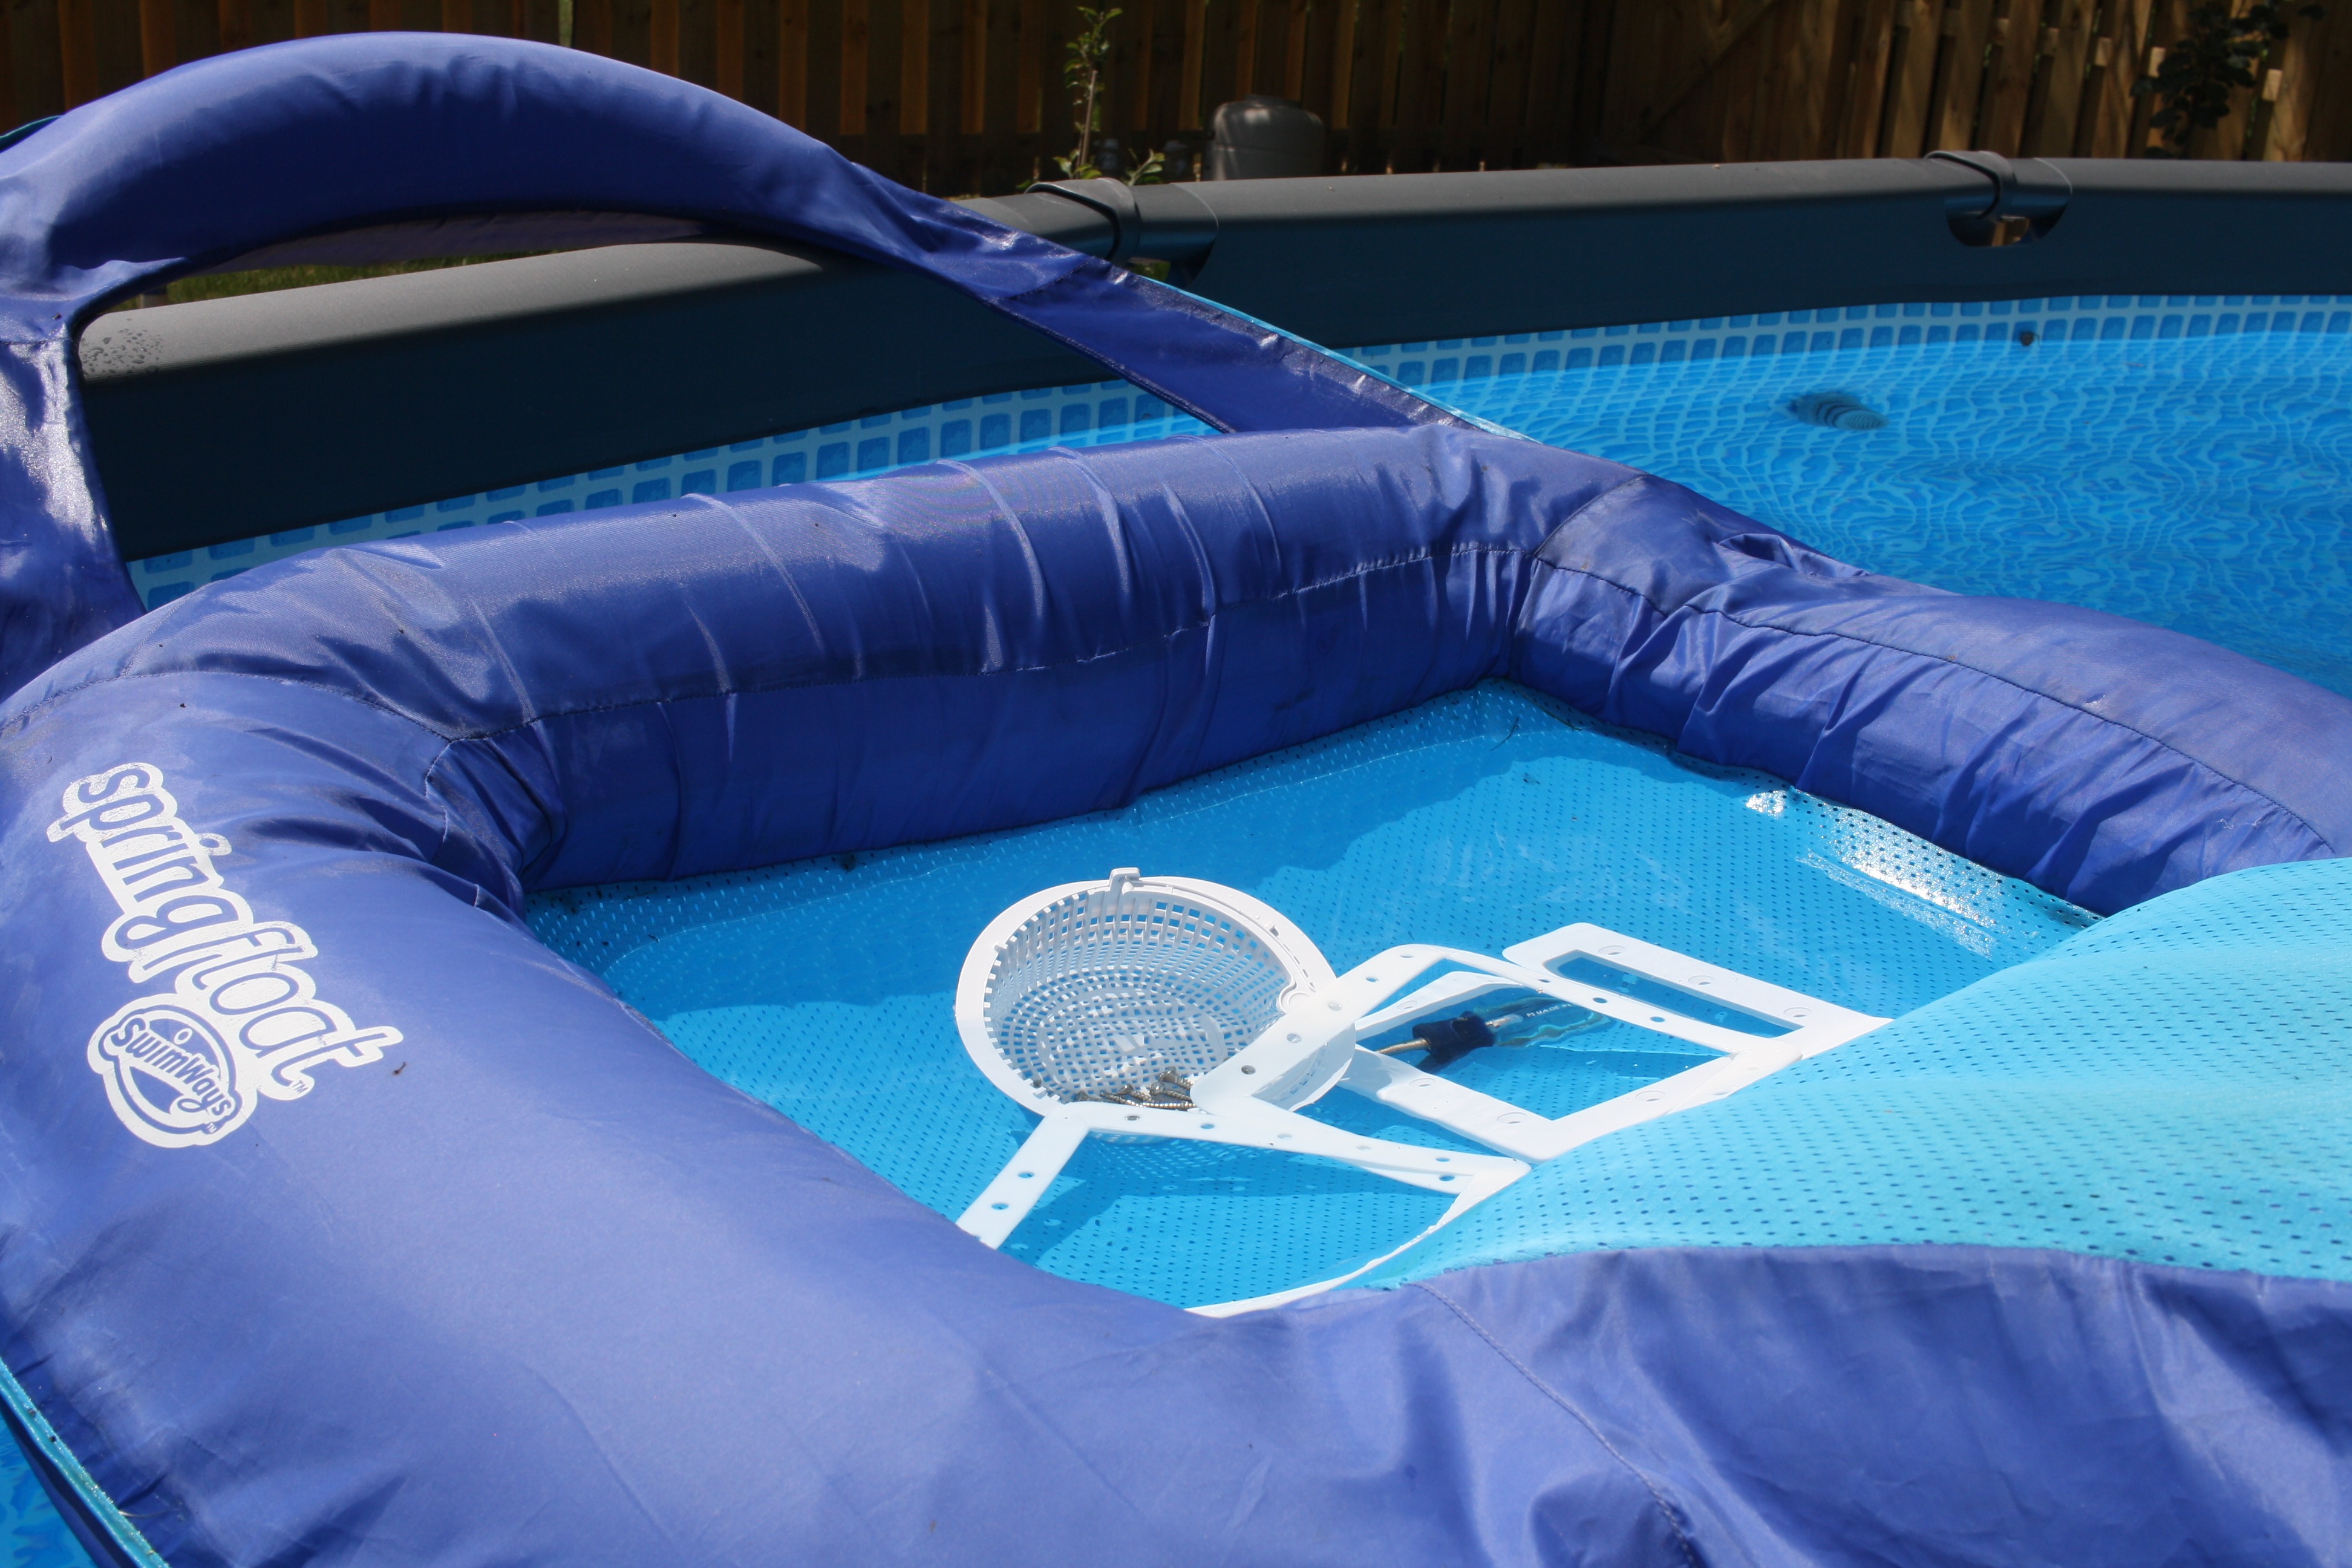
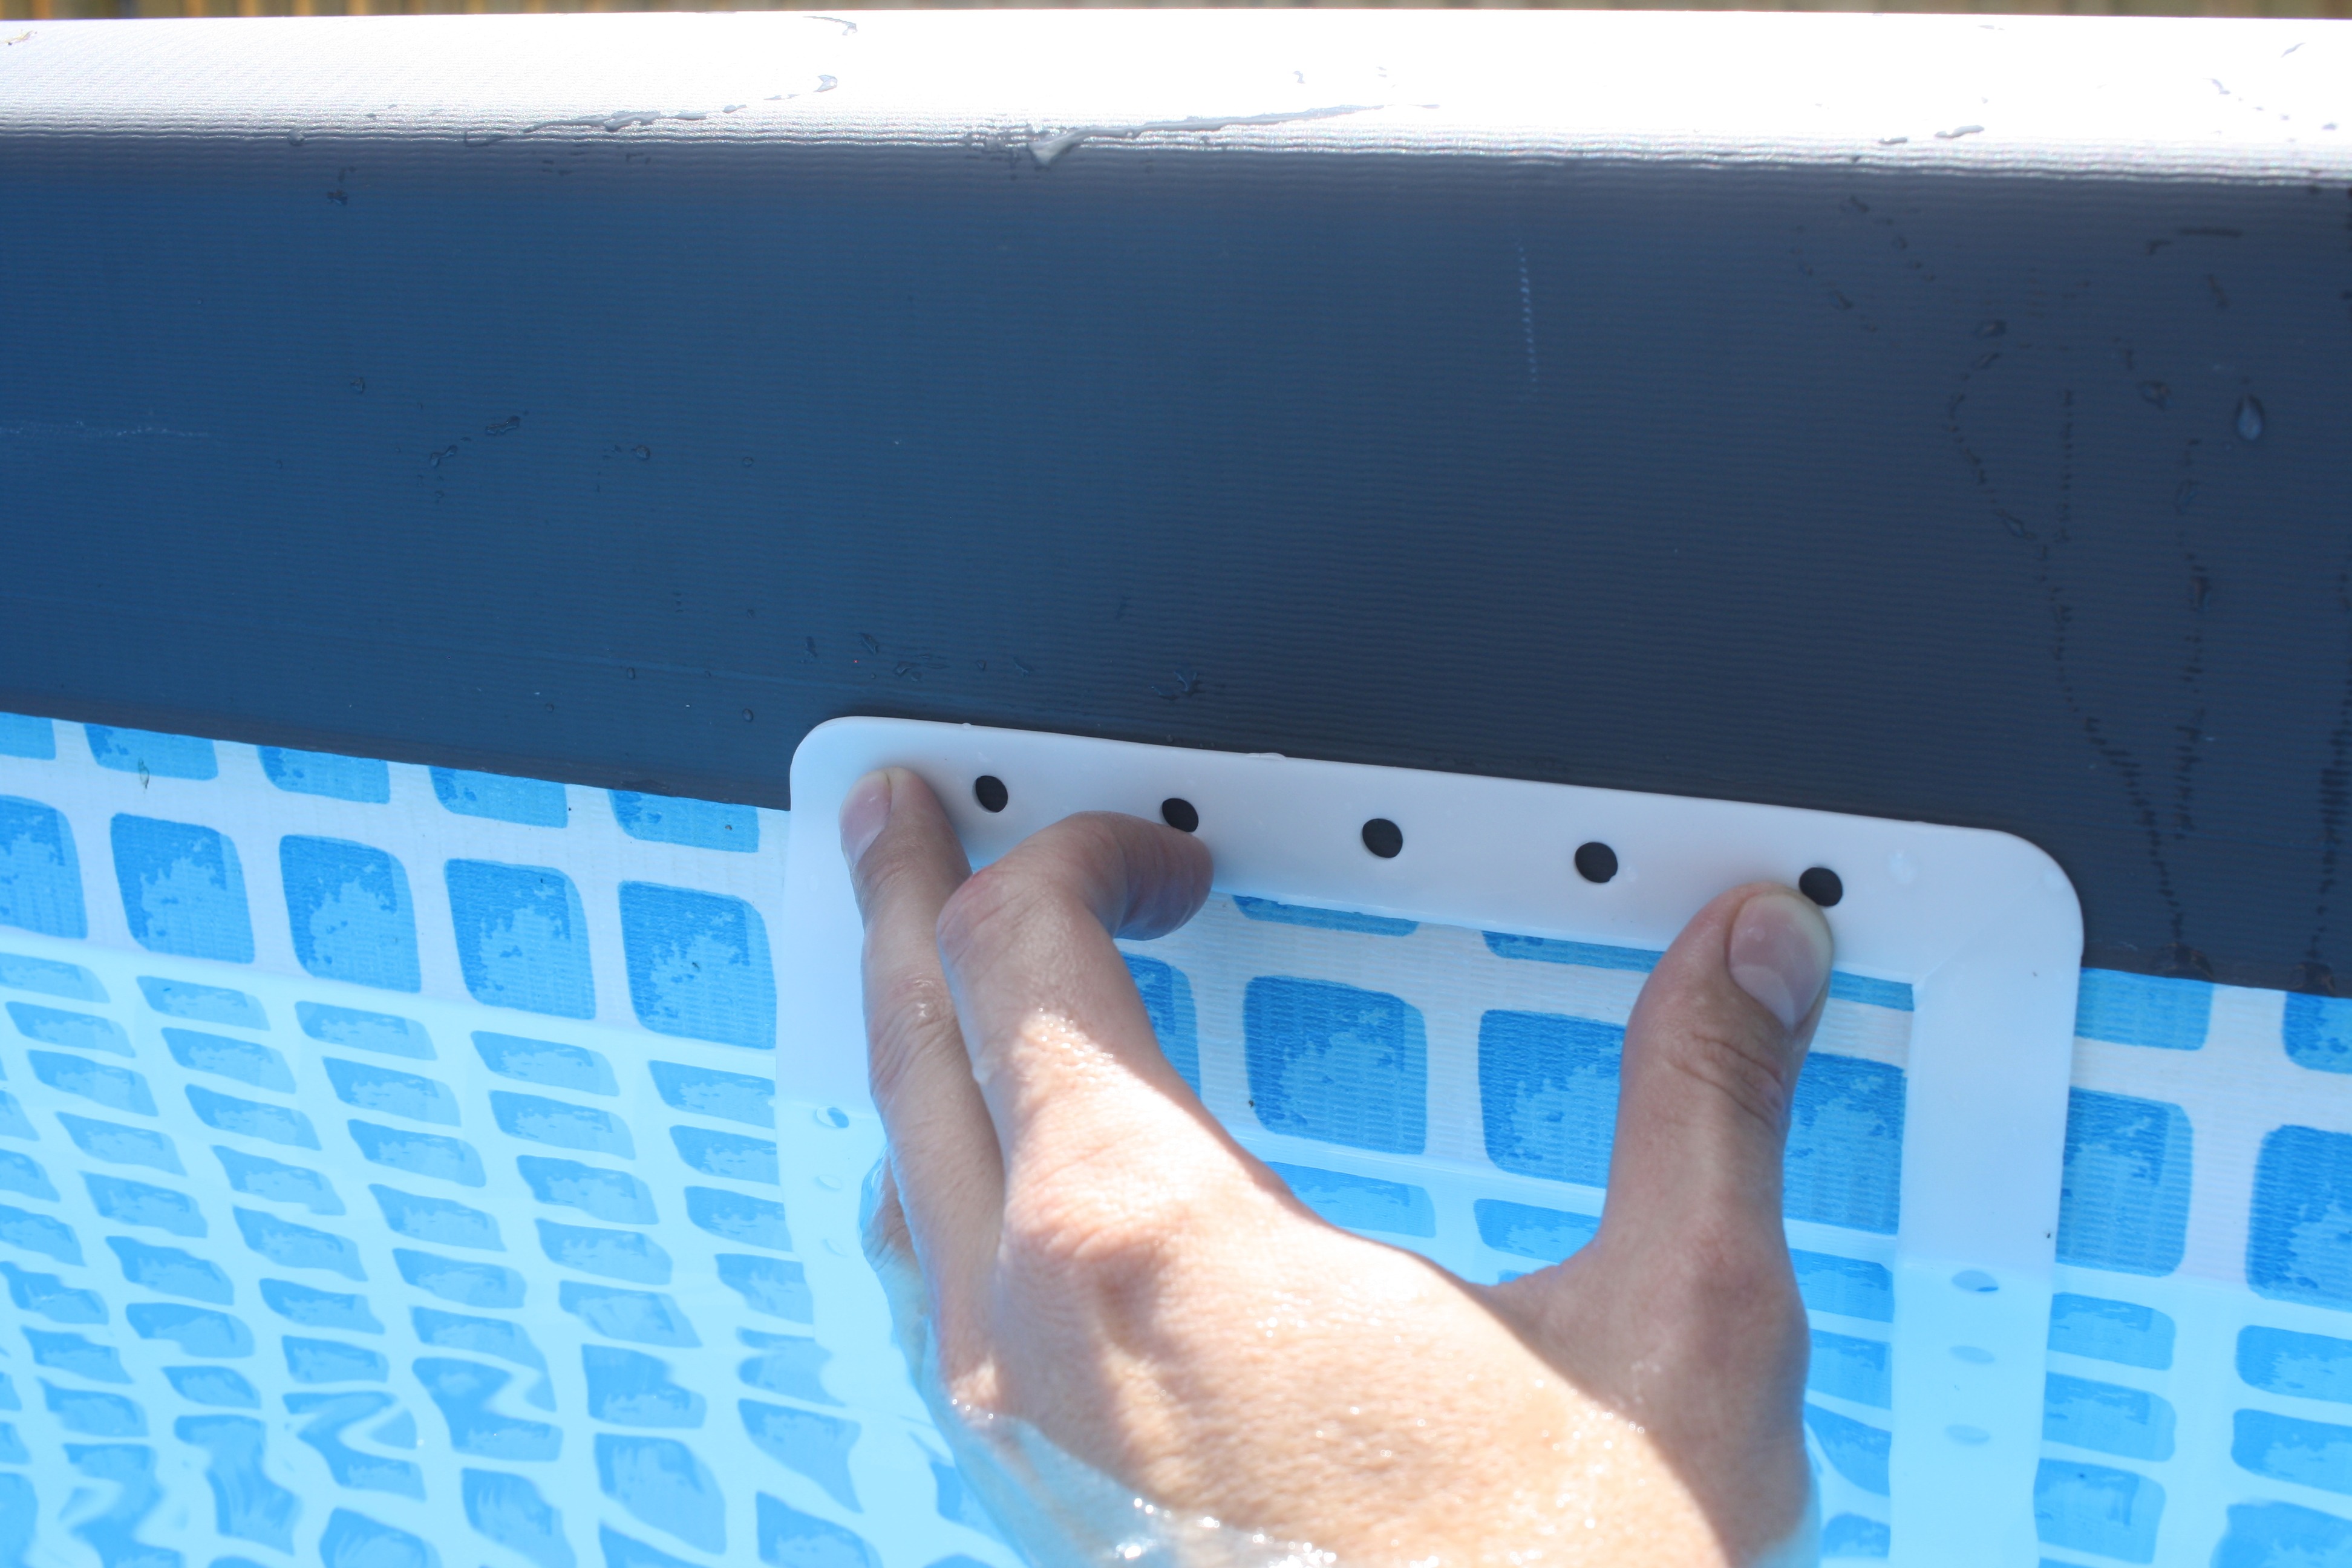
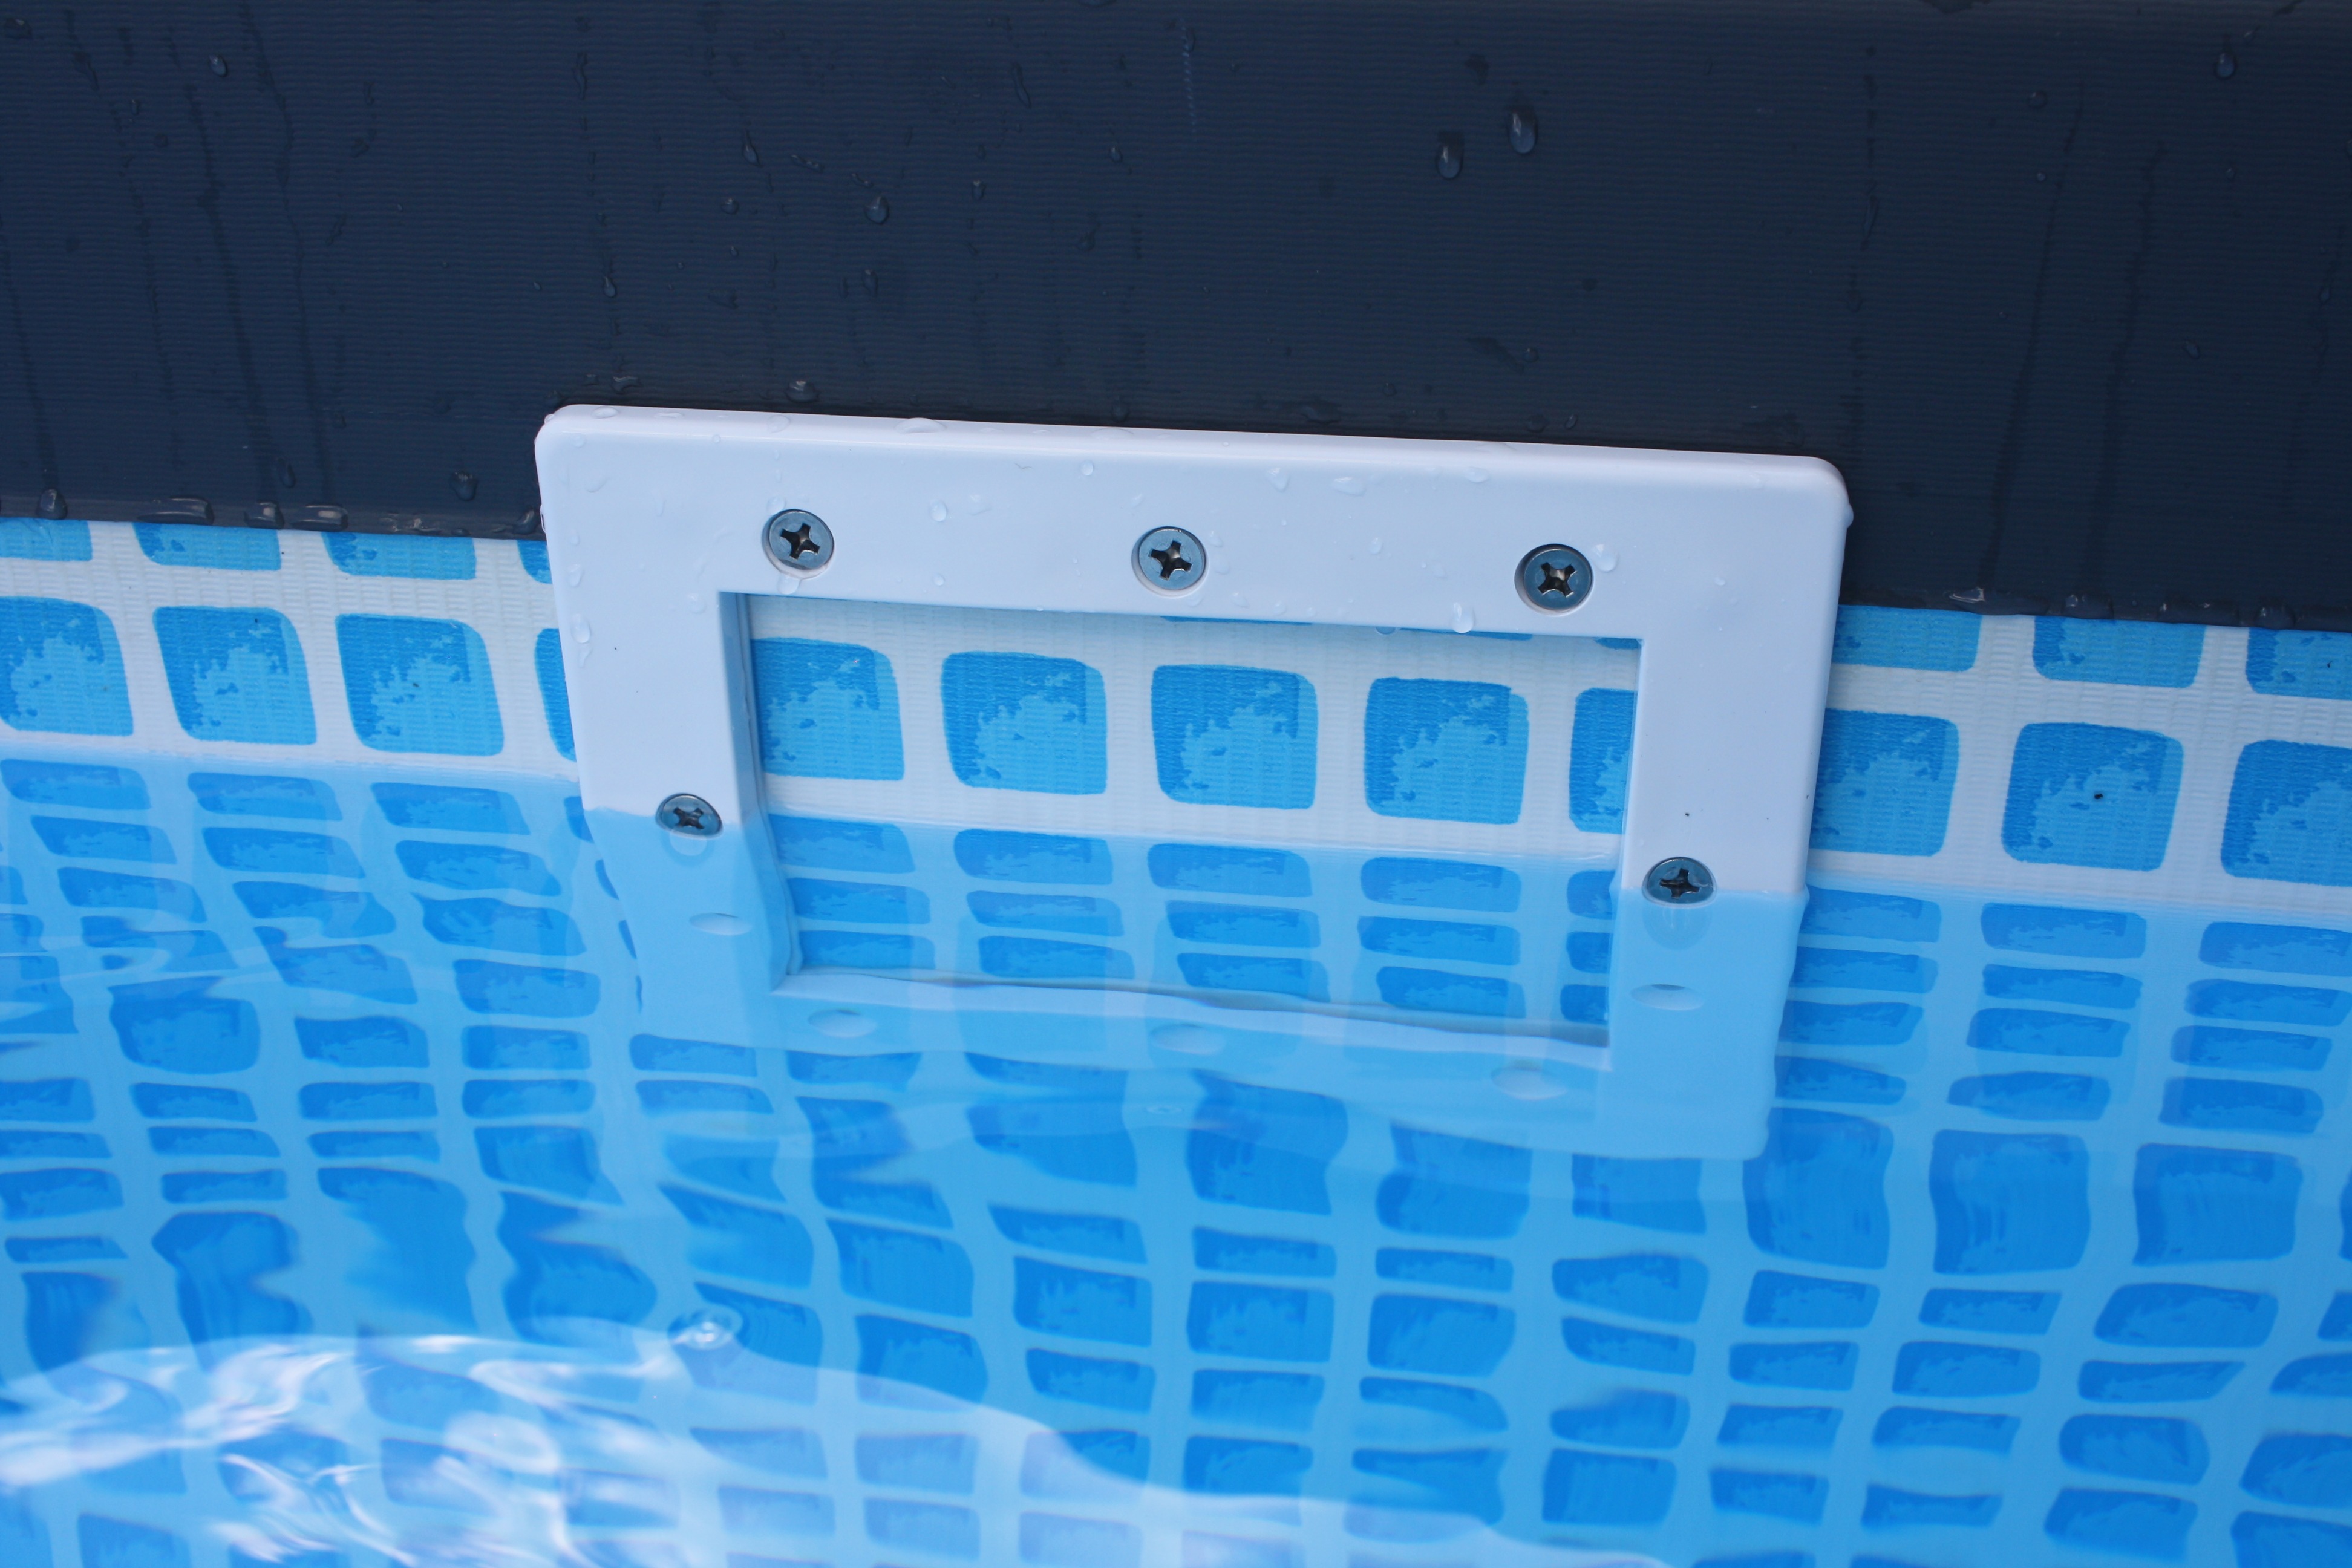
You want the skimmer fairly high, so the pool can be filled up as full as possible without going over the top of the skimmer, but you don't want to stress the liner. This means you want the skimmer to be as high on the outside as possible, without having it hit the portion of the liner that starts angling diagonally away to go over the upper bars.
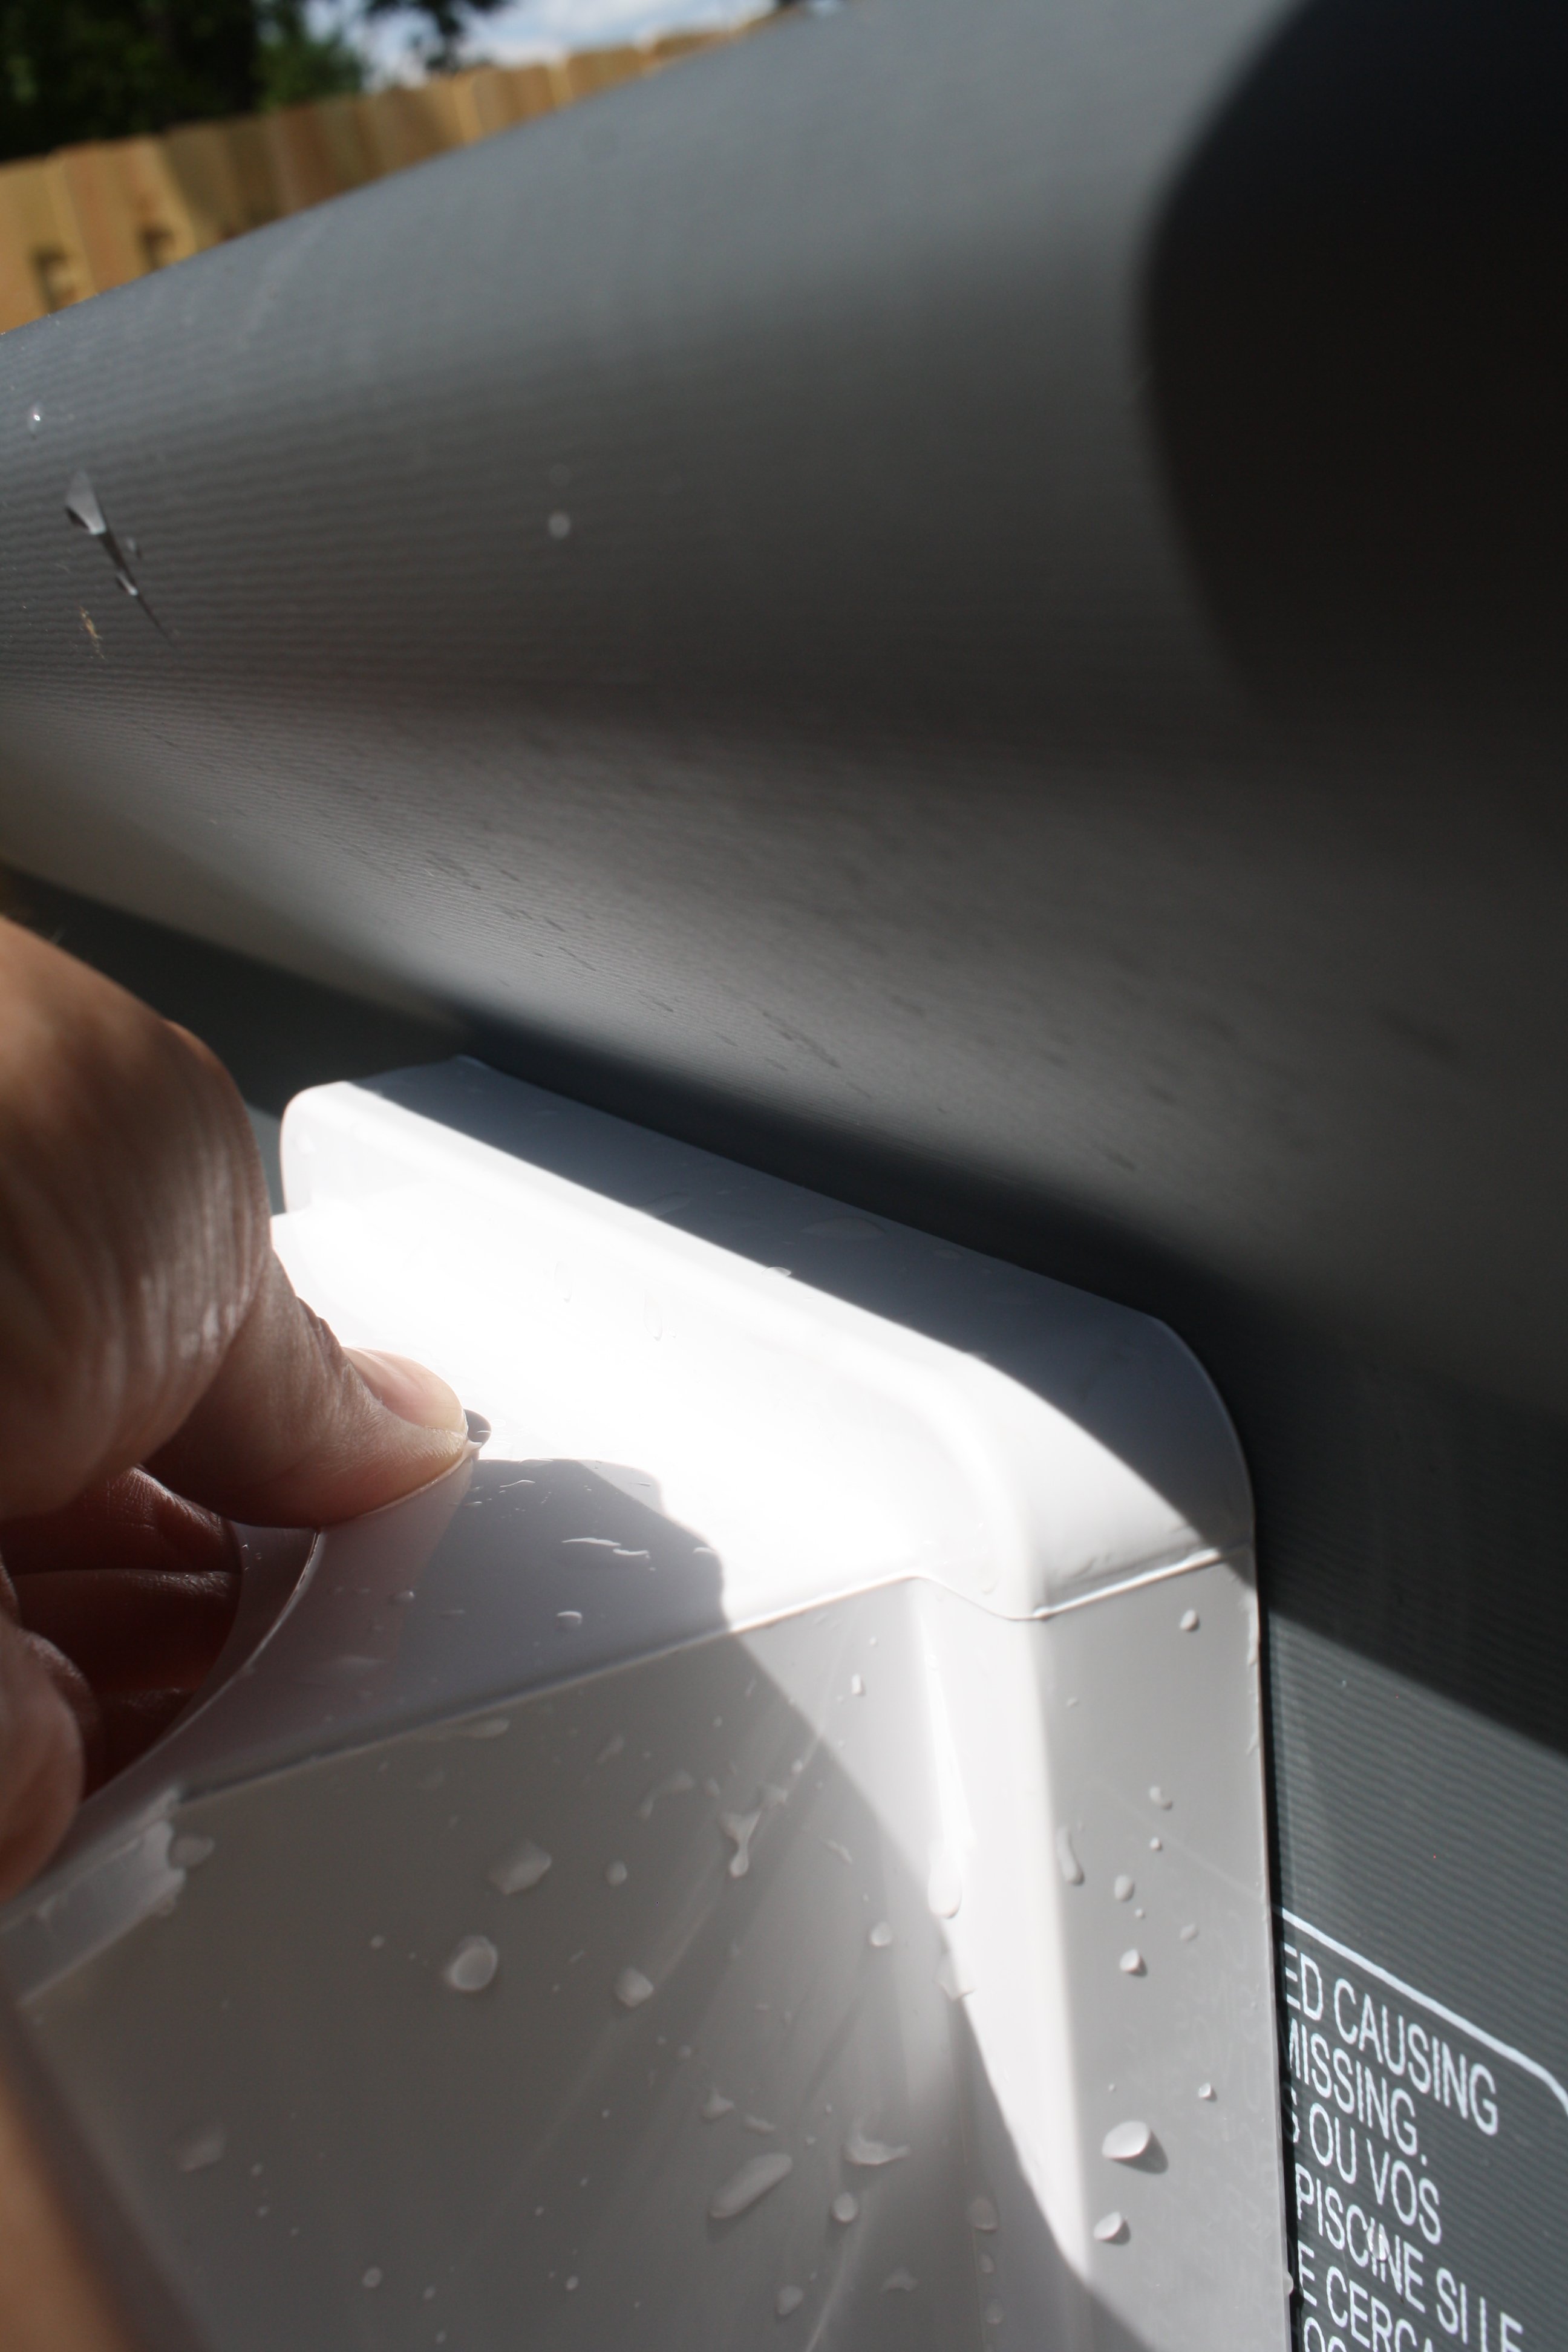
It's somewhat hard to see, but that means you'll want the inner gasket right about here, with the top edge slightly below the top of the melted seam line on the liner.
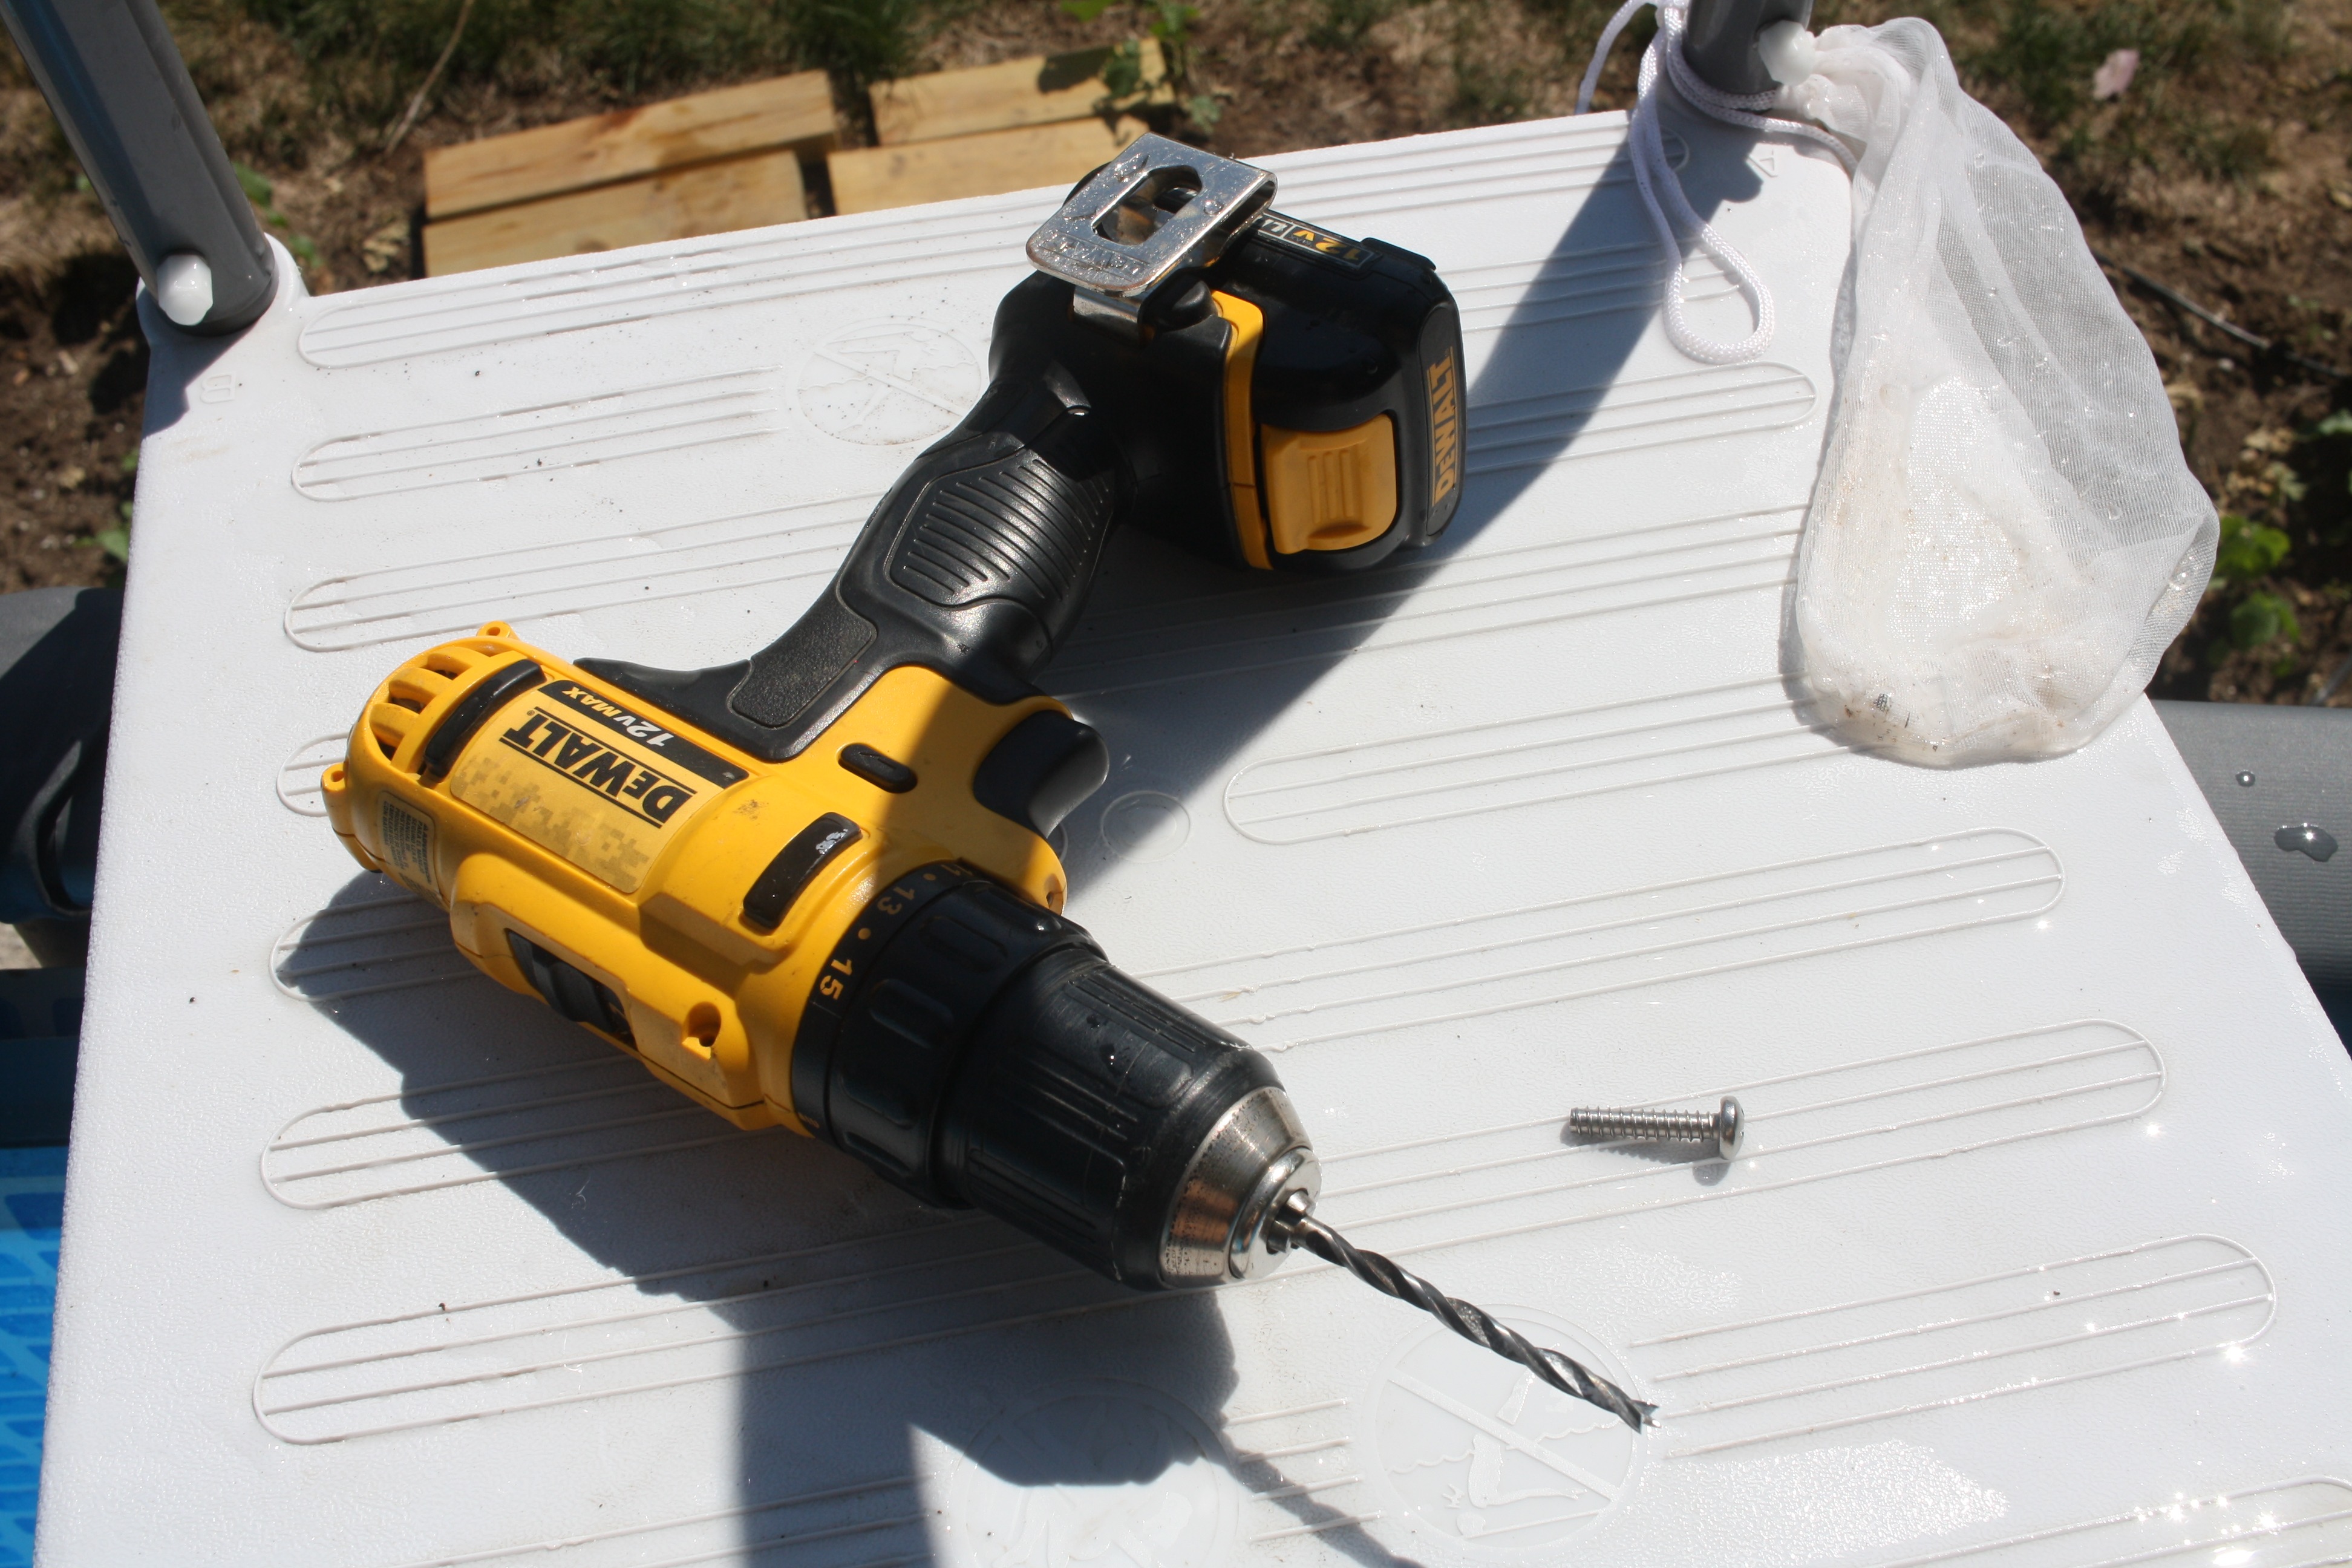
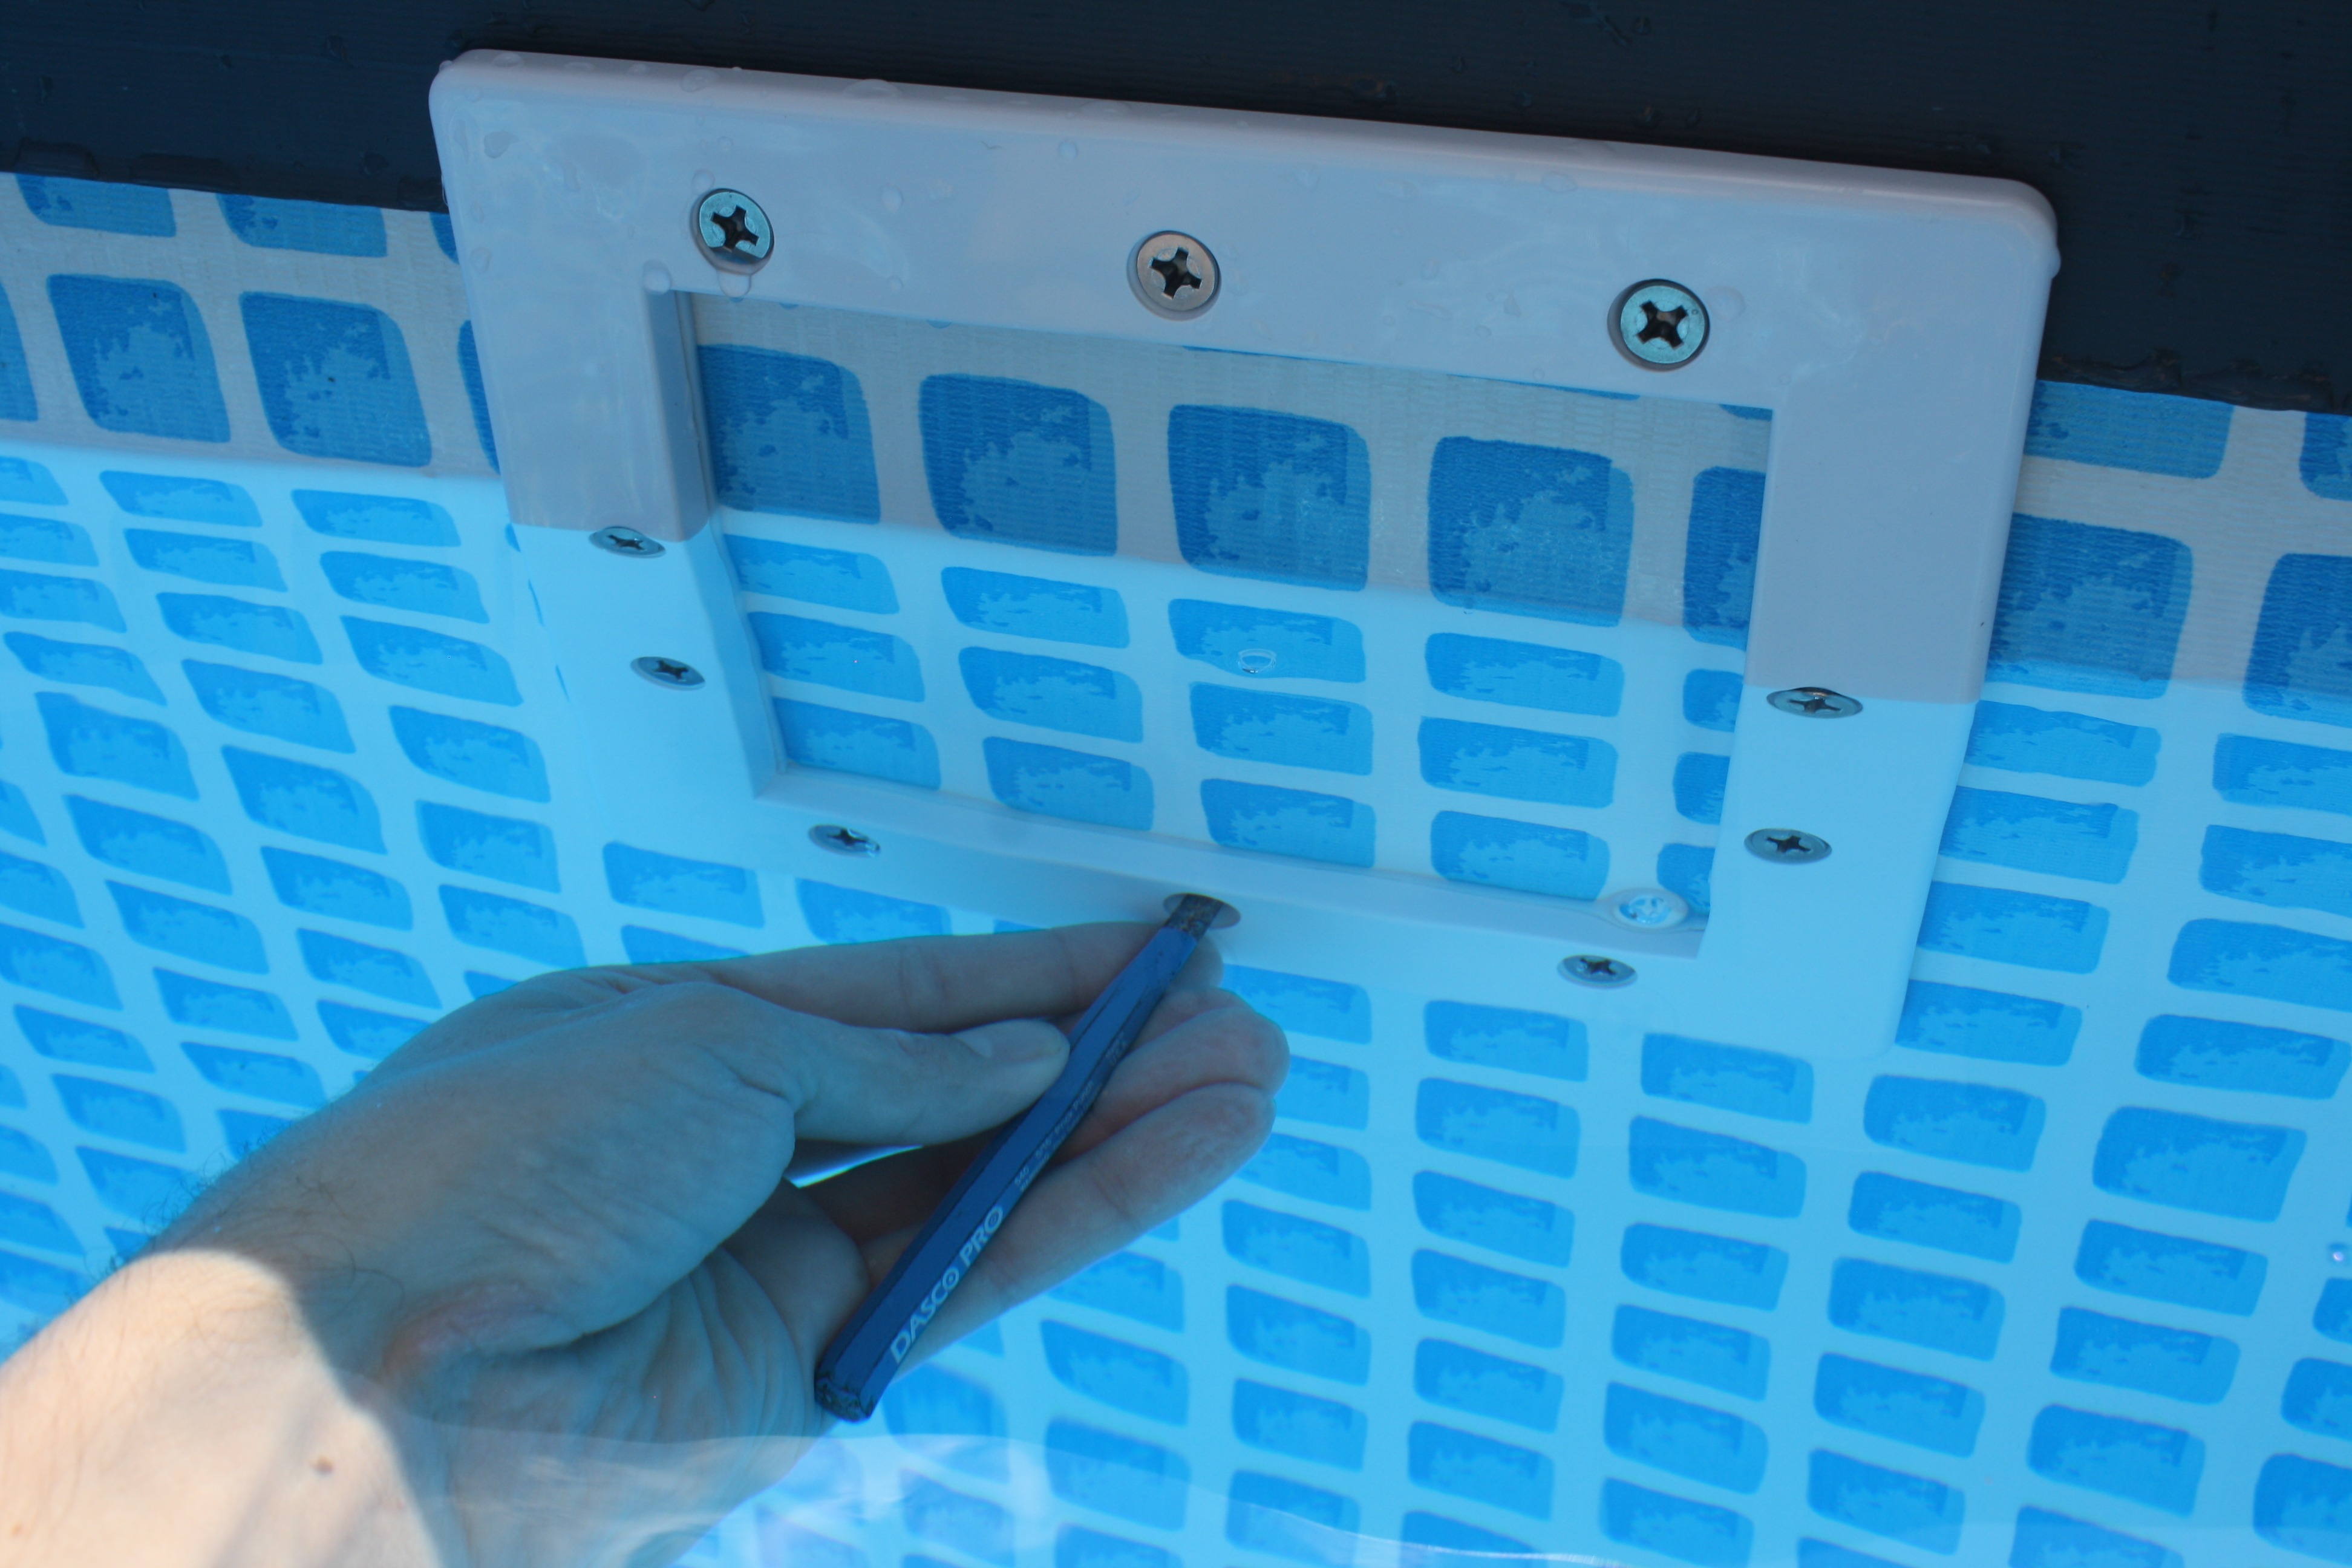
Now, I had an awl, and intended to use it to punch a hole through the liner, then put the screw in. Problem was, the top row of screws is on the welded seam, so it's twice as thick and I could not really punch through with the awl. A different awl, with a more tapered point, probably would have worked...but I broke out the drill. DO NOT USE A CORDED DRILL IF YOU DECIDE TO USE A DRILL. BATTERY OPERATED DRILL ONLY!!!
The idea here is get the gasket and inner frame lined up where they should be, punch (or drill) through the liner on one of the top corner holes, then stick a screw through the hole. One through, put the outside gasket over the screw, then screw the screw into the skimmer. Do not tighten down fully. Repeat with the top screw on the other corner. At this point you should have the skimmer supported by the top two screws.
I then put the middle top screw in.
I proceeded downwards on both sides, making sure the gasket was lined up before putting the screws in. At this point I started gently snugging the screws down, as the faceplate, at least for me, was sticking out from the pool further down, so I wanted to pull things together slowly rather than try to put a screw in the bottom when the faceplate was more than 1/4" off the liner.
On the other hand, you don't want to fully tighten the screws until they are all in, so you can tighten them crosswise. So I tightened the screws until the gasket/faceplate just started to touch, then proceeded to the next screw.
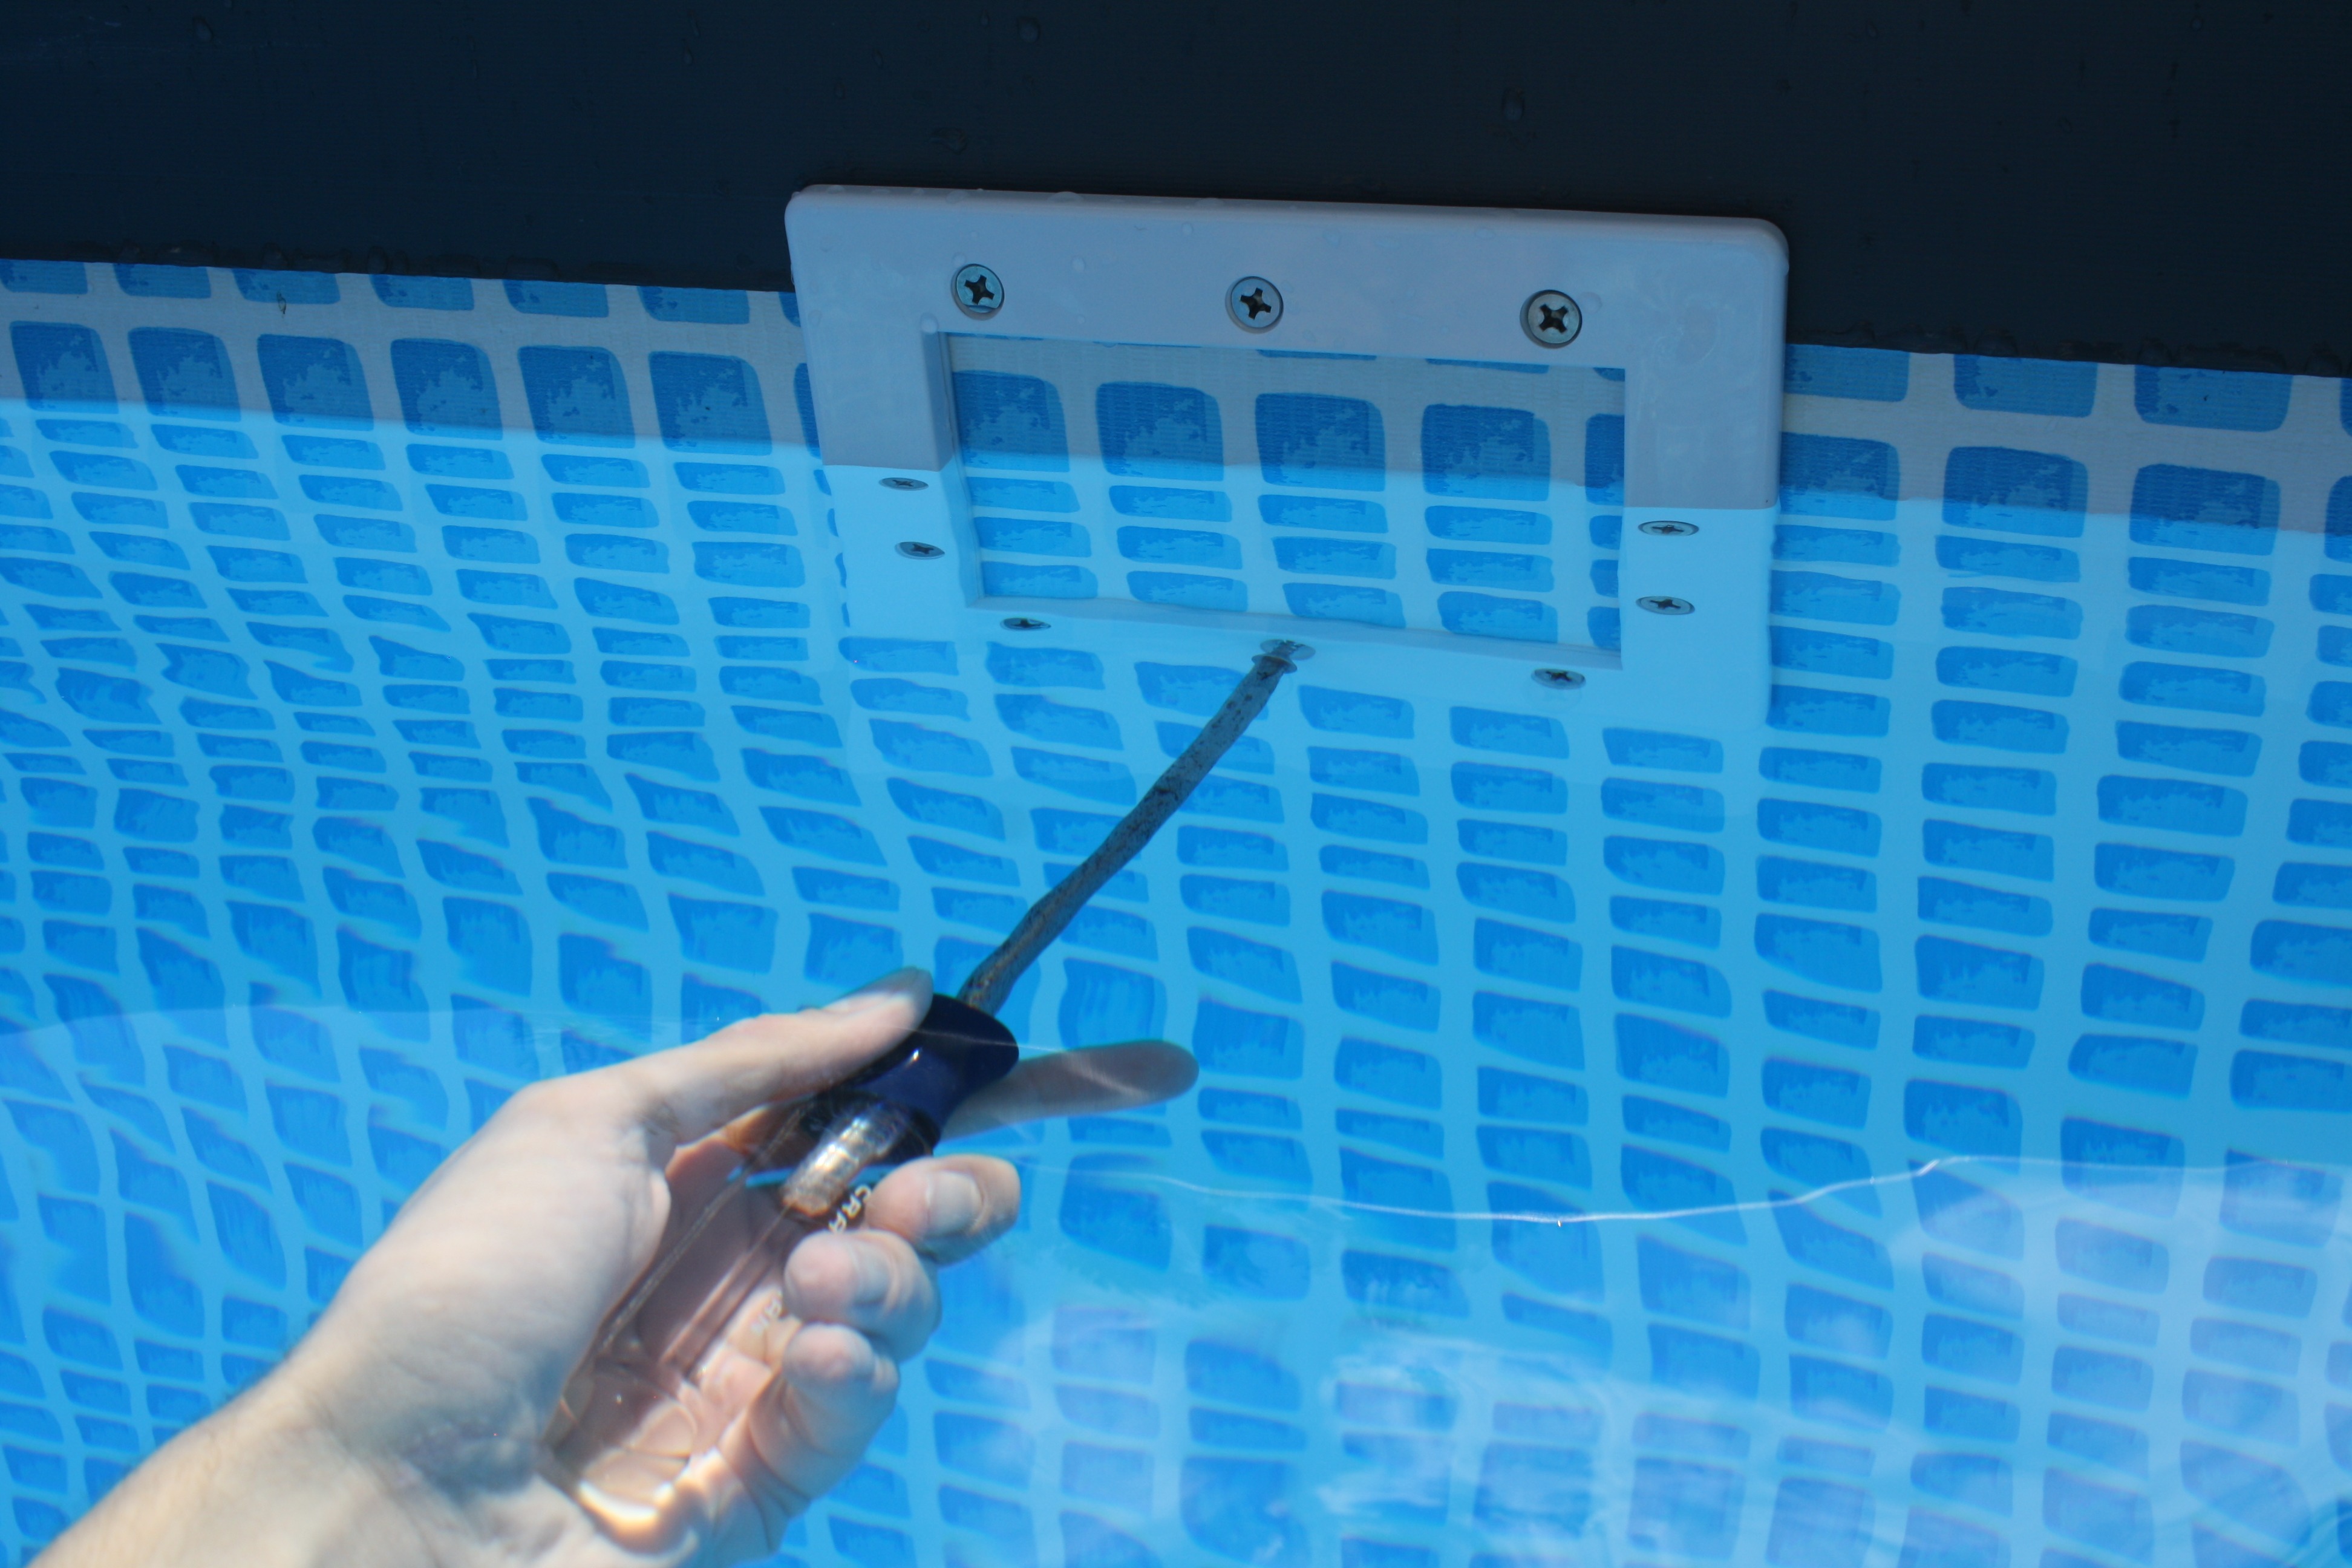
I proceeded one screw down, then the opposing screw at the same height, until I was at the bottom middle. Here's my process. After the top screws in the double liner section, I was easily able to punch a hole through the liner with my awl.
Then I'd stick a screw in and tighten it down till the faceplate/gasket was just touching. My mask and snorkle where handy at this point to watch things underwater, as there is a better view that way vs looking at it from above the water.
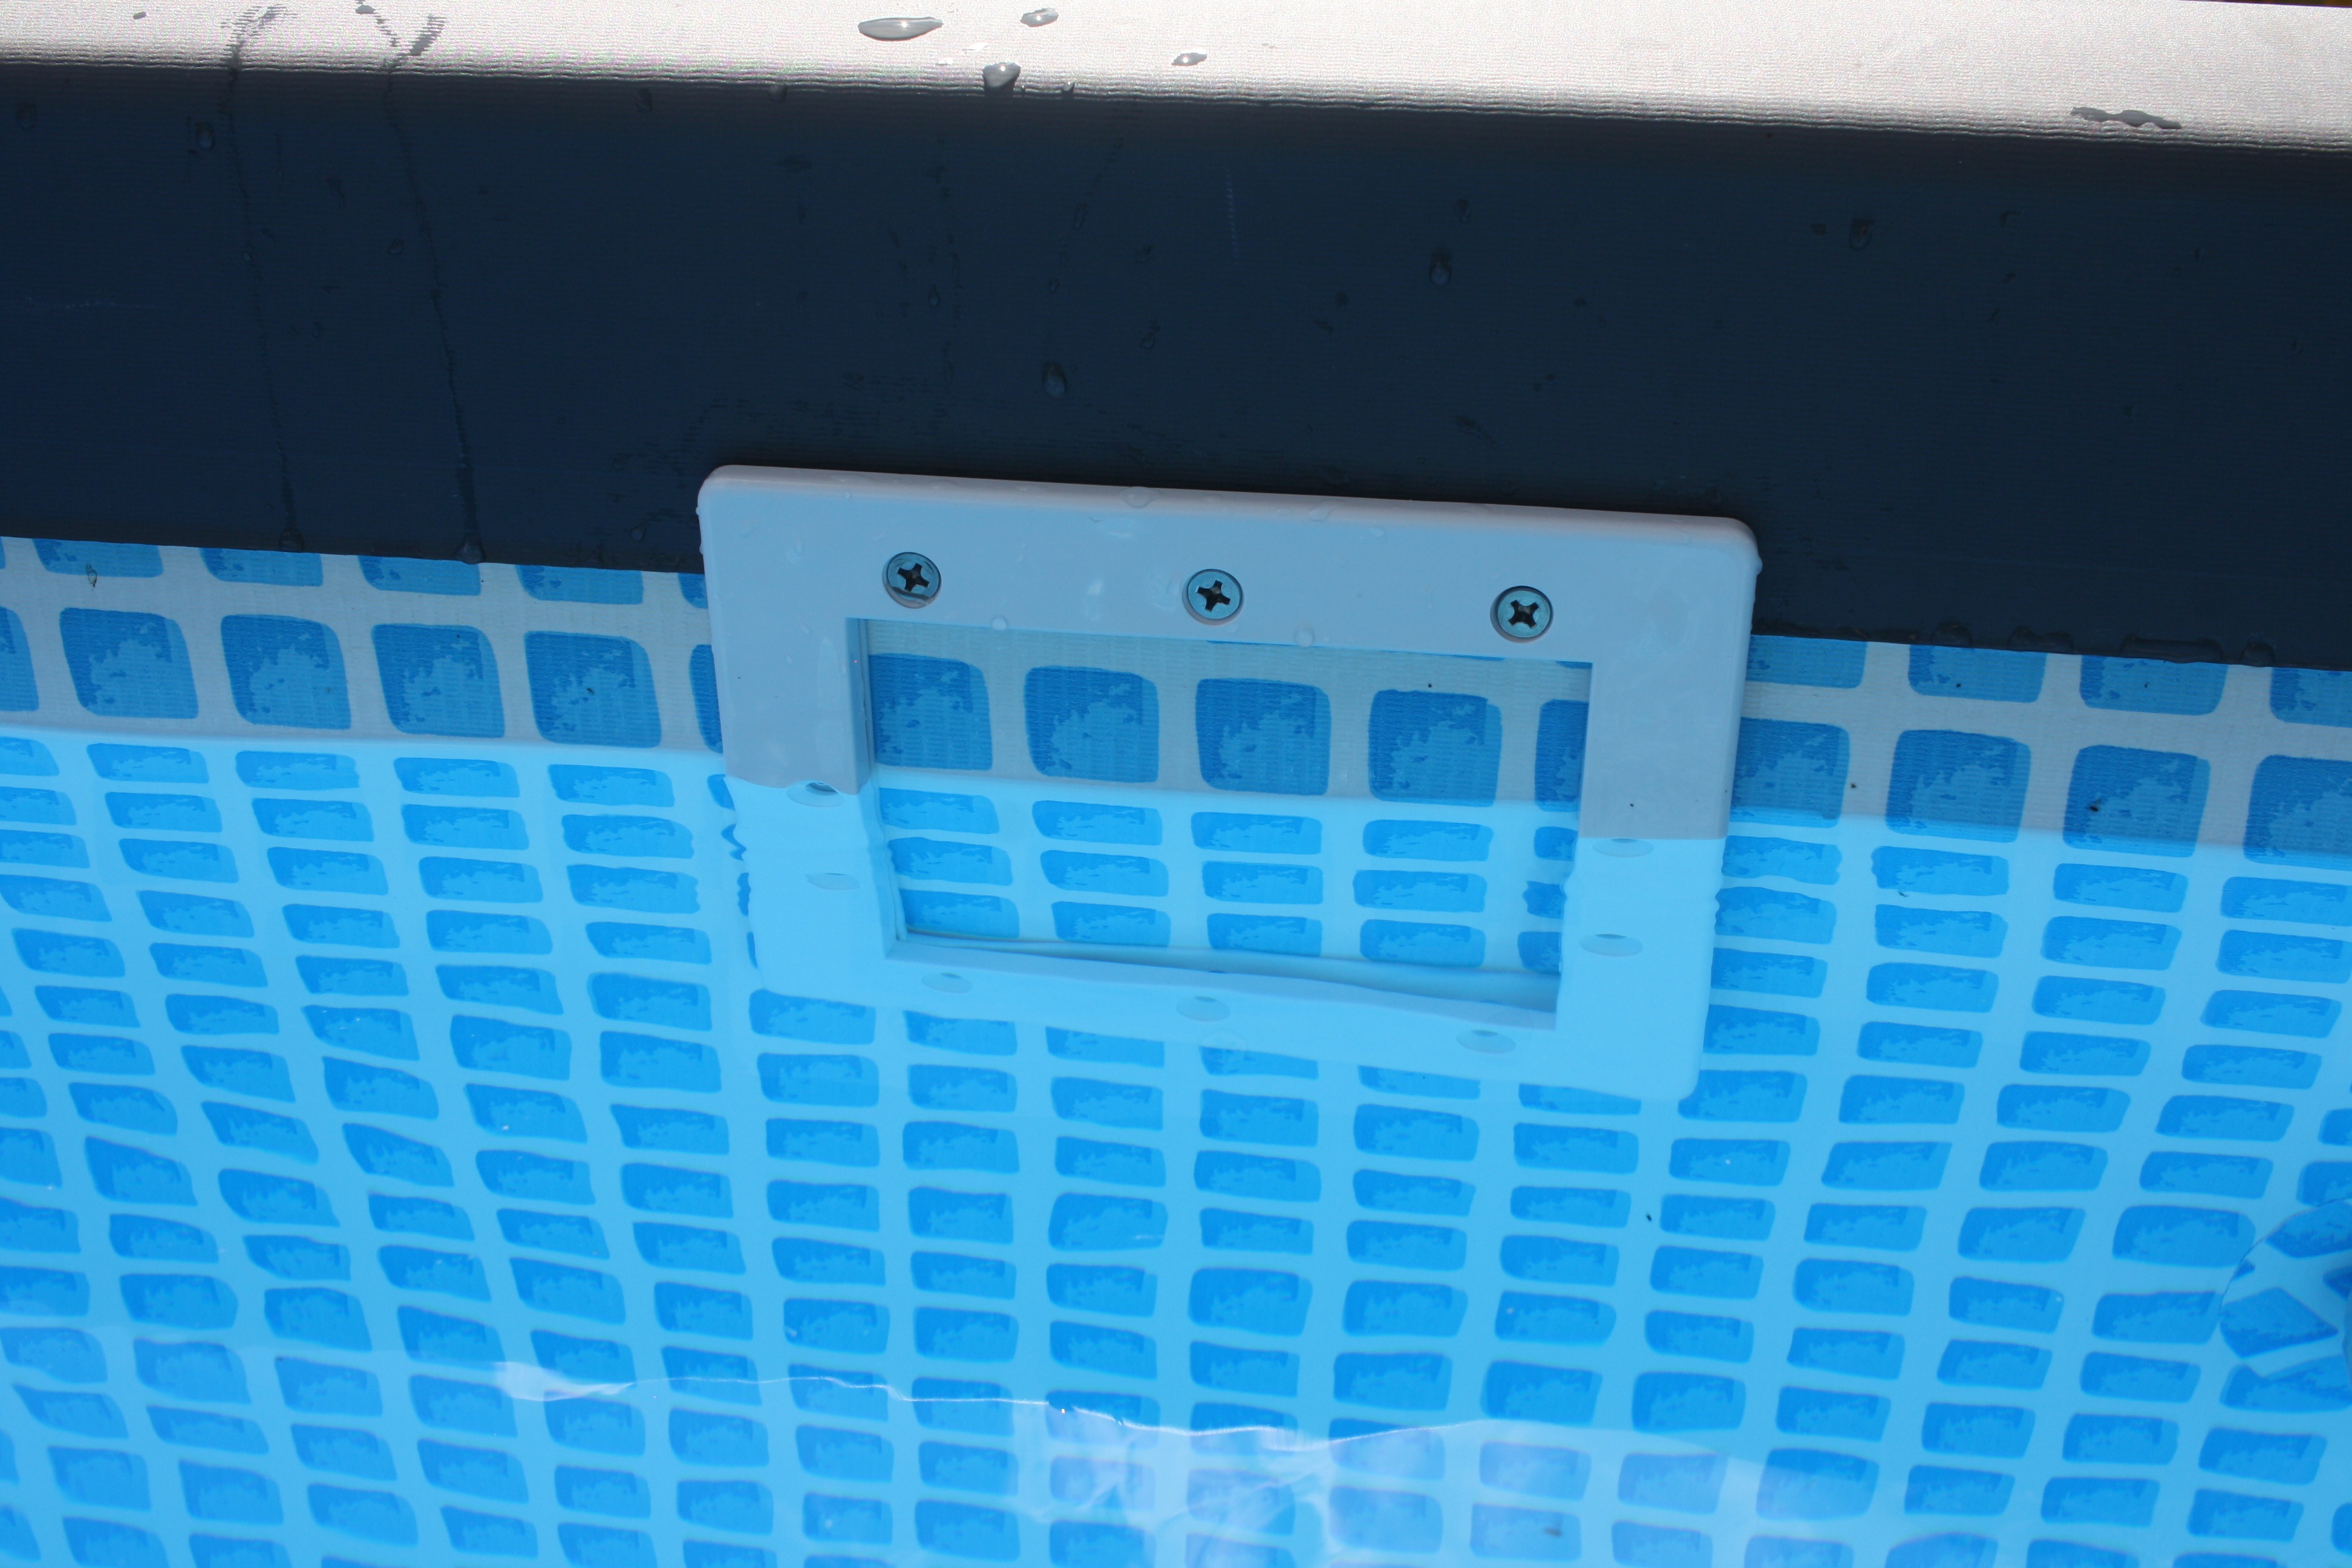
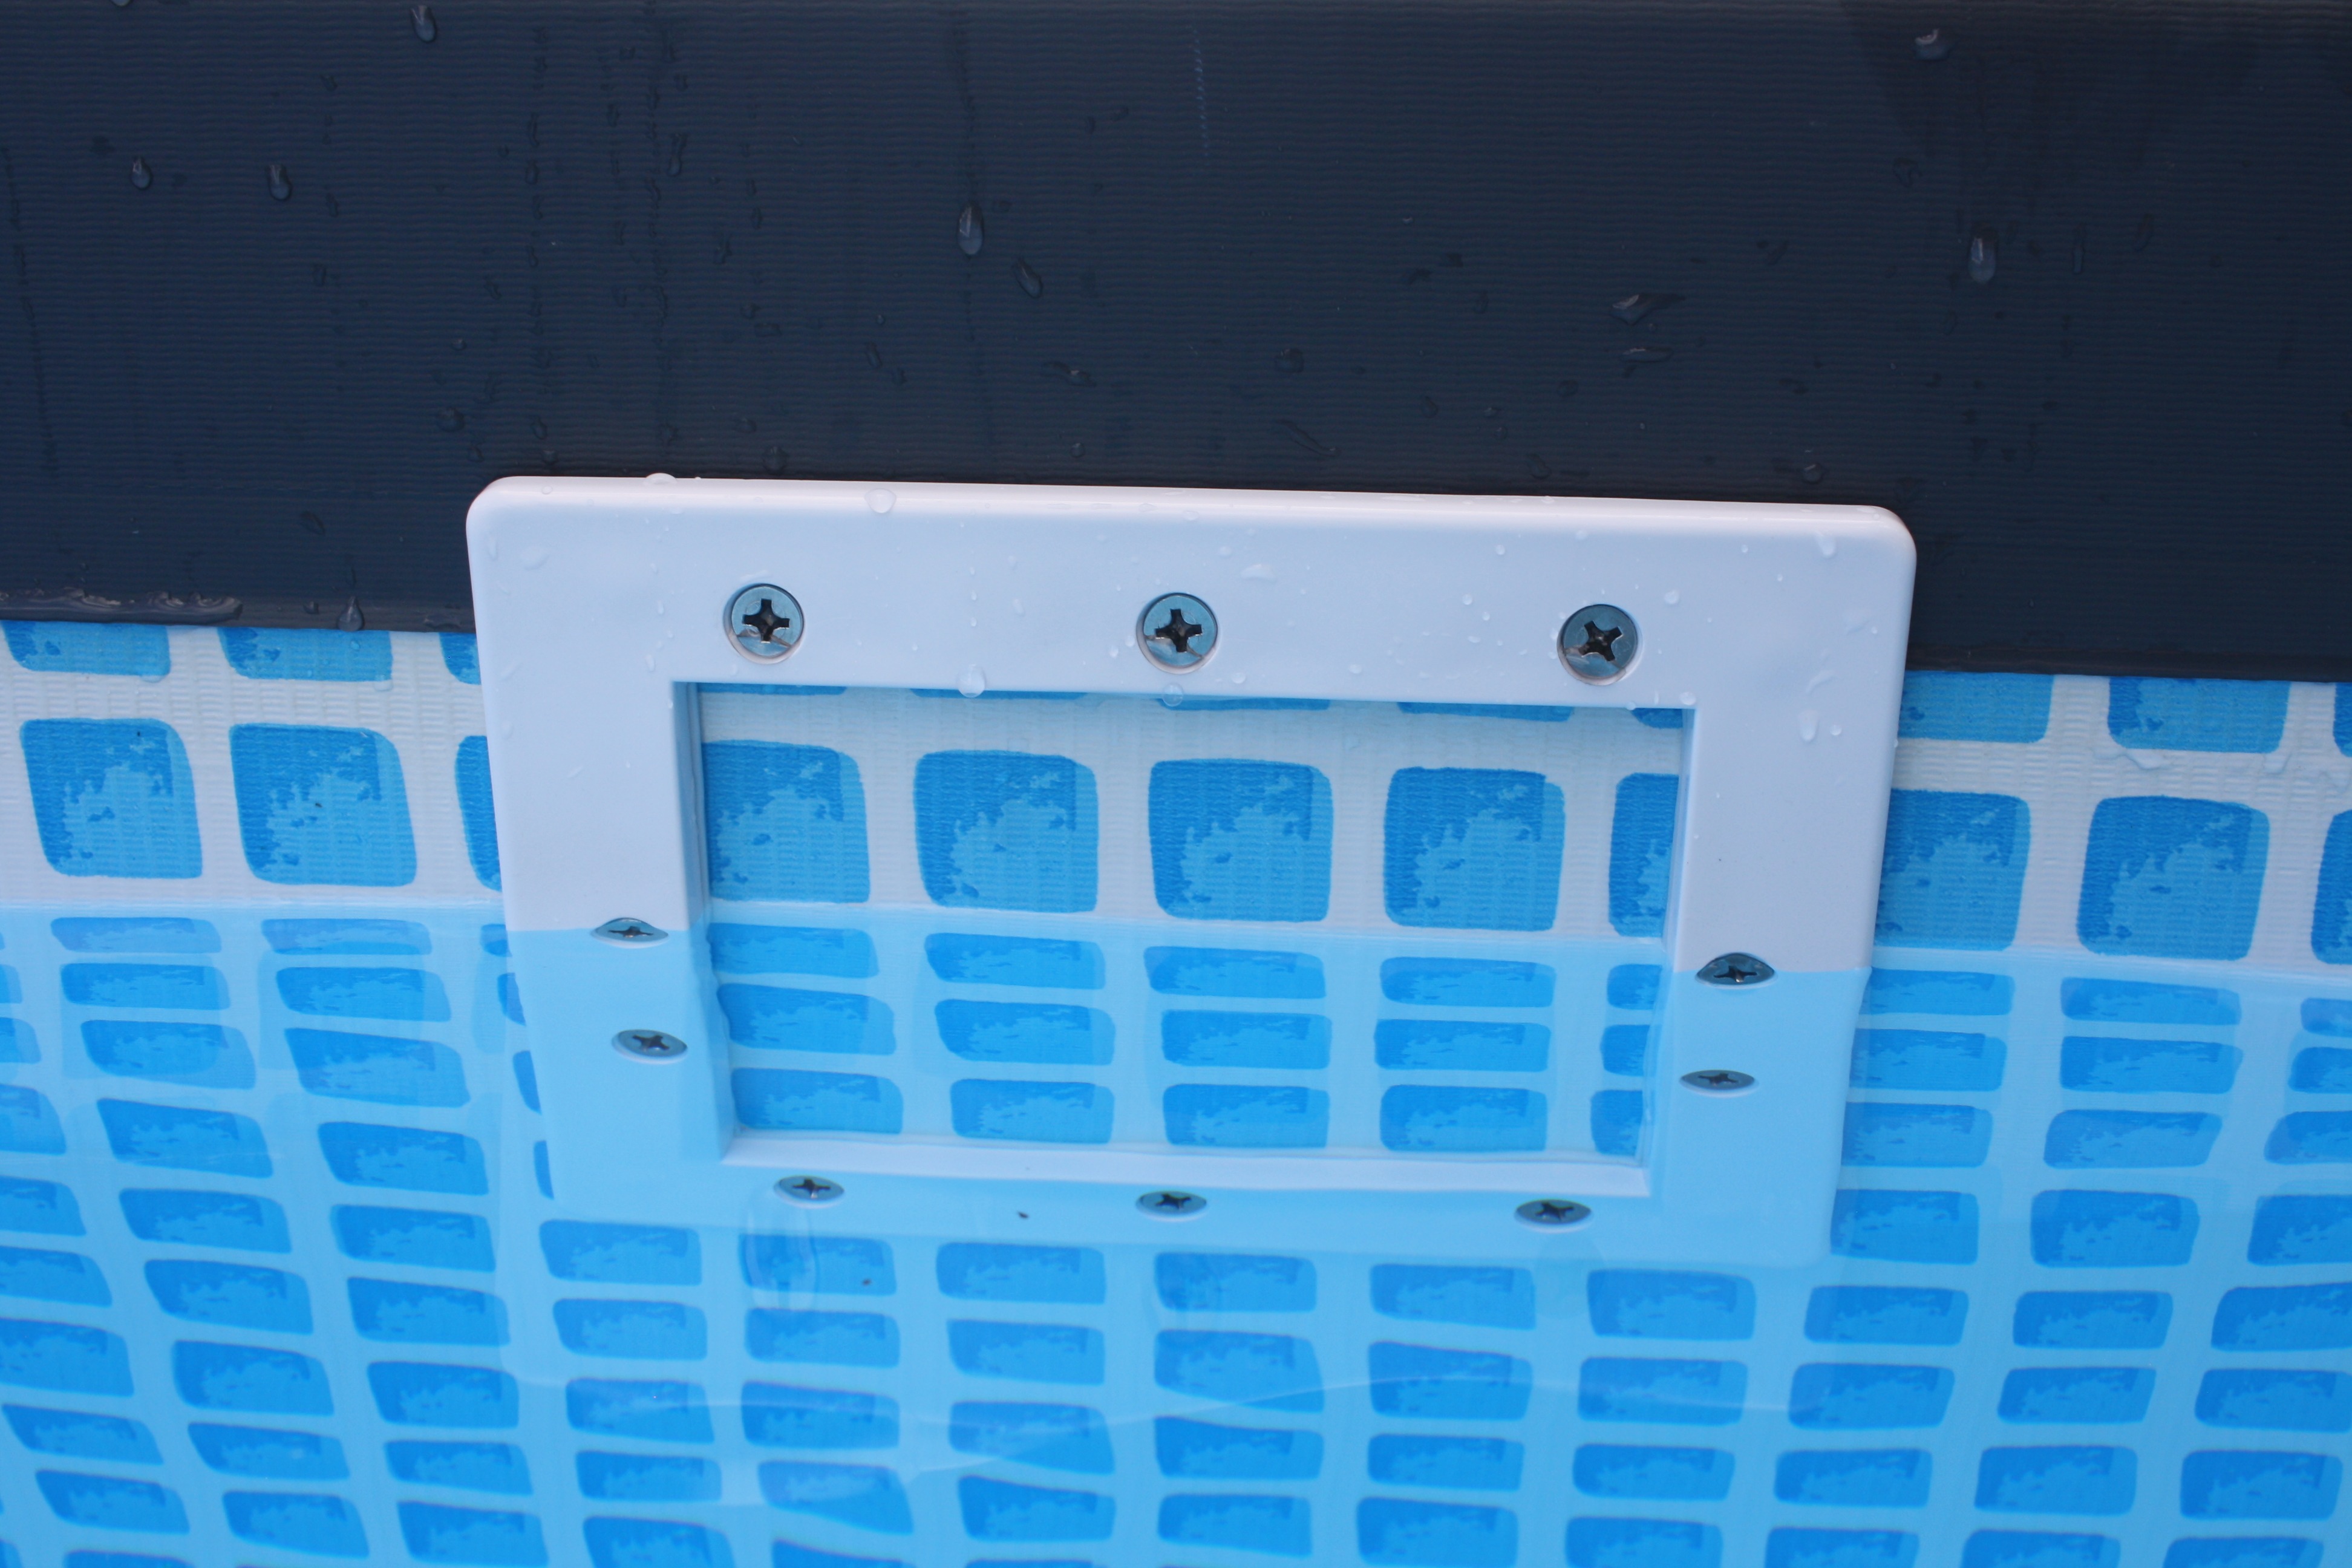
Once all the screws were in, I tightened them down crosswise. I did something like top left, bottom right, top right, bottom left, right top, left bottom, left top, right bottom, top middle, bottom middle. Then went around a second time to make sure all where tight. At this point it looks like this.
You will need:
- Skimmer. I used the Hayward SP1091LX, ordered off Amazon. Other people use the widemouth Hayward, which should work just fine with these instructions.
- Intex to standard adapter. I used the GAME 4560 40mm to 1 1/2 inch conversion kit. Other people have fit together PVC pieces from Home Depot or similar, but this lets you convert from the skimmer straight to Intex tubing (if you don't have hard PVC plumbing yet)
- A longer Intex style hose may be needed, depending on your pool's specific hose setup. I had ordered a two pack of 59" Intex hoses previously, and that came in handy.
- Scissors
- Razor blade
- Phillips #3 screwdriver. Seriously, pick up a #3 if you only have a #2 laying around. #2 can be pressed to work on #3 screws, but it's far from ideal and you will often end up stripping out screws. Get a #3 screwdriver. $5 or less at your local hardware/home improvement store.
- Awl or other sharp pokey device.
- Goggles may be useful. I personally used a mask and snorkle, and found that quite helpful. This is not needed if you drain the pool.
When finished, you have two gasket halves, one of which has a ridge of stuff "sticking out".
I used the scissors again to trim this off.
Which left me with two flat gasket pieces.
Sort out the screws. The round head ones you don't need. I tried to use them, and while someone helpful, can also not be very helpful, and caused me to do more work. I'd skip them. You need all the countersunk screws though (ones on the left). And a #3 screwdriver, not the standard #2!
Put the parts somewhere easy to grab. I stuck the screws in the skimmer basket.
You want the skimmer fairly high, so the pool can be filled up as full as possible without going over the top of the skimmer, but you don't want to stress the liner. This means you want the skimmer to be as high on the outside as possible, without having it hit the portion of the liner that starts angling diagonally away to go over the upper bars.
It's somewhat hard to see, but that means you'll want the inner gasket right about here, with the top edge slightly below the top of the melted seam line on the liner.
Now, I had an awl, and intended to use it to punch a hole through the liner, then put the screw in. Problem was, the top row of screws is on the welded seam, so it's twice as thick and I could not really punch through with the awl. A different awl, with a more tapered point, probably would have worked...but I broke out the drill. DO NOT USE A CORDED DRILL IF YOU DECIDE TO USE A DRILL. BATTERY OPERATED DRILL ONLY!!!
The idea here is get the gasket and inner frame lined up where they should be, punch (or drill) through the liner on one of the top corner holes, then stick a screw through the hole. One through, put the outside gasket over the screw, then screw the screw into the skimmer. Do not tighten down fully. Repeat with the top screw on the other corner. At this point you should have the skimmer supported by the top two screws.
I then put the middle top screw in.
I proceeded downwards on both sides, making sure the gasket was lined up before putting the screws in. At this point I started gently snugging the screws down, as the faceplate, at least for me, was sticking out from the pool further down, so I wanted to pull things together slowly rather than try to put a screw in the bottom when the faceplate was more than 1/4" off the liner.
On the other hand, you don't want to fully tighten the screws until they are all in, so you can tighten them crosswise. So I tightened the screws until the gasket/faceplate just started to touch, then proceeded to the next screw.
I proceeded one screw down, then the opposing screw at the same height, until I was at the bottom middle. Here's my process. After the top screws in the double liner section, I was easily able to punch a hole through the liner with my awl.
Then I'd stick a screw in and tighten it down till the faceplate/gasket was just touching. My mask and snorkle where handy at this point to watch things underwater, as there is a better view that way vs looking at it from above the water.
Once all the screws were in, I tightened them down crosswise. I did something like top left, bottom right, top right, bottom left, right top, left bottom, left top, right bottom, top middle, bottom middle. Then went around a second time to make sure all where tight. At this point it looks like this.
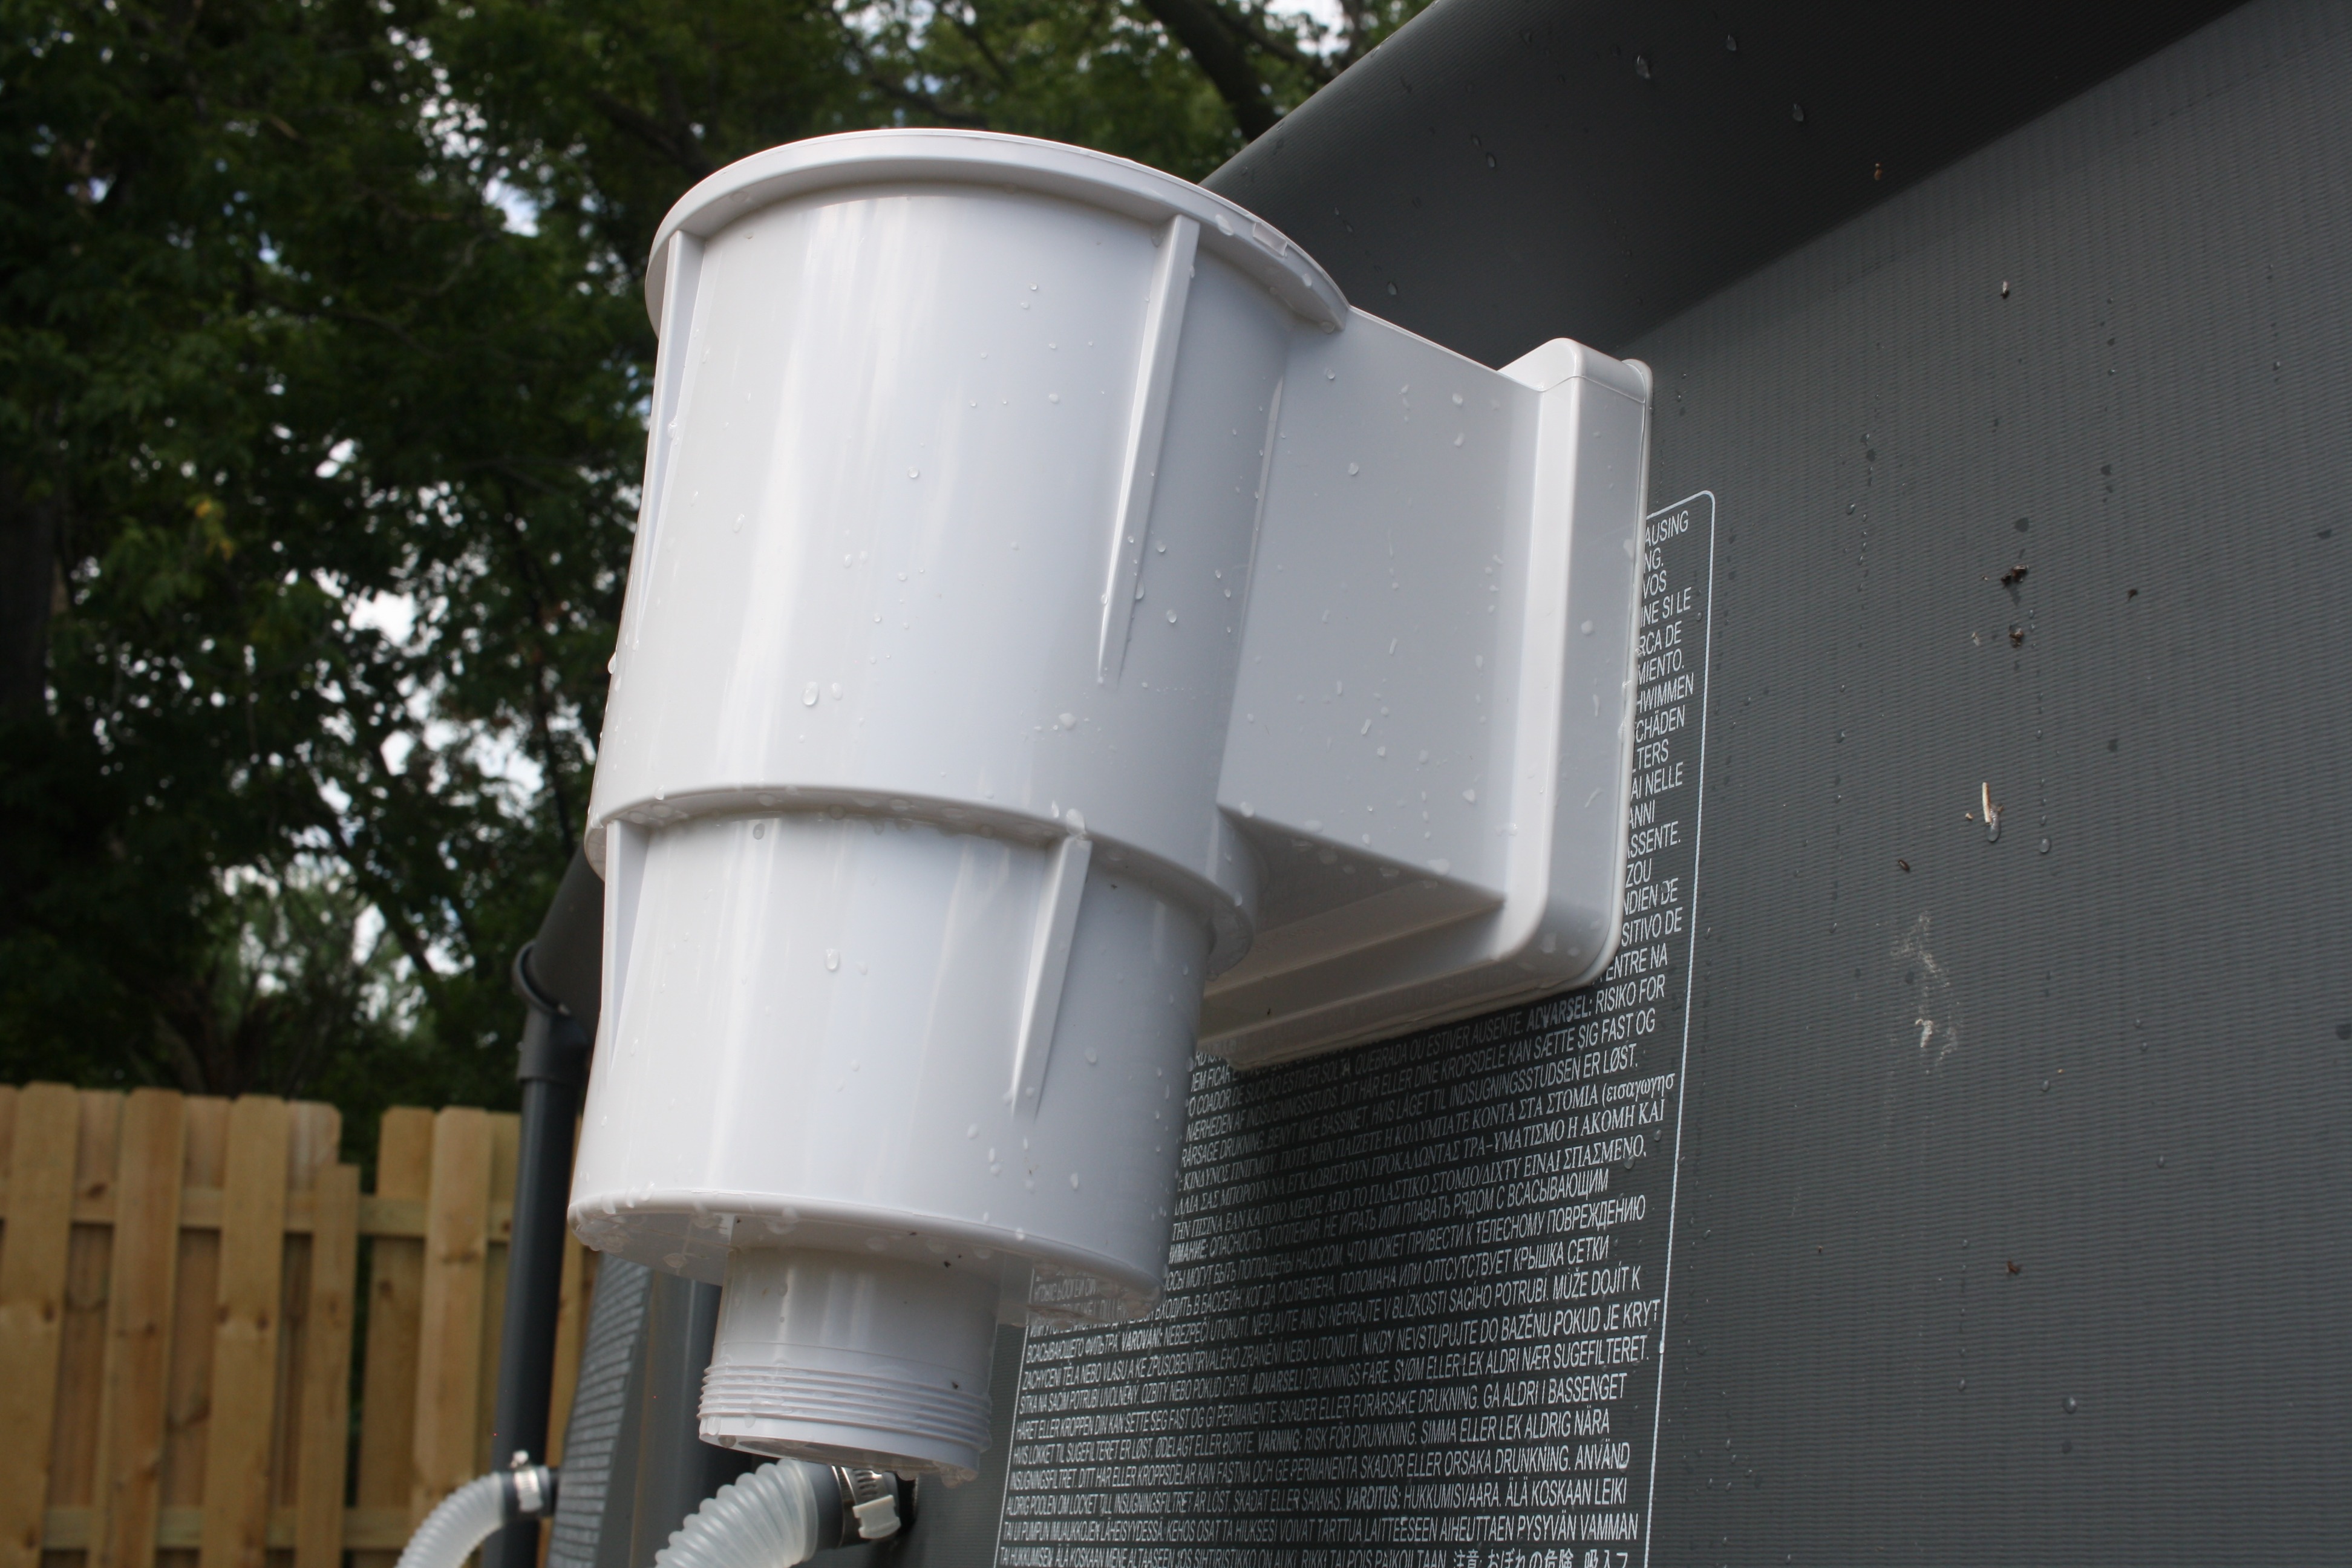
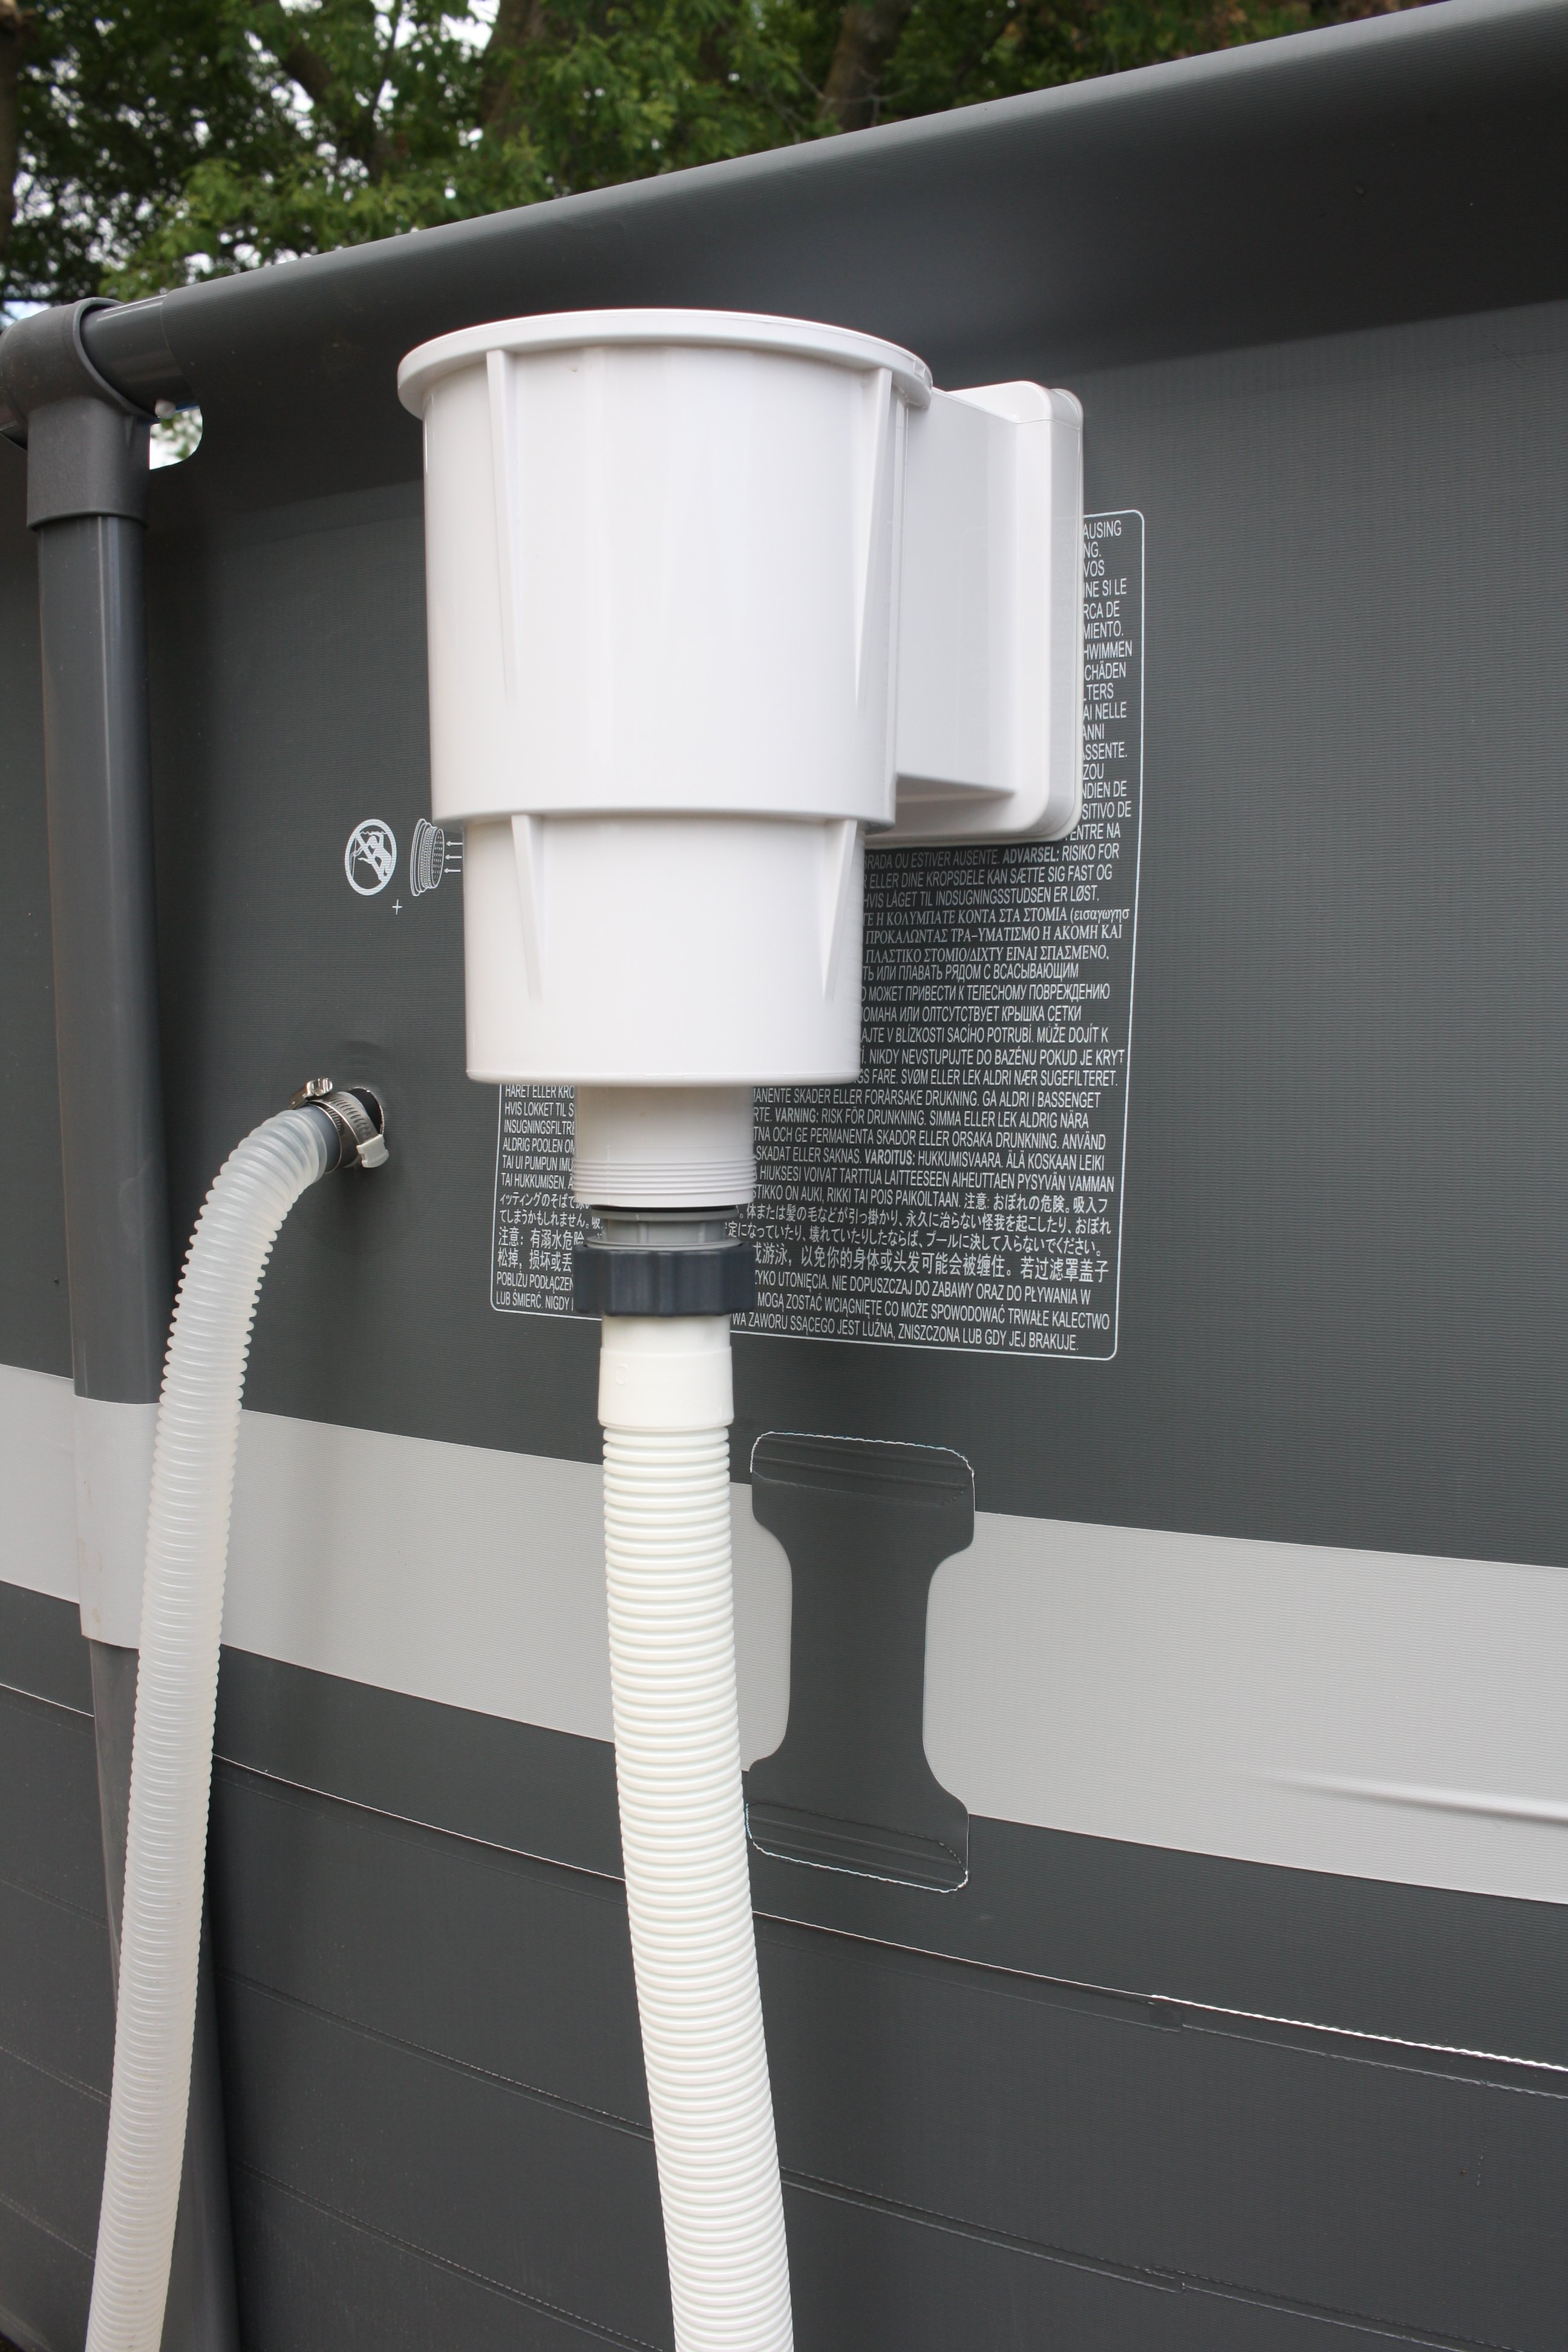
Now to connect it up. You need to do the plumbing before cutting the liner. At some point I want to do some hard PVC, but at this point the Intex lines are fine with me. One thing at a time...
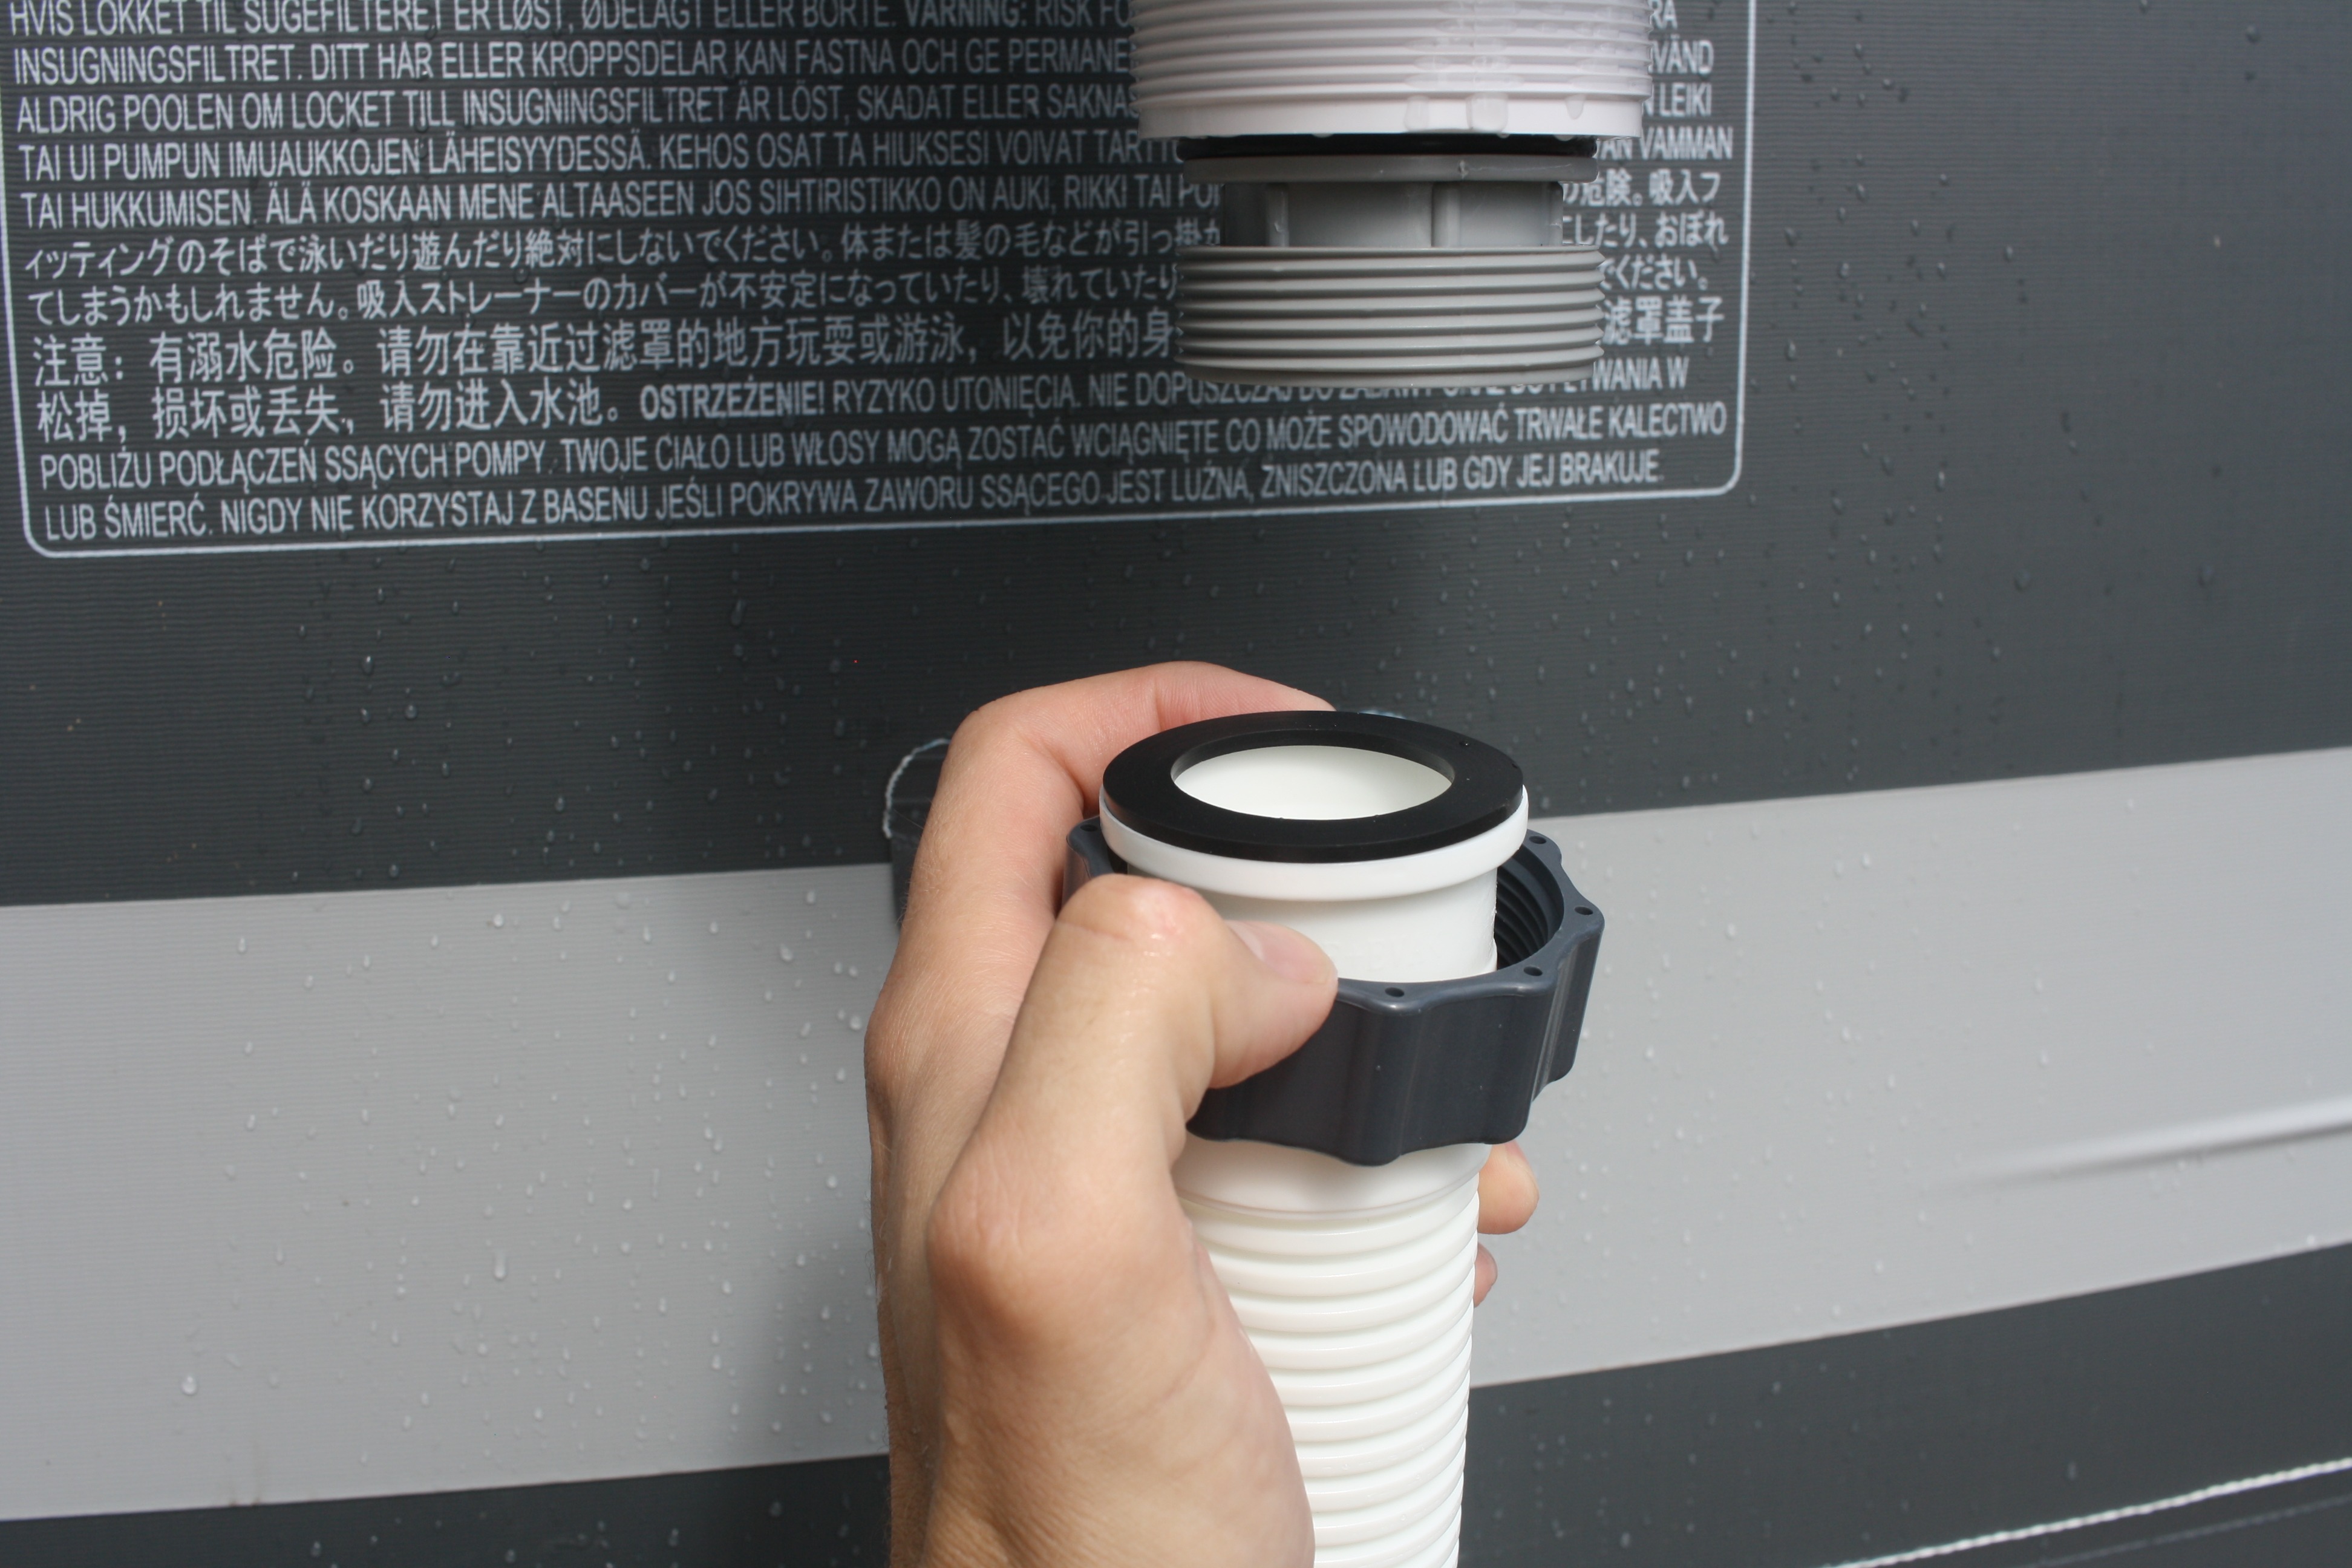
The 40 mm to 1 1/2" adapter I linked above works fine for this. The Hayward skimmer has inside and outside threads. The adapter screws into the inside ones.
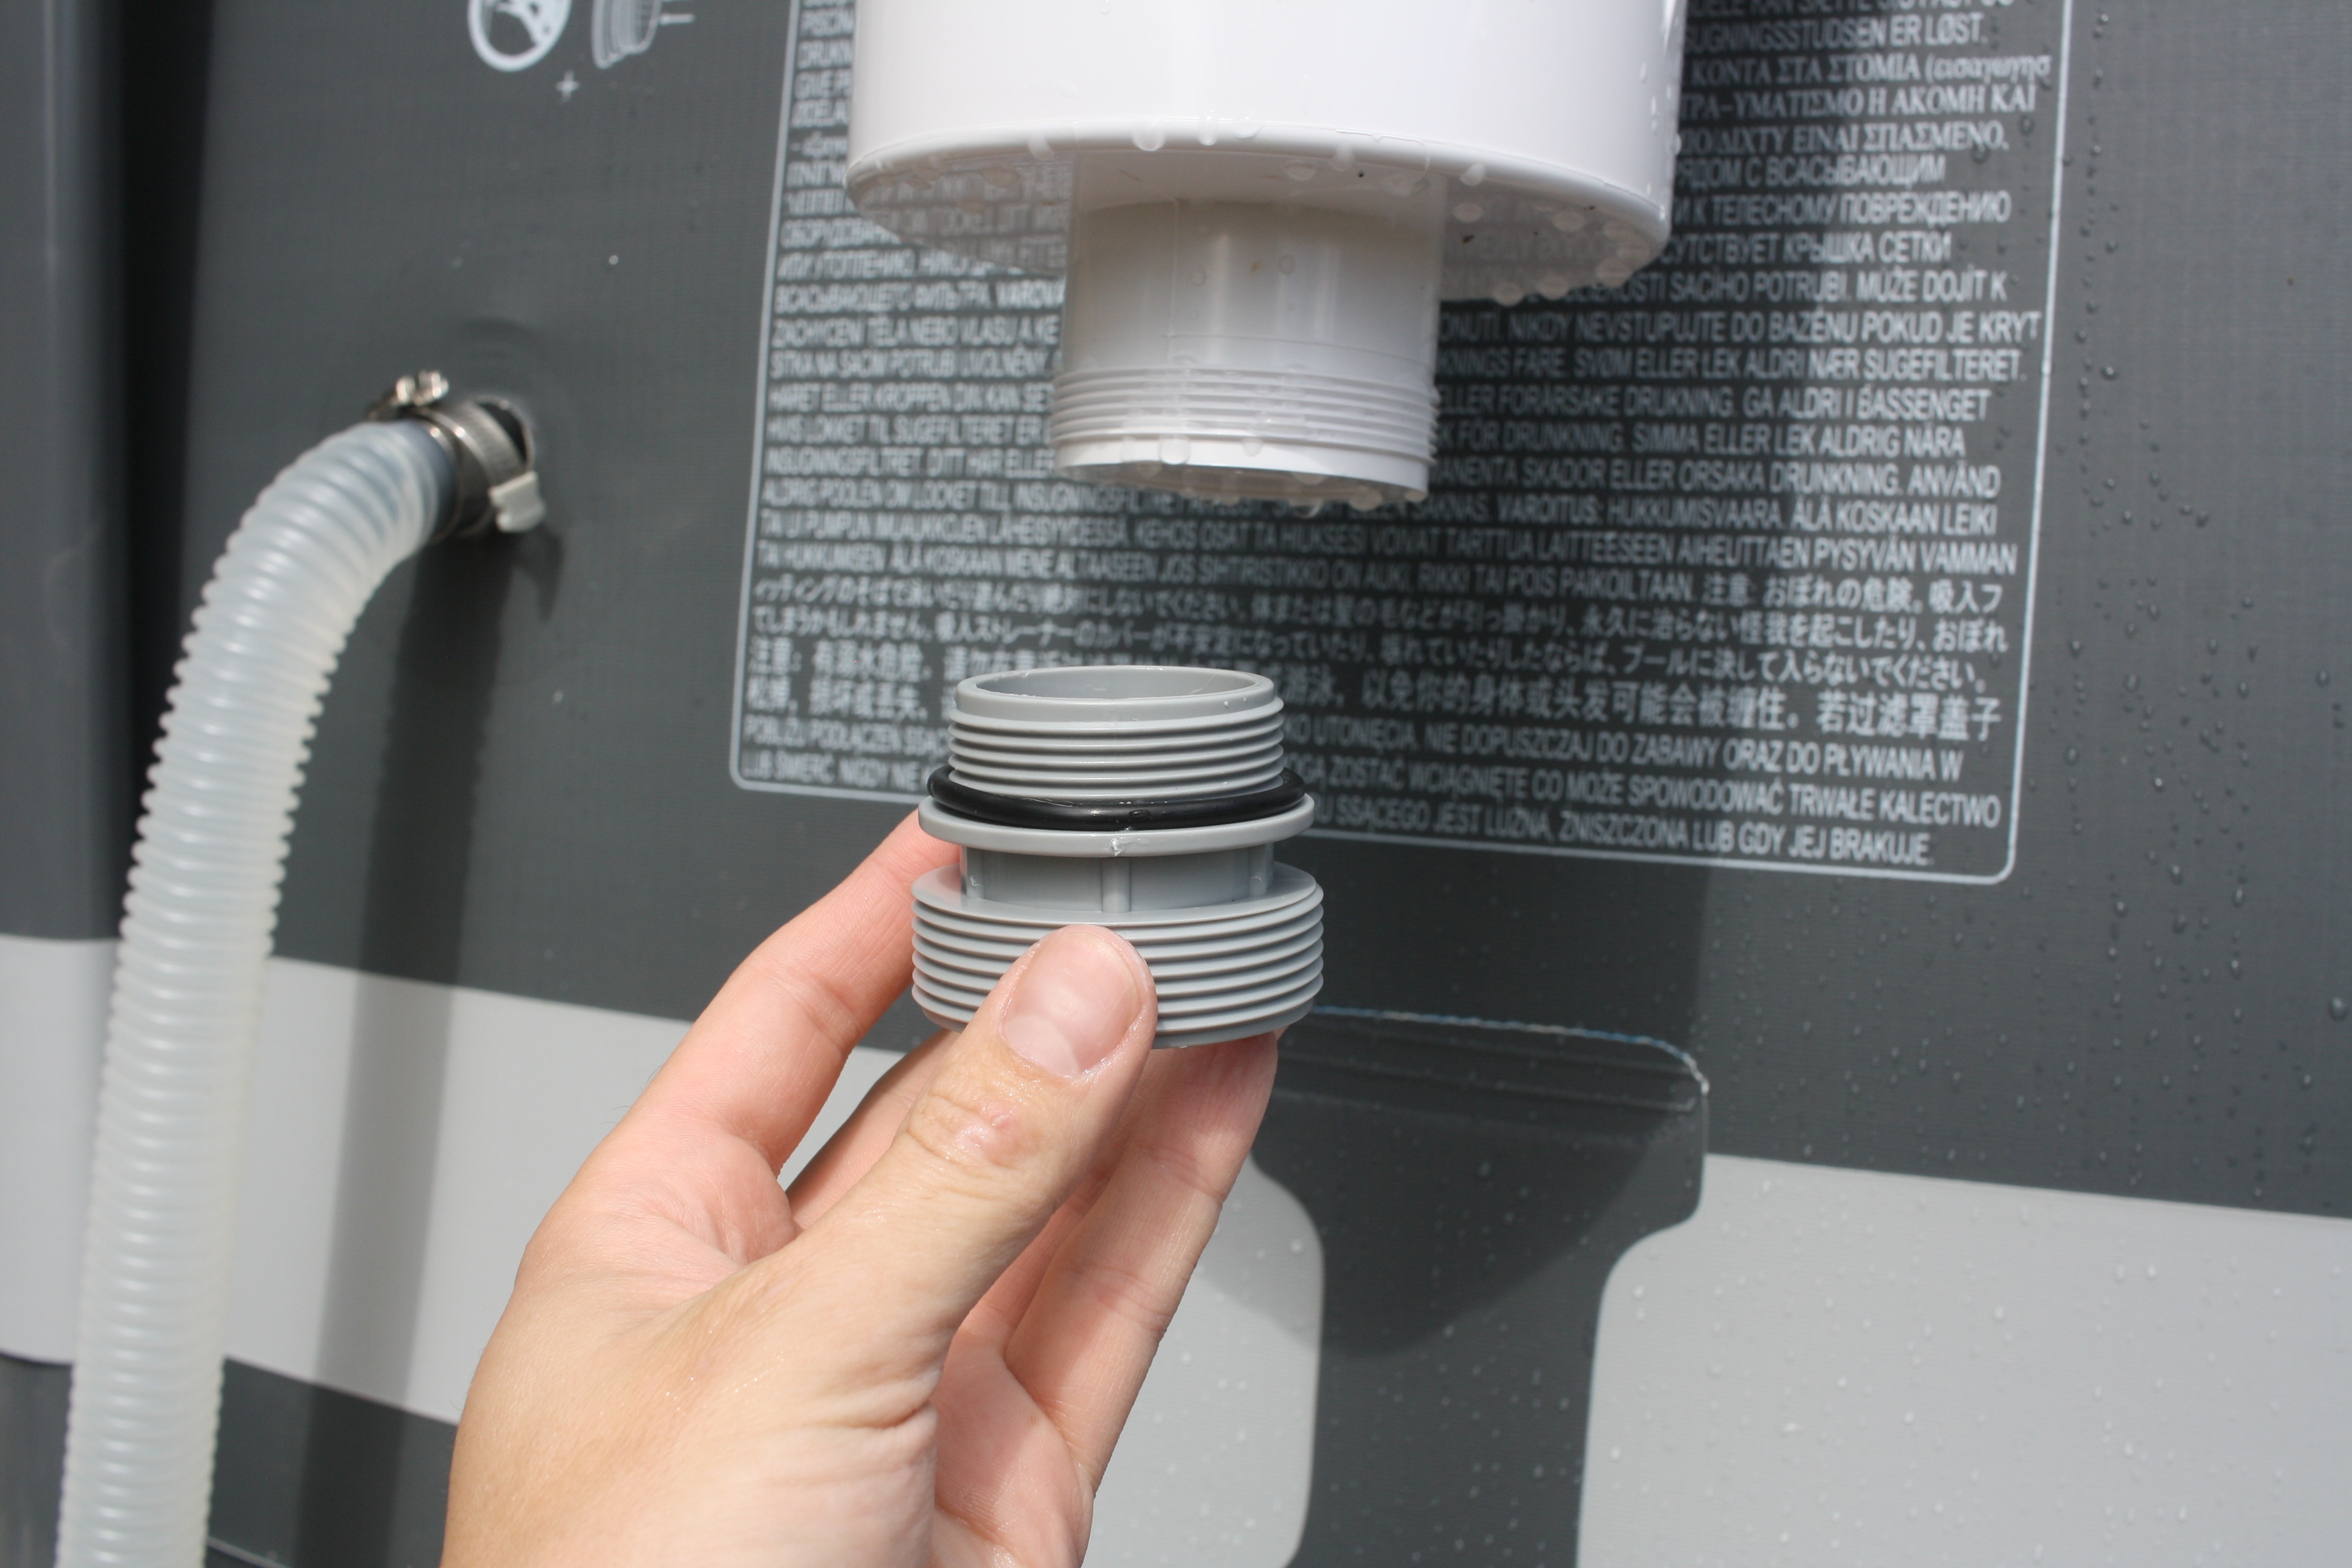
There's an o-ring seal, so you don't need thread tape, even thought he adapter kit comes with it. One note though, if you screw it down too tight, the o-ring will bulge out. If this happens, unscrew until the o-ring goes back, then re-tighten to a point before the o-ring starts bulging out.

The 59" Intex hose I got previously worked fine, but unlike the gaskets the Intex hoses use to connect to the pump that fit nicely inside a hole, these hoses came with flat gaskets. With no centering portion, it was a bit annoying to get it to seal up, but after a few tries I got it. It seemed to help to put the gasket in, then before attaching the hose, slide up the gray threaded ring as far as it would go, then make the connection while holding the threaded ring up.
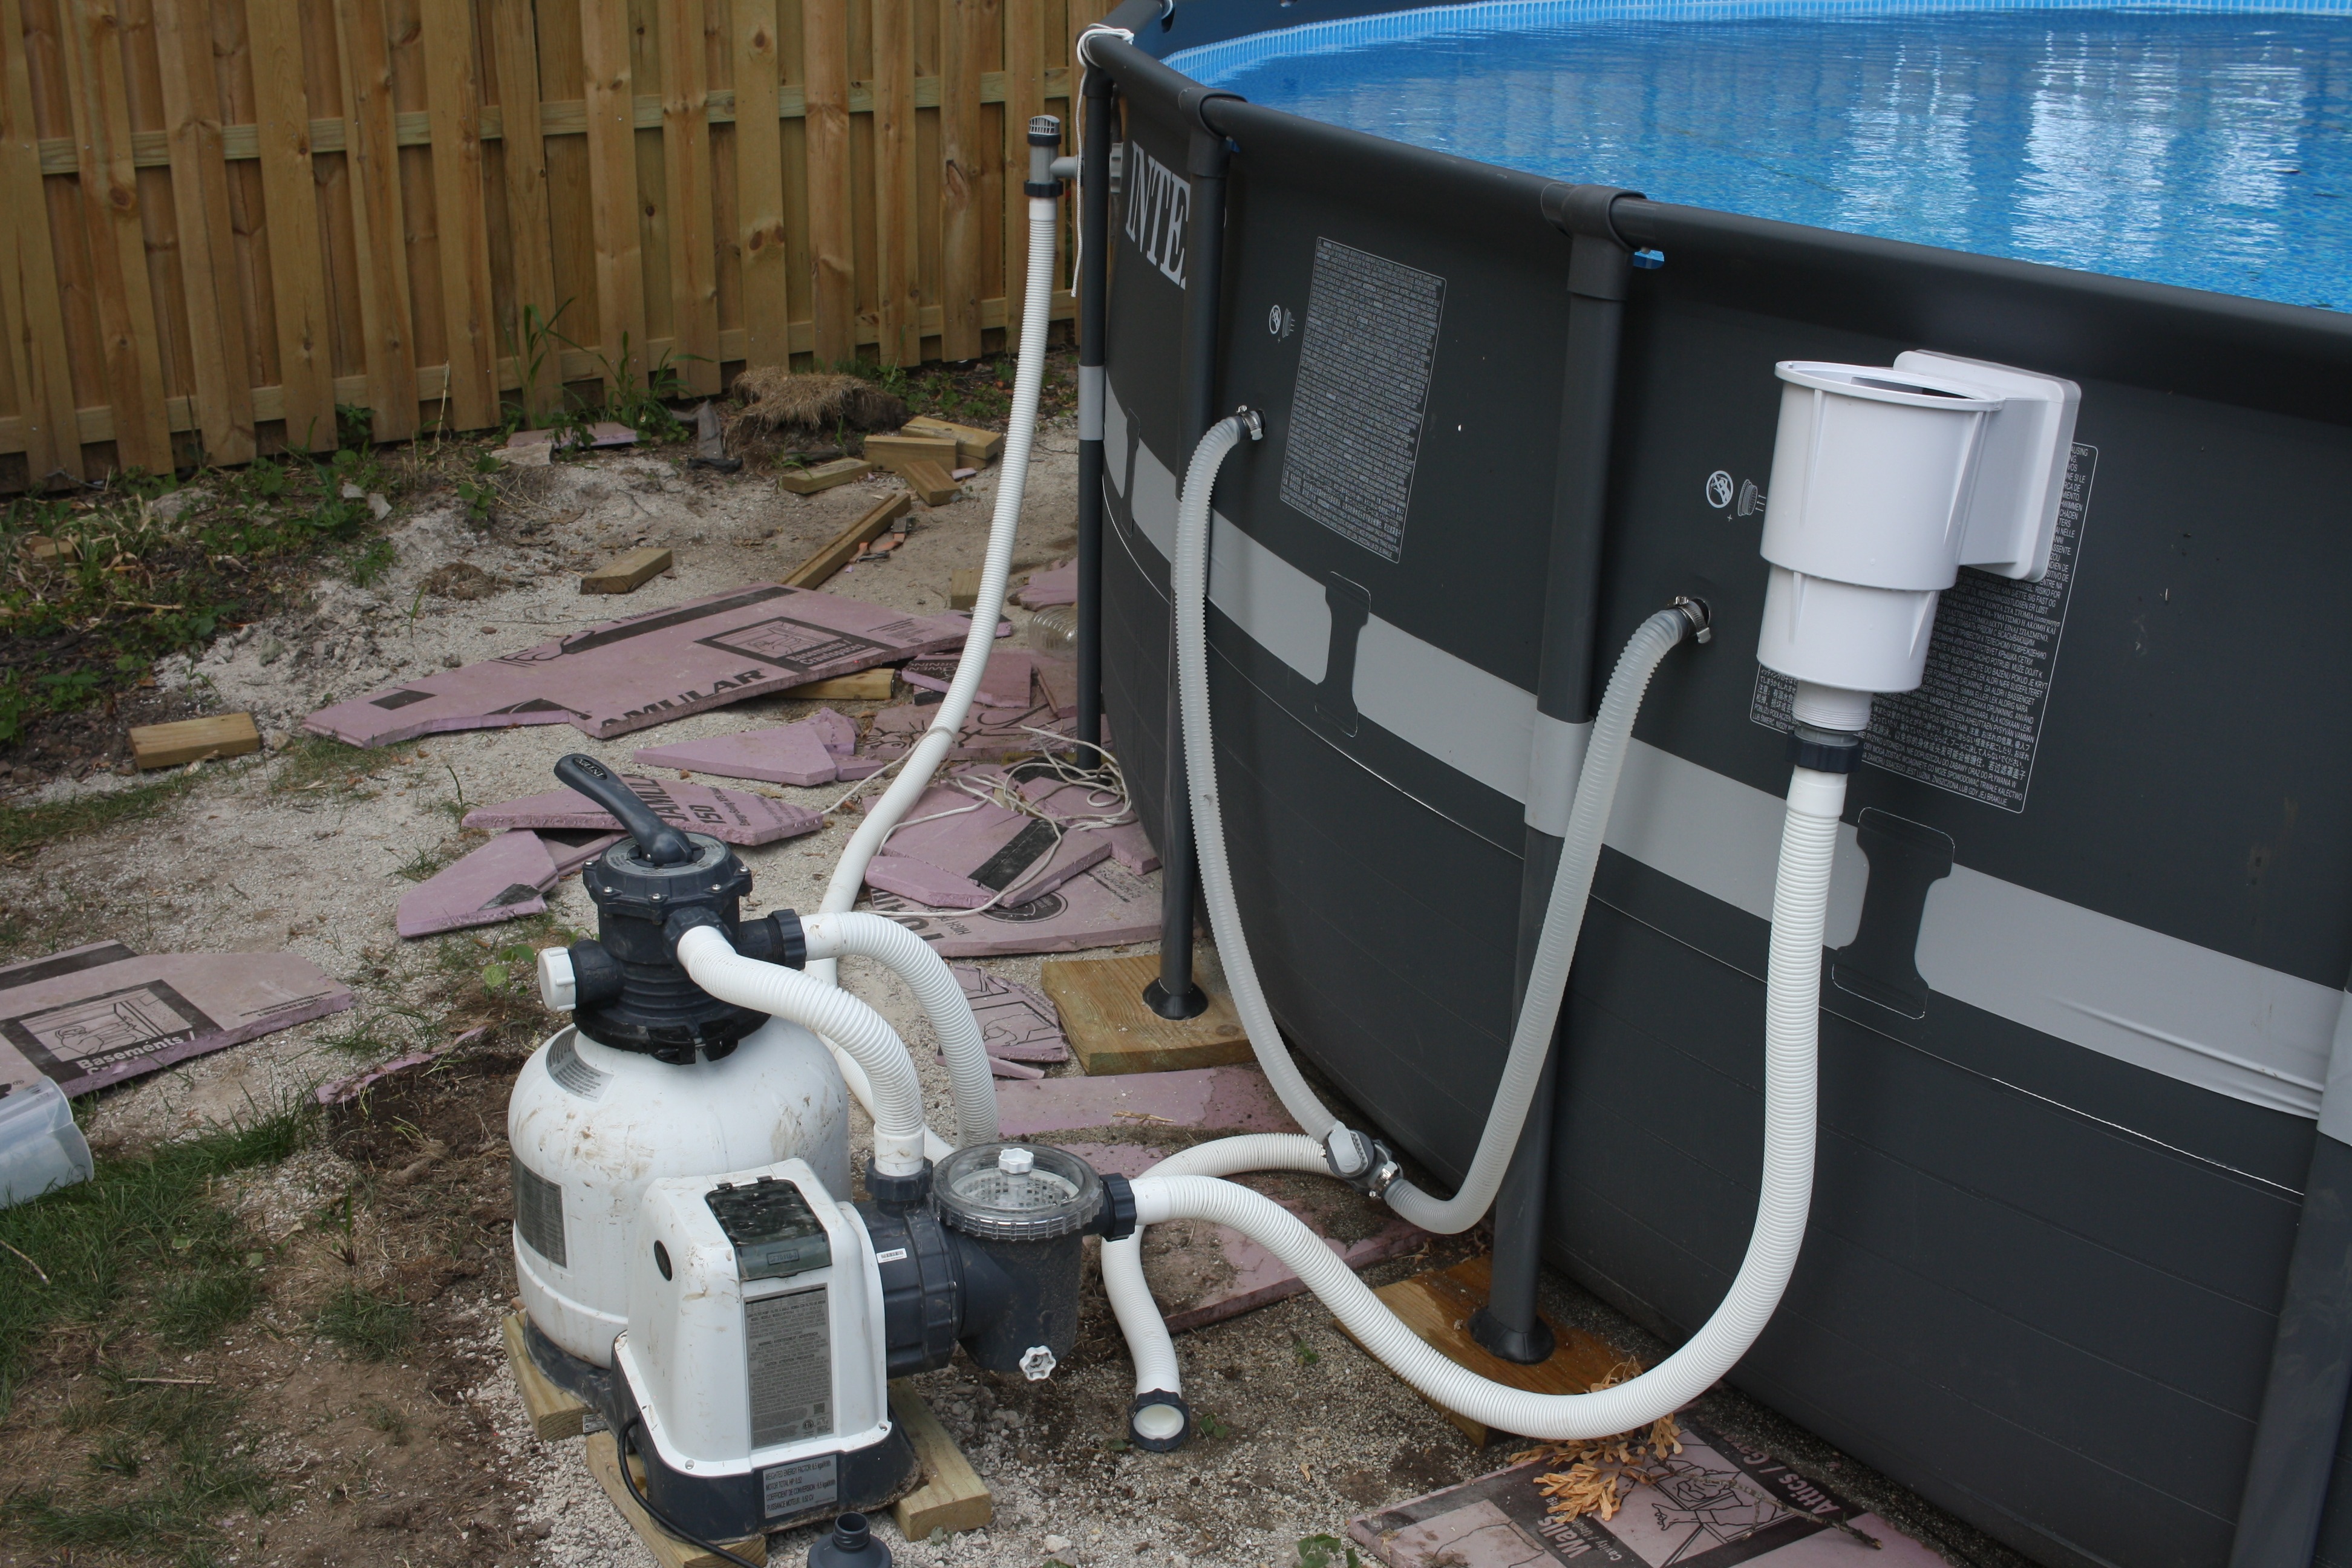
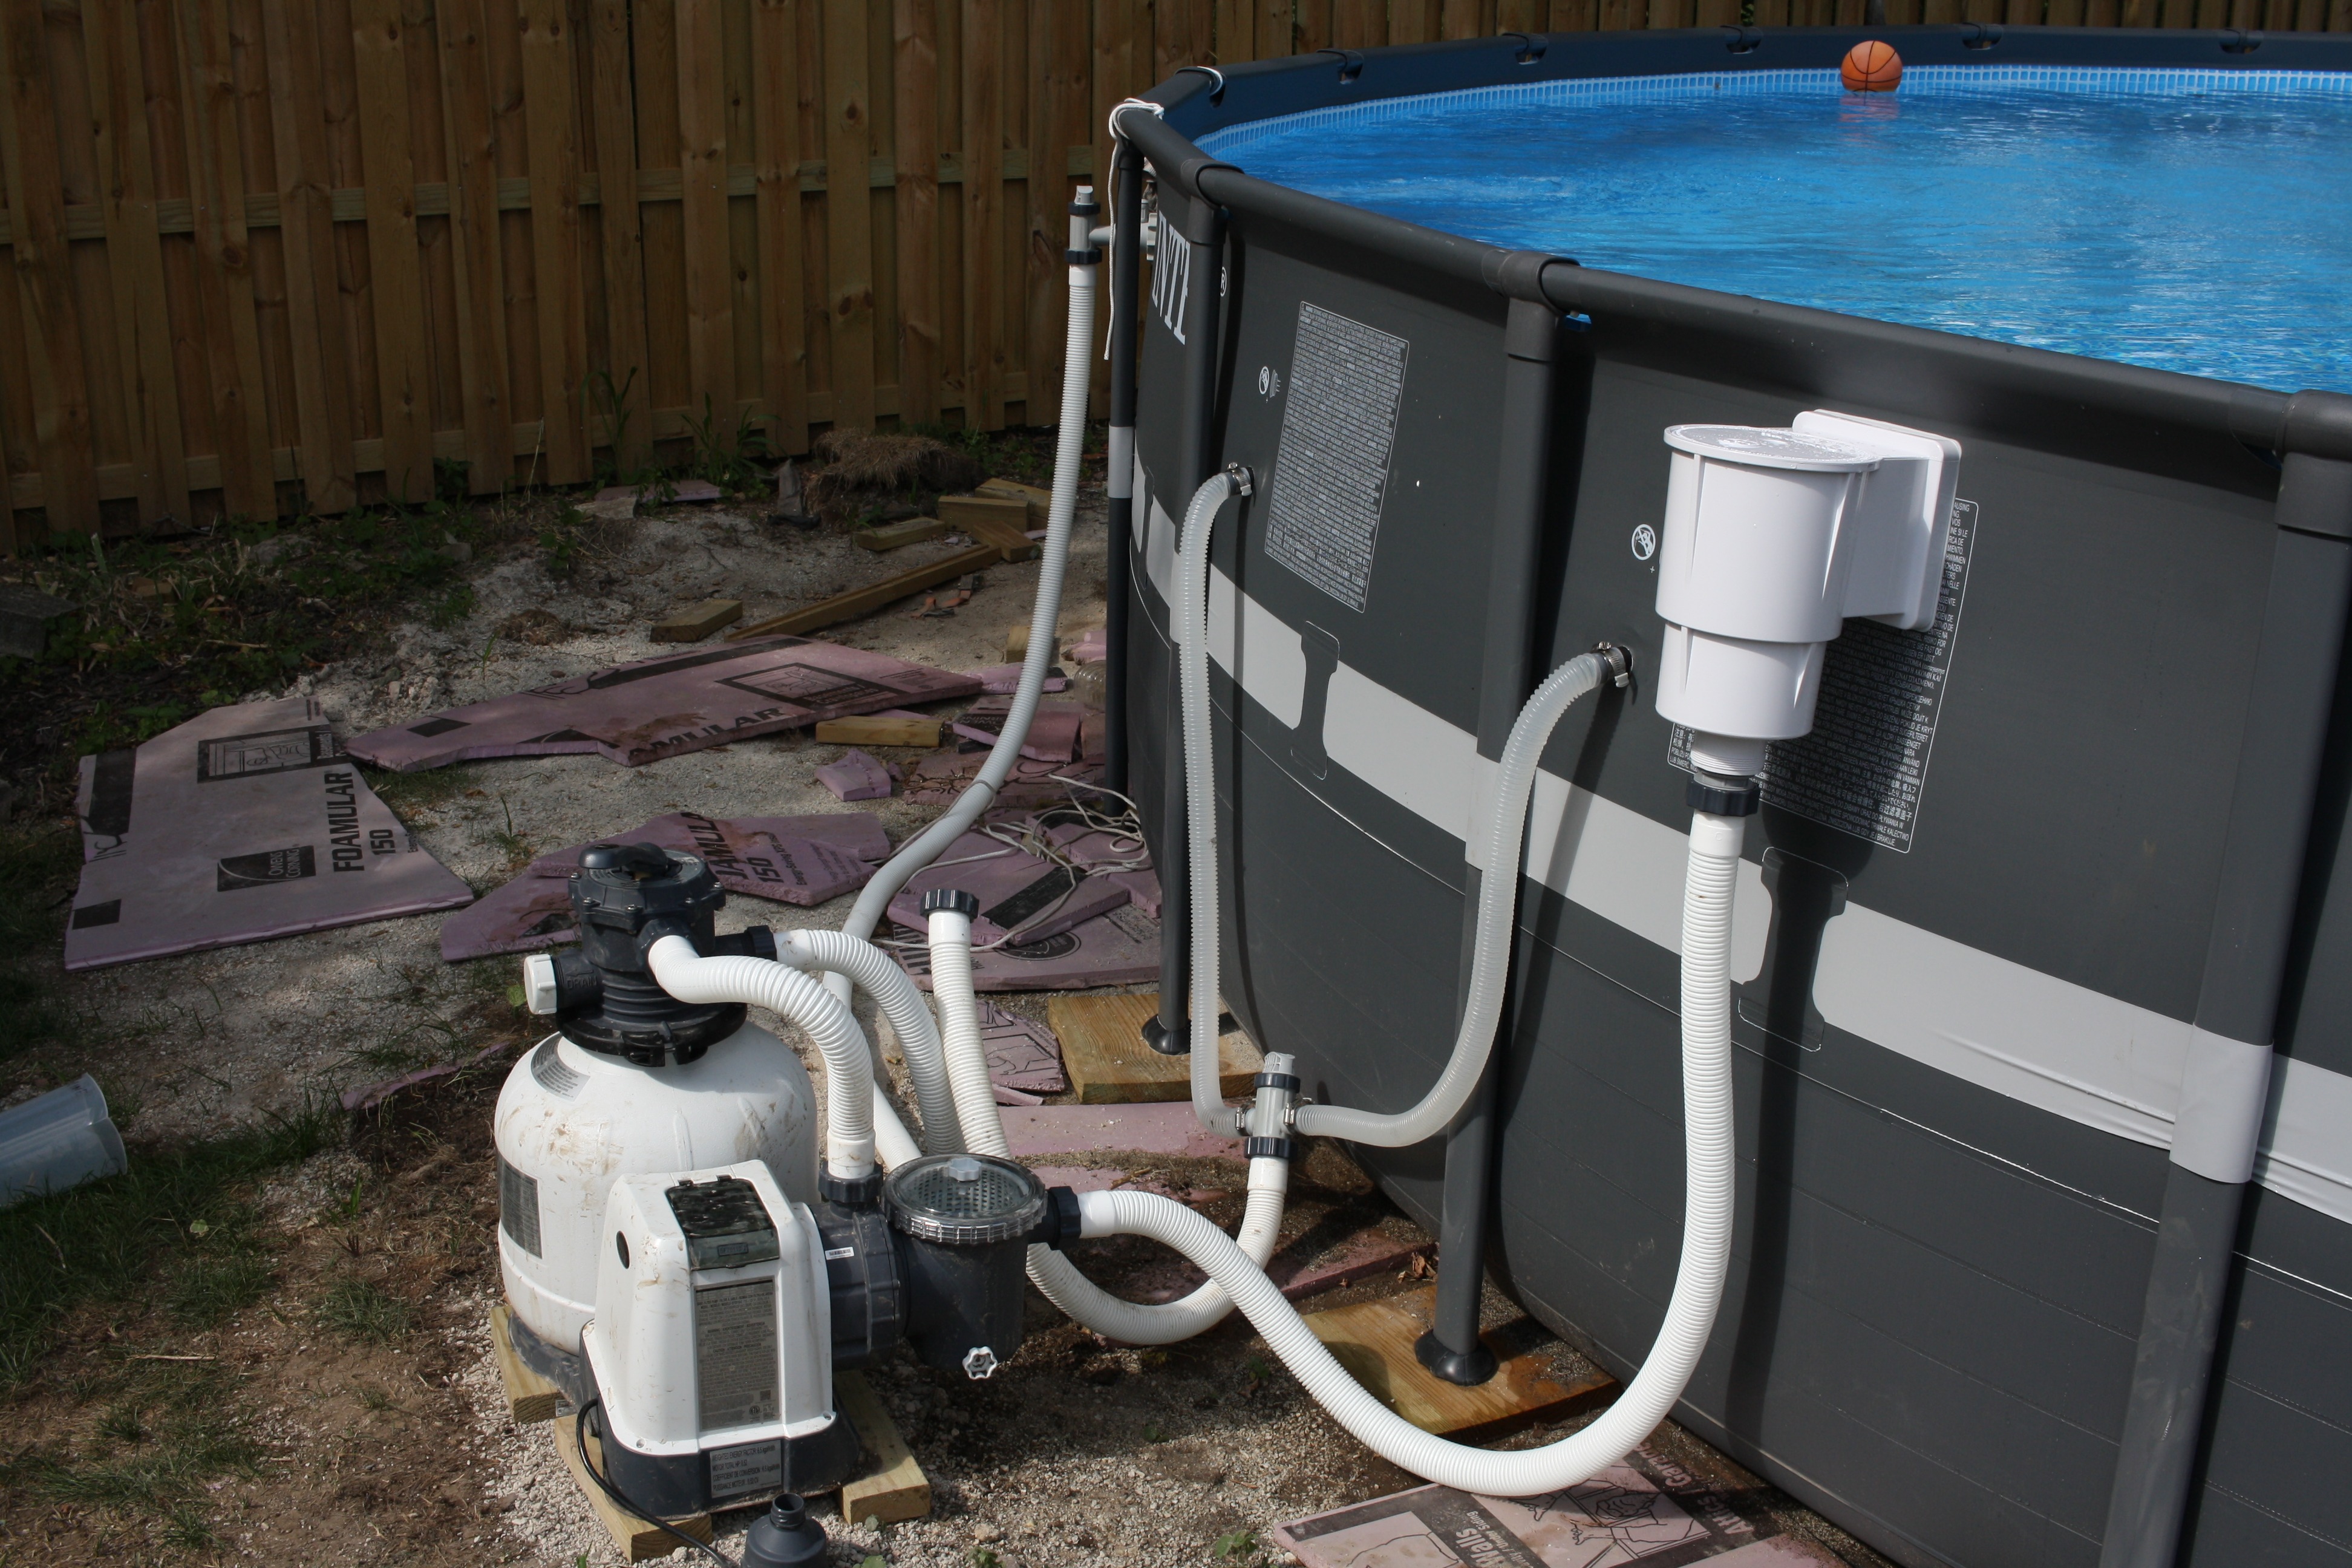
At this point it now looked like this. The original dual inlet was disconnected from the pump, and my 59" hose went from the skimmer to the pump.
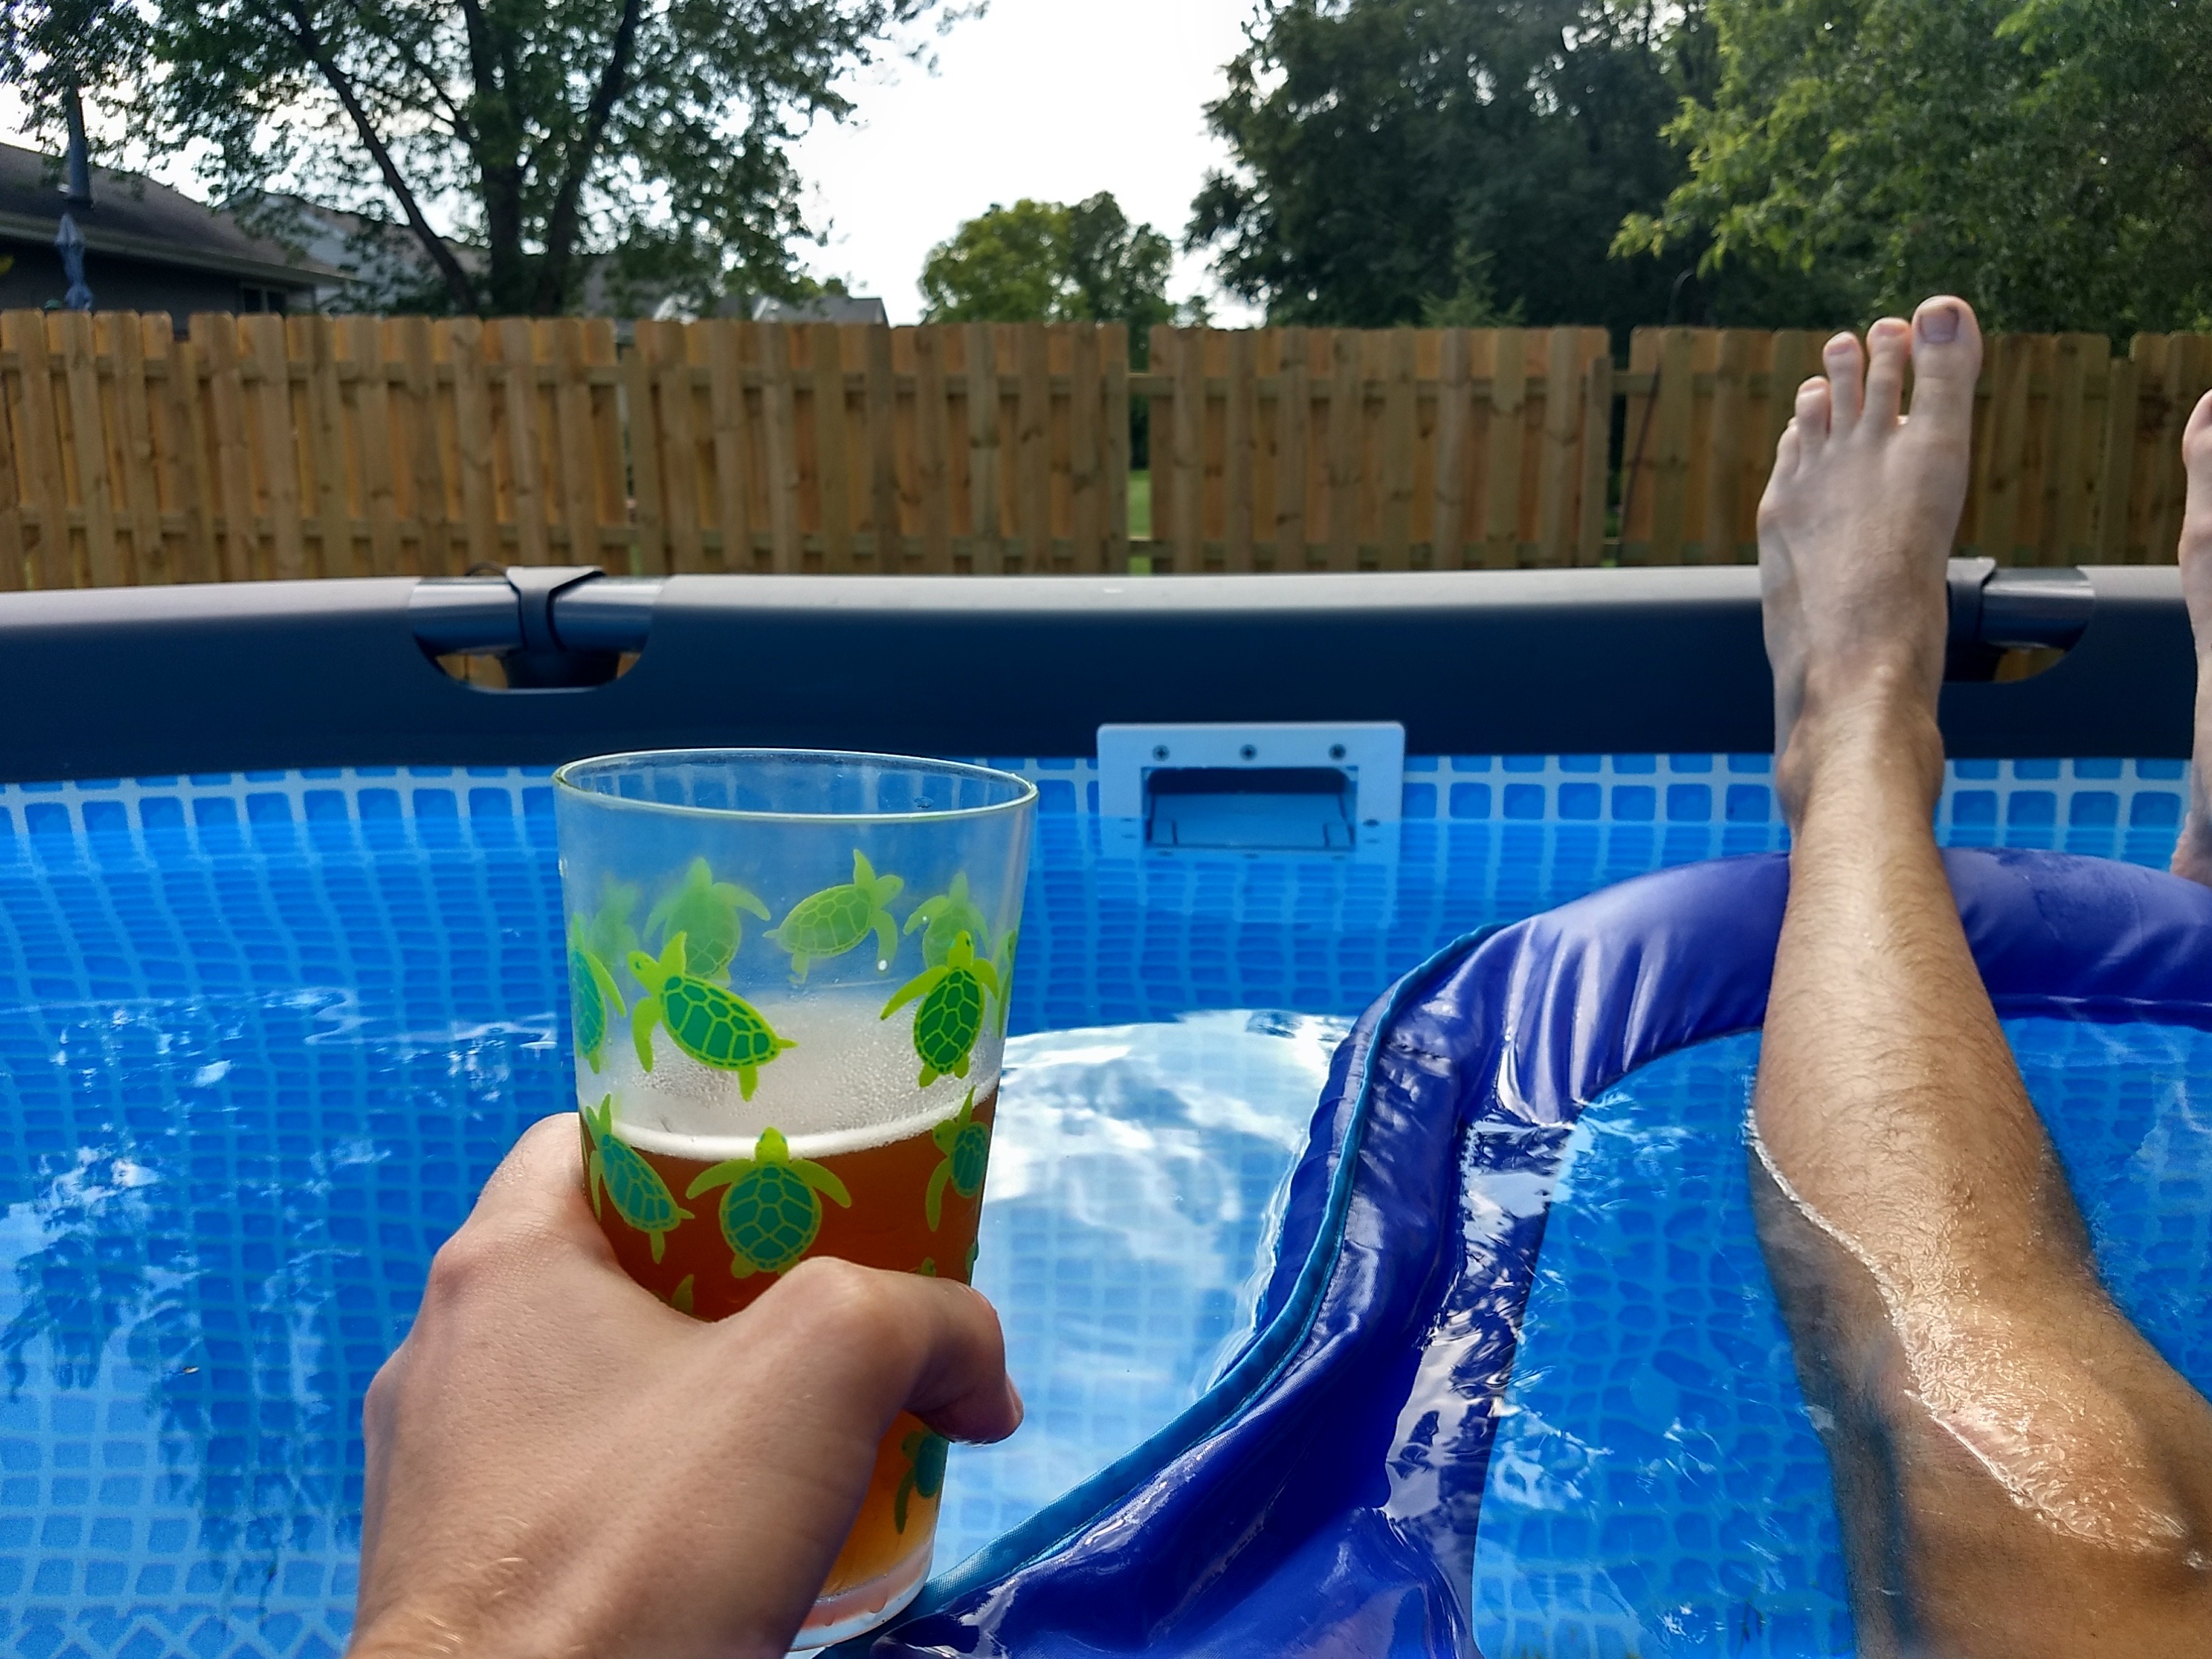
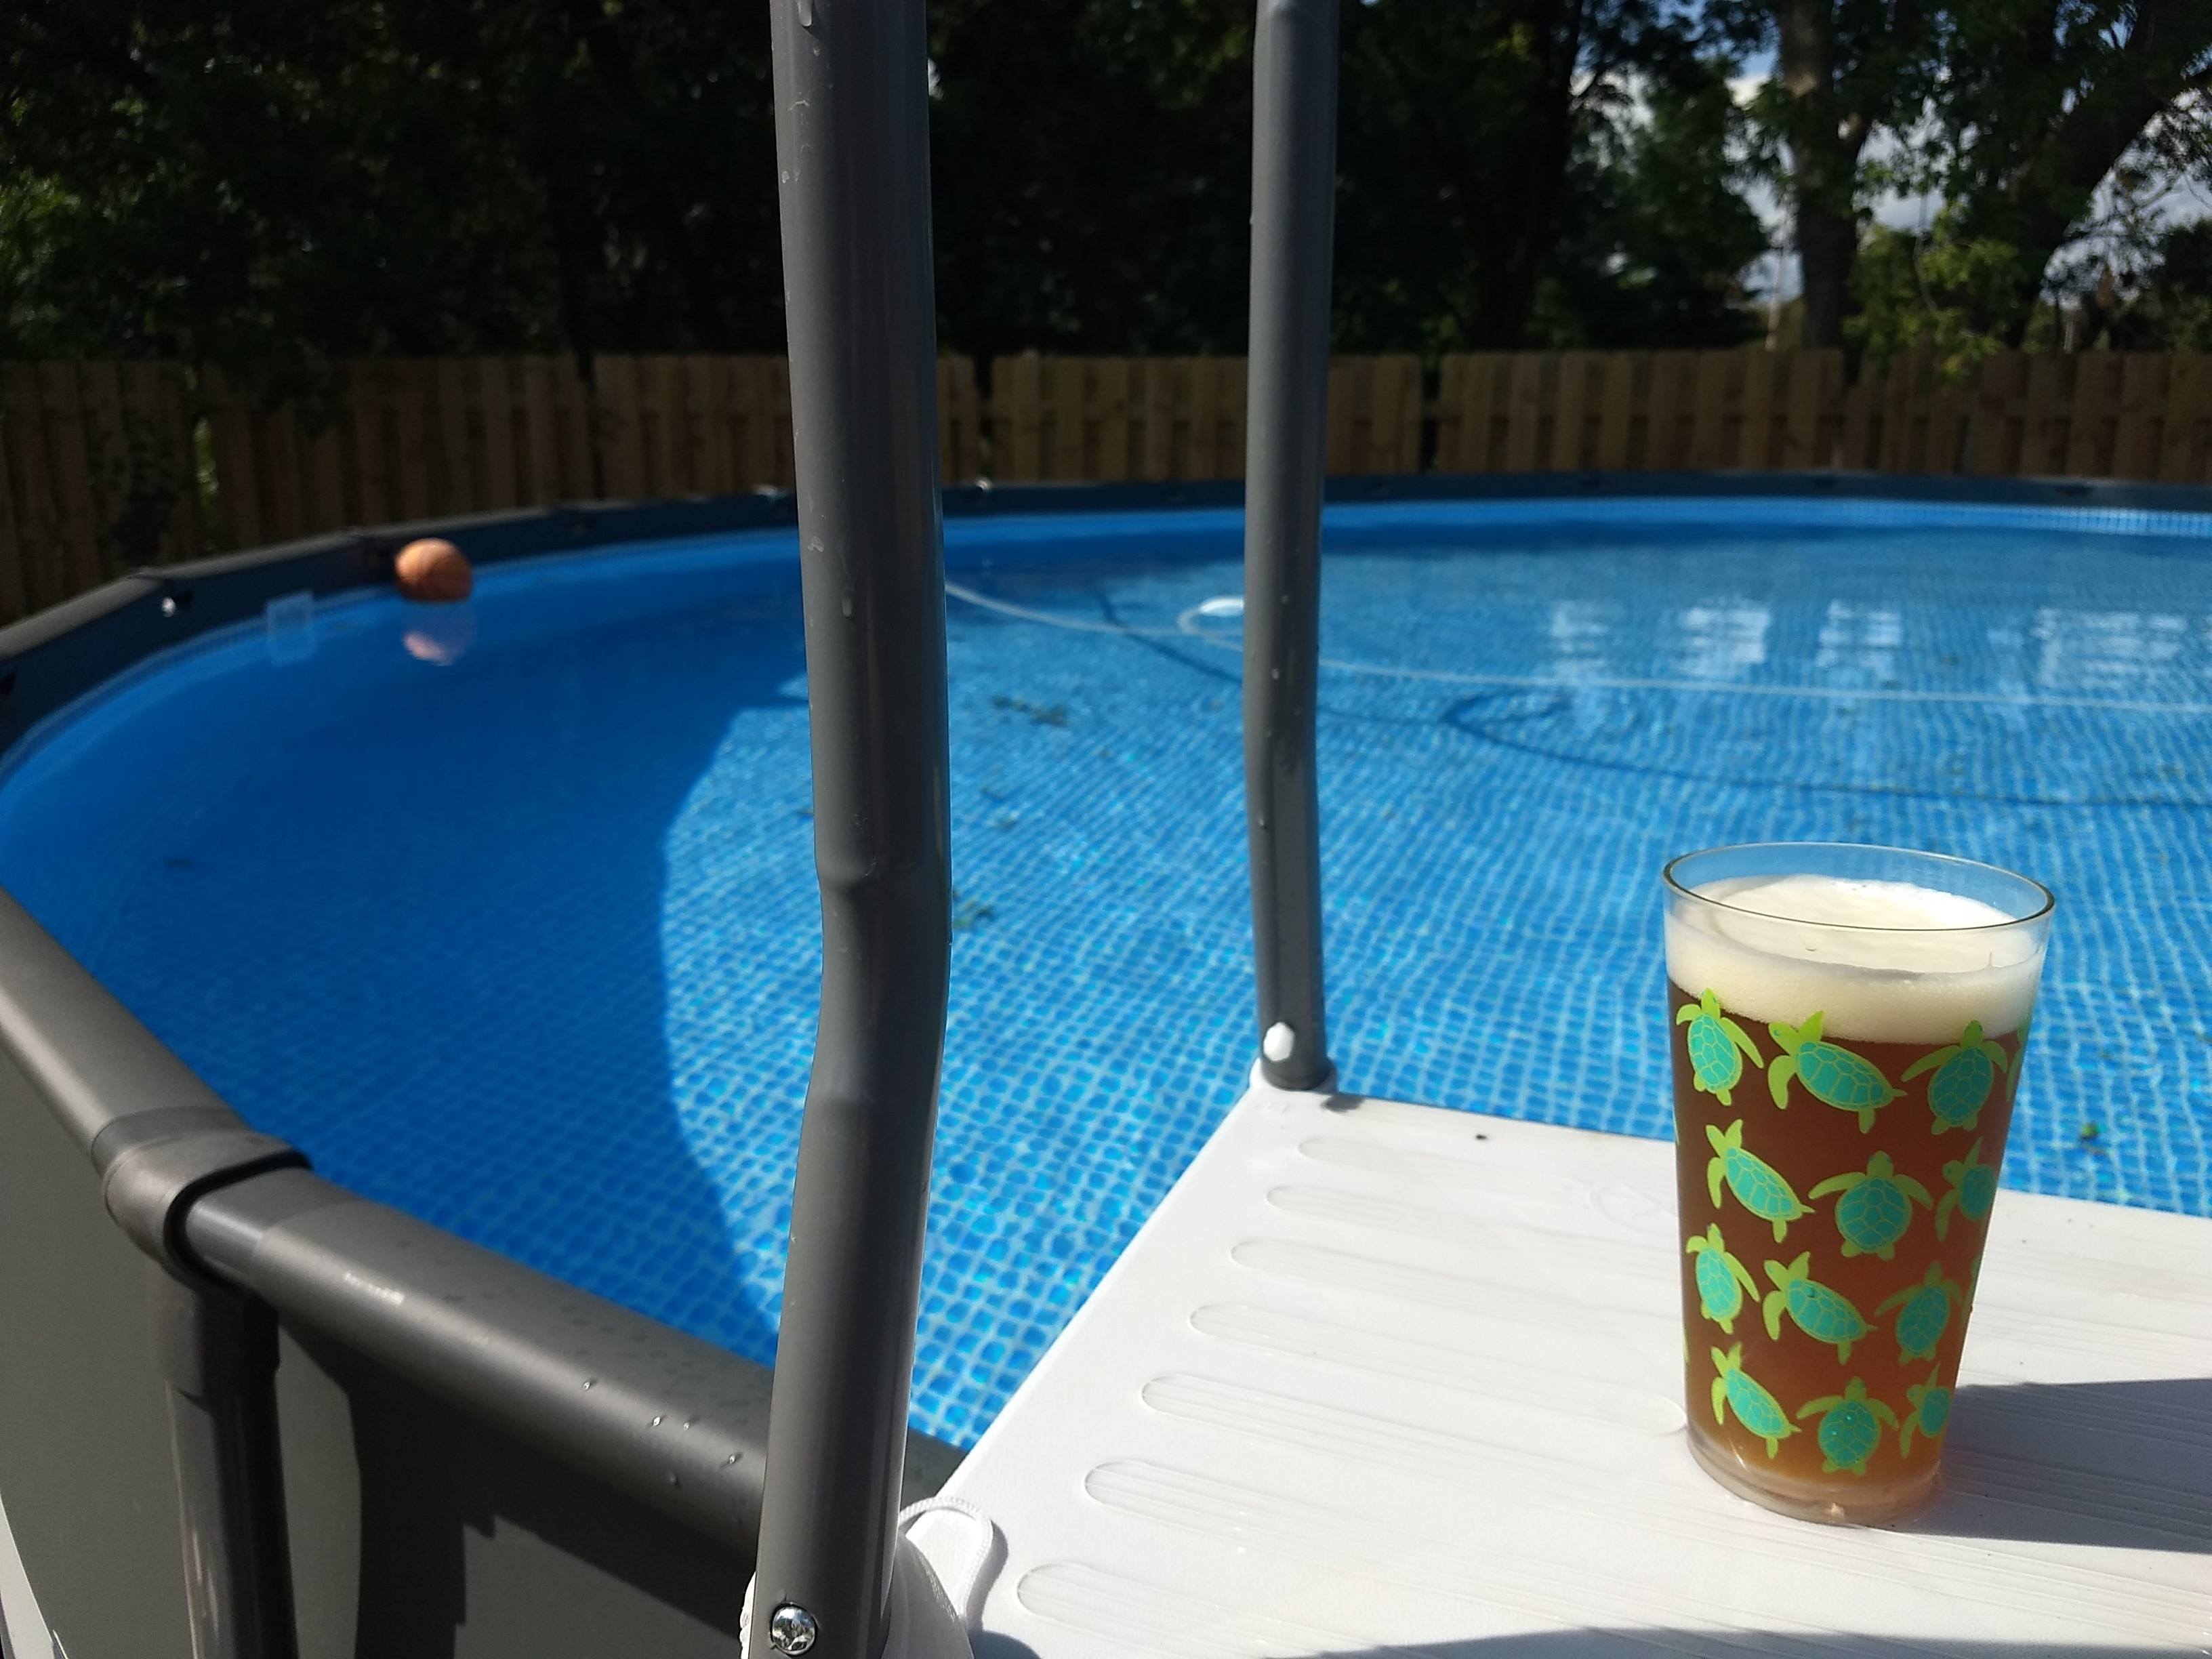
At this point I got myself a container, a towel, and a beer.
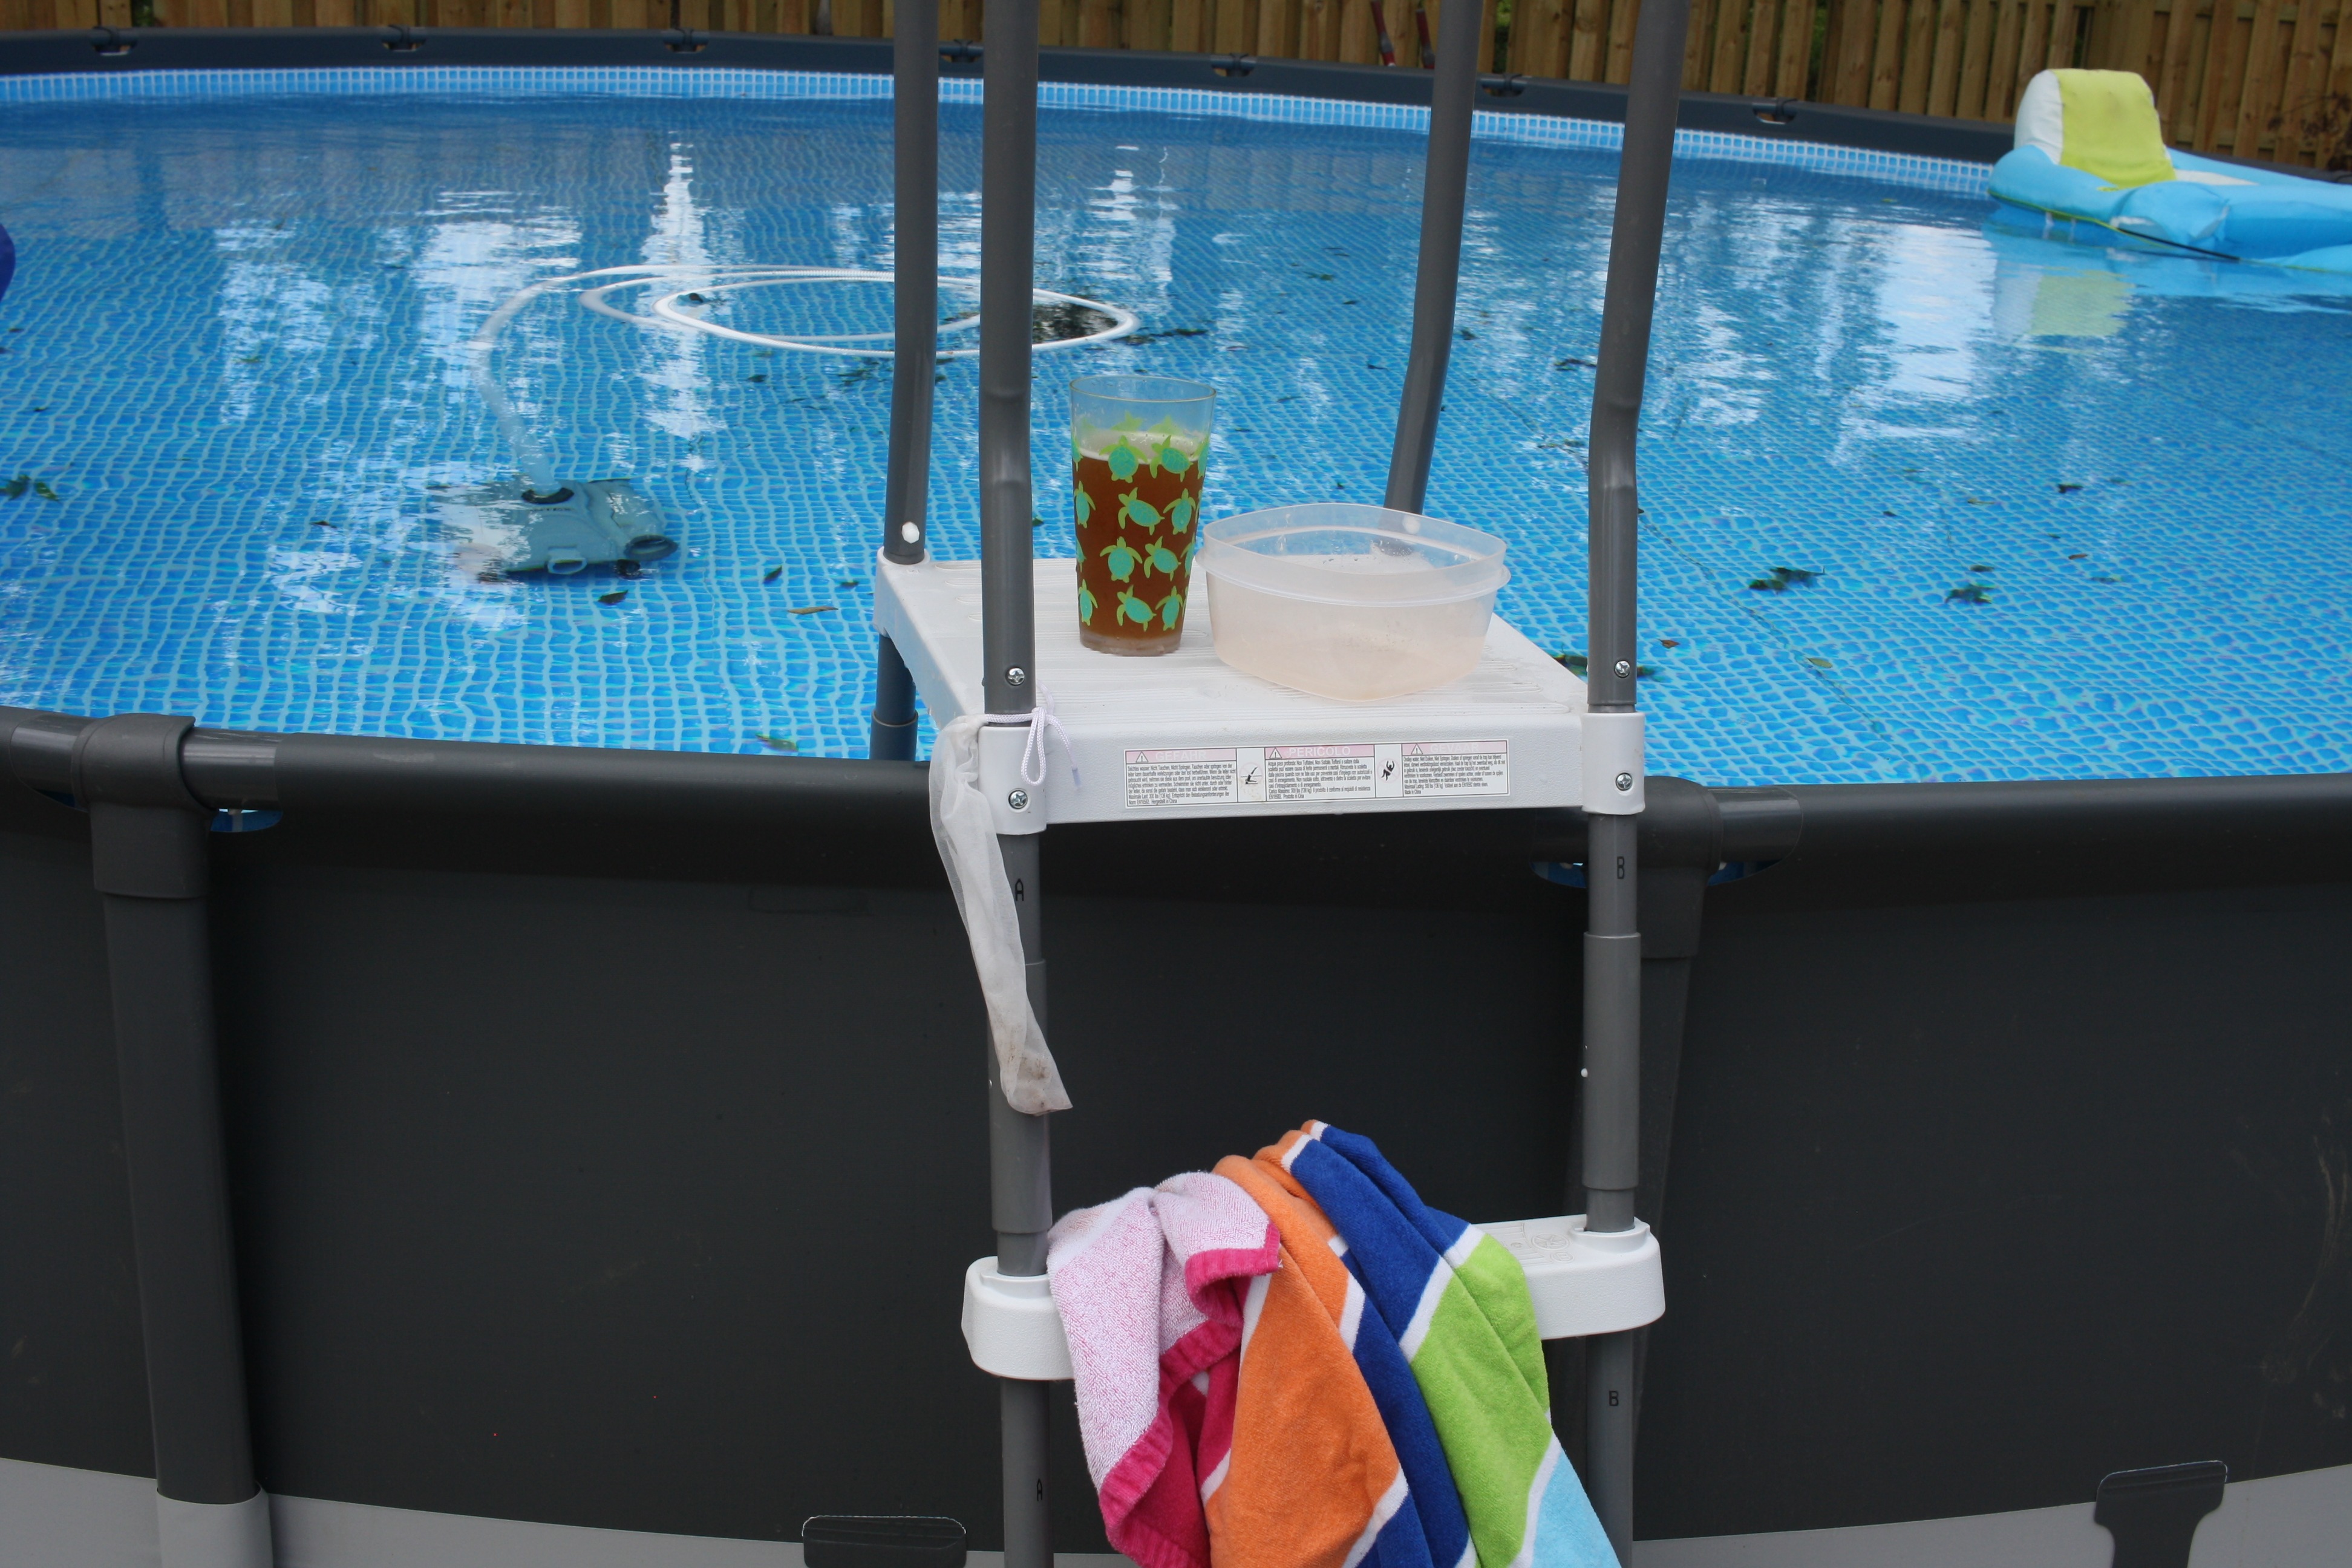
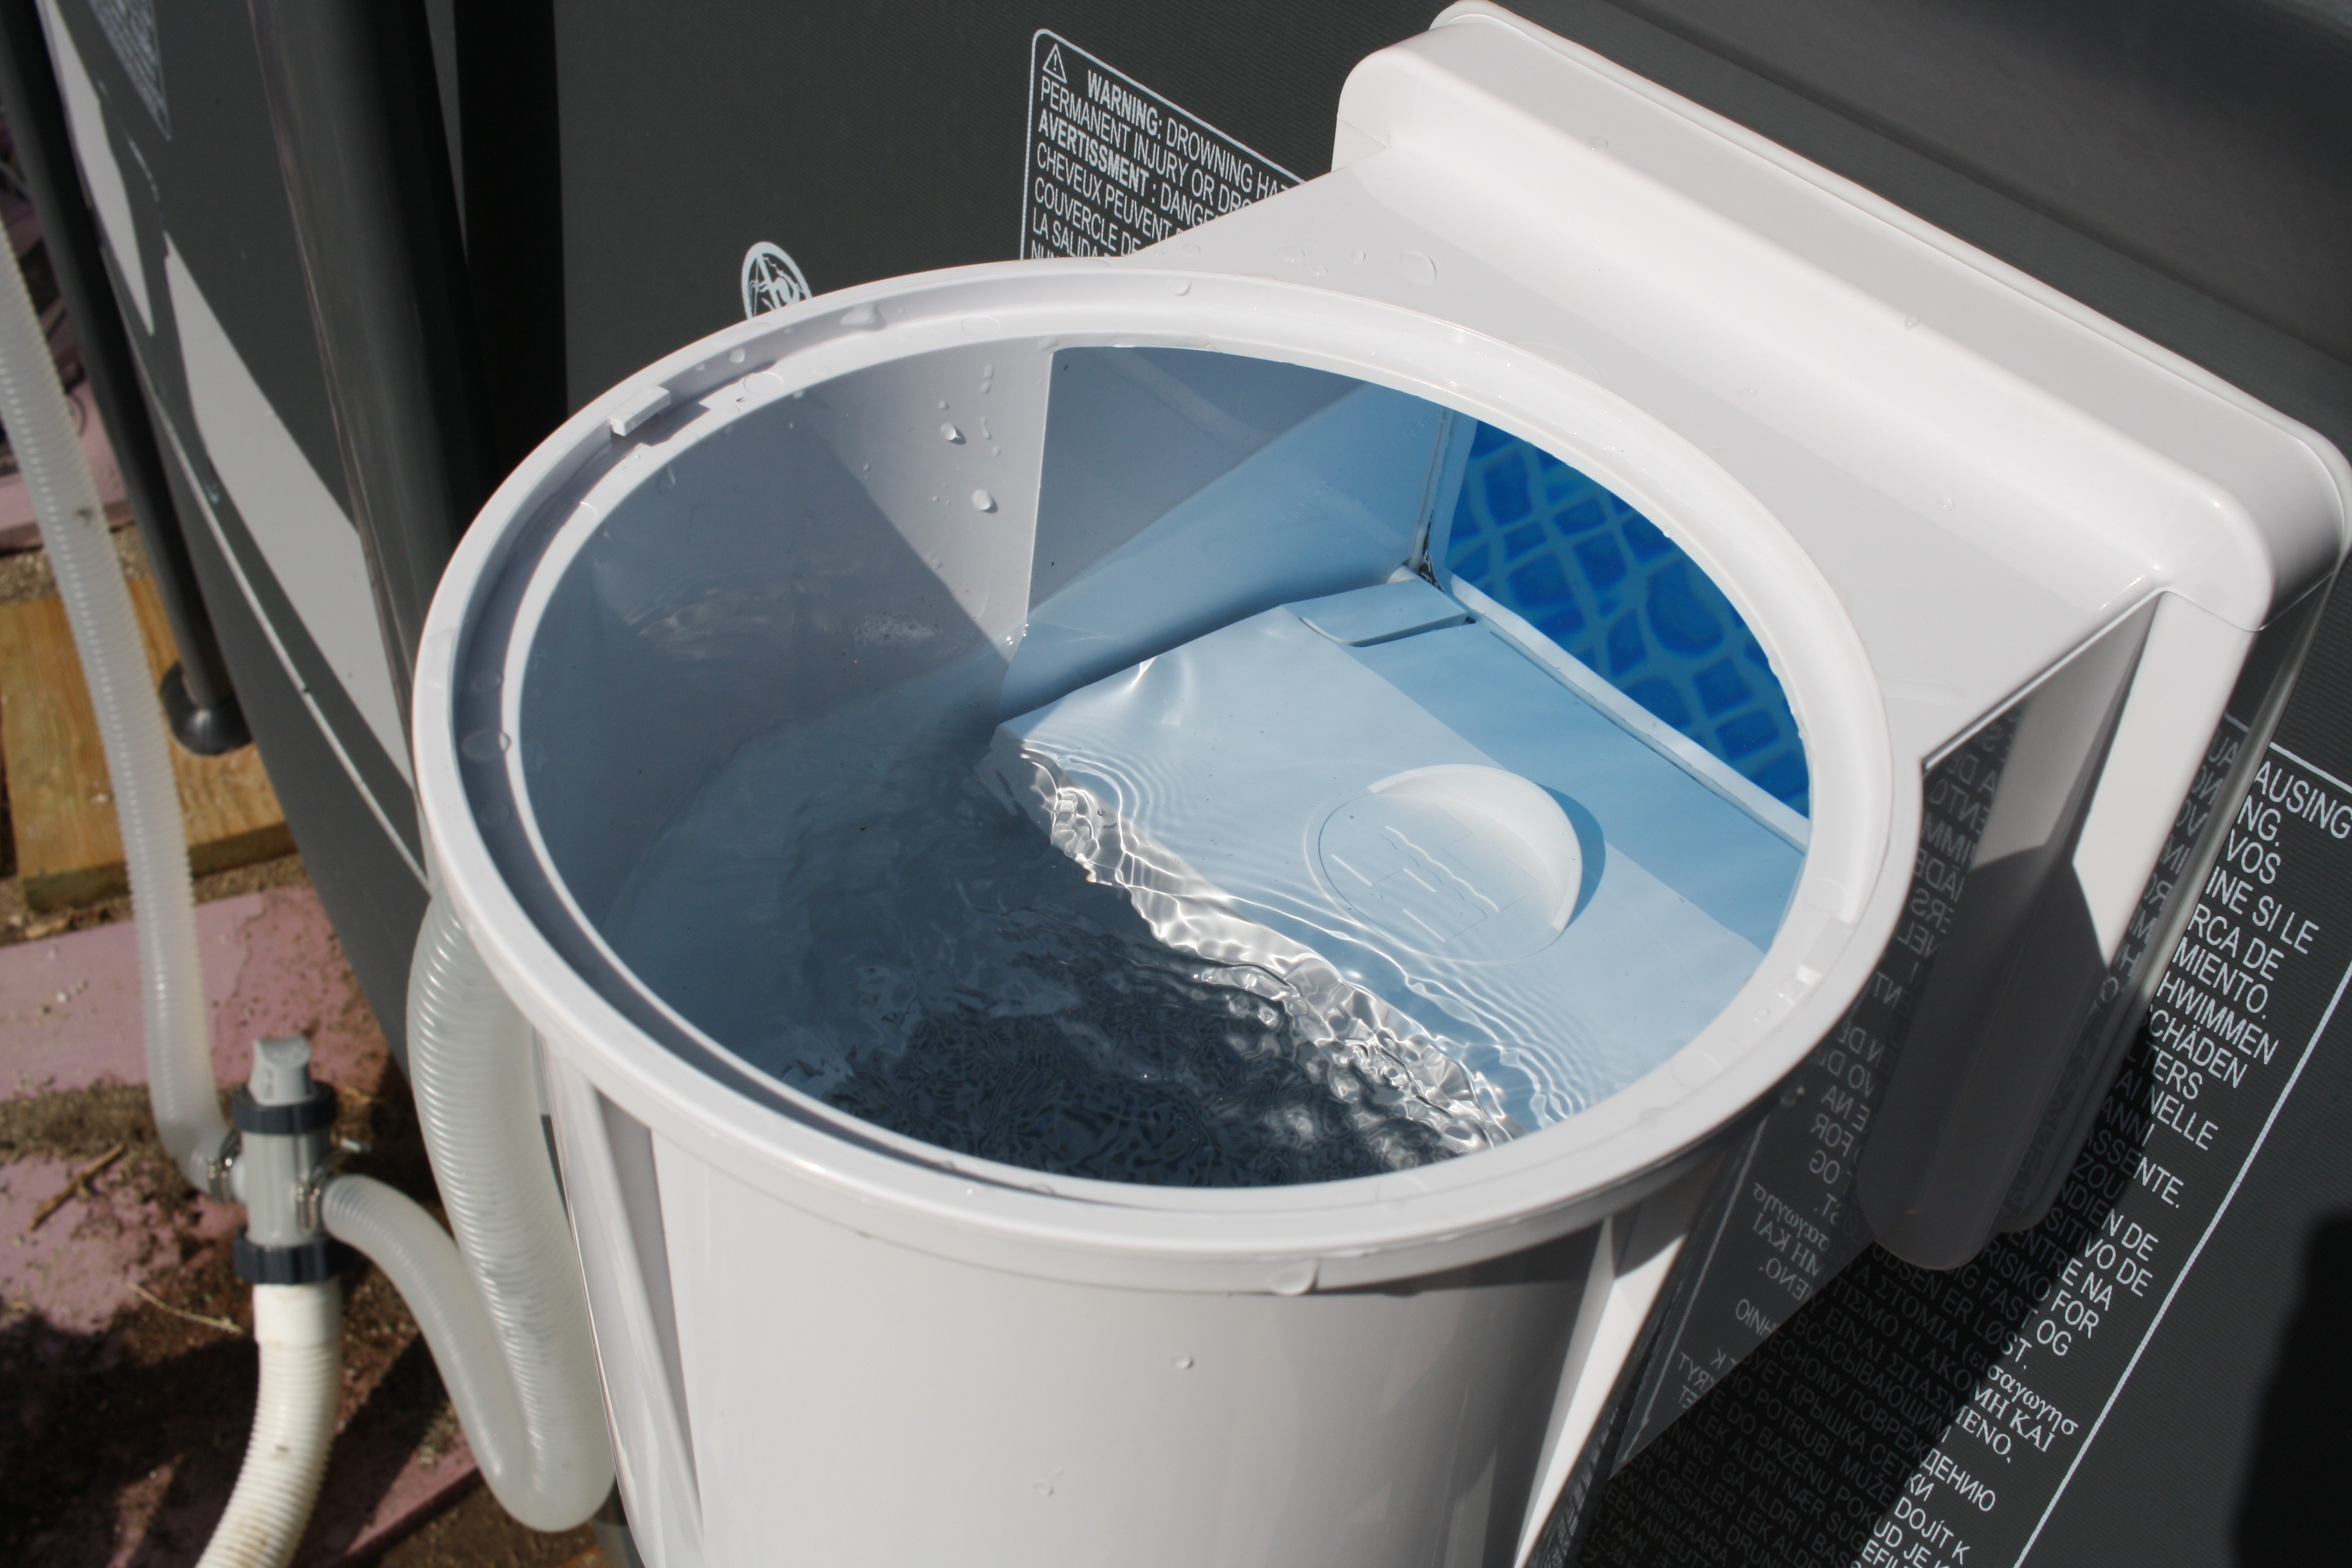
I used the container to fill the skimmer up to the top with water to check for leaks.

I used the towel to dry off the outside of the skimmer, the pool, and the hose.
With everything dry, I let it sit for about 5 minutes to check for leaks. This is important to do before you cut the liner!
Turns out I had a leak at the Intex hose at the bottom of the adapter. I disconnected, re-centered things and got it re-connected. Re-filled with water, then dried everything off again and waited another 5 minutes or so. Nothing leaked this time.
Now that it was verified to be leak-free, it was cutting time. I took the razor blade and carefully cut out the liner inside the skimmer opening. I rounded the corners a bit...engineer me doesn't like square corners, but it's probably fine in this case...
Mask and snorkel came in handy again here, though again not strictly needed.
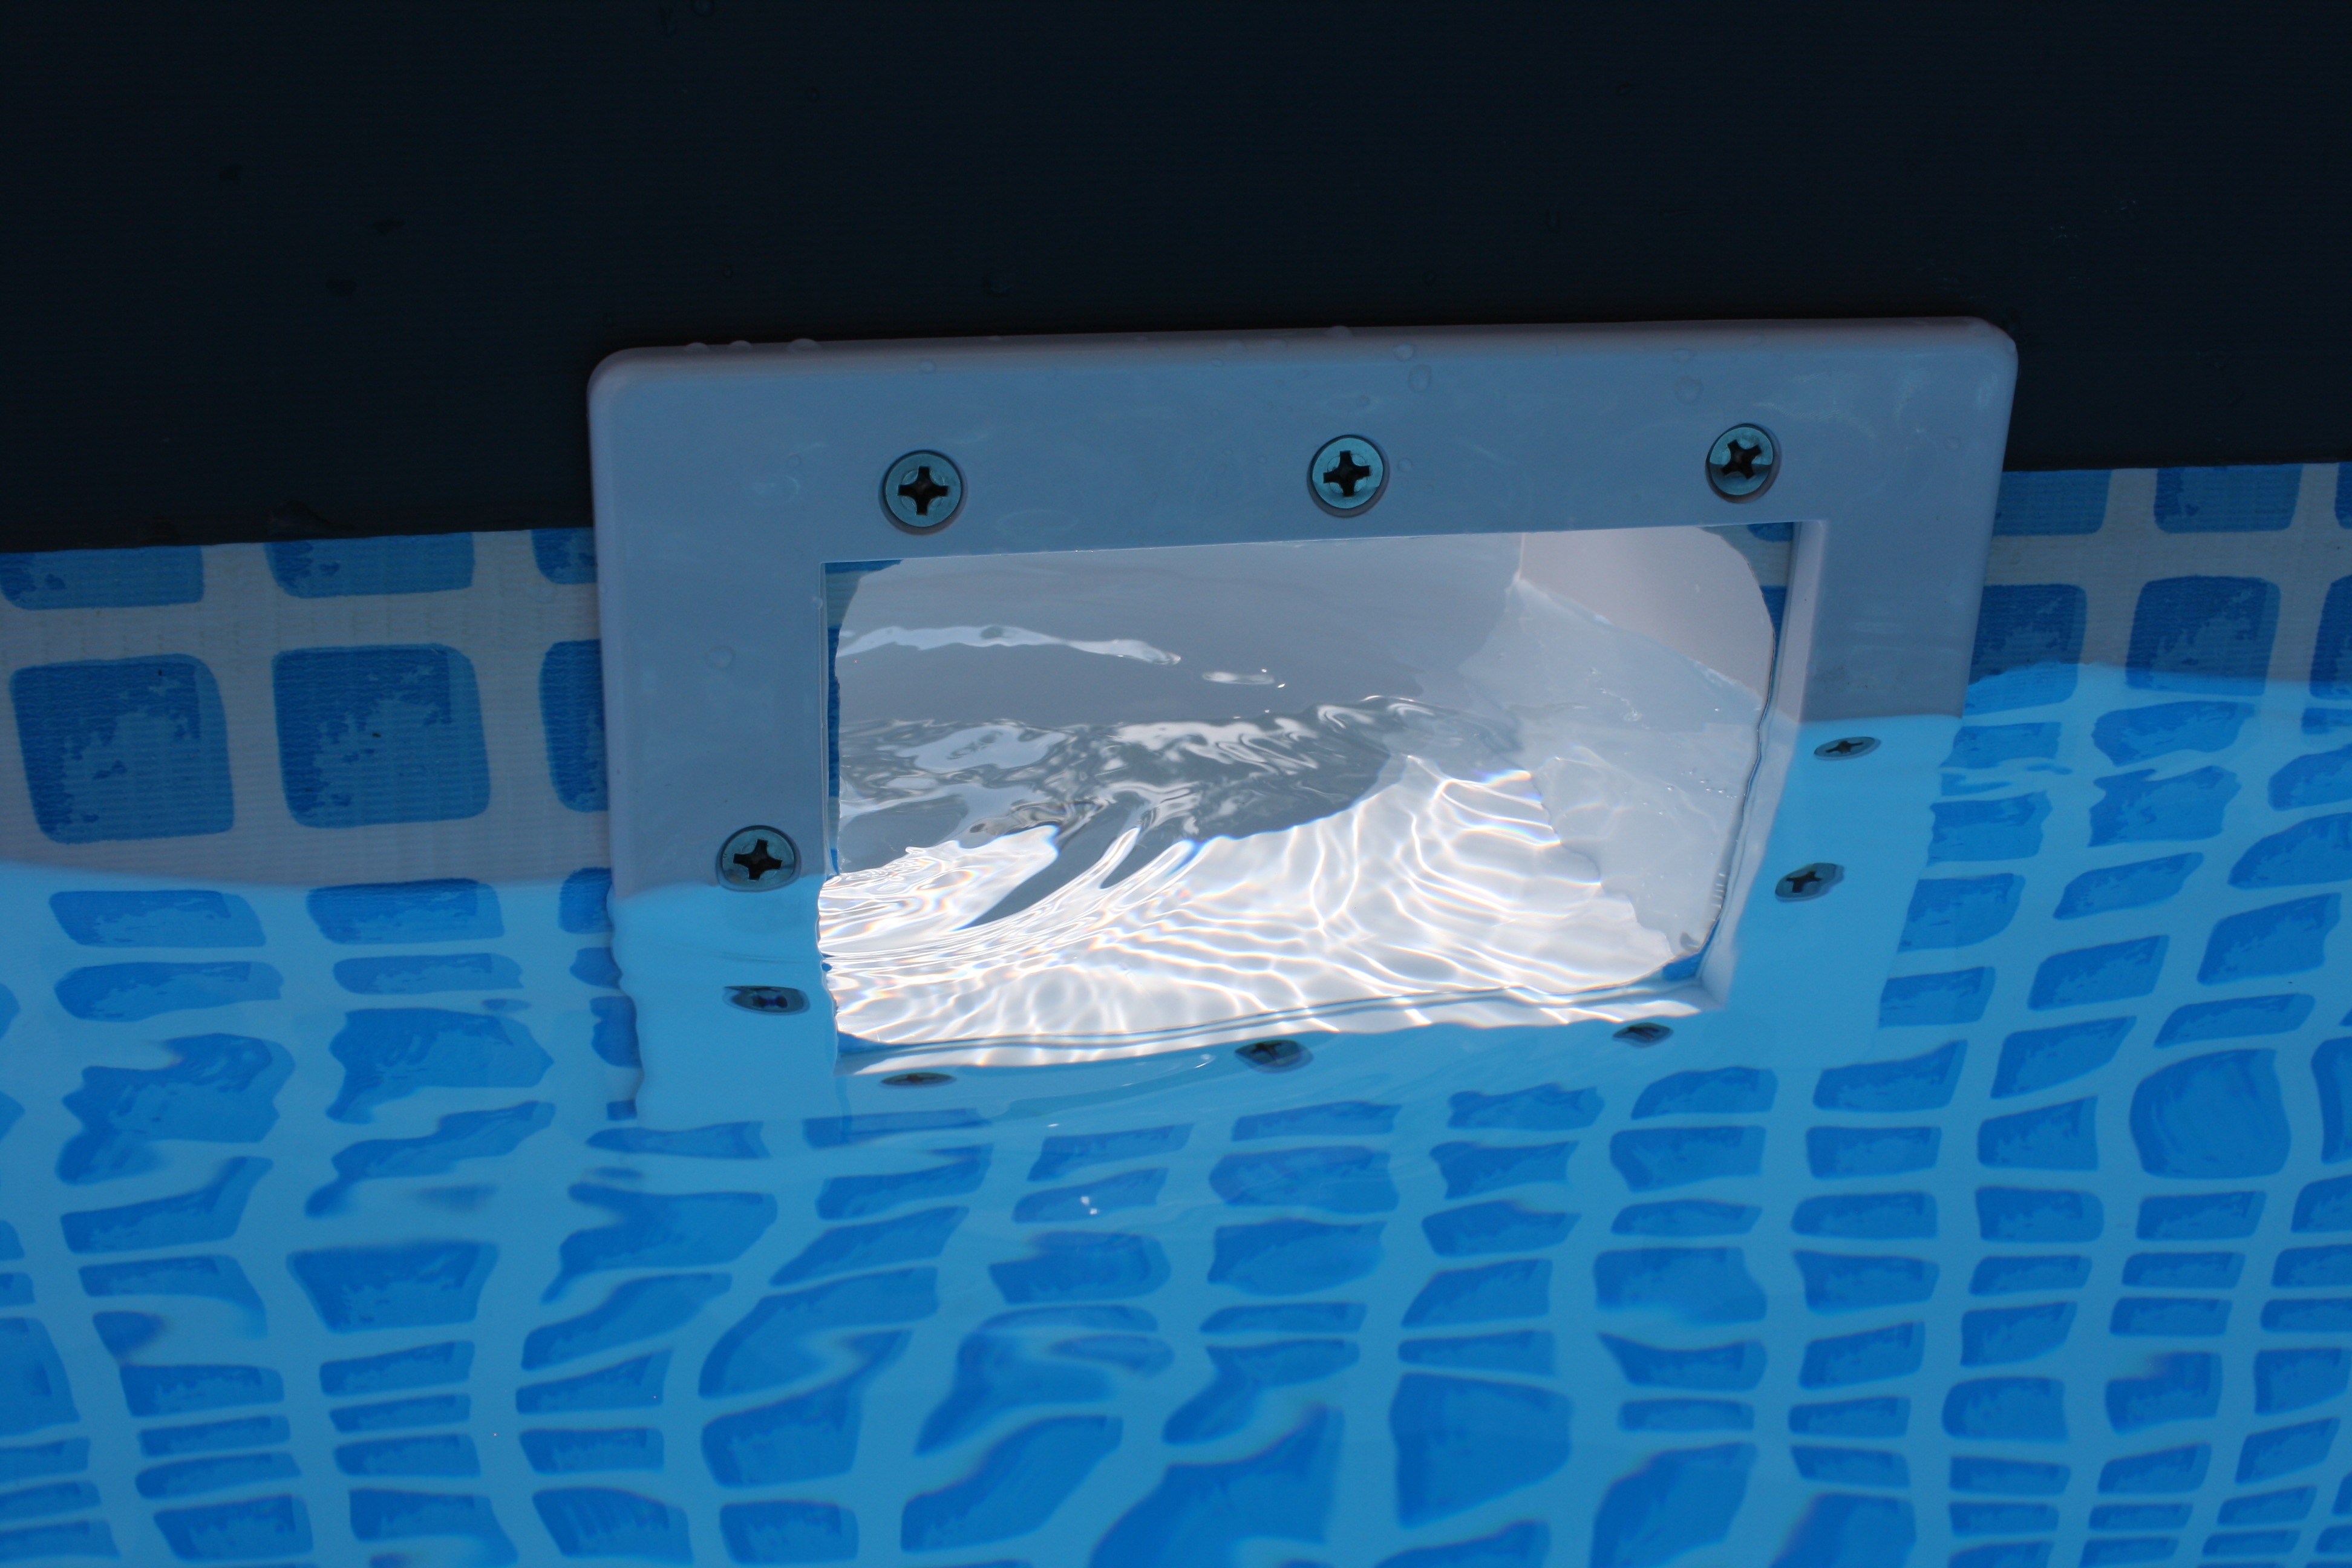
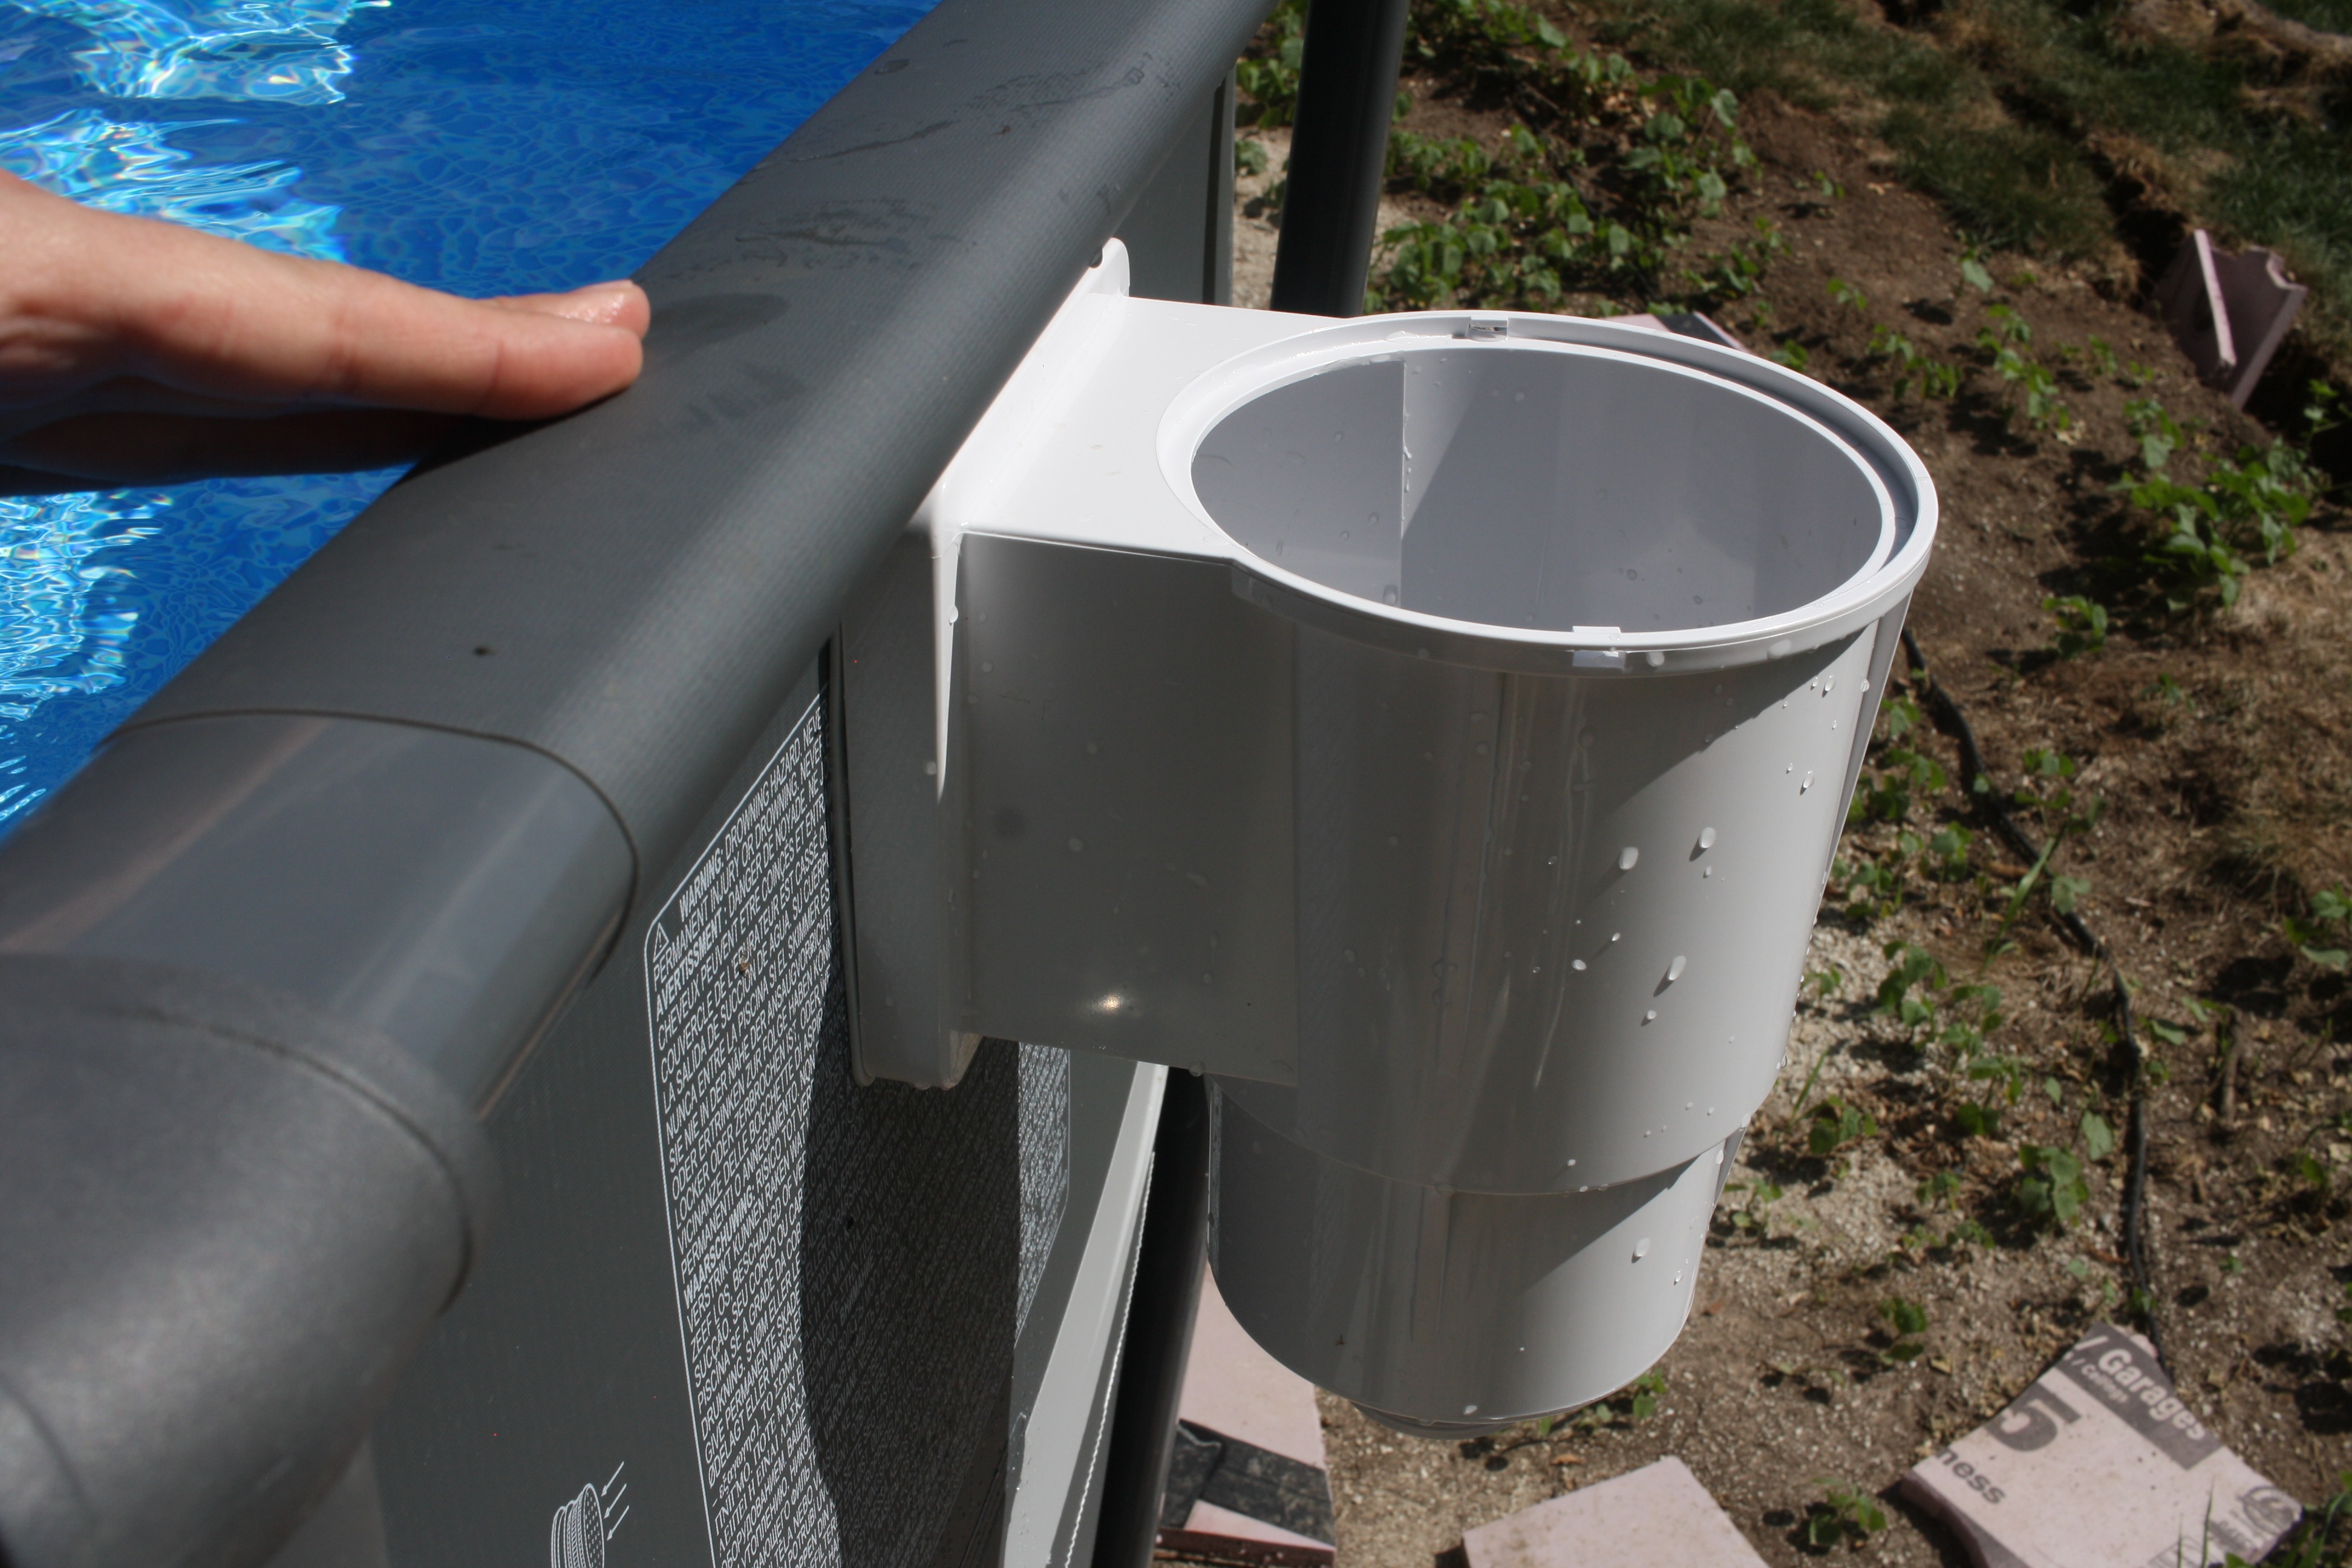
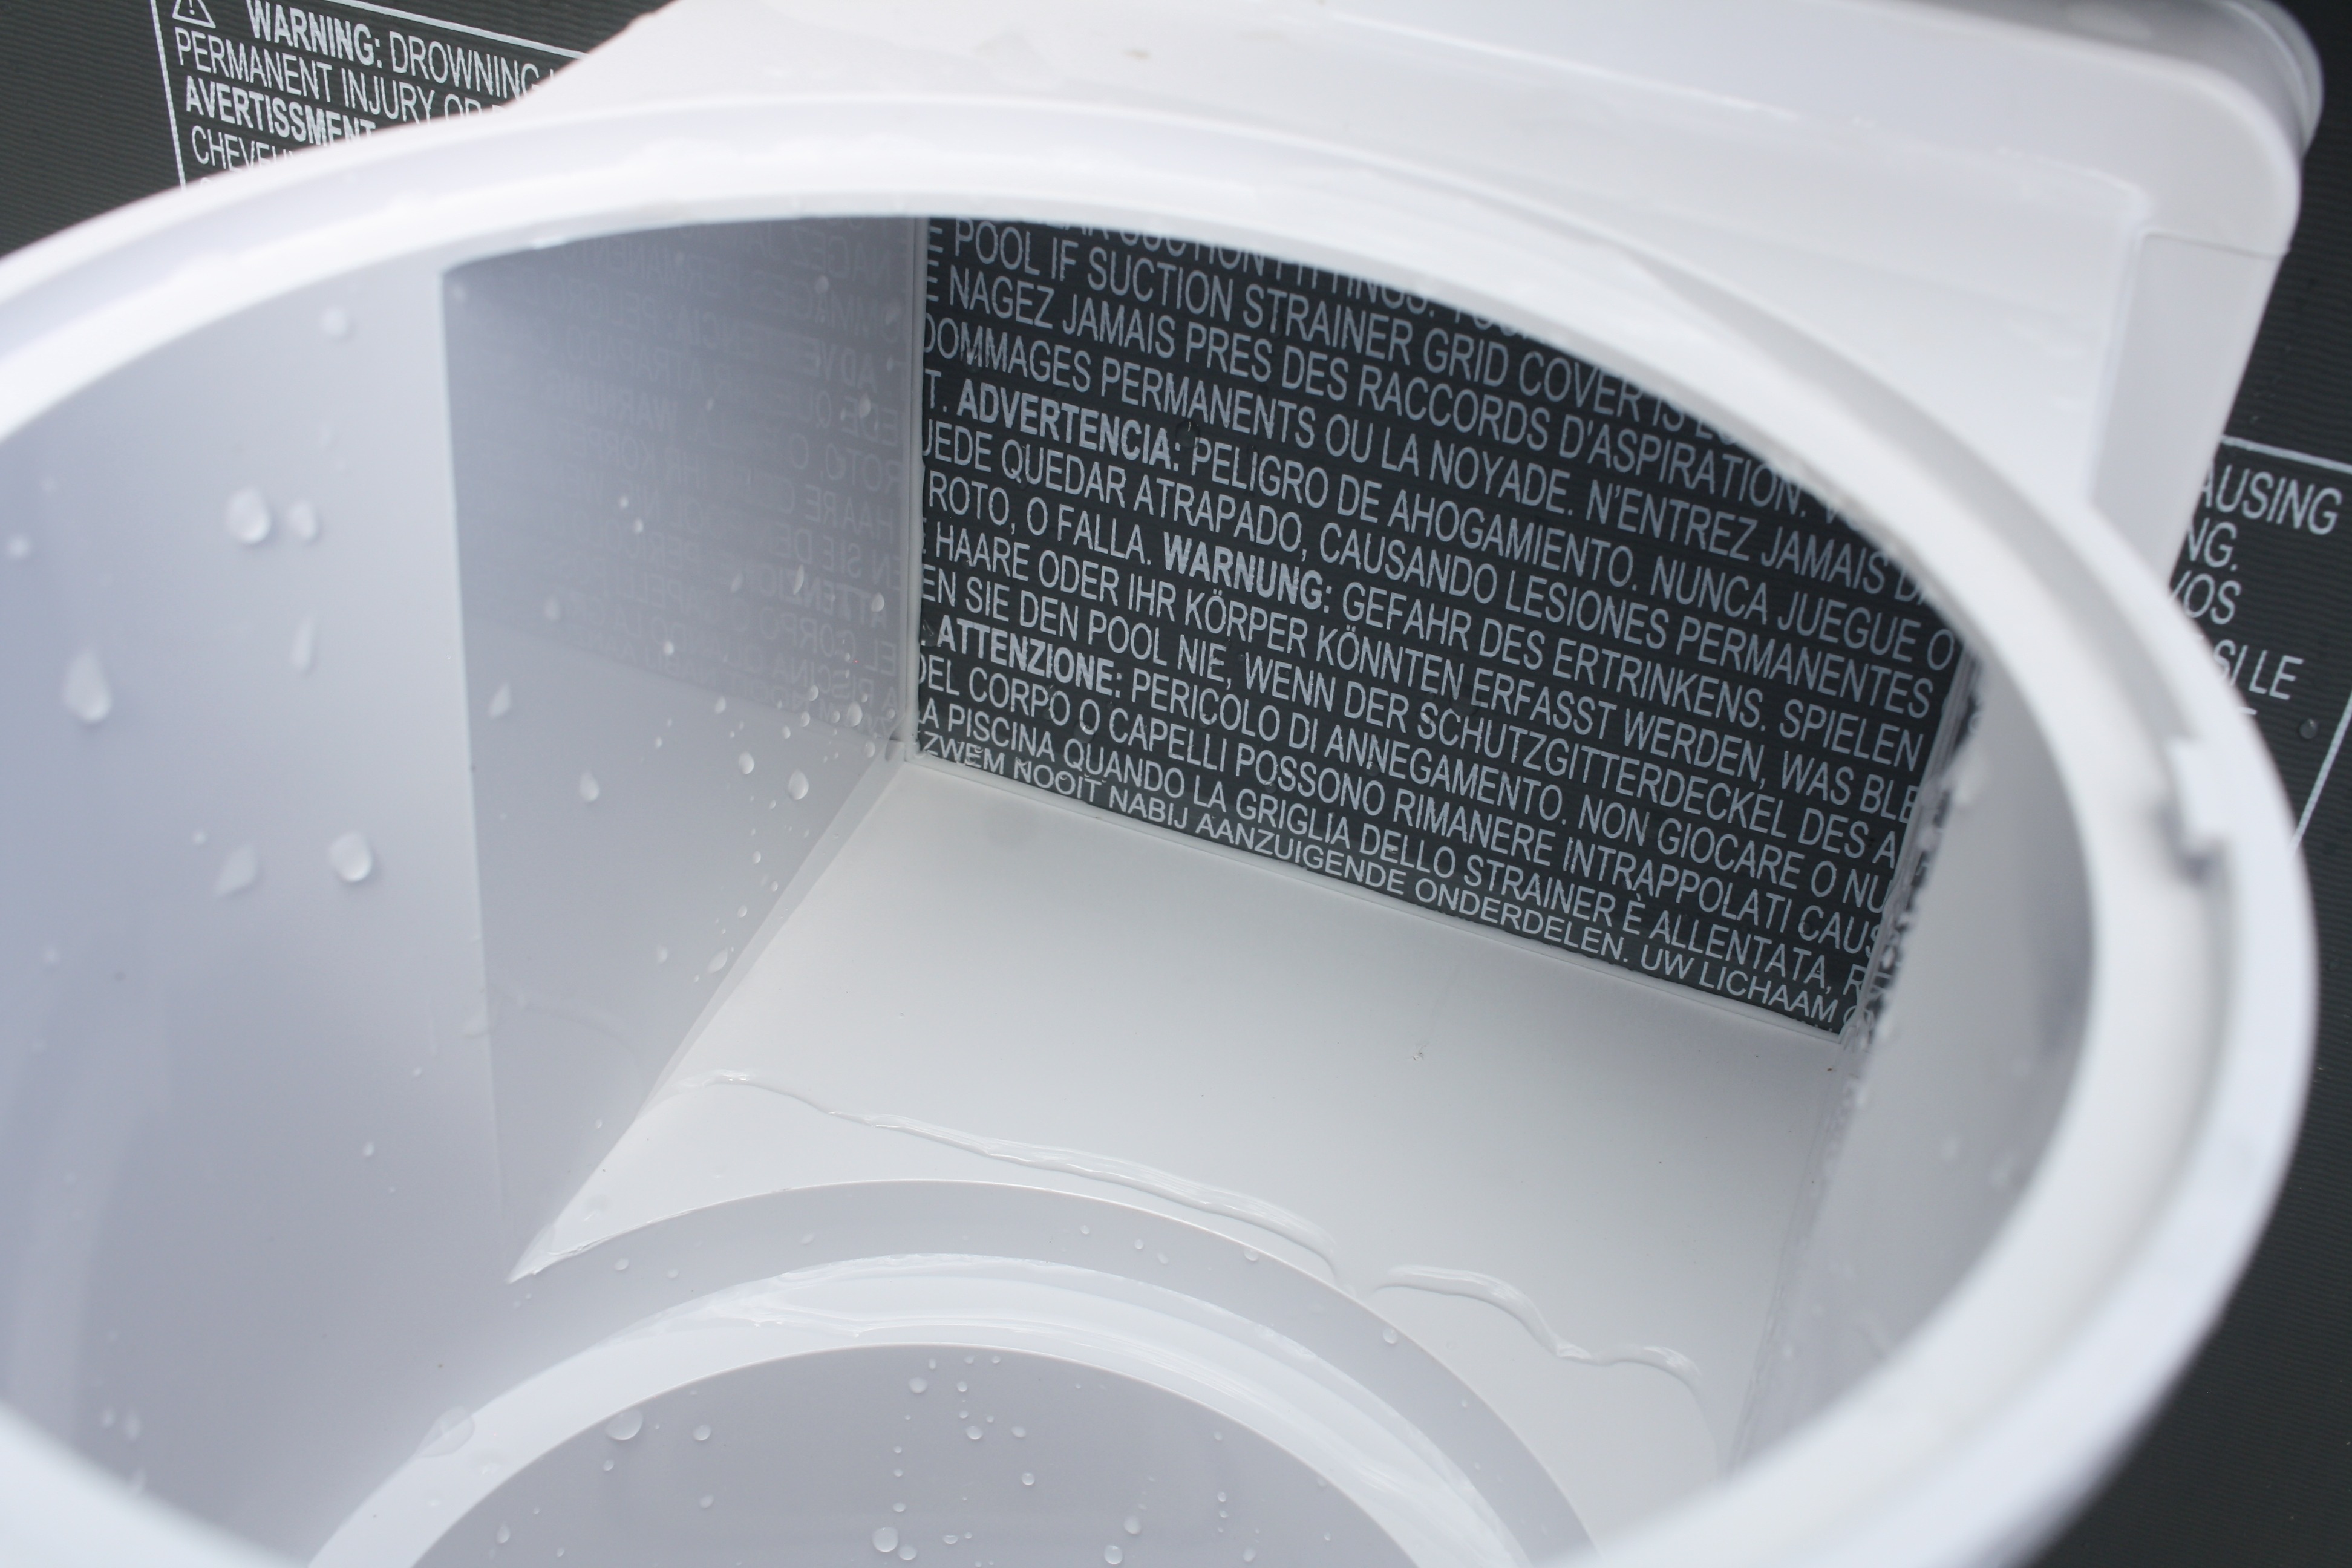
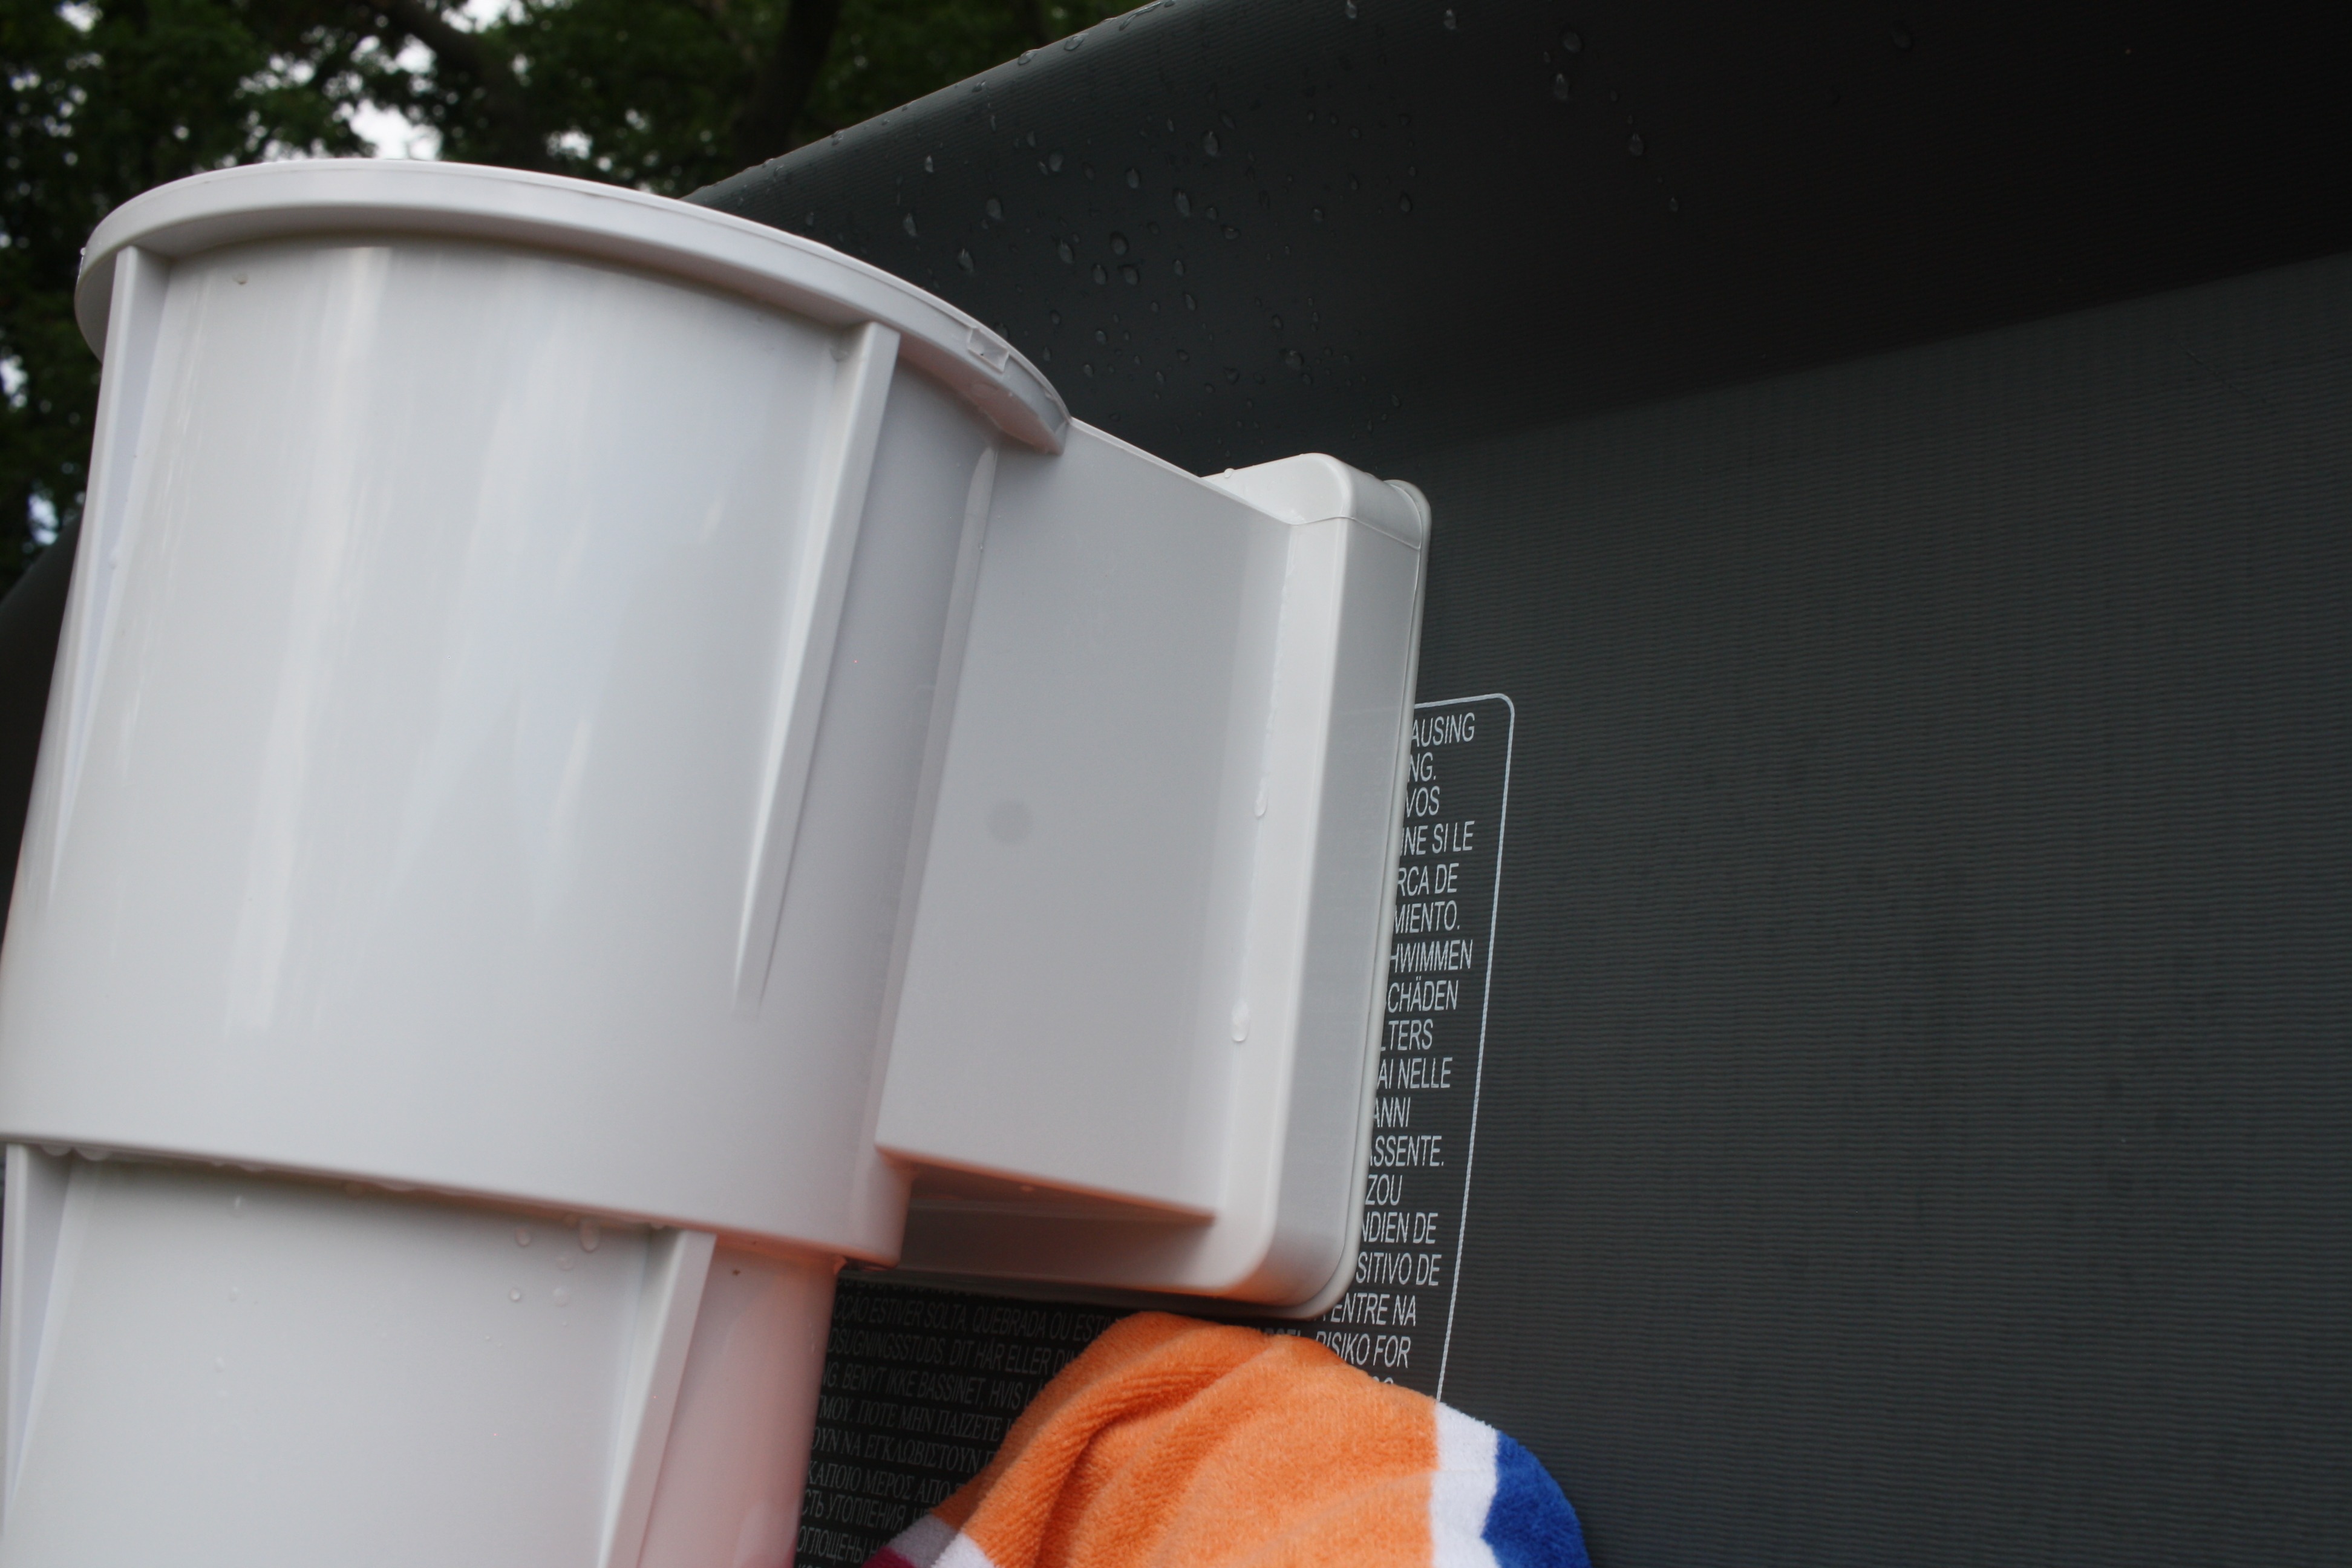
Added the weir door.
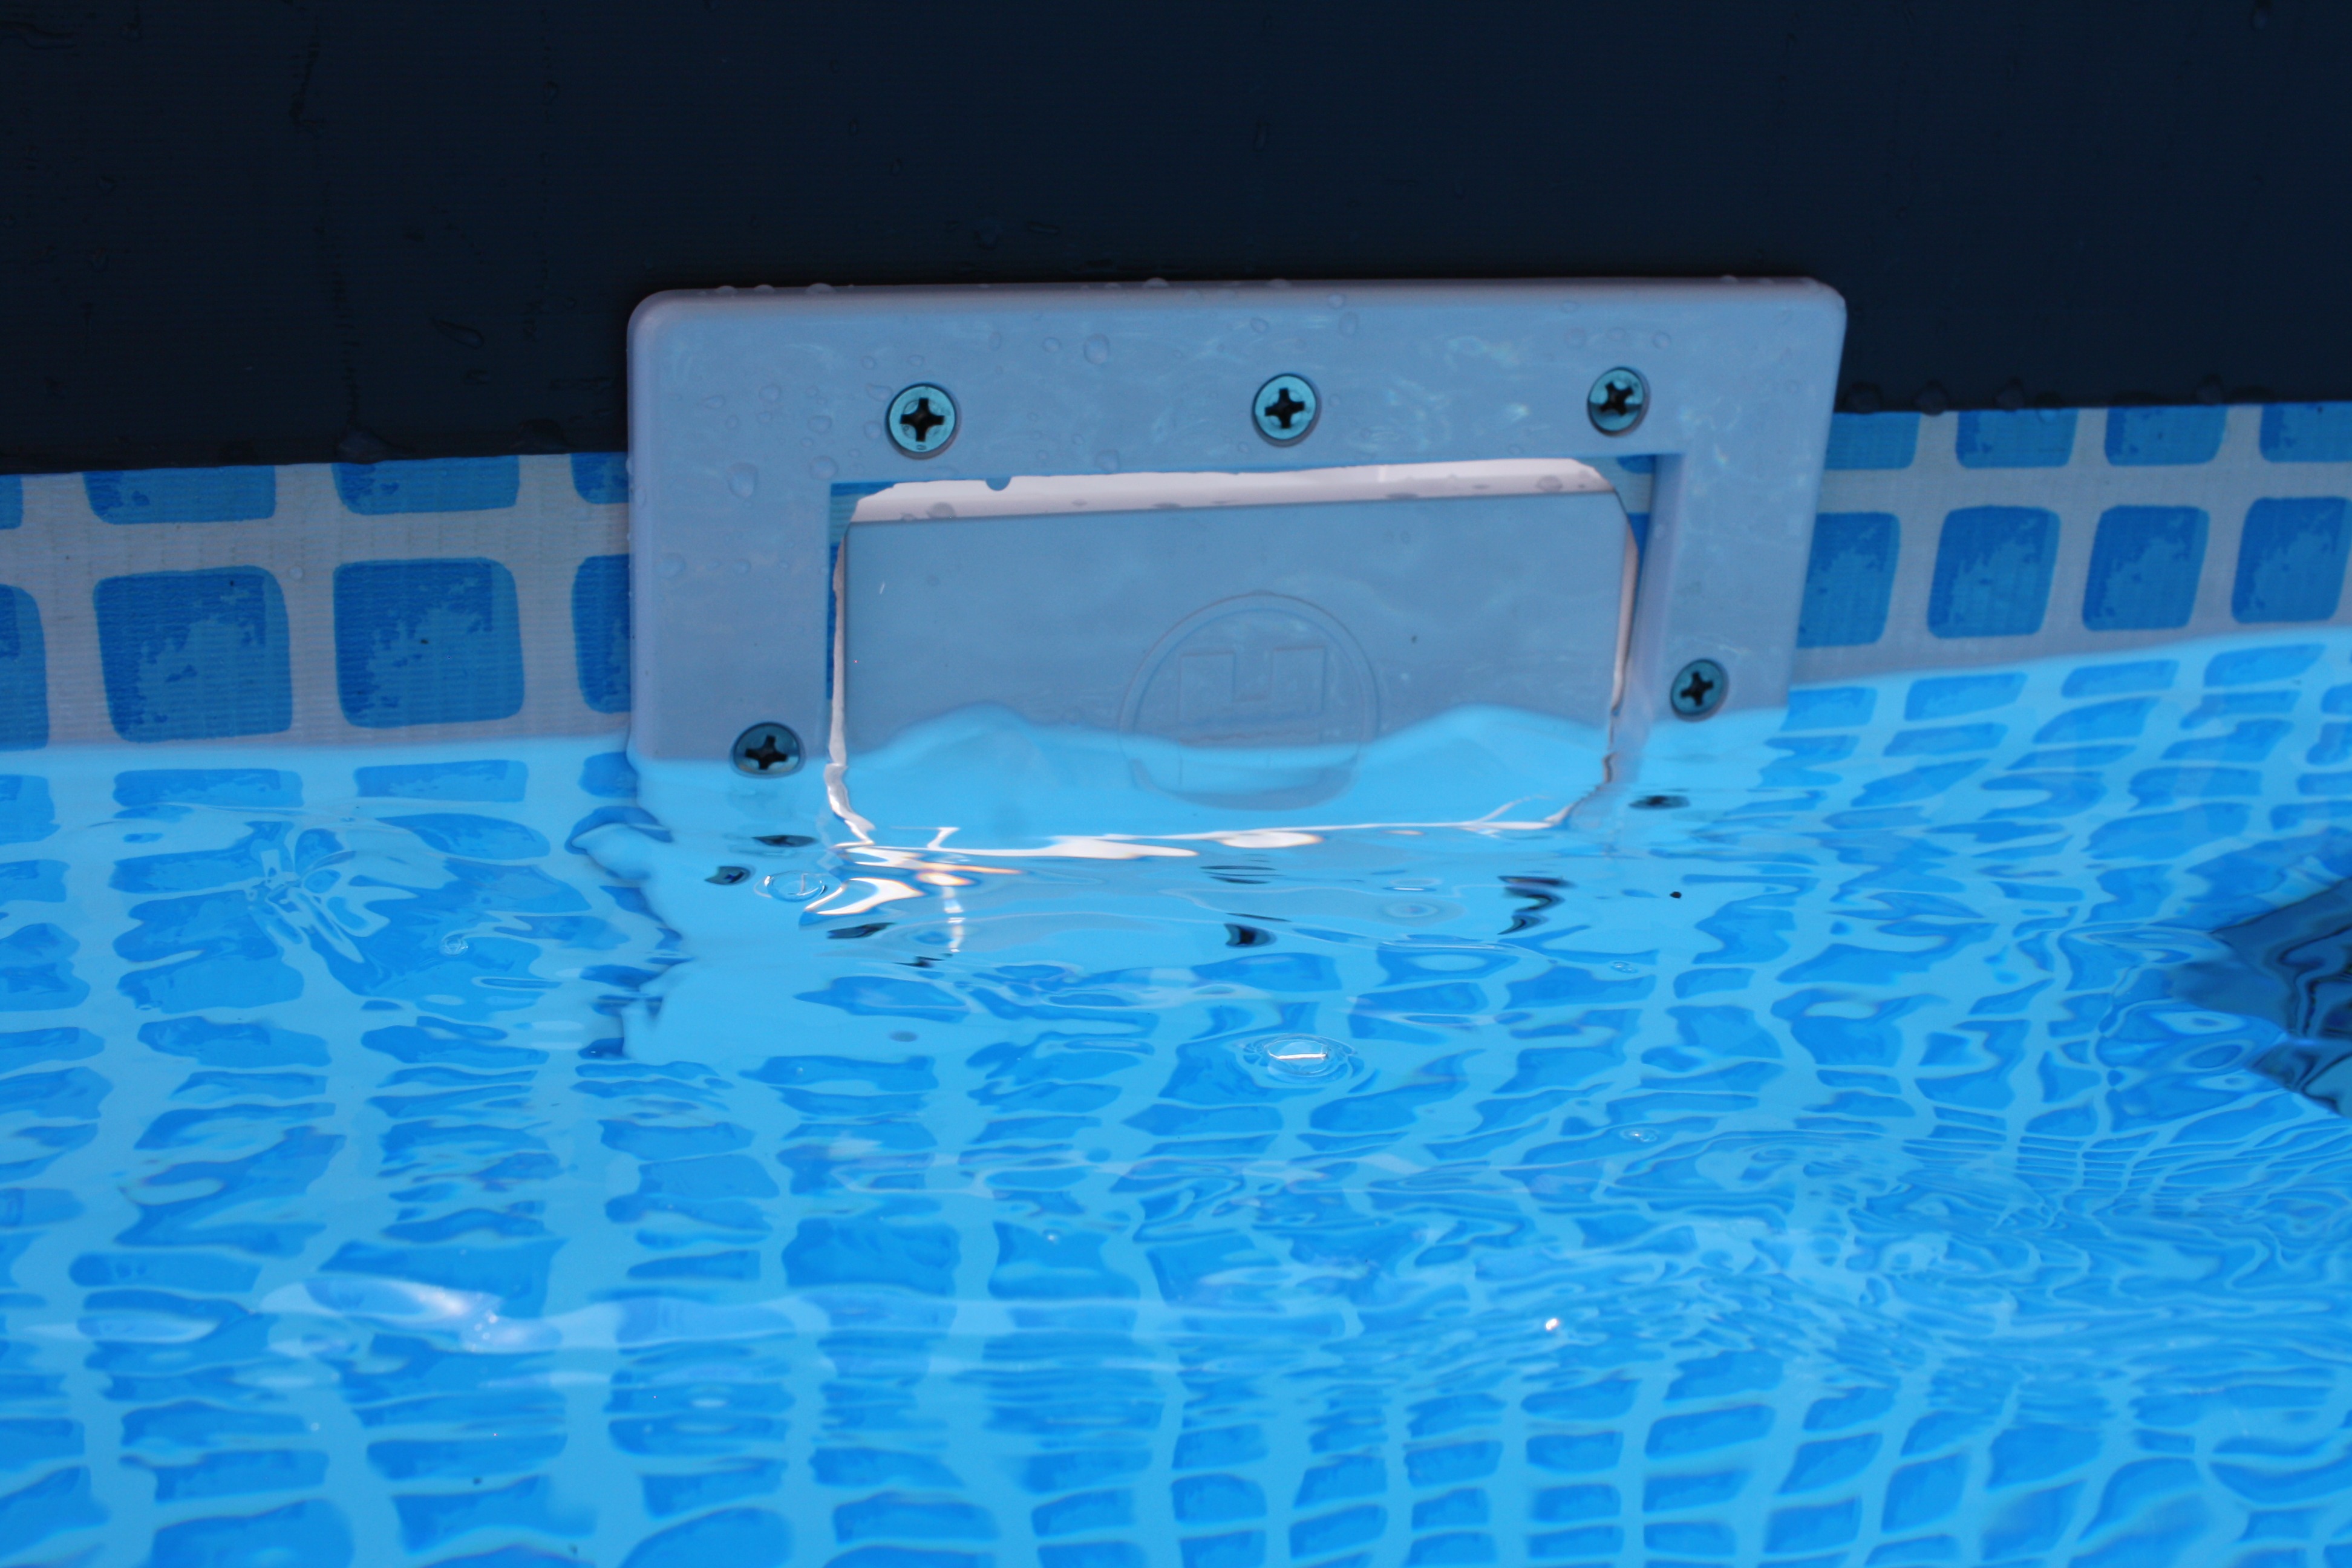
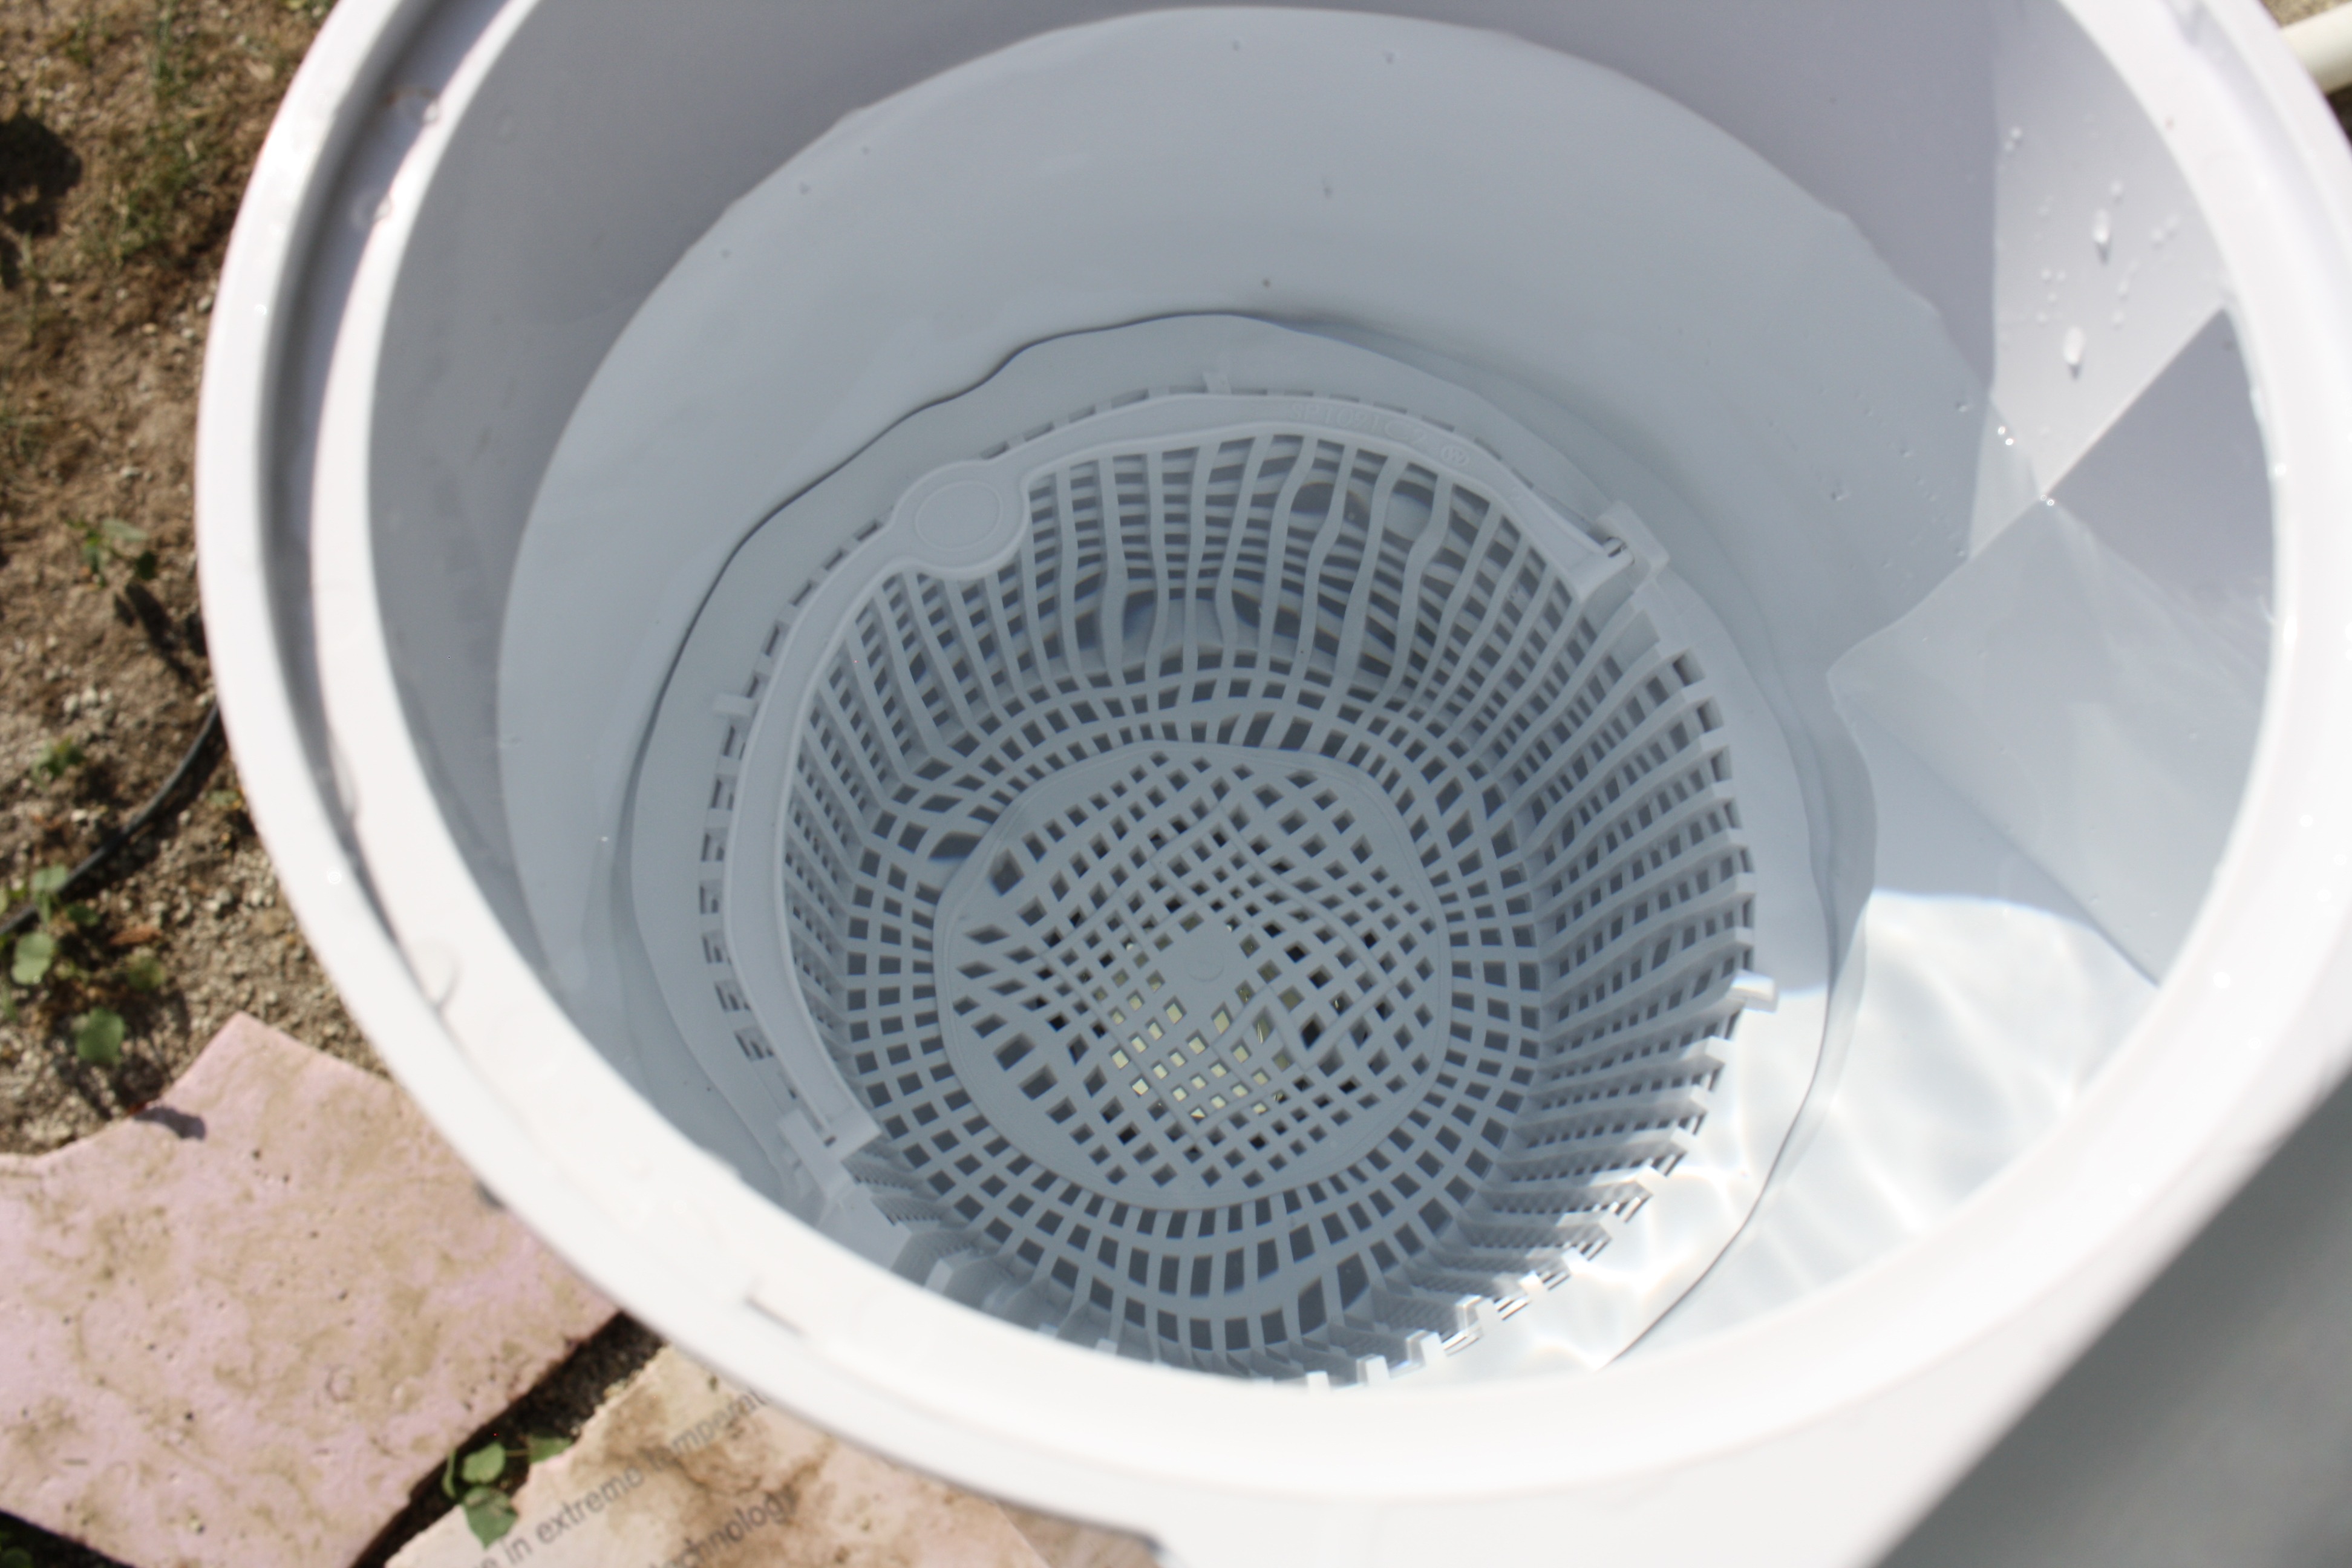
Added the skimmer basket.
And it was go time. I opened the valves and turned on the pump!
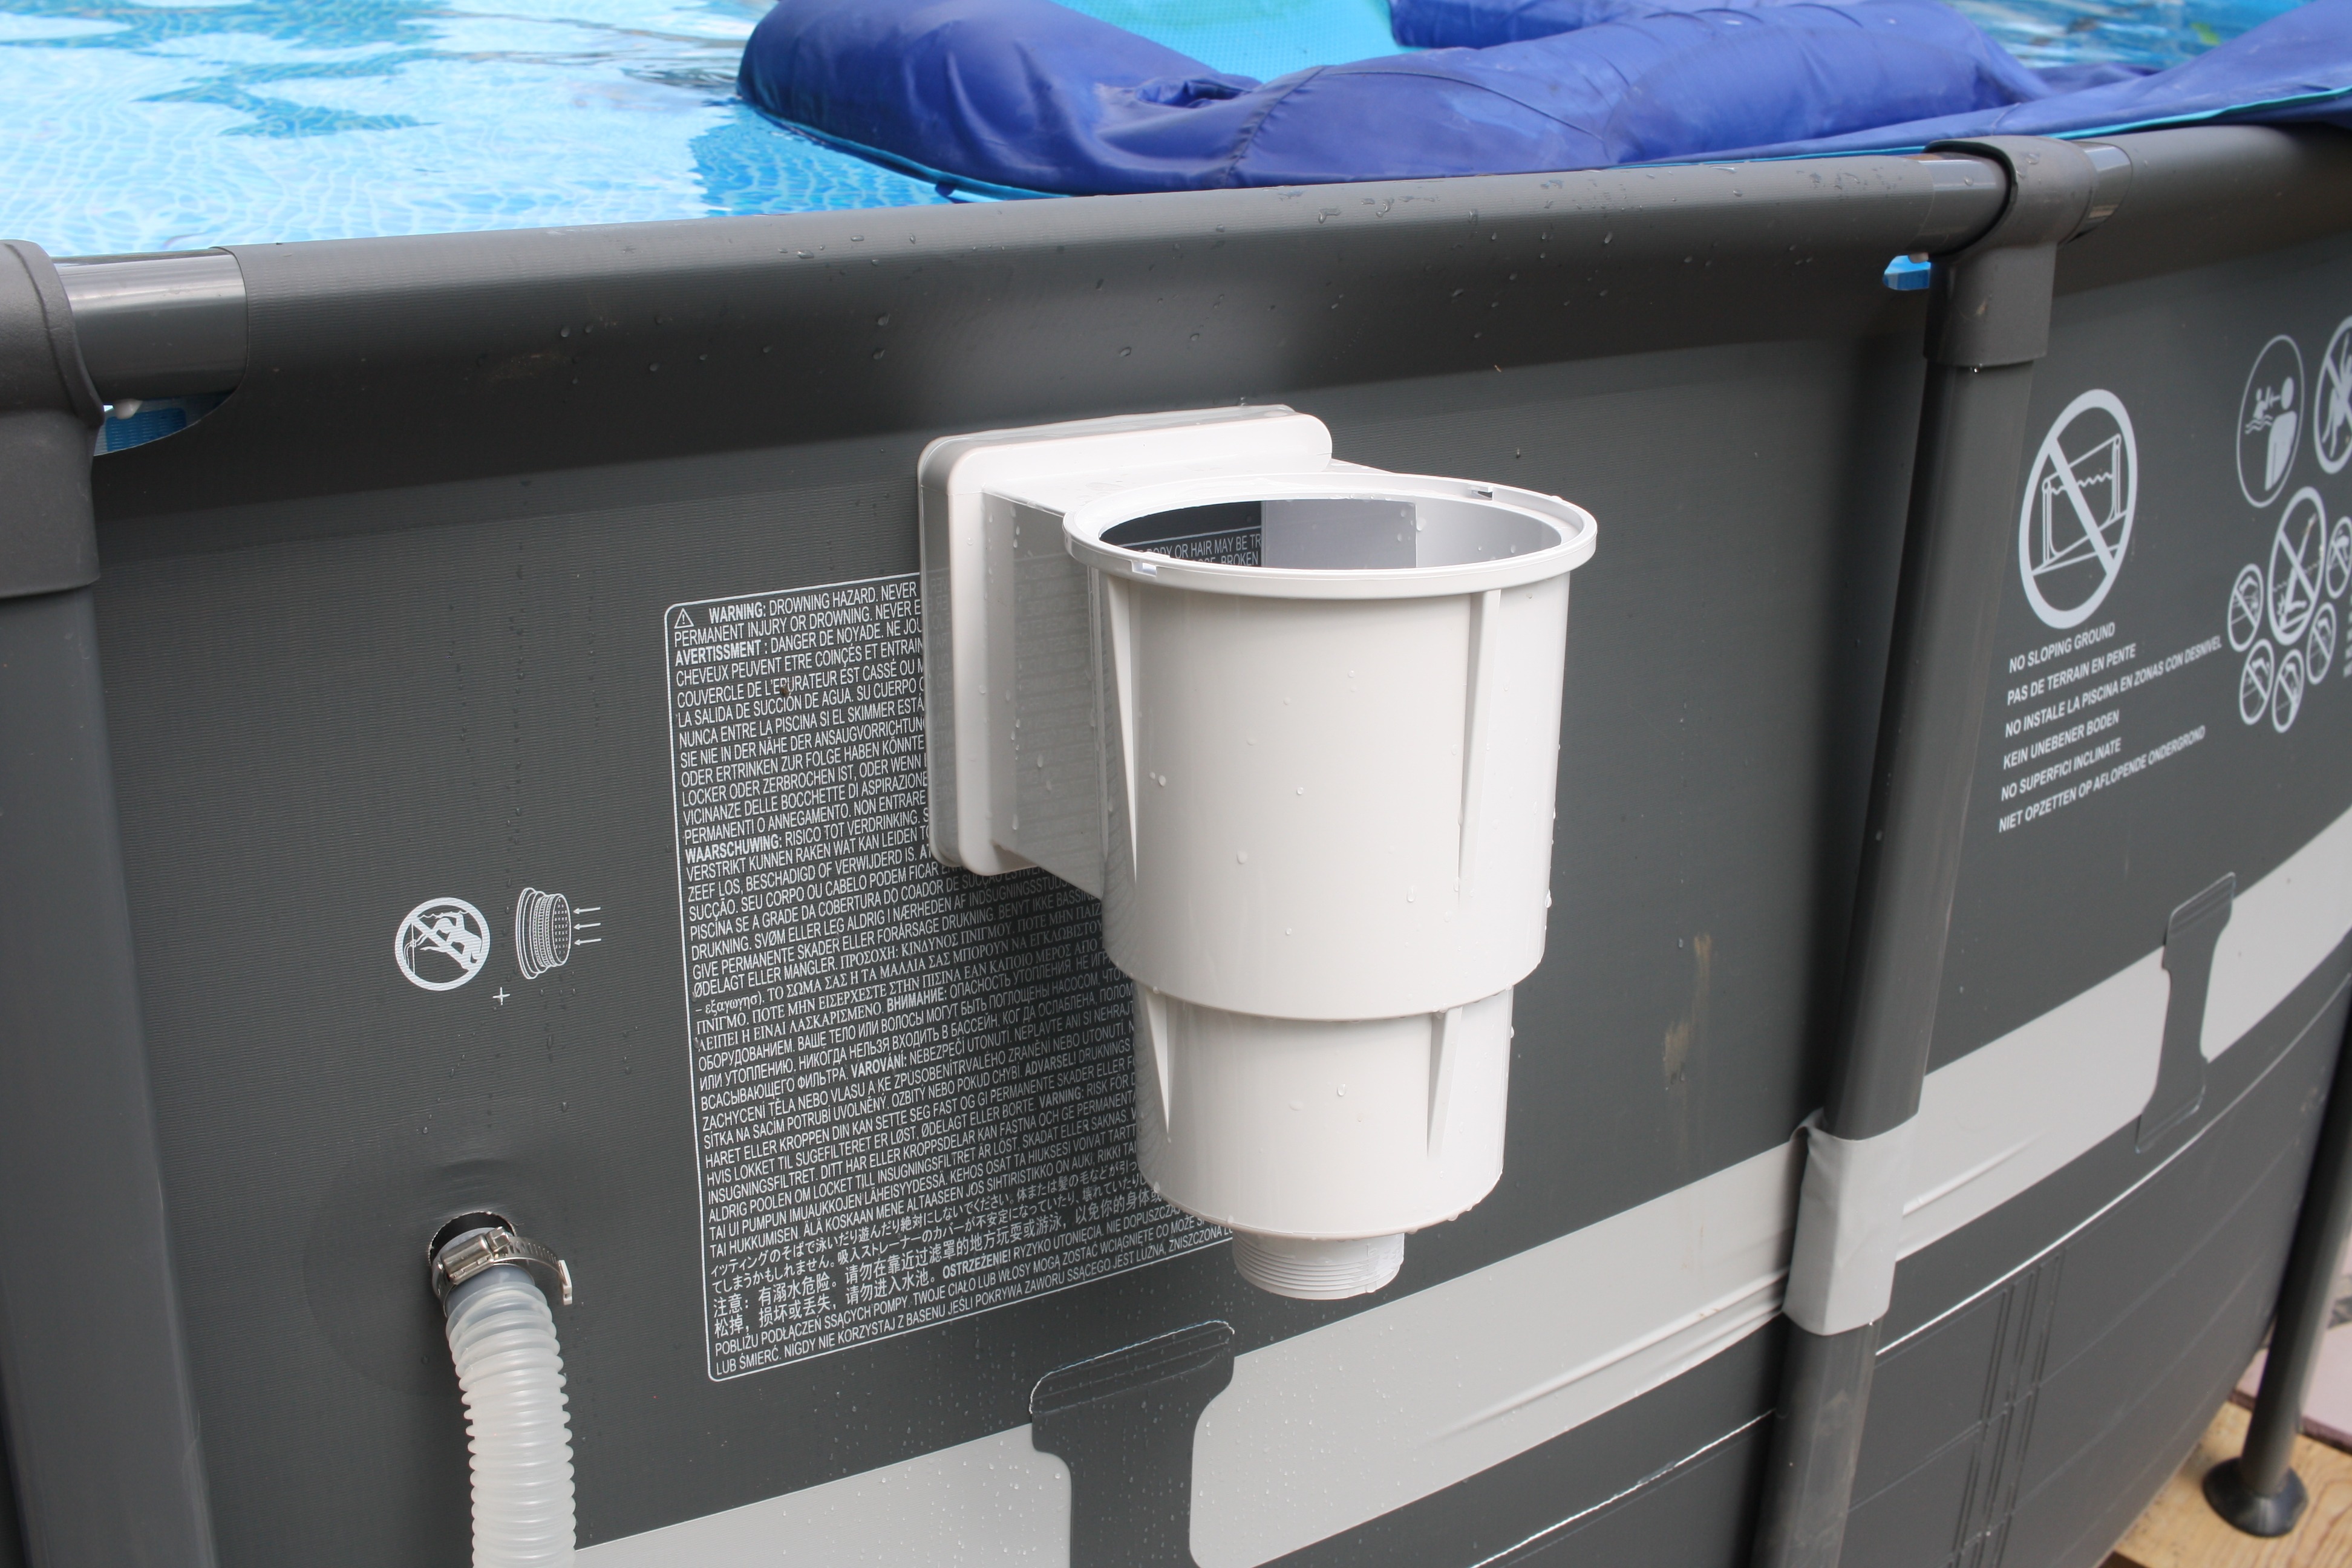
The only thing left to do was put the skimmer lid on, and we were done.
At this point I got my Intex auto cleaner running again (because of the leaves seen in an earlier picture), poured myself another homebrew...
...and there we have it! One skimmer install, on an Intex pool, with no draining.
Couple extra thoughts:
Some things may be different, if you already have hard plumbing, or use a non-Hayward skimmer. Adjust appropriately.
Note that I have gone from the Intex dual inlets to a single inlet on the skimmer. This probably isn't the best. The dual returns are due to the Virginia Graeme Baker Pool and Spa Safety Act, which requires that pool drains be "unblockable". With one inlet, if the inlet is covered up completely there will be a tremendous amount of suction force, and people, especially children, can and have died by becoming stuck underwater on inlets. In the unfortunate case of Virginia Graeme Baker, a 7 year old girl who the law was named after, she became stuck on a hot tub inlet. Her mother was unable to pull her off. Two men eventually were able to pull her off the inlet, but the suction force was so great the inlet broke in the process, and it was too late for the girl.
I say this to point out the risk involved in modifying plumbing to go from multiple to single inlets. With two inlets spaced appropriately apart, the suction force never becomes as extreme, as water can flow through the second, unblocked, inlet, and people are unlikely to become stuck underwater. I plan on adding a second skimmer at another location in the pool. Either that, or I'll reconnect one of the original inlets so I have one through-wall inlet and one skimmer. But right now I don't have the plumbing to do this, so for the moment this is how it is, and I will use appropriate caution (if we had kids, I wouldn't have left it for any length of time like this).
All that said, a skimmer is not the same as a regular wall inlet or floor drain, as there is a hole in the lid. Even if the opening is blocked completely, the pump can pull air in through the hole in the lid, keeping the opening from pulling a truly terrifying amount of suction. Still through...
Finally, while everything went smoothly for me, as always there is some amount of risk with this procedure. I take no responsibility for any actions taken as a result of this post. It's likely easier, and perhaps a bit safer, to drain the pool at least to a point below the bottom of the proposed skimmer.
In any case, I hope this is useful for some people. As I said, I've seen a lot of people add these, but never a lot of pictures of the process or details, so I hope this makes the process easier for people in the future!
The 40 mm to 1 1/2" adapter I linked above works fine for this. The Hayward skimmer has inside and outside threads. The adapter screws into the inside ones.
There's an o-ring seal, so you don't need thread tape, even thought he adapter kit comes with it.
One note though, if you screw it down too tight, the o-ring will bulge out. If this happens, unscrew until the o-ring goes back, then re-tighten to a point before the o-ring starts bulging out.
The 59" Intex hose I got previously worked fine, but unlike the gaskets the Intex hoses use to connect to the pump that fit nicely inside a hole, these hoses came with flat gaskets. With no centering portion, it was a bit annoying to get it to seal up, but after a few tries I got it. It seemed to help to put the gasket in, then before attaching the hose, slide up the gray threaded ring as far as it would go, then make the connection while holding the threaded ring up.
At this point it now looked like this. The original dual inlet was disconnected from the pump, and my 59" hose went from the skimmer to the pump.
At this point I got myself a container, a towel, and a beer.
I used the container to fill the skimmer up to the top with water to check for leaks.
I used the towel to dry off the outside of the skimmer, the pool, and the hose.
With everything dry, I let it sit for about 5 minutes to check for leaks. This is important to do before you cut the liner!
Turns out I had a leak at the Intex hose at the bottom of the adapter. I disconnected, re-centered things and got it re-connected. Re-filled with water, then dried everything off again and waited another 5 minutes or so. Nothing leaked this time.
Now that it was verified to be leak-free, it was cutting time. I took the razor blade and carefully cut out the liner inside the skimmer opening. I rounded the corners a bit...engineer me doesn't like square corners, but it's probably fine in this case...
Mask and snorkel came in handy again here, though again not strictly needed.
Added the weir door.
Added the skimmer basket.
And it was go time. I opened the valves and turned on the pump!
The only thing left to do was put the skimmer lid on, and we were done.
At this point I got my Intex auto cleaner running again (because of the leaves seen in an earlier picture), poured myself another homebrew...
...and there we have it! One skimmer install, on an Intex pool, with no draining.
Couple extra thoughts:
Some things may be different, if you already have hard plumbing, or use a non-Hayward skimmer. Adjust appropriately.
Note that I have gone from the Intex dual inlets to a single inlet on the skimmer. This probably isn't the best. The dual returns are due to the Virginia Graeme Baker Pool and Spa Safety Act, which requires that pool drains be "unblockable". With one inlet, if the inlet is covered up completely there will be a tremendous amount of suction force, and people, especially children, can and have died by becoming stuck underwater on inlets. In the unfortunate case of Virginia Graeme Baker, a 7 year old girl who the law was named after, she became stuck on a hot tub inlet. Her mother was unable to pull her off. Two men eventually were able to pull her off the inlet, but the suction force was so great the inlet broke in the process, and it was too late for the girl.
I say this to point out the risk involved in modifying plumbing to go from multiple to single inlets. With two inlets spaced appropriately apart, the suction force never becomes as extreme, as water can flow through the second, unblocked, inlet, and people are unlikely to become stuck underwater. I plan on adding a second skimmer at another location in the pool. Either that, or I'll reconnect one of the original inlets so I have one through-wall inlet and one skimmer. But right now I don't have the plumbing to do this, so for the moment this is how it is, and I will use appropriate caution (if we had kids, I wouldn't have left it for any length of time like this).
All that said, a skimmer is not the same as a regular wall inlet or floor drain, as there is a hole in the lid. Even if the opening is blocked completely, the pump can pull air in through the hole in the lid, keeping the opening from pulling a truly terrifying amount of suction. Still through...
Finally, while everything went smoothly for me, as always there is some amount of risk with this procedure. I take no responsibility for any actions taken as a result of this post. It's likely easier, and perhaps a bit safer, to drain the pool at least to a point below the bottom of the proposed skimmer.
In any case, I hope this is useful for some people. As I said, I've seen a lot of people add these, but never a lot of pictures of the process or details, so I hope this makes the process easier for people in the future!
Amazingly done as always !!!! This will help so many people who are unsure of what to do.
Nicely done! Just a comment... you don’t actually have to cut the gasket for an Intex pool. I didn’t! I did drain just below where I was going to place the skimmer, then installed the faceplate by itself so I could mark the screw holes and cut the skimmer hole. Then I took the plate off, fitted the butterfly gasket (it was perfect) and then installed skimmer for real.
i did keep a second suction line. I usually keep it partially open to assuage my paranoia that my water level will drop below the skimmer without me noticing and cause my pump to run dry. LOL
i did keep a second suction line. I usually keep it partially open to assuage my paranoia that my water level will drop below the skimmer without me noticing and cause my pump to run dry. LOL
That's true, you don't have to cut the gasket but you do have to drain then. Tradesoffs I suppose. I didn't want to drain. Other aspects of the install get easier with draining though, so maybe I should emphasis that most people may want to drain a few inches.
Update: The skimmer works, and works well. I'd say it's a must have for anybody that gets leaves in their pool. It's not even fall, and this is what I had this morning after some rain during the night. I had emptied it yesterday evening.
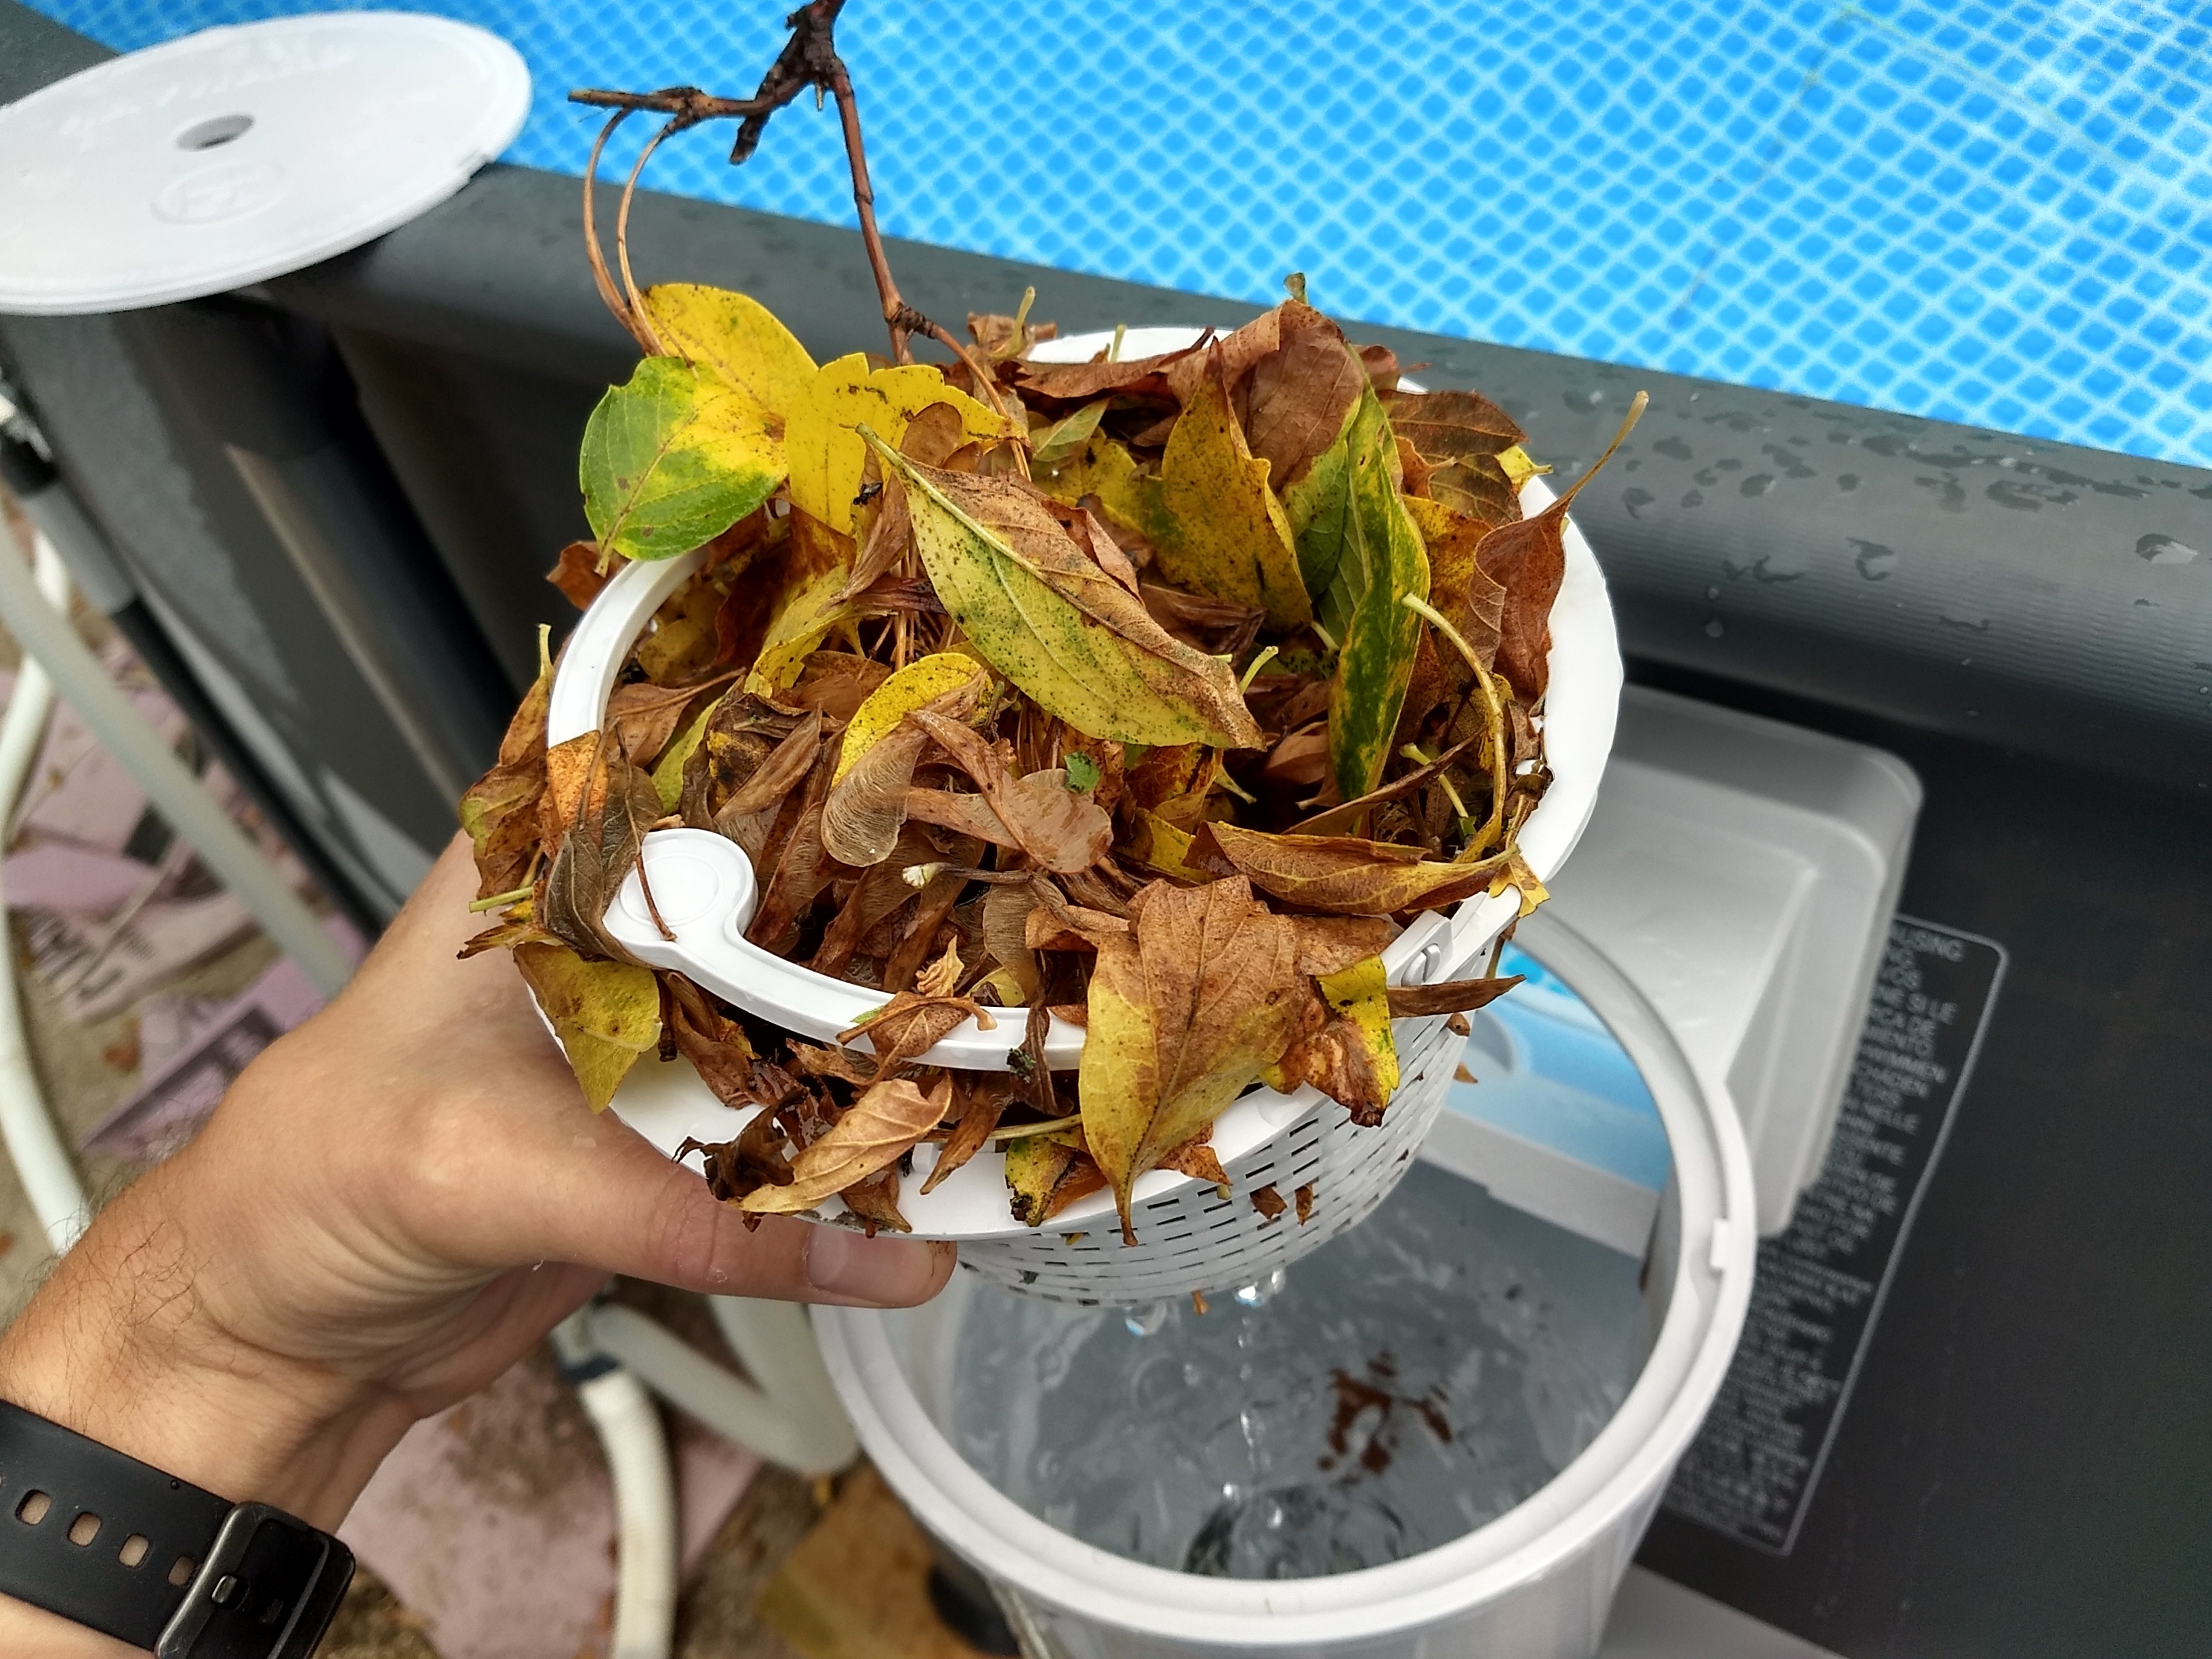
Problem I've discovered is that it works best with a circular water circulation from the pool pump, so the leaves get pushed around and have a chance at getting sucked in. But if I run my Intex auto cleaner, which is a pressure side cleaner, the water doesn't circulate in a circular pattern, and so the skimmer is much less effective. So as the cleaner is picking up leaves, it's making the skimmer less effective which means more leaves will end up on the bottom! Should have gotten a robot...
In other news, the temp dropped drastically last night as a front moved through. The high today is 69, and will slowly work back up into the 80's at the weekend, but the water was already down to 72 and would drop further if I left it. So I finally dragged out the solar cover I bought a month ago. That was a pain to get on without getting in the pool. Should have thought to put it on yesterday evening when I was in the pool. I may try to build or buy a cover reel at some point. I'll trim the cover in the next couple weeks.
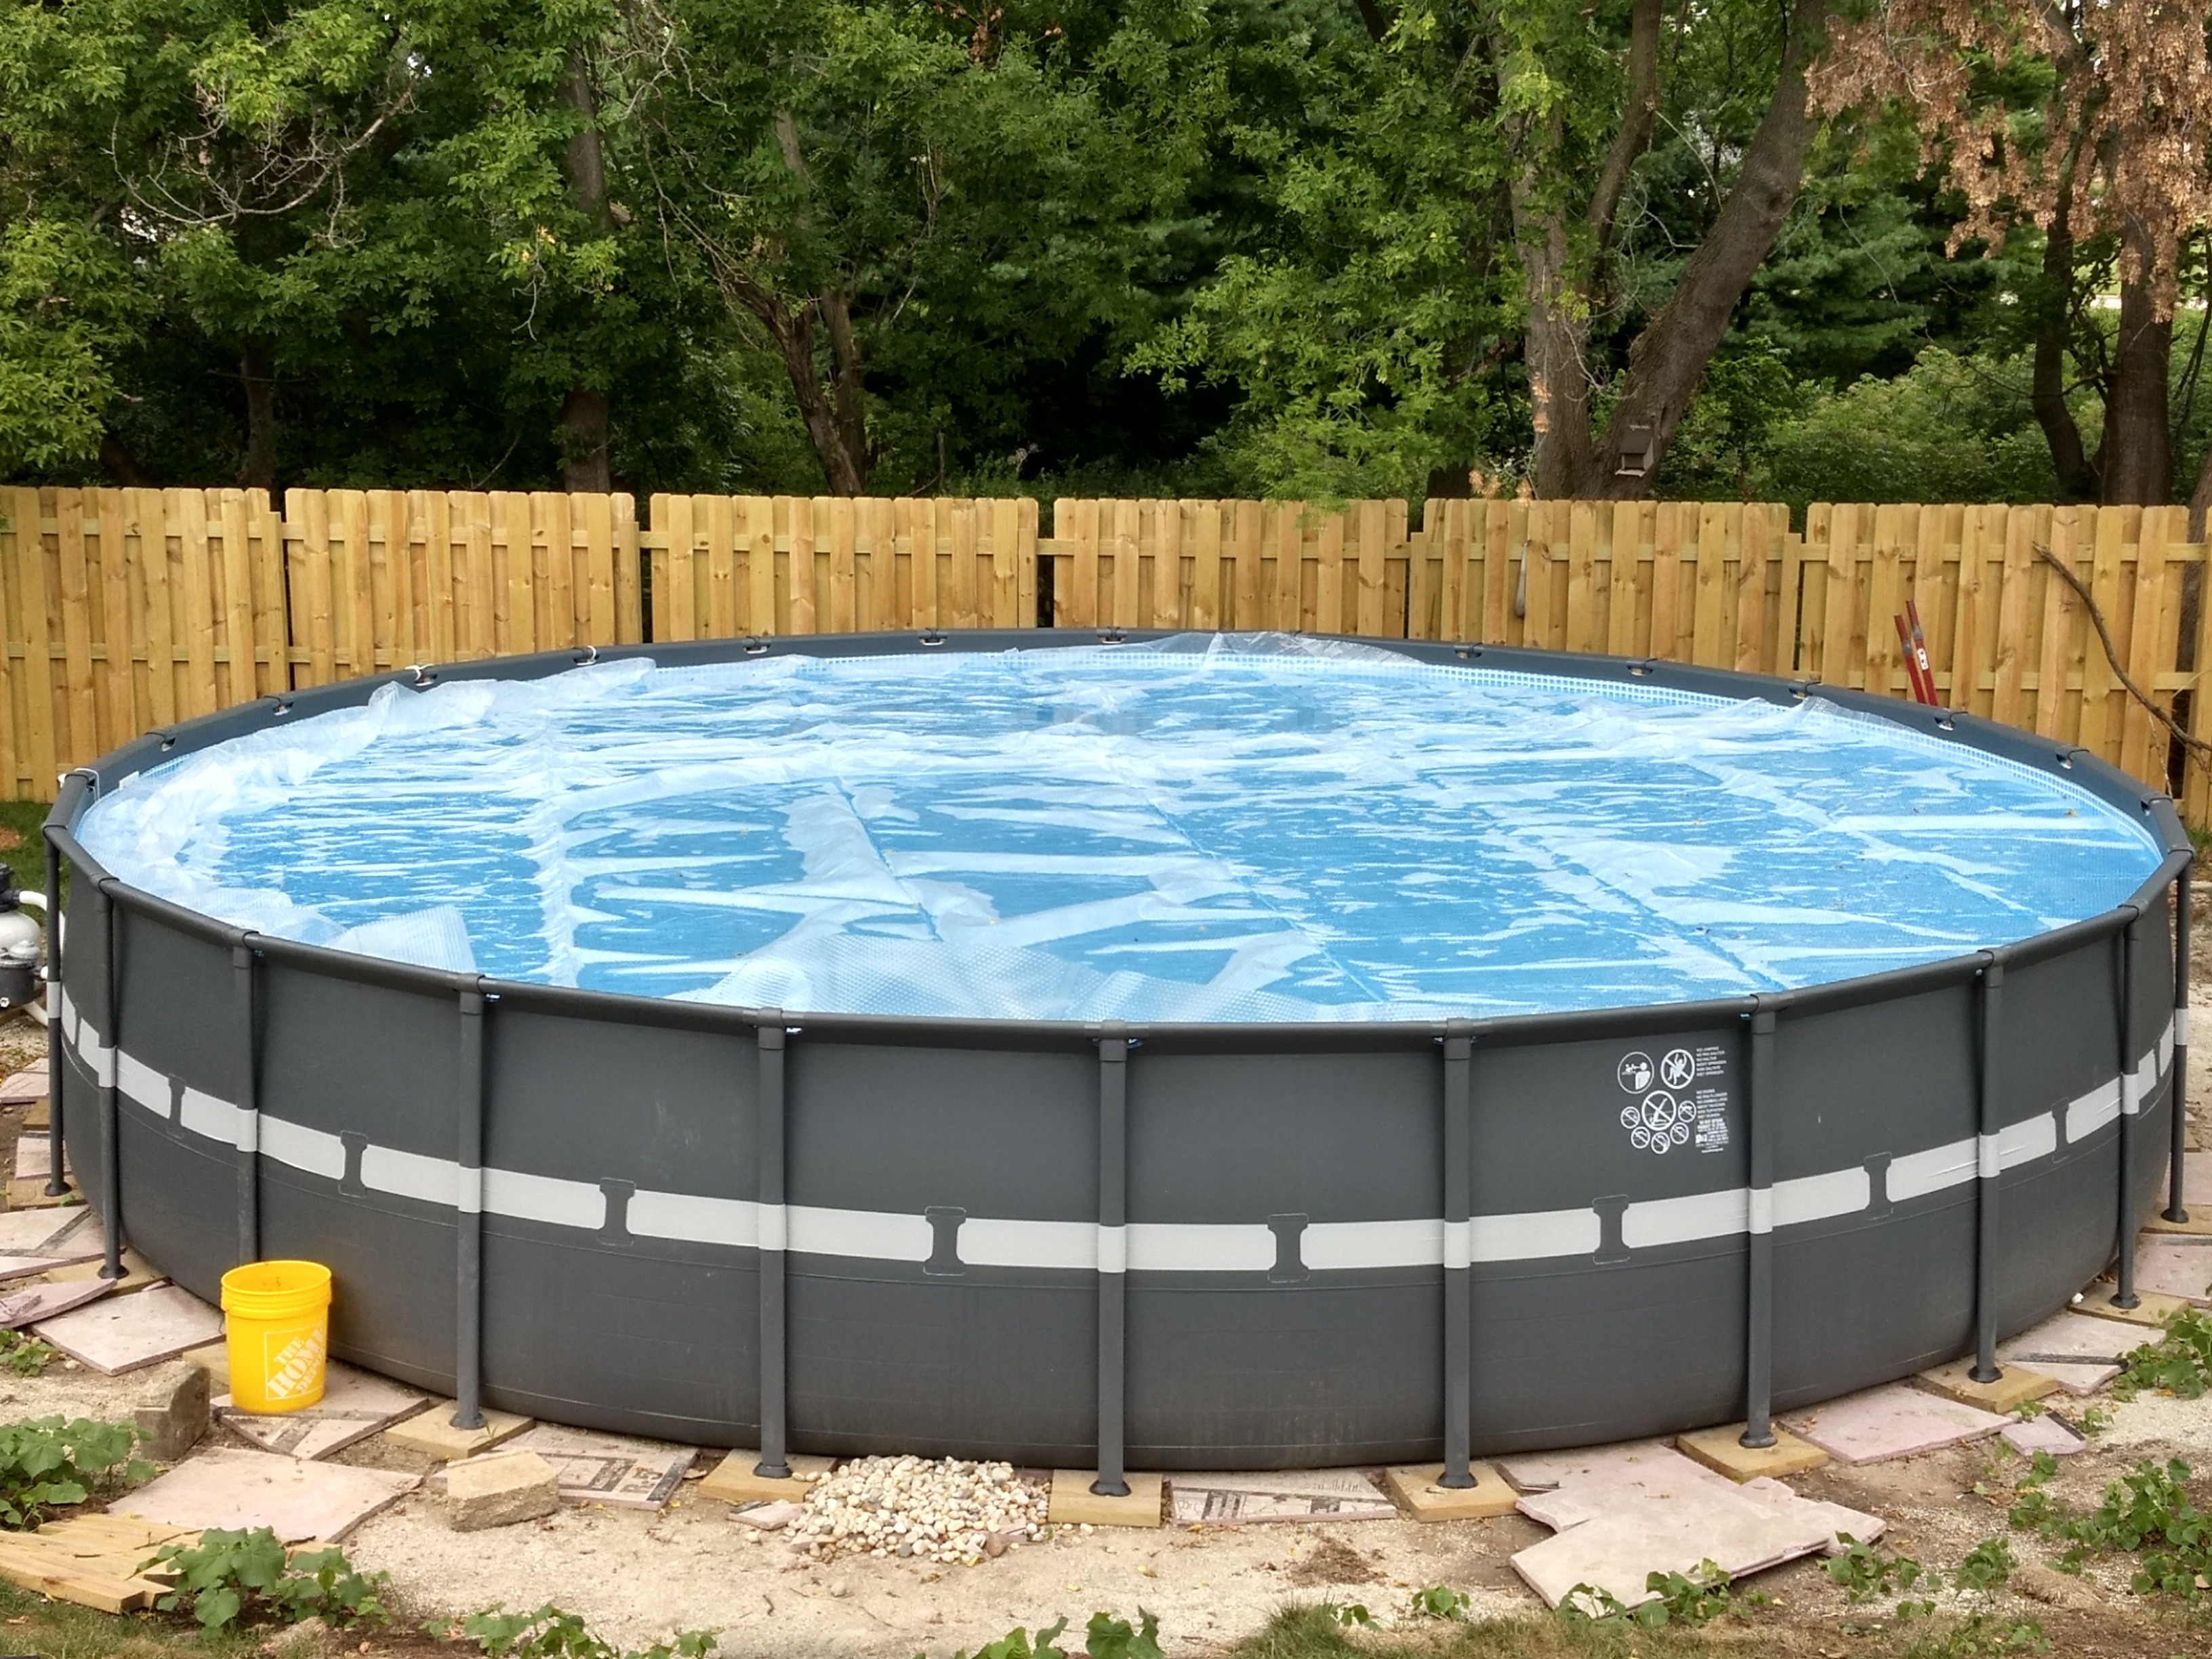
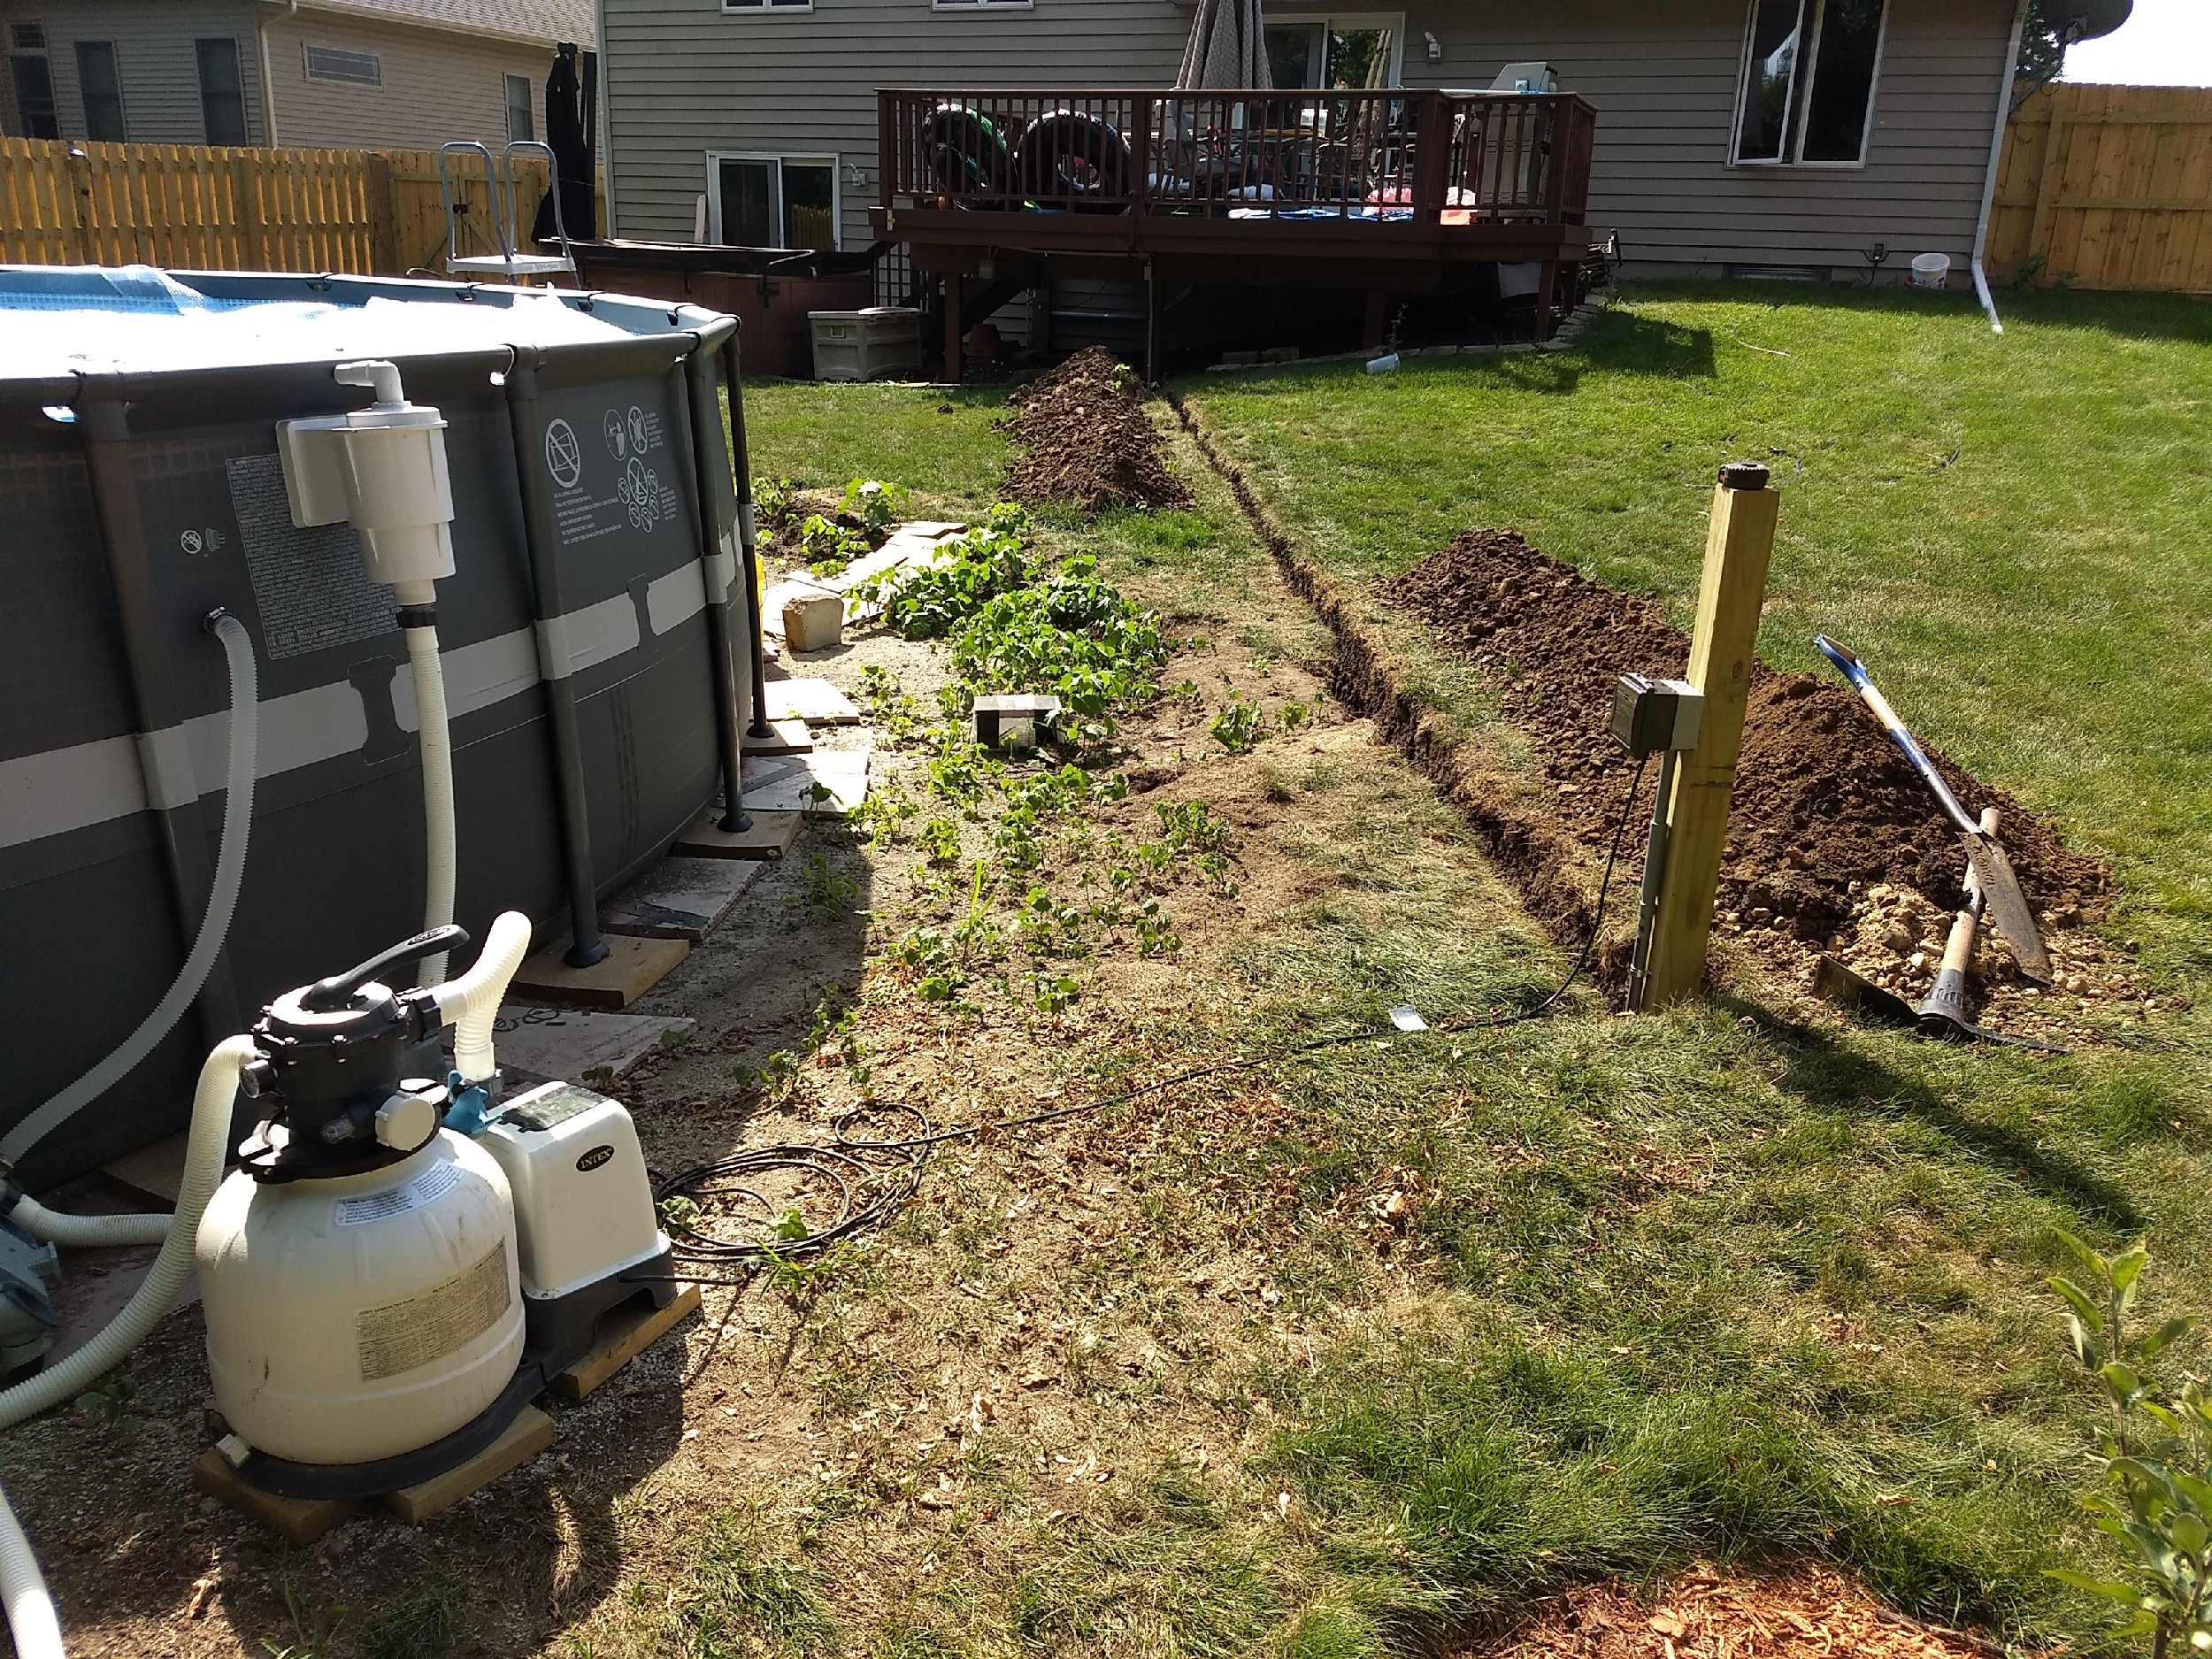
In other news, still no landscaping going on, as you can see. Off to the side I'm currently digging a ditch for electrical install, the electrician will be here Wednesday. He'll be installing a few outlets on a post, which will mean I can finally get the power cord out of my yard. If I get lucky maybe I'll have the landscaping done by winter...
Problem I've discovered is that it works best with a circular water circulation from the pool pump, so the leaves get pushed around and have a chance at getting sucked in. But if I run my Intex auto cleaner, which is a pressure side cleaner, the water doesn't circulate in a circular pattern, and so the skimmer is much less effective. So as the cleaner is picking up leaves, it's making the skimmer less effective which means more leaves will end up on the bottom! Should have gotten a robot...
In other news, the temp dropped drastically last night as a front moved through. The high today is 69, and will slowly work back up into the 80's at the weekend, but the water was already down to 72 and would drop further if I left it. So I finally dragged out the solar cover I bought a month ago. That was a pain to get on without getting in the pool. Should have thought to put it on yesterday evening when I was in the pool. I may try to build or buy a cover reel at some point. I'll trim the cover in the next couple weeks.
In other news, still no landscaping going on, as you can see. Off to the side I'm currently digging a ditch for electrical install, the electrician will be here Wednesday. He'll be installing a few outlets on a post, which will mean I can finally get the power cord out of my yard. If I get lucky maybe I'll have the landscaping done by winter...
Wobblerlorri
Bronze Supporter
- Apr 16, 2019
- 2,010
- Pool Size
- 4024
- Surface
- Vinyl
- Chlorine
- Liquid Chlorine
Solar cover seems to be helping retain heat like it's supposed to...imagine that! Pool water is currently 75 and rising, even though it was a high of 69 on Monday and 72 yesterday, with lows around 50.
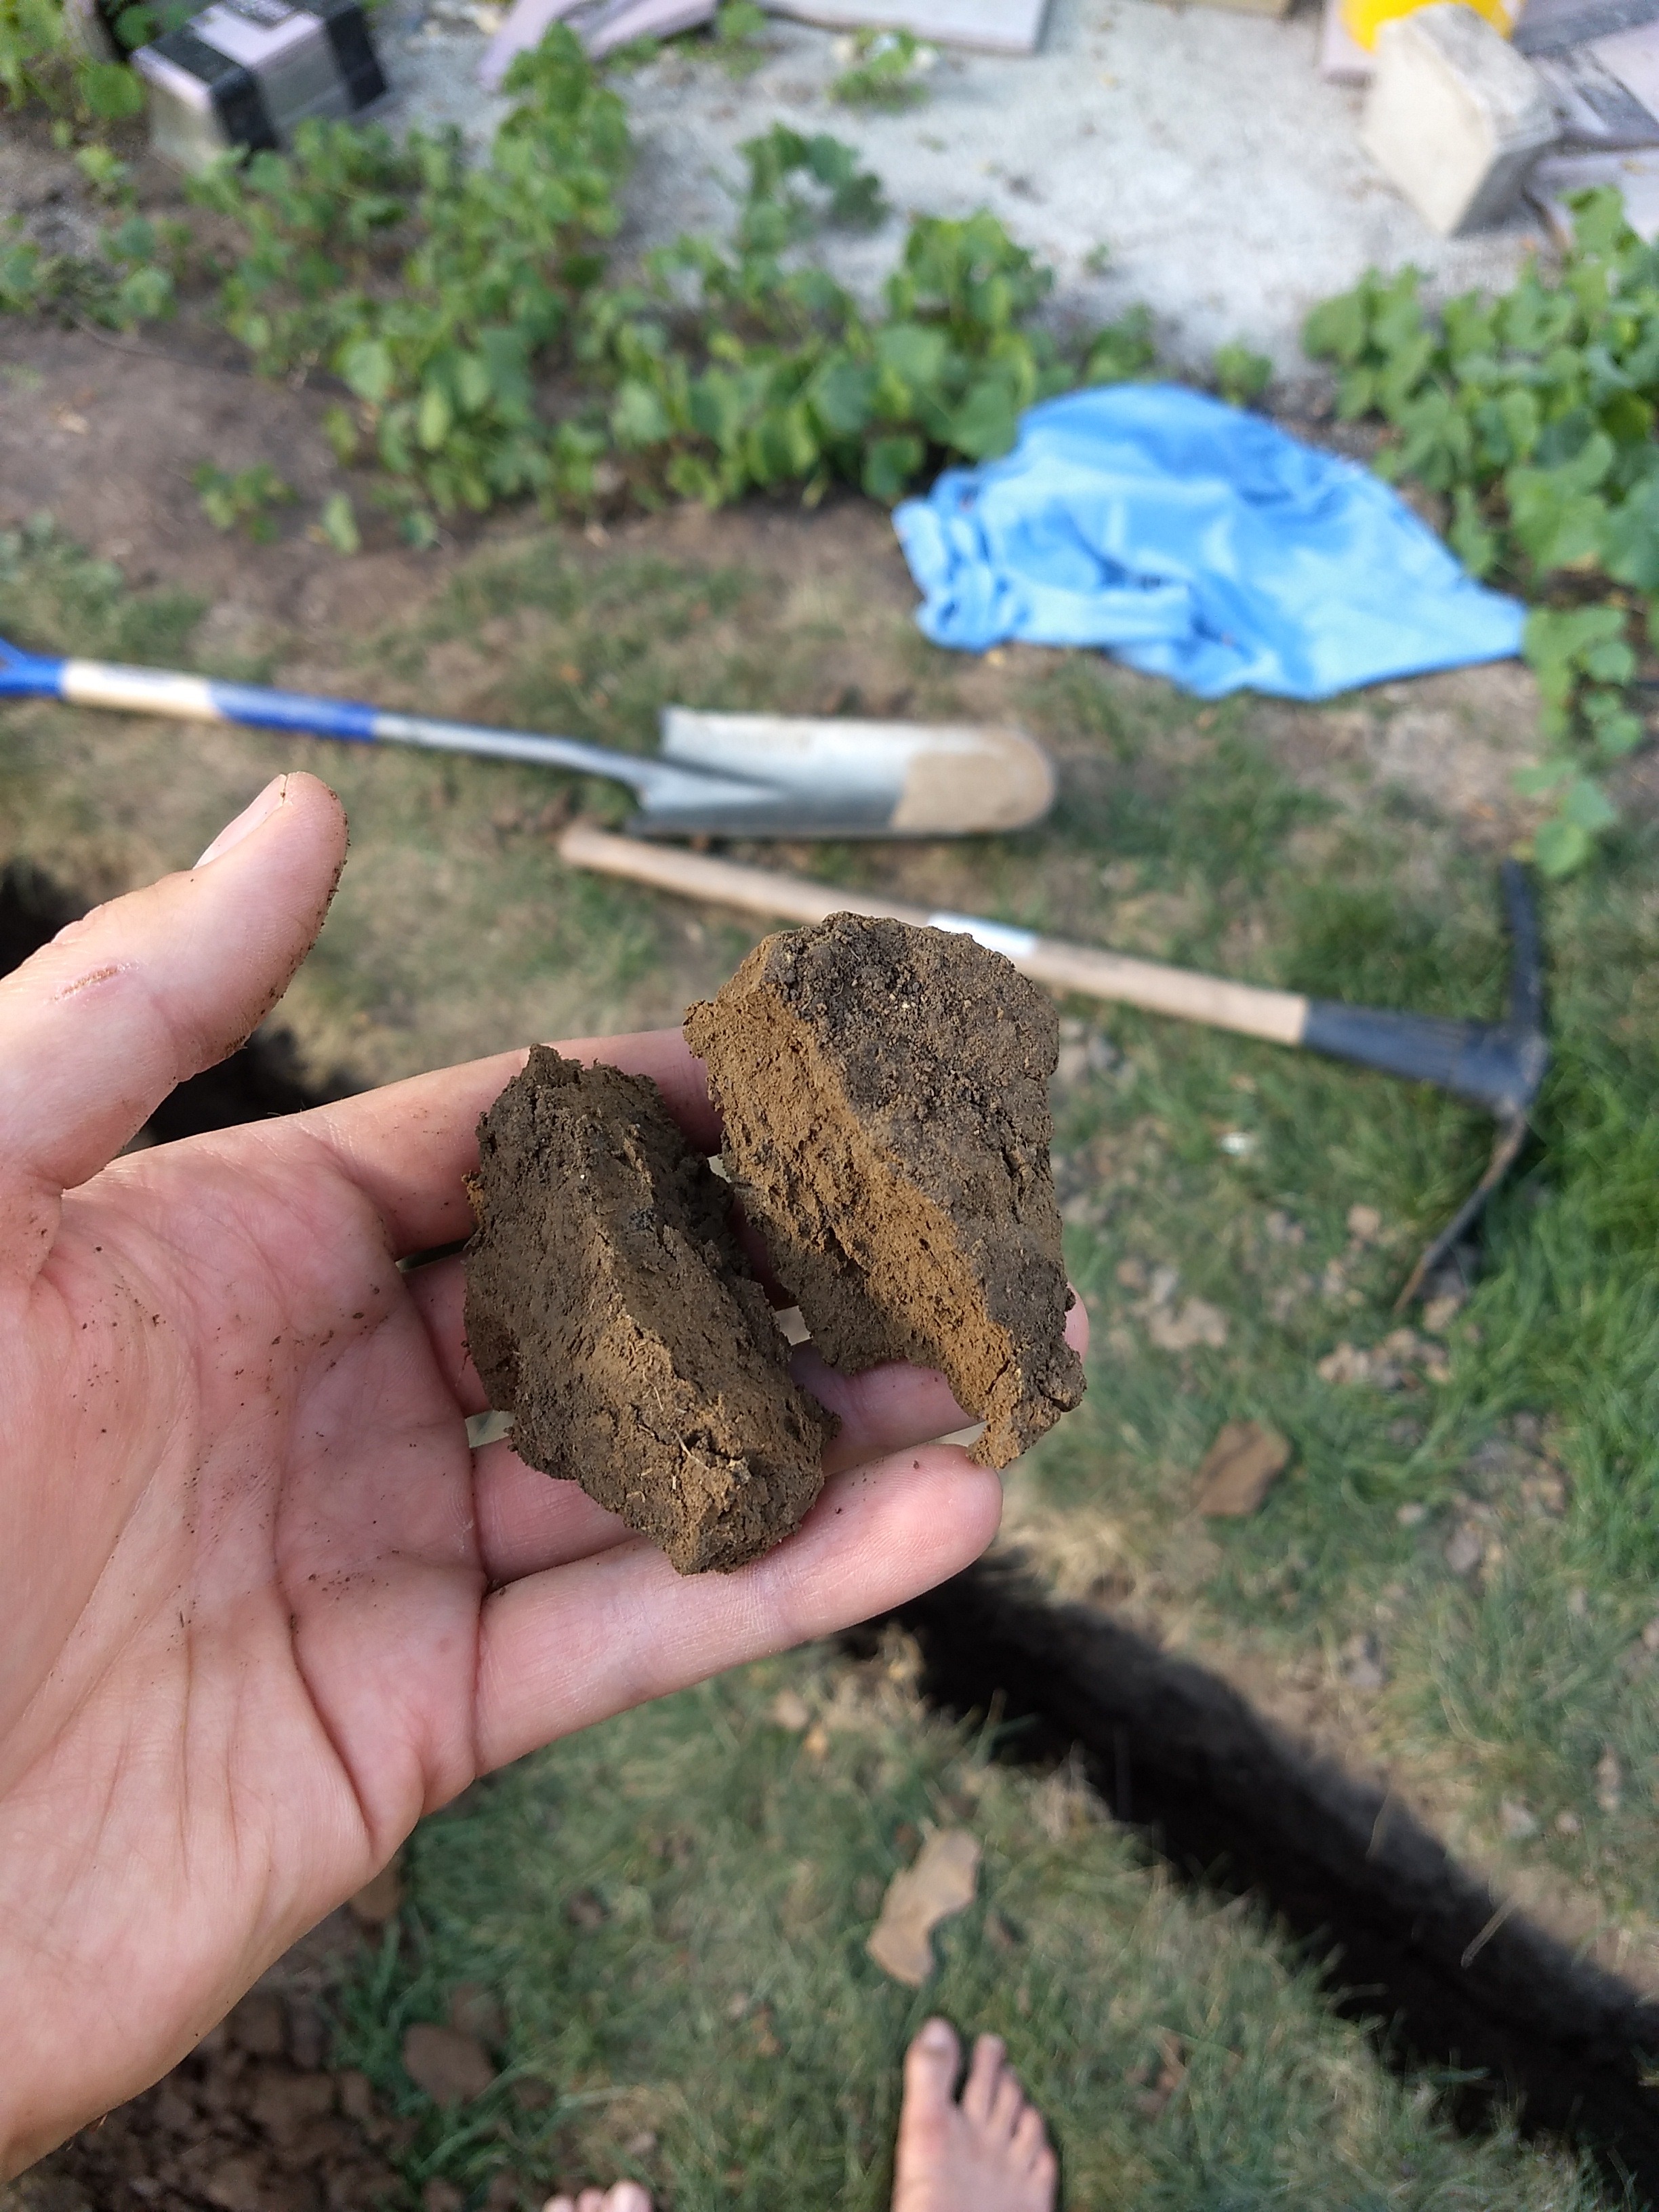
Like when I was in college and finished HW and projects the night before they were due, I spent 3.5 hard hours yesterday finishing the electrical trench yesterday before the electrician showed up today. The top part, to the depth of my spade, was easy. But turns out digging a narrow trench to 20" isn't as easy as I thought. I had to use a mattock as a spade can't dig that deep, and I hit solid clay in the bottom 4-6", which wasn't fun.
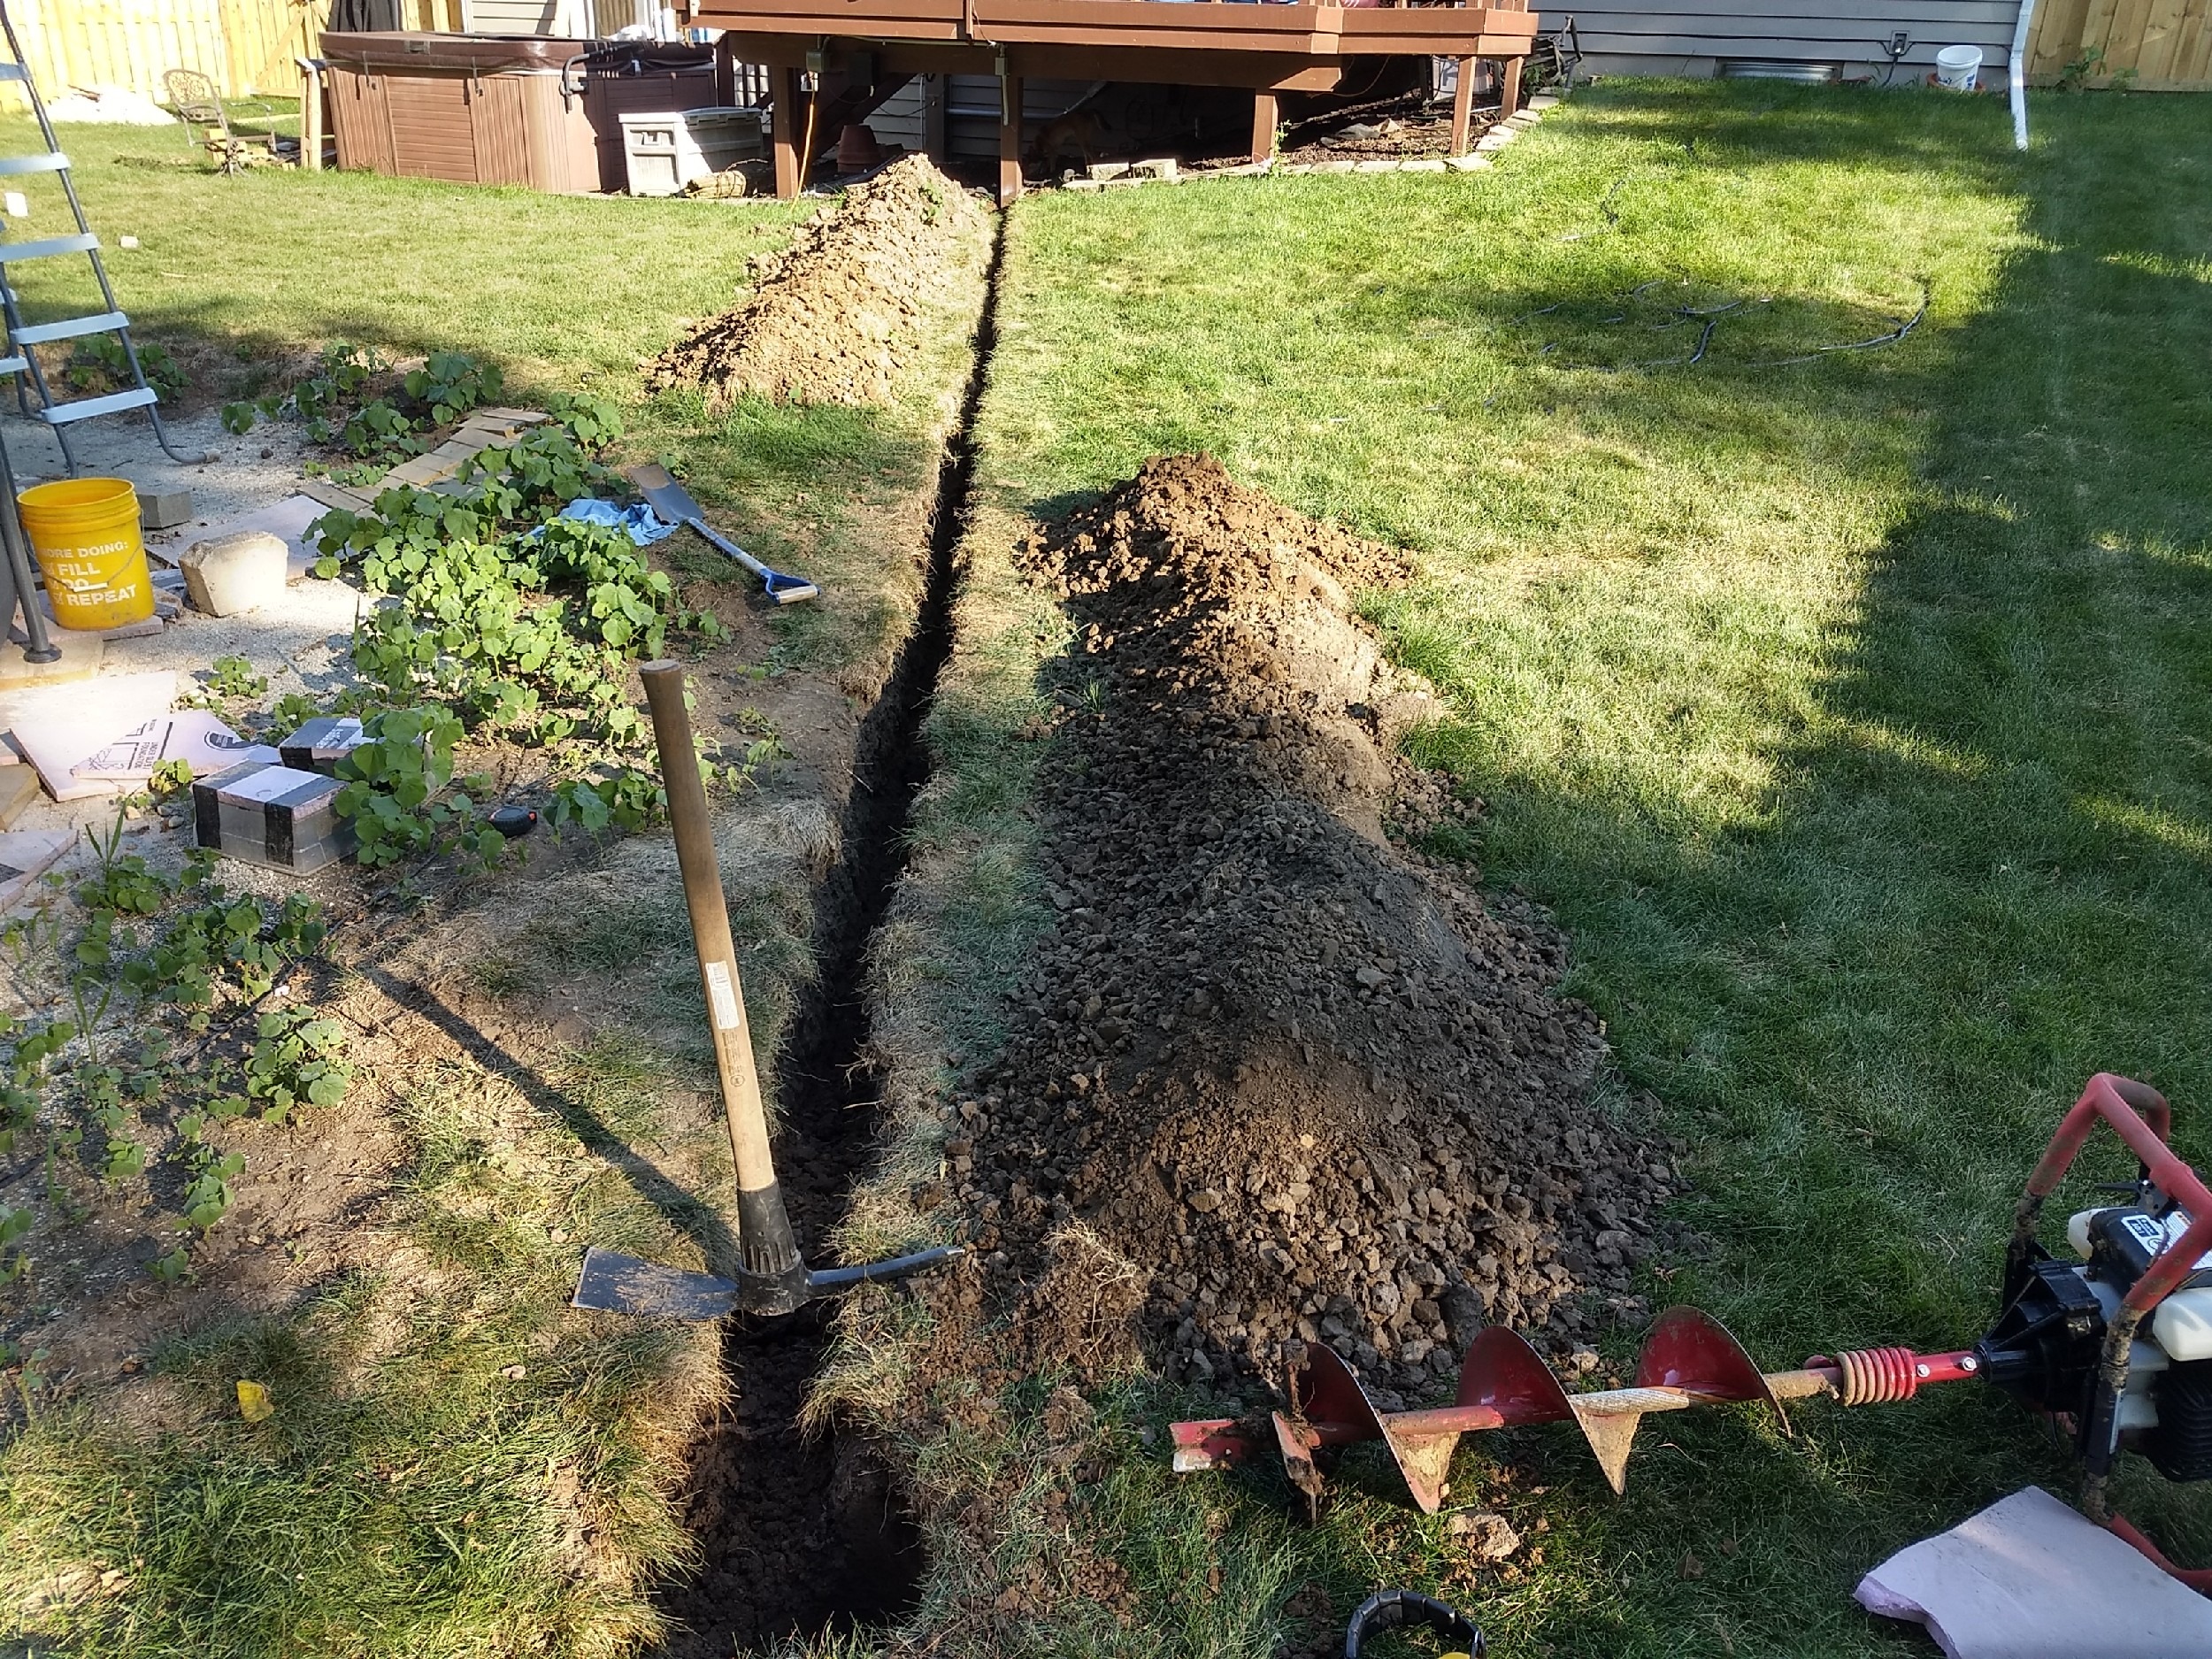
Not only that, but the clay was pretty dry, which made digging even worse. If I had more time I would have got it wet and let it soaked in to soften it up slightly.
The electrician connected the conduit to the stub he left on the deck the last time he was out here, however long ago that was. He had already wired to that point from the main panel but just hadn't connected it to a breaker yet.
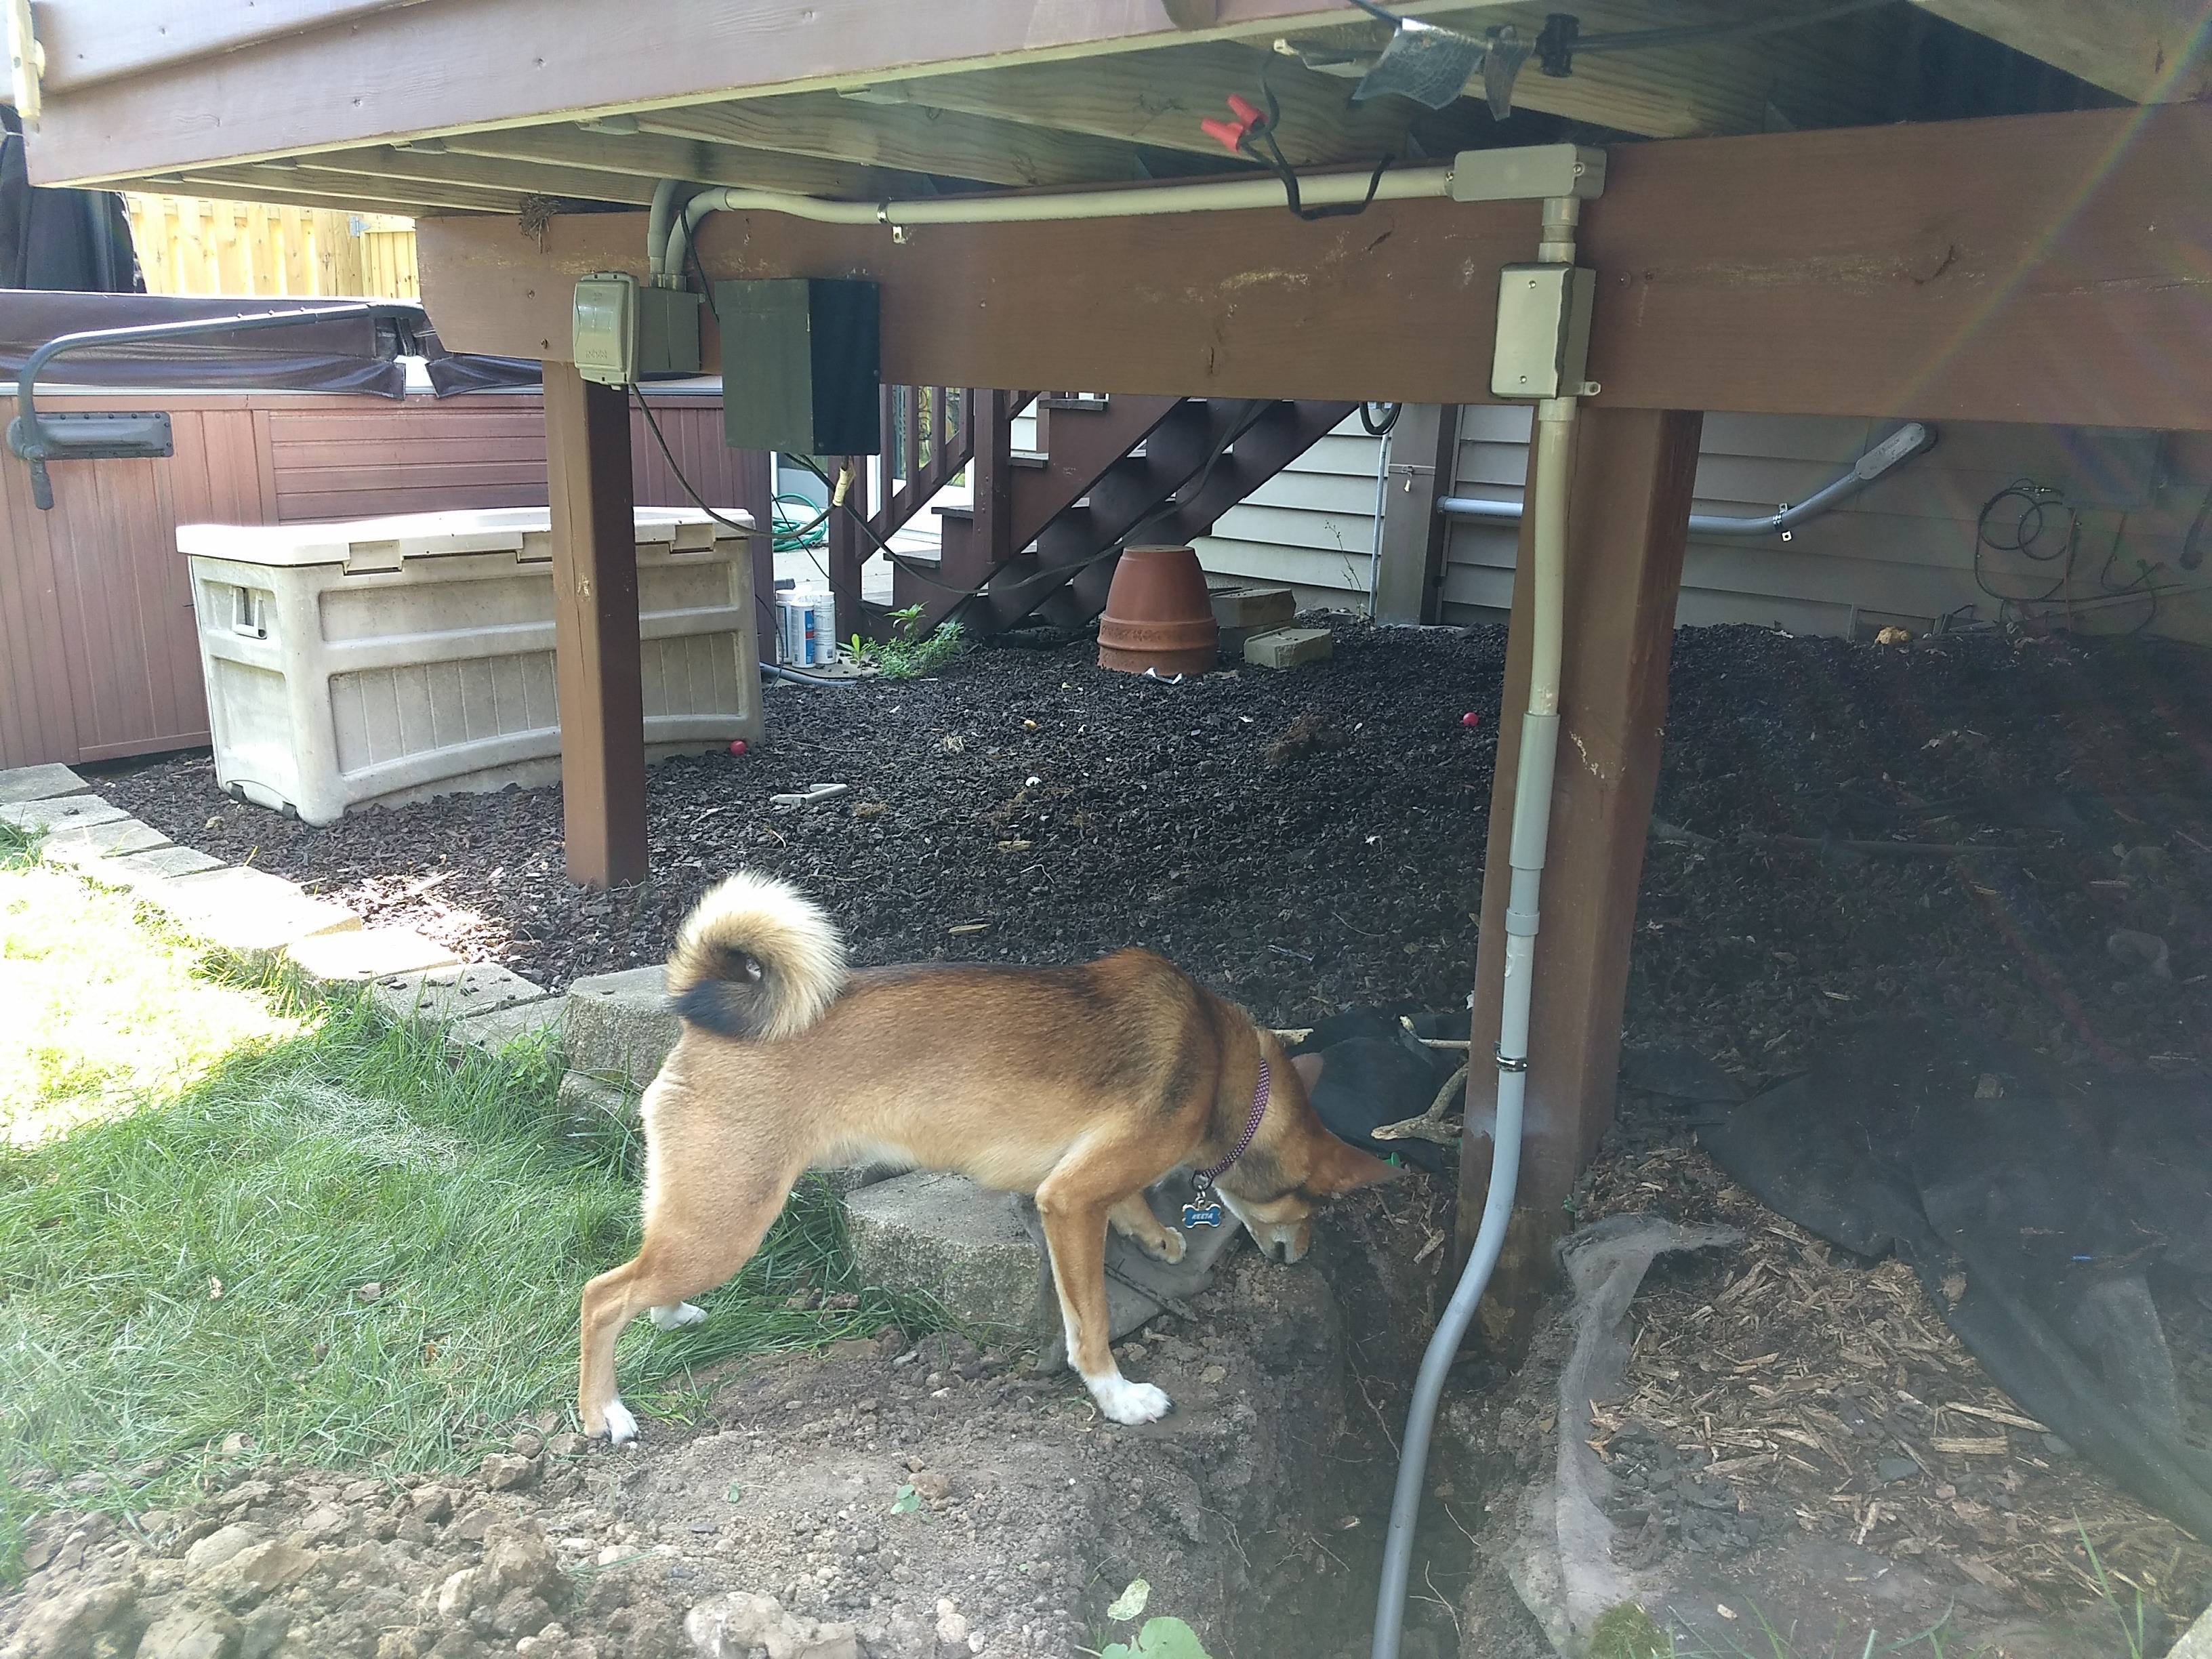
Here's the completed trench project. Well, besides backfilling and planting grass that is.
The outlet is a quad, mounted in a large heavy duty outdoor rated box. With a little sawing on the bottom to extend the cord opening, the OEM GFCI plug from Intex fit and allows the cover to close.
The left duplex is on a different line than the right one, and a different side of the circuit breaker panel. This means not only do I have two separate 120 V outlets but that there's 240 V available. Not only that but it's run in 3/4" conduit so the wires themselves can easily be upgraded or added to (as opposed to something like direct bury NM cable). So lots of flexibility for future expansion, especially if we ever upgrade to a hard sided pool. This was a goal I had in mind, so I didn't have to dig another trench if we ever upgraded pools or equipment.
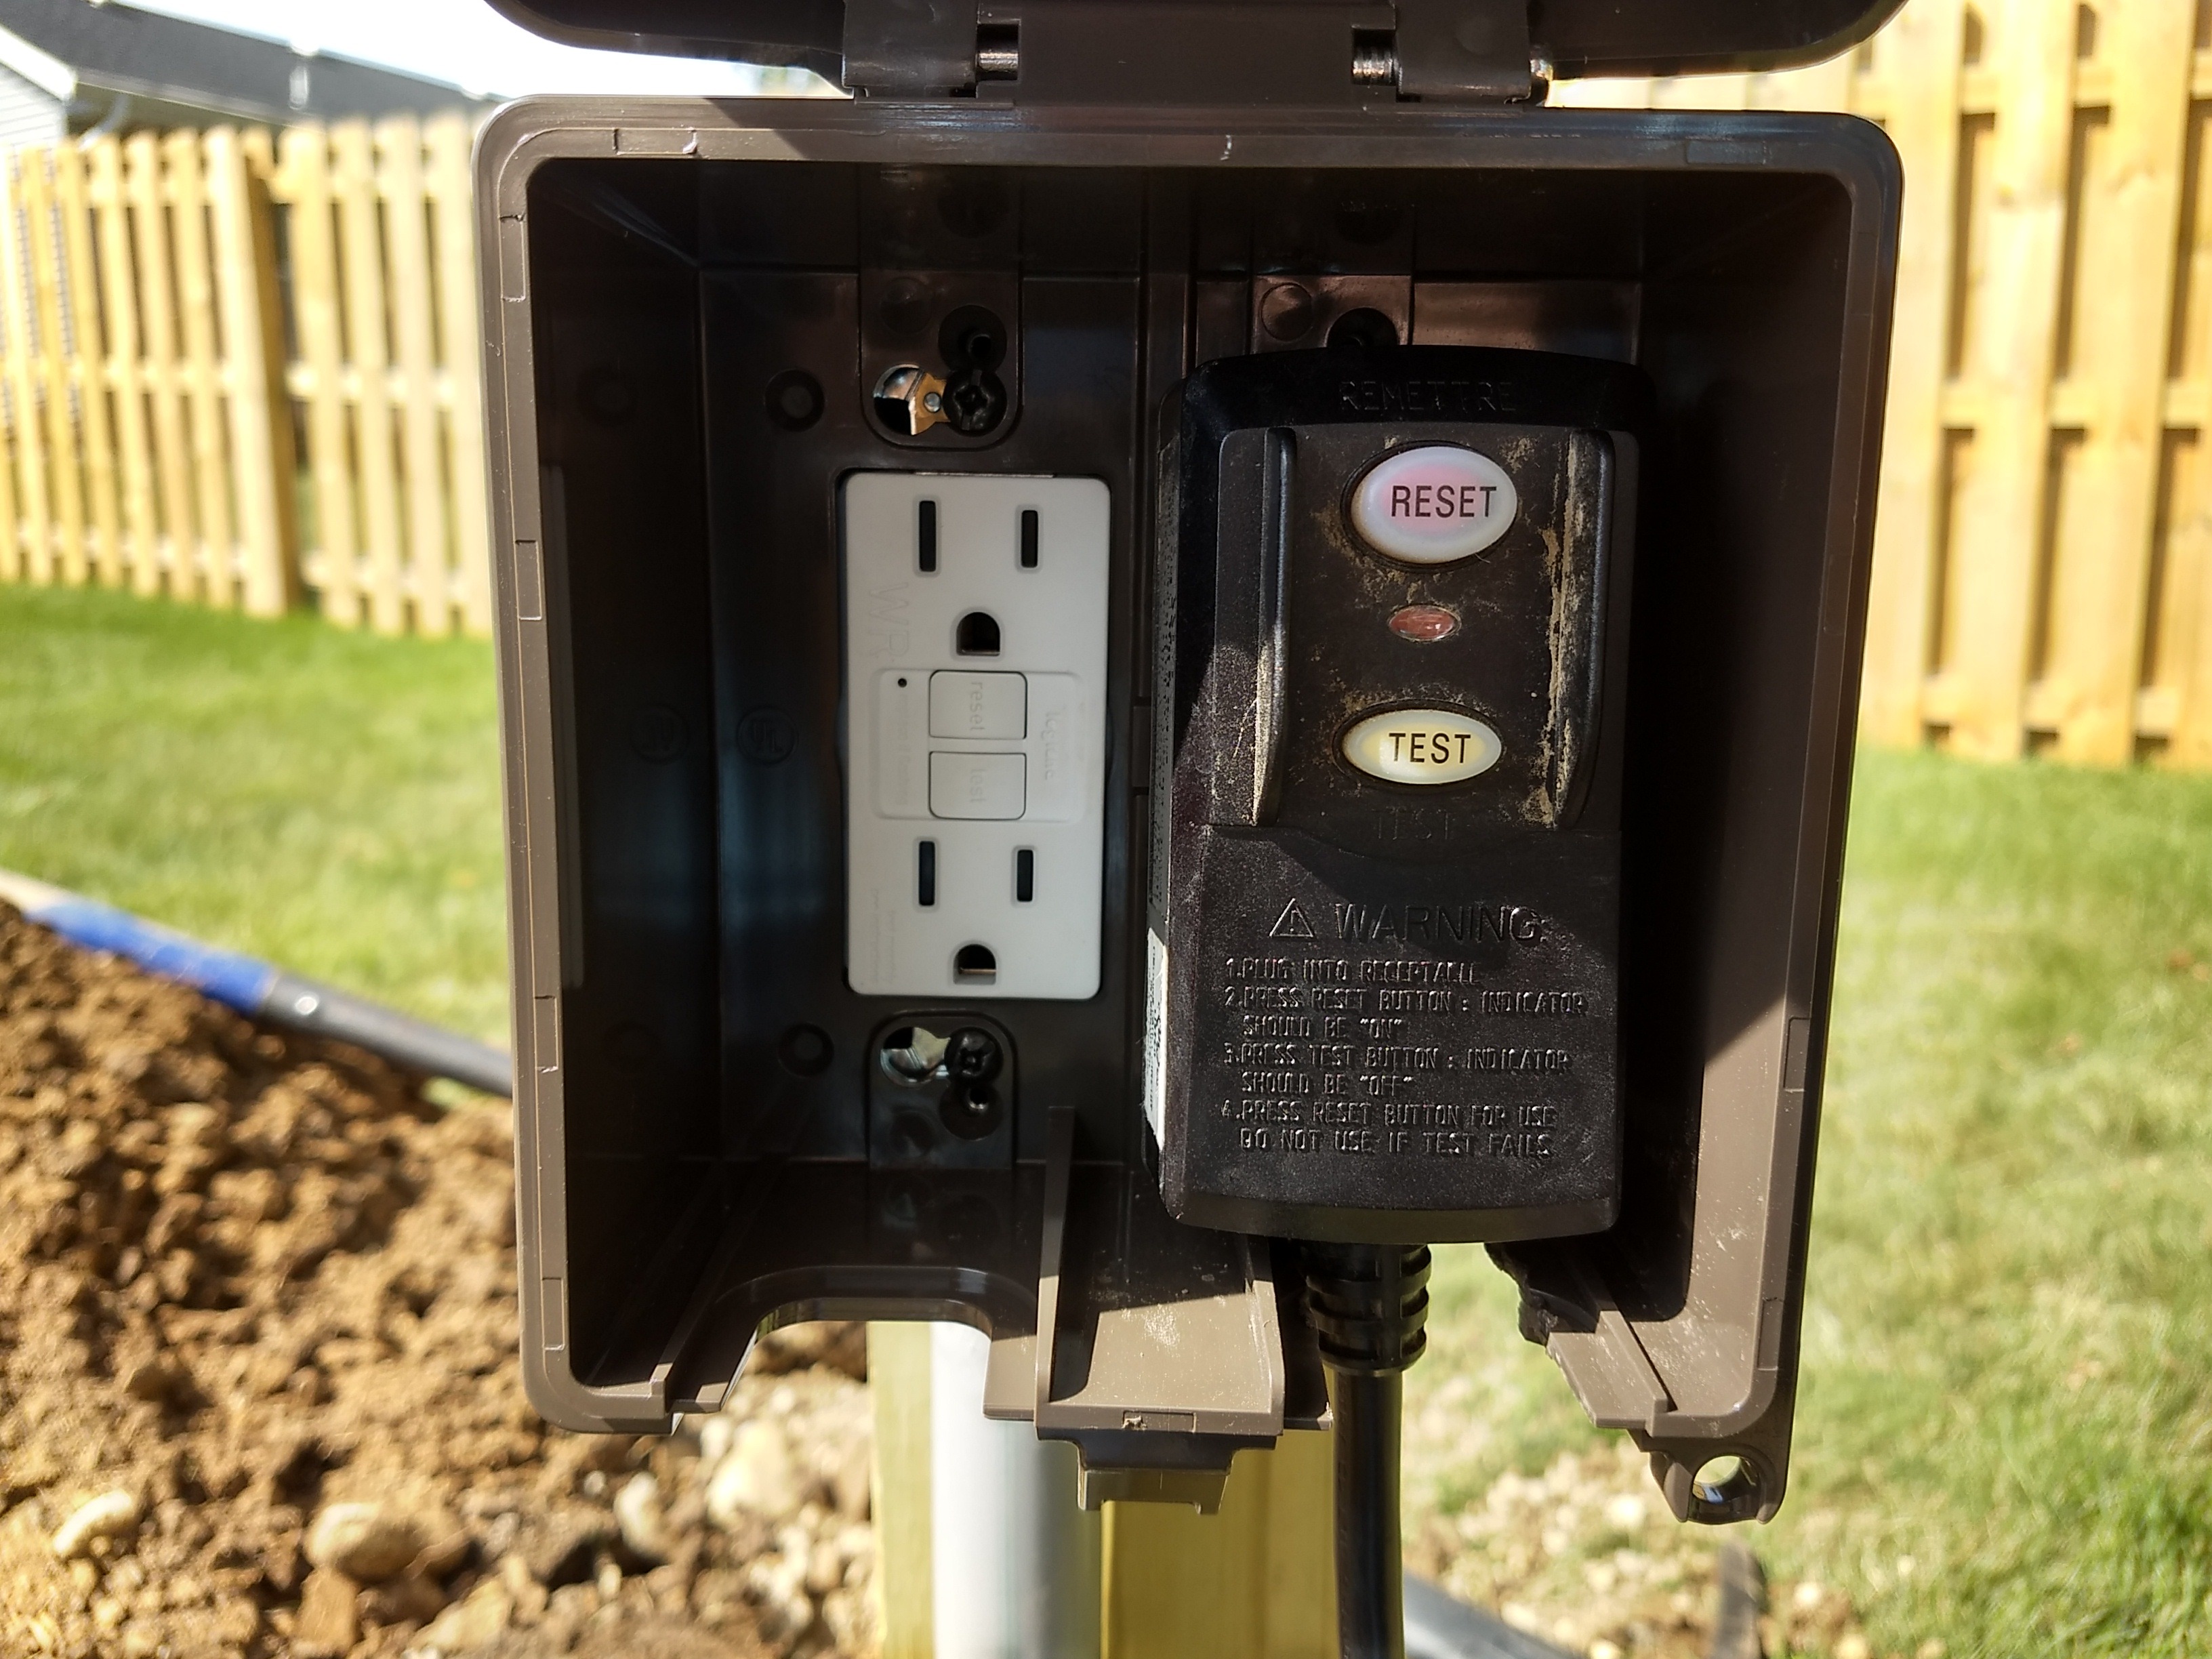
Electrical inspector will be out at some point to inspect these outlets, after which I'll call and have the pool inspector come out to do the final pool inspection so I can get the permits closed out.
It doesn't feel like it at times, but I am making progress, slow as it is. After wrapping up the permits, I have no excuse left for not working on the landscaping around the pool finally, so stay tuned!
Like when I was in college and finished HW and projects the night before they were due, I spent 3.5 hard hours yesterday finishing the electrical trench yesterday before the electrician showed up today. The top part, to the depth of my spade, was easy. But turns out digging a narrow trench to 20" isn't as easy as I thought. I had to use a mattock as a spade can't dig that deep, and I hit solid clay in the bottom 4-6", which wasn't fun.
Not only that, but the clay was pretty dry, which made digging even worse. If I had more time I would have got it wet and let it soaked in to soften it up slightly.
The electrician connected the conduit to the stub he left on the deck the last time he was out here, however long ago that was. He had already wired to that point from the main panel but just hadn't connected it to a breaker yet.
Here's the completed trench project. Well, besides backfilling and planting grass that is.
The outlet is a quad, mounted in a large heavy duty outdoor rated box. With a little sawing on the bottom to extend the cord opening, the OEM GFCI plug from Intex fit and allows the cover to close.
The left duplex is on a different line than the right one, and a different side of the circuit breaker panel. This means not only do I have two separate 120 V outlets but that there's 240 V available. Not only that but it's run in 3/4" conduit so the wires themselves can easily be upgraded or added to (as opposed to something like direct bury NM cable). So lots of flexibility for future expansion, especially if we ever upgrade to a hard sided pool. This was a goal I had in mind, so I didn't have to dig another trench if we ever upgraded pools or equipment.
Electrical inspector will be out at some point to inspect these outlets, after which I'll call and have the pool inspector come out to do the final pool inspection so I can get the permits closed out.
It doesn't feel like it at times, but I am making progress, slow as it is. After wrapping up the permits, I have no excuse left for not working on the landscaping around the pool finally, so stay tuned!
Know what it *does* feel like ???? That you are saving a boat ton on labor costs VS hiring out all the projects. Make a mental tally anytime it seems slow. Let’s see........ I’ve spent $7k but not $22k. *happily goes back to whistling while chipping away clay*It doesn't feel like it at times, but I am making progress, slow as it is
Well that's totally true!Know what it *does* feel like ???? That you are saving a boat ton on labor costs VS hiring out all the projects. Make a mental tally anytime it seems slow. Let’s see........ I’ve spent $7k but not $22k. *happily goes back to whistling while chipping away clay*
There is a compromise though, as in I could have rented a walk behind trenching machine and gotten this trench done in about 30 minutes to an hour, plus an hour to pick up and drop off the trencher, for $200. Still cheaper than hiring it out, but much less physical labor. If I have to trench again (such as for a gas line if we decide to add a heater at some point), I'll be renting a trencher! This is what I'm talking about:
Last edited:
Thread Status
Hello , This thread has been inactive for over 60 days. New postings here are unlikely to be seen or responded to by other members. For better visibility, consider Starting A New Thread.