First Time Pool Owner - Sacramento, CA

CantSwim2047

0
Silver Supporter
Apr 13, 2017
91
near Sacramento, CA
Hi everyone. I'm about to become a first-time pool owner and currently have a pool under construction. I've appreciated seeing other members pools, as well as all the information I've read here so far, and wanted to share my own project.

It will probably take a few posts to catch up on all the progress made so far.

-- EDIT to add pool/equipment specs --

- 15,000 gallon gunite pool
- Finest Finish Microfusion pebble finish in "French Grey", w/ abalone shell
- Jandy 2.0 HP ePump
- Jandy AquaPure PLC1400 salt water chlorine generator (rated for up to 40,000 gallon pools)
- Jandy CL/CV-460 cartridge filter, 460 square foot filter
- 2 Spectrum360 mutli-color LED lights
- Jandy iAqualink automation / remote control
- Tiered raised bond beam, tiled, with 2 24" sheer descents
- 3 returns, 2 venturi skimmers

-- END EDIT --

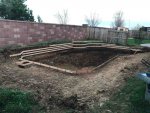
First, here are some "before" pictures of the backyard. The house is newer construction and backyard is a "clean slate" for landscaping. Pictures were taken right before excavation so the outline of the pool has already been marked.
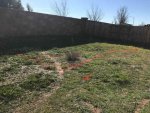
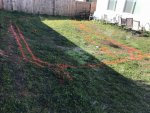
Backyard-Before1.jpg

Backyard-Before2.jpg

- - - Updated - - -

After several revisions, here's the design we settled on.

We don't have a large backyard, so we're trying to be efficient with our space without just putting in a rectangle.

Note that 36" raised bond beam is incorrectly marked. That section is actually 30". The raised bond beam is used to retain dirt as the yard has a bit of a slope as you approach the back wall.


PoolPlan.jpg
 
Awesome looking design! Bet you can't wait to get in it!

No kidding! My wife has been pushing for a pool since we bought the house 2 summers ago. I was reluctant but eventually gave in. We signed the contract last October and have just been waiting for our dig day since, so it's exciting to see it all coming together now.

- - - Updated - - -

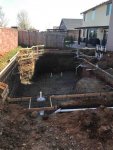
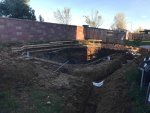
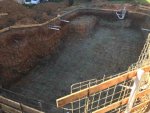
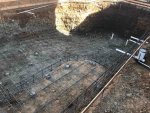
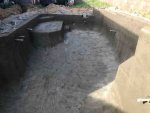
March 19, 2018 - Dig Day!

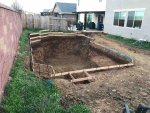
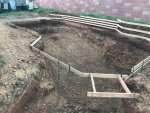
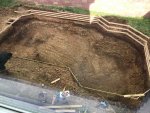
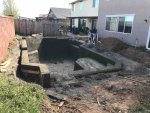
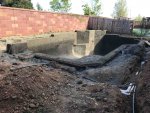
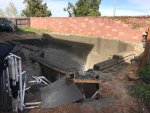
Rough shape of the pool is established. Front yard is pretty trashed (as expected) from the excavation equipment. Some decent rains hit just following excavation but no major cave-ins.

After the pool and raised bond beam was framed out, it was noted that the wall height was just on the edge for retaining the slope. At this point the decision was made to raise each section of the wall an additional 6", partly to keep dirt from entering the pool, plus my wife liked the idea of the tiled wall being more of a feature of the yard.

2 - Excavation1.jpg

2 - Excavation2.jpg

2 - Excavation3.jpg

2 - Excavation4.jpg
 
Nice use of the yard and very neat shape of the pool! Good call on raising the back wall up. Sure don't want rain to wash dirt and stuff into your pool!

The one thing I noticed in the plans and a couple of pics-the 2nd skimmer. The one by the bench of the front, right of the pool when looking from the house. That scares me. If someone were to sit in front of it with the pump on it could suck in their hair or bathing suit material or........I see in last pic above that it's box is not there anymore. Hoping someone re-thought this and moved it. Better safe than sorry.

Kim:kim:
 
Nice use of the yard and very neat shape of the pool! Good call on raising the back wall up. Sure don't want rain to wash dirt and stuff into your pool!

Thanks! Really, I think it could have worked without raising it, but my wife got excited at the thought of more wall, more tile, and raising the sheers up another 6" so they are more easily seen through the living room window.

It was kind of a close call though on the original 12" section. But by bumping it to 18" we had to bump the rest up 6" too to keep the look.

The one thing I noticed in the plans and a couple of pics-the 2nd skimmer. The one by the bench of the front, right of the pool when looking from the house. That scares me. If someone were to sit in front of it with the pump on it could suck in their hair or bathing suit material or........

Hmm, I hadn't thought of that (first time owner). The pics are out of order and that 2nd skimmer is definitely there. I will discuss with the builder. Perhaps we can valve down the flow through that skimmer a bit. That kind of defeats its purpose, I suppose, but safety is most important as I have 3 young children. Or perhaps they will have another idea.
 
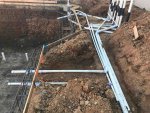
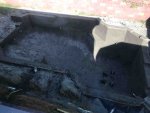
March 26-27, 2018 - Rebar and Rough Plumbing

After several days of some decent rains, the project is proceeding forward. However, the hole has accumulated a bit of water in the deep end.

On the 26th, the rebar crew showed up and began pumping the water out. They came back the next day and completed the rebar. The plumber also arrived, trenched the yard, and completed all rough plumbing.

3 - RebarPlumbing-1.jpg

3 - RebarPlumbing-2.jpg

3 - RebarPlumbing-3.jpg

3 - RebarPlumbing-4.jpg

3 - RebarPlumbing-5.jpg
 
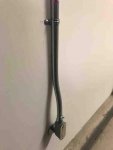
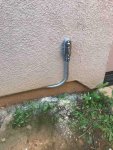
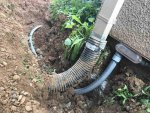
March 28, 2018 - Rough Electrical

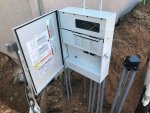
Rough electrical is in! Conduit ran from behind main breaker panel, along inside of garage, and then popped out to exterior, then mostly hidden until it runs into the trench to sub-panel. Install looks nice and clean, in my opinion, and will be nicely hidden once trenches are filled.

Sub-panel is in. First additional power outlet is in Rough work for pool lighting in place.

4 - Electrical1.jpg

4 - Electrical2.jpg

4 - Electrical3.jpg

4 - Electrical4.jpg
 
Hate that but..........safety first! Let us know what they have to say. I bet they could move it over away from the bench!!!

They certainly can't. I'm still catching up on posting pics but gunite is already in.

I should have posted for feedback prior to construction. :(

- - - Updated - - -

March 29, 2018 - Inspection #1

Pool passes first permit inspection with no issues.

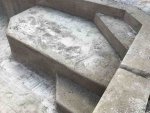
April 2, 2018 - Gunite!

Gunite is in! Watering it twice per day, per builder and gunite sub recommendation.

5 - Gunite1.jpg

5 - Gunite2.jpg

5 - Gunite3.jpg

5 - Gunite4.jpg

5 - Gunite5.jpg

5 - Gunite6.jpg
 

Enjoying this content?

Support TFP with a donation.

Give Support
LOVE the steps!!!

All is not lost. We can/will come up with something to keep the kids safe. Let me ask you a couple more questions-what is the pipe sticking out under that skimmer? Can you take and share a pic looking at the bench/skimmer area from the back side of the pool? I have ideas!

Kim:kim:
 
LOVE the steps!!!

Thanks! They go well with the 45' degree angles of the pool shape as it is. We also have a few 45' angles on the first floor of the house, so the pool is kind of an extension of the house in that way. My wife even picked out pool trim tile to match the furniture we have downstairs.

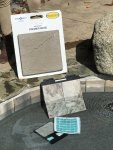
TileSelection.jpg

Premier beige concrete, waterline/raised bond beam tile, 2 rows of 1x1 trim tile on all steps and benches, and a sample of the "french grey" pebble finish.

Let me ask you a couple more questions-what is the pipe sticking out under that skimmer? Can you take and share a pic looking at the bench/skimmer area from the back side of the pool? I have ideas!

Too dark for pictures right now, but that's the return pipe for the skimmer. The skimmers they put in are venturi skimmers. You push return water through the bottom of the skimmer and somehow it sucks more water in the top. Doesn't make sense to me, but here's a link to the manufacturers website: Renegade Venturi In-Ground Skimmers .

Initially, I was concerned about debris in the pool (hence the 2nd skimmer) and they suggested upgrading the included single skimmer to a venturi skimmer for an additional cost. I declined, opting for two standard skimmers. However, when the 2nd revision of the plan came back the skimmers had been changed to venturi for some reason. I don't know if they will work any better (and I have no context for "normal" anyway), but it's hard to pass up a free upgrade.
 
Oh I like that skimmer system! I will have to poke around and see if anyone else has used them and what they think!
I did a quick search and didn't find too much. Some people said they worked fine, a couple people said the return pushed debris away from the skimmer. We'll see.

I will wait on the pic before I throw my idea out there.

VenturiSkimmer.jpg
 
Sorry it took so long to get back to this. I wanted to work on it when I had some time to really think about it. Here is what I came up with. Make a PVC "wall" that will keep bodies/people from sitting there. It can be removable. I would fill the PVC with concrete to make it stay in place. Here is a sloppy paint job to show you want I am thinking:

VenturiSkimmer.jpg

Notice I put little legs on it to help keep it upright. You can paint it to help make it blend in better. Safety first!

Kim:kim:
 
Here is what I came up with. Make a PVC "wall" that will keep bodies/people from sitting there. It can be removable. I would fill the PVC with concrete to make it stay in place.

Interesting. I initially wondered if doing something similar in concrete/gunite would work, but I like the "removeability" of this idea! Thanks!

- - - Updated - - -

April 10, 2018 - Tile

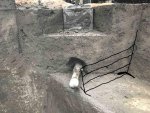
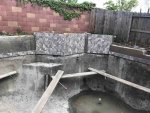
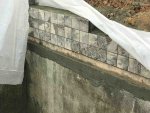
Tile crew arrived. First they appeared to build up the areas to be tiled with concrete. Then applying the waterline and wall tile began. The crew will be out another day to finish tile.

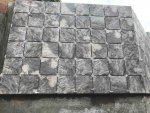
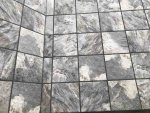
The wall/waterline tile is "Ridgeline Silver".

6 - Tile1.jpg

6 - Tile2.jpg
 
April 10, 2018 - Tile (Day 2)

Waterline and wall tile installation completed. Tile grouted with grey grout. Underwater "hand hold" along wall sections complete.

7 - Tile3.jpg

7 - Tile4.jpg


Dolphin S300i from Marina Pools delivered. It's going to be a while yet before it gets put to use, but that didn't stop me from opening the box and setting it up!

7 - S300i.jpg
 

Enjoying this content?

Support TFP with a donation.

Give Support
Thread Status
Hello , This thread has been inactive for over 60 days. New postings here are unlikely to be seen or responded to by other members. For better visibility, consider Starting A New Thread.