Just bought a used Esther Williams 15x30 Carousel

Since we are slow moving this morning I'll post a few pics. The cumulative affect hit me this morning and the snooze button was hit.

IMG_4351.jpg

IMG_4352.jpg

Center line string helped keep us square with the world. No reason to be terribly precise other than just making sure we didn't shift later on.

IMG_4353.jpg

IMG_4354.jpg

Radius end blocks dug and buried. Oh joy.

IMG_4355.jpg

Buttress end blocks dug, leveled and buried. Notice they are turned from previous picture where we had dug then. Noticed our error when reviewing instructions later that day and the change was made. This was before we leveled and filled them. Would they have been OK turned 90 deg? Probably. Are they all 100% perfect? No. The end radius are the ones we made sure that were spot on. The buttress end blocks are level (mostly) but most importantly the spot that the end hits is level with the side frame. Using a spot level on the blocks we kept the bubble in the circle of the center but probably not dead center. Especially the last couple done at midnight.


IMG_4357.jpg

Shade helps!

IMG_4360.jpg

IMG_4361.jpg

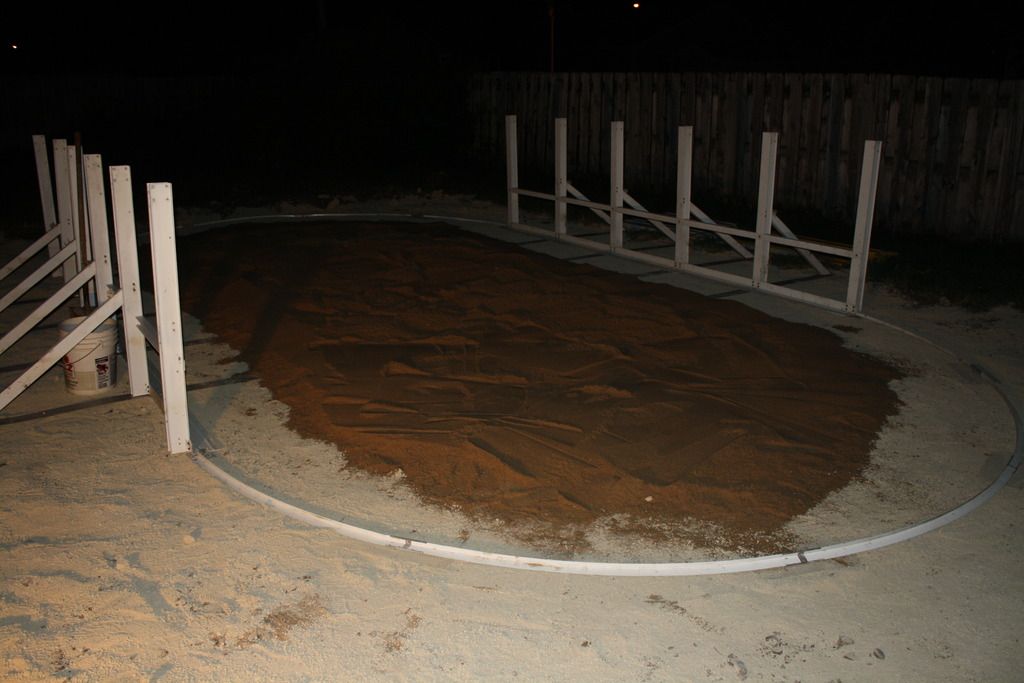
Frame up. Then did some house keeping and cleared the area around it for ease of work.
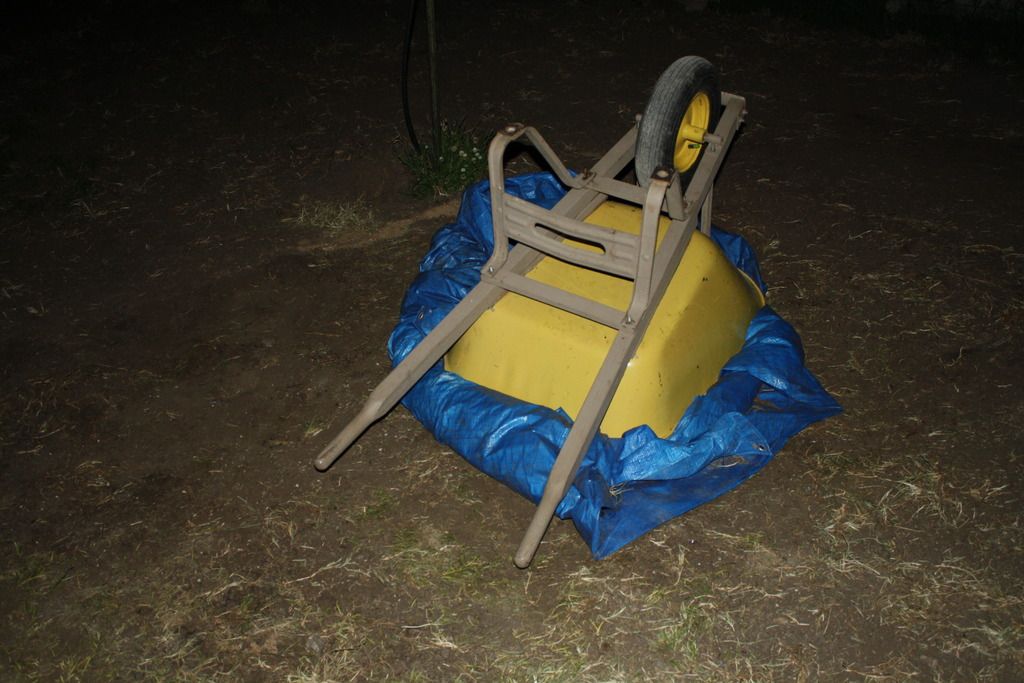
IMG_4362.jpg

Wheelbarrow ramp.

IMG_4363.jpg

This pile.


Turned to this in 3 hours.


Ta da!!

Time to go put up the walls! Trying to decide on my skimmer location. It's gotta go in an end per instructions. Previous owner had it under the patio which is fine as long as the basket can come out. Protection from UV's and harm under there. Otherwise I plumb it to the far end. The electric and pump pad are at the patio end.
 
Last edited:
(I'm adding the last 2 pictures from post #61 above here. As I was going through and uploading pictures to here on TFP due to the whole Photo bucket thing I could now only include 10 pictures in a post and there were 12 I needed to change. I'm throwing the last 2 pictures of post #61 here so they can for sure be viewed by all)

IMG_4365.jpg

Turned to this in 3 hours.

IMG_4366.jpg

Ta da!!

(Now this post as it was)


So the wall went up. Spreading sand and decide to measure depth of sand and see if we have too much or what. Something is not clicking in my head. The wall measures about 48".??? We were told it was a 52" deep pool. I even have the ad printed out. I NEVER MEASURED THE POOL TO CONFIRM THE DEPTH!!! I took their word for it. Nowhere in the instructs does it say differently. So here I sit with a 52" liner. Geez. I'm the champion of triple checking so I don't have these problems. I prefer to be the master of my own destiny. I'm going to be ill.......... Maybe the liner company can shorten the liner. It's better than being too short and needing a longer side. I don't what is involved with putting the bead on it. I know one thing involved $$$. LOL I'm sure during the height of pool season I'll be a long way out. Shower and bed here I come.
 
Last edited:
Awesome work you've accomplished there! It's inspiring to see people actually making progress. I'm still doing ground work after dark, because of heat, humidity, and rain during the day.

I'm so sorry about your liner issue :( I can totally imagine how you feel. If the company can't shorten it could you get some coping strips and just convert it to an overlap? I think I saw someone do that but don't hold me to it I've read so much these last few months. Though I do realize that doing that would suck since you ordered a beaded liner you obviously want the look/convenience of it.

Good luck!
 
According to this site you can use it as an overlap.

Liner Conversions

I don't know how the decking is set up on your pool but if it would be a real PITA to take your top rails back off in the future for a liner change our if you just want to do the beaded liner eventually he says you can re-install the bead receiver over the coping. Then ideally all you'd have to do hopefully many years from now, is cut the liner out and hang a new one in the bead receiver.

I wish I could remember where I saw someone else talking about doing this so I could link you to it.
 
OH NO Chief!! :( I have to say I would not have checked it either with them previous owner saying and typing the size like they did :hug:

YES you can use a beaded liner like an overlap liner with it being "too big"......the extra will be what allows you to over lap it. I would NOT cut anything until you have it installed as it is only 4 inches difference so you might need every little bit you can get to go over the the wall.

LOOK what I just found!! This companies site is AWESOME! This talks about how to use a beaded liner as a overlap liner!

How To Install a Beaded Pool Liner for an Oval Pool - INYOPools.com


As for a replacement bead.........I don't think so........the bead is a part of the liner. It is like it is "welded" on.

Can you send it back? I know that means more time until you get to jump in your pool but they will take it back I bet...you will have to pay for shipping and that could be pretty penny but doable.

Let us know what you decide to do.

Kim:cat:
 
I guess the Big Guy upstairs thought I needed a break from the sun. I'll investigate those links. Not having an overlap style ever I'm not familiar with what is on top of the wall the liner goes over. Is that the coping strip? I'll have to spend some time investigating once I get caught up here at work. If I can't get my liner re-beaded from the company who made it then I don't have much to lose using as an overlap. I'd just have to buy coping strips. I'll call liner co soon.
 

Enjoying this content?

Support TFP with a donation.

Give Support
Over lap liners need plastic coping strips and then a,metal stabilizing bar goes over top of that. That's how over lap liners work.
 
I talked to my liner supplier. He will call me back. His inclination is to get me another liner. (My $$ and time of course. It was not their fault) Their overlaps are 54" plus a little. 52" might be OK. I'm more concerned about the end radius uprights which are part of the wall. A picture would explain better. The overlap would not be just up over in those spots. They are like legs. He acted like they could shorten mine but freight 2 ways and the labor to fix it might not make $ sense. We'll see. It will get done when it's supposed to get done. In the grand scheme of things of the world this is really minor. Have a big water hole to play in is a privilege and not a "need." No lesson to be learned. I knew better but didn't do better. I do hate being a dummy though.................
 
So we have this guy...........

IMG_4358.jpg

sitting up on the power pole at the rear of the yard. Doing the cooing that doves do.
Day 1: Awww look! He's keeping us company and talking to us!
Day 2: Hey! He's back! Kinda noisy though.
Day 3: Look he's back. Oh joy. Does he ever shut up?
Day 4: Really? You again? Shoo!!
Day 5: When does dove hunting season start?

To add insult to injury we can hear the neighbors out in their pool splashing and having a good 'ol time. Nice. Come home today and a swim store's catalogue was in the mail. Quite humorous.
 
Last edited:
Darn i'm sorry to hear that you hafta but a new liner! Be sure to put the current one up for sale on Craigslist or something so you can recoup some of the cost atleast.


Fingers crossed you'll be floating soon, tell that dove he don't wanna mess with you. If you can beat the ground into submission as thoroughly as you did, how's a noisy dove gonna fare?

.
 
Last edited:
Long time no see!! The trials of life have kept me busy this week. So where was I? Oh yeah. I was mere minutes from despair and anger and didn't know it yet.

IMG_4367.jpg

IMG_4368.jpg

Don't suppose you can tell which panels got the pre assembly cleaning?
IMG_4369.jpg

Almost there!

IMG_4370.jpg

IMG_4371.jpg

These illustrate why trying to use my liner as an overlap could prove troublesome.

IMG_4372.jpg

Here I have all the wrought iron chairs with any weight in use along with a few plastic with blocks on them. All uprights on the sides have c clamps positively holding this together. Attempting to be "Riding the storm out". It rode thru a strong one the other night.
New liner on order. And YES I did measure length and width while confirming wall height. I'm going to be smoothing small dirt areas around the area which I get tired of tripping on. Also I'll buy and steal from the stash plumbing to have this quickly hooked up. Till then!
 
Last edited:

Enjoying this content?

Support TFP with a donation.

Give Support
Thread Status
Hello , This thread has been inactive for over 60 days. New postings here are unlikely to be seen or responded to by other members. For better visibility, consider Starting A New Thread.