First, thanks in advance to everyone who contributes their time and knowledge in helping others like myself with this process that can sometimes seem overwhelming. As the thread title says, we are about to start the process of building an inground gunite pool north of Houston. We are about to contact some builders to get some quotes but depending on the bids, I am also considering an owner build. I have some construction and contracting experience but have never built nor even owned a pool before. The below specifications and criteria are just best practices that I have researched here and other places, and from previous construction experience. That said, I have nerve built a pool and ANY guidance and/or recommendations would be greatly appreciated.
POOL:
Size: Free form ~43’ Long X ~21’ wide In Ground Gunite
Perimeter: ~116 Linear Feet
Volume: ~36,000 Gallons
Surface Area: ~765 Sq. Ft.
Depth: 4’ shallow to 8’ deep with a sloping transition of 1’ depth per 3’ horizontal
Plumbing: 2 skimmers, 1 main drain, 1 dedicated vacuum inlet, 6 main pool returns (1 plumbed to chiller), 6 returns to weeping wall water feature, 2 overflow, 1 fill line
Plaster: TBD - Pebble Sheen Black Onyx or Stone Scapes Black Mini or Similar dark pebble
Coping: Oklahoma Flagstone or similar
Pump: Pentair IntellliFlo VSF
Filter: Pentair Clean and Clear 520 Plus (Cartridge)
Sanitation System: Pentair IntelliChlor IC60 Salt Cell Generator
Chiller: Glacier GPC215 ?? (still debating whether to go with chiller or not)
Lighting: (4) Pentair MicroBrite Color LEDs facing away from house
FEATURES:
~19 linear feet of 6” tall raised beam faced with waterline tile
~27 linear feet of small boulder weeping wall water feature set into coping and waterline
(1) diving boulder set into coping
~8’ long cove bench in shallow end and ~8’ long bench in deep end
(2) umbrella sleeves to be set into coping / bond beam
STEEL SPECS:
Bond Beam – #4 Rebar 4-Bar Box Beam
Rebar extending through sides of beam at decking locations
Floor and wall – #4 Rebar on 8” Centers. With extra vertical steel at deep end??
Rebar to be located 3” above bottom of 8” thick floor and centered in the 8” thick wall shell
Skimmers wrapped in rebar for support
GUNITE SPECS:
4,000 psi min design strength / minimum 6 bags of cement per yard
Minimum 14” wide X 12” tall bond beam
Walls & Floors: minimum 8” thickness
Any “rebound” will be discarded and not used in any way
All excess and overspray to be removed from job site
PLASTER / PEBBLE SPECS:
Pebble Sheen Black Onyx or Stone Scapes Black Mini or Similar dark pebble
Max water-to-cement ratio of 0.48
No calcium chloride added
Any plaster splatter on waterline tile to be cleaned with damp towels vs. sprayed water
Gunite shell to be pressure washed before plaster/pebble application if dirty
Gunite shell to be cured at least 29 days before plaster / pebble application
COPING & WATERLINE TILE:
Coping: Oklahoma flagstone or similar
Coping mortar color: TBD
Waterline Tile:
Master tile magazine Rock Stream (MAS RKR 610) or Desert Canyon (MAS DS 650)
Type S mortar bed
Cementitious waterproofing agent over mortar bed
Thinset rated for continuous submersion
Waterline Tile grout color: TBD
Accent Tile: TBD (if any)
Accent Tile Grout color: TBD
Trim Tile: TBD (if any)
Trim Tile Grout color: TBD
Weeping wall water feature mortar color: Tan
Flagstone coping and weeping wall to be sealed with:
PLUMBING SPECS:
Poured Concrete equipment pad:
#3 rebar 16” OC
4” thick with thickened edges
Equipment located and spaced to accommodate future repairs
Equipment located and spaced to accommodate possible chiller and acid tank
Wide sweep 90s used to the maximum extent practical
Pad sized and equipment placed to minimize the number of plumbing 90s
All manual valves to be Pentair or Jandy Neverlube
Pump, filter, & chiller connected with unions
All plumbing runs 18” deep with 2” of clean sand below and above pipes
All plumbing run side by side horizontally and not stacked in trenches
(2) skimmers
(1) main drain
(1) Dedicated suction line for manual vacuum
A&A leafVac canister on skimmers, main drain, and dedicated suction lines at pad
(6) wall returns
(1) fill line to be plumbed and tied into timer by owner
(2) 1” overflow lines
All plumbing Sch 40 PVC unless otherwise noted
No “hard 90s” on buried pipes
Skimmers, main drain & suction line to be each separately plumbed back to pump pad with 2” sch 40 and manual Jandy valves for individual control
Wall returns placed 18” from top, each separately plumbed back to pump pad with 1.5” Sch 40 and ball valves to set relative flow rates of each return
Weeping wall water feature will have a 3-way actuated valve to switch from returns to weeping wall feature and plumbed with 2” water returns each separately plumbed all the way to the pump pad with ball valves to set relative flow rate of each water source
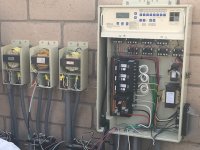
ELECTRICAL SPECS:
All buried electrical in SCH 40 conduit with sweeps
Bonding: 8 AWG bare copper with direct burial & cement rated lugs, & PB 2008 water bonding lug on return line 1’ below water line
Control Panel fed by 20 AMP GFCI at sub panel
Eaton Type 2 SPD whole panel surge protector at the pad sub panel
An additional junction box fed by 120V to be run approx 70’ from equipment pad sub panel
Permanent light and switch installed at equipment pad
EQUIPMENT SCHEDULE:
Automation System: Pentair IntelliCenter (model / kit # TBD)
Pool only (no spa) with the load center & SWCG transformer built it. Deciding between the 5 relay or 8 relay option. Depending on pricing, will probably get a kit that includes the IC60 SWG.
Filter System: Pentair (cartridge type) Clean & Clear 520 Plus (Model: 160332)
Pump: Pentair IntelliFlo VSF Variable Speed & Flow Pump (Model: 011056)
Sanitation System: Pentair IC60 Salt Cell Generator (Model 521105)
Chiller: Glacier GPC215 ?? (still debating chiller or not)
Lighting: (4) Pentair MicroBrite Color LED w. 100’ of chord (Model 620425)
Skimmers: Grey / Black body with a tan lid
Model: TBD - Pentair Skimmer Bermuda ABS for Concrete OR other similar
Still deciding between Venturi style or a traditional style skimmer
Main Drain: TBD – (2) round 36” apart or (1) channel style
Leaf Canister: A&A LeafVac debris removal canister (Model: 522538)
Returns: Directional (Model: TBD)
Valves:
(4) Jandy nerverlube 2-2.5” for skimmers, main drian, & vacuum line (Model: 4716)
(1) 3-way Jandy neverlube 2-2.5” with actuator to switch from returns to weeping wall main line (Model: 4716)
(6) ball valves in weeping wall manifold to set relative flow of each water source
Valve Actuators: Pentair or Jandy valve actuator to switch from returns to weeping wall main line:
Check Valve: Jandy 2-2.5” standard (Model: 7305) between pump and filter
Unions: (6) CMP Hi-Temp 2” MIP – 2” PVC (Amazon ASIN: B00AKMV4K)
Robot: Dolphin S200
Misc Contract Scope Items:
Equipment pad location approximately 75’ from center of pool
Pool pump will be aprox. 24” in elevation above top of pool water
Pool to be filled between 6 to 24 hours after completion of plaster / pebble
10% of contract price to be held back until completion and punch list complete
Excavated dirt can be placed on site ~150’ from dig
Electrical Sub Panel (12 CBs) already set and connected to 125 amp 240V feed at pad site
Overflow does NOT need to be tied into public sewer
Pool depth to be specified every 2 feet in drawing
City / County approval NOT needed but HOA approval is required
DECKING:
New Decking: BY OWNER
Specs: #3 Rebar on 16” centers.
Minimum 4” thick with thickened edge
Control joints max spacing lesser of 2X width or 12’
Control joint to be cut/place at least 25% depth of concrete
Sand / gravel back fill
Drainage: all flatwork slope between ¼” and ½” per foot away from pool. A round drain with associated smooth wall non corrugated drain pipe located in low point of 6” raised deck
QUESTIONS / CONCERNS:
- Should extra vertical rebar steel be placed in the deep end or extra on the shallow to deep transition on the floor?
- I read that the max water-to-cement ratio should be 0.48. Does this also apply to pebble too, or just plain plaster?
- Can umbrella sleeves be set directly into the coping / bond beam?
- Any guidance on deciding between 1 channel main drain vs 2 round main drains?
- I am considering up to 6 returns. Is 1.5” pipe large enough if they are each individually plumbed back to the pump pad or should I go with 2”?
- Any opinions on plumbing a dedicated suction for manual vacuum in addition to purchasing a robot for cleaning?
- Thoughts on A&A LeafVac debris removal canister located at the pad?
- Thoughts on flanged vs flush mount returns?
- Thoughts on option A vs. option B for the weeping wall plumbing?
- Thoughts on the Pentair IntelliFlo VSF vs. the newer IntelliFlo3 VSF?
- Would the flow rate of the IntelliFlo VSF (model 011056) be enough to operate the 27 linear feet of weeping wall with (6) 1.5” feeds. I am planning on actuated 3-way valve to switch from the (6) 1.5” main pool returns to the (6) 1.5” weeping wall feeds with each of the weeping wall feeds individually valved for relative flow control. If I need more pump, I am also considering the IntelliFloXF VSF (model 022056)
- With an electrical sub panel already set at pad site, is there any advantage in the integrated load center option in the Pentair IntelliCenter? How much extra does the integrated load center option cost?
- Any input on the 5 vs. 8 relay option on the IntelliCenter? I’m assuming the IntelliFlo pump, IntelliChlor & possible future IntelliPH are controlled through a communication cable and will not take up one of the 5 or 8 included relays. Is this correct thinking?
- The Pentair IntelliCenter comes in many combo kit options. Generally, are the Pentair combo kits (IntelliCenter + IntelliChlor) a good value or the same price if purchased separately?
- Should I install a well pit? No one in my area seems to have one. The soil here is a very expansive (water-tight) clay.
- I have read about placing gravel on the bottom before placing gunite but, as with the well pit, not many in my are seem to do so.
- If the (4) MicroBrites are to be controlled by the IntelliCenter does each light need to run back to the IntelliCenter or can each light run back to a junction box and 120V to 12V transformer which is ran back to the IntelliCenter at the pad?
POOL:
Size: Free form ~43’ Long X ~21’ wide In Ground Gunite
Perimeter: ~116 Linear Feet
Volume: ~36,000 Gallons
Surface Area: ~765 Sq. Ft.
Depth: 4’ shallow to 8’ deep with a sloping transition of 1’ depth per 3’ horizontal
Plumbing: 2 skimmers, 1 main drain, 1 dedicated vacuum inlet, 6 main pool returns (1 plumbed to chiller), 6 returns to weeping wall water feature, 2 overflow, 1 fill line
Plaster: TBD - Pebble Sheen Black Onyx or Stone Scapes Black Mini or Similar dark pebble
Coping: Oklahoma Flagstone or similar
Pump: Pentair IntellliFlo VSF
Filter: Pentair Clean and Clear 520 Plus (Cartridge)
Sanitation System: Pentair IntelliChlor IC60 Salt Cell Generator
Chiller: Glacier GPC215 ?? (still debating whether to go with chiller or not)
Lighting: (4) Pentair MicroBrite Color LEDs facing away from house
FEATURES:
~19 linear feet of 6” tall raised beam faced with waterline tile
~27 linear feet of small boulder weeping wall water feature set into coping and waterline
(1) diving boulder set into coping
~8’ long cove bench in shallow end and ~8’ long bench in deep end
(2) umbrella sleeves to be set into coping / bond beam
STEEL SPECS:
Bond Beam – #4 Rebar 4-Bar Box Beam
Rebar extending through sides of beam at decking locations
Floor and wall – #4 Rebar on 8” Centers. With extra vertical steel at deep end??
Rebar to be located 3” above bottom of 8” thick floor and centered in the 8” thick wall shell
Skimmers wrapped in rebar for support
GUNITE SPECS:
4,000 psi min design strength / minimum 6 bags of cement per yard
Minimum 14” wide X 12” tall bond beam
Walls & Floors: minimum 8” thickness
Any “rebound” will be discarded and not used in any way
All excess and overspray to be removed from job site
PLASTER / PEBBLE SPECS:
Pebble Sheen Black Onyx or Stone Scapes Black Mini or Similar dark pebble
Max water-to-cement ratio of 0.48
No calcium chloride added
Any plaster splatter on waterline tile to be cleaned with damp towels vs. sprayed water
Gunite shell to be pressure washed before plaster/pebble application if dirty
Gunite shell to be cured at least 29 days before plaster / pebble application
COPING & WATERLINE TILE:
Coping: Oklahoma flagstone or similar
Coping mortar color: TBD
Waterline Tile:
Master tile magazine Rock Stream (MAS RKR 610) or Desert Canyon (MAS DS 650)
Type S mortar bed
Cementitious waterproofing agent over mortar bed
Thinset rated for continuous submersion
Waterline Tile grout color: TBD
Accent Tile: TBD (if any)
Accent Tile Grout color: TBD
Trim Tile: TBD (if any)
Trim Tile Grout color: TBD
Weeping wall water feature mortar color: Tan
Flagstone coping and weeping wall to be sealed with:
PLUMBING SPECS:
Poured Concrete equipment pad:
#3 rebar 16” OC
4” thick with thickened edges
Equipment located and spaced to accommodate future repairs
Equipment located and spaced to accommodate possible chiller and acid tank
Wide sweep 90s used to the maximum extent practical
Pad sized and equipment placed to minimize the number of plumbing 90s
All manual valves to be Pentair or Jandy Neverlube
Pump, filter, & chiller connected with unions
All plumbing runs 18” deep with 2” of clean sand below and above pipes
All plumbing run side by side horizontally and not stacked in trenches
(2) skimmers
(1) main drain
(1) Dedicated suction line for manual vacuum
A&A leafVac canister on skimmers, main drain, and dedicated suction lines at pad
(6) wall returns
(1) fill line to be plumbed and tied into timer by owner
(2) 1” overflow lines
All plumbing Sch 40 PVC unless otherwise noted
No “hard 90s” on buried pipes
Skimmers, main drain & suction line to be each separately plumbed back to pump pad with 2” sch 40 and manual Jandy valves for individual control
Wall returns placed 18” from top, each separately plumbed back to pump pad with 1.5” Sch 40 and ball valves to set relative flow rates of each return
Weeping wall water feature will have a 3-way actuated valve to switch from returns to weeping wall feature and plumbed with 2” water returns each separately plumbed all the way to the pump pad with ball valves to set relative flow rate of each water source
ELECTRICAL SPECS:
All buried electrical in SCH 40 conduit with sweeps
Bonding: 8 AWG bare copper with direct burial & cement rated lugs, & PB 2008 water bonding lug on return line 1’ below water line
Control Panel fed by 20 AMP GFCI at sub panel
Eaton Type 2 SPD whole panel surge protector at the pad sub panel
An additional junction box fed by 120V to be run approx 70’ from equipment pad sub panel
Permanent light and switch installed at equipment pad
EQUIPMENT SCHEDULE:
Automation System: Pentair IntelliCenter (model / kit # TBD)
Pool only (no spa) with the load center & SWCG transformer built it. Deciding between the 5 relay or 8 relay option. Depending on pricing, will probably get a kit that includes the IC60 SWG.
Filter System: Pentair (cartridge type) Clean & Clear 520 Plus (Model: 160332)
Pump: Pentair IntelliFlo VSF Variable Speed & Flow Pump (Model: 011056)
Sanitation System: Pentair IC60 Salt Cell Generator (Model 521105)
Chiller: Glacier GPC215 ?? (still debating chiller or not)
Lighting: (4) Pentair MicroBrite Color LED w. 100’ of chord (Model 620425)
Skimmers: Grey / Black body with a tan lid
Model: TBD - Pentair Skimmer Bermuda ABS for Concrete OR other similar
Still deciding between Venturi style or a traditional style skimmer
Main Drain: TBD – (2) round 36” apart or (1) channel style
Leaf Canister: A&A LeafVac debris removal canister (Model: 522538)
Returns: Directional (Model: TBD)
Valves:
(4) Jandy nerverlube 2-2.5” for skimmers, main drian, & vacuum line (Model: 4716)
(1) 3-way Jandy neverlube 2-2.5” with actuator to switch from returns to weeping wall main line (Model: 4716)
(6) ball valves in weeping wall manifold to set relative flow of each water source
Valve Actuators: Pentair or Jandy valve actuator to switch from returns to weeping wall main line:
Check Valve: Jandy 2-2.5” standard (Model: 7305) between pump and filter
Unions: (6) CMP Hi-Temp 2” MIP – 2” PVC (Amazon ASIN: B00AKMV4K)
Robot: Dolphin S200
Misc Contract Scope Items:
Equipment pad location approximately 75’ from center of pool
Pool pump will be aprox. 24” in elevation above top of pool water
Pool to be filled between 6 to 24 hours after completion of plaster / pebble
10% of contract price to be held back until completion and punch list complete
Excavated dirt can be placed on site ~150’ from dig
Electrical Sub Panel (12 CBs) already set and connected to 125 amp 240V feed at pad site
Overflow does NOT need to be tied into public sewer
Pool depth to be specified every 2 feet in drawing
City / County approval NOT needed but HOA approval is required
DECKING:
New Decking: BY OWNER
Specs: #3 Rebar on 16” centers.
Minimum 4” thick with thickened edge
Control joints max spacing lesser of 2X width or 12’
Control joint to be cut/place at least 25% depth of concrete
Sand / gravel back fill
Drainage: all flatwork slope between ¼” and ½” per foot away from pool. A round drain with associated smooth wall non corrugated drain pipe located in low point of 6” raised deck
QUESTIONS / CONCERNS:
- Should extra vertical rebar steel be placed in the deep end or extra on the shallow to deep transition on the floor?
- I read that the max water-to-cement ratio should be 0.48. Does this also apply to pebble too, or just plain plaster?
- Can umbrella sleeves be set directly into the coping / bond beam?
- Any guidance on deciding between 1 channel main drain vs 2 round main drains?
- I am considering up to 6 returns. Is 1.5” pipe large enough if they are each individually plumbed back to the pump pad or should I go with 2”?
- Any opinions on plumbing a dedicated suction for manual vacuum in addition to purchasing a robot for cleaning?
- Thoughts on A&A LeafVac debris removal canister located at the pad?
- Thoughts on flanged vs flush mount returns?
- Thoughts on option A vs. option B for the weeping wall plumbing?
- Thoughts on the Pentair IntelliFlo VSF vs. the newer IntelliFlo3 VSF?
- Would the flow rate of the IntelliFlo VSF (model 011056) be enough to operate the 27 linear feet of weeping wall with (6) 1.5” feeds. I am planning on actuated 3-way valve to switch from the (6) 1.5” main pool returns to the (6) 1.5” weeping wall feeds with each of the weeping wall feeds individually valved for relative flow control. If I need more pump, I am also considering the IntelliFloXF VSF (model 022056)
- With an electrical sub panel already set at pad site, is there any advantage in the integrated load center option in the Pentair IntelliCenter? How much extra does the integrated load center option cost?
- Any input on the 5 vs. 8 relay option on the IntelliCenter? I’m assuming the IntelliFlo pump, IntelliChlor & possible future IntelliPH are controlled through a communication cable and will not take up one of the 5 or 8 included relays. Is this correct thinking?
- The Pentair IntelliCenter comes in many combo kit options. Generally, are the Pentair combo kits (IntelliCenter + IntelliChlor) a good value or the same price if purchased separately?
- Should I install a well pit? No one in my area seems to have one. The soil here is a very expansive (water-tight) clay.
- I have read about placing gravel on the bottom before placing gunite but, as with the well pit, not many in my are seem to do so.
- If the (4) MicroBrites are to be controlled by the IntelliCenter does each light need to run back to the IntelliCenter or can each light run back to a junction box and 120V to 12V transformer which is ran back to the IntelliCenter at the pad?