Raypak 337a Cast Iron Flange Header Installation

SpongeBob

Gold Supporter
May 7, 2021
61
Austin, TX
Pool Size
20000
Surface
Plaster
Chlorine
Salt Water Generator
SWG Type
CircuPool RJ-60
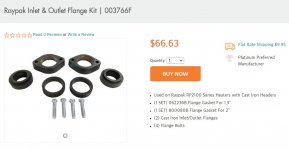
So I hace a Raypak 337a, Cast Iron Header with flange gaskets. I'm running into a problem which is, when I tighten the flange bolts, to match the installation instructions picture, the gasket deforms and pops inside out of the seat. Doesn't say anything in the manual about how tight to make this or how loss. Any suggestions on this? Attached is the page from manual, circled the gasket I'm using and arrow showing the gap Raypak is depicting. I guess the questions are, should the flange be touching the header? If not, how tight is tight enough, I know, it's like asking how long is a piece of string?

Raypak-Header.jpg

What everything looks like before hand:
20210703_190818340_iOS.jpeg

Before tightening:
20210703_190630789_iOS.jpeg20210703_190640806_iOS.jpeg

After tightening:
20210703_190724286_iOS.jpeg20210703_190731591_iOS.jpeg
 
Just a little curious as to why the header flange bolt holes are oval instead of round? Are these aftermarket rather than OEM parts? I have run into problems with repair parts for my Hayward "H" heater that are listed with a Hayward OEM part number, but seem to be spec'd differently and will not work as a replacement part !
 
  • Like
Reactions: SpongeBob
Just a little curious as to why the header flange bolt holes are oval instead of round? Are these aftermarket rather than OEM parts? I have run into problems with repair parts for my Hayward "H" heater that are listed with a Hayward OEM part number, but seem to be spec'd differently and will not work as a replacement part !
Good catch! This was part of the install kit for a new unit. Shrink wrapped and all. If they are wrong, it came from Raypak that way. However, when I look up the replacement part online I get ones with round hole only.
raypak.parts.jpg

Flange.jpg
 
I would be inclined to loosely attach the flanges, then complete the rest of the piping, and then just tighten as necessary to stop any leaks. In the video above, it doesn't look like he's putting much force on a very short wrench.
 
I would be inclined to loosely attach the flanges, then complete the rest of the piping, and then just tighten as necessary to stop any leaks. In the video above, it doesn't look like he's putting much force on a very short wrench.
Tried that, didn't work, same problem, so went ahead and ordered replacement kit, lets see what shows up in a few days. Fingers crossed it's not what I have already, design updated blah blah blah.
 
Were the header and the head flanges all part of the same package?? If they came directly from Raypak the whole package should be returnable and I hope that you are getting all new parts. If the machining on the flanges is incorrect/off, I would also question the machining on the header. When installing the flanges, go fingertight and check spacing between the flange and the header at the bolt ends of the flange. Then slowly tighten in small increments alternately.
 
Were the header and the head flanges all part of the same package?? If they came directly from Raypak the whole package should be returnable and I hope that you are getting all new parts. If the machining on the flanges is incorrect/off, I would also question the machining on the header. When installing the flanges, go fingertight and check spacing between the flange and the header at the bolt ends of the flange. Then slowly tighten in small increments alternately.
Yip, same packing, one big crate, with a big box, inside the big box raypak heater, on it's own mini crate, another install kit box with all the bolts, manual, bit's 'n bobs to install including the flange and two sets of gaskets, one for if you plan to run galvanized or copper piping straight into the heater or use the CPVC adapter, which is what I"m doing. I bought the unit back in March, only getting around to installing it now as Texas winter storm has pretty much delayed all contractors by alot so not sure if it's still returnable. Lesson learn, check at time of arrive.
 

Enjoying this content?

Support TFP with a donation.

Give Support
After talking to Wayne at Raypak support, Wayne's the man, he said, make sure gasket and cast iron is bone dry, any moister, lube or anything will cause it to pop. What he recommends is cutting a 1" CPVC sleeve to fit in the gasket to prevent it from warping and popping out. Apparently Pentair ships 2" sleeves with their cast iron flange gaskets for this exact reason.
 
Last edited:
Thread Status
Hello , This thread has been inactive for over 60 days. New postings here are unlikely to be seen or responded to by other members. For better visibility, consider Starting A New Thread.