Here We Go Again....Pool Build in Magnolia

I prefer straight steps as well. Looking at the balance of curved and straight lines in #2 design, the steps need to be straight to break up the curves that happen after them.

We have step lights that are wired in under the treads (the top edge of each step) and they are tucked up under the over hang and cast a light over 12" out of a 6" light and over 2' out of a 12" light (actual light width to be determined once we have power). The case these lights are mounted in cause the light to shine down vs out to illuminate the ground better. The housings are stainless (they had other materials but this went with our design) and while not cheap, just remember that 1) lighting the steps is first and foremost a safety feature, 2) you want well made products being installed so they last a good while and just need bulbs replaced so you don't have to mess up the deck wiring new lights, 3) lighting can add beautiful drama to your yard and pool area and highlight key features at night so it's a good bonus.

I also agree to a larger space around the fire pit to allow for flexibility regarding smoke, heat, and conversion. Whenever we go and hang out around our friends fire pit, there are always different clusters of people having conversions and they aren't usually just sitting in a perfect circle.

For decking, concrete has so many things that can be done to it now a days. I really like the emphases on the edges in design #2 so if you don't do flag stone there (no personal experience with it, just always read it will, eventually, flake and wear away even if slowly by adding a sealer) a talented artist can make the concrete be almost anything you desire. Marble, stone, brick, etc etc etc.

Seeing as our build is still going, I can't comment on other questions as others have more experience but I love your design (#2) and can't wait to see it progress.

I remember the step lights being pricey so I have other ideas to add landscape lighting via the planters to illuminate the steps.


I love our SWG. We have travertine. It MUST be sealed. We went with the "wet look" to enhance the colors. It's time to re-seal (every 2 years), but it has held up and looks great!

Great looking pool! Would have done travertine with a different house but the flagstone just goes better for ours.
 
Well, interesting things this week and the hole isn't even being dug yet!

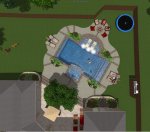
We decided on PB#2. I won't bore you all with the details but it was one of those "best fit" for us things. Their rendition is below as a reminder. We are really looking forward to this project!

IMG_0192.jpg

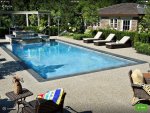
We met with the PB yesterday and will be back with him tomorrow to go over a lot of the nitty-gritty questions that we have. While going over some questions, a coping tile caught my eye. Usually, that wouldn't be significant, but in this case it really changes the pool, I think. Why it caught my eye is because of this photo from Houzz (one of the most costly websites in the world!).

IMG_0212 (1).jpg

It has somewhat become my inspiration for the pool. It has the pebble decking that we will have but the grey (actually bluestone) is different and it allows the pool to stand out more. I believe it lends a classic feel to the pool.

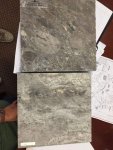
The tile, at the top, that caught my eye is in the pic below. As labelled, it is Blue Moon travertine. The Silver also caught my eye, but I wanted more grey and darker (yes, I know, hotter, but I like it!). What I didn't know until bringing it off the display case is that my wife wasn't much on the flagstone all along and she also loves it. I asked the PB to provide me a 3D of a darker travertine coping and step edge to give me a visual to imagine.

IMG_3339 (1).jpg

What do you all think?

-We also ditched the planters on either side of the spa. Thanks to the poster who suggested this as we got a glimpse of the deck without it and we liked how much cleaner it looked. The planters down by the sun ledge help with establishing the lushness we plan around the fire pit when we get to the landscaping of that area.

-We stuck to our guns with the SWG. Might regret it, but I think there was a greater chance of regretting not getting it. Eliminated the Ozonator and UV systems with that based on the research in the forum.

- Enlarged the fire pit although we have to make sure the fence is where I think it is based on my yard marking and not where it sits in the layout on paper

I can finally put some firm items down-

Specs

34'x21.5' (main body of pool is 16' wide)
615 sqft and 121 linear feet
4'-5.5'-4' Sport Style
Approx 18k-20k gallons

Pentair Cartridge 520 Clean & Clear
3hp Intelliflo VSP (Says it's the VS3050 but I show that as discontinued)
1.5hp Silencer Blower for Spa feeding 8 Hydro-Air Jets
Intellichlor IC60 SWG
Pentair Mastertemp 400k BTU NG Low NOX Heater
EasyTouch System 8 for automation
3 Intellibrite LED Color Lights (2 for pool, 1 for spa)
1 Globrite for Sun Ledge

2 Channel Drains (1 pool, 1 spa)
2 Skimmers SQ U3 2"
7 Pool Returns
Separate lines for all skimmers and main drains
Pentair 2"x2.5" Neverlube Valves
Pool Fill Line (won't do auto-fill)
Overflow Line to creek in back

Travertine Blue Moon Coping (as of 6/28) and Step edges
Pebblesheen (Leaning towards Blue Granite as of 6/28, but also like Tahoe Blue and intrigued by French Grey) w/ Shimmering Sea (maybe!)
Unsure on Tile
Pebble Decking
Unsure of Spa Spillway Cascade Stone, Columns and Raised Beam Stone Facing

2 year warranty on workmanship (Surprising!)

Fire away! I'm sure I missed plenty. I hope to have newer pictures and a diagram to show dimensions on my next post in a day or two.
 
OHHHHHHH I love that coping tile!!! There was a build a couple of summer ago that did the very thing and it came out AWESOME! Of course I cannot find it but will keep looking. Double score that the wife likes it also!!

Good job on taking the spa planters out..........that will open up the sight line for sure.

-3hp Intelliflo VSP (Says it's the VS3050 but I show that as discontinued)-he may have a warehouse with stuff like this in it...ask him to make sure.

You nailed everything as far as I could see. I can tell you have been reading and listening! :hug:

Kim:kim:
 
Love the grey coping! Either the dark or light. Excellent choice for outlining the pool and more unique. If I ever get new coping, that will be my choice.

Great move on taking out the planters too. I thought those were gonna be in the way but I didn't want to say that because I don't want to be negative or rain on someone's ideas, but I was concerned about your view and also your access to the pool when you need to brush and do other maintainence. You will use every inch of the deck for access to the pool at some point and kids need a place to jump in too.

Excellent you got rid of the ozone and etc water treatments too.

Coming along now!

Crystal
 
I love the changes you've made. Like your wife, I just wasn't seeing flagstone for your pool design. Houzz is so dangerous, right?! That inspiration pic is perfect for your layout!

On the travertine, just a couple of thoughts. With all the warnings on variations in colors that stone places love use to explain away any customers unhappy with results......

* Ask if the Blue Moon sample you have is one of the darkest, lightest, or medium colors in the range.
* Same for the Silver sample
* Will the coping be filled and honed - usually hotter but usually better with a SWG system. Or will it have the holes as in regular pavers?
* Do you plan to seal the coping?
------ Really should seal both types of the stone, but definitely should if it has the holes.
------ The honed and sealed won't soak up as much sealant since it's not as porous. That means, the color won't change as drastically as if the paver (with holes) coping is sealed.
------ You can test both by spraying them with water if that wasn't already done at the showroom. (don't just spritz) Wet stone gives the effect of sealant. Then again, there are sealants that say they won't change the color at all. Usually the ones that have the word Enhancer will definitely darken the stones.
------ I don't know if this would make a difference, but my Enhancer sealant had a gold tone to the liquid. That wasn't a concern for me, since my travertine is in the beige range of colors. Would that change even slightly the colors in your grain stones? You might be ok with that, or not. If you go with an Enhancer, be sure to check on that if you don't want any gold undertones.
------ Finally, it will be important to test sealants on sample or left over pieces regardless of what you decide. It worked well for me to put sealant on one half the stone for an apples to apples comparison. Then did a couple more stones the same way to get a cross section of the different stone colors and patterns in my sample.

My apologies if you've already got this covered. Maybe it will help someone else....

Love it all!
Suz
 
Ladies, thanks for all the suggestions and compliments. It's really turning out great.

We, the whole family, had a great meeting with the PB today. The bulk of time was my in-the-weeds questions on how things will look, how will it be put together, etc. A little bit of time was spent picking out the stone for the different areas. Yep, you read that right, very little time. My wife and I built this house a few years ago and only had one minor difference in opinion on materials. The pool was slightly more, but still quick.

First, the changes visually.

Now
Blackburn_Residence---V5---6.29.17_001 (1).jpg

Before
PB2 Overhead.jpg


Now
Blackburn_Residence---V5---6.29.17_004.jpg

Before
PB2 Angle.jpg

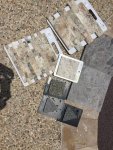
Blue Moon Travertine- Coping, Steps, and Vertical Faces on the Steps- 12"x24"
Antico Onyx Split Face- Beam Facing on each side of Spa, Large rectangular planter, and Fire Pit in 2"x4"
Antico Onyx Smooth Tile- Raised Spa Walls, Columns on each side of Tanning Ledge, and Vertical Faces of Curved Steps from Tanning Ledge in 1"x2"
Peitra Roma Ceramic Tile- Waterline Tile 6"x6"

We went to the tile store and they gave us some samples. There is the obvious variation in the Blue Moon but we still love it.

Sorry, not much bling ladies! We may throw the shells in, but I don't see enough to warrant it.

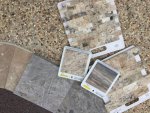
The combinations-

IMG_3345.jpg

The "stratified" waterline tile was very nice also, but is only included because this is a better picture of the selected waterline tile- Pietra Roma.

IMG_3346.jpg

In the above pic, the waterline tile detail doesn't stand out as much, but the Pebble Sheens that we are considering- Blue Granite, Tahoe Blue, and French Grey- are included. We are up in the air on these although the better half is leaning towards French Grey which shows grey in shallow depths and a nice blue deeper depths.

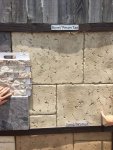
For the upper patio, we've always wanted it looking a little different and a little nicer than the pool deck so it will be stamped concrete. The pic below shows the travertine pattern in Bone/Pecan Tan that we decided on. We think it goes well together and are glad we drifted towards travertine this week.

IMG_3348.jpg

Again great meeting with tons of questions answered and almost all were going to be done the way we wanted without asking.

We did almost get talked into an outdoor bathroom! I think I read someone's point in this forum say that it becomes pretty under-utilized. Our closest pit stop is our Master Bath through one of the patio doors and over a 2'-3' stretch of carpet that we can live with, but who knows. This all stemmed from me asking about putting a pad out for an outdoor rinse station with drainage tying into the deck drains. Also, we may include a pad built for building a storage unit on the back of our house to the right of the top pic.

Info I found out that is open for opinion-

Spa- 2 seating heights at 24" and 27" (goes up to each of our shoulders) and an overall depth of the footwell of 42"

Spa Blower- 1.5hp but can swap out for 2hp blower if we don't think it blows enough

Easy Touch- has the Intelliflo on a circuit but I think I read it is built into the pump itself and doesn't need a circuit at the panel- anyone know? I think I read that the IC60 also doesn't need one of the 8 circuits as it is tied into the pump. Am I making sense?

Equipment Pad- normally 2.5'x8' but I had them bump out to 12' for whatever may come along. Pump, heater, IC60 utilize the unions but not all equipment uses unions as the PB sees them fail enough to not do it. Added a faucet and light (using the EasyTouch) in this area. PB doesn't put surge protectors on the panel (and hadn't heard of it) but not a biggie as I have an electrician that has put one on my past couple of houses.

Pillars will have drain and irrigation sleeves to allow future pots or such. Thought that was neat.

I can't put outlets in the bottom planters as it violates code of distance from water and is below our pool level. Crud!

Will get grey skimmers to go along with colors.

Agreed to using 3" PVC from main drains. Didn't see need for it on returns and I didn't really either.

Every pipe has a shutoff valve. Plainly labelled pipes at equipment pad.

Lots of deck drains. He knows this is a pet peeve of mine when water is pooled on concrete after a rain. I think he knows to avoid it.

12" steps in pool. I know some here advise against it but I already am taking up too much pool for steps and we'll have to stay healthy!

I should have diagrams soon with skimmers, light locations, and dimensions to show how big this is turning out. We have almost 2000sqft of decking which is more than our first house! Ouch.

OK, enough rambling, but I really did have a lot of fun today!
 

Enjoying this content?

Support TFP with a donation.

Give Support
OH that does class it up quite a bit!!! Love the changes in color. Good job!

So nice when you are on the same page on most things right from the start like you are with your wife. Makes life good!

Unions-IF you do not have a union on a piece of equipment it will have to be cut out if/when you need to remove it so...........think it through........short term/long term.

Kim:kim:
 
Wow, almost 2 months since I posted about our build. Summer is my busy work time and I was admittedly getting overdone with pool research, but now with Harvey slowing things down a lot for my neck of the woods in Houston (i.e., avoided the horrendous flooding my neighboring communities have had to endure) and I have found time to get back into a normal groove. Besides, it was nice not staring out the back windows waiting for a dig to start and bugging the forum with my rumblings. We are just past gunite now!

We made a few additions to our overall design. The biggest is we decided to add a showering pad and the foundation for a possible bathroom and storage area along the back of our house. I have read both sides of having an outdoor bathroom and just wanted to ability to add on in the future based how we use the area. I didn't want to spend the extra $8k-$10k on it and then never use it so we'll just wait and see. I'll put a couple of storage sheds or cabinets on the deck for now just to store our pool items.

Blackburn_Residence---V6---Bathroom Added---7.14.17_001 (1).jpg

Blackburn_Residence---V6---Bathroom Added---7.14.17_003 (1).jpg

I think the PB did a great job of incorporating this into the design.

Onto the build-

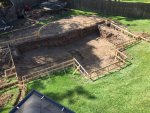
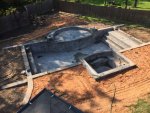
The dig (Thursday, Aug 16)

IMG_3444.jpg

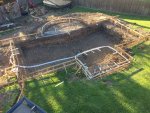
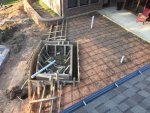
Rebar and stubout (Friday, Aug 18)

Fortunately, we caught that the tanning ledge was only going to be 6" so we had the PB redig and rebar for 9". He already had to call the guys out to dig out the steps out the back side and redo some plumbing for the light so it wasn't much of an issue.

IMG_3455.jpg

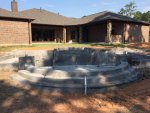
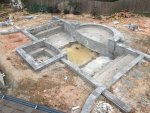
Gunite after cleanup (Wednesday, Aug 23)

3-5 yards of fill just to fill in around the pool. Lots of filling left to go with the decking up to the house and to get the right heights around the pool.

IMG_3465.jpg

IMG_3477.jpg

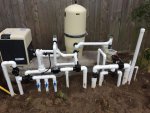
Plumbing (Thursday and Friday, Aug 24th and 25th)

IMG_3499.jpg

I included this pictures because I thought the pad was poured with a slant and putting the equipment on it confirmed it. I'm debating telling the PB to redo it and getting the pad and equipment level. I wouldn't be surprised if the goes ahead and redoes it on his own as I have been impressed with their proactiveness in the initial stages including redoing some of the stubout that wasn't even or at the wrong level.

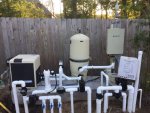
Through reading the Intelliflo pump installation instructions, it mentions that there shouldn't be a valve or elbow within 5 in of the inlet or outlet but from looking through other builds on this site, it seems this isn't really followed too much. Is this something to bring up? Any input on the equipment install is appreciated. Yes, there is an Intellichlor there in case we abandon the SWG in the future. I doubt it, but for the small extra cost, it is already there. I asked for and the PB said he would put unions in for each piece as I know that there will be replacing to be done in a few years and I wanted to make it easy. Obviously, it didn't get passed to the plumber.

Harvey had other plans for us after the last pictures of the plumbing. The plumber had to call it quits after running the pool's main water line to the side yard before being able to attach it to the house's main water line. The landscaper was here beginning the installation of the retaining walls but had to stop half way through last Friday also due to getting home before the rains would set in.

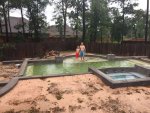
I have been amazed at how little erosion took place with 25"+ of rain that fell on our yard. The pool filled, unfortunately about 5-6 weeks early, and gave us some entertainment while riding out the rains over the last 5 days. The pool is a nice, greenish algae color while the spa went to an electric blue that looks like it would eat your skin if you decided to use it. Neither color suits us so we'll go with a PebbleSheen color instead. Nonetheless, we decided to have fun with the situation to look back at and laugh over the years.

IMG_3529.jpg

IMG_0843 (1).jpg

Do we wish we could have had the week to keep building? Yep, but small beans compared to our friends along the Gulf Coast who have lost a lot. Our prayers are with you all.
 
Nice work on catching the shelf measurement! LOVE the shape and details of the pool! Something for everyone!

Slanted pad...how slanted is it? Maybe they did that so the water would drain towards the front instead of off the back and risk washing out under the fence?

LOL love you and your mini me playing in the pool. How hard was it to keep either one of your from jumping in for real? I think I would have! :slidehalo:

Kim:kim:
 
Kim,

Our only initial concern with the pool is the width. It's probably more narrow than we would have wanted but I don't think we could have made it any bigger with the way everything fits together.

The slant on the equipment pad is from left to right and water runoff is what we initially thought also, but it makes the filter and heater look funny because they now aren't level and stand out more. We'll see what the builder says.

I was initially going to get fully in but decided against it since I couldn't see the bottom and would not be surprised if something were taking shelter in there. Besides, I am not fully sure that the dust from the gunite layered on my body for even a minute would be worth it!
 
Just an update for those that care. Sorry I've slacked on this. Part of this thread was to allow me a journal of our progress which has mostly been a good experience for a pool build except for one major thorn.

I've wanted to share a picture of the equipment pad for those that like to reference these, like me, or for any insight into any problems anyone may see.

Equipment Pad


IMG_3601.jpg

I think it is pretty clean.

- We had a chlorinator added, as mentioned previously, in case we find the salt too much for our stone although I don't think it will be a problem.
- A light was added that will be tied into the automation.
- All equipment except for the pump are attached through unions and the pool builder knows I want the same for the pump.
- One can't tell the slant on the pad from this pic too well. At first I was going to have the pool builder redo it (yep, I was probably pushing it) but I have decided I can live with it since I will be the only one knowing it and probably (hopefully) won't see it much.

Obviously, the plumbing and electrical have been run. I won't bore with those pictures as I doubt anything new is derived from this. I may post a pic of the wiring inside the Easy Touch just in case there is something to worry about.

Retaining Walls

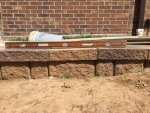
Our biggest thorn in this project, and it has been a big nuisance, has been the retaining walls on each side of the project against the house. We really didn't get a say in the material used although the landscaper picked out what we probably would have so not a big deal. What we have come to find out is that he really isn't that good at building walls on the smaller scale where detail is important. Some items that stood out-

- No base material used initially. This has became a problem as we realized the wall had a lot of "wave" to it. Overall, it was level per se as the high points of the wall were level. Unfortunately, with a 4' level, there were a lot of gaps showing under the level. For example,

IMG_3689 (1).jpg

We told the builder that it was amazing that the wall showed level as it seems harder to do this than to have the whole thing flat and level.

- The cap stones were initially the wrong size, not deep enough, and trapezoidal. Being trapezoidal wasn't an issue as you can just alternate the cuts and it will "lock" the cap together, but the landscaper thought all the caps should have lined up the same way causing big, triangular gaps along the back edge. I showed him the right way to lay those and a light went on. Again, though, they weren't big enough and new rectangular caps had to be ordered.

- The brick used for this isn't really designed for smaller projects. These stones are the ones you see as big retaining walls along streets and highways- walls 8'-10' high. The tight radial turns at the corners were a problem at first and the landscaper aggravated this problem by putting most of the smallest bricks in the corners causing the seams to line up instead of being staggered like brickwork. Obviously, this is where a lot of the wall's strength comes from.

- The capping on the corners, oh, the corners. Wow! This was painful. First, irregular cuts in all kinds of angles. Some were flat with the wall while others had a proper lip coming out from the wall. In all, this was the part redone the most.

On the plus side, the retaining wall bricks go with our house brick very well and should do the same with the decking when it is poured. It also shouldn't draw the eye away as a strong focal point either.

- With this stacked wall, it obviously steps back with each level. Along each level, the setback varied greatly. These bricks have a lip that should help with making this setback even across a row of bricks but I think the batch was bad and the landscaper had to chip a bunch of these lips off.

In the end, the landscaper rebuilt the wall twice after the first time the wall was completed. Within those 3 builds there were numerous changes, but I think it is finally 99% there. It now sits flat, level and pleasing to the eye. I will hand it to the landscaper and PB, they were both very aware of the shortcomings and never gave me any grief as they could see the issues too. I don't know why I would have to point them out if they could see them, but I didn't feel any pressure to accept any work that wasn't up to par.

Upper Deck


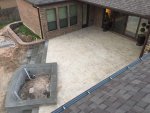
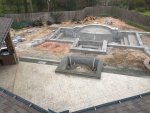
This has turned out really well. As has been mentioned before, we didn't want to bust the budget with stamping all the decking used. We really liked the look of pavers but figured our favorite colors would be too hot on the feet. We decided to stamp the upper decking to make it feel nicer and more like part of the house that wraps around it and just do pebble decking for the decks around the pool.

We're glad we did.

IMG_3581.jpg

IMG_3641.jpg

IMG_3652.jpg

IMG_3676.jpg

It turned out great!

Good thing we were paying attention with a couple of the items. Initially, the downspout drain pipe wasn't laid. The PB was going to lay 4" sleeves from each planting area to the center planter but forgot and then put in 2" pipes. Each time we balked and pushed for the 4" pipe, we were told it would delay the pour but neither did. We even had them put in 1/2" sleeves that run to eat column and under the windows so that we can run a drip line through in case we put any potted plants in those areas. The concrete guys did a great job as we have had a couple of rains and no puddles have formed on the patio.

Best part, it is very open but doesn't feel too big. It makes the living area inside the sliding doors feel bigger and it will definitely help with traffic and sitting areas for the parties we have. Downside, more furniture and outdoor rugs- Ouch!

Tile

The tile guys have been doing their craft for the last 8 days. Yep, 8 days! They still have a couple left, but I don't mind. They are being meticulous and I haven't had an issue yet with what I have seen other than using a tile by mistake on an area.

Not much can be seen as the Blue Moon Travertine blends in with gunite. It is pretty though and we can't wait to see it against a blue water.

IMG_3677.jpg

IMG_3673.jpg

They have been working on the vertical walls today. Really good looking split face travertine and tile that I'll photograph today and put some pictures up tonight or tomorrow.


I ordered the test kit last night. Can't wait to relive my high school chemistry days. We have a water softener so we can compare that water to the normal water from an outdoor faucet.

Long enough. Hope you all enjoy as much as I do watching your pools get built.
 
Great build thread! I'm just up the road from you in Montgomery and also in the middle of a build (posted here as well). I'd be interested to know which builders you met with and who you decided on. The pool and deck are looking awesome!
 

Enjoying this content?

Support TFP with a donation.

Give Support
Thread Status
Hello , This thread has been inactive for over 60 days. New postings here are unlikely to be seen or responded to by other members. For better visibility, consider Starting A New Thread.