The 15 yr old and friend have earned their steaks!!!
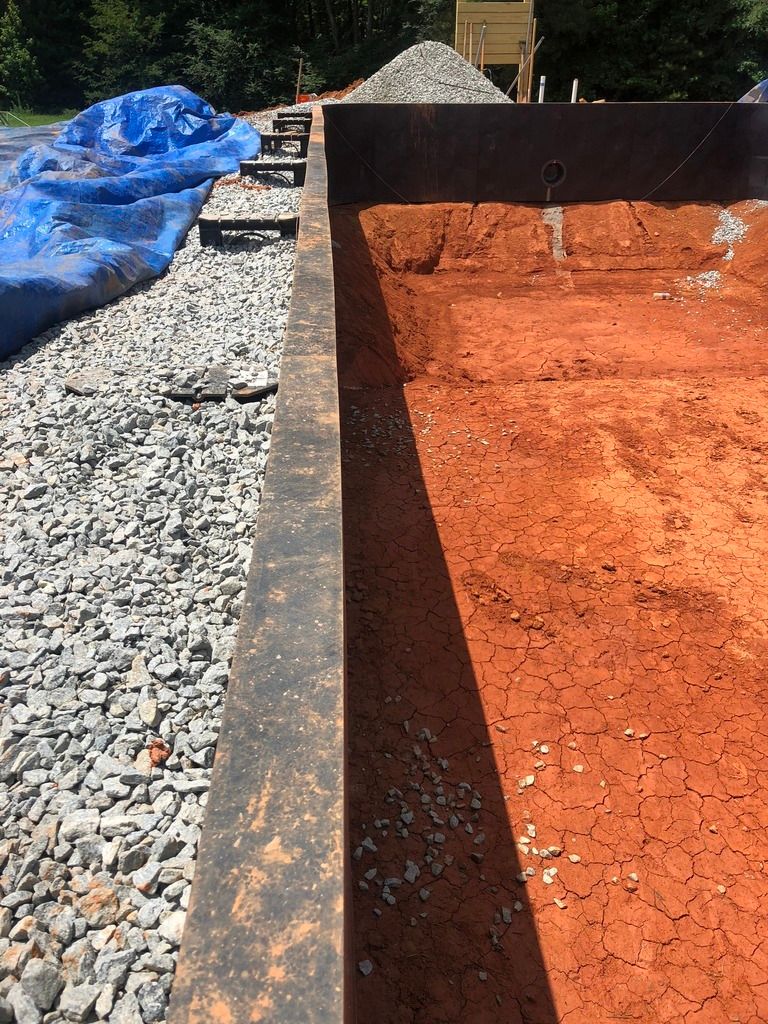
I wonder/hope that once you get the backfill and water it the sides will stabilize the walls so you will not see as much movement.
Here is thinking about your inspection tomorrow!!!
Kim
I wonder/hope that once you get the backfill and water it the sides will stabilize the walls so you will not see as much movement.
Here is thinking about your inspection tomorrow!!!
Kim
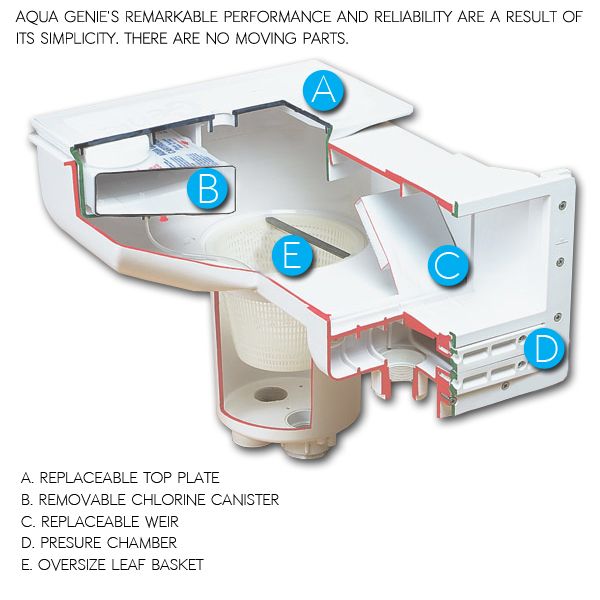
")