UK Indoor Pool Refurbishment

jakeblat

Bronze Supporter
Jul 27, 2021
39
UK
Pool Size
26000
Surface
Vinyl
Chlorine
Liquid Chlorine
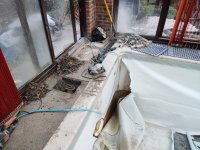
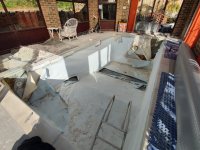
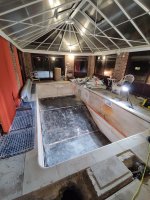
Just over a month ago I moved to a new house with a small "indoor" pool in the garden. I knew the pool needed a bit of work and definitely a new liner, but this restoration has snowballed into a much larger project. I'll be documenting the progress as I try to get the pool back to fully working order.

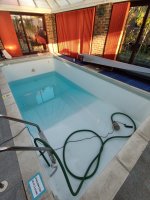
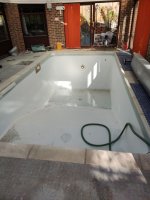
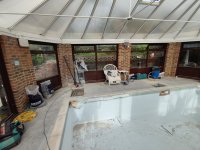
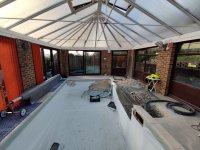
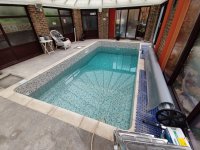
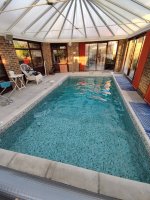
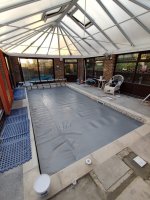
In the garden there is a 6x3m pool (around 25,000 litres) in an enclosed conservatory. This is how it looked shortly after moving in.
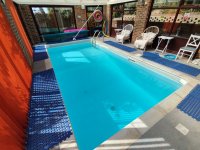
IMG_20220912_123008.jpg

I'd always heard that owning a swimming pool was a "money pit", and so far that's definitely what this project feels like. We were in a rush when buying this house and during buying process I didn't get someone in to do a full survey of the pool. This was definitely a mistake. I had tried contacting several pool companies (of which there are very few in the UK).

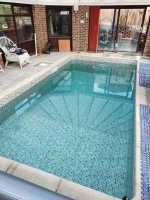
Here's where I am now
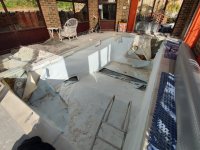
IMG_20221027_131643.jpg

The leak

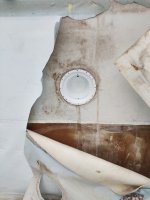
I was warned the pool needed a new liner and had a minor leak but measuring top-ups (with a LinkTap) I discovered 150 litres was being lost everyday. The liner was in a very poor condition with many repair patches so it was my assumption that it was the main source of the leak. I read a few guides on the best techniques to identify potential sources of leaks so started testing.

Water loss from evaporation? 150 litres definitely seemed like too much. I ordered a new cover and roller to replace the existing one which had suffered a lot of UV damage and was falling apart, and just to eliminate it as an issue. The new cover is an EnergyGuard GeoBubble for use in the colder months with less sun. It'll also reduce excessive humidity in the enclosed space.
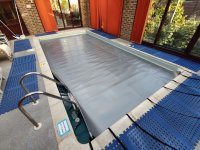
IMG_20220922_153149.jpg

I bought some leak dye and looked for leaks around fittings and patches but this didn't show anything obvious.

Next onto checking if things got better or worse without the pump and filter running. No obvious change in the volume of water being lost every 24 hours.

Now blocking the returns, again no change.

A plug in the bottom of the skimmer.

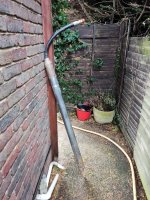
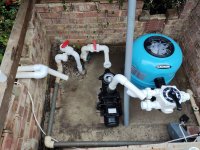
Time to look more carefully and it appeared the pipework in the pump/filter enclosure was leaking in a few different places. Someone had attempted to make a repair to the sand filter which was leaking, along with a small leak from a flexible coupler used on the pipework to connect to a pipe right up against the concrete floor.
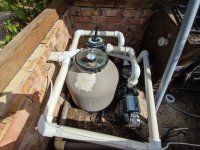
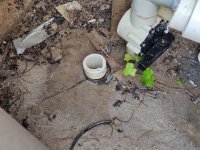
IMG_20220912_123028.jpg

IMG_20221001_152741.jpg
It was also clear at this point that the pump was very oversized (1HP) for a pool this size 25m3 / 6,600 US gallons. The small filter was just letting all the dirt straight through thanks to the powerful pump.

I decided I would tackle replacing the pump and filter to eliminate another leak source.

At this point I called several pool companies to get them to quote on
  • pressure testing the pipework
  • replacing the skimmer (as Kafko parts were going to be difficult to source)
  • replacing the main drain (as above)
  • replacing the light with an led version
  • replacing the liner
 
  • Like
Reactions: Newdude
Only one pool company actually got back to me in the end and after some back and forth by email this was the initial scoped work.

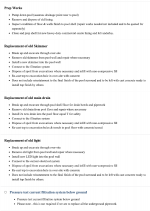
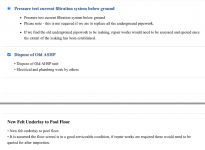
1667217132345.png

It didn't take long for this plan to change however as it wasn't going to be cheap. After an in-person visit some changes were made to reduce the overall costs.

  • New pipework was taken off the list under the assumption the existing pipework was good, and as long as it passed pressure testing it could be re-used
  • A new light was dropped to save money as the existing light and niche looked to be in OK condition
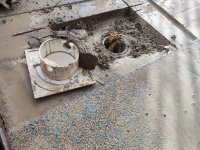
  • The single main drain was flagged as a safety hazard and suggested to be converted to an equal tee dual drain. In the end it was decided to remove the drain as it would involve a lot of groundworks (more on groundworks later)
  • A bag liner would be installed rather than on-site lining
So the new plan:

1667217397835.png
1667217406994.png

After a few weeks of waiting to see what other options there were, and having been pitched a fibreglass conversion and a liner replacement with bodges by two other companies I decided to go ahead with the well-scoped plan above.

The week after committing the work started.

IMG_20221010_170352.jpg


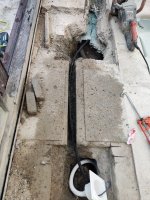
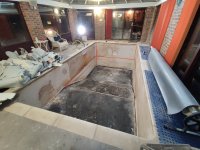
It didn't take long before some problems started to surface. The concrete surround for the pool was over 23cm thick (9 inches) and very hard and time consuming to break into.

IMG_20221010_170438.jpg

The black layer of concrete was full of very hard aggregates and lots of flint and proved to be very difficult to cut even with a diamond saw. Access to the pool is only possible by foot up a couple sets of stairs so smaller tools were the only option.

IMG_20221012_110854.jpg

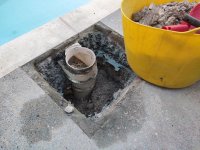
Almost all the water out and the skimmer mostly removed, first return removed and second return in-progress.

IMG_20221011_150018.jpg

Several sections of liner were peeled back to check the construction of the pool as it was not known. It turns out the pool has a concrete bottom with felt liner, metal wall panels around the top edge and concrete walls below the panels in the deeper sections.

IMG_20221012_110610 (1).jpg


Now all the fittings had been removed it was time to pressure test the pipework.

  • Returns - Good
  • Drain - Good
  • Skimmer - Very leaky
With a significant leak in the pipework found everything was put on pause to determine how to replace the pipe to the skimmer. It was recommended that all the pipework be replaced at this stage as it was brittle and coming up to 40 years old (pool was installed around 1983).

The real challenge at this stage was removing the concrete to put in new pipework. The pool company themselves were not keen to do it due to the depth and hardness, as well as how long it had already taken to just excavate the small pits.

At this stage I took over to find a company to cut out the concrete...
 
  • Like
Reactions: Newdude
At this stage costs had already increased significantly and the only company willing to quote on the work due to the difficult site access gave a very expensive quote. The pool company was willing to do it but only at a day-rate with no definite number of days to get the work done.

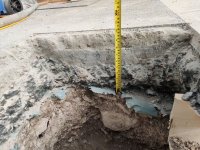
I looked into other options and came across moling/trenchless technology which is commonly used for run water pipes for domestic properties without having to disturb the surface. I wasn't sure if it would work to get from outside the building, inside and under the foundation wall. Looking at the original plans for the building it suggested there would be brickwork 1m deep onto a strip footing which suggested I'd need to dig down and drill a hole through.

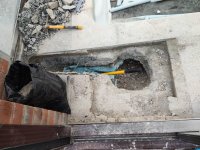
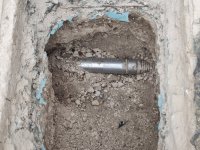
Time for a test pit, lucky for me there was a gap in both locations where I needed to run the new pipework out the building.

IMG_20221022_111531.jpg

In with the trenchless company for a quote and they were confident they'd be able to do it, even with the dense chalk ground. The quote was 1/6th the price of cutting up the concrete so I was willing to give it a go. The only downside was that flexible pipework would need to be used as there would not be space to get rigid pipework through easily. I spoke to the pool company who reassured me they use the flexible pipe for all their new build pools without issue and we don't have a lot of the potential problems you get in the US like termites.

The mole, 78mm to give some extra space for the 50mm flexible pipework. It's powered by pressured air and basically hammers it's way through the ground.
IMG_20221024_101839.jpg

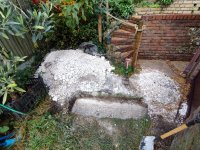
All that was needed was a 1.2m long launch pit to start from.


IMG_20221024_103318.jpg

2 pipes to run, one to the skimmer and one to the return. The long run to the skimmer went through first.

IMG_20221024_115711.jpg

It took less than an hour to get the pipes in place once the pit had been dug and equipment setup.


IMG_20221024_125444.jpg

I would take care of the remaining trenching of the pipes outside to the pool equipment to save some money.

Now to call the pool company back in to continue!
 
The Pool Light

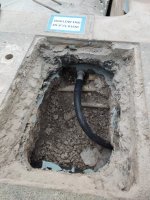
I thought it would be best to double check the condition of the pool light as the transformer for it on the surface looked very rusty. Opening the lid on the light deck box it was clear it wasn't properly sealed with both o-rings missing and condensation in the box.

It turns out that the pool was originally built as an outdoor pool and when the structure was built around it the floor level was raised up. Various shortcuts seem to have been taken when this was done such as placing new lids/boxes over the light deck box as well as the skimmer instead of using the correct fittings.

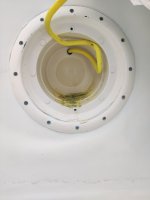
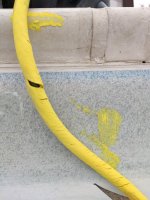
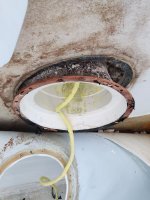
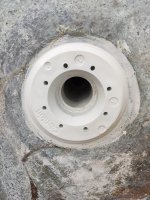
Removing the light from the niche revealed a cable in very poor condition and also highlighted another potential point of water leakage through the back of the niche.

IMG_20221013_125111.jpg


IMG_20221013_125119.jpg

Time to order a new niche, light and transformer. I decided to carry out this replacement work myself after some investigation to save more money on a reasonably straightforward replacement job.

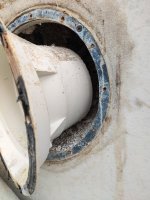
After removing a few screws it was possible to just pull the niche out as the backfill material behind the wall was just loose enough.

IMG_20221024_173728.jpg

The retaining ring on the other side of the wall was an exact match for the screws on the new niche which meant I didn't need to dig all the way down to it on the other side.

IMG_20221029_131945.jpg

By this stage I had bought an electric diamond saw so I could cut some additional access for pulling the new pipework through one last section that wasn't moled in. Time to cut out another section of concrete.

The light deck box was a bit of a surprise, the bottom had been cut off to sit on top of an original deck box.

IMG_20221025_132624.jpg

At this stage I realised I was making a lot of mess so tried to be tidier for the rest of the work.

IMG_20221025_172708.jpg

In with the new niche.

IMG_20221030_154419.jpg

I have also run a new power cable as the old cable couldn't be pulled through the existing conduit. Backfill material also went into the hole alongside the new deck box to niche conduit and was compacted in stages to fill material that fell out when the old niche was removed.

IMG_20221030_160104.jpg
 
Now you're just about caught up on the real-time progress of this project.

The pool company have been back between me completing the light and niche replacement and carried out pressure testing on the new pipework. The pipes were pressure tested before and after the new fittings were installed and everything passed.

IMG_20221027_131643.jpg

Each of the returns has ended up with a dedicated run back to the equipment pad which will hopefully make dealing with any problems easier in the future.

IMG_20221027_160640.jpgIMG_20221029_131641.jpg

The height of the skimmer has also been raised up as much as possible without having to patch the metal wall panel. Previously the water level was a bit low down from the coping.


IMG_20221027_160616.jpg

Once I finish trenching in the pipework I'll be connecting up a new pump and filter that I'd previously bought but didn't get round to setting up before the leaky pipework was discovered.

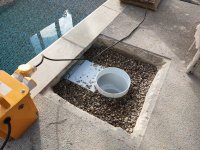
The new filter is an Lacron 18" sand filter and the pump is a 0.5HP Hayward Powerline pump. All the existing plumbing in the concrete will be capped off under the concrete. The 2 pipes coming into the left side are for the heatpump.

IMG_20221004_154218.jpg

There's a few things left to do now:

  • My responsibility
    • Trench in pipework outdoors and bring into pump pad
    • Connect pipework up to pump/filter/heatpump
    • Connect up light power supply
  • Pool Company
    • Order new liner
    • Remove old liner
    • Re-attach foam/felt to walls/floor where needed
    • Remove and fill in old main drain
    • Backfill holes around returns/skimmers
    • Replace concrete
    • Install new liner
The pool liner is being made by Plastica and have chosen fully patterned "Persia Sand".
1667257758993.png

From now onwards I'll post updates as the work happens. I didn't originally plan to post this as this project was only meant to be a liner replacement, however it's ended up being a lot more complicated and hopefully it's interesting to some.
 
  • Like
Reactions: kne and Newdude
Hot Dang, Jake.......

You KNOW how to make an entrance. :ROFLMAO:

Congrats and Bravo !!!

*if it's not too late, replace the flex plumbing with rigid PVC. Solid PVC plumbing is all but permanent, while the bendy kind may or may not be.
 
  • Like
Reactions: Casey
After some delays there's finally been some progress. Last week the pool company returned with the new liner.

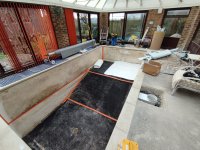
Out comes the old liner over the course of the day, didn't get many pictures of this in-progress. The old liner was incredibly brittle and couldn't be rolled up nicely to take away.

IMG_20221128_165757.jpg

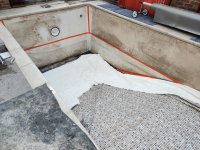
I had decided to keep the existing foam/felt to save some more money. The condition was ok and there was just some staining on it so it got glued back and place and taped at the seams where needed.

IMG_20221128_165856.jpg

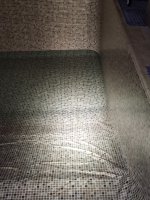
An extensive vacuum and check of the floor and corners was done in preparation for the new liner. The new liner arrived in a giant round cardboard cylinder but was actually quite small, you can see it on the left side of the shallow end of the pool. At this point the main drain had also been filled with concrete as it was too awkward to replace the pipework to it. Felt was glued over the top of the concrete before the liner was fully unfolded.

IMG_20221129_124747.jpg

IMG_20221129_135747.jpg

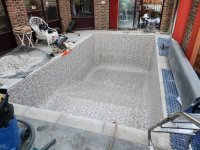
In place with the vacuum running. There were some issues getting the edge of the liner into the liner lock on one side where the coping had compressed the liner lock, they got it in there eventually. Water going in and waiting game commences as the flow rate is rather slow (got another project going on to replace the water main to the house as it is undersized). You can just about see the pits around the pool have been backfilled with gravel, the chalk that was removed from them was determined to be unsuitable for backfilling.

IMG_20221129_155141.jpg

Had some wrinkles appear as it filled overnight so I got in and smoothed them out with my feet while the water level was low enough. The water was 11C and unpleasant to be in.

IMG_20221129_192227.jpg

The backfilled skimmer in the daylight, water had reached the level where I was asked to stop filling and call the pool company back to install the fittings for returns/skimmer.

IMG_20221130_121226.jpg
 
  • Love
Reactions: Lanzz and Newdude

Enjoying this content?

Support TFP with a donation.

Give Support
Been very busy with other jobs that need doing but the pool is full! There's still some work left for me to sort out and the weather has made it difficult. We're now into freezing temperatures and I didn't manage to trench in the last bits of the pipework in time so I capped off the returns and put an expanding rubber bung in the skimmer to keep water out the pipework.

Pool company returned to remove the vacuum and install all the faceplates for the returns, skimmer and light.

IMG_20221205_113112.jpg

Concrete work also done

IMG_20221205_113114.jpg

Tidied up a bit and time for the full fill

IMG_20221205_123109.jpg


IMG_20221206_090629.jpg

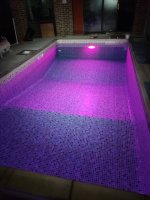
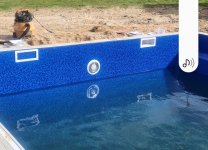
It's full! The liner looks good with most of the seamlines matching well on the mosaic pattern. Amazing how much the pattern affects the colour of the water which has become a deep aqua.

IMG_20221207_124000.jpg

Gave everything a good stir after adding some chlorine as it's just been tap water up until this point

IMG_20221207_145518.jpg

Cover washed and back on to limit evaporation and keep the humidity down inside

IMG_20221207_145624.jpg

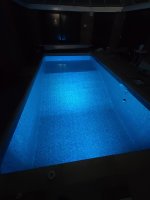
Connected up the light to test it works

IMG_20221207_191151.jpg

IMG_20221207_191214.jpg

Overall I'm quite pleased with the result. There's a few things that still need doing like plumbing up the pump and filter properly once I've buried the pipework. I'm also going to try sticking down the sections of rubber flooring that were lifted up and refit them, then revisit new flooring next year.

Sadly the water temperature is 9C (48F) so I don't plan to heat it back up and will wait until March to swim. There's a 9kW heatpump but electricity prices in the UK are currently 34.0p/kWh (or $0.42/kWh converted to USD) so it would be very expensive to keep warm with 1C average outdoor temperatures at the moment.
 
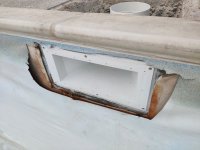
I never thought I'd appreciate a crew removing the liner from the skimmer mouth. Then I built pool #2 and here we are. :ROFLMAO:
Screenshot_20221214-143011_Gallery.jpg

Yours is looking SWEET. Thanks for sharing. (y)
 
@Newdude Glad I wasn't the one cutting into a brand new liner!

Very close to being able to close out this project now, just need to get the motivation to haul another ~20 bags of gravel up my stairs to backfill around the pipework, not very fun in freezing weather though.

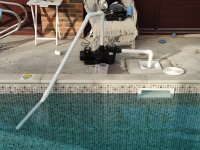
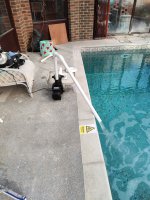
Have also setup some temporary circulation today while it's staying above freezing in the pool house. Plumbed up the pump next to the pool to get the water mixed for balancing and to mix in algicide to close for winter. Looking forward to summer and actually being able to use the pool!

IMG_20221214_124127.jpg

IMG_20221214_123348.jpg

Looking at reducing the TA (~250 is what I get out the tap) but need to get hold of some more hydrochloric acid as I've got less than 1litre left. Also using the temporary pump setup for aeration to raise pH in preparation for adding the acid.

------------------------------------------
Build Type: Vinyl
Volume: 25500 liters
------------------------------------------
Latest Test Result Summary:
FC: 3.3 (3 hours ago)
CC: 0.1 (5 hours ago)
pH: 7.5 (3 hours ago)
TA: 244 (7 days ago)
CYA: 11 (3 hours ago)
TEMPERATURE: 9° (3 hours ago)
==========================================
------------------------------------------
Test Results 2022-12-14 @ 04:12 pm
------------------------------------------
Free Chlorine: 3.3
pH: 7.5
CYA: 11
Temperature: 9°C

------------------------------------------
Test Results 2022-12-14 @ 03:08 pm
------------------------------------------
pH: 7.5

------------------------------------------
Test Results 2022-12-14 @ 01:50 pm
------------------------------------------
Free Chlorine: 3.2
Combined Chlorine: 0.1
pH: 7.4
CYA: 9

------------------------------------------
Chemical Addition 2022-12-14 @ 01:29 pm
------------------------------------------
+ 300 Milliliters of Bleach

------------------------------------------
Test Results 2022-12-14 @ 10:30 am
------------------------------------------
Free Chlorine: 1.9
Combined Chlorine: 0.1
pH: 7.4
Temperature: 9°C

------------------------------------------
Chemical Addition 2022-12-12 @ 10:45 am
------------------------------------------
+ 500 Milliliters of Bleach

------------------------------------------
Test Results 2022-12-12 @ 10:30 am
------------------------------------------
Free Chlorine: 0.1

------------------------------------------
Test Results 2022-12-09 @ 02:10 pm
------------------------------------------
Free Chlorine: 0.4
Combined Chlorine: 0.0
pH: 7.4
CYA: 15
Temperature: 10°C
 
  • Like
Reactions: Newdude
Log into PoolMath with your TFP credentials then go to the settings icon and enable sharing and then we can just see your #s.

What are your plans for testing ? Have you found a source for a drop based kit over there ?

Also, it's time you filled out your Signature. You got yourself a bona-fide pool there. It'll help us not have to ask questions when you have questions before we can help with your questions. :)
 
Sharing turned on PoolMath Logs (also enabled on forum profile) and updated signature.

I've ended up with a Pool Lab 1.0 photometer as it seemed like the best option that was available for a reasonable price. It turns out you can't legally obtain the liquid reagents in the UK or EU. I've documented my search here UK Pool Test Kits

There are definitely some downsides to the Pool Lab such as the FC upper range being 6.0ppm so SLAM testing will require dilution, however it's a higher range than many of the other test kits/photometers available to me.
 
  • Like
Reactions: Newdude
I've ended up with a Pool Lab 1.0 photometer as it seemed like the best option that was available for a reasonable price.

I tried the PoolLab out of curiosity, and was actually positively surprised by it.

The FC test seems to give reasonable results with the caveat that FC has to be below 8ppm which rules it out for me, as I am usually above 8. But for your indoor pool with low CYA it should work.

And I was really surprised by the CYA test. I still prefer the Taylor test but I was running both in parallel for a while, and the PoolLab seems to be give reasonable results.

Key seems to be to crush up the tablets properly. What worked best for me was to crush the tablets between two teaspoons and then add the powder. Much better than using the provided plastic crusher, which always leaves uncrushed pieces behind that take ages to dissolve. I also think that crushing the tablets in the vial will scratch the vial over time which might affect the test results.

pH test seems to be OK with the caveat of chlorine interference, which might not be a problem in your case. But I prefer my pH-meter for that, anyway.

The TA test on the other hand seems to be absolutely useless, wouldn't give a penny on those results.

Never tried the CH test.

For TA and CH I'd recommend looking into Aquarium test kits, there are good ones from Red Sea, for example.

Problem with Aquarium TA kits can be chlorine interference, which can be mitigated by adding a drop of Thiosulphate. Again, with your low CYA indoor pool probably not an issue. Aquarium kits usually claim that they test for Carbonate Alkalinity rather than Total Alkalinity, but this is just because there is no CYA- or Borate-Alkalinity to be expected in Aquarium water. The test principle is the same - you add an acid until you reach pH 4.5. But I find the Taylor indicator with the green to red transition much easier to read than for example the Red Sea indicator with its blue to yellow transition - but it works.

All in all, the PoolLab doesn't seem worth the price for someone who can buy Taylor test kits, or equivalents like CCL in Australia, for a reasonable price, but it seems to be an option for those who can't source good kits.
 
  • Like
Reactions: Newdude
The test results I've been getting with the Pool Lab do seem to make sense when compared to water quality reports my water company has to provide. Maybe a little low on the TA reading but when I've used my Fill the Multitester with pool water, add tablets and compare the colouration with the scale: The reliable check of several parameters could not be easier. | Lovibond tester I get a very similar reading.

I've got deionized water available for dilution testing for higher chlorine levels, however as I plan to keep the CYA reasonably low I don't think I'll need to do this often.

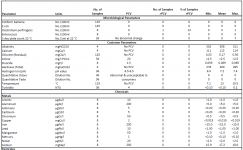
Here's my latest water quality report to give an idea of my tap water used for filling.

1671100551851.png
 
Alkalinity in this report is reported in units of mgHCO3/l. In the pool world, Alkalinity is usually reported in units of mgCaCO3/l. HCO3 has a molecular weight of 61, CaCO3 has 100. That means that the test result in this report has to be multiplied with 100/61 to compare it with your test results and TFP recommendations.

So, the Alkalinity of 308 in this report is actually 505 in units of mgCaCO3/l.

Similar with Calcium, which is reported in units of mgCa/l, but in the pool world mgCaCO3/l is being used. With Ca having a molecular weight of 40, the report value has to be scaled with 100/40 to make it comparable.

Therefore, the Ca value of 112 is actually 280 in units of mgCaCO3.

I'd recommend to get a different test for TA, and also one for CH. You'll have to work on your TA to make pH manageable and to avoid scaling. You might want to look into a way to minimise evaporation to slow down calcium increase over time with fill water additions to compensate evaporation losses. You'll have no rain support to help with reducing CH increase. Having a water softener for your fill line might be a good idea.
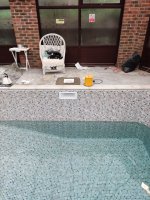
 
There is a mgCaCO3/l reading in the report under "Hardness" of 278-285 separate from the "Alkaility". That's close to my own reading of 244 TA with the Pool Lab using slightly sloppy dilution. The Pool Lab TA range tops out at 200ppm which is why I'm having to dilute. I'll try again using a high accuracy lab pipette for the dilution and see what I get from both the pool and direct from the tap. I did find there's a liquid reagent test available for calcium hardness for the Pool Lab so I'll order that to try it out.
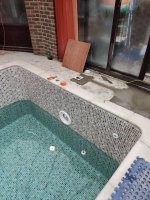
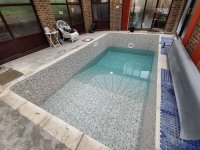
I did find that the stirring crushing stick that came with the Pool Lab was awkward to use and am using one from a Lovibond set which has the same crushing end but a longer and easier to grip handle on it. I did wonder about scratching the vial but the photometer sensors are actually looking in from quite high up the sides so as long as it's only the bottom that's scratched up it shouldn't affect results. You can also pick up a replacement vial cheaply which is nice.

I'll have to think about managing CH levels, now that it's full I will probably be topping up with captured rain water rather than tap water which should mitigate CH increase. It's nice to not have a leak anymore (was losing 150litres/day) which should make it easier to maintain balance.
 

Enjoying this content?

Support TFP with a donation.

Give Support
Thread Status
Hello , This thread has been inactive for over 60 days. New postings here are unlikely to be seen or responded to by other members. For better visibility, consider Starting A New Thread.