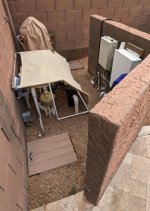
Last September I did some exploratory excavations to see if my pad could be remodeled to accommodate some changes I wanted to make. I’m finally getting close to being finished after long periods of inactivity…weather, trips, holidays, laziness, etc. Here are some pictures of what I found early and what my plans were.
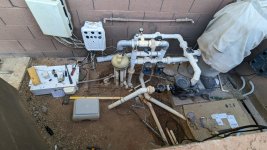
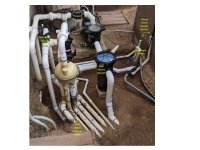
This first picture shows the amount of stuff I have in that small area. It is TIGHT and always has been.
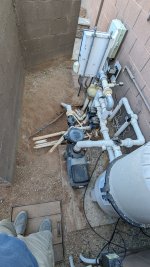
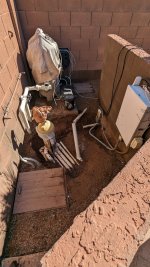
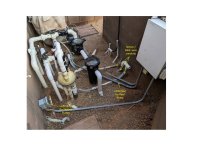
This 2nd picture is from a different angle and has the main features labelled.
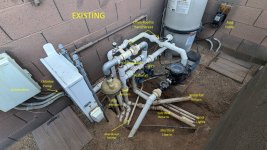
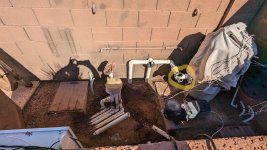
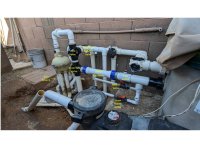
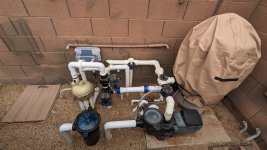
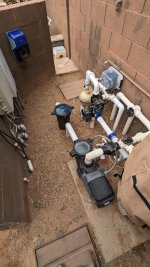
This 3rd picture highlights what I hoped to accomplish.
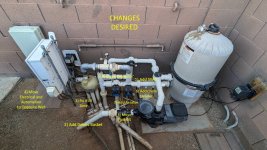
1) I am going to add a SWG, it will chlorinate all three return paths: IFCS, Wall Returns, Waterfall
2) I am going to add a debris basket to the front end of the pump to increase the size of the basket that catches debris from the main drain while using my IFCS. I think emptying it will go from approximately 2 weeks to 6 weeks, which is good for the trips that we take.
3) I want to fix an irritation in the implementation of my IFCS, I have only five zones but a 6-zone distributor was used. The way they plumbed it was that two consecutive outputs go to the same zone. There are a couple reasons why this is NOT beneficial, but I won’t get into the details here. Just know that this is NOT how extra zones are connected in modern IFCSs. In order to make this zone change, I will have to remove the concrete above those IFCS returns that hold up the electrical box.
4) Because I have to remove the concrete for the electrical box, I want to move all the electrical and wiring to the opposite wall, which rarely gets direct sunlight. It’s also an eyesore of messiness. The electrical conduit runs are also in the way of #2, where I want to put the debris basket.
5) I have an IFCS regulator that is useful…but no one wants the details of this, haha. I no longer need this implementation as I use the IFCS valve actuator to accomplish this function directly without need for another valve.
6) I am going to add a chemical testing header path…I will eventually add automated pH testing and adjustment. Doubtful at this point if I will add ORP/salt testing.
7) My aerator has been not part of my system for a long time. With recently installed soft water fill for the pool, I want to experiment with this. Long gone @Arizonarob told me he used this function successfully in the summer to cool the pool in the early morning hours. I will hook it back up.
8) My FlowVis (usually uninstalled but sometimes there), is not in a good location. Occasionally a few palm fronds have caught on it…as a TFP expert told me a long time ago (after I had installed it), its best to have the FlowVIS after the filter or at least after the pump basket to eliminate this issue.
I’ll post a few pictures that I took during this project over the next few days to show how it ended up.
This first picture shows the amount of stuff I have in that small area. It is TIGHT and always has been.

This 2nd picture is from a different angle and has the main features labelled.

This 3rd picture highlights what I hoped to accomplish.

1) I am going to add a SWG, it will chlorinate all three return paths: IFCS, Wall Returns, Waterfall
2) I am going to add a debris basket to the front end of the pump to increase the size of the basket that catches debris from the main drain while using my IFCS. I think emptying it will go from approximately 2 weeks to 6 weeks, which is good for the trips that we take.
3) I want to fix an irritation in the implementation of my IFCS, I have only five zones but a 6-zone distributor was used. The way they plumbed it was that two consecutive outputs go to the same zone. There are a couple reasons why this is NOT beneficial, but I won’t get into the details here. Just know that this is NOT how extra zones are connected in modern IFCSs. In order to make this zone change, I will have to remove the concrete above those IFCS returns that hold up the electrical box.
4) Because I have to remove the concrete for the electrical box, I want to move all the electrical and wiring to the opposite wall, which rarely gets direct sunlight. It’s also an eyesore of messiness. The electrical conduit runs are also in the way of #2, where I want to put the debris basket.
5) I have an IFCS regulator that is useful…but no one wants the details of this, haha. I no longer need this implementation as I use the IFCS valve actuator to accomplish this function directly without need for another valve.
6) I am going to add a chemical testing header path…I will eventually add automated pH testing and adjustment. Doubtful at this point if I will add ORP/salt testing.
7) My aerator has been not part of my system for a long time. With recently installed soft water fill for the pool, I want to experiment with this. Long gone @Arizonarob
8) My FlowVis (usually uninstalled but sometimes there), is not in a good location. Occasionally a few palm fronds have caught on it…as a TFP expert told me a long time ago (after I had installed it), its best to have the FlowVIS after the filter or at least after the pump basket to eliminate this issue.
I’ll post a few pictures that I took during this project over the next few days to show how it ended up.


