Dave...I thought I was the ultimate cheap guy...but you take the cake. NICE! By the way, I stole Ron's "bury the tank" idea, I stole your "sprinkler timer" idea. I almost went for your pump, too...but got a decent deal on my stenner on eBay.

Stenner installation with buried tank for AZ heat
- Thread starter jonpcar
- Start date
You are using an out of date browser. It may not display this or other websites correctly.
You should upgrade or use an alternative browser.
You should upgrade or use an alternative browser.
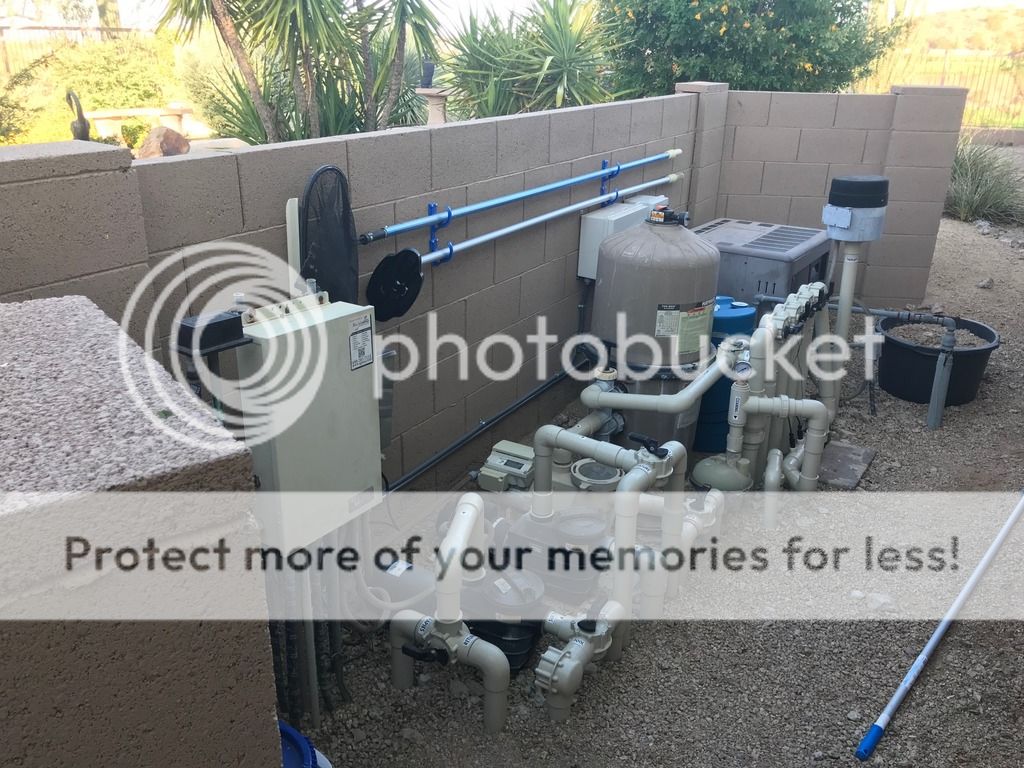
So, I started the next phase of this project...I had decided to add a buried tank + Stenner pump for my acid injection. I realize that the acid doesn't degrade from the heat like the chlorine does; but I don't have a lot of room out at my pad and have decided that I really like the look and access to the buried chlorine tank.
I have chosen a five gallon acid tank, a Coleman water jug. I estimate that five gallons should hold me for 3-5 months based on past acid additions...which are unfortunately not as often or as regular as they should be. Once again I asked my brother-in-law for a piece of pipe to surround the buried tank (he still owes me). I ended up using the hole I started in the 1st/2nd picture of this thread as there is really no other spot to put this additional tank. Luckily, this hole did not have to be nearly as deep as the hole for the 15 gallon chlorine tank. I built a similar "lid" for access using pressure treated wood and vinyl fence slats.
I am getting close to the deployment of a pool automation/monitoring project which will include the ability to add chlorine/acid via a phone app and/or at regular intervals. I have also ordered the hardware to monitor the levels of both tanks (Milone eTapes). So I haven't decided yet whether or not to fully install the acid stenner pump and control it using the Orbit sprinkler controller that currently controls the chlorine stenner pump, or wait until my automation system is up and running. It will be a race to see if I can get the automation installed before a long trip we have planned later this summer.
I also haven't decided exactly where to put the acid injection in my pool piping. I will be installing a pool water temperature probe and an automated valve for my aerator as part of the automation project, so I probably will do all those changes at the same time...but my piping is pretty tight.
Finally, I am ordering another of those HUGE red funnels to store inside the lid of the acid tank enclosure. For pouring dangerous liquids, I can't recommend it enough...huge enough to block every little splash that occurs. That thing is amazing, haha.
Last edited:

I like it!
I have been thinking of a stenner for my acid as well, but haven't pulled the trigger on it yet.
I have been thinking of a stenner for my acid as well, but haven't pulled the trigger on it yet.
I like it!
I have been thinking of a stenner for my acid as well, but haven't pulled the trigger on it yet.
Yeah, I've been sitting on my 2nd ebay Stenner pump for about 8 months now. I decided to wait for it to heat up around here before actually installing it, haha. Bad choice on my part...
How is that pvc/shade cover holding up? I was considering doing something similar. Any recommendations?I just completed this project today...I need to still upload my latest pictures but here was the status a week and a half ago.
In the back you can see a failed start for the hole...I decided I wanted it closer to the action (electrical and plumbing). The tank is a standard 15 gallon one that can be bought in many places, I got mine (actually 2) on Cragslist for $20 each. The pooper scooper and the dig bar were indispensable in digging the hole. No way I could get down in there to get the dirt out. If you look closely, the hole is sandwiched between two buried pipes on either side.
It fits...but I wanted the ability to take the tank out easily so I asked my brother-in-law for a pipe to put it in.
And did he ever give me a piece of pipe! I didn't know they made PVC 15" in diameter and an inch thick. This piece was 34 inches long, cut from a 20 foot piece he had in his construction yard. He owes me for a lot of things...haha.
I'll try to upload the remainder of the photos tomorrow.


Hey runboy...it’s holding up great but it’s only been less than a year. I don’t expect sunshades to last for more than 3-5 years in our sun but it is probably going to depend on the exact sunscreen chosen.
Here’s what I used...don’t know it’s endurance factor...
And the “thread” to lace it:
If I remember your setup correctly, it seems like @Arizonarob ’s type setup might be a good fit. He posted a picture in this thread:
 www.troublefreepool.com
Here’s what I used...don’t know it’s endurance factor...
Amazon.com : Gale Pacific, USA 302245 6X15 90% Uv Wheat Shade, (6' x 15') : Outdoor Sunscreen Fabric : Garden & Outdoor
Amazon.com : Gale Pacific, USA 302245 6X15 90% Uv Wheat Shade, (6' x 15') : Outdoor Sunscreen Fabric : Garden & Outdoor
www.amazon.com
And the “thread” to lace it:
Amazon.com: Coolaroo 301408, Lacing Needle Attachment and Placement, (1 Set, 80' Cord) Shade Fabric Accessories, Black: Garden & Outdoor
Amazon.com: Coolaroo 301408, Lacing Needle Attachment and Placement, (1 Set, 80' Cord) Shade Fabric Accessories, Black: Garden & Outdoor
www.amazon.com
If I remember your setup correctly, it seems like @Arizonarob ’s type setup might be a good fit. He posted a picture in this thread:
Retractable, Removable Pool Equipment Cover / Sun Shade / Protection
When I recently was working on my pool equipment pad (I replaced my old Fiberstars fiber optic lights with SR Smith Treo LED lights), I realized that my pool equipment and plumbing that I put in 4 years ago as part of our pool remodel was getting pretty beat up by the Arizona sun. So, last...
www.troublefreepool.com
Last edited:
Runboy, I used 90% solar screen (the kind you use on windows) that I picked up at Home Depot to wrap my frame with. It breathes well while offering great UV protection. 

Thanks guys. Yes, Arizonarobs solution would be easier, but I’m afraid it would be too big for my application. I think I have more distance between the back wall and the front wall:Runboy, I used 90% solar screen (the kind you use on windows) that I picked up at Home Depot to wrap my frame with. It breathes well while offering great UV protection.
View attachment 106915
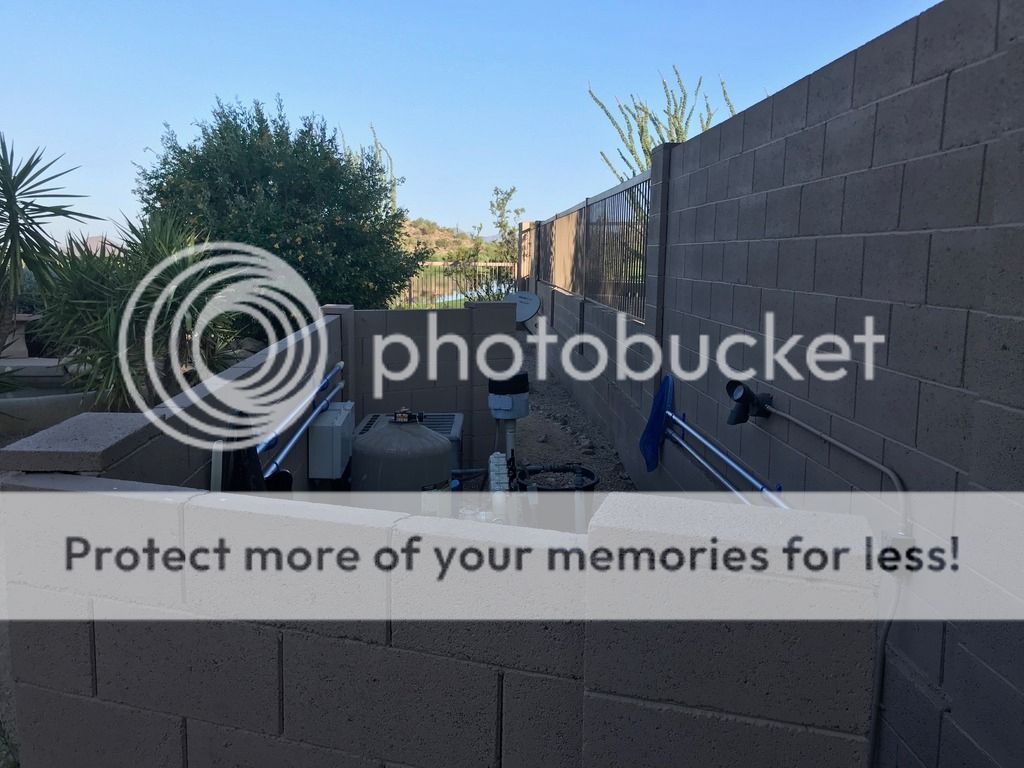
Yes, I guess I could do that, but it’s still quite the distance from back to front. I’ve also considered an angled shade sail so I could walk under it, but I would have to enforce the walls significantly, make an alu skeleton or bury some poles.
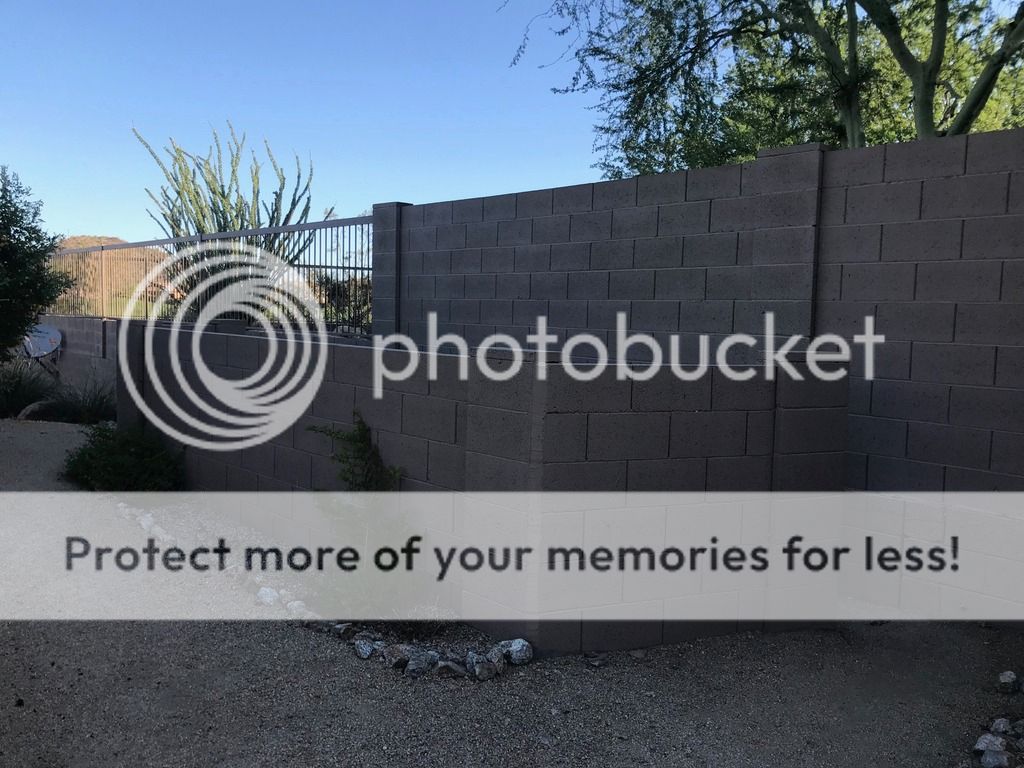
What about like Rob's....but hinge it on the short wall so that it can fold over into your yard to move out of the way (maybe implemented as a couple panels to make it easier). It doesn't seem like you have to extend it all the way to your back wall; it doesn't look like you have to worry about the sun coming in the back, just over the top+ of all the equipment.
Last edited:
Yes, that have crossed my mind as well. I think I would have to come up with some sort of support in the middle and I can’t very well flip it over since I have plants on the other side, but maybe some sort of support to keep it open at a 45 degree angle or so.
How did you attach the sun screen material to the PVC?Easy peasy. Just make 2 covers. Split the distance in the middle.
Ran into a little hiccup. My sidewall is angled 67.5 degrees. Obviously can’t get an elbow joint in that angle. Some places online have 22.5 angle joints, but I haven’t been able to locate one of those in any stores.
How did you attach the sun screen material to the PVC?
Ran into a little hiccup. My sidewall is angled 67.5 degrees. Obviously can’t get an elbow joint in that angle. Some places online have 22.5 angle joints, but I haven’t been able to locate one of those in any stores.
I used SS self tapping flat head (large) screws to attach it to the underside of the PVC, and also some rubber coated wire (found in the picture hanging section of HD.) to wrap around the pipe where the screen just sits on top.
As far as angles. Remember, it’s just a cover, you don’t need it to be perfect, you just want it to cover most of your equipment.
Finally got around to making one. The tall wall to the neighbor creates a lot of shade, so I elected to keep it easily accessible. I still have hinges so I can lift it up, but the majority of maintenance I can accomplish without.
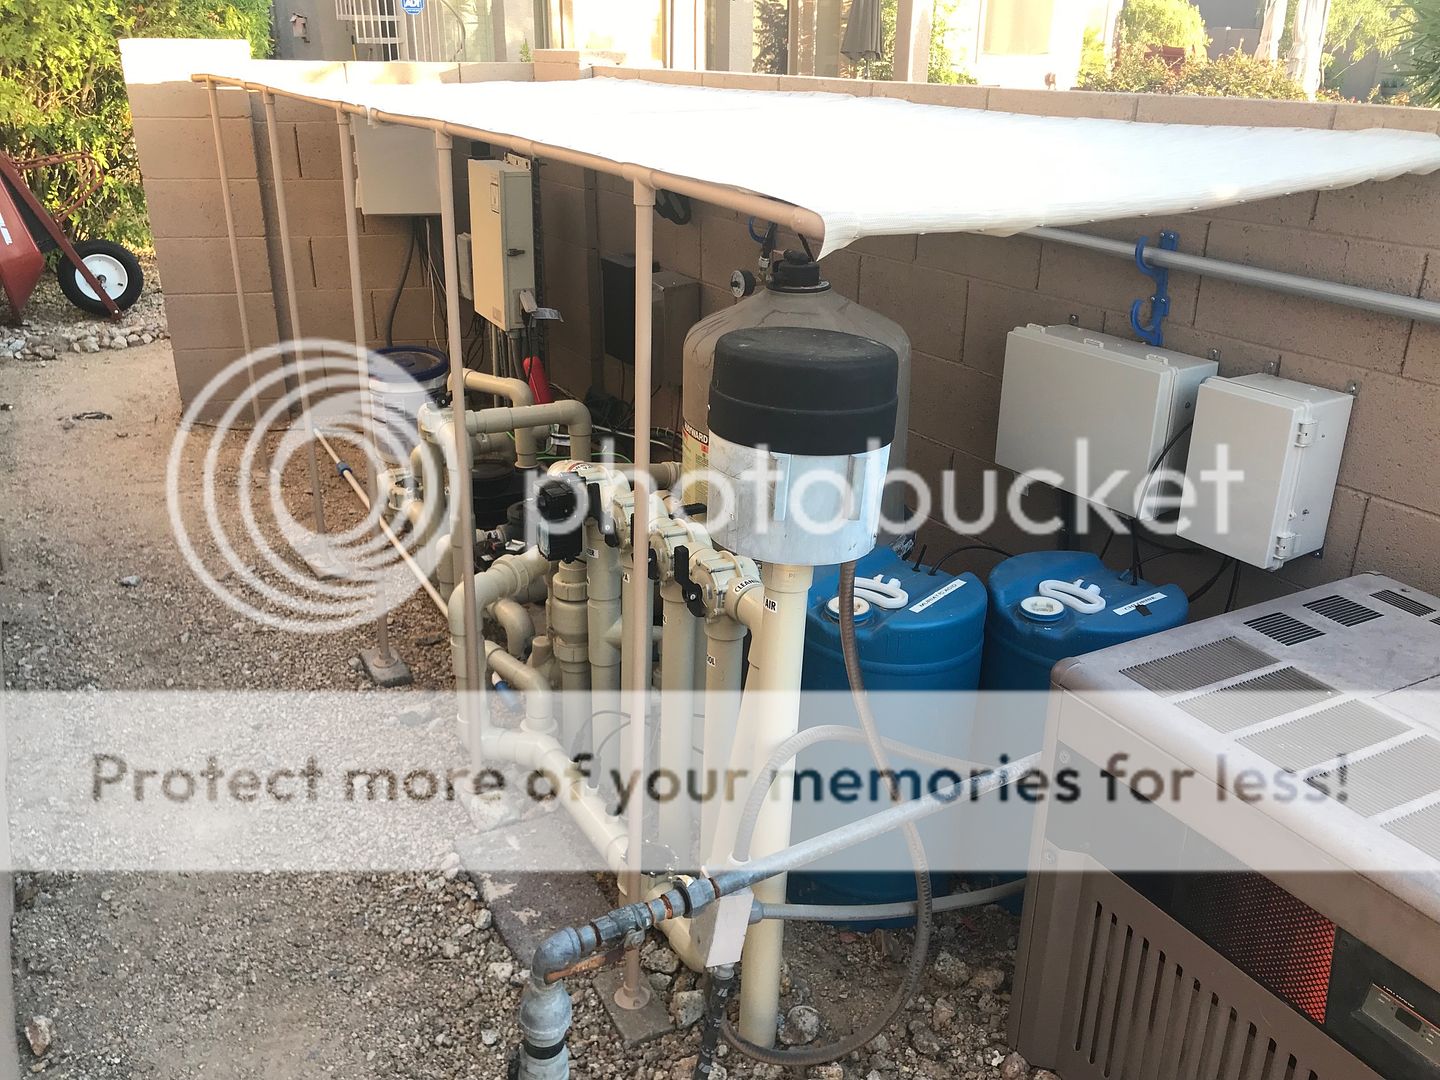
Does the job & out of sight...perfect! Now hopefully it doesn’t turn into a big “wing” during one of our monsoons, haha.
Time will tell. I might need to tie it down just to make sure. It was pretty windy the other day and the shade was completely unaffected, but of course if the wind hits just right you never know.Does the job & out of sight...perfect! Now hopefully it doesn’t turn into a big “wing” during one of our monsoons, haha.
I was concerned that the wind coming over the front wall would create some lift on the shade, but that doesn’t seem to be the case. I guess it ends up more as a turbulent layer.
I like it, good job dude!!
There’s a couple of ways you can secure that down if you have to. Simple 5 gallon bucket filled with stone, bricks, whatever, then loop a bungee cord around the pipe and handle on the bucket.
There’s a couple of ways you can secure that down if you have to. Simple 5 gallon bucket filled with stone, bricks, whatever, then loop a bungee cord around the pipe and handle on the bucket.
Yep. That’s a nice simple solution. Gives purpose to the bucket of rocks I’ve already collected from the yard that I didn’t know what to do with ?I like it, good job dude!!
There’s a couple of ways you can secure that down if you have to. Simple 5 gallon bucket filled with stone, bricks, whatever, then loop a bungee cord around the pipe and handle on the bucket.
Thread Status
Hello , This thread has been inactive for over 60 days. New postings here are unlikely to be seen or responded to by other members. For better visibility, consider Starting A New Thread.