Signed the contract this morning, New build Orange County, CA

I think it looks great! Also - I think I'm going to do slumpstone instead of CMU and stucco thanks to the pics above. :wave:

Im also looking forward to your review of the Jandy equipment - you are the only other dude on here recently with the "all-handy" set up.

Nice BBQ. Low and slow!
 
There are pumps capable of pumping 3/4 aggregate mixes but the cost is 2-3 times that of a standard pump. Many do not like runs longer than 100' from the pump since the hose is so large and heavy and that's also asking a lot of the pump.

A 4" slump - 3/8 aggregate pump mix can be pumped through a standard pump but unless the hopper has a vibrator, the mix will have trouble getting through the screen. The pump operators don't like low slump mixes because they can be a little more rough on the pump and increase the chances of air making its way into the line.

I've gotten best results with low slump mixes and properly placed control joints. Standard mixes above a 5" slump will likely have issues with excessive cracking.
 
There are pumps capable of pumping 3/4 aggregate mixes but the cost is 2-3 times that of a standard pump. Many do not like runs longer than 100' from the pump since the hose is so large and heavy and that's also asking a lot of the pump.

A 4" slump - 3/8 aggregate pump mix can be pumped through a standard pump but unless the hopper has a vibrator, the mix will have trouble getting through the screen. The pump operators don't like low slump mixes because they can be a little more rough on the pump and increase the chances of air making its way into the line.


I've gotten best results with low slump mixes and properly placed control joints. Standard mixes above a 5" slump will likely have issues with excessive cracking.

Thanks Brian, folks this is the absolute truth here. My run was about 100ft, When I asked after the fact why they did not use a better pump to get the "correct" mix back there they said it cost a lot more. Just for learning purposes, this was a $19k deck, the contractor told me labor and materials was $7,700.00. Not sure why they would tell me that, but seems to me they could have done it correctly (4" slump 3/4" aggregate, correct pump) but that would have eaten into their margins. I did mention I spoke with (2) construction civil engineering firms here in OC, both said exactly what Brian said above. The reason we as residential consumers have so many issues with concrete decks is that there is no oversight and the homeowner is at the mercy of the contractor. I did a lot more research than most, but even I fell victim to trusting too much.

In the end, life will go on, but I feel compelled to at least help other people avoid similar issues on their projects.

- - - Updated - - -

Waiting also to see how you like Jandy. A builder we're talking to offers the choice of Jandy or Pentair so if we choose them we'll have to decide which.


Sent from my iPhone using Tapatalk

I will report back on the equipment after start up.

Frank, I use the (2) Weber WSM for the low and slow, the Kamado is for grilling prime rib eye's at 700d degrees, I gave my gas grill away after getting the Kamado 3 years ago.

Drainage on pad and clean out, look for the grate in the middle
0B3C1FB0-27C8-4954-B4C5-0D97ECC09641_zps8lmloyap.jpg

C2CF037B-0712-4510-A1BC-C28DE9E88728_zpscxskt0wl.jpg


Higher level view, concrete still blotchy, getting better.
B24E6DEE-4AA3-4BDD-A31D-232390E06468_zps8vha8ktj.jpg

C4CD747F-72BD-4DF6-8AAB-AD643DE5E004_zpshlfb25vv.jpg


Need to tackle the fire pit gas lines this weekend. Gotta figure out how to fix the fact the vertical pipe is not plumb, so the fire ring is 3/4" higher on one side that the other. Thinking of replacing the black pipe with a 12" piece of flex to prevent this. Concern is will the flame be different on one side of the ring vs the other?

A283ECC4-9304-4B8A-AFC7-11AA3C81045B_zps1vljnu7x.jpg
 
I used to use my Komodo for ribs, because you could get in down in the low 200 degree range, but I bought an electric smoker and that is a whole other world.

As far as the gas line - two street 90's screwed into each other makes a very effective swivel joint for leveling out lines. Chances are, it is going to be buried inside what ever you are backfilling the pit with.
.
 
Something positive, the firepit is up and running, could not believe it took 31 .(5 cf ) bags of pea gravel to get it filled 2 3/4" from the top. Then another 135lbs of copper reflective glass. The glass is awesome! The burner is a 24" HPC Penta burner, make a much more natural flame than the circle burners especially on low settings. I decided to use SS flex instead of black pipe, I would have had to use too many 90s and 45s to get this centered and plumb. The flex is a whistle free 12" line, worked perfect and will use less BTUs. I will upload a video at night later, came out nice. Anyone thinking about the fire glass, do it, it also radiates a lot of heat. Lowes had the reflective glass for $2.69 per pound which is a STEAL!!!

9DC60A12-C794-4A09-B18F-FFA66601DE9B_zpssgrwysln.jpg

1166D360-9D07-4D9E-B4CE-111F60832164_zpspgu84itc.jpg

D3A2AB87-BAB0-430E-975C-69CB9FC0868A_zpsptvmzyxj.jpg
 
Titan7,
Things are looking great so far. Thanks for posting so much detail on your build. I'm at the plumbing phase on my build http://www.troublefreepool.com/threads/114941-New-Pool-Build-Porter-Ranch-CA and I picked up several things that I've double checked with my contractor on (auto-fill install, gas line sizing, etc.), so thanks again! It's nice to read some local builds in So Cal. I'll keep updating my build as progress is made.
 

Enjoying this content?

Support TFP with a donation.

Give Support
I have the gas line sizing charts if anybody needs it I can post, there is a difference between PE and Iron pipe, default to your plumber. Another note, if your gas fire pit ring state the BTU is 200k, remember that's a MAX rate. You will never get 200k BTU out of a 1/2" line. Glad the posts are helpful to some. I have not posted any updates as we have been in a holding pattern since the beginning of March when we started having issues with the concrete decking (you can see the separate threads I started in my profile, did not want to take the build thread too far off topic.

So the solution we arrived at for the decking is to demo all 2400SF of concrete and install pavers, lol. Yeah, I know, it's even hard for me to say this out loud, but it was the best option. So wish I stuck to my gut back in January and went for pavers. So we are scheduled to have the deck demo started on Monday 5/23. We will also need to re-do most of the drains and re-build the gate wall that is currently in the way of the bobcats. I am not spending anymore $$ that I would have to do pavers originally the contactor is absorbing the cost for demo, I am just paying the difference between concrete and pavers which is another $12k. I figured about 2 wks for this to finish then I can get pre-plaster inspection once the gates are up then plaster and water. I have targeted July 1 for water, let's see how that goes.

Will post another update after demo/pavers keep your fingers crossed!

Saw the Porter Ranch Pool, wow, that's a lot of Rebar!! Look like it will be a great pool!

JG210302, glad the post helped, can't wait to see the build.

other threads related to the build:
Another after the fact question
Interlocking concrete pavers: drains and base
Bonding grid question


PE gas charts start on page 4. again, I would trust your plumber, but at least this will give you an idea. I freaked out because my firepit burner rating is up to 200k but if you do the gas flow calculation, you can even get close to 200k BTU per hour through the step down 1/2" line, actually the last 12" of my split off the main 1 1/2" line is 3/8"IE. My line goes 1 1/2" from the meter, at 80 ft splits off to the fire pit using 1" to the firepit value with steps down to 1/2" Iron pipe, to the 90 degree elbow in the middle bottom of the pit, from there it's a 1ft long 1/2 OD/3/8" ID flex line. My guess is I am seeing 50-75k BTU at the burner. So my 1.5" line should deliver about 550+ BTU per hour. If I could do it again, I would have over sized it a bit, not sure what the cost to go to 2" pipe would have been. There are load calculations your plumber can do to get it exact rather than just "shooting from the hip". I guess if every gas appliance in my home is on at the same time I could run into an issue as the total load would be 630 but the GAS Company did a load calculation and installed the 625BTU P/H meter in place.

https://www.gastite.com/downloads/pdfs/peinstallationguide_1.pdf
 
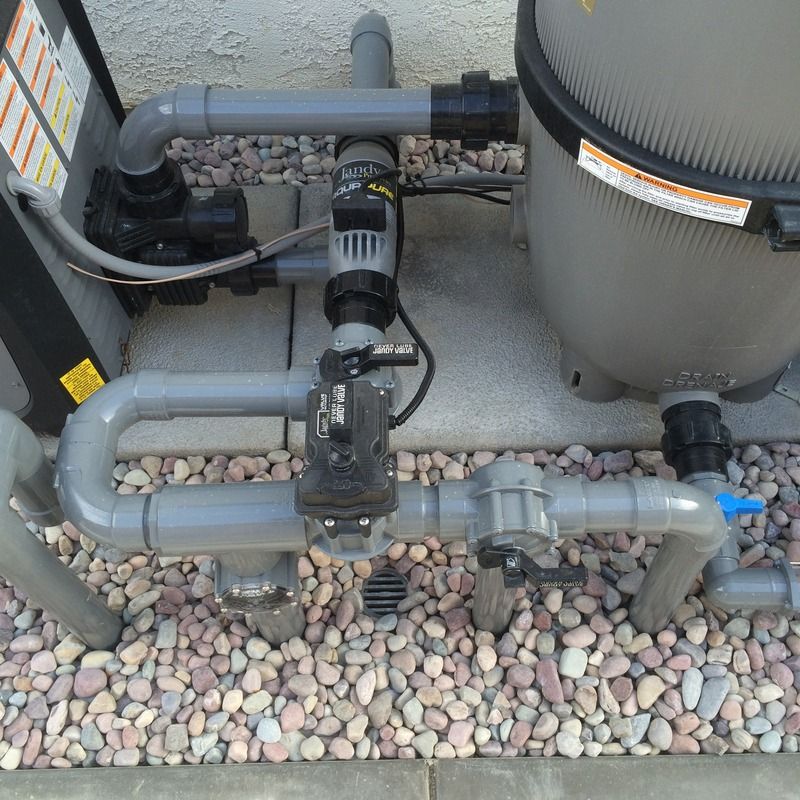
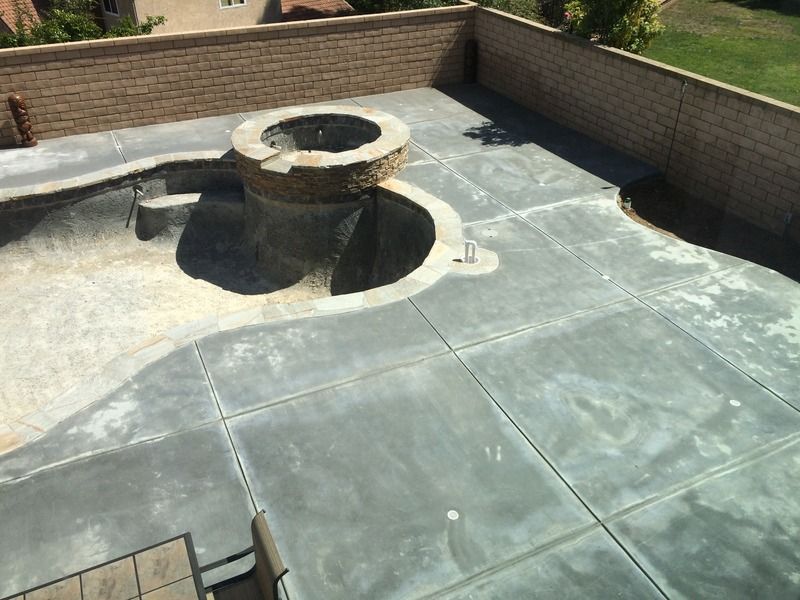
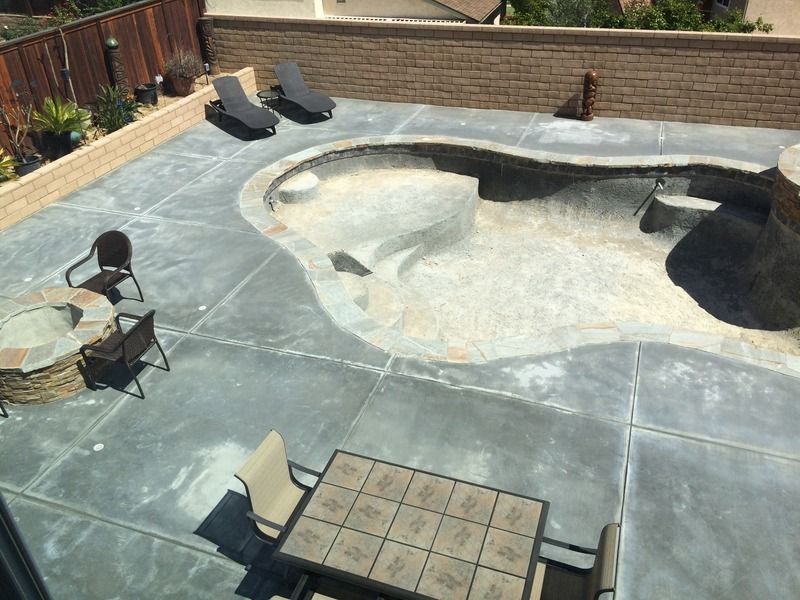
Well, it's been a couple months. The deck nightmare has been over for a couple weeks. During demo all the drains got destroyed so it was a 100% re-do. The 2 tractors with breakers arrived on may 23, it was ugly. Removing 2500 sf 4-6" thin k concrete with rebar was a mess. I purchased 6 sheets of plywood to protect walls, windows, etc. and moved as needed. placed moving blankets on all the coping. the only casuallties were the handle and diverter on one of the jandy valves, easy fix, and the grout joint in a couple places on the coping from vibration. Lost some stacked stone that had to be put back in place but for all the potential issues that could have occured, i think we were lucky.

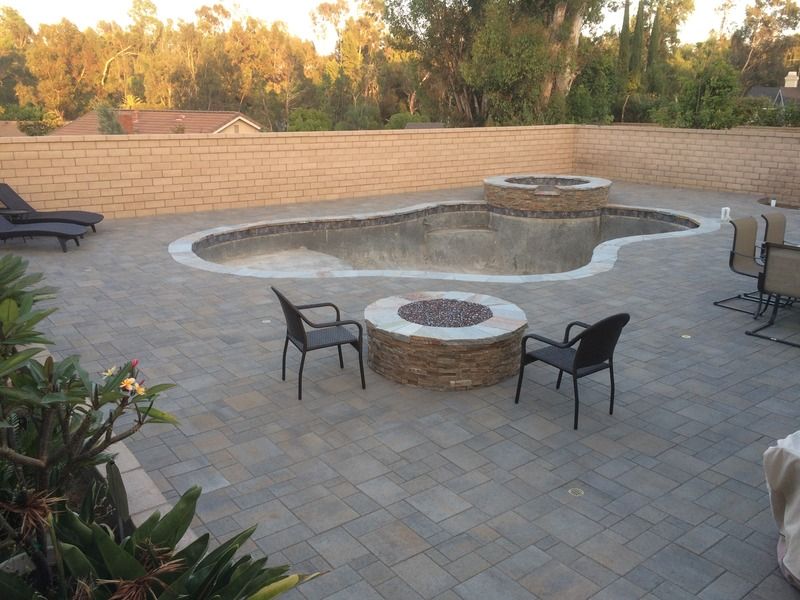
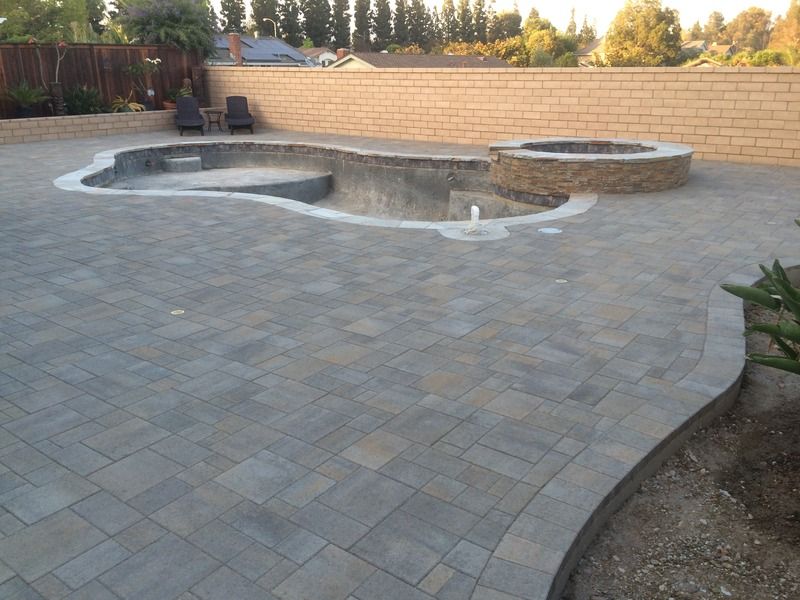
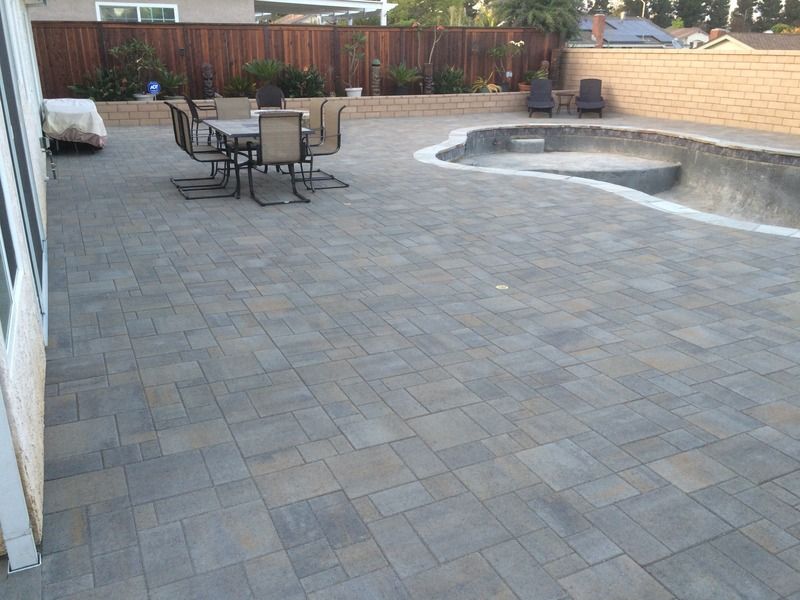
The pavers came out pretty nice and look WAY better than the concrete. When i look at the concrete photos i cant believe the difference. For those interested in the paver install: They are Belgard Catalina pavers, large and small pattern (6) pieces, the color is Victorian. It blended well with the Quartzite coping, ledger stone, and walls well, they pick up the silver/gold tones perfectly, depending on time of day they are more grey with a slight gold light brown.

I had them excavate 10-11" below the coping. We installed a geotextile membrane on the sub base and compacted Type II road base every four inches. The pavers are in 1" of bedding sand and we used Polymeric sand. I have to wait several months before sealing them.

So the gate was installed yesterday and I am waiting on pre-plaster inspection today **EDIT, just passed pre-plaster! Looking at plaster and water by the end of the week or early next week.

Now I have to decide on Tropics blue or Midnight blue Pebble plaster. Since I have been MIA for a couple months, have there been any new Tropics or Midnight blue builds?

2B588141-AC41-41C7-9255-F251EEBE55E6_zpst5psvkhz.jpg

8C2E2DF8-8E58-4169-A3A6-24B93B99AF2B_zps10u7qbi7.jpg

11FC162B-CF83-43C1-BBCE-8632BEC31CCA_zpsyxouamgq.jpg

4CB35070-055E-48DF-A6F8-F54BBC03FE02_zpsiqfmx5f7.jpg


Well since I am updating the thread, I did resolve a few other small issues since May. I replace the spa spill over as the original one was a different color stone and the edge looked broken on one side. I will post photos. This took several trips to the stone yard to find the right piece of stone with a slight radius on the leading edge and right sized. They popped it out pretty easily. I was worried for nothing. The other one was the ugly white skimmer color and lid. since I have stone coping with grout, I had them pop the white collar out (was set in grout) and replace it with a grey collar and grey lid. Looks much nicer than the white. Now the skimmer body is still white but you can't see it unless you take the lid off. Note to others, the skimmers come in White, Grey, Tan. If you have a preference ask before plumbing at least I could easily resolve this issue since I had stone coping, in concrete this could not have been done.

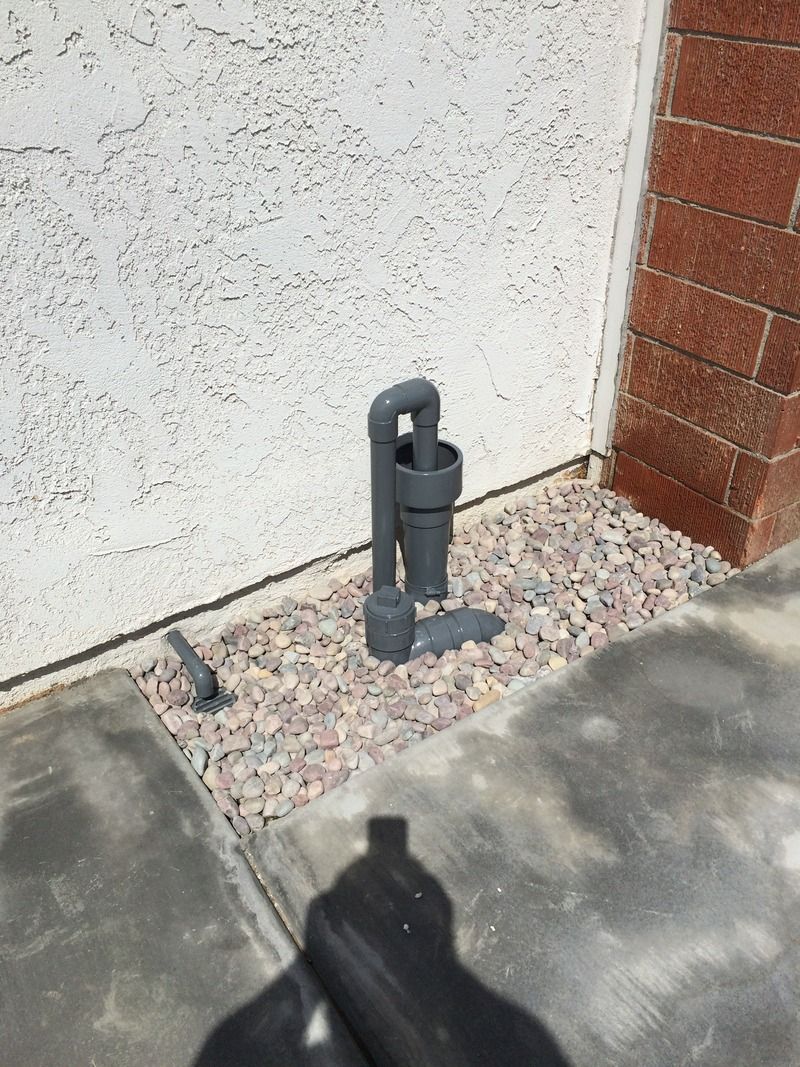
As far as the auto fill lid, I have the grey plastic pour-a-lid unit in place now. I still have the other pour-a-lid with my old concrete in it. I may try to stain the concrete to match the pavers or attempt to cut one the my extra pavers to fit inside the pour-a-lid. That's looks like a lot of work to attempt to do so we will see how that goes later.

I still need to get more top soil for the planters, plant some stuff, and hook up the drip lines, and low voltage lighting. I ran all the lines to the transformer and irrigation timer prior to the first deck. so I should be GTG.

We still need to do the front yard where drains, gas, and electric were run, we had to demo about 400SF of old concrete in the front on the house down to the sidewalk, I plan on taking a break from construction for a month or so before we decide on concrete or pavers for the front driveway, lol.
 
OH man that looks awesome! Yea!!!!!!! What a nightmare for you but it came out great in the end.

As far as I can remember there have not been any new pools with those plasters in a while. I say put the two colors in a bag and see which one you pull out! Make sure to tell us!

You are ready for the links I share with new pool owners. The first link is something you need to go over with your PB as HE holds the warranty card.

Pool School - Start-up New Plaster

(Please note the 30 days no swimming is depending on what kind of start up your PB does. Ask him and let us know so we can guide you on that as well.)

Print these out:
Pool School - Basic Pool Care Schedule

Pool School - Recommended Levels

Bookmark these:
Pool School - Recommended Pool Chemicals

http://www.troublefreepool.com/calc.html

Pool School - ABCs of Pool Water Chemistry

Make sure to ask any and all questions you might have no matter how small! We have all been where you are at one point.

Do you have a test kit yet? Ask your PB what one he is getting you and let us know so we can fill in any holes.

Kim:cat:
 

Enjoying this content?

Support TFP with a donation.

Give Support
Thread Status
Hello , This thread has been inactive for over 60 days. New postings here are unlikely to be seen or responded to by other members. For better visibility, consider Starting A New Thread.